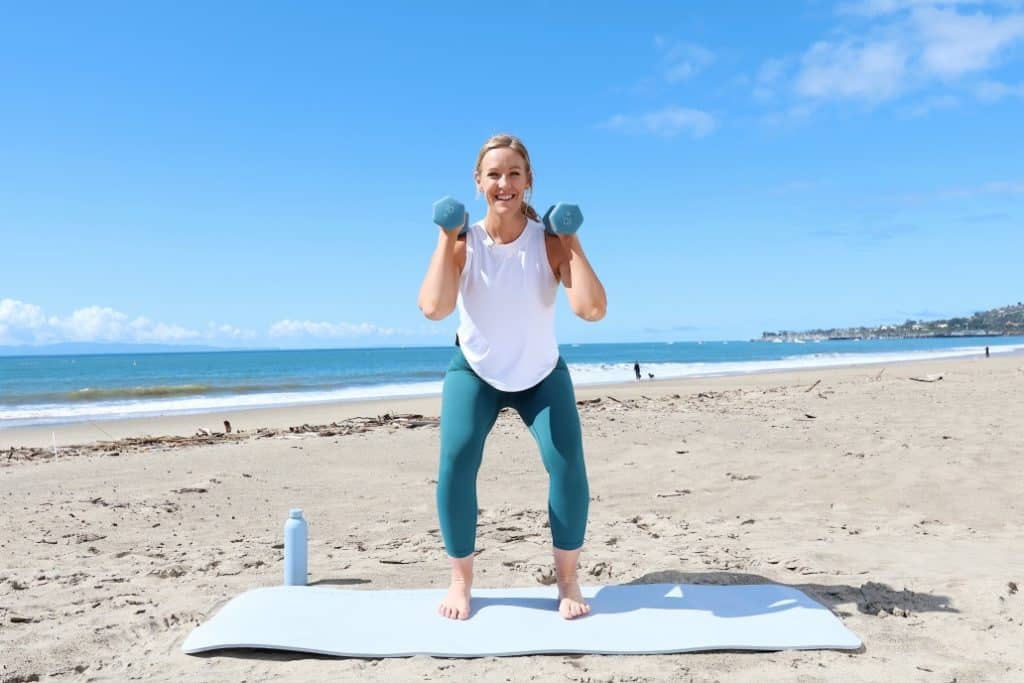
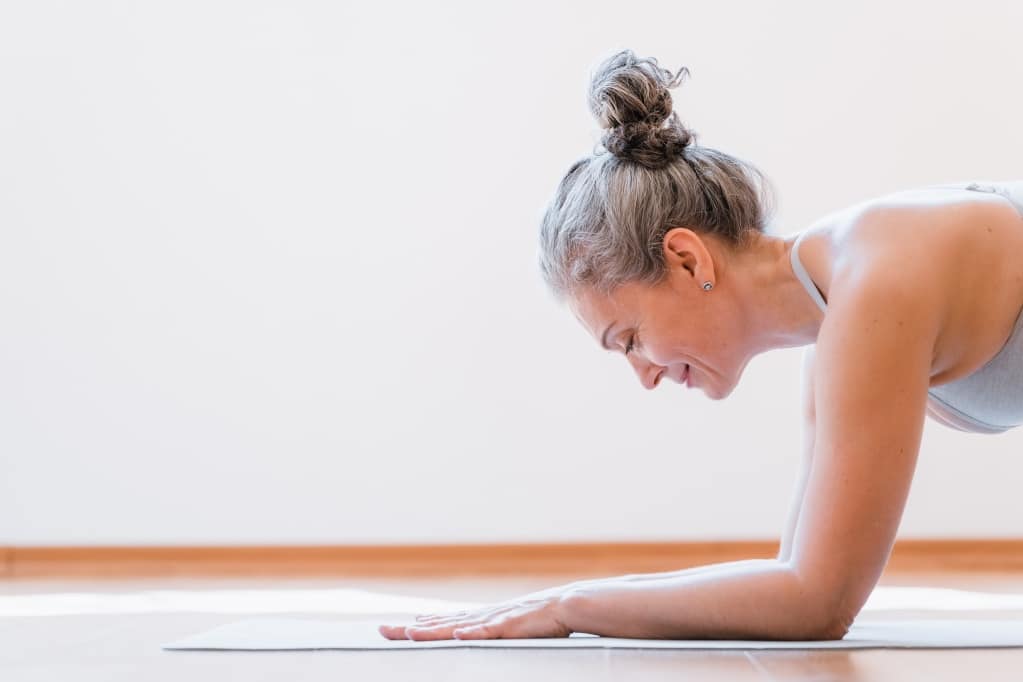
If you’ve been playing the Pilates vs. weight training game (Which one is better? Which one should I choose?)—I have good news: you don’t have to choose. Even better, when you combine Mat Pilates (Pilates without a reformer, which is what we do at Lindywell) with weight training, you reap the benefits of both.
When you look closely, it’s easy to see how the two are very similar: both target the musculoskeletal system to develop strong, resilient muscles, joints, tissues, and bones. In addition, both forms of exercise can be classified as resistance training:
Weight workouts utilize weights for added resistance
Pilates mat workouts primarily utilize body weight for resistance
This means that combining the two can provide a well-rounded workout routine that not only builds strength but also improves mobility, reduces stress, and increases mindfulness.
I’m often asked, “Which is better?” and I’m here to tell you that they both have benefits.
What I’ve seen, however, is that not all weight training programs are created equal. It’s imperative to bring what we know about Pilates in terms of proper movement mechanics into our weights workouts to reduce the risk of injury and actually benefit from the workouts.
Let’s ditch the Pilates vs. weight training mindset. Here’s what you need to know to get started with both!
Pilates vs. Weight Training: Let’s Break it Down
Traditional weight training relies on lifting weights as the primary form of resistance to increase muscle strength. Progressively increasing load is what leads to gains in strength, stamina, and endurance. Weight training is an important and effective way to maintain muscle mass and bone density as we age.
Mat Pilates, on the other hand, can be done with or without light weights (1-3 lbs), or other equipment to increase resistance. Whether you’re using body weight or added weight, the Pilates principles remain the same, keeping the movement focused on alignment, control, and intention.
And this is what’s often left out of weight training programs or may be missed if you’re lifting on your own: the focus on form, alignment, and breath. However, applying these Pilates principles to weight training workouts not only reduces your risk of injury but also increases the effectiveness of your weight training workout so you see better results.
Pilates and Your Core
There is one more distinction that sets all Pilates (Mat and otherwise!) apart from traditional weight training: the core. Pilates focuses on engaging the core in every movement to create stability, protect your back and build strength in your spine. It’s imperative that we add this focus to weight-training workouts for the best results.
Your body relies on this strength for nearly everything you do in life, from reaching for a glass to bending down to tie your shoes. This means weight training can be more impactful when combined with Pilates because you’re also getting that core focus.
How to Choose Your Workout
First and foremost, you don’t need weights to experience the benefits of Mat Pilates. These bodyweight workouts allow you to build strength using your own body weight as resistance. This has even been shown to increase bone density as well.
This is incredibly important as we age, considering we begin to lose muscle and bone as early as age 30. Adding additional resistance to your Mat Pilates workouts (through light weights, bands, or even equipment like the Reformer) or lifting heavier weights with traditional strength training, can help you continually challenge your body.
Challenging your body, in whatever way is best for you, is important in maintaining your muscle mass and strength as you get older. And how you create that challenge will change from season to season. Sometimes this might mean using weights and sometimes it may not.
With that in mind, the workouts you choose from day to day depend upon the following:
How much do you want to challenge yourself?
What is your body is craving in this season?
Can you maintain your form as your weight increases?
Here’s what you need to know and how I recommend making this choice for yourself.
Weighted Pilates Workouts
Adding light weights to your Mat Pilates workouts can be a great way to add an extra challenge. In this case, I typically reach for our Lindywell hand weights, which are just 2.2 lbs each. They’re built as a no-slip capsule so they’re easy to use and look as good as they feel in your hand.
If you want to switch it up with your resistance-based Pilates workout, here are some additional ways to do that:
If your body feels ready for the added challenge of heavy weights, strength training is a great choice. But I encourage you to do it with the Pilates Principles in mind. The tricky thing is, not many workout programs focus on this.
I’ve noticed that most programs include little to no cueing and there’s also no guidance on how to activate the proper muscle groups or where you should be feeling the movement.
If you want to learn how to strength train in a way that focuses on form, breath, alignment, and mindfulness, we have something for you: our new series, Pilates-Inspired Weight Training, inside the Lindywell app!
With this series, you’ll do traditional strength training exercises like squats, lunges, bicep curls, and flies. How much weight you use will be up to you. Tthe program is designed to focus on working your muscles to fatigue. This helps you progress in your strength training in a way that is safe, effective, and tailored to your personal needs and goals.
Each movement is slow, controlled, and supported by our core, which is likely very different from how you’ve learned to lift weights.
Inside the Lindywell app, you’ll find a variety of strength workouts. You can integrate these into your routine, including full body, lower, upper, arms, and shoulders. Each workout is 10-20 minutes so you can choose what’s best for your body and day.
Start your 14-day free trial to get instant access to all of Pilates-Inspired Weight Training, along with 275+ Pilates workouts, hundreds of anti-inflammatory recipes, and guided breathwork sessions.
Don’t Choose Between the Two: Combine Them!
You can amplify the power of Pilates by adding external weights safely and with intention. If you want to build more strength and challenge yourself, this is a perfect way to do that. Remember to tune into what your body needs in each workout. Sometimes weights will be the perfect addition while other times, your body may be asking for less intensity.
Don’t forget that as you add strength training you will need to do Pilates all the more to make sure you don’t add tension or tightness to your body. This will help you stay strong in your core to support your strength and weight-training workouts.
The bottom line is it’s not Pilates vs. weight training. It’s: how can I bring these together to see even more progress in my practice?
If you’re ready to bring weights into your Pilates workouts or try Pilates-inspired strength training, sign up for a 14-day trial of Lindywell and get instant access. If you’re already a member, just open your app and choose your workout!
Mindful movement changed the fitness game for me. I spent years exercising without any sense of what my body needed or how it actually felt. Coincidentally, I could also never stay consistent with any program or routine.
I’d be invested and excited for a few months and then life would get busy and all of a sudden, lifting weights or going to the gym felt like the last thing I wanted to do. So I’d stop and then eventually, start again at some point in the distant future.
You may be familiar with this off-and-on relationship with your fitness routine. One of the things that made it possible for me to stay consistent once and for all was mindful movement.
Pilates brought this style of exercise to my attention and in the last 10 years, it’s created a powerful shift, not just in my fitness routine but in my life as well.
If you struggle with stopping and starting your fitness routine but want to be consistent enough to experience both the mental and physical benefits, this may be the missing piece. Mindful movement reminds us that exercise is about so much more than simply showing up. It’s about slowing down, being in your body, and taking even just 10 minutes for you to focus on yourself.
Let’s talk about what mindful movement is and how it can help your fitness routine stick once and for all.
What Is Mindful Movement?
Do you pay attention to the sensation of your muscles contracting as you lift weights?
Are you able to breathe slowly and intentionally as you move your body through your workout?
How often do you listen to the needs of your body when choosing your workout each day?
All of these ways of thinking about and approaching exercise are part of mindful movement. This is the integration of mental awareness and physical exertion. It helps you focus on what your body is doing—and how it feels—from one exercise to the next.
This style of movement helped me stick with my workout routine once and for all. I started choosing exercises that my body was craving rather than forcing something I didn’t want. I also started noticing the mental benefits of consistent mindful movement, like less stress and better sleep.
All of this showed me that simply showing up to my workouts wasn’t enough. To stick with it, I needed to slow down, tune into my body, and take note of how each workout was impacting my life, not just during but after.
How to Incorporate Mindful Movement
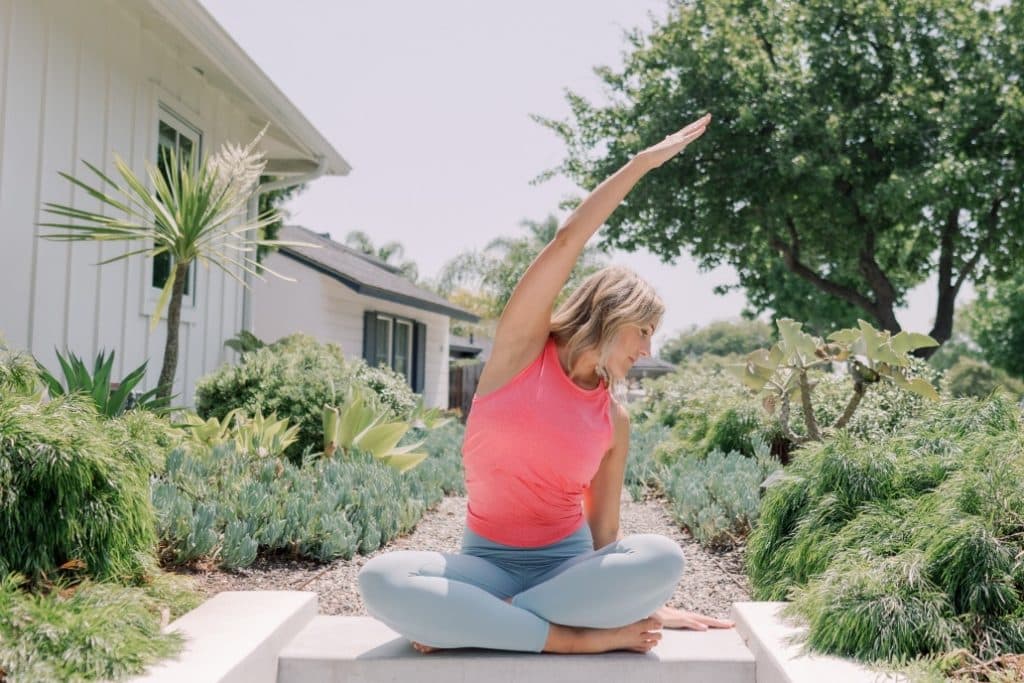
A few of the most common examples of mindful movement include yoga, tai chi, and, of course, Pilates. This is the basis for our workouts here at Lindywell, but all types of movement can be done with a mindful approach using these basic principles:
Slow down and breathe: Slow down each movement and use your breath to connect with your body as you do it. For example, breathe out as you roll your body down to touch your toes, breathe in at the bottom, and breathe out as you roll back up.
Focus on what your body needs: Some days you may want to lift heavy weights but other days you may want to stretch gently. This is especially true for women who have a monthly cycle. Choose the movement that your body is craving each day rather than forcing something that doesn’t feel good.
Set an intention: Your workout does so much more than build muscle. It can help you tap into your creativity, let go of anxiety, or cultivate energy for your day. What do you want to get out of your workout? Set that intention and keep it front of mind as you go through the movements so it becomes not only about the movement itself but how you feel as a result.
How Mindful Movement Creates Consistency
If your idea of a workout is to rush through a series of intense exercises as quickly as possible, then mindful movement may be far outside your comfort zone. That’s okay, I’ve been there! But, trust me, if you’re willing to give it a try, this will change the way you experience movement.
It may also be the missing piece to creating more consistency in your workout routine. On that note, here are eight science-backed reasons mindful movement will make your fitness routine (finally!) stick.
1. Stress Management
The combination of being mindful while also moving your body is impactful, according to researchers at Penn State University. This state of being can help relieve stress, anxiety, or depression because mindfulness trains you to take deep breaths and concentrate on physical sensations, rather than what’s happening in your mind.
Both of these actions reduce cortisol (stress hormone) levels, creating a relaxing effect on the body—even when it’s in motion.
When do you most often bail on your workouts? When you have a stressful day. Yet that’s when you need it most. Consistent mindful movement with Pilates is one of the main ways I show up as the best version of myself for my kids, my husband, and my business because it helps me manage and reduce my stress.
Without it, I would definitely struggle more to juggle everything that life throws my way so I always prioritize it.
2. Fewer Injuries
When you slow down to focus on the correct form, cadence, and technique of an exercise, you’re less likely to injure yourself. This is important to consider because, when you injure yourself, you’re more likely to get out of your workout rhythm to take time for rest and healing.
Slow down with mindful movement to avoid injury in the first place. This way you have one less reason to get out of your fitness routine. Let’s be honest, we all have enough reasons already, right?!
3. Better Sleep
Mindful movement can boost sleep quality and alleviate insomnia by regulating your nervous system. A regulated nervous system can stimulate the natural sleep-wake cycle, in addition to helping you manage inflammation, increase oxygenation, and lower your resting heart rate, all of which promote better sleep. Lindywell member, Kristen, experienced this after starting Pilates:
“I have also noticed that I am getting more deep sleep than I was before starting Pilates, and there is a noticeable increase in my core strength, which is definitely encouraging and motivating.”
Take note of your sleep patterns and habits. When you slow down your workout, do you notice you sleep better at night? This benefit might just be enough to help you stick with your routine because we all feel so much better when we get quality sleep!
4. Mood Regulation
Physical activity releases mood-lifting hormones (cue that post-workout glow) like dopamine, serotonin, and endorphins. When you integrate mindfulness into the exercise routine, those benefits are amplified.
That’s because mindfulness training improves emotional regulation, self-esteem resilience, and satisfaction in life. Being mindful during workouts can strengthen your mental health as a whole. This makes your fitness routine so much more impactful in every area of your life, giving you just another reason to stick with it consistently.
5. Athletic Endurance
Stamina is important not just in your workout, but in life. If you want to go hiking with friends or run around your yard with a pup or grandkids, you need stamina. According to the Neural Plasticity Journal mindfulness optimizes aerobic endurance (stamina). In other words, you can enjoy your favorite physical activities for longer periods of time when you stick with a mindful movement practice. Yes, please!
6. Improved Energy Levels
Diaphragm-based breathwork (deep, slow breathing) is an essential part of mindful movement that brings big benefits. It’s been found to boost respiratory function, which helps circulate more oxygen to the brain and body and, in turn, can boost your energy levels.
Research from the Health Promotion Perspectives Journal also found that combining exercise with meditation curbs fatigue. This means you feel both alert and invigorated, which is another great reason to stick with it. I mean, does anyone else always want more energy, or is that just me?
Here’s how Lindywell member, Lori, experienced this boost of energy after she joined:
“I joined Lindywell in 2017 and I was hooked. I was able to be more consistent with exercise because of the shorter workouts at any time of day. I quickly built strength and tone and more energy and less stress!”
Experience this yourself with Lindywell’s guided breathwork! Join our 14-day free trial to get access to all the breathwork sessions plus 275+ workouts!
7. Better Concentration
Mindful movement requires a different level of concentration than simply doing a workout. The benefit of tuning into each muscle contraction and physical sensation is that you’re grounded in the present. Consistently doing this enhances your brain function.
In fact, a new study from Frontiers in Psychology found that mindfulness-based exercises strengthen the neural networks that increase focus, memory attention span, informational processing, and other key executive functions. Stick with your mindful movement routine and you may notice you focus better in every other area of life!
8. More Enjoyable Workouts
When you’re connected to the sensory experience of a workout, it’s easier to intuit how your body feels and what it might need. This makes the fitness program itself more enjoyable which promotes well-being and makes it easier to turn it into a habit.
It makes sense when you think about it: why would you keep doing something that doesn’t feel good or that you don’t enjoy? Choosing workouts that you do enjoy—the format of which may change from day to day—makes you want to do it, rather than feeling like you need to force it.
Tap into Mindful Movement with Lindywell
Mindful movement might just be the missing piece in creating a fitness routine that sticks. You can bring mindfulness into any movement format, and at Lindywell, we help you do that through Pilates. With more than 275 workouts ranging from 10 to 30 minutes, plus breathwork sessions, anti-inflammatory recipes, and more, you’ll stress less, feel amazing, and strengthen your mind-body connection. Start your 14-day free trial to access your workouts instantly!
The benefits of wall sits go much further than just getting you through the dreaded middle school PE tests! While not all fitness challenges have stood the test of time, wall sits are still one of the most effective ways to build strength in your core and lower body.
That’s why I love this movement. At Lindywell, we love efficiency and a wall sit is exactly that. It’s also simple, requiring no equipment or space (just an empty wall!), and can help tone your body, challenge your endurance, and boost your confidence. Yup, all of that!
Plus, it only takes one minute each day to see these results. If this exercise isn’t part of your movement routine already, allow me to convert you. Here are five undeniable benefits you can experience from doing a wall sit for just one minute per day. Make it a consistent habit, and I’m confident you’ll notice the difference, both mind and body.
How to Do a Wall Sit
As with all exercises in Pilates, I want you to be intentional with form so you can maximize the benefits and avoid injury. Here are five steps for getting in and out of your wall sit while protecting your spine and building strength and endurance.
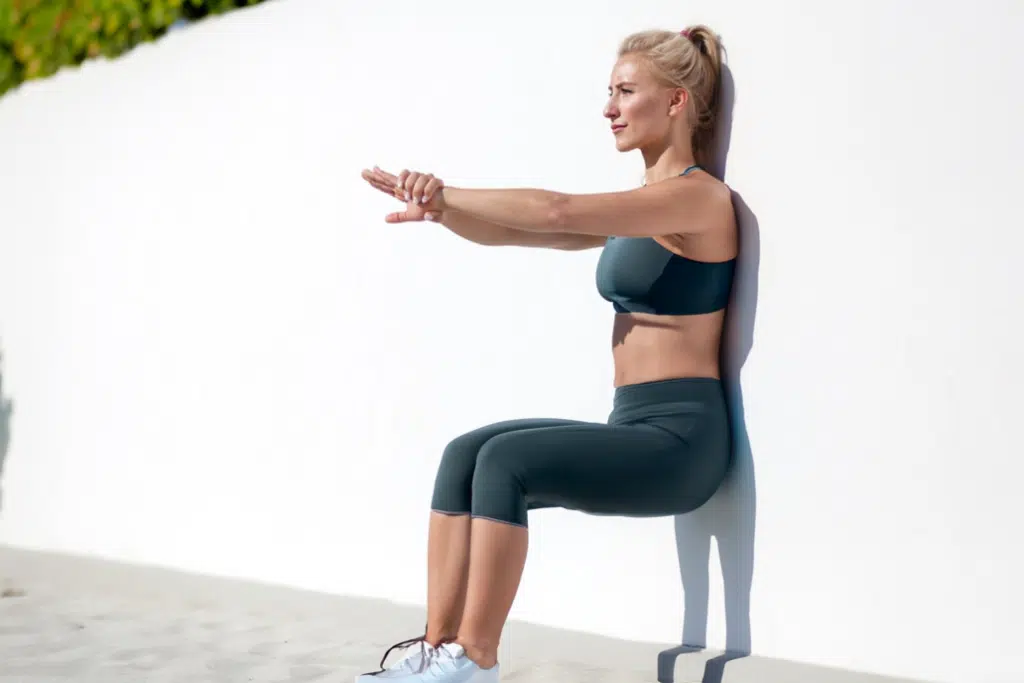
1. Position your back flush against the wall, pull your belly button toward your spine, and place your feet hip-width apart.
2. Walk your feet away from the wall and slide your back down until your knees are bent at 90 degrees. You can reduce this angle by not sliding down to a full 90 degrees, if you’re new to the exercise or concerned about balance.
3. Relax your shoulders away from your ears and push your feet into the floor to activate your glutes and keep your core activated (belly button pulled toward the spine).
4. Breathe in and out slow and controlled, sending energy down into your body which will help you hold the motion and sustain the burning sensations you might be feeling in your muscles.
5. Hold the stance for one minute and then slowly slide your back up as you step your feet back toward the wall to return to standing.
The Mind-Body Benefits of Wall Sits
The beauty of a wall sit is you don’t need to unroll your mat or pick up your weights to build strength. Simply holding this position for one minute can impact your mind and body in ways you may not realize. Here are a few of the benefits of wall sits that I can’t get enough of.
1. Boost Core Strength
At Lindywell, your core is always at the heart of ours so I love this move to help you (and me!) continue building core strength. When performing a wall sit, it’s common to feel the most work in your lower body. However, your core is firing on all cylinders too.
Holding an isometric contraction—which is when your muscles are flexed and strong, but don’t actually move—takes a lot of work. In a wall sit, your abdominals (as well as surrounding muscles in your back and hips) have to work hard to hold your entire body in this isometric contraction for a whole minute.
Your abdominal muscles maintain stability and support the spine, in other words: keep you upright. Your lower back muscles help counterbalance your natural inclination to lean forward. Finally, your pelvic floor muscles help your body stay in pelvic alignment and provide stability.
All of this leads to a stronger core that supports your body in nearly any movement, from bending over to reaching over ahead.
I also want to add that if you’re healing from Diastasis Recti and looking for safe ab exercises to recover your strength and repair connective tissue, wall sits can be great for you! Just focus on drawing the belly button to the spine and lifting the pelvic floor as you hold the contraction. Learn more about this, your core and pelvic floor in episode 90 of The Balanced Life!
Nearly every workout you’ll find within the Lindywell app helps you build core strength. Sign up for your 14-day trial and get access to all 250+ workouts, plus breathwork, recipes and more!
2. Build Muscle and Improve Circulation and Metabolism
Wall sits activate your hamstrings, quadriceps, calves, and glutes. The isometric contraction increases tension on these muscle groups which, in turn, stimulates hypertrophy (muscle cell growth). In other words, holding the squat position for even just a minute helps you build muscle.
Not only does this contribute to muscle mass in your legs and core, but hypertrophy can also boost your metabolism and circulation. This can lead to reduced inflammation, better digestion, and an overall greater sense of mental and physical well-being. A win-win-win!
3. Improve Alignment and Posture
We care a lot about posture here at Lindywell because a healthy mobile spine helps you move throughout your day with ease and freedom. Part of maintaining great posture is having awareness of it as you go about your day.
Maybe you’ve had a moment where you finished a meeting on your computer or had been watching TV on the couch and realized you were hunched over the whole time. You didn’t even have awareness of it, but then, as you straightened back up, you felt that familiar discomfort or stiffness.
Wall sits can help you increase postural awareness (and limit that discomfort) because, as you hold your back up against a wall, you’re creating muscle memory that helps your muscles recognize and remember what it feels like to maintain a tall posture. The more you do it, the more you can train yourself (and your muscles) to be conscious of your posture on a day-to-day basis.
This improved posture not only helps reduce back and neck pain but can also boost your confidence. You stand taller and walk stronger, which can leave you feeling more empowered in every area of your life!
4. Boost Your Endurance
Muscular endurance refers to how long a muscle can keep working (I.E. pushing or holding something) without getting tired. Isometric exercises (like the wall sit) boost this endurance because your body has to hold that resistance (in this case, your body weight) for a specific length of time without releasing the tension.
As you build this endurance, you may find that you can do more of the activities you love, like hiking, biking, gardening or just running around the yard with your pets. This ultimately improves not just your physical body, but overall quality of life. This is one of the most important aspects of movement for us at Lindywell!
5. Keep Your Joints Mobile and Flexible
The wall sit is considered a functional exercise. This means it can optimize the range of motion in your joints, making it easier to perform normal daily movements. When doing a wall sit, your hip, knee, and ankle joints are all in a state of flexion (bending), which in turn promotes that joint mobility.
Plus, the activation of your quadricep muscles reduces the amount of pressure or load on your joints. If you struggle with joint pain in your ankles, knees, or hips, wall sits can be a low-impact way to build strength without causing further discomfort. As a bonus, you’re also moving lymphatic fluid in those areas each time you gently flex them, which supports healing, immune health and detoxification.
It’s Simple and Beneficial to Do a Wall Sit for One Minute Each Day
You might only notice the feeling of your legs screaming to stand up (been there!), but the benefits of wall sits extend far beyond what you can feel or even see. If you’re searching for a convenient, low-maintenance exercise that delivers maximum results in a short amount of time, this one is for you. You’ll build core strength, support posture and alignment, and more—all in just one minute, with no equipment at all.
Flying with a bike was literally a source of anxiety for me in the build up to attending the TriLiving triathlon training camp in Lanzarote, back in 2019. Tip – scroll to the very bottom for the TL;DR – How…
Affirmations are powerful positive statements. You may be aware of them as a tool for self-improvement or to help you reach your goals. Did you know that affirmations can help improve your relationships with your partner, family, friends, and even your colleagues?
By choosing your words carefully and meaningfully, you can improve relationships in every area of your life.
Show Empathy
You can use affirmations to show the other person that you see their feelings and acknowledge them. Affirmations can be used as a component of active listening. Listen to what they are saying, without interrupting, and when you do speak, you reflect back what they said to you. You acknowledge where they are and give them space to vent or celebrate or just get their message across.
The key to showing empathy is to make sure you don’t contradict or negate their feelings. Don’t offer advice or give a contrary opinion. Just stand with them in their space.
Be Authentic
Make sure your affirmations are coming from a place of sincerity. Don’t say things you don’t mean. Keep your affirming messages to the point and focused on the other person.
Affirmations that are economical with the truth or speak out of character will undermine your relationship, not build it. Make sure you speak from the heart. And you don’t have to use flowery language, just be nice.
Tell Your Loved Ones They’re Loved
Saying I love you early in a relationship is easy. But as time goes on, it’s easy to let endearments slide. Get into the habit of telling your partner, your children, your family, your friends how much you love them. Don’t take it for granted that they feel loved, make sure they know it!
Say Thank You
When was the last time you said thank you for a home-cooked meal? Or for proofreading your job application? Or even for taking the garbage out?
No act of kindness should go unacknowledged. Show your family and friends and colleagues that you appreciate what they do for you. Affirm their role in your life.
Give Public Praise
Sometimes the best affirmations come in the form of public acknowledgment. Give credit where it’s due to your team members, your partner, and your kids. Show them you’re grateful and proud of them. Make it a point to acknowledge the extra effort and exceptional achievements.
Joyful aging can seem like an oxymoron if you’re struggling with the experience of aging. And hey, I get it—as the messages to continually look younger and stay young in order to be relevant take a toll on me too.
My body has certainly changed since having my four children. If you’re a Lindywell member, you may have heard me refer to what I call my “Twin Skin,” a part of my body that I lovingly embrace. Keeping my hormones balanced and finding time to take care of myself has become more difficult as my responsibilities continue to increase.
As I look ahead, envisioning the years to come, I want to continue embracing a joyful aging mentality and love each and every step of the way. At Lindywell, we see aging as a gift, which is why I solicited some advice from our team.
We’re lucky to have many incredible women who have embraced the experience of aging and were willing to share their tips and advice with us. Keep reading to hear what they had to say about joyful aging. You’ll pick up a few ideas and words of encouragement along the way, I know I did!
Look for the Opportunity
With each age, change, and shift, comes an opportunity. Kayleen W., Lindywell Member Resources Coordinator said what she loves most about aging is “the opportunity for growth and joy at every stage. While I do have some insecurities still (who doesn’t), as I’ve aged I’ve grown more grateful and less self-focused, therefore much less insecure, which is wonderful!”
This can be hard to see when you’re frustrated with changing hormones or struggling to manage unexpected physical or emotional changes. When you embrace the natural unfolding of age, this new perspective can help make the experience more enjoyable and interesting.
To stay in this mindset, Kayleen said her number one tip for joyful aging is: “Never stop growing, challenge yourself always! Learn new skills and subjects that interest you. Followed very closely by living a life of gratitude. Every passing day and year really is a gift.”
Feed Your Soul
As you get older, you may find you have more and more responsibilities and obligations, from taking care of children or aging parents to managing your career. Jen M., Lindywell Member Support Lead, reminds us to embrace joyful aging by not forgetting who you are and what you love:
“Stay active, keep moving. Feed your soul by taking time to do the things that make you happy. Don’t be afraid to try new things.” By doing this, Jen has found an unexpected sense of body love and appreciation, despite the challenges of letting go of societal expectations.
When I asked what her favorite part of aging is, she said: “Feeling so much better in my body than what I anticipated it would feel like in my 50s. I have come to feel proud of my wrinkles and that I’ve earned them all by a life lived being outdoors (my favorite way to spend time), being adventurous, and living a full life.”
Nourish and Nurture (And Love!) Your Body
Your mind and body may be different now than in your 20s, but that doesn’t mean it deserves any less love and attention. One way to embrace joyful aging is to give your body the love it needs.
This suggestion comes from Julia K., Lindywell Member Support Coordinator, who said her number one tip for joyful aging is: “Take care of your body by eating nourishing foods, getting in healthy movement, and feeding your skin with clean skin care products.”
The ability to learn what your body needs takes time, which is another beautiful aspect of aging if you choose to embrace it. As Emma T., Lindywell Executive Assistant said:
“The best part of aging is every year I become more familiar with my body, its unique needs, and how to take care of it. I think learning what foods, exercises, and practices feel good for you only comes with time. Getting to know yourself emotionally takes time too. I look forward to continuing to age as I continue to get to know myself and am more in tune with my best self!”
Surround Yourself With A Diverse Community
Staying curious is one way to embrace aging and the many changes you experience as you go through it. One of the best ways to do that is to surround yourself with a diverse group of people. This is the number one tip for aging joyfully from Donna Y., Lindywell Member Support Lead. She said:
“Surround yourself with diverse people, not just of different cultures but also of different ages, experiences, backgrounds, etc. We learn so much from each other, whether it is the wisdom of someone 20 years older or the technical know-how of someone 20 years younger. Continually being curious and wanting to learn keeps us young!”
While this can apply to staying curious about life, I also see this as a reminder to stay curious about what you’re moving through. Rather than getting stuck in the frustration of a shifting metabolism or changing life circumstances, we can always come back to curiosity.
For example, when I get frustrated that I don’t feel the way I used to, I recognize it as an opportunity to get curious. What could be going on in my body, or in my routine, that is causing these feelings? Could I need more rest? Should I reach out to my counselor? Am I eating foods that provide the nourishment I truly need? Do I need to change something about how I’m spending my time?
The curiosity allows me to stay present in my current experience and avoid complacency.
Shift Your Perspective From Curse to Gift
It can be hard to see the gifts in changes that you don’t necessarily want. A perspective shift, from curse vs. gift, however, is the number one tip for joyful aging from Kasey M., Lindywell’s Social Media Manager.
She said, “It is a gift to wake up each day and I’m grateful for each day I get to grow older. The experiences and moments I’ve witnessed in my lifetime [are what I’ve loved most about aging], the wisdom I’ve gained from these experiences, and the lessons I’ve learned.”
There’s so much to gain with each passing year. We can embrace the beauty of this every step of the way, especially when we’re frustrated or disappointed with the changes we’re experiencing.
You Can Embrace Joyful Aging
It can feel impossible to embrace joyful aging in a culture that doesn’t seem to honor the beauty and power of getting older. At Lindywell, we believe women can live a full life at any age. Does this mean we won’t experience challenges and changes? No. But it does mean that when we have a positive mindset around this truth and work with our bodies instead of against them, we open ourselves up to embrace and enjoy our whole lives, every season, every age. And that is the power of joyful aging.
We love Star Wars around these parts (our site is literally called “Nerd Fitness”), so you’re in the perfect place to begin your training, my young Padawan.
We specialize in creating nerdy-themed workouts and today one of our coaches will walk you through an exercise routine that would make even Mace Windu proud.
Workout Summary: This workout includes a number of explosive movements meant to fire up your nervous system, build explosive muscles, and get your body to start thinking “POWER!”.
It also includes some static holds, whole-body movements, and even grip strength moves.
THE STAR WARS WORKOUT:
(Coach Jim filmed this during the pandemic, which not only explains why he shot it in a hallway, but also why he looks a little “scruffy looking.”)
Walk or stand for 60 total seconds with weights at your side.
Rack carry:
Walk or stand for 60 total seconds with weights at shoulder height.
The Jedi Master Variation: Rack carry with some lunges – 2 x 60 seconds –
Walk or stand for 60 total seconds with weights at shoulder height. Master-level if you’re able to knock out 10 total lunges (5/side) during that time).
The goal with Chewbacca Carries is to pick up the heaviest weight (or luggage) you can manage and then carry it around your house for the set amount of time. This builds up bone density, tendon strength, and muscular strength, and fires up your body’s central nervous system.
Rest: Again, slow down 1-2 minutes in between sets. Keep things safe.
Part 5: Han Solo Shuttle runs
I love Han.
He shoots first (literally) and asks questions later.
He also runs into situations where he might not have the upper hand.
This round of your Jedi Workout looks like:
Padawan:March in place for 3 minutes of intervals (6 sets of 20 seconds on, 10 seconds off)
Knight:High knees in place for 3 minutes of intervals (6 sets of 20 seconds on, 10 seconds off)
Master:Alternating sets of high knees and burpees for 3 minutes of intervals (6 sets of 20 seconds on, 10 seconds off)
A Tabata Timer might be helpful in setting your intervals here.
We’re having you mostly run in place because you’re probably trapped inside your house (or escape pod). If you have a big backyard, feel free to use it.
For our Padawans out there, you’ll march in place:
When you reach Knight status, do some high-knees:
For the Jedi Masters out there? You’ll mix in some burpees with your high-knees:
For this last variation, do alternating sets of high knees and burpees for 3 minutes of intervals:
Knight: 4 sets of 8 push-ups or dive-bomber push-ups
Master: 4 sets of 8 pike or handstand push-ups
This is probably my favorite Jedi move. Channel the Force, and use it to violently PUSH things away? Awesome. Where do I sign up?
Now, although we can’t actually Force Push in real life…yet, it doesn’t mean we can’t build up our explosive Force push muscles.
For our Padawans, you’ll do elevated or knee-push-ups:
Our Jedi Knights will do normal push-ups or divebomber push-ups:
Are you now the master? Then you’re doing pike or handstand push-ups:
Again, this can get sketchy if you start doing these last push-up variations while tired. Go ahead and rest whenever you need to.
Part 7: hanging Over the Sarlacc
The last section of the Jedi Workout looks like:
Padawan:Doorway Leans – 2 x 60 seconds
Knight:Bar hang – 2 x 60 seconds
Master:One arm bar hang – 2 x 30 seconds for each arm
Sometimes, Jedi find themselves dealing with a creature that wants to digest them for 1,000 years.
That’s where your hanging skills will come in use!
Our Padawans will start with some simple doorway leans:
You’ll hold onto the edge of a doorway and lean back for 60 seconds of hang time – should feel harder on the grip than doorway rows
If you’re following our “Knight variations,” you’re going to be doing bar hangs:
Not enough? Then train to hang from one arm:
This skill will become useful if you ever lose an upper appendage in a lightsaber duel (it happens to the best of us).
Note: this can be challenging on your joints if you’re not used to hanging, so progress slowly on this one! Start with just a few seconds and work your way up!
Complete this workout with regularity, and work your way up to the Jedi Master levels for each.
As I discuss in our guide, How to Build Your Own Workout Routine, I generally recommend newbies complete a full-body workout two to three times a week.
Our Star Wars Workout would be considered “full-body” since we hit every major muscle group. You could also alternate it with a more conventional strength training practice.
Here are some options for next steps with Nerd Fitness:
Option #1) If you want a professional coach in your pocket, who can do video form checks, provide feedback, and adjust your workouts based on the equipment you have available, check out our 1-on-1 Online Coaching Program!
For example, let’s say you find yourself stuck indoors, and you want somebody to custom-build you a workout program based on the equipment and furniture you have. That’s where an online coach is a game-changer!
Personally, I’ve been working with the same online coach since 2015 and it’s changed my life. You can learn more by clicking on the box below:
Option #2) If you want an exact blueprint for working out at home (while doing nerdy-themed workouts!), check out NF Journey. Our fun habit-building app helps you exercise more frequently, eat healthier, and level up your life (literally).
Try your free trial right here:
Option #3) Become part of the Rebellion! We need good people like you in our community, the Nerd Fitness Rebellion (the real name).
Sign up in the box below to enlist and get our Rebel Starter Kit, which includes all of our “work out from home” guides.
Get your Nerd Fitness Starter Kit
The 15 mistakes you don’t want to make.
Full guide to the most effective diet and why it works.
Complete and track your first workout today, no gym required.
Alright, I want to hear from you and your experience:
Did you try the Star Wars Workout?
What level are you on?
Any exercises that we missed that would be perfect for a Jedi?
By Jessica Thiefels, Lindywell member & Marketing Consultant
My Pilates transformation was unexpected. I’m a former personal trainer, ex-gym rat, and long-time “clean eating” advocate. I’m also in the depths of disordered eating recovery and body image healing.
I always exercised to change the way I look. Get more toned, keep my belly flat, and feel like I was good enough, or in many cases, better than everyone else. Running parallel to my fitness journey, was my food journey, which included intense elimination diets to heal a variety of mysterious body issues, like extreme bloating and a rash all over my chest, shoulders, and back.
For a Type-A, perfectionist who thinks in black and white, this was a recipe for disorder.
However, nearly a decade after I started my body healing journey, in the fall of 2022, I said to my husband, “I’m walking a fine line between disordered eating and conscious eating.”
At that moment, though, I knew which side of the line I was on. I was also more obsessed with how my body looked than ever before. I was doing intense workouts, eating with strict rules—and feeling anxious and stressed.
The realization that I needed to make a change came clear and sharp. I was exhausted. I felt like I was running on a hamster wheel and could not, no matter how hard I tried, get off. So, I did what I do best: went all in.
I listened to stories of eating disorders and recovery through podcasts, started reading books on Intuitive Eating, and most importantly, started working with a professional for body image and disordered eating recovery.
And this is where my story with Pilates begins. Just two months after starting this work I began working with Lindywell as their SEO and content marketing consultant. Part of my job was to try the app, try the workouts, and get familiar with what they do and how they do it.
I resisted logging in and trying a workout until January 1, 2023. But on Day 1, my Pilates transformation began.
Week 1 Transformation
Setting non-body intentions and loving quick and easy workouts that energize and ground me.
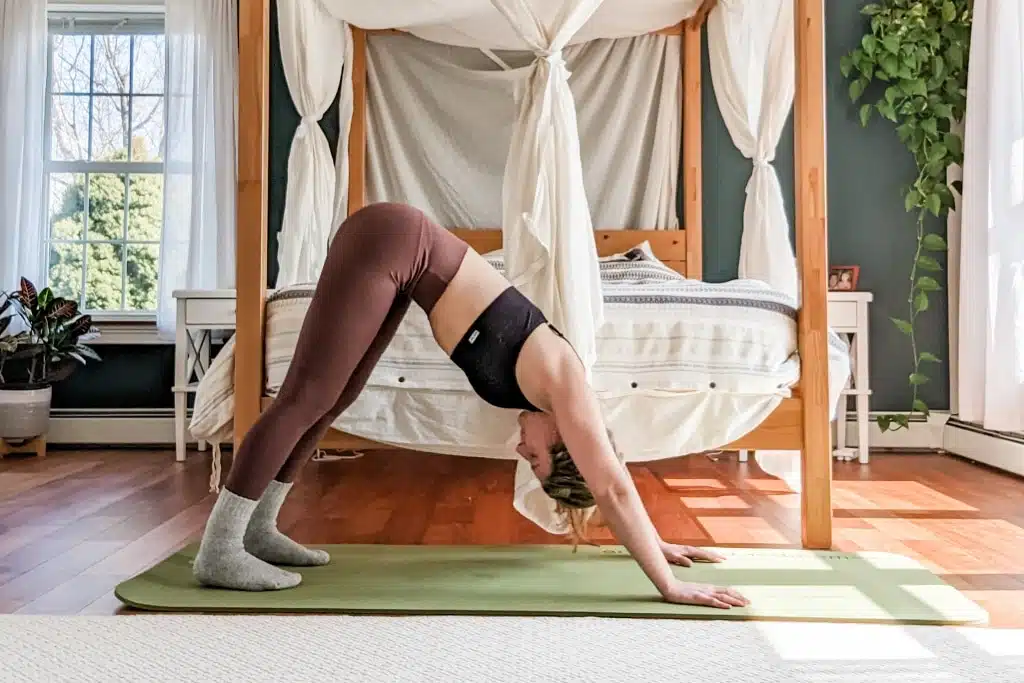
I can honestly say, the moment I stepped on the mat, I felt a shift. As someone who had always lifted heavy weights and sprinted hard on the treadmill, this was different in so many ways. The slow-down, the moments of grounding, the gentle movement. It was all exactly what I needed.
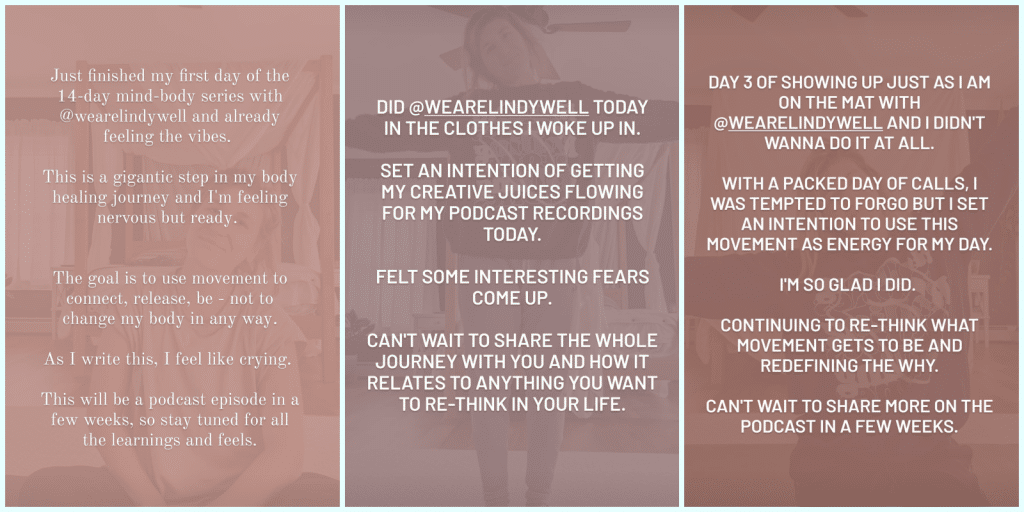
As a natural content creator and 12-year marketer, I decided to share my experience on Instagram Stories for the first 14 days with Lindywell. I posted each day, right after the workout, so rather than telling you how I felt in week 1, I’ll let those posts do the talking.
Within the first few days, I also realized that this was the perfect way to move my body as a busy mama who also runs a business and has an active social life. On Day 4, I posted:
“Day 4 with @Wearelindywell, and my intention was energy. Weston was up real early today and mama is tired!”
If you notice I said, “my intention was…” This was another big part of my Pilates transformation. I wanted to make this time on the mat about more than my body. So each day, I set a clear intention that’s focused on something other than my body, like energy, creativity, or peace.
Almost four months later, I’m still setting an intention before each workout. Shifting my focus from how my body looks or “performs” to how I am feeling from the movement has been incredibly powerful.
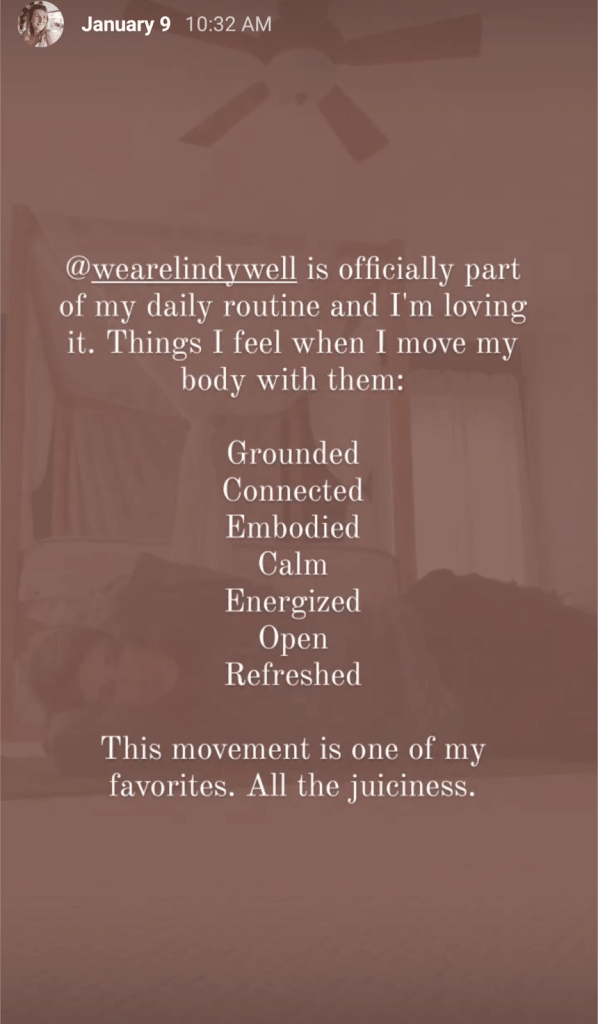
Turning Pilates into a daily part of my routine and noticing my physical strength.
As week two rolled in, the calm of the movement became one of my favorite things about it. On Day 8, I posted: “Day 8 with @wearelindywell and feeling so grateful for the slow, powerful pace of Pilates and the calm I always feel when I come onto the mat.”
It was at this point that I also realized this was now part of my daily routine. On day 9, I posted:
During week two, I also started noticing how strong my body was becoming. In just 10 days, I could see an increase in strength, especially in my core. After one of my workouts, I was playing around with doing a headstand, something I’ve been able to do for many years. Getting up into the pose had never felt as easy as it did that day.
I was also noticing certain movements—like Rolling Like a Ball—that were challenging on day one already felt so much easier to do. My body was changing, but so was my mind. They were syncing, connecting, and supporting me in every area of my life.
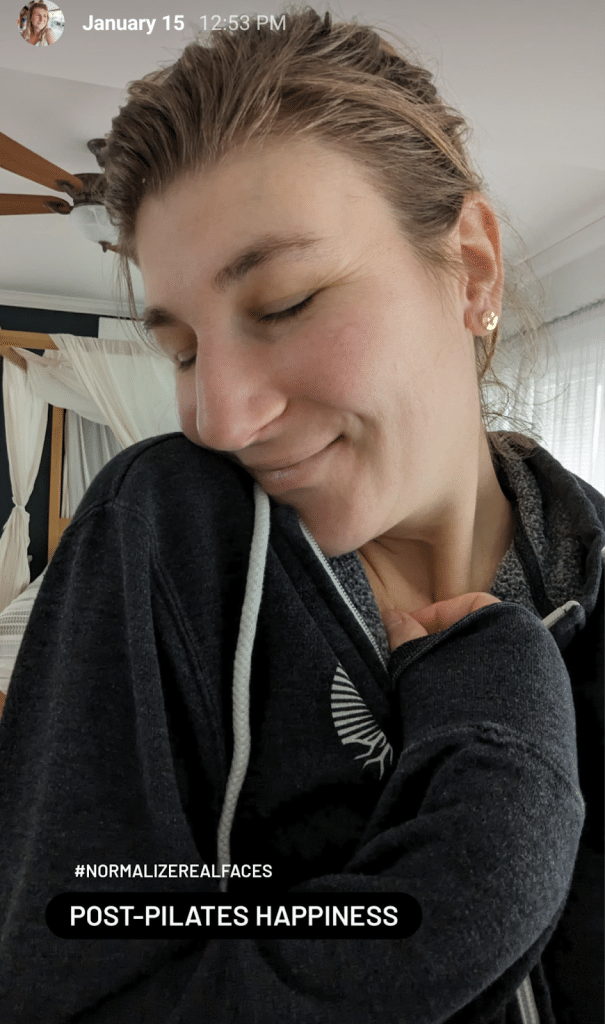
Showing up on my mat without question and loving the variety of options.
On Day 15, I posted this photo with greasy hair and no make-up, full of those post-movement feels:
This sums up how week 3 felt for me. My Pilates transformation was always about so much more than my body, and during week 3, I began to simply love the process, the experience, and how I was feeling after every single workout.
I also started digging into the different workout options, even doing two a day—one that challenged me in the morning and one that helped me wind down and stretch in the evening. It didn’t feel like I needed to do two to change my body. I was just craving being back on the mat.
Most importantly, I loved that I could choose a long or short workout and, no matter which it was that day, it was always enough. This mindset is the direct result of what Robin, the founder and lead instructor of Lindywell, reminds us every time we step on the mat:
Being here is enough
Meet your body where it’s at
Do what feels good for you today
For me, that translated into total bliss. All the pressure I used to carry around working out disappeared.
In addition to all of that, the mindfulness I was practicing on the mat was also translating into my disordered eating recovery. I was eating foods I love (that I’d sworn off for years), listening to what my body really wanted, and so much more.
Leaning into ease off the mat and feeling beyond grateful for Lindywell.
On Day 23, I posted a Reel titled, “Pilates Lessons for an Easeful Week” and this is the perfect example of how I was feeling as my first month of Pilates closed out. While I was noticing clear strength gains and was able to commit to daily workouts in a way I never had before, the greatest Pilates transformation I experienced wasn’t felt so much on the mat, but off the mat.
As I shared at the beginning, I’ve always had a Type-A, black-and-white, perfectionist personality. Pilates brought a calm and groundedness that I was resisting as I moved through this incredibly challenging healing journey. As Stephen Pressfield, the author of The War of Art (if you haven’t read it, pick it up now), says:
“The more resistance you experience, the more important your unmanifested art/project/enterprise is to you—and the more gratification you will feel when you finally do it.”
This was so true for me. I knew Pilates, specifically from Lindywell, would change me, but I was resisting slowing down and grounding. I was resisting finding a new way to move. On the other side of that resistance, however, was something that will impact me forever.
My Pilates transformation was so much more than I could have ever imagined it would be. It came at a time when I needed it most and has now become a regular part of my routine that I truly love. Whether I get on the mat for 10 minutes or 25, I always feel strong and energized—and somehow also calm and grounded. It changed so many aspects of my life and I know it will do the same for you.
If you haven’t tried Lindywell yet, I highly recommend signing up for their 14-day trial. I have a feeling at the end of the 14 days, you’re going to wonder how you ever got through your days without it!
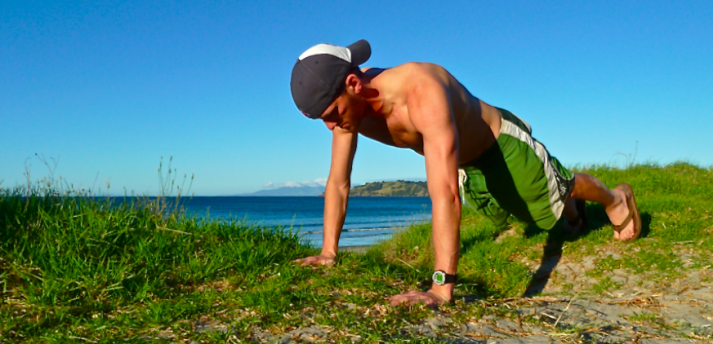
Before we jump in, if you’re looking for a way to train anywhere (like with push-ups), you may be interested in the new app we built!
Nerd Fitness Journey will guide you through a workout routine that can be done anywhere, all while creating your very own superhero!
You can give it a free test drive right here:
How to Set up for a Proper Push-up (Staging)
When it comes to push-ups, your form is crucial. Each push-up needs to be done with proper form so that your total reps measured from workout to workout are on equal footing.
If you did 20 push-ups two days ago, and then today you did 25 push-ups by only going down halfway, sticking your ass up in the air, etc., it’s absolutely impossible to tell if you got any stronger.
Here’s how to get into proper push-up position:
1) On the ground, set your hands at a distance that is slightly wider than shoulder-width apart.
Draw a straight line from your chest/nipple down to the floor – it should be directly over your thumbnail.
Depending on your strength and experience, your hands should be angled in a way that feels comfortable to you. For me, my hands are set up so that my middle finger points straight up and away from me.
2) To alleviate wrist pain (if you have poor wrist flexibility) do your push-ups holding onto push-up handles (so your wrists aren’t as compromised), or a bar:
If you’re hardcore, you can do them on your knuckles (as long as you’re on a semi-soft surface like grass or carpet or broken glass. Wait, scratch that last one).
3) Your feet should be set up in a way that feels right and comfortable and in balance. For some, that might be shoulder-width apart.
For others, it might be with your feet touching. Generally speaking, the wider apart your feet, the more stable you’ll be for your push-ups.
4) Think of your body as one giant straight line – from the top of your head down through your heels. Your butt shouldn’t be sticking way up in the air or sagging. You’re essentially holding a plank throughout the entire movement, as shown in this video below:
5) If you have a problem getting the proper form with your body, try this: clench your butt, and then tighten your abs as if you’re bracing to get punched.
Your core will be engaged, and your body should be in that straight line. If you’ve been doing push-ups incorrectly, this might be a big change for you.
Record a video of yourself to make sure you’re doing it correctly.
6) Your head should be looking slightly ahead of you, not straight down.
I read somewhere that said “if you’re doing them right, your chin should be the first part of your head to touch the floor, not your nose.”
Looking up helps you keep your body in line, but feel free to look down if that helps you concentrate more.
7) At the top of your push-up, your arms should be straight and supporting your weight. You’re now ready to do a push-up.
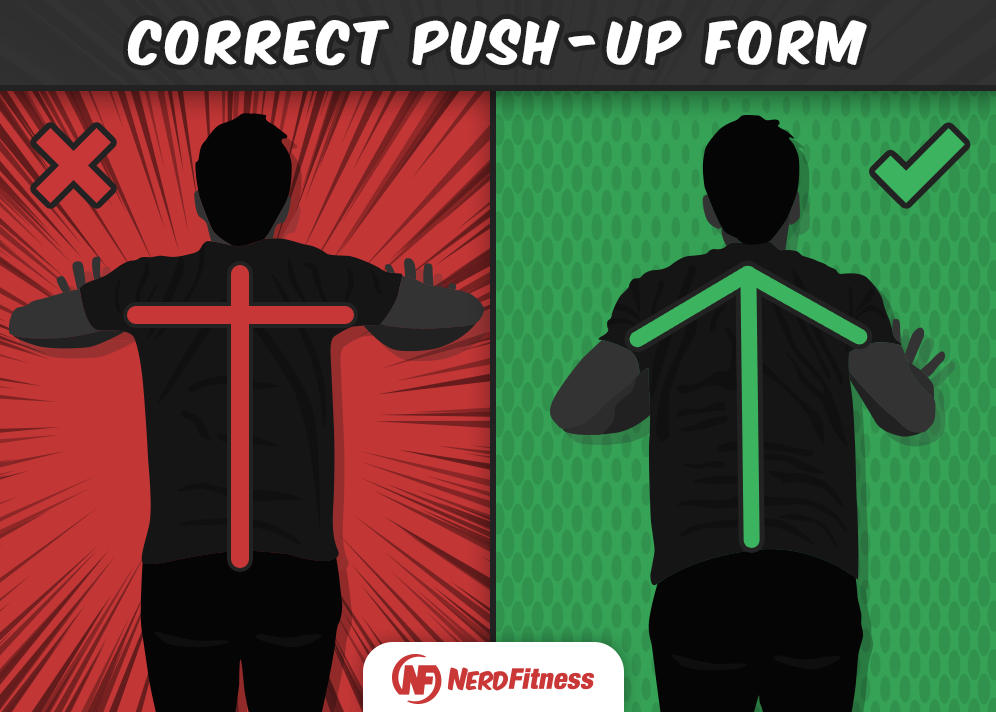
8) I want to draw special attention to that first step with hand position: nearly EVERYBODY does push-ups with their arms out far too wide and their shoulders flared. This is bad news bears.
If I was looking down at you from above, your arms and body should form an ARROW, not a T.
WARNING: If you have been doing push-ups with your arms flared, doing them with proper form will be significantly more difficult!
How to Do a Proper Push-Up (Correct Push-Up Form with Video).
In the 5-minute “Perfect Push-Up” video above, featuring yours truly and two of our coaches, we take you through EACH of the steps of a push-up, including some variations!
Here’s how to complete one perfect repetition of a proper push up:
With your arms straight, butt clenched, and abs braced, steadily lower yourself until your elbows are at a 90-degree angle or less. Depending on your level of experience, age, and flexibility, 90 degrees might be the lowest you’re able to go. Personally, I like to go down until my chest (not my face), hits the floor. That way, I know I’m going the same distance each and every time.
Try not to let your elbows go flying way out with each repetition. Keep them relatively close to your body, and keep note of when they start to fly out when you get tired.
Once your chest (or nose/chin) touches the floor (or your arms go down to a 90-degree angle), pause slightly and then explode back up until you’re back in the same position.
Do as many as you can until you start to feel your form slip (even slightly); you are done for that set.
Here’s why you should focus on form over quantity:
10 good push-ups and 5 crappy ones are tough to quantify against eleven good push-ups.
If you can only do 10 of something, write down your results and aim for 11 next time.
Perfect form allows you to keep track of your improvements week over week.
Want to know where push-ups should fall into your workout routine? I have three options!
1) Try Nerd Fitness Journey!
Nerd Fitness Journey will guide you through a bodyweight workout routine that can be done anywhere (yep, even there). You can try it for free right here:
Grab Your Beginner Bodyweight Routine Worksheet. No Gym Required!
Complete this workout at home, no equipment required
Avoid the common mistakes everybody makes when doing bodyweight exercises
Learn how to finally get your first pull-up
3) Make your own workout with push-ups by following our“Build Your Own Workout” guide! It’ll walk you through everything you need to build an exercise program for your goals in 10 steps.
How Do You Train to Do Push-Ups? (Where to Start If You Can’t Do a Push-Up.)
Don’t worry if you can’t do a push-up yet. As we lay out in the video above, we have a plan that will help you get there.
You need to start with an easier push movement, and work up to progressively more difficult types of moves that will eventually result in you doing true push-ups.
We’ll progress from Level 1 Push-ups to Level 4 Push-ups:
Wall Push-Ups: Level 1
Elevated Push-Ups: Level 2
Knee Push-ups: Level 3
Regular Push-ups: Level 4
LEVEL 1: HOW TO DO WALL PUSH-UPS
Stand in front of a wall. Clench your butt, brace your abs, and set your hands on the wall at slightly wider than shoulder-width apart.
Walk backwards with your feet until your arms are fully extended and supporting your weight (generally one decent sized step back with both feet will suffice). Keeping the rest of your body in a straight line, steadily lower yourself towards the wall until your nose almost touches the wall, and then explode back up to the starting position.
HOW TO TRAIN WALL PUSH-UPS:
Do 4 sets of wall push-ups with a 2-minute rest between sets, every other day. Keep track of how many repetitions you can do WITH PROPER FORM for each set in a notebook for easy comparison to previous workouts. Once you can do 4 sets of 20 repetitions of wall push-ups, you can progress to knee push-ups.
LEVEL TWO: HOW TO DO ELEVATED PUSH-UPS
As we demonstrate in this video above from Nerd Fitness Prime, elevated push-ups are just what they sound like – your hands are on an elevated surface, whether it’s something as tall as a kitchen table or as low as a few blocks that are inches off the ground. This will depend on your level of strength and experience.
If you’ve just progressed from wall push-ups, pick something that is at a level that’s right for you – I generally find the back of a park bench or the side of a picnic table to be a perfect height for doing incline push-ups. Like so:
HOW TO TRAIN ELEVATED PUSH-UPS:
Do 4 sets of elevated push-ups with a 2-minute rest between sets, every other day. Again, keep track of all of your stats for how many proper form repetitions you can do in each set. Once you can do 4 sets of 20 repetitions, it’s time to either move to regular push-ups, knee push-ups, or a lower height for your hands to be supported.
Once you can do 4 sets of 20 repetitions, it’s time to either move to regular push-ups, knee push-ups, or a lower height for your hands to be supported.
To work on progression, try to doing your elevated push-ups on the stairs in your house. As you get stronger, you can move your hands to lower and lower steps until your hands are on the ground.
LEVEL THREE: HOW TO DO KNEE PUSH-UPS
Once you’re comfortable doing wall or elevated push-ups, proceed to knee push-ups. Your shoulder and hand placement will look just like a regular push-up (an “arrow”, not a “T”), but you’ll stabilize yourself on your knees instead of your feet. As demonstrated here:
HOW TO TRAIN KNEE PUSH-UPS
Once you can do 4 sets of 20 repetitions on your knees, you can start thinking about doing regular push-ups.
To recap, if you can’t do a regular push-up, move from:
Wall Push-Ups: Level 1
Elevated Push-Ups: Level 2
Knee Push-Ups: Level 3
Regular Push-ups: Level 4
How do I know the above progression will work? Well, it’s the exact plan we use to help people crush push-ups in Nerd Fitness Journey!
You can see how we scale our bodyweight workouts right here:
What Are Other Types of Push-Ups? (Push-Up Variations)
Basic push-ups can get boring…
Fortunately, there are dozens upon dozens of variations to make things more difficult for you.
Once you’re cranking out perfect form push-ups like it’s your job,[1] try some of these advanced variations on for size.
Click on each for a video demonstration (these are some of the push-up variations pulled from NF Prime):
#1) One-legged Push-ups: introducing some variety and balance by removing one of your legs for less stabilization:
#2) Side-to-Side Push-Ups –Get into the classic push-up position and move your hands farther apart. Now, lower yourself down towards one arm only – you should feel like you’re supporting a lot of your weight.
To complete the rep, slide horizontally over to the other arm, and push-up. The farther apart your hands, the higher percentage of your bodyweight will be supported by that side of your chest/shoulder and arm (thus getting harder)!
#3) Decline Push-Ups – these work your shoulders and triceps more so than normal push-ups.
#4) Diamond Push-Ups – keep your arms tight at your side, rotate your hands outward, and keep your elbows tight as you lower your body. Works your triceps like crazy.
#5) Dive-Bomber Push-Ups – funky, difficult, but oh so fun. I’d explain it, but just watch the video
#6) Plyometric Push-Ups – these are brutal and will wear you out just after a few repetitions. Just don’t hurt yourself and smash your face during a failed attempt (not that I’ve ever done that. Shut up my face always looks like this)!
#7) Handstand Push-Ups – This goes without saying, but you should be able to do a proper handstand before attempting these!
Kick up against a wall, and without flailing your elbows way out to the side (which can wreak havoc on your shoulders and elbow joints), slowly lower yourself down until your head touches the ground softly.
Then raise yourself back up.
Rotate some of these advanced push-ups into your workout routine and you’ll be well on your way to a great strength training practice.
If you want more strength building tips, we also have a comprehensive guide, Strength Training 101: Everything You Need to Know, when you sign up for the Rebellion (that’s our community) below:
Download our comprehensive guideSTRENGTH TRAINING 101!
Everything you need to know about getting strong.
Workout routines for bodyweight AND weight training.
How to find the right gym and train properly in one.
How to Get Better at Push-Ups
So you’ve learned how to do a push-up, you can do a few of them, but you want to get better!
Here are some tips to help you along the way:
Get healthy! As you lose weight (which is 80% nutrition!), you will have to move less weight around than before, which will make your push-ups easier to manage. Have you had trouble losing weight in the past? Check out our article “Why Can’t I Lose Weight?” to find out why.
Don’t cheat on the last few push-ups – when you’re tired, it’s easy to skip out on good form for your last few reps. As soon as you do one bad form push-up, you’re done. Finish up your four sets, write down your numbers, and try to beat those numbers next time.
When starting out don’t do push-ups two days in a row. You need to give your muscles time to rebuild and recover – take off at least 48 hours in between your push-up adventure. However, when push-ups became a warm-up exercise for you – you can do them every day if you want. If you’re advanced, you can consider a PLP program.
Get enough protein into your system after finishing up your workout – protein helps rebuild the muscles you just broke down doing push-ups, and it helps them rebuild those same muscles stronger than before. You can read our ultimate guide on protein for some tips on how to up your protein intake.
If you can do 4 sets of 20-25 perfect form push-ups no sweat, then it’s time to start looking into push-up variations to keep things interesting.
Build up your core with planks – this will help keep your core strong so that it’s not the weakest link in your proper form push-ups.
These 6 tips will be a great addition to your strength training plan. Keep at it and before you know it you’ll be doing one-arm push-ups like Batman.
What’s that? You don’t have a strength-building plan!!! Well then…
What’s Your Strength Building Plan?
It makes me sad when we get emails from people who struggle and try and work hard to get healthier, and to be better at push-ups, and just can’t seem to make any progress.
If that’s you, you’re not alone!
1) Consider working with an online coach (or in-person trainer).
Helping people learn push-ups and other bodyweight exercises is why we built our1-on-1 Online Coaching Program:We build programs for busy people to cut through the noise and just get results
2) Exercising at home and need a plan to follow? Check out Nerd Fitness Journey!
Our fun habit-building app helps you exercise more frequently, eat healthier, and level up your life (literally).
Try your free trial right here:
3) Join our community! We have hundreds of thousands of people, and I send out two free emails every week to help them level up their lives. Join our free community today, and I’ll send you a dozen free ebooks, including TONS of workout plans you can do anytime, anywhere.
Join the community by signing up in the box below:
Grab Your Beginner Bodyweight Routine Worksheet. No Gym Required!
Complete this workout at home, no equipment required
Avoid the common mistakes everybody makes when doing bodyweight exercises
Learn how to finally get your first pull-up
YOUR MISSION, SHOULD YOU CHOOSE TO ACCEPT IT:go home, set up a camera, and check your form on your push-ups.
I hope you’ll find that your form is as good as you expected, but it’s okay if it’s not, it’ll give you something to work on.
Go do some push-ups, and work on getting better with them every day.
You’ll be moving from Level 1 to Level 4 push-ups and beyond!
-Steve
PS: Not to brag, but I typed this entire article while doing 1-handed push-ups.
PPS: Okay no I didn’t. But it would have been cool if I did, right?
By Kiesha Yonkers, Head of Breathwork + Somatic Programs
The connection between breathwork and hormone health and wellness cannot be ignored. My experience, from the very start of exploring this practice, is the perfect example.
In mid-2020, my stress hormones (cortisol) were at an all-time high. As was the case for so many of us. I was chronically in fight or flight, and as a result, I was feeling anxious, worried, and far from connected to myself.
When I started doing breathwork, I felt the stress start to melt away. This meant that I was shifting into my parasympathetic system, which is the “rest and digest” system. It’s also the opposite of fight or flight, which is when you’re in the sympathetic system.
Shifting into this parasympathetic state allowed my body to activate the “happy” hormones, like dopamine, serotonin, and oxytocin. In this state, I felt safe and that allowed me to connect with my loved ones and myself more effectively. I was also able to release some of the anxiety and feel all the goodness that those happy hormones were sending my way.
As you know, we strive to keep our discussions here at Lindywell rooted in evidence while keeping things simple and approachable. So let’s bring some science to this scenario with a few practical tips on how to use breathwork for your hormone health and wellness.
First: Why Do Hormones Matter?
Let’s break down the key hormones that impact us as women and what they do.
Estrogen: Estrogen keeps us on our toes! It’s a multi-purpose hormone that supports everything from your menstrual cycle to bone health and that glowing skin we’re all trying to achieve. This hormone naturally fluctuates throughout your life as a woman, all the way through menopause.
Progesterone: Progesterone (sometimes called the feel-good hormone because it can make us feel calm—yes, please) varies throughout your cycle each month. Its main role is to prepare your body for pregnancy and support fetal development.
Testosterone: Testosterone is not just a hormone in men! This hormone supports muscle growth, bone health, and libido for women.
Thyroid hormones: Your thyroid hormones are the unsung heroes of health and wellness. They come from the thyroid gland and regulate many of the most popularly discussed aspects of our health, like metabolism and energy levels.
When I talk about supporting hormone health and wellness, I’m referring to the steps we can take to keep these hormones (and all the others that are at play in our bodies) in balance. This means we feel good and our body can function.
If any of these hormones are out of balance or not being produced, you may notice a wide range of symptoms. These symptoms, which depend on the type of hormone imbalance and underlying cause, can include fatigue, mood changes, weight gain, hot flashes, acne, low sex drive, depression and so much more.
How to Breathe Your Way to Healthier Hormones
Breathwork activates the parasympathetic system, and when your body is in this state, it is better able to produce and activate the hormones you need to feel safe, loved, connected, and happy. This is also when your metabolism improves, digestion works well, and your body can function exactly as it should.
While it’s not necessary to always be in one of those states to keep your hormones happy (that’s not even possible!), breathwork helps you come back to that place of “rest and digest” regularly, rather than staying in fight or flight.
The good news is, you don’t need to be experienced in the art of meditation to reap the hormone benefits of breathwork. Even better, you don’t need to spend hours each day doing it! Here’s what you need to know about using breathwork as a tool for your hormone health and wellness.
Start Slow and Simple
Breathwork can be intimidating (I get it, I’ve been there!) so I encourage you to start slow and simple with box breathing. Breathe in slowly and deeply for four seconds, hold for four seconds, breathe out for four seconds, hold for another four, and start again. You may be surprised by how at ease you feel after doing this just 4 or 5 times.
You can try a guided breathwork session from yours truly in the Lindywell app! If you’re not a member, start your 14-day trial and get instant access to a variety of breathwork sessions and techniques.
Make it a Part of Your Routine
As with anything, consistency is key to success. A single breathwork session is helpful. Still, the goal is to continually bring ourselves back into the parasympathetic system over and over. This is what activates those happy hormones needed to help us thrive.
Remember that taking even just 2 or 3 minutes for breathwork can have benefits like less stress and anxiety, better focus and mental clarity, and boosted energy levels (yes, please!). Longer sessions can offer even more benefits, like better lung capacity and sleep, and the ability to release blocked emotions that are making you feel stuck or anxious.
Short daily breathing exercises are important and effective. However, longer sessions guided by an expert can increase the benefits and provide an opportunity for significant transformation. If you want to experience the power of these longer, guided breathwork sessions, reserve your spot for Exhale Hour. Join me for live breathwork sessions that deeply support you, both mind and body.
Pair Breathwork With Pilates
There are many ways to support your hormones. Breathwork is one of them and exercise is another, specifically Pilates. Research has found that this form of movement is especially beneficial for women’s hormone balance. One study saw a significant decrease in participants’ menopausal symptoms, which are directly impacted by hormone health, after practicing Pilates.
The best way to pair these two powerful hormone helpers is to join Lindywell.Sign up today and you’ll get your first 14 days for free!
Once signed up, you get immediate access to 250+ Pilates workouts, multiple guided breathwork sessions, and hundreds of recipes created to support hormone health and reduce inflammation.
Breathwork is a Powerful Partner in Hormone Health and Wellness
Our hormones want to support us, but if we’re constantly in fight or flight, we inhibit their ability to do so. This is why breathwork is so important and can’t be overlooked for your hormone health and wellness.
Deep breathing gets us into that all-important parasympathetic state, which in turn supports our hormones. When we commit to breathwork (and Pilates!), we feel happier and less stressed. In the process, we also feel more connected and our bodies can function exactly as they’re supposed to. A win-win!