If your warm-up is the appetizer, and your strength-based workout is the main course, then a post-workout stretching routine is the dessert (sorry for making you think about Creme brulee).
In this guide, we’ll cover it all (click to get to those sections):
Now, if you’re stretching as part of a strength training routine, you might be interested in our 1-on-1 Online Coaching Program.
We don’t just focus on weight loss, but helping people level up their entire lives. That includes nutrition, mobility, goal setting, and even overcoming fears and becoming an actual superhero.
Okay, let’s get bendy like Gumby!
Beginner Full Body Stretching Routine Video
The Beginner Full Body Stretching Routine:
Reach above and fully extend your body.
Keep legs straight, bend forward and stretch for 10 seconds.
Stretch towards the left for 10 seconds, and then the right for 10 seconds.
With legs together bend forwards for 10 seconds.
Squat down and hug your knees to your chest.
Roll onto your back in the same position.
Kneel and lean back with arms extended and rock forwards stretching the lower back (repeat 3-5 times).
Sit with the bottoms of your feet together, lean forward and stretch (repeat 2 or 3 times).
You can do this routine both AFTER your strength training routine, and also on your off days. Do your best to stick with this routine regularly to get maximum benefits like increased mobility and flexibility!
Advanced Stretching Routine
This advanced stretching routine is a mix of yoga, stretching, tai-chi, pilates, and awesome.[1]
Although I move quickly through the movements to keep the video short, don’t confuse my movements with bouncing. Stretch as far as you can, hold it for a few seconds without bouncing, and then repeat the process
Is Yoga Good for a post-workout stretch?
Yoga is awesome.
It can help improve flexibility, strength, and mindfulness.
Plus, if you’re looking for a stretching routine to cool down with after your training, yoga almost seems built for it. Oftentimes a yoga routine will end in corpse pose, the perfect posture after a hard training session.
Here is a FULL yoga routine you can do anywhere. It’s a great routine to follow on your non-training days:
If you stretch after your workout, your muscles will be warm and less likely to suffer an injury.[2]
Instead, you should be doing a dynamic warm-up before your workout (jump jacking, leg swings, arm circles).
Coach Staci covers such a warm-up in this video:
As this study shows, “a dynamic warm-up” can also help reduce soreness after a workout.
Okay, back to stretching.
Stretching AFTER a workout CAN be helpful, but perhaps not for the reason you’d expect!
Stretching hasn’t been proven to reduce soreness or improve one’s recovery time, but stretching CAN help improve flexibility.
This is super helpful if you have the flexibility and mobility of this robot:
So stretching after a workout allows you to work on flexibility and mobility without needing to worry about losing your strength (if you had stretched before your workout)!
And with improved flexibility comes improved performance in almost all areas of life (yup, even THAT).
Also, as you get older, your flexibility and mobility start to go…making you FEEL older.
If you can stay flexible, you’re more likely to stay happy and healthy for far longer.
Staying flexible keeps you active, and staying active keeps you young.
If you are interested in improving your mobility, make sure you check out these two guides:
How to Touch Your Toes– which will walk you through 4 stretches to help you reach those little piggy wiggies.
One last point – even if you’re JUST going to do some stretching, it’s still a good idea to warm up first for about five minutes. Again, it could just be with some legs kicks and arm circles:
pARTING WORDS ON STRETCHING EXERCISES
What’s that? You want even more stretching recommendations?
Depending on how you’re feeling, where you’re sore, and so on – you can throw in some additional movements:
#1) The Ballet Stretch
#2) The Full Body Stretch:
#3) The Back Stretch:
No matter what training you’re doing, whether it’s with bodyweights, actual weights, or running, always make sure you take some time post-workout for some stretching exercises: you’ll be improving your flexibility which gets more important every day you get older!
Before I dip out, if you want Nerd Fitness to help you along with your fitness journey, here are three ways we can help:
#1) If you want a professional coach in your pocket, who can do video form checks, provide feedback, and adjust your workouts based on your experience level, check out our 1-on-1 Online Coaching Program!
For example, let’s say you have an old injury and couldn’t perform one of our stretches. A Nerd Fitness Coach can work with you to create a customized routine for your exact situation.
Personally, I’ve been working with the same online coach since 2015 and it’s changed my life. You can learn more by clicking on the box below:
#2) Exercising at home and need a plan to follow? Check out Nerd Fitness Journey!
Our fun habit-building app helps you exercise more frequently, eat healthier, and level up your life (literally).
Plus, you can take part in flexibility challenges alongside a group of nerds who are all trying to better themselves!
Try your free trial right here:
#3) Become part of the Rebellion! We need good people like you in our community, the Nerd Fitness Rebellion.
Sign up in the box below to enlist and get our Rebel Starter Kit, which includes all of our “work out from home” guides.
Get your Nerd Fitness Starter Kit
The 15 mistakes you don’t want to make.
Full guide to the most effective diet and why it works.
Complete and track your first workout today, no gym required.
Alright, your turn:
Do you have any favorite post-exercise stretches?
Any difficult areas you try and troubleshoot after your training?
What do you do to help with post-workout recovery?
Let us know in the comments!
-Steve
PS: With all this talk on post-workout stretching, did you remember to warm up before your workout? I got you!
If we rewound to the start of 2022, I’d say my all time favourite adidas trainers were anything in the ultra boost family, but since then, I’ve road tested a fair few different pairs of womens trainers from adidas, and…
Does your Wegovy diet plan include lifestyle changes to build long-term strength and reduce stress and anxiety? If not, it’s time to take a step back and look at your health from a holistic lens. While weight loss can be important, it’s far from the only aspect of life that impacts health.
In fact, your health is made up of many factors including where you live, your education level, your relationships and so much more. Two of those factors that play an especially critical role are long-term physical strength and mental health.
In my 20’s, I thought weight loss was what I needed—and yet, it never made me happier. It took discovering Pilates, which helped me consistently build mental and physical strength and resilience, to make me see that. Now, as a business owner, mother of four, and person who wants to thrive, this is what’s helped me manage health setbacks, feel good in my ever-changing body, and weather the many storms that have come my way.
Let’s take some time to dig into the science, understand why all of this matters, and how you can make sure they’re part of your Wegovy diet plan—or any weight-loss plan!
First: What is Wegovy?
If you’re checking this article out because you’re curious about what Wegovy is (let’s be honest, a lot of people are talking about it!), then let’s do a quick overview. Wegovy is a semaglutide; another popular version of this that you’ve probably been hearing about is Ozempic.
These drugs were initially developed for those with Type 2 Diabetes. When used as a treatment, adults with type 2 Diabetes get a once-weekly injection to improve blood sugar levels. This is also used to lower the risk of major cardiovascular events like stroke, heart attack or death, for adults with type 2 diabetes who also have heart disease.
This drug has clear medical benefits and has provided hope for many people who really need it. Unfortunately, however, many people with the financial means have begun using it solely to lose weight—regardless of whether they have Diabetes or not. This has caused a lot of conversation around both the use of the drug and the importance of and focus on weight loss.
How I Look at Wegovy
When I look at Wegovy or Ozempic and their rise in popularity I think about two important things:
I am not here to “drug shame” anyone. I recognize the opportunity for many people who struggle with Diabetes and their weight to achieve their weight loss goals. We are not here to layer on guilt or shame in this conversation or alienate people who need help and are looking for answers.
I know that health is about so much more than weight. While this can play a role in your overall health picture, to create sustainable, long-term health (that will last beyond initial weight loss and help you feel happier, calmer, and stronger), you need to make lifestyle changes that address your holistic health picture.
Focusing on holistic health can help you bring all of these factors together so you can feel good in your mind and body. Here’s how you can start moving toward this approach.
What Your Wegovy Diet Plan is Missing
It’s often the case that when someone thinks of health, they think only of weight. For some people, weight is an indicator of overall health and can or should be addressed. However, what’s often overlooked (and yet is so important) is a holistic health approach that includes:
Long-term physical strength
Mental health and mindset
Optimal nutrition and nourishment
Let’s dive in to see how these aspects of health impact your life and how you can start making changes.
Long-Term Physical Strength
Weight loss does not have the same benefits for your long-term health as building strength. This is especially true when you consider how the body changes in the aging process. What’s more, drugs like Wegovy not only drive weight loss but muscle loss as well, so it MUST be counteracted with exercise if you want to stay healthy and age well.
Strength building can vastly improve what you can do and the quality of your life long-term. One report called, “Resistance training is medicine,” (just love that title, how true!) shared how the body improves with resistance training, meaning to work out with weights, bands, or other equipment:
Improved movement control, functional independence, cognitive abilities, and self-esteem.
Prevention and management of type 2 diabetes.
Boost cardiovascular health.
Promote bone development.
Reduce low back pain and ease discomfort associated with arthritis and fibromyalgia.
Reverse specific aging factors in skeletal muscle.
What’s more, bodyweight training, working out with no equipment at all, can have a similar impact. One study found bodyweight training reduced inflammation and improved overall functional fitness in postmenopausal female participants. I know I’ve definitely experienced these benefits from bodyweight-based Pilates. (Our thousands of members have too!)
All of this is critical if you want to live a long, comfortable, and functional life. And yet, no Wegovy diet plan is recommending physical movement.
How to Build Strength
While there are many ways to build strength, we at Lindywell love one particular form of exercise the most: Pilates. Not just because it’s what we teach, but because we know it can have all of the benefits shared above and then some!
At Lindywell we use body weight, resistance bands, and even Pilates-inspired weight training to build strength and focus on good form and healthy movement while building muscle.
Plus, at Lindywell, we remind you to focus on grace over guilt. We want you to meet your body where it’s at so you can build strength without forcing your body to do what isn’t right or doesn’t feel good. This is not only key to avoiding injury, but creating consistency that will help you keep your body strong for many years to come.
Lindywell supports your ever-changing body and mind no matter what season of life you’re in. Start your 14-day free trial of Lindywell today. You’ll get instant access to 300+ workouts, plus guided breathwork sessions and easy recipes!
Mental Health and Mindset
Weight loss does not lead to happiness. In fact, a study of nearly 2,000 people found that while weight loss leads to changes in physical markers of health, participants who lost 5 percent or more of their initial body weight were more likely to report feeling depressed than those who stayed closer to their initial weight (within 5 percent).
At Lindywell, we’re not saying not to lose weight or that it’s bad. We’re saying that your mental health and mindset are just as important to your overall health picture. Yet, this isn’t the focus of any Wegovy diet plan or being shared by people touting the weight loss benefits of the drug.
If you aren’t happy, you’re always stressed or anxious or have a hard time shifting your perspective in tough situations, then you’ll likely still feel that way even after you lose the weight. The goal is to enjoy life, even if it gets hard, which will continue to happen.
That’s why focusing on your mental health and mindset is so important. It’s not about removing the stress and anxiety of your life, but learning how to cope with it, according to the World Health Organization (WHO).
The WHO defines mental health as:
“… a state of mental well-being that enables people to cope with the stresses of life, realize their abilities, learn well and work well, and contribute to their community. It is an integral component of health and well-being that underpins our individual and collective abilities to make decisions, build relationships, and shape the world we live in.”
So how do you support your ability to cope in these ways? Let’s talk about it.
How to Support Mental Health
There are so many ways to support your mental health—and that’s the beautiful thing. We can all dig into a massive toolbox of options that can help us feel mentally stronger, calmer, and happier every day, no matter what life brings our way and no matter what we have access to.
Here are some of the strategies I use to support my mental health that can support yours too:
Time in nature: Science shows this is a huge component of mental health, helping to reduce stress and anxiety and improve mood. Simply getting outside, whether you take a walk around the block or go for a hike, can support your mental health.
Meditation and mindfulness: Bring meditation (even just 2-3 minutes) and mindfulness into your daily routine. It can vastly improve your mental health because these practices calm the mind and enhance overall well-being. This is also a powerful way to shift your mindset and begin seeing the world through a different lens.
Breathwork: Breathing deeply and with intention, even for just 5 minutes each day, can improve your mood and reduce anxiety. This can also improve physical markers of health like respiratory rate, heart rate, and heart rate variability. A win-win! If you’re not sure about breathwork: check out our blog post on how to make it more fun, Read our Q&A with Lindywell’s Head of Breathwork and Somatic Programs, or Join a live guided breathwork session!
While Lindywell can support you in many of these areas, my brand new book, Well to Core, dives into each of these aspects of mental health in a practical way. Buy your copy today!
Optimum Nutrition and Nourishment
When using drugs that reduce your appetite, your body’s need for adequate nutrients does not change. If you’re not pursuing a diet that is rich in macro and micronutrients you won’t experience long-term health improvements (or feel very good!).
Our body needs nourishment—from vitamins and minerals to an adequate balance of protein, carbohydrates, and fat—in order to function well. Your brain health, digestion, and energy levels (among so many other functions of your body and life) rely on a nutrient-rich diet to thrive.
How to Support Your Nutrition
Sometimes the easiest way to boost your daily nutrition is to follow nutrient-dense recipes that are simple and easy to prepare. If you’re anything like me, so this is key to making it happen! That’s why I often turn to the hundreds of recipes in the Lindywell app. All of them were created by Micah Siva, our resident recipe maker and a registered dietician.
From breakfast, lunch, and dinner to snacks and smoothies, we have something for every day of the week. Plus you’ll find options for preferences like gluten- or dairy-free and your kids will love these recipes too! Start your 14-day free trial of Lindywell to get instant access to all of these recipes!
Focusing on Holistic Health
It can be easy to get caught up in wanting to lose weight, especially when drugs like Wegovy are now available. While losing weight isn’t bad, and for some, is necessary, there’s so much more to be considered, including long-term strength building, mental health, and mindset.
These aspects of health are critical for building a sustainable healthy lifestyle. This, in turn, can help you cope with both the physical and mental challenges of life. Weight loss is not a magic bullet (and the science proves it). So make sure your Wegovy diet plan—or regular weight-loss plan—includes these important aspects of living a happy, healthy life.
If you want to lose weight, gain muscle, and/or just look and feel better, strength training will do just that.[1]
In this comprehensive series, we’re going to cover EVERYTHING you need to know about getting strong.
By the way, hi. I’m Staci Ardison,Senior Coach for Team NF, with a 455 pound deadlift, and strength training has changed my life.
Here’s that deadlift by the way (at a bodyweight of 150 lbs):
I help men and women get strong with our 1-on-1 Online Coaching Program, and in addition to this strength series, I’d love for our team to help you get strong too:
In this introduction to Strength and Resistance Training, we’ll cover:
This is also quite a lot to absorb, so we’ve combined this article along with the rest of our strength articles into a “Strength Training 101: Everything You Need to Know” guide.
Grab it free when you join the Rebellion by putting your email in the box below.
Download our comprehensive guideSTRENGTH TRAINING 101!
Everything you need to know about getting strong.
Workout routines for bodyweight AND weight training.
How to find the right gym and train properly in one.
#1) Halt and even reverse sarcopenia: As we age our skeletal muscle deteriorates, which is a condition known as sarcopenia. Strength training has been found to reduce the negative effects of sarcopenia allowing us to maintain an independent lifestyle (and out of a nursing home) and live longer.[3]
#2) Prevent disease and degenerative conditions:[4a] Heart disease is the leading cause of death for both men and women.
Strength training helps correct issues relating to cholesterol, high blood pressure, obesity, diabetes, and inactivity – all factors for heart disease.
Cardiologists are even starting to recommend strength training for people who have suffered a heart attack as little as three weeks after the attack.[4b]
#3) Improve the quality of life for people with: arthritis,[5] osteoporosis,[6]Parkinson’s Disease,[7]Down Syndrome,[8] lymphedema,[9]fibromyalgia,[10]who have recently had a stroke,[11]have had a spinal cord injury,[12]cancer survivors[13] and clinical depression.[14] Clinical exercise physiologists working with these special populations listed above strongly recommend incorporating strength training to slow down the progression of their disease or disorder, decrease their risk for other comorbidities, and decrease their risk for premature mortality.[15]
Now, in addition to making life easier LATER, strength training has a lot of great benefits right now.
How Strength Training Will Help You Today:
#1) Lose weight, look good naked: You can find study[16] after study[17] after study[18] that shows you the benefits of strength training for weight management when combined with “calorie restriction.”(eating fewer calories than you burn every day), such as greater fat loss and improvements in muscle mass. Additionally, the combination of these two behaviors also decreases one’s risk for the development of chronic diseases (e.g., CVD) and premature mortality.[19]
#2) Strength training can help increase your metabolism by speeding up your Resting Metabolic Rate (RMR).[20] It takes your body more calories to maintain muscle than it does to maintain fat!
#3) Strength training has a much greater level of excess post-exercise oxygen consumption than aerobic exercise.[21]
What does this mean?
When you finish a workout, your body needs to do a lot of work to replenish itself in order to bring itself back to a normal state (the way it was before you worked out). This takes a lot of energy, and some studies have shown that it can boost your metabolism for up to 38 hours after you finish your workout. If you do your resistance training quickly, minimizing rest intervals in-between sets, you can actually increase this effect.[22]
This is why it’s important to stay off of the phone in-between sets!
In addition to physical improvements, strength training will improve your next doctor’s visit.
How Strength Training Can Make You Healthier:
#1) Strength training increases bone density, builds a stronger heart, reduces your resting blood pressure, improves blood flow, halts muscle loss, helps control blood sugar, improves cholesterol levels, and improves your balance and coordination.[23] This is all great news because this will decrease your risk of developing conditions such as osteoporosis, hypertension, and type 2 diabetes.
#2) Strength training will make you FEEL better: Not only will you find yourself with more energy and confidence, less stress and anxiety,[24] and a better overall mood,[25] but you’ll actually begin to think better (resistance training has been proven to help increase cognitive function[26]).
You may be asking how this is possible?
Strength training allows for neurogenesis and neuroplasticity to take place, which is the process of creating new neural pathways in the brain.
Plus, strength training also allows for certain neurotransmitters (e.g., dopamine) to be released that plays a role in brain health.[27]
And while training too close to bedtime can be a bad idea, exercising earlier in the day has been proven to help prevent sleep apnea and insomnia.[28]
But wait, there’s more!
I even improved my posture from strength training – when I started lifting, I was 5’4”. Now I’m 5’5.5”.[29]
This is also a major concern for today because of prolonged cell phone use, which finds people constantly tilting their head forward and down resulting in neck pain and faulty posture.[30]
#3) Last but not least, strength training is fun! Whether you are looking for the most effective 20-30 minute workout (to stay fit and look great naked), or are looking for a competitive sport that you can really get into, strength training can help you meet your goals.[31]
It’s easy and fun to see progress as you strength train, almost like leveling up (“You gained 100xp and +1 STR with your deadlift today”).
If you’re looking to improve in other areas (a sport, traditional cardio, or an activity like rock climbing), strength training is an easy choice! Strength training will help keep you injury free too.[32]
We have coaching clients from 18 to 80+, and we work on strength training with practically every single one of them due to just how many benefits it provides! We’d love to work with you too:
Who SHOULDN’T strength train?
Trying to be balanced, I wanted to find studies of a single group of people who should not strength train.
But it didn’t go so well…
I found studies on how strength training can be beneficial for paraplegics.[33]
There are also studies that show the benefits for children and adolescents.[34]
You can also find plenty of studies that explain the benefits of strength training for pregnant women.[35]
And thus I’ve decided, not knowing you, you should probably strength train.
IMPORTANT CAVEAT: if you do fall into any of these special populations (e.g., paraplegics, children, pregnant women, etc.) it is imperative that you work with a qualified professional (e.g., clinical exercise physiologist, strength and conditioning coach, etc.).
These qualified professionals will perform a risk stratification and pre-assessments so they can start you off with the perfect training program that will improve your physical and mental health, and will decrease your risk for injury and prevent your condition from progressing to a more severe state.
Oh, and if you are already injured, you should check with a doctor[36]or physical therapist before strength training.
Long story short: EVERYBODY should strength train.
Robots too…probably.
It’s what we’re genetically designed to do: move around, push, pull, jump, and carry things.
What Is Strength Training? The Basics You Need to Know.
“Strength training” of any kind can be explained by two things:
Movement of any weight (including your body weight) – Doing ANY exercise that pushes your muscles outside of their comfort zone, forcing them to rebuild stronger to prepare for the next challenge.
Progressive overload: exerting slightly more effort than last time (lift heavier weight or do 1 more rep) consistently. Your muscles will constantly have to adapt and will constantly be rebuilding themselves to get stronger.[37]
That’s strength training!
If you want 7 different ways to achieve progressive overload, watch this video:
All this means if you do 10 squats and 10 knee push-ups right now, you have completed a strength training workout.
Feel free to do this right now to give yourself a quick win.
And we’re back!
So what’s actually happening to our bodies when we strength train?
Let’s get on our magic school bus and learn about the wonders of muscles!
Here’s what you need to know your muscles and strength training:
We’ve got 642 muscles in our bodies (but who’s counting), and they all work together to help our bodies move, stand, and exist.
When you bend your arm, your biceps contract and your triceps do the opposite (elongate) in order to let your elbow bend.
Every muscle in your body works alongside other muscles to let you move and do things. In this particular example, the biceps is known as the agonist muscle and the triceps is the antagonist.
Strength training starts when you move your bodyweight (doing 10 push-ups), or pick up a weight (a 100 pound deadlift) that is beyond what your body is normally used to.
In other words:
Strength training finds you pushing your muscles outside of their comfort zone.
They “break down” and tear slightly during this workout, and then over the next 24-48 hours they rebuild themselves stronger and more resilient.[38]
This is the foundation of strength training, and it’s called hypertrophy, in which the individual muscle fibers packed into your muscles are growing larger in size.[39]
There are a few types of hypertrophy,[40] which you can nerd out about here (don’t worry, this won’t be on the quiz):
Sarcoplasmic hypertrophy focuses on increasing the amount of sarcoplasm, the non-contractile fluid found in your muscle. This type of hypertrophy helps build overall size.
Myofibril hypertrophy focuses on strengthening the myofibril, the contractile part of the muscle. You are strengthening the actual muscle fiber so it helps you build super dense, strong muscles.
Transient hypertrophy is the temporary increase in muscle size that happens during and immediately after weight training due to fluid accumulation in the intracellular space, that you might know as “the pump”.
“Staci, what does this mean for me?” You might be wondering.
We cover exact strategies in our “How many sets and reps?” guide, but here’s what you need to know:
If you want dense muscle and strength (myofibrillar hypertrophy), keep the reps low and the weight heavy (in the 1 to 5 rep range).
If you’re looking to build muscle size, (sarcoplasmic hypertrophy), do more reps with a lighter weight (in the 8-12 range).
If you’re looking to build cardiovascular health and muscular endurance, hang out in the 12-20 reps per set range.
Please note: each of these rep ranges are NOT exclusive – when you train in a higher rep range you’re not JUST getting size, you’re also getting strength.
And if you get really strong, it can also help you with size and endurance.
#2)Recovery: The general rule is to wait 48 hours before working the same muscle group again. For example, if you trained your biceps and triceps today, then you should wait 48 hours before hitting them again. However, recovery is different for everyone depending on many different factors such as what the actual workout is, how old you are, your sleep quality, diet, and other recovery elements (such as massage, including the popular massage guns, foam rolling, and stretching).[42]
#3) Soreness after a workout: The day after an intense strength training workout – or 2 days after – you’re going to be VERY sore. This is called “Delayed Onset Muscle Soreness(DOMS)”. It’s a normal part of the process of repairing your muscles from the damage to the fibers you created while exercising. More recently, research evidence has found that the eccentric part of a lift, or the part of the lift in which the muscles are lengthening and stretching, produces the greatest degree of soreness.[43]
Expect to be more sore after doing an exercise for the first few workouts. As your muscles get used to that movement (and adapt to being put under stress), they will get less and less sore every time.
If you are sore, don’t skip the next workout!
That’s because:
The best way to alleviate soreness is to continue exercising.
This increases blood flow to the muscles and helps them heal.[44]
Already overwhelmed and just want to be told what to do? I hear you. It’s why we created our coaching program:
Can I strength train to lose weight?
We get questions relating to weight loss and strength training all the time, and it’s a BIG part of this entire Strength 101 series.
Let me quickly address it here:
Fat and muscle are two different things – one can’t transform into the other.
We all have plenty of muscle right now (otherwise we wouldn’t be able to move, walk, sit up, etc.), the muscle is just hiding underneath a layer of body fat.
In order for us to lose weight and look better, we want to do two things:
Build our muscles stronger and tighter.
Burn the fat on top of it!
And luckily, both of those things happen simultaneously through strength training!
So NO, you don’t need to lose weight first before you start strength training.
You will lose weight BY strength training (and keep the muscle you have).
You do NOT need to do hours of cardio for weight loss – weight loss is 90% a result of your nutrition. So honestly, you don’t need to ever set foot on a treadmill again (unless you WANT to).
Strength training will help you lose weight and look better IF you do two key things for effective weight loss:
As we cover in our “Why can’t I lose weight” article (full of fun Harry Potter references), combining a caloric deficit and strength training is magic:[45]
You’re not consuming enough calories to carry out your body’s daily functions. Our bodies require enough calories to support normal physiological functions such as heart rate and breathing. Additionally, enough calories are needed to help maintain our blood glucose, which is the major energy source for our brains.[46]
Your body needs to use lots of calories to rebuild the muscle that was broken down during the strength training workouts. Our bodies use calories to facilitate a process known as protein synthesis, which is the process of muscle hypertrophy.[47]
Your body has no choice BUT to pull from fat stores to get stuff done! As mentioned earlier, higher-intensity strength training results in a greater post-exercise oxygen consumption, resulting in greater caloric expenditure post-exercise.[48]
Just by doing those two things (get strong, reduce calories), all sorts of wizardry and witchcraft takes place in your body:
Get stronger and keep the muscle you have.
Build tight dense muscle.
A revved up metabolism while rebuilding muscle.
Burning of body fat to get things done.
Yeah, you’re hearing me correctly.
Lose the body fat that sits on top of your muscles and you’ll make your muscles tighter and denser = look better without clothes on.
Oh, what’s that? You just want somebody to tell you exactly how to train for your body, and how to eat for your goals?
Fine!
Check out our 1-on-1 Coaching Program– it’s helped thousands of people lose weight through strength training – and proper nutrition. We work with you on habit building and lifestyle design to actually get stuff done!
I cited dozens of studies above that show strength training is beneficial for people of all ages. And even for the frail elderly, studies have shown that drastic resultsare possible in just 10 weeks of weightlifting (for both men and women in their 70s through their 90s).[49]
In fact, weight training has also been shown to delay Alzheimer’s and stave off dementia.[50] As mentioned earlier, strength training allows for neurogenesis and neuroplasticity to take place, which is the process of creating new neural pathways in the brian. And, strength training also allows for the dopamine (i.e., neurotransmitter) to be released that plays a role in brain health.[51]
Research has also shown that older adults can safely engage in higher-intensity strength training resulting in improvements in strength, body composition, disease status, and independent lifestyle.[52]
So, if you think you might be “too old,” you’re probably the exact type of person that SHOULD be strength training!
Team NF’s Steve’s gramma is 89 and she strength trains. You are not too old!
We have plenty of coaching clients who are retired and just STARTING to strength train now in their 50s or 60s+. In fact one of our coaches, Kerry, is certified as a Functioning Aging Specialist, and you better believe she has her clients strength training!
By the way, if you are 90+ and reading Nerd Fitness, please email us at contact@nerdfitness.com – I’d love to hear from you 🙂
Will Lifting Weights Make Me Bulky?
No (unless you are TRYING to get bulky).
Let me first address this from a women’s point of view, then I’ll get to the men.
Or Christina, who got strong as hell, lost 31 total inches, and now crushes sets of pull-ups!
That “bulky” look in women does not happen by mistake or overnight – we simply do not have the hormones necessary to get there on our own.
To achieve this look, women have to eat incredible amounts of food and consume incredible amounts of drugs.
When we strength train normally, without these supplements, we end up looking like athletes.
And for the men: if your fear is getting too bulky, you can rest easy. Steve, creator of Nerd Fitness, has spent his entire life trying to get “too bulky.” It was only after fixing his diet (and hiring an online coach) that he went from Steve Rogers to Captain America.
That’s right, strength training is only 10% of the “slim down or bulk up” equation. The other 90% is nutrition and total calories consumed.
Want to lose weight? Strength train + caloric restriction. It is recommended that you seek a calorie deficit by consuming 250-500 less calories per day below your typical calorie intake. This will result in a realistic weight loss goal of 1-2 pounds per week.[53]
Want to get bigger? Strength train + caloric surplus. It is recommended that you seek a calorie surplus by consuming 250-500 additional calories above your typical calorie intake. This will result in a realistic gain in lean muscle mass of about 0.5 pounds per week.[54]
“My focus is on running/basketball/quidditch and I need to stay slim! How do I strength train for this scenario?”
Studies have shown that strength training increases the endurance of your muscles.[55]
In fact, resistance training and weight training not only help to tune up an out of shape nervous system and increase the activation of motor units within your muscles, but also helps increase their overall endurance. More specifically, strength training can result in improvements in how much force muscles can generate and also how much fatigue they can resist leading to better exercise economy.[56]
You just have to keep challenging your muscles and get strong as heck.
Look at any gymnast, male or female – those physiques are built through bodyweight training!
To progress in bodyweight exercises, you need to start, so you have something to advance from. You can begin by trying our beginner bodyweight routine RIGHT NOW:
It’s super fun building your own program, but many people just want to follow a plan that they know is aligned with their goals. If you hate gyms and still want to get strong, let us help!
How to Start Strength Training Today: Next Steps
If you’re ready to start, fantastic.
We’d recommend a simple program to get your feet wet.[57] You know, to learn the movements, build some confidence and prove to yourself that you can DO this!
If you want to take the Next Step, here’s how Team Nerd Fitness (that’s us!) can help you:
1) Work with a professional Yoda! If you want confidence that you’re following a program that is tailor-made for your busy life, situation, and goals, check out our popular 1-on-1 Coaching Program.
You’ll work with a certified NF instructor who will get to know you better than you know yourself, keep you accountable, and help you reach your goals.
2) Join our amazing free community, the Nerd Fitness Rebellion! It’s free to join, and we provide you with free goodies like our Strength Training 101 ebook when you sign up:
Download our comprehensive guideSTRENGTH TRAINING 101!
Everything you need to know about getting strong.
Workout routines for bodyweight AND weight training.
How to find the right gym and train properly in one.
3) Read ALL of the other amazing resources on Nerd Fitness. We’ve published millions of words over 800+ articles at Nerd Fitness that you can read, but these are the guides that will be the most helpful to you on your journey:
Portugal EM, Vasconcelos PG, Souza R, Lattari E, Monteiro-Junior RS, Machado S, Deslandes AC. Aging process, cognitive decline and Alzheimer`s disease: can strength training modulate these responses? CNS Neurol Disord Drug Targets. 2015;14(9):1209-13. doi: 10.2174/1871527315666151111121749. PMID: 26556087
A look at strength training and sleep apnea is right here.
For more on strength training and posture, read “Effects of a Resistance and Stretching Training Program on Forward Head and Protracted Shoulder Posture in Adolescents.” Source, PubMed.
Al-Hadidi F, Bsisu I, AlRyalat SA, Al-Zu’bi B, Bsisu R, Hamdan M, Kanaan T, Yasin M, Samarah O. Association between mobile phone use and neck pain in university students: A cross-sectional study using numeric rating scale for evaluation of neck pain. PLoS One. 2019 May 20;14(5):e0217231. doi: 10.1371/journal.pone.0217231. PMID: 31107910; PMCID: PMC6527223
The important thing to keep in mind is that you have to find the exercises that are most enjoyable to you. Research has found that when you find something to be more enjoyable you are likely to adhere to it.
Zwolski C, Quatman-Yates C, Paterno MV. Resistance Training in Youth: Laying the Foundation for Injury Prevention and Physical Literacy. Sports Health. 2017 Sep/Oct;9(5):436-443. doi: 10.1177/1941738117704153. Epub 2017 Apr 27. PMID: 28447880; PMCID: PMC5582694
A look at strength training during pregnancy is right here.
“I went to the doctor. All he did was suck blood from my neck. Do not go see Dr. Acula” – RIP Mitch Hedberg. ”
In other words, in order to achieve your training goals or to see improvements, your training must gradually and constantly increase. Keep in mind that if the overload increases too quickly, poor technique and injury may result. And if the overload progresses too slowly, improvements will be minimal or non-existent. Rest and recovery must also be included in the progression, as training hard all the time could result in chronic fatigue, a decrease in performance, and eventually injury. Soucre: Haff G, Triplett NT. (2016). Essentials of strength training and conditioning. Fourth edition. Champaign, IL: Human Kinetics
Don’t worry though, this “break down” and tearing does not hurt and the only thing you may experience is muscle soreness.
This totally sounds like something you’d win in Super Smash Bros.
Powers SK, Howley ET. (2011). Exercise physiology: Theory and application to fitness and performance. New York: McGraw-Hill Humanities/Social Sciences/Languages
Powers SK, Howley ET. (2011). Exercise physiology: Theory and application to fitness and performance. New York: McGraw-Hill Humanities/Social Sciences/Languages
Powers SK, Howley ET. (2011). Exercise physiology: Theory and application to fitness and performance. New York: McGraw-Hill Humanities/Social Sciences/Languages
Remember what we said earlier, incorporating both strength training and calorie restriction (i.e., eating less) has been found to result in greater fat loss and improvements in muscle mass. Additionally, the combination of these two behaviors also decreases one’s risk for the development of chronic diseases (e.g., CVD) and premature mortality. For more, read “A carbohydrate-restricted diet during resistance training promotes more favorable changes in body composition and markers of health in obese women with and without insulin resistance.” Source, PubMed.
Spano MA, Kruskall LJ, Thomas DT. (2018). Nutrition for Sport, Exercise, and Health
Spano MA, Kruskall LJ, Thomas DT. (2018). Nutrition for Sport, Exercise, and Health
It should also be noted that when our bodies pull from fat stores to get things done, a few things happen that results in less caloric expenditure: first, we are forced to exercise at a lower-intensity resulting in a lower caloric expenditure, and second, we have a lower post-exercise oxygen consumption resulting in less caloric expenditure post-exercise. So, we need to consume enough calories so we can engage in higher-intensity exercise and have a greater caloric expenditure.
Moro T, Tinsley G, Bianco A, Gottardi A, Gottardi GB, Faggian D, Plebani M, Marcolin G, Paoli A. High intensity interval resistance training (HIIRT) in older adults: Effects on body composition, strength, anabolic hormones and blood lipids. Exp Gerontol. 2017 Nov;98:91-98. doi: 10.1016/j.exger.2017.08.015. Epub 2017 Aug 15. PMID: 28821429
Spano MA, Kruskall LJ, Thomas DT. (2018). Nutrition for Sport, Exercise, and Health
Spano MA, Kruskall LJ, Thomas DT. (2018). Nutrition for Sport, Exercise, and Health
One such study on strength training and endurance is right here.
I’m now a regular powerlifting competitor and a Senior Coach for the NF coaching program, where I help people like you hit their strength training goals.
I’ve written this guide on Deadlifts because it’s the exercise that will change your life too.
So why is the deadlift so great?
Well, when you deadlift you use every single muscle in your body:
Your arms, forearms, and hands hold onto the barbell and make sure the bar stays in the right position and stays stable throughout the lift.
Your shoulders and traps hold the weight and hold it stable.
Your back and core help keep your entire body tight and stable to help keep your spine secure.
Your posterior chain[1] and legs to act as a lever and lift the weight.
Whenever anyone asks me where I got my shoulders/abs/etc, I answer the same: deadlifts.
Why do a million crunches when I can just do deadlifts instead?
On top of that, the deadlift is a basic human movement. Other than the squat, there might not be another movement that is more “functional.”
From the grocery store, to moving a piece of furniture, to picking your child up off the floor – you are deadlifting.
As you build solid form deadlifting in the gym, your form for picking things up in real life will also improve.
This means you’ll be less likely to injure yourself now and later down the line (not only because you are stronger, but because your body knows how to properly handle the weight).
And this goes further than just picking up objects – how you move while shoveling snow, doing yard work, and doing other basic everyday life tasks will all dramatically improve from deadlifting.
Don’t be that guy/gal with back problems from lifting that random object!
Oh, and by the way, the effectiveness of the deadlift isn’t limited to an age or gender – even grandma thinks they’re cool.
The deadlift is awesome – perhaps the purest measure of strength: either you can pick the weight off of the ground, or you can’t.
What Is Proper Deadlift Form? How to Deadlift Safely
When doing a deadlift you’ll be lifting a dead weight off the ground (hence the name, duh).
The deadlift can actually be taught in one sentence:
“Bend your knees and bend over with a flat back to pick up a loaded barbell off the ground.”
Of course, this sentence doesn’t do the awesomeness of this exercise justice.
Here’s how to do a conventional barbell deadlift:
Step up to and under a barbell with your feet angled slightly outward, at hip-width apart.
Bend over and grip the barbell with both hands at shoulder width.
Bend your knees until the bar almost touches your shins.
With a neutral spine, flex your butt and brace your stomach.
Pick the bar up off the ground (It helps to think “press DOWN into the floor with your feet through your heels”).
Continue pressing down with your legs until the barbell passes your knees, then thrust your hips forward until you are standing up.
Reverse your movement until the bar returns to its starting place on the ground.
High five yourself for you doing a deadlift.
(Don’t worry I’ll get more in-depth below.)
Oh, what’s that?
You want even MORE detail on each of those steps!? Sure.
PHASE ONE: The Deadlift Setup.
*NOTE: Always warm up properly, and start with just the bar, even for deadlifts!
Load the bar and secure the plates with collars. If you are just starting out with the movement, begin with 5-10 lb plates, using boxes or blocks to elevate the bar to about where it would be with 45 lb plates attached (if your gym has training plates that are this size, even better!). You may also be able to use your gym’s power rack for this.
Step up to the bar as if you are about to JUMP. Naturally, your feet should end up about hip width (8-12 inches) apart, and your feet slightly angled outwards (5-10 degrees).
Look down – the bar should be over the middle of your feet. If you’re wearing laced shoes, the bar would be approximately over the tied part of your shoelaces.
PHASE TWO: Preparing to lift the bar!
Here are the next steps to take before lifting the bar off the ground (I’ll petition Websters to add the word “deadliftoff” to the dictionary):
Without moving the bar, or your hips, bend over and grab the bar. Your legs should still be straight at this point. Your grip width will be slightly outside of your legs, but not so close they touch. For now, a simple double overhand grip (both palms facing behind you) will work. We will discuss options in grip in more detail later!
Now that you’re holding onto the bar (but not moving it), move your hips down. While you do this, your shins will come forward until they touch the bar Stop moving your hips down when your shins touch the bar.
Press your chest out and flex your pecs like you’re King Kong getting ready to bang on your chest for intimidation. As you do this, your back should flatten, and your spine should go into a neutral spine position.
This is the final starting position of the deadlift: everything is tight and in position and you’re ready to pull.
To Recap we DON’T want your back to round or hyperextend.
If you’re just starting out, getting into a neutral spine might feel like you’ve gone too far (hyperextended), so don’t be afraid to ask a friend for help or to record yourself so you can see what you’re doing.
PHASE THREE: Deadlifting with proper form (THE DEADLIFTOFF!)
If your setup looks and feels good, you’re ready to lift.
Here is the Conventional Deadlift, as demonstrated by me (Staci) and Jim from the NF Coaching Program:
Here are those steps in written form.
Inhale and fill up space deep in your stomach (like a deep belly breath), and while keeping your entire back, butt, and core tight with your chest puffed out, drive down through your heels and the bar should lift off the ground:
All of your weight should be on your heels and midfoot. You should be able to wiggle your toes the entire time (though that is not a part of deadlifting!). Imagine you are pushing the earth world away from the bar with your heels rather than pulling the bar up.
During the movement, your entire body should move upwards at the same speed. This means that your butt should not rise faster than your chest, or vice versa. You may have heard of the term “stripper deadlift” – this is when your butt rises first before your chest.
Your arms should stay straight the entire time. They are just there to hold onto the bar – they are not bending or pulling at all. Your legs and core are doing all the work!
The bar should stay in contact with your body the entire time – you will literally be dragging it up your thighs. This is why you see many powerlifters with chalk or baby powder covering their legs (and why they typically wear socks that cover their shins, to prevent cuts and scrapes). Do not let it come forward. If you were to draw a line that follows the bar’s path from the floor to lockout, it should be a straight, vertical line.
As you are pulling, you should be squeezing your glutes like you’re pinching a penny between your…well, you know. Once the bar passes your knees, think of getting your hips under the bar by squeezing your glutes. So while you’re pulling with your arms, you’re pushing through the floor with your feet, pushing your butt under the bar.
At the top of the movement, you should be standing tall and proud with your chest open, like if you were King Kong getting ready to pound his chest.
At the top, do not hyperextend and lean back. You want to keep your spine neutral and everything tight.
I realize that’s a lot to take in, and that’s okay! You’ve read this far and I’m proud of you.
Many people are so afraid of the deadlift and avoid it at all costs because they’re afraid of splitting themselves in half or getting injured in another way.
That’s why we not only created this awesome guide on deadlifts, but also a way to review technique and proper movement so you have the confidence you’re doing it correctly.
If you want an expert to check your deadlift form and help build a workout program specific to your goals, check out our 1-on-1 Online Coaching Program. Our coaching app lets you record and send a video of your movement directly to your coach who will provide specific feedback:
Setting the Bar Down (Should I drop the bar on a Deadlift?)
Okay! You got the weight off the ground and finished the movement. But now what!?
Your body should descend all at the same time, just as it ascended during the deadlift, only in reverse!
Unlock your hips and slowly move your hips backward until the bar lowers past your knees, then bend your knees and slowly lower the bar to set it down (make sure you unlock them at the same time.
Don’t unlock your knees first, as it will cause a lot of awkward movement, and possibly your lower back to round).
I REPEAT: DO NOT DO THIS:
Don’t lose tightness until you let go of the bar.
This is extremely important – a large amount of deadlift injuries come from people getting super excited about making a lift, losing tightness, and then putting the bar down wrong.
You want this to be a quick movement – lowering the deadlift slow will take a lot out of you and leave you sore for days.
Should you drop the bar during the deadlift?
The eccentric part of the deadlift (lowering it) is actually riskier than the concentric (picking it up) part of the deadlift.
Many coaches will advocate dropping your deadlift (especially with advanced athletes where they can’t afford to sacrifice performance later in the week).
In our opinion, especially if you’re training in a commercial gym, I would recommend putting the bar down (especially if you want to compete in powerlifting competitions – the lift does not count if you drop it).
So, practice putting the bar down properly. It’s just as important as practicing picking it up.
By the way, we have a massive Strength 101 Guide that you can download free when you join the Rebellion (our free community).
Get the guide when you sign up in the box below!
Download our comprehensive guideSTRENGTH TRAINING 101!
Everything you need to know about getting strong.
Workout routines for bodyweight AND weight training.
How to find the right gym and train properly in one.
Proper Deadlift Grip, Straps, and other Equipment
Grip strength is a huge part of the deadlift. If you can’t hold on to the bar, you can’t lift it!
There are two main grips when it comes to the deadlift.
#1) Double overhand grip. Your palms are both facing towards your body. This is the safest grip, and the best grip for beginners to start with.
#2) Mixed Grip: One hand grabs the bar with an overhand grip, and another hand grabs the bar with an underhand grip.
The mixed grip has many disadvantages:
It places uneven stress on your shoulders
It can aggravate problems in the biceps on the side in which your palm is facing outwards
It’s easier for your lift to be uneven as you’re literally gripping the bar it with uneven hands.
So why do a mixed grip?
You can physically lift more.The bar wants to roll out of your hands, so by using a mixed grip you are more likely to not have your grip fail you on a heavy lift.
As you start to lift more than your grip can handle, you can consider doing a mixed grip for your heaviest lifts, but be sure to use the double-overhand throughout your warm-up sets. Consider doing grip strength work as well.
#3) Hook grip: This grip is where you put your thumbs under your fingers.
This type of grip is preferable to the mixed grip due to the fact that it doesn’t introduce any imbalances. However, it does have one major disadvantage:
It hurts like hell!
From personal experience, you get used to it and your thumbs can manage, but prepare for pain when you learn to do the hook grip!
No matter what grip you use, you’re probably going to want to invest in some chalk! It’s absolutely optional and initially won’t be incredibly useful.
However, after you start to put some weight on the bar, chalk will be enormously helpful for hanging on to the bar (I use this kind of lifting chalk). I certainly find this to be a better, smarter, and safer option than either straps or gloves.
Speaking of which…
Here are some common questions on deadlift equipment:
#1) “Should I use straps while doing deadlifts?”
Ehhh, probably not. Straps can help you lift more than your hands can hold with an overhand grip, but relying on straps could cause your grip strength to be undeveloped down the road.
Short answer: consider using straps strategically when doing high-volume deadlifts, but don’t rely on regularly them for max lifts: improve your grip strength.
Instead, chalk, stronger grip strength, and a hook grip for max lifts is your friend!
#2) “Should I wear gloves while doing a deadlift, Staci?”
Nope.
Gloves actually create space between your hands and the bar, and it reduces your grip security, increases the diameter of the bar, and makes the bar harder to hold on to.
This means the gloves are doing the exact OPPOSITE of what you think they’re doing.
I don’t recommend using gloves unless you have an injury like a ripped callus.
Speaking of ripped calluses, or if you’re worried about getting rough hands from deadlifting – make sure to take care of your hands and they are less likely to happen!
#3) “Do I need to use a lifting belt?”
When starting out, you don’t have to worry about using a belt.
However, as you get to really heavy weights, it may be something to look into.
Belts need to be worn correctly in order to be effective.
#4) “What kind of shoes should I wear to deadlift?”
GREAT question. I don’t care what kind of shoes they are, as long as they are flat.
You really have four options for deadlifting shoes:
FLAT SHOES:Chucks work great. I personally prefer to deadlift in either socks or zero drop minimalist shoes. Do NOT wear clunky athletic shoes with thick heels or shoes with pockets of air bubbles in the heels.
DEADLIFTING SHOES: Getting a bit fancy here, but if you are competing or just want shoes you can deadlift in, consider deadlifting shoes.
GO BAREFOOT: If you don’t want to invest in new shoes, deadlift barefoot. Just don’t go walking around the gym in socks – you might get kicked out or have a weight roll across your feet!
SLIPPERS: No, not fuzzy Snoopy ones. Look into deadlift slippers – they’re just fancy socks approved for competition.
Still here, eh? Amazing!
We want to be part of a community that helps you reach your goals. Whether you want to deadlift for the first time, or you’re trying to hit the 1,000 club, our Nerdy Coaches want to help.
Let us take care of everything so all you have to worry about is following the instructions and picking up the weight!
7 Common Faults and Mistakes while Deadlifting
DON’T DO THESE THINGS:
#1) Rounded Back – not keeping your spine in neutral the entire time. Letting your lower back round at all is a huge no no. [2]
#2) Looking up (with your neck) – Along with keeping a neutral spine, hyper extending your neck to look up is also something we want to stay away from.
#3) Hyperextending at the end of the movement – The spine should still be in neutral even at the top. Hyper extending at the top is actually not something we actually strive for or need to do.
#4) Treating the deadlift like a squat with the bar in your hands. You are not starting in a squat position and standing up – it is a different movement.
#5) Letting the bar come forward – The bar needs to stay over your midline and be dragged up your body the entire lift – any movement forward of your midline should be avoided.
#6) Butt rises faster than your chest (also known as the “stripper deadlift”) – your chest should lead the movement, and your entire body should move upward at the same pace.
#7) Bending your arms – your arms should stay straight. Don’t bend your elbows to try to get the bar up faster.
NOT SURE YOUR FORM IS RIGHT? I hear you – Personally, I deadlifted with bad form for years and I didn’t even realize it.
It wasn’t until I enlisted the help of an online coach who checked my form via video and helped me with the right “mental cues” to get me to start deadlifting correctly.
If you want somebody to check your form – AND build the workout for you – consider our 1-on-1 online coaching program with form check:
What Are the Different Types of Deadlifts?
So far we’ve addressed the conventional/traditional barbell deadlift.
There are MANY different variations of deadlifts, and you can use whichever one floats your boat (if you have a boat to float, that is).
Here are 8 different deadlift variations:
1)Conventional Deadlift – Your hands are just outside your feet, standing at about hip-width apart. Our article has been highlighting this form of deadlift.
2)Sumo Deadlift – Your hands are inside your feet with a wider stance.
3) Hex or Trap Bar Bar Deadlifts – Use a specialty bar made just for deadlifting which changes the biomechanics.
4) Snatch Grip Deadlift – Your hands will use a wide grip like in the Snatch.
5) Romanian Deadlift: Think of this as the top half of a conventional deadlift (imagine you’re a “drinking bird” bending over at the waist).
6) Deficit Deadlift: This movement increases the range of motion of your deadlift, since your feet are elevated compared to the bar.
7) Rack Pulls: Conversely, this decreases your range of motion with the deadlift, since the bar is raised higher.
8) Dumbbell Deadlift Variations: For either accessory work, or if you don’t have access to a barbell and weights.
This guide covered primarily the conventional deadlift, because it’s a great variation for beginners and an exercise you can do every week for the rest of your life.
Once you get comfy with it though, move onto others. Need more tips for strength training moves?
Oh and don’t forget to grab our Strength Training 101: Everything You Need to Know when you sign up in the box below:
Download our comprehensive guideSTRENGTH TRAINING 101!
Everything you need to know about getting strong.
Workout routines for bodyweight AND weight training.
How to find the right gym and train properly in one.
Frequently Asked Questions on the Deadlift
#1) “What do I do if I can’t get into the proper starting position?”
While you are getting the mobility to get into the correct starting position, you can put the bar on blocks to raise it up a few inches to help you get in the right position.
Each workout, start with the bar a little lower, until it is just on the floor.
Each week, your goal should be to lift SLIGHTLY more than last week.
That’s it. By going SLOWLY, you’re giving all of your muscles, joints, tendons, your grip, and your central nervous system a chance to level up together.
So start small. Lift more each week.
#3) “Should I do ‘touch and go’ or ‘dead stop’ if I’m doing a set of multiple reps?”
A dead stop means letting the weight settle completely on the ground before doing the next rep, while “touch and go” reps means you’re essentially bouncing the weight at the bottom of the movement and going RIGHT into the next rep.
Touch and go reps are thus easier:
The stretch reflex where your body quickly rubber bands in the other direction.
Locomotion: the bar is already in motion, so it’s simply easier to lift something that is already moving than it is to lift something that is completely stopped.
Bounce: If you are at a gym that has rubber bumper plates, these plates actually will bounce a little when they hit the floor – helping you lift the weight.
HOWEVER, while “touch and go” reps are easier, they are also more dangerous. It’s easier to mess up your form if you aren’t resetting every rep and easier to get fatigued.
It is also in the eccentric (lowering) part of the “touch and go” deadlifts that most people get hurt. This is one of the most technically demanding, important lifts out there and should be treated with respect.
For that reason, resetting between every rep is preferred for general strength programs. This allows you to reset, get your form right, and get your breathing right on every rep.
Yes, If you are doing a CrossFit WOD, you might be doing touch and go for time. Awesome. You do you, boo.
#4) “Okay, I get it. Deadlifts are great! How often should I deadlift?”
I love your enthusiasm and I would never ask you to curb it, but there are some things we need to take into consideration when adding deadlifts into our program.
Heavy deadlifts are extremely taxing on the central nervous system.
This means your body needs more time to recover. In fact, it’s so taxing that some coaches recommend taking the deadlift out completely for their more advanced, sport-specific athletes.
Most good strength programs only deadlift once a week – and it’s lighter volume than with your squats.
Both Starting Strength and StrongLifts only include ONE set of 5 deadlifts. Meanwhile, they program 5 sets of 5 for squats.
In our Coaching Program, we add deadlifts into each person’s workout on a case-by-case basis.
Generally, it’s once per week, and we’d love to help build a program for you that has you deadlifting 400+ pounds in no time!*
*Okay it’ll definitely take longer than “no time,” but it might happen sooner than you think!
Get Out There and Deadlift: Next Steps
I am so excited for you to start deadlifting, because it’s the ultimate physical AND mental exercise.
For people looking for the next step, we’ve built 3 options that might float your boat:
You’ll work with our certified NF instructors who will get to know you better than you know yourself, check your form, and program your workouts and nutrition for you.
2) If you want a snazzy app to teach you exactly how to start crushing deadlifts (using things you might have around the house), check out NF Journey. Our fun habit-building app helps you exercise more frequently, eat healthier, and level up your life (literally).
Try your free trial right here:
3) Download our free Strength 101 Guide, which you can get when you sign up in the box below:
Download our comprehensive guideSTRENGTH TRAINING 101!
Everything you need to know about getting strong.
Workout routines for bodyweight AND weight training.
How to find the right gym and train properly in one.
this is a fancy term for your…”posterior” muscles – your glutes and hamstrings
(Note: there are some powerlifters that purposefully round their upper back to decrease range of motion, but this is a sport specific move, still a fault, and something you should not consider as a beginner.)
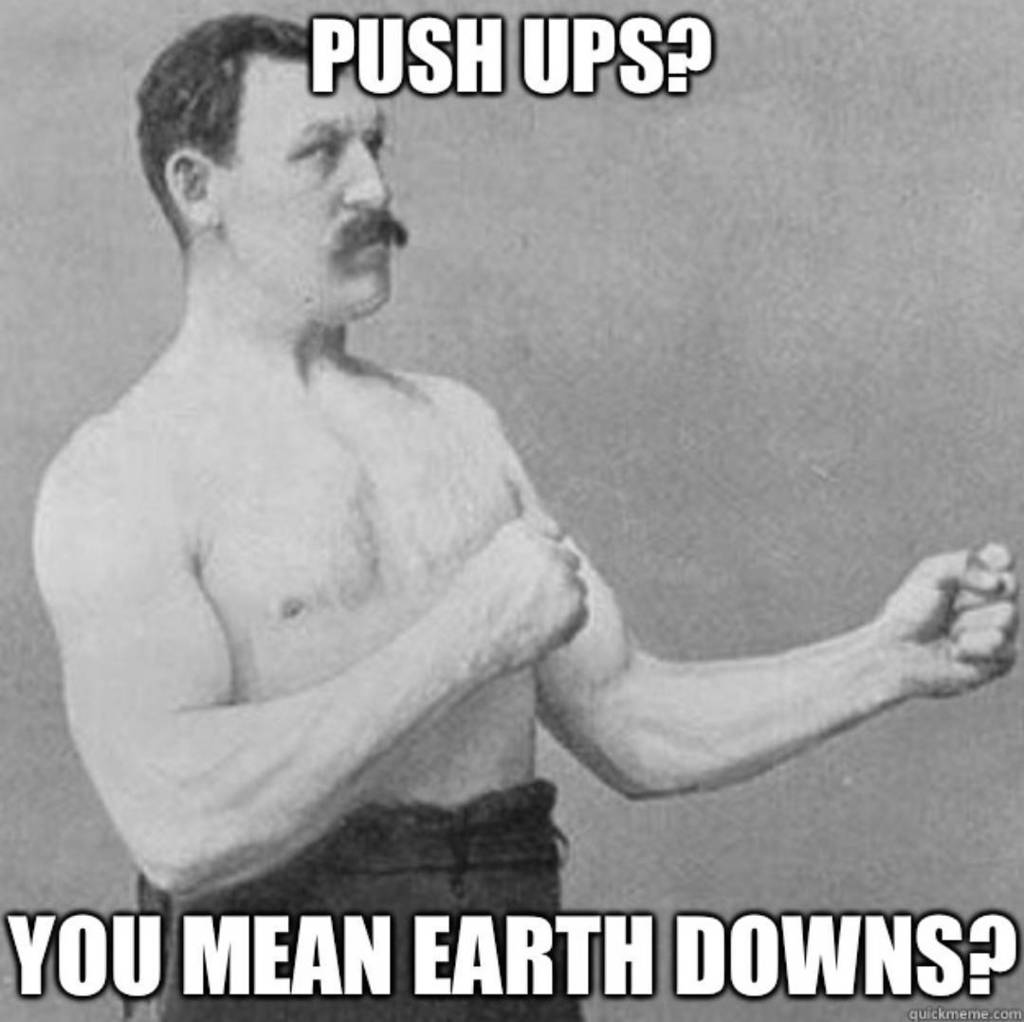
Follow our guide and you’ll be doing “Earth Downs” in no time:
Let’s get started.
What’s the Best Push-up Progression Plan?
As I discuss in the video above, the most important part of your push-up progression plan: consistency.
Yeah, I know, there’s nothing too earth-shattering there.
But no matter what your current strength level is, the best way to work towards a push-up is to train your push muscles consistently. No matter where you’re starting today.
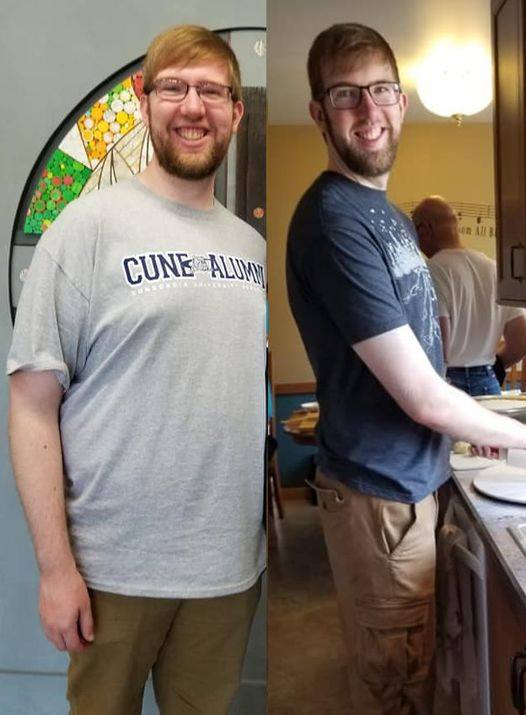
This is how our friend Mason went from wall push-ups to regular push-ups, then all the way to diamond push-ups.
Oh, and he lost like 70 pounds along the way too!
I’ll discuss push-up variations you should start within the next section. Plus, we’ll wrap up today’s guide by discussing just how often you should train your push muscles.
Just remember, if you want your first push-up (and you should cause push-ups are awesome), then you’ll need to be consistent with our push-up progression plan.
Cool?
Cool.
Our first stop on the Push-up Progression Plan: finding a push-up variation for you to become comfortable with. Something you can do about 8-10 reps with, for about 3-4 sets.
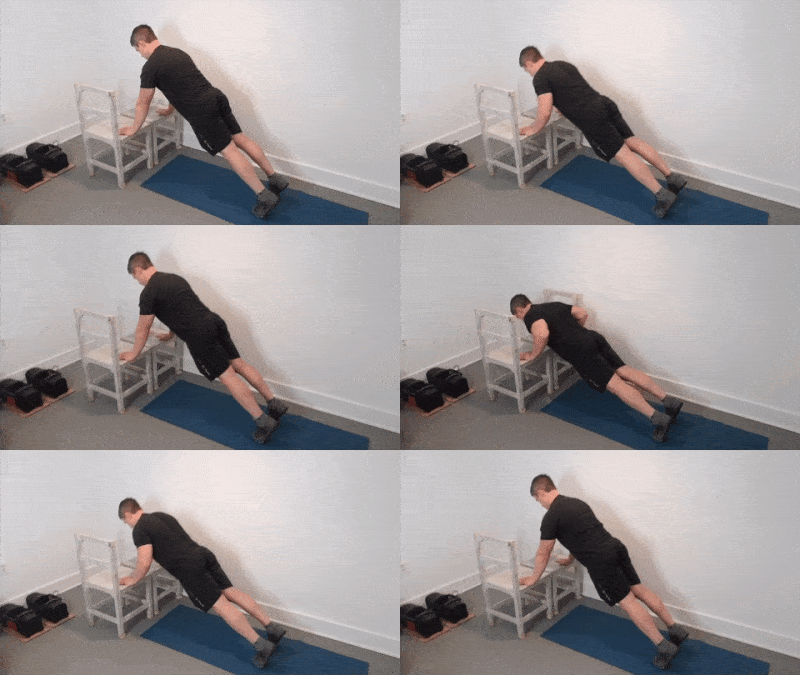
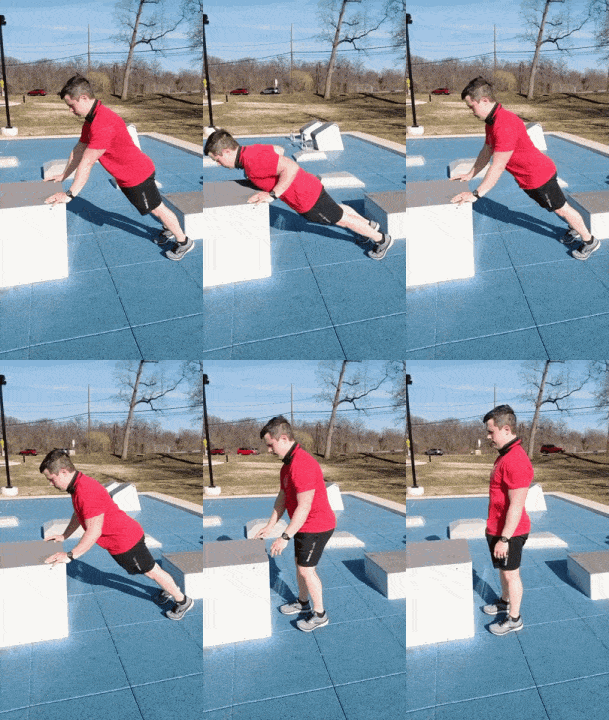
To start, you’ll probably train with an elevated push-up variation:
These will be easier than a regular push-up, since the higher the elevation, the less of your body’s weight you’ll be lifting during the movement.
Conversely, if you were to elevate your feet, you’d actually be lifting more than a regular push-up:
Let’s provide a rough breakdown of the percentage of your body’s weight lifted for different elevations of push-ups.[1]
The Percentage of Body Weight Supported by Our Hands During Push-Ups:
4’ Elevated Push-up (Wall): 9%
3′ Elevated Push-up (Countertop): 20%
2′ Elevated Push-up: 36-41%
Knee Push-up: 49%
1′ Elevated Push-up: 54%
Regular Push-up: 64%
The strategy behind our push-up progression plan is to slowly move you down to the ground, lifting more and more of your own weight as you go.
Think of it like gaining XP in a video game, so one day you’ll be able to tackle the final boss: the floor.
It might help to pretend there’s a witch below it.
Alright, let’s show you exactly how to do some of these push-up variations.
4 Push-up Variations (to Progress to a Full Push-Up)
The push-up variations below can be thought of as benchmarks.
If you can’t complete 8-10 reps, nbd.
We’ll have you train at the level below and you’ll move up before you know it.
Here are 4 variations for our Push-up Progression Plan:
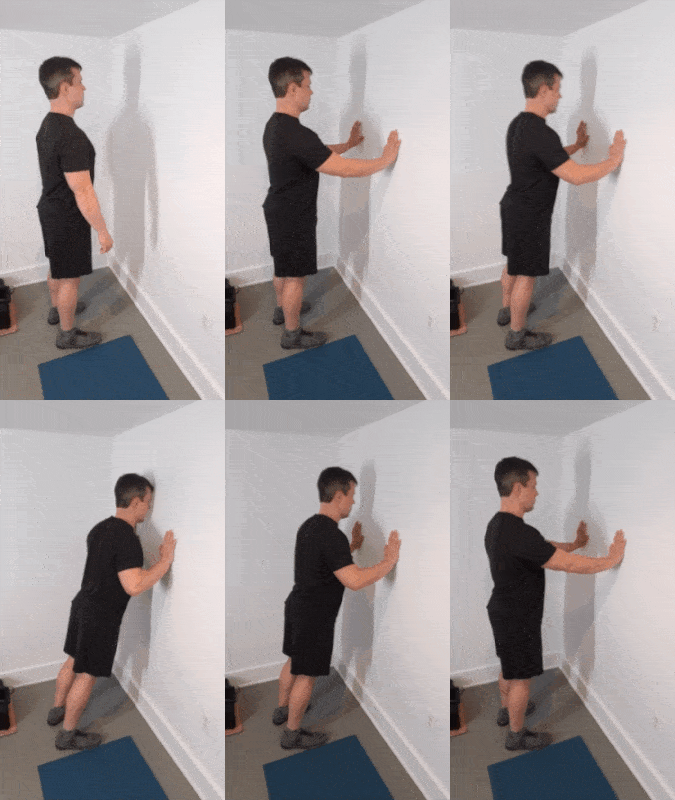
Push-up Progression Level 1: Wall Push-ups
Place your hands on a wall about chest weight (roughly 4′, 48″, or 122 cm). Bend your arms and get as close to the wall before pushing back up.
Push-up Progression Level 2: Waist-High Push-ups
Place your hands on a surface about waist high (roughly 3′, 36″, or 92 cm). Bend your arms and touch your chest to the surface before pushing back up.
Push-up Progression Level 3: Knee-High Push-ups
Place your hands on a surface about knee high (roughly 1.5′, 18″, or 46 cm). Bend your arms and touch your chest to the surface before pushing back up.
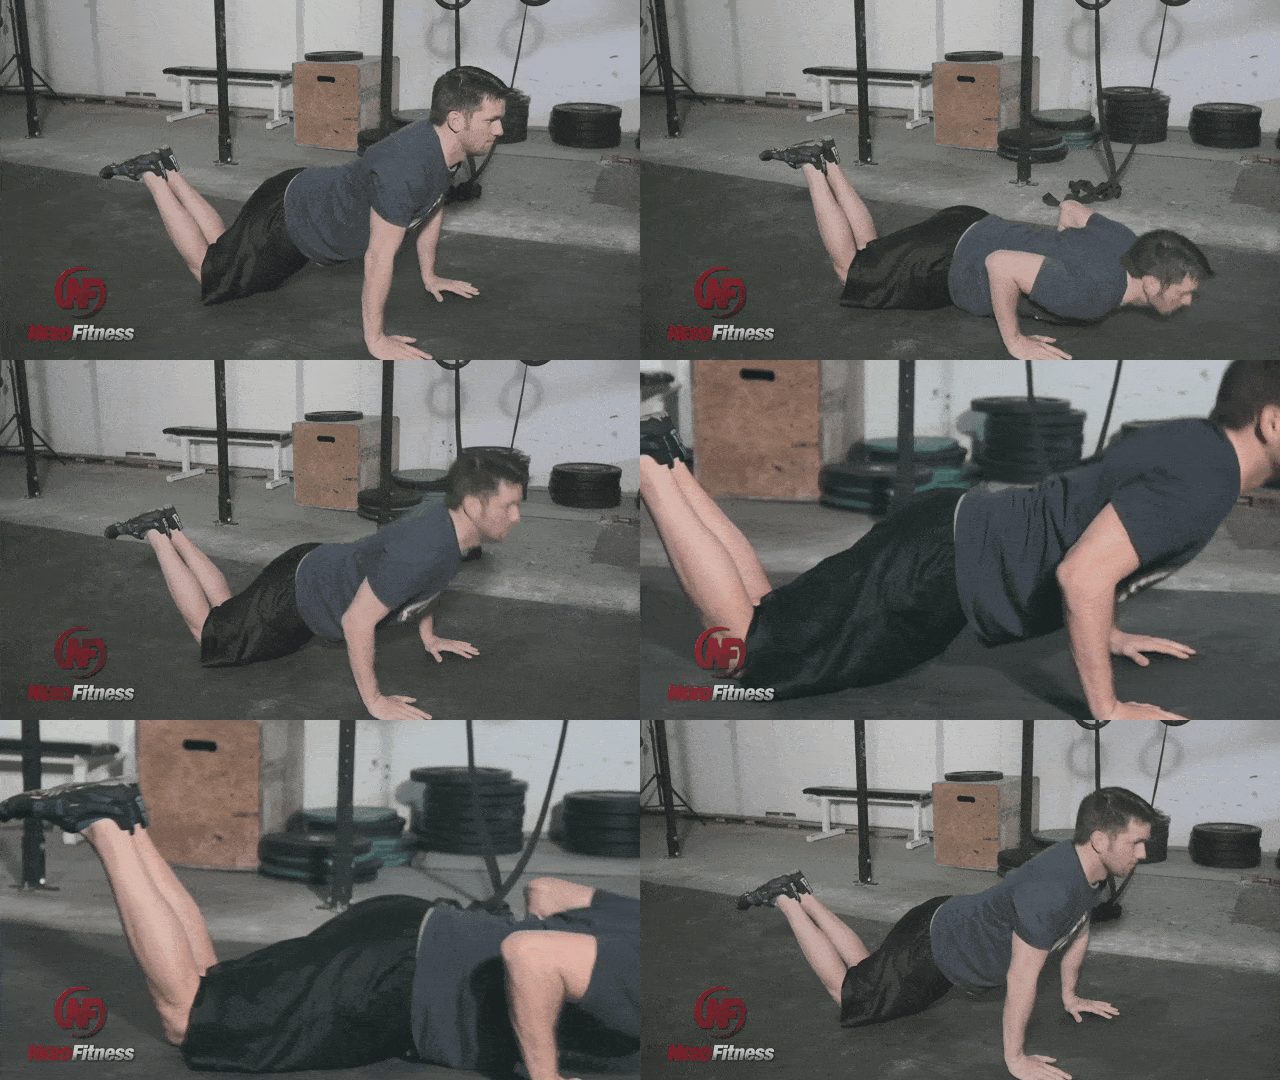
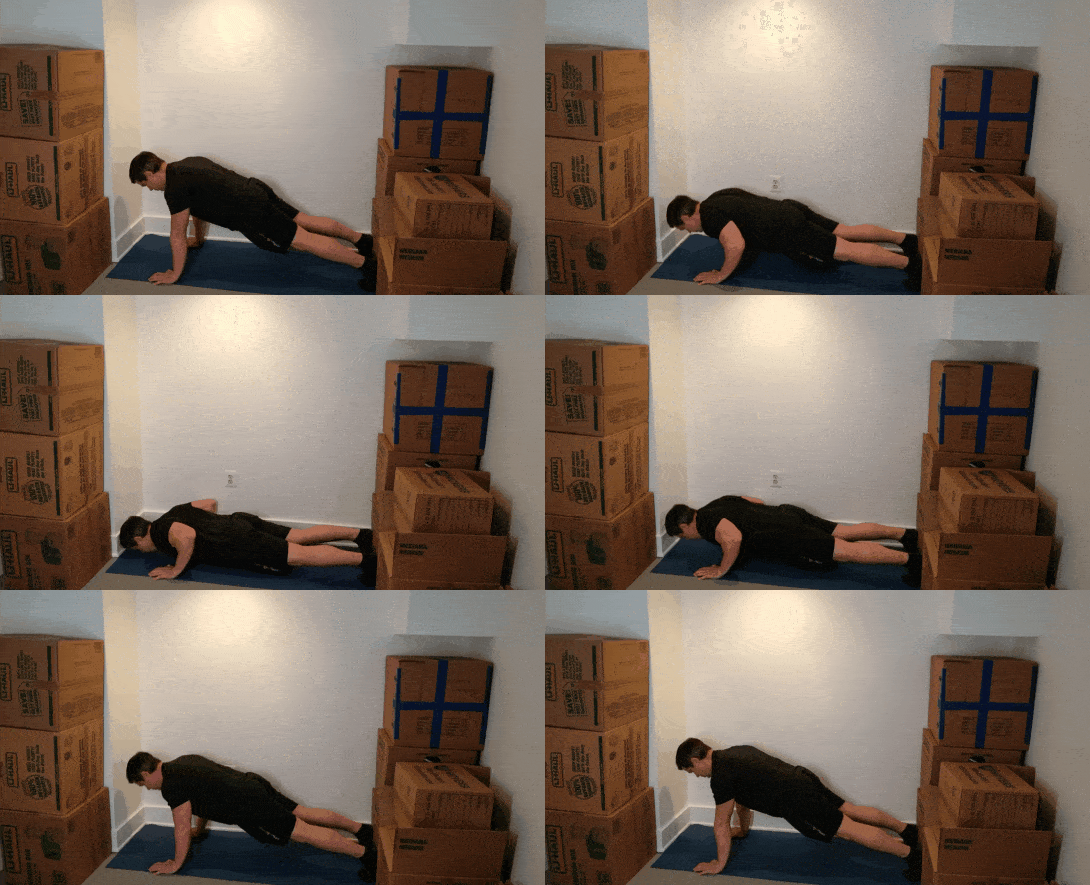
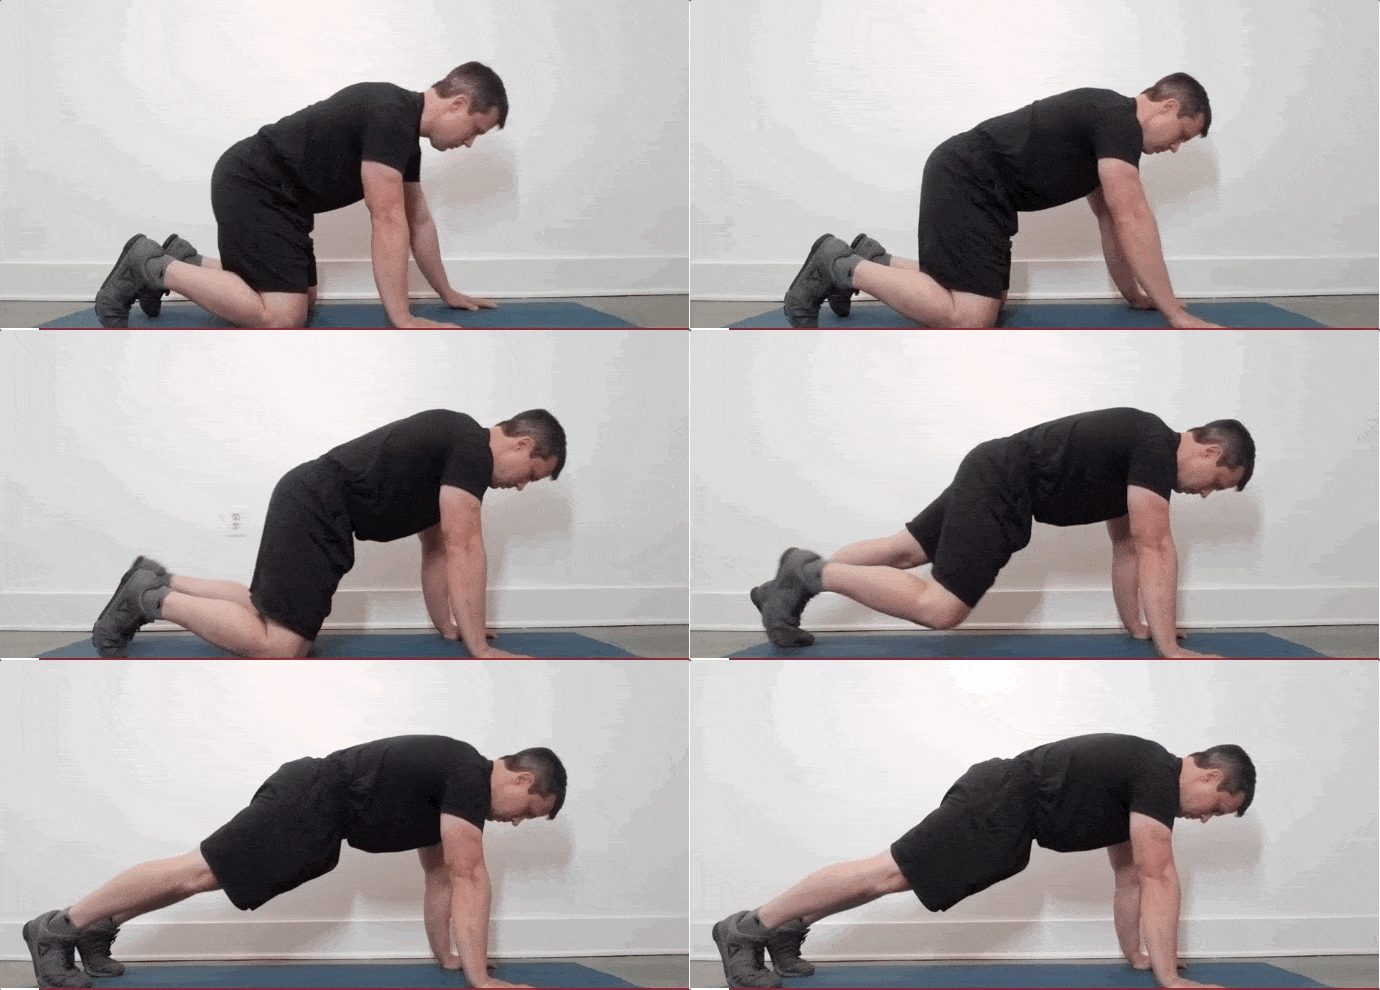
Push-up Progression Level 4: Knee Push-ups
Hold yourself up on your hands and knees, with the body in a straight line from shoulders to knees. Lower down to the ground before pushing back up.
FINAL BOSS: Push-ups!
You made it to a push-up!
Are you doing them correctly?
Our next section will dive into the correct form, since this is a guide on getting your first proper push-up (I wouldn’t hold out on you).
But first, you may be asking yourself a question: when do I progress up to the next level?
For that, I’d recommend downloading our new app (it’s free to try out).
Nerd Fitness Journey will guide you through a workout routine specifically designed to help you get your first push-up, with benchmarks and signals on when to move up.
Plus, you get to earn actual XP so you level up your very own superhero!
You can give it a free test drive right here:
What Is the Proper Form for a Push-Up?
The video above walks you through the correct way to do a proper push-up, and also includes a few well-placed jokes from yours truly.
Here’s how to complete one perfect push-up:
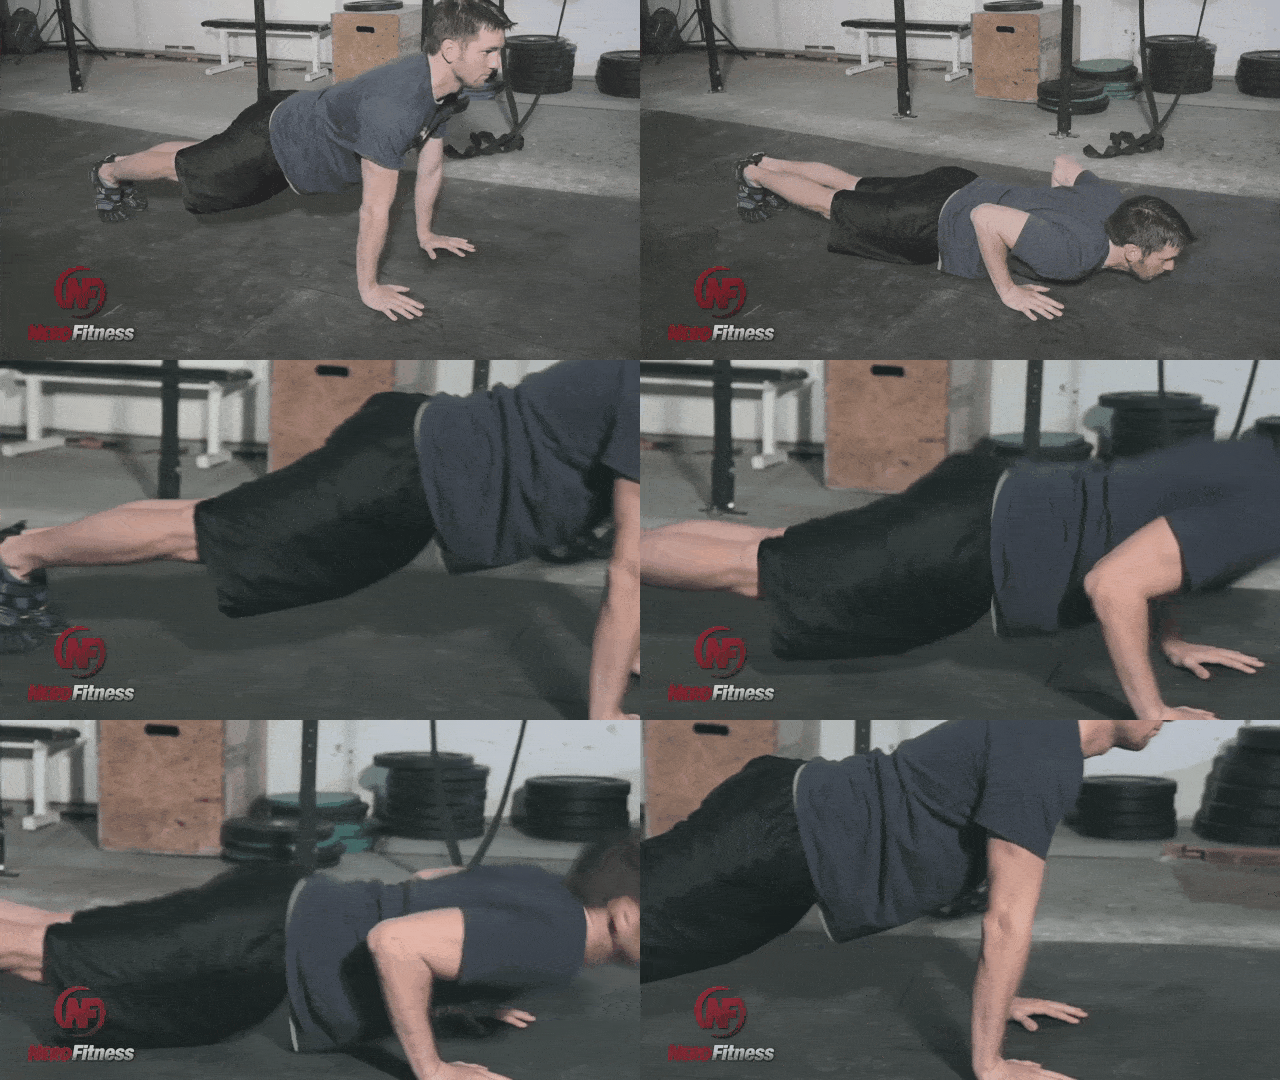
With your arms straight, glutes clenched, and abs braced, steadily lower yourself until your elbows are at a 90-degree angle or less.
Try to keep your elbows relatively close to your body, and keep note of when they start to flare out as you get tired.
Once your chest (or nose/chin) touches the floor (or your arms go down to a 90-degree angle), pause slightly and then push back up until you’re at the starting position.
Here are 4 common mistakes with push-ups:
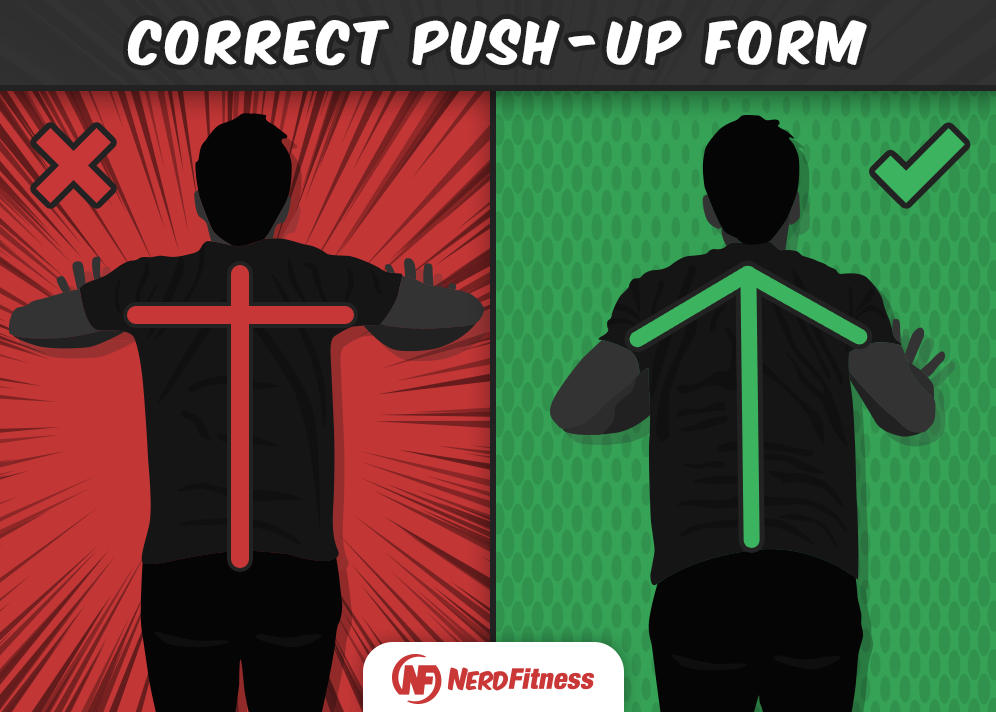
#1) Make sure you keep your elbows in. Often, beginners will flare out their elbows when doing a push-up.
A good way to think of this, is you want your body to appear more like an ARROW from the top, not a T.
This infographic on the proper push-up form shows you want I mean:
#2) Keep your head in line with your body. We don’t want your head shifting forward, which could put unnecessary stress on your neck and prevent a full range of motion.
#3) Keep your hips in line with your body (no sagging). We want you in one straight line as you push your body up and down:
#4) Attempt to do a full range of motion with your push-up (as long as it’s pain-free). Shoot to come all the way down, so your chest is touching the ground or the object you’re doing push-ups against.
If you want more help here, we have a full guide on how to do proper push-ups, (including advanced variations to try).
Exercises For Achieving a Full Push-Up
There are two exercises that will go a long way towards achieving your first push-up:
Push-up Negatives
Front Planks or Top of Push-up Holds
First, let’s talk about push-up negatives.
“Negative” in exercise terminology generally means only doing half of a traditional rep, normally lowering the movement.
To do a Push-up Negative:
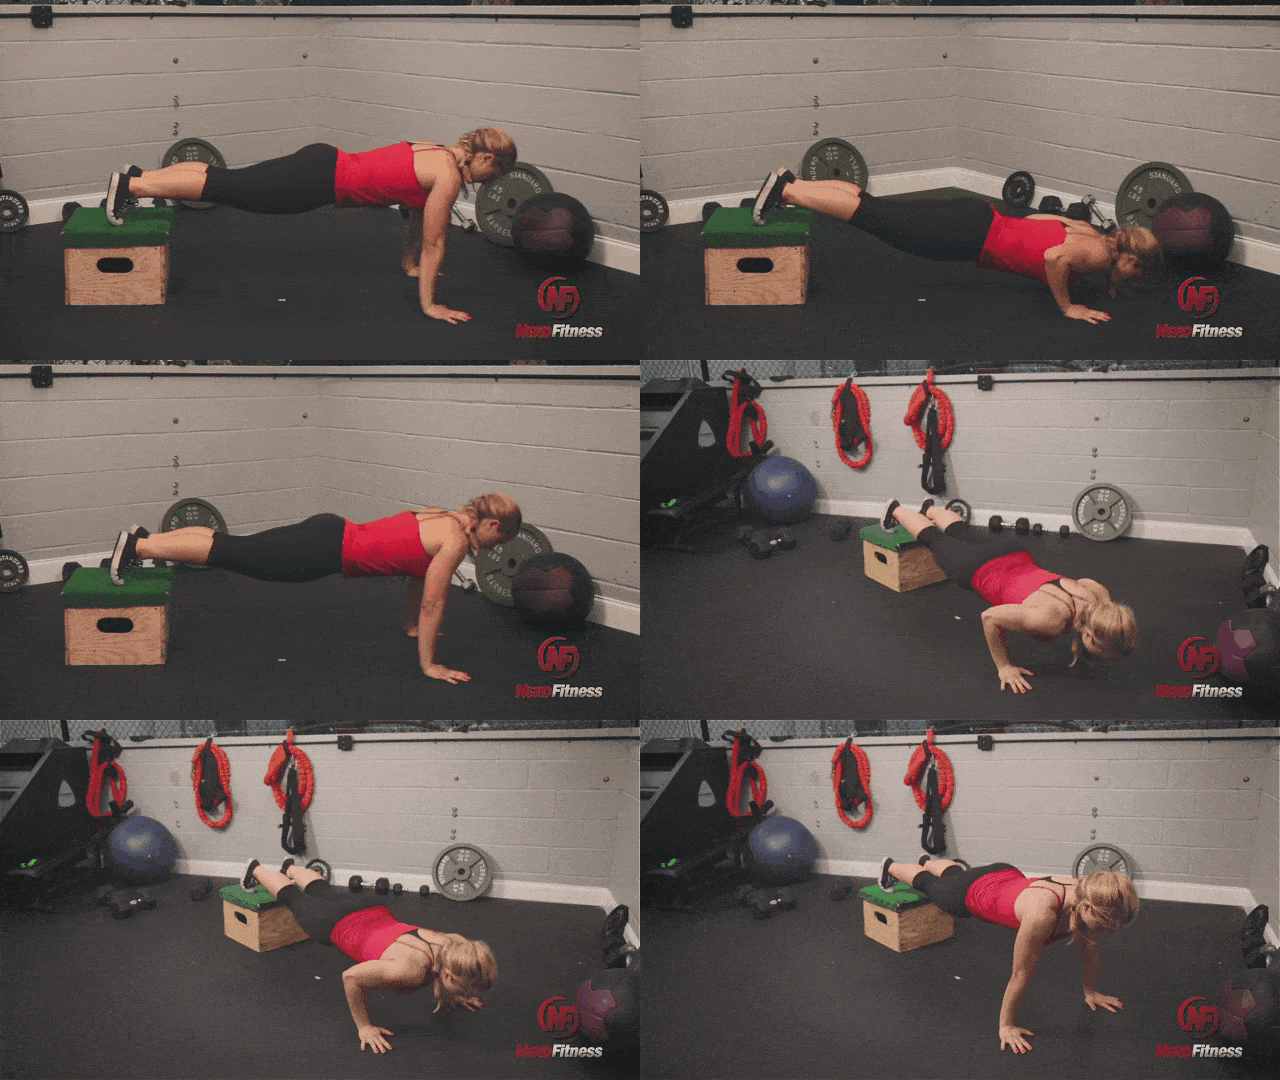
Hold yourself up at the top of a push-up, with the body in a straight line from shoulders to feet.
Lower down and touch the ground, then let the knees rest on the ground to help you push back up.
You can do a push-up negative from an elevated surface too.
Next, let’s talk about Front Planks or Holding at the Top of a Push-up.
This is important for a few reasons:
Builds a strong midsection. A sturdy core will help a lot when doing push-ups.
If you can’t hold the top of a push-up position, doing one complete rep will prove almost impossible.
Holding a plank might be tough for you, so let’s talk about a few variations you can experiment with.
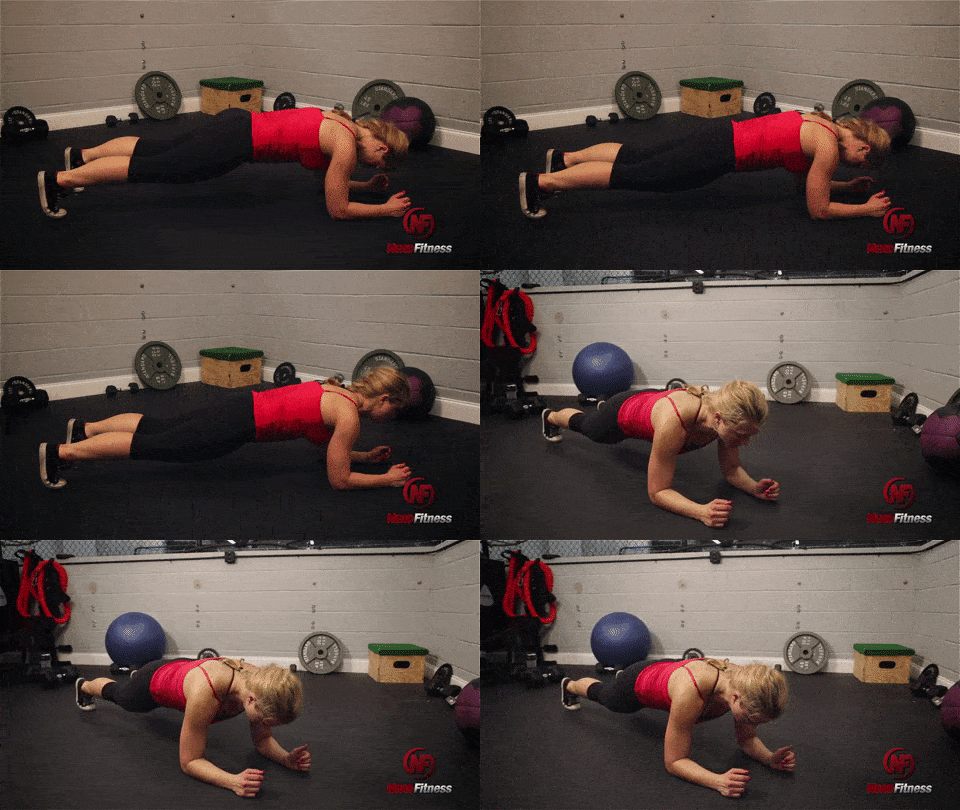
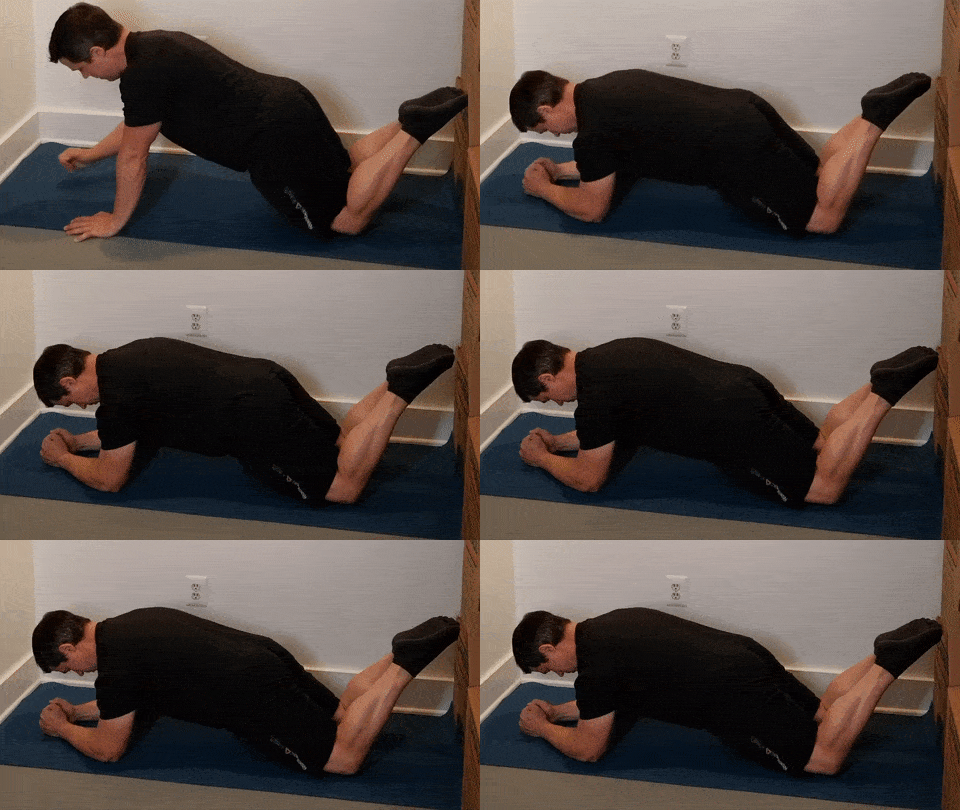
Hold Level 1: Knee Planks
Hold yourself up on your forearms and knees, with the body in a straight line from shoulders to knees.
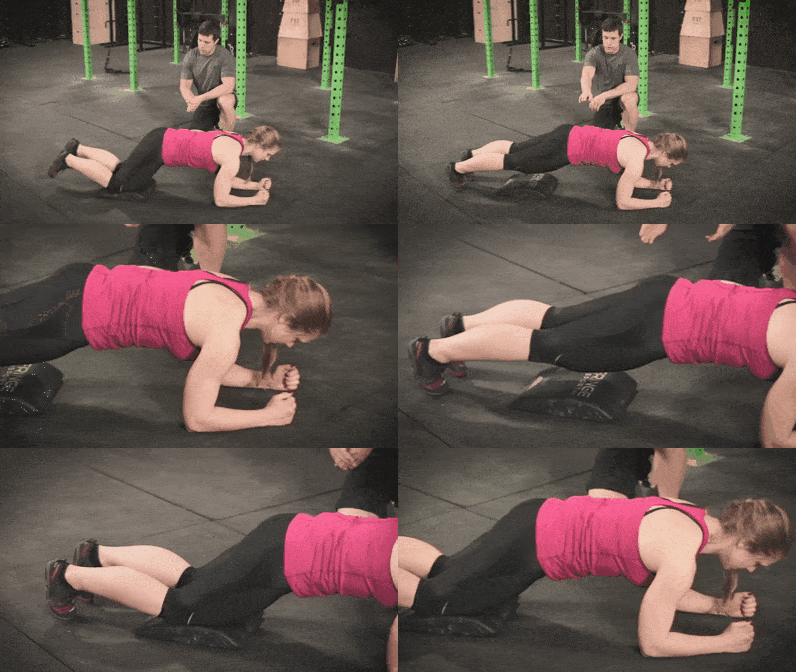
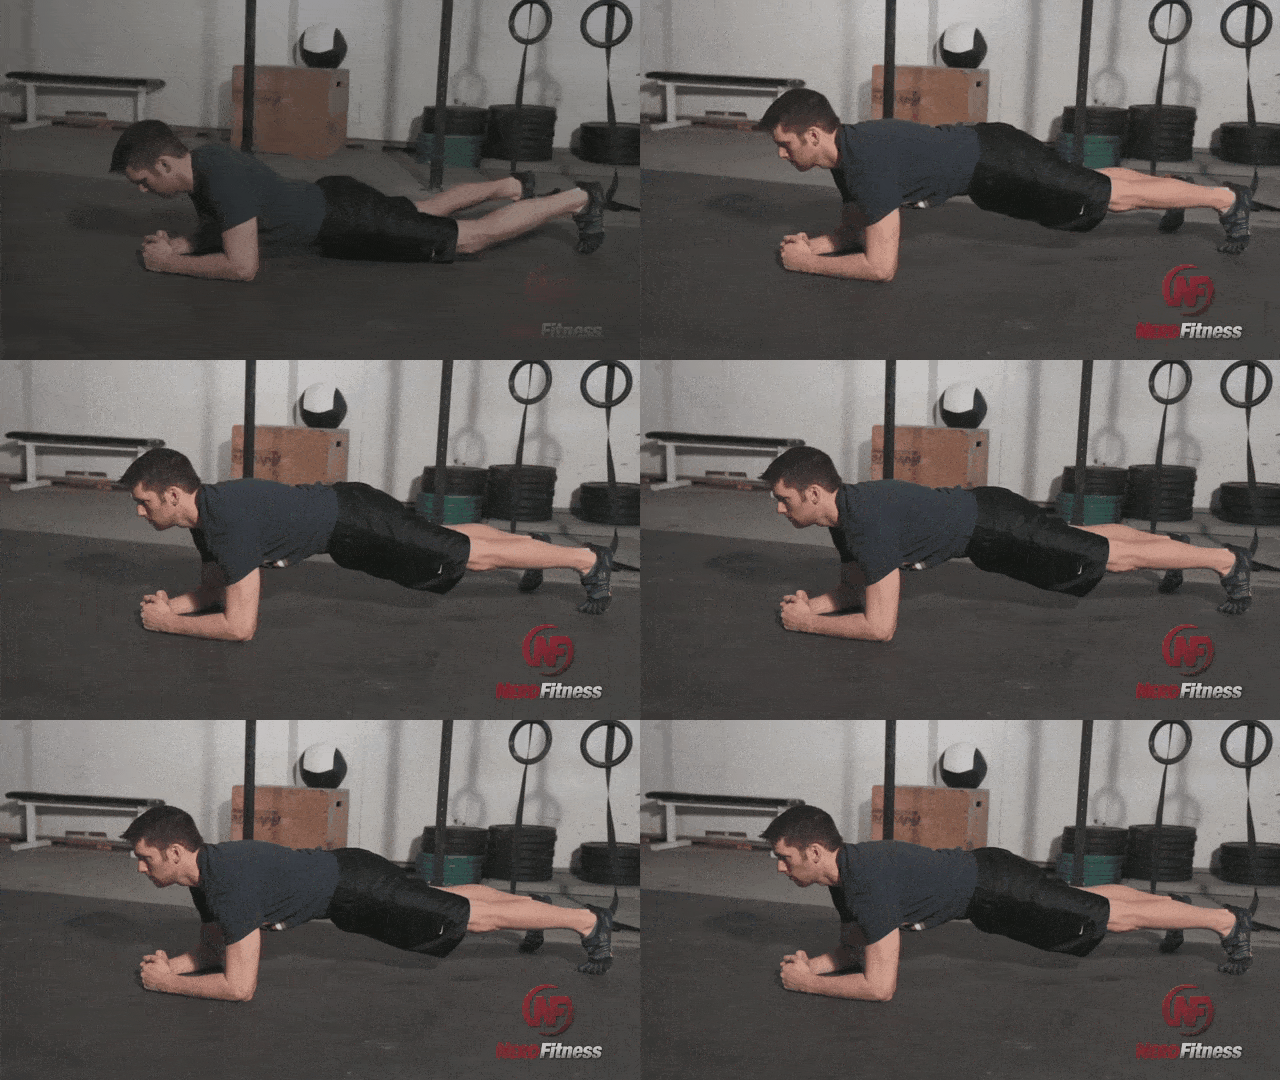
Hold Level 2: Front Planks
Lie on the floor with your forearms flat, making sure that your elbows are aligned directly under your shoulders.
Engage your core and raise your body off the floor in a straight line from head to feet, keeping your forearms planted. Try not to let your hips rise or drop.
Hold Level 3: Push-up Hold
Hold yourself up at the top of a push-up position, with the body in a straight line from shoulders to feet.
If you follow the Push-up Challenge in NF Journey, you’ll notice that pretty much every workout ends with a type of one of these holds, since core strength is so critical for push-ups.
Oh, and if you want to just try Nerd Fitness Journey to see what I mean, you can do so right here:
The Push-up Workout Plan
Remember earlier when I said the name of the game with push-up progression is consistency?
To show you what I mean, it’s time to build a workout for conquering push-ups.
I’d recommend three workouts a week for a Push-up Progression Plan, with a rest day between.
Could be Monday-Wednesday-Friday or Tuesday-Thursday-Sunday.
You can always do a more formal warm-up routine, but just make sure you include some variation of these two moves.
Step #2) Train with a Push-up Variation
Earlier, we went through 4 variations that will help you get your first push-up.
After your warm-up, you should train with one of them.
For our Push-up Progression Plan, I want you to alternate between two variations:
On Day A, do 3 or 4 sets of a push-up variation that you can do 8-10 reps in.
On Day B, do 3 or 4 sets of a push-up variation that you can do 5-8 reps in (so a harder variation).
For example:
On Monday maybe you do 3 sets of waist-high push-ups for 10 reps.
Wednesday, you can do 3 sets of knee-high push-ups for 8 reps.
Then Friday, back to the waist-high variation.
Step #3) Do a Negative
After you train with your push-up variation, I want you to attempt 2-3 reps of a negative push-up.
If these are too tough, simply do an easier variation, like knee push-up negatives:
Any of the 4 variations we discussed earlier can be done as a “negative.”
These negatives will be important, as they’ll go a long way towards building strength for a regular push-up.
Step #4) Plank/Hold for 60 seconds
We’re going to end our “Get Your First Push-up” Workout with a hold:
Front Plank
Holding the Top of the Push-up
Choose whichever variation you like, but attempt to hold the position for a full minute, with as few sets as possible.
If you need to break up the 60-second hold, you could:
Do three sets of 20 seconds each.
Do two sets of 30 seconds each.
Just aim to go longer and longer as you go. If you can’t make it to a full minute, don’t stress. Just work on holding a knee or elevated plank.
These holds will help strengthen your core, which will be critical for doing push-ups with proper form.
Oh, and if you want someone to modify this workout for you (let’s say you also want to do some HIIT for fat loss) our 1-on-1 Online Coaching Program can do just that.
Plus, your coach can review your movements through our app so you’ll know your training correctly and safely.
How to Achieve Your First Push-up (Next Steps)
That should give you everything you need to get started with the push-up progression plan.
Remember…
The “Get Your First Push-up” Workout is:
A Warm-Up
3 or 4 sets of a Push-up Variation for 8-10 reps
2 or 3 reps of a Push-up Negative
60 second Plank or Hold
Do this three times a week, with a day of rest between workouts, and you’ll be good to go.
As you continue on the Push-up Progression Plan, remember to keep pushing harder. We want you slowly but surely increasing the challenge of the workout (known in the biz as “progressive overload.”)
This could be:
Adding another rep (8 reps of waist-high push-ups to 9)
Adding another set (3 sets of knee push-ups to 4)
Moving up to a more difficult variation (waist-high push-ups to knee-high)
Oh, and if you need any help along the way, I gotcha boo.
Here’s how to continue your journey with Nerd Fitness:
#1) Our Online Coaching Program: perfect for someone who wants an expert (like me!) to design the right path for conquering push-ups. We’re all different, so why not have a coach guide you through a program that’s custom-made for you?
You can schedule a free call with our team so we can get to know you and see if our coaching program would be a good fit. Just click on the image below for more details:
#2) If you want an exact blueprint for crushing push-ups, check out NF Journey. Our fun habit-building app helps you exercise more frequently, eat healthier, and level up your life (literally).
Plus, our 6-week Push-up Challenge has helped quite a few Rebels achieve their first push-up!
Try your free trial right here:
#3) Join the Rebellion! We need good people like you in our community, the Nerd Fitness Rebellion. You’ll meet individuals from all different walks of life, all of whom are trying to level up their lives.
Sign up in the box below to enlist and get our “Strength Training 101: Everything You Need to Know” guide, which will teach you exactly how to grow strong enough to rock push-ups:
Download our comprehensive guideSTRENGTH TRAINING 101!
Everything you need to know about getting strong.
Workout routines for bodyweight AND weight training.
How to find the right gym and train properly in one.
Alright, I want to hear from you now:
Can you do a proper push-up?
If not, what level are you on?
Are we missing any helpful suggestions for a beginner?
Let me know in the comments!
-Jim
PS: Check out the rest of our guides on doing push-ups:
Breathwork for trauma is being talked about more and more—and for good reason: 70 percent of adults across the globe have dealt with at least one traumatic event in their lives. These traumas can be the result of events or experiences that range from violence and abuse to serious accidents or even exposure to death or loss.
Using deep breathing and various breathing techniques with a trauma-informed practitioner or program can be invaluable for healing. This can be a way to work through the experience, the physical manifestations, and the disconnect from your body that often happens as the result of a traumatic event.
Breathwork was a tool that I used when I healed through the trauma of my stroke. It continued to be invaluable as I worked through the collective trauma of a pandemic and social and political unrest, which most (if not all) of us experienced.
As such, this is a very personal topic for me and something I feel passionately about sharing. Let’s look into how trauma affects the body and how breathwork can help restore balance and connection within yourself so you can heal.
How Trauma Manifests in the Body
The brain’s reaction to trauma stimulates an acute stress response, causing imbalanced cortisol (stress hormone) levels. If this cortisol imbalance goes unresolved, it can cause an allostatic load (cumulative chronic stress) to manifest in the body. This leads to anxiety, depression, inflammation, and a handful of other physical bodily experiences.
Trauma can also cause dissociation from the body. Dissociation is as “an involuntary detachment from reality,” and is one of the ways your brain protects you from the experience. This survival instinct is biological. It’s meant to keep you safe from the trauma, however, it can also keep you stuck in the experience because your body doesn’t recognize that the trauma is now gone and you are safe.
Breathwork with a trauma-informed program or practitioner can safely get you back into your body to begin the healing process.
Breathwork as a Tool in Trauma Recovery
This work is so powerful for trauma healing because slow, controlled breathing techniques produce a meditative effect on the autonomic and central nervous system. This can help increase feelings of comfort, relaxation, alertness, and positive energy. At the same time, it also reduces stress, arousal, fear, depression, anxiety, confusion, and anger.
Think of it as quieting the noise of the trauma in your body and coming back to a space of balance and calm where you can reconnect with your body to process and heal.
New research shows that fast-paced breathing modalities can also help build stress resilience and regulate sympathetic nervous function. This style of breathwork, categorized as “temporary voluntarily-induced stress,” builds stress resilience in a different way than slow, deep breathing. Despite being different, it’s still supportive in the healing process.
If you want to experience the power of this fast-paced breathwork, join me for Exhale Hour where we use somatic techniques to drop into the body, be present with emotions, and move through them with energy work.
What to Keep in Mind With Trauma and Breathwork
Breathwork can play an important role in trauma healing. As a consistent practice, it can also expand your mental and emotional capacity to deal with future challenges as they arise. However, I do want to emphasize that breathwork is not a cure for trauma. This tool is most effective and beneficial when used alongside other therapeutic modalities.
I always encourage trauma survivors to seek out licensed professionals with clinical education and expertise in trauma-informed care. When I suffered from complex trauma and PTSD after my stroke, breathwork was the initial access point. This led me to a team of trauma therapists who specialized in somatic (body-centric) treatments. This is what ultimately motivated me to become a somatic practitioner myself.
A Simple Breathwork Practice for Trauma
Given my own experience and the scientific research surrounding it, I love to use breathwork with clients as a helpful adjunct to their trauma healing. One of my favorite breathing exercises to create calm and reconnect with the body is simple:
Take a full inhale.
Breathe out a long, slow exhale.
As you breathe out consciously repeat the word, “peace.”
Repeat 3-5 times.
This breathing practice calms the heart rate and lowers heightened states of arousal. This allows you to come to a place of mental, emotional, and physical equilibrium. While this one practice can be helpful, breathwork for trauma is not a one-time thing. To heal, you need to be consistent with the work, and in many cases, pair it with other modalities.
Don’t Overlook Breathwork for Trauma Healing
Traumatic events can cause you to disconnect from your body, but with trauma-informed support and interventions, it’s possible to restore a sense of well-being, balance, and connection within your own body.
Remember: healing looks different for everyone. The healing process is unique and non-linear, so I encourage you to move at whatever pace feels manageable. While breathwork for trauma healing is becoming more well-known, it’s important that you assemble a team of clinicians who specialize in trauma care to get the care you need.
As someone who’s been through it before, I can promise you that with the right support team, you will be able to find yourself and your own sense of safety again.
Deep core and pelvic floor exercises are some of the most important for your body, especially if you’re a woman. They’re the reason why I can still jump on a trampoline after having four children! (As long as I don’t have a full bladder and have to sneeze at the same time – ha!)
These exercises help you build strength that supports whole-body balance, a flexible range of motion, and postural alignment. A healthy core and pelvic floor also allow for hip and back mobility, greater sexual pleasure, and better digestion—all things most of us want!
If you’re doing core exercises only thinking about your “abs” though, you’re going to miss out on a lot of the benefits. At Lindywell, our goal is to help you slow down, tune in, and use that focus to be more intentional with movement to help you maximize the benefits.
This type of mindful movement is especially important with deep core and pelvic floor exercises. Let’s talk about why and then get into which exercises you should bring into your workout routine (hint: you won’t find any talk of crunches here).
What You Need to Know About Pelvic Floor Function
The pelvic floor is so important, and yet, for many women it’s a cause of discomfort, difficulty, or pain. Research shows that 32 percent of U.S. women will experience at least one pelvic floor issue in their lifetime. Here are some of the most prevalent ways that pelvic floor dysfunction can manifest:
Sexual Issues: painful intercourse, decrease in arousal or libido, infrequent orgasm
Chronic Pain: back or pelvic muscle spasms, soreness or tightness in the lower back, hips, genitals, rectum, or pubic bone
Pelvic floor issues usually occur when something weakens this group of muscles, tears the connective tissue around it, or puts unnatural stress on the pelvic region. Whether that’s a procedure, event, or health condition, here are a few main culprits:
Traumatic pelvic injuries
Surgeries in the pelvic area
Physical changes due to pregnancy
Abdominal separation in childbirth
Nerve damage in the pelvic area
Untreated UTIs or vaginal infections
Chronic pelvic inflammation
Pelvic strain due to obesity
While pelvic floor dysfunction is common, you don’t need to accept it as “normal.” Instead, you can strengthen and heal this area of your body with deep core and pelvic floor exercises. If you’re experiencing visible and/or chronic symptoms, seeking the support of a medical professional might be advised and check out NIH’s guide to pelvic floor disorders to learn more.
5 Deep Core and Pelvic Floor Exercises
While chronic or severe cases of pelvic floor dysfunction might require medical intervention, many women experience restored functionality and lasting pain relief with Pilates. This happens as the result of the intentional breathing, postural realignment, and deep core strengthening aspects of this type of exercise.
You may be surprised to learn that rhythmic breathing is one of the most important aspects of Pilates for supporting pelvic floor health. On exhalation, the transversus abdominis (innermost core muscle) and pelvic floor draw into your midline. Then on inhalation, the diaphragm contracts to release and lengthen your pelvic floor.
In addition, the gentle, low-impact style of movement builds functional mobility, strength, balance, and flexibility. This means you’ll activate the core and pelvic floor with each intentional movement, alleviating tension while building strength.
However, you won’t get these results with basic abdominal exercises like crunches. Use these five deep core and pelvic floor exercises instead. For each exercise here, you can add resistance by squeezing a ball or towel between your knees. Get the full workout on YouTube and don’t miss the tips and suggestions below so you can get the most out of each movement.
Pelvic Floor Lift
The focus of this move is to contract and lift your pelvic floor muscles on each exhale, then lower and release them on each inhale. As you do this, think about pulling a tissue out of its box—that is the same motion you want to imitate with your pelvic floor.
Pelvic Curl
To perform this move correctly, contract the pelvic floor muscles as you use slow, controlled movement to raise your hips into a bridge, releasing as you return to the mat. For healthy pelvic floor function, it’s crucial to be able to maintain a fluid rhythm of contraction and relaxation.
Bent Knee Fall Out
When hinging your each leg out to the side, think about the motion of opening a book. Your core and hips stay stable, like the spine of a book, as your leg (the page) opens. The goal of this move is to create stability in the pelvic floor.
Seated Spinal Twist
As you twist from side to side, focus on keeping the pelvic floor muscles as stable and stationary as possible. This movement should be coming from your core, using those muscles to twist, hold, and return to center, rather than using your arms or hips.
Standing Chair Squat
As you do this movement, remember that your knees will bend, but they should not protrude in front of you. The focus of this squat variation is to release the pelvic floor widen the sit bones as you squat, and activate and lift the pelvic floor as you return to standing.
Strengthen Your Core and Pelvic Floor
Whether you feel discomfort in the pelvic floor region or you want to strengthen this area to help avoid future issues, Pilates is a solution you shouldn’t overlook. Work these exercises into your current daily or weekly movement routine and remember to go at your own pace. At Lindywell, we remind all of our members to meet their body where it’s at and build from there.
Get access to 300+ fun and effective Pilates classes to support your whole body (and mind!), with a 14-day free trial! As a member, you get all the workouts plus a library of guided breathwork sessions and nourishing recipes.
If you’re feeling stuck when it comes to your body, you’re not alone. My new FREE workshop is an opportunity to discover how to cultivate a healthier relationship with your body, food and movement—so you can embrace self-acceptance and prioritize your mental health without sacrificing your health goals.
So many of us are confused by the extremes in the fitness world and have fallen into this body-checking culture. Body-checking is the habit of seeking information about our bodies (weight, shape, size, appearance, etc). And it can be truly harmful to our self confidence.
So I decided to put together a FREE workshop to help you reclaim your body and freedom!
In a world that often fixates on appearance and external measures of health, it’s time to shift the conversation.
We’re going to uncover the myths and lies in the fitness, beauty and diet industries that have led to a culture of body insecurity and dissatisfaction. The goal that I have for this workshop is to show you how you can erase the lies and negative self-talk. You’ll walk away with a fresh sense of motivation.
You deserve that, I deserve that, and that’s what we’re going to dive into in the Stop being stuck workshop.
You may have heard someone say, “just listen to your body” and thought: “How do I even do that?” I get it. Learning how to listen to my body has been a practice of mine for the last decade—and I still have to be mindful about it today.
This skill is crucial for maintaining a sustainable health journey in today’s world where we’re often encouraged to ignore our intuition and physical cues. I know you’ve been told, “Push through the pain!” or seen an Instagram post that says, “Don’t stop when you’re tired, stop when you’re done.”
While these sentiments are meant to motivate and inspire, they can also be harmful because they encourage you to ignore your body. The problem is, if you push when your body says stop, you could hurt yourself. If you always force yourself to workout when you don’t want to, you’ll never stay consistent because you don’t enjoy the experience.
Long-term, sustainable health comes when you listen to your body, and then respond with care, action, and compassion. This has been a significant part of my health journey, and a big reason why I started Lindywell, so let’s talk about what it means and how you can start listening.
What Does It Mean to Listen to Your Body?
Listening to the body means cultivating a mindful awareness of what it (you!) needs at any given moment, followed by honoring that need. This intuitive practice will help you understand and make decisions based on internal cues, rather than steamrolling past your own limits.
The more present and responsive you are to these important cues, the more impactful your health journey can be. In fact, simply maintaining intentional body awareness (listening to your body), can improve:
Creating a mindful relationship with your body can also make it easier to instill positive habits around nutrition, exercise, body image, self-care, mental resilience, and coping mechanisms.
Emotional regulation
Attentional span
Self-acceptance
Brain function
Compassion
Stress management
Anxiety or depression
Plus, when you do what feels good to your body, rather than forcing something that doesn’t, you are often more consistent because you enjoy the experience. This, in turn, leads to better long-term results and feeling more confident.
5 Ways to Listen to Your Body
All that sounds great, but you’re probably wondering how to actually take action. Here are five practical strategies I’ve used to listen to my body and honor those cues each and every day.
1. Ask Questions and Scan Your Body for the Answer
Set aside at least one moment each day to pause and ask yourself, “How do I feel and what do I need right now?” Then before rushing into the next item on your to-do list, take action on what your body needs. Here are some examples:
I’m feeling tired, so I’m going to have a snack, take a short walk, and then come back to my computer feeling more refreshed and ready for work.
I’m feeling energized and craving movement, so I’m going to squeeze in a 15-minute Lindywell workout right now, while the kids are at school. That way I don’t have to worry about it when they get home.
I’m feeling some tension in my neck, so I’m going to do a few neck circles and stretches to ease that discomfort before driving to the store.
In your fast-paced and often hectic life, it’s easy to overlook these basic bodily necessities. The good news is, tuning in and asking what your body needs doesn’t have to derail your day. It may just mean you spend a few minutes stretching or taking a walk—and that will likely make the rest of your day so much better too.
2. Notice How Your Body Reacts to Certain Emotions
Emotions manifest in the body, especially within the cardiac, respiratory, nervous, and gastrointestinal systems. I know I often feel anxiety in my chest or stress in my head. You may be able to recall areas of your body where you commonly feel your emotions too.
Bringing awareness to these emotions, and tuning into where you’re feeling them in the body, can make it easier to soothe those intense reactions and get back to feeling balanced quickly. Next time a strong emotion comes to the surface, be curious about where you feel it.
Constriction in your throat?
Warmth in your cheeks?
Tension in your forehead?
Sweat in your armpits?
Nausea in your stomach?
A pounding heart rate in your chest?
Finally, visualize sending love, calm or peace to that area of the body while taking slow, deep breaths until you start to regain equilibrium. You may be surprised by how quickly the emotion passes compared to the times when you try to push it aside.
In fact, according to Dr. Jill Bolte Taylor, all it takes is 90 seconds to move through an emotion if you stop, identify it, and simply maintain awareness of that emotion. Instead of letting that pesky anxiety hang around all day, let it go right then and there!
3. Build a Mindfulness Practice Around Meal Times
Bring mindfulness to meal times to start creating greater body awareness. The idea is simple: when you’re eating a meal, slow down and tune into your senses.
What do you smell?
How does it taste?
What is the texture like?
Do you hear crunching or slurping sounds?
By practicing this for even just one meal a day—eating dinner with kids is likely not the easiest time to practice this, but perhaps a solo lunch is—you’re training yourself to slow down and listen to your body. This may also make it easier to notice hunger cues that say you’re full or you want to go in for seconds; a skill that most of us have lost touch with.
In addition, mindful eating can reduce stress, promote digestive health, increase body acceptance, and curb emotional eating behaviors.
4. Choose Your Workout Based on What Your Body Needs
Your workouts are most effective when they match your current energy levels, stamina, and time capacity—all of which fluctuates from one day to the next. One morning I might wake up with the motivation to do a 30-minute weighted Pilates workout, while the next day, I desire a slow, 15-minute stretching session in the afternoon.
This is so normal for women and why cycle syncing your workouts can be really beneficial. If you don’t have a cycle, however, you can still choose workouts each day based on what your body is asking for.
Pause before starting a workout and tune into which kind of movement feels most enjoyable at the moment. Do your legs feel strong and ready for a challenge? Or does a slower-paced movement sound really good? Plus, ask yourself: do I have extra time or do I need to fit something in quickly? Choose your workout based on these answers.
It’s really easy for Lindywell members to honor what their body is craving (and their schedule calls for) because we have 300+ workouts, both gentle and challenging, that range from 10 minutes to 30+ minutes. As a member, you’ll find whatever workout you need, no matter the season or time frame.
Start your 14-day free trial to get instant access to all of our workouts, plus guided breathwork sessions and nourishing recipes!
5. Carve Out Alone Time to Connect with Your Body
When was the last time you thought of your body as a friend to connect with, instead of just a vehicle to move through life? All too often, the focus is on pushing through and getting things done so you forget to spend time with yourself and your body. I fall into that rhythm so easily as a busy mom and business owner and have to be really intentional about this.
Whether you can spare 2 minutes or 20, carve out time and space each week—if possible, each day—to be alone with yourself. Unplug from social media and other external distractions and just connect. You can do this by listening to gentle music, moving your body, meditating or even doing a breathwork session in the Lindywell app.
Practicing mindfulness like this, especially using meditation to do so, can improve your memory, mood and overall well being. Plus it helps you start to understand the language of your body so it’s easy to hear what it’s asking for.
Listening to Your Body Is a Integral Part of Wellness
Your body is always speaking to you—but are you listening? No matter how long it’s been since you last paid attention to those inner cues (or you never have before), consider this an invitation to start. These practical strategies will help you listen to your body, and as a result, get more consistent with workouts, choose movement you enjoy, and ultimately, see better results. It truly is the key to long-term health and happiness.
Take your relationship with your body one step further with my upcoming book, Well to the Core! In it, I dedicate an entire chapter to developing the skill of listening to our bodies and how we can break free from the confines of problematic fitness sayings and develop a more holistic and sustainable approach to our fitness journeys. Pre-order your copy now and get $300 in free bonuses!


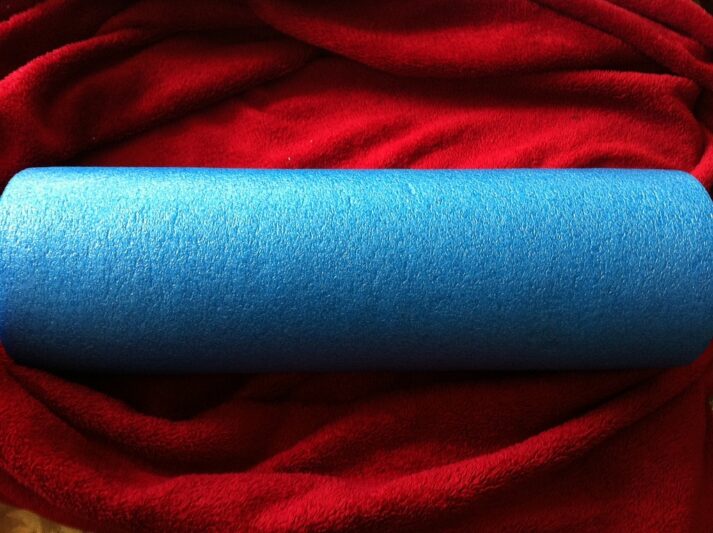


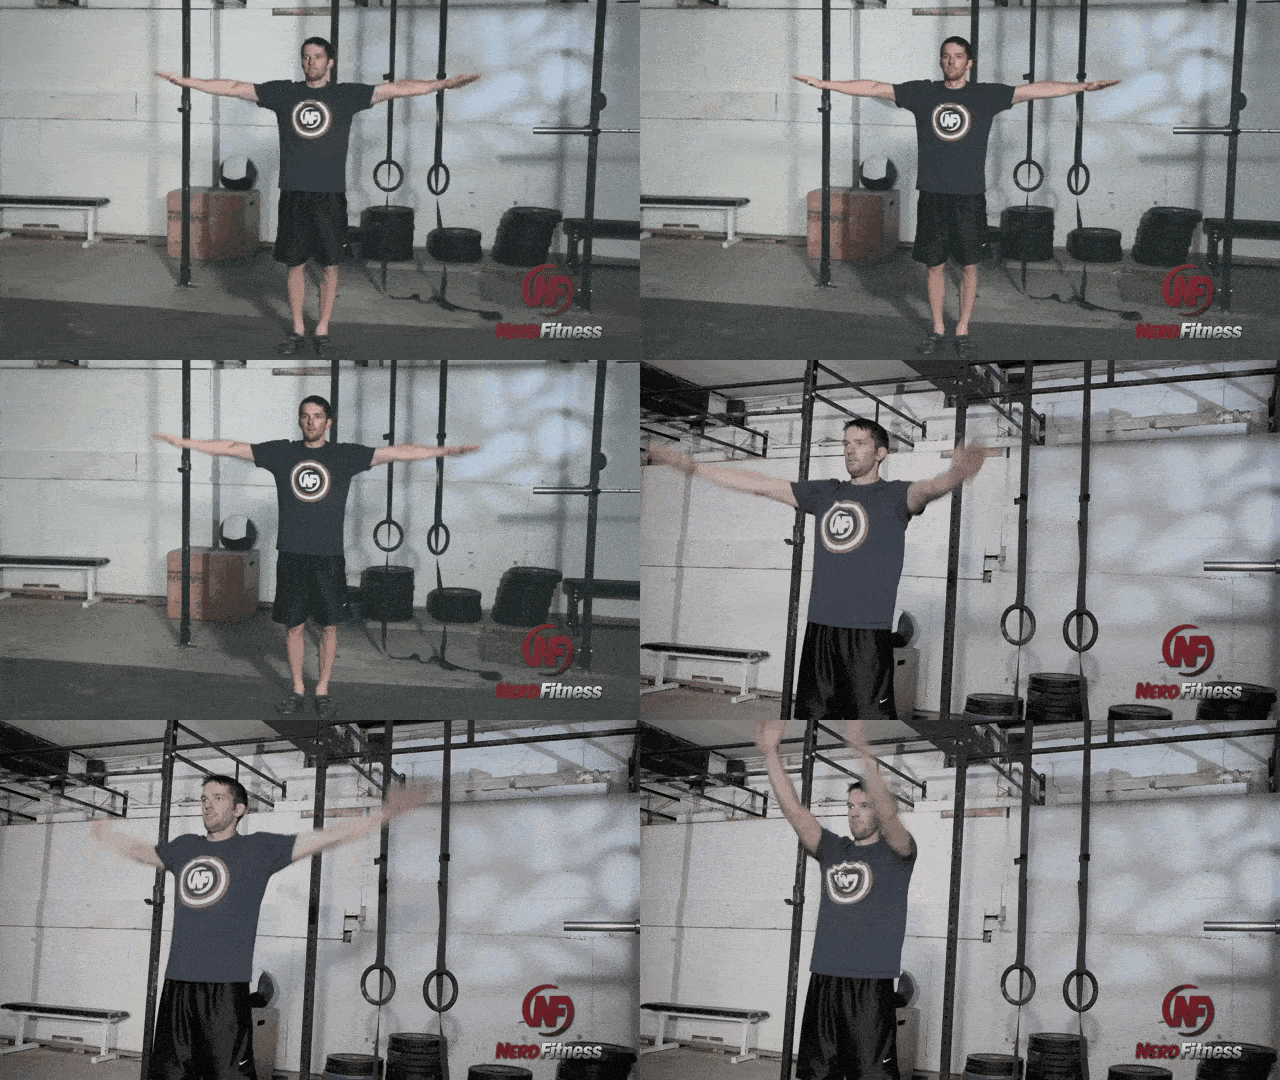
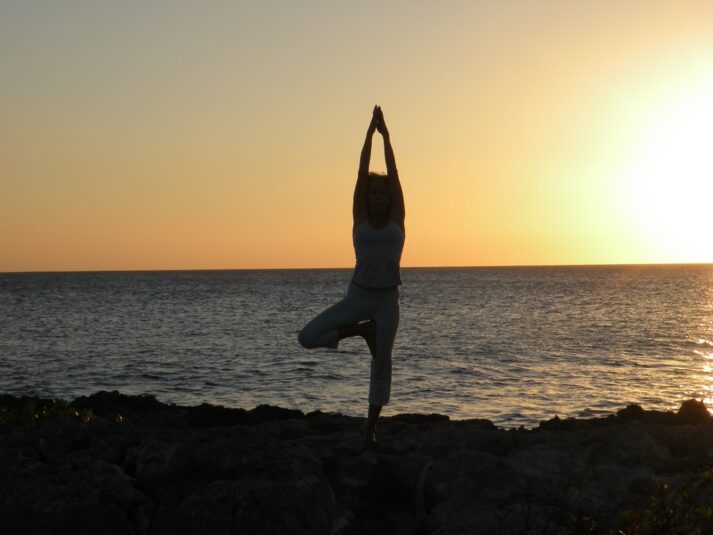




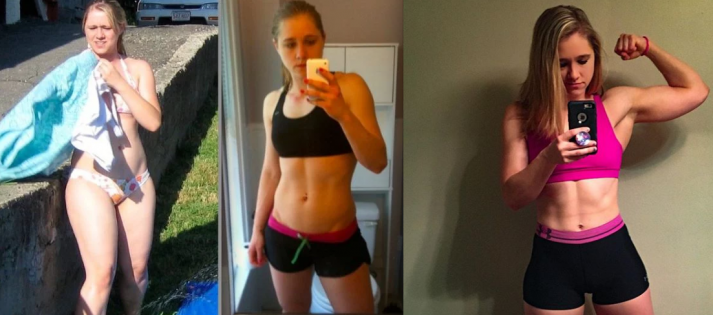
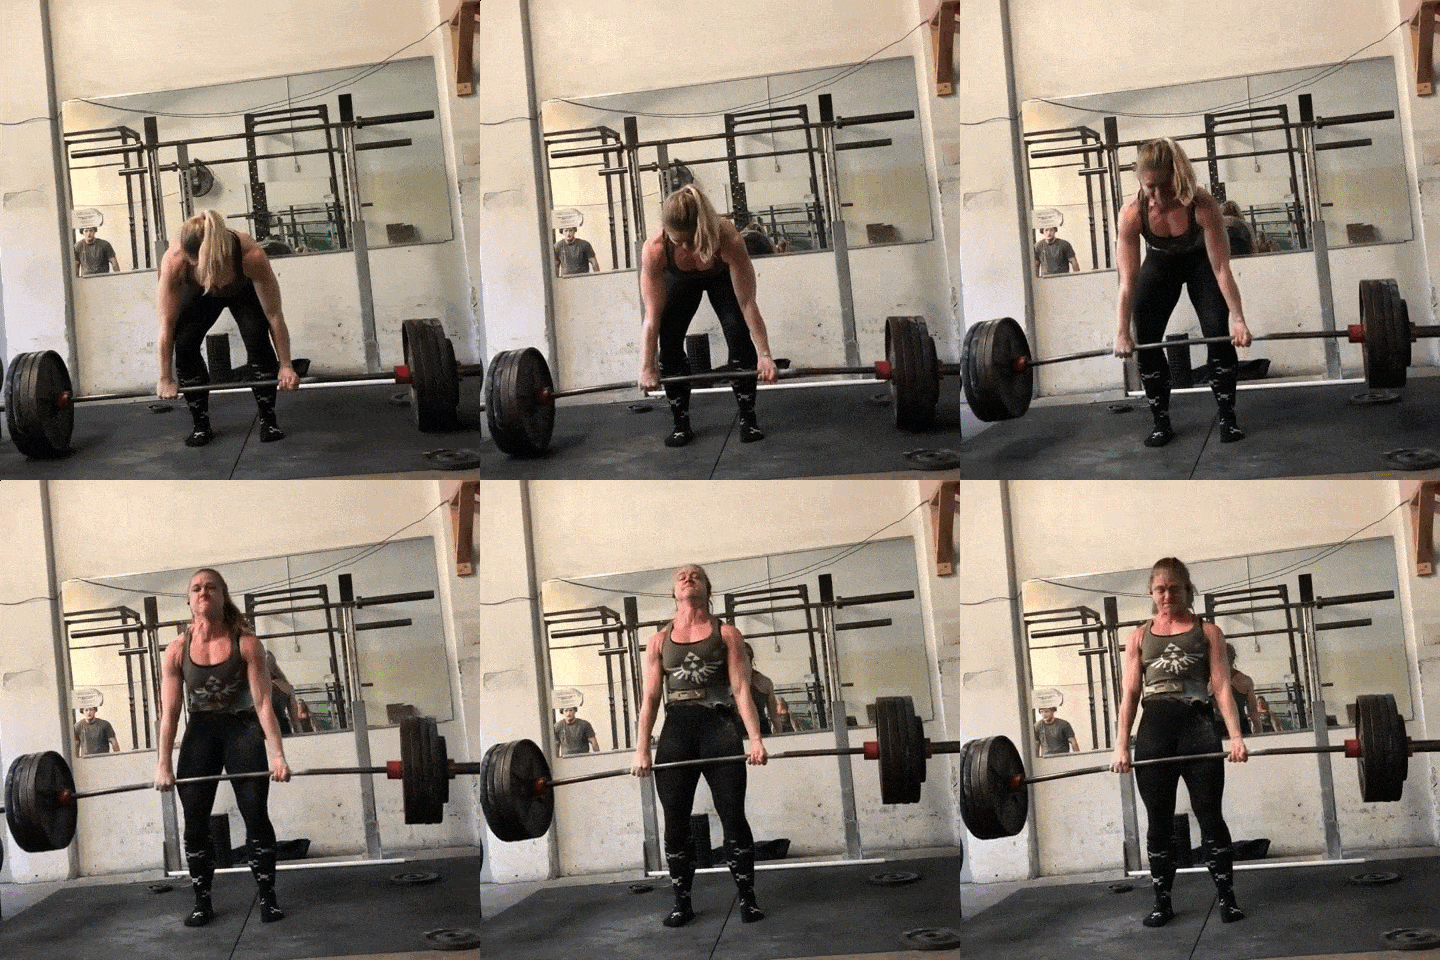






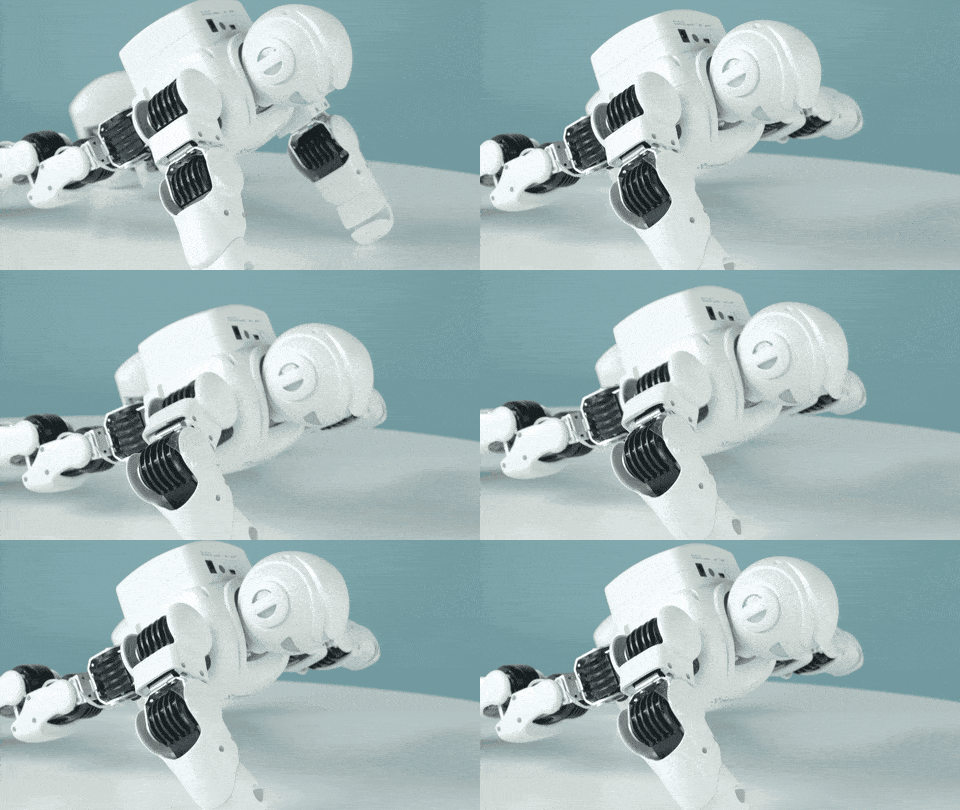








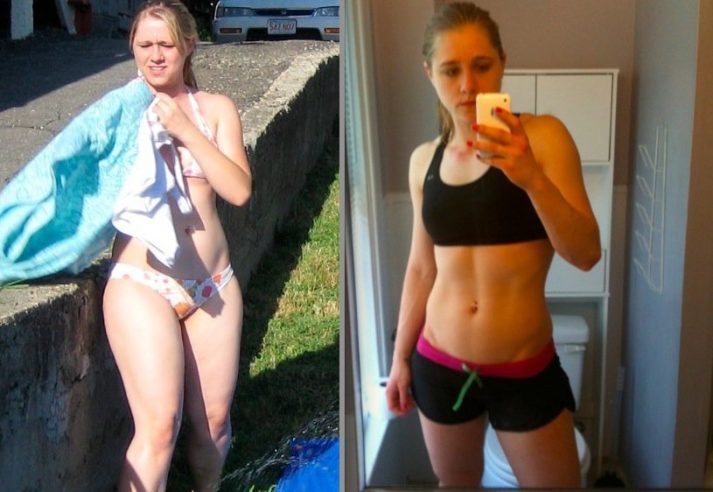
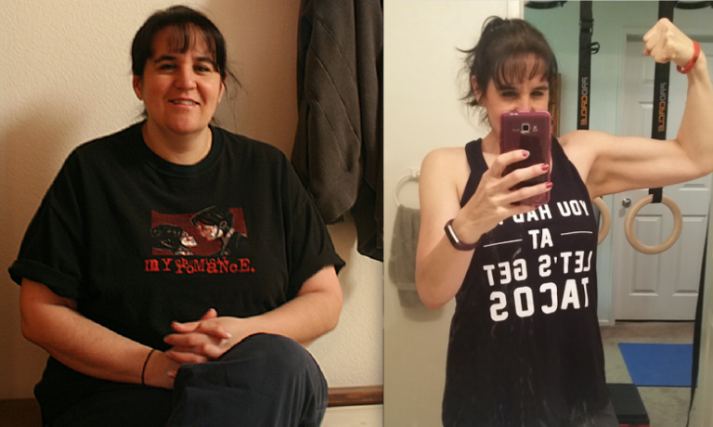
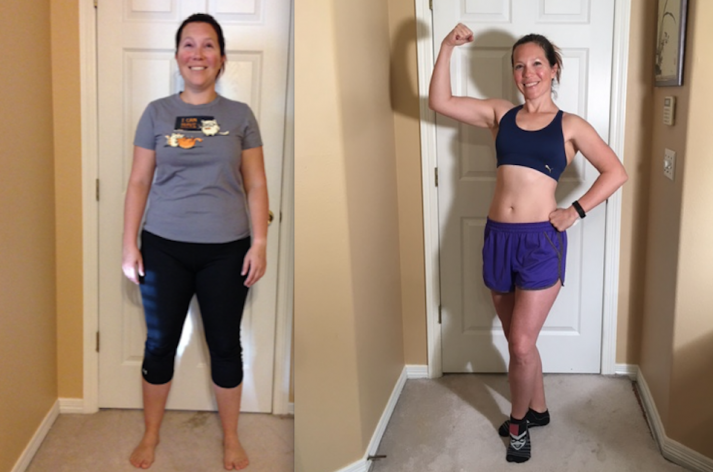
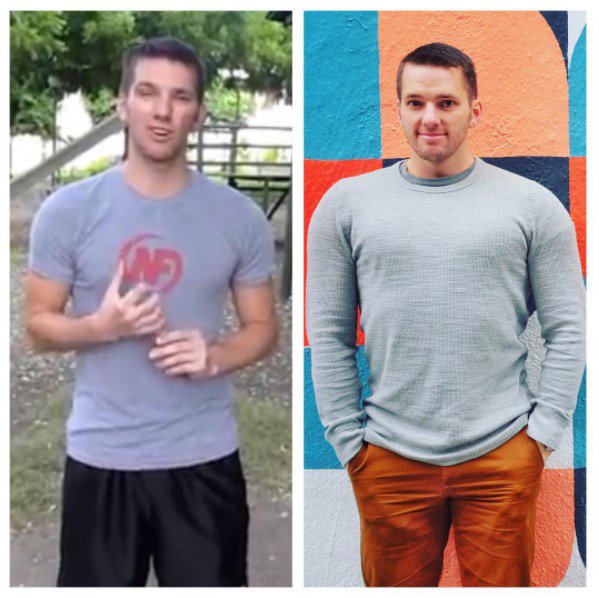



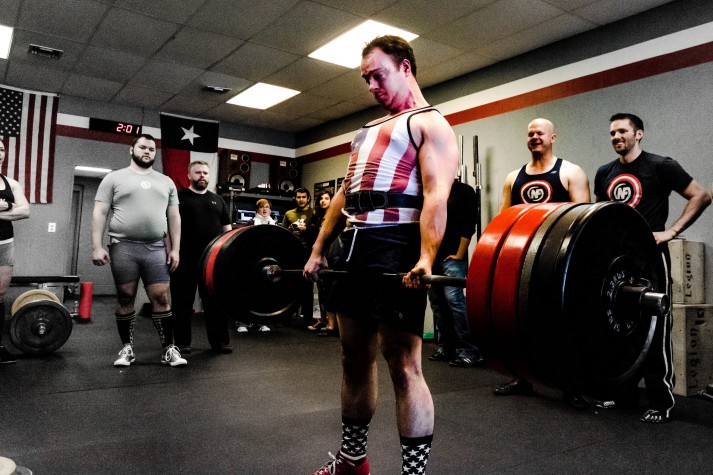
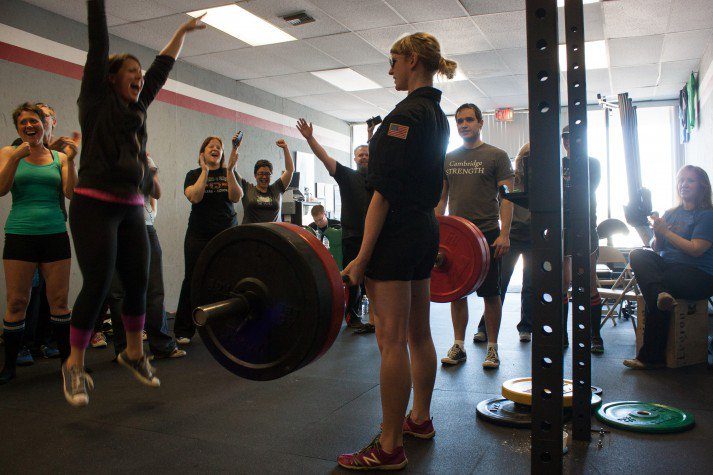
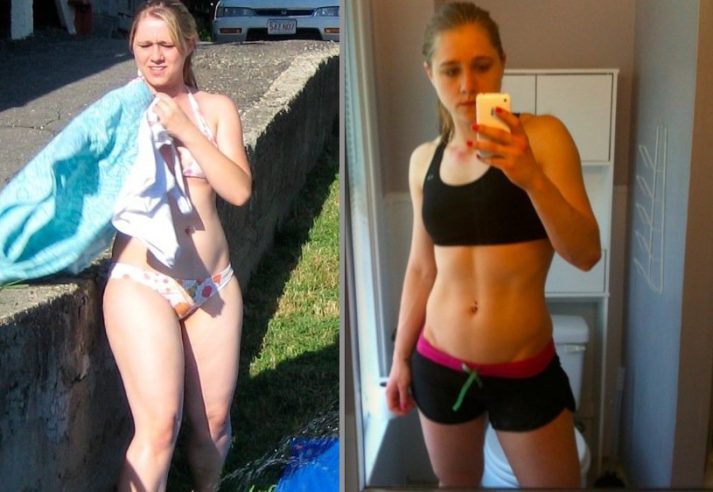
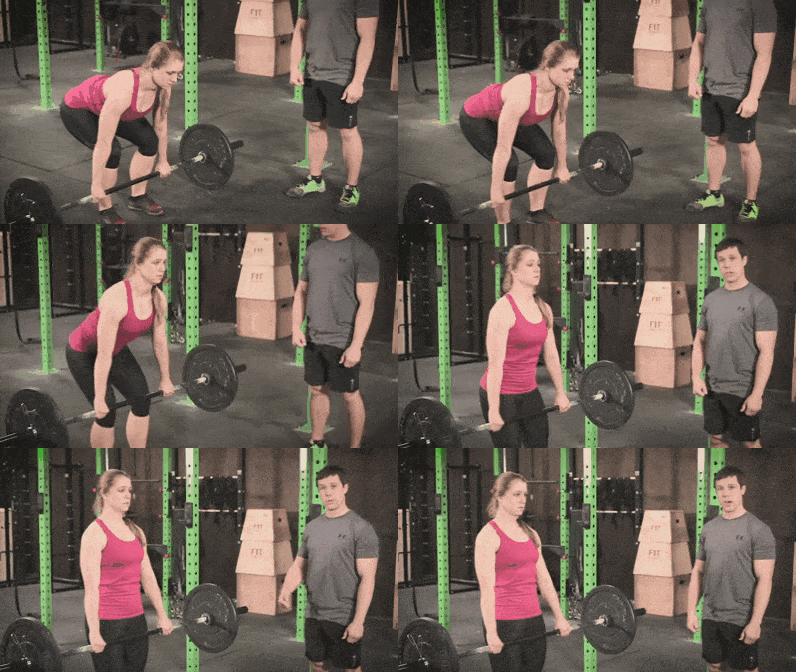
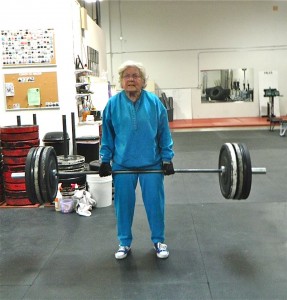
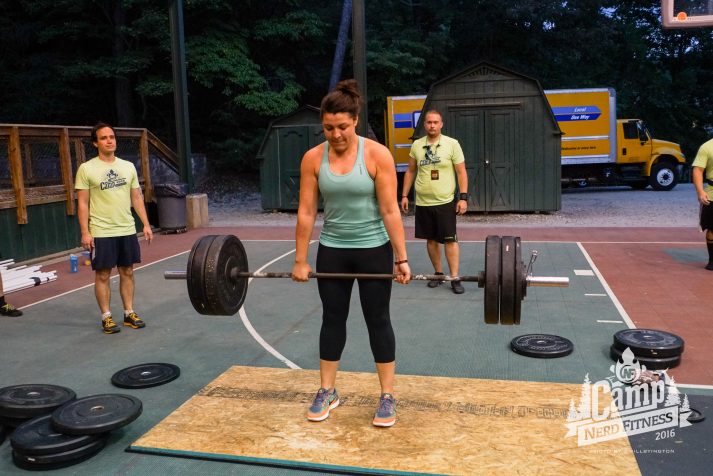
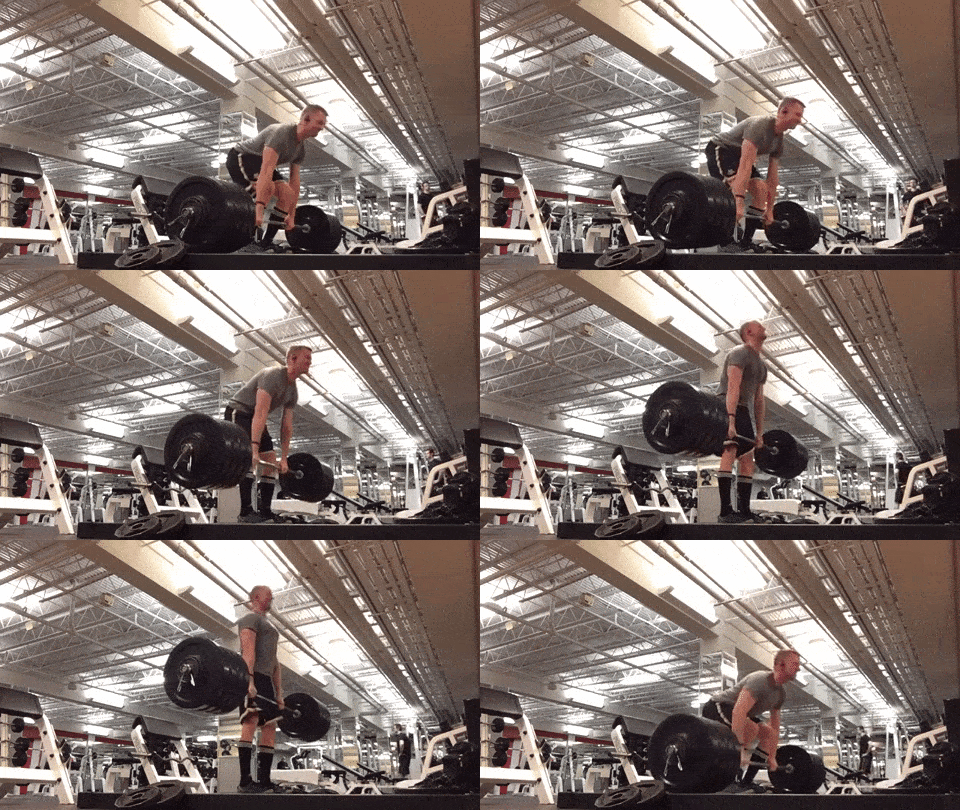
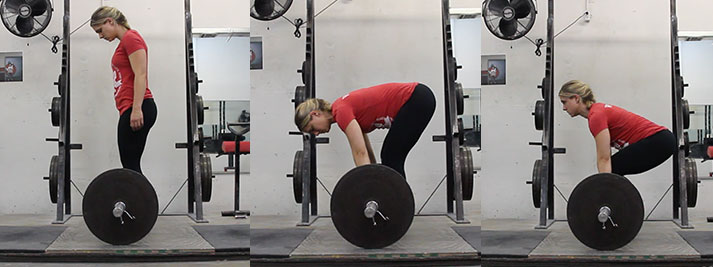
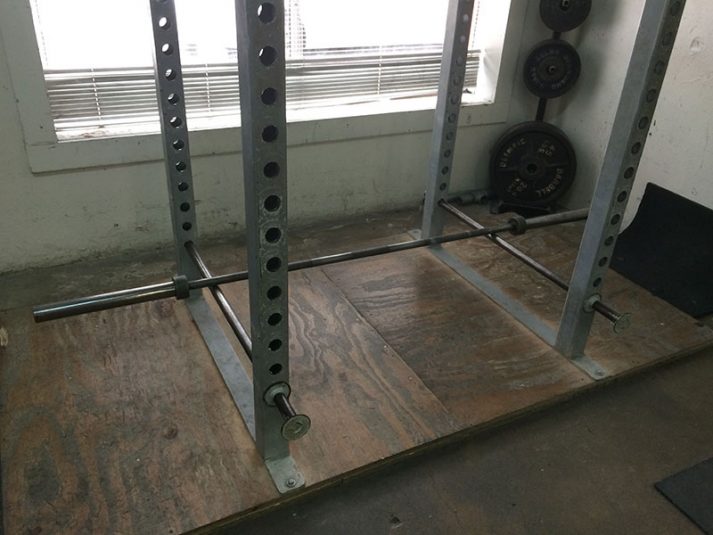
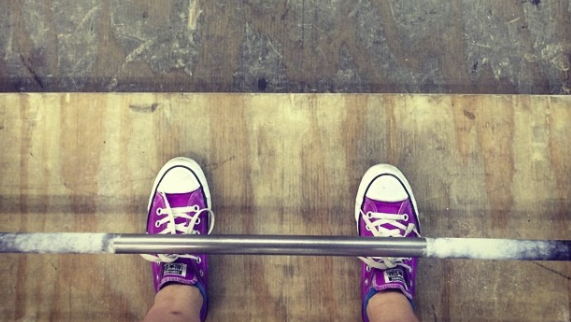
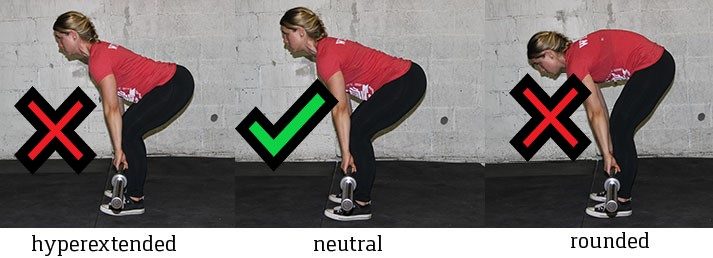
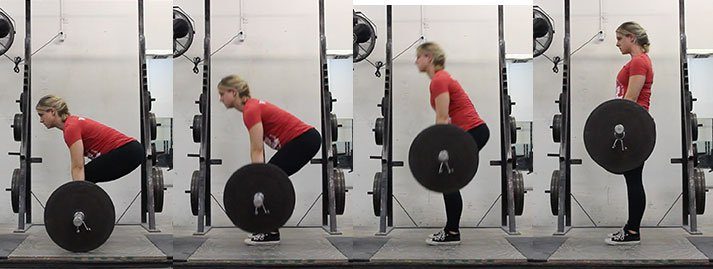

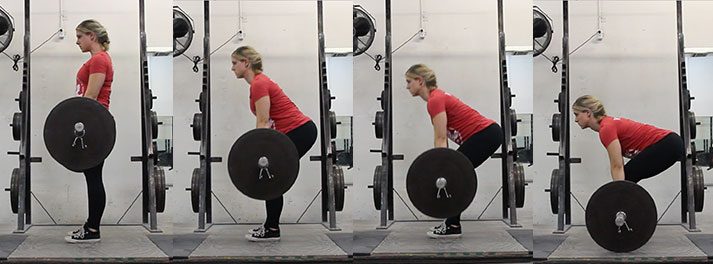
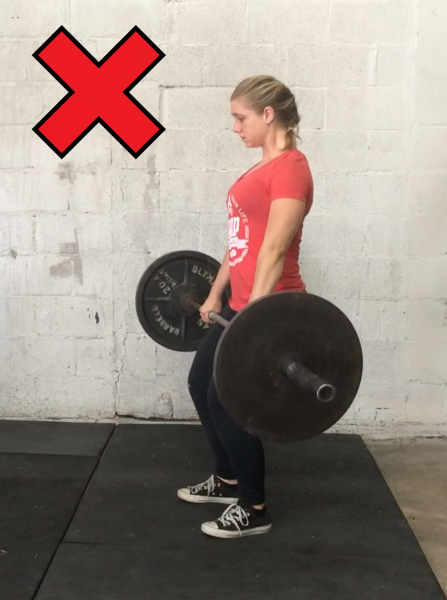
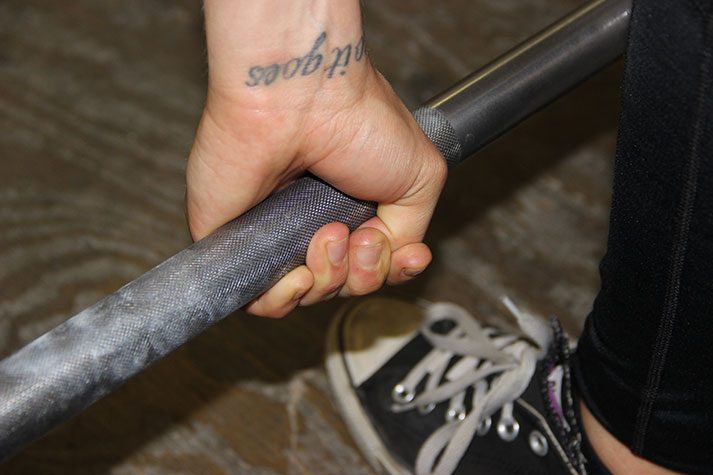
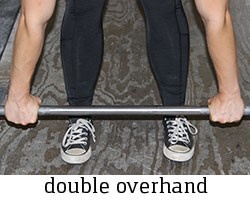
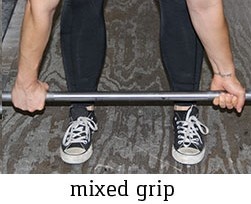
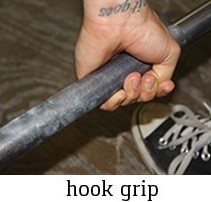
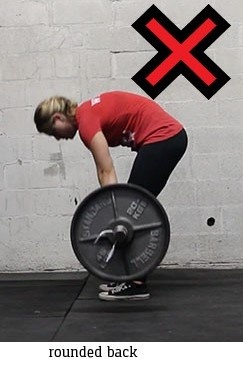
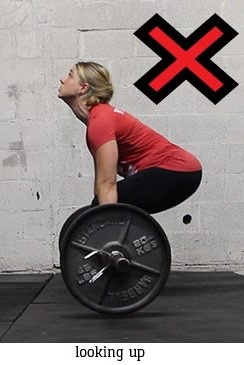
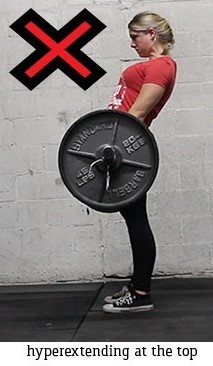
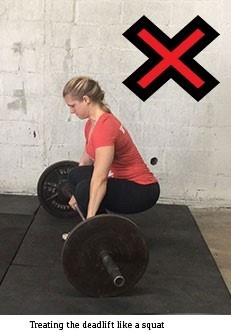
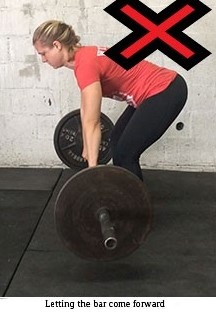
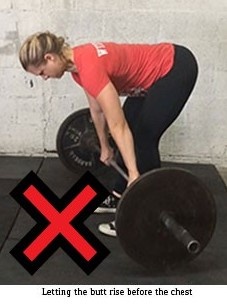
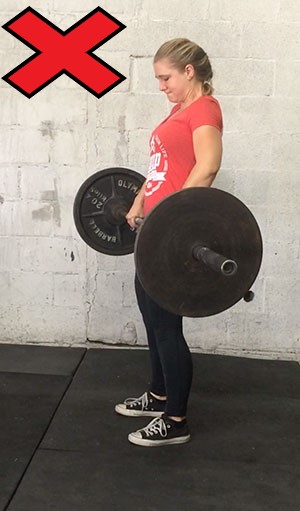
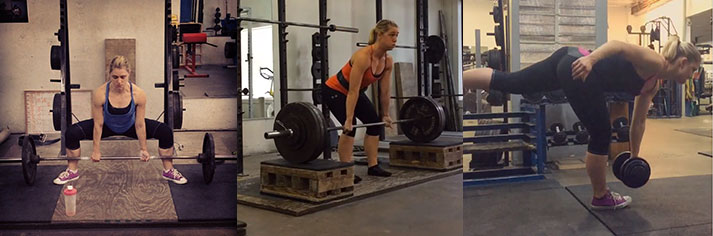
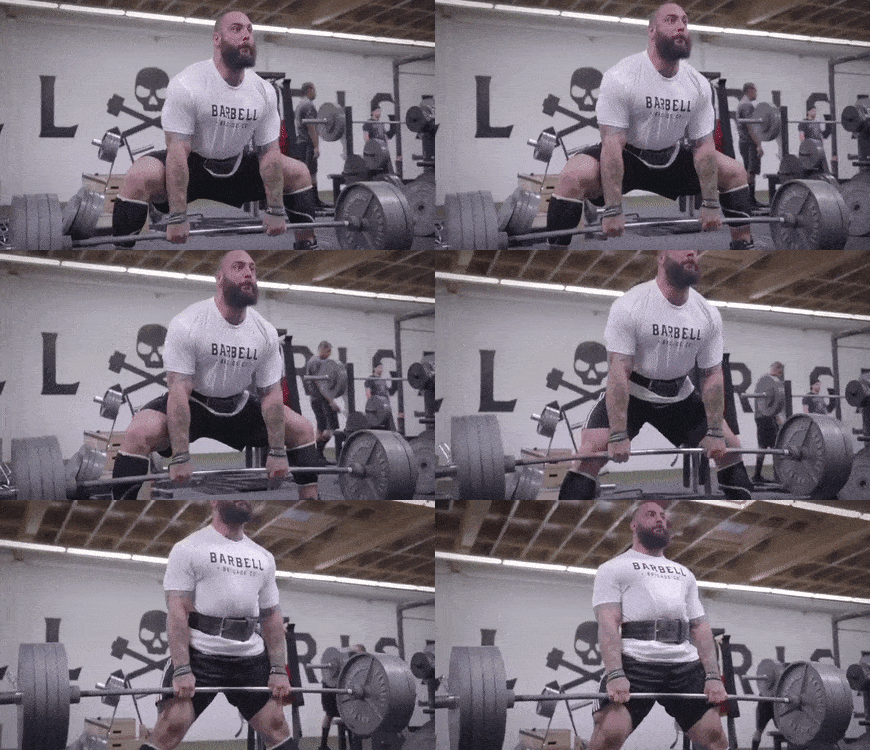

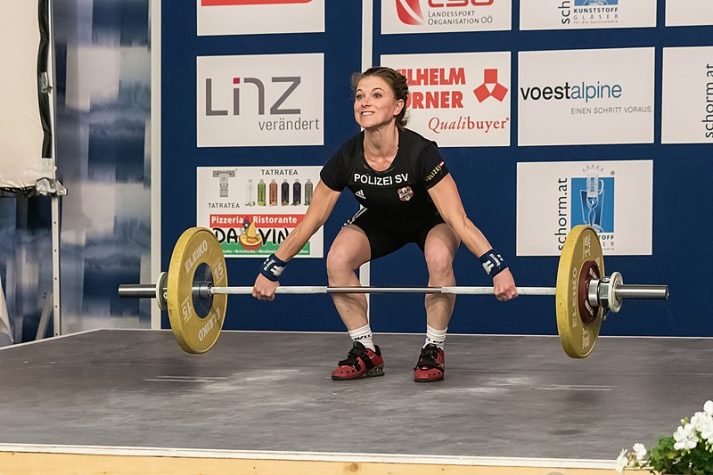
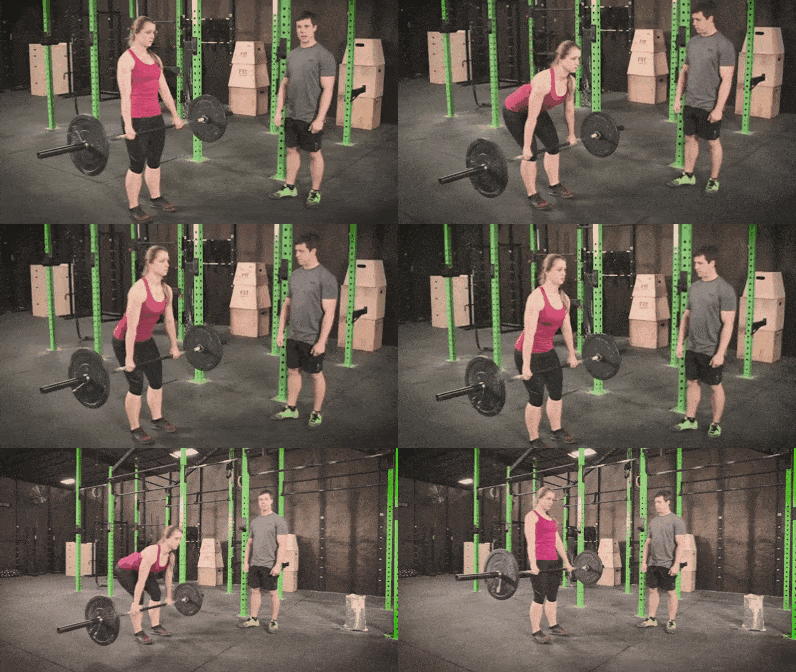
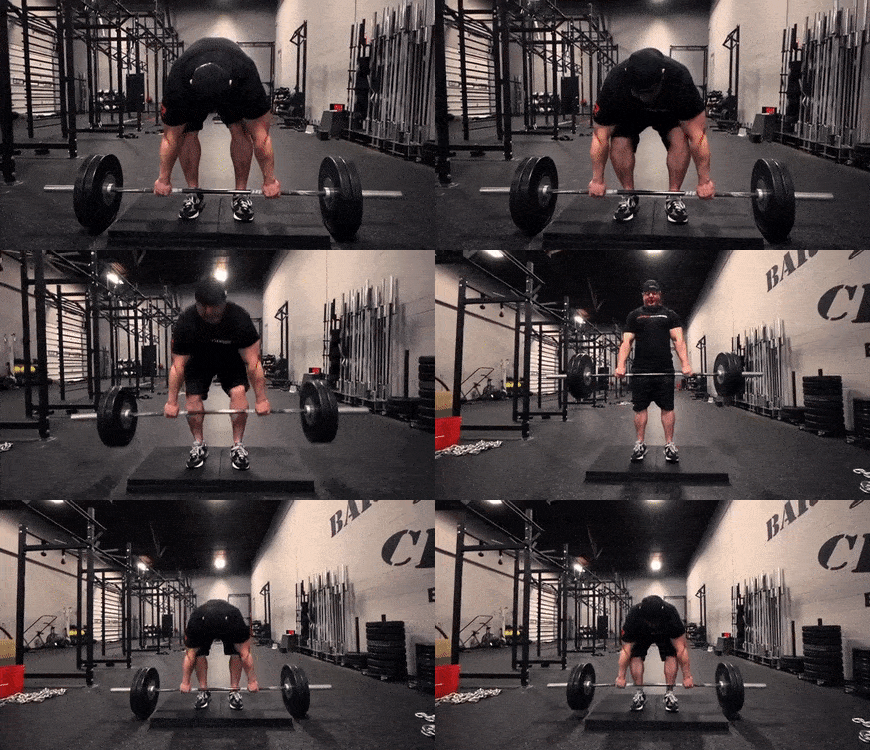
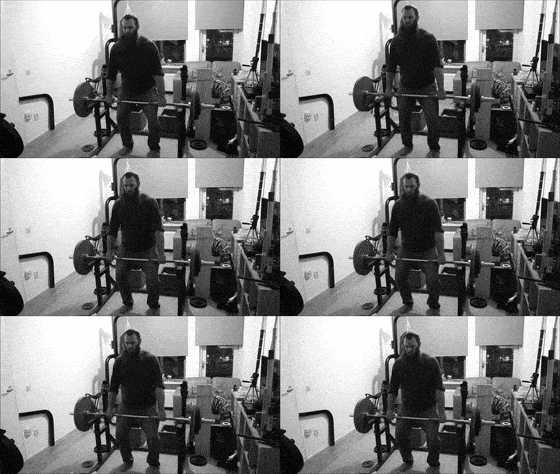
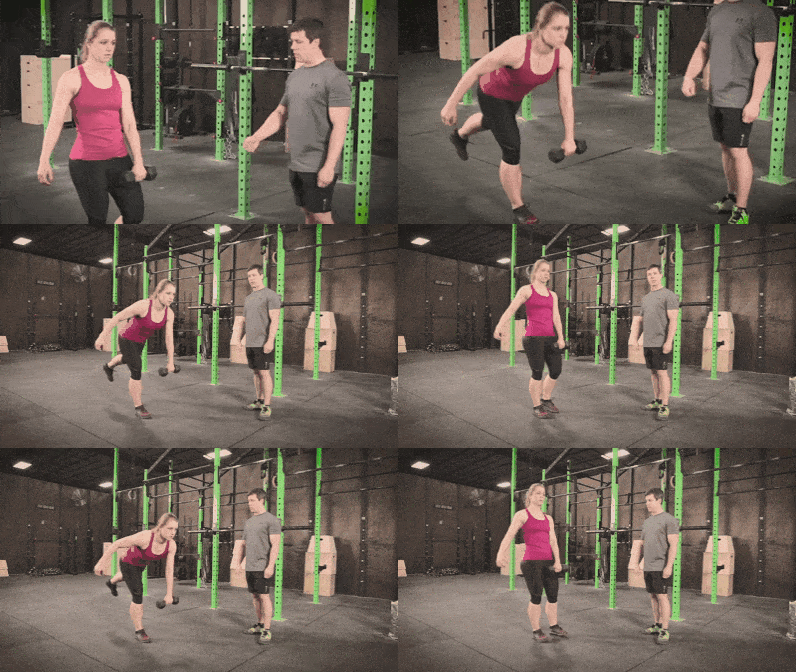
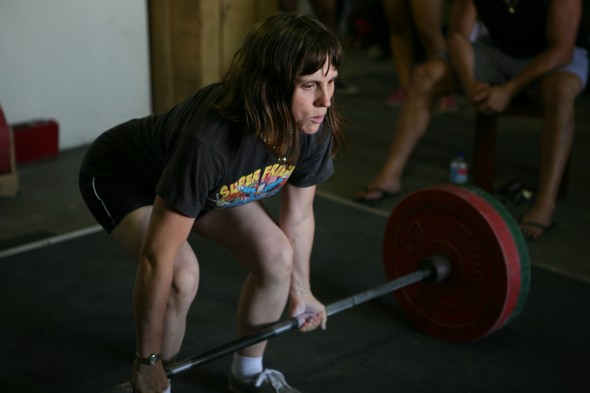
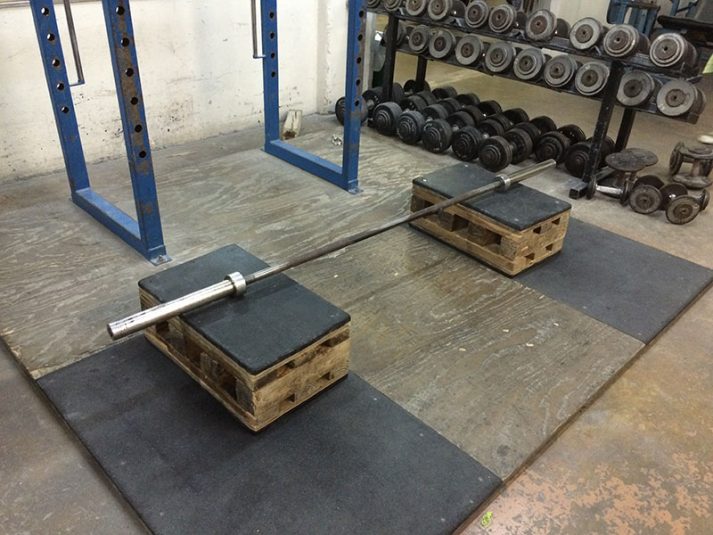
 I am so excited for you to start deadlifting, because it’s the ultimate physical AND mental exercise.