After the last couple of years, your stress level may have quadrupled.
If you find yourself responding by “stress eating,” know that you are not alone.
One of the top issues faced by clients in our 1-on-1 Online Coaching Program is emotional or stress eating. And yep, the global pandemic only made it worse.
Today, we’re going to show you exactly how we address emotional eating with our clients, including when it’s – GASP – actually okay to stress eat.
Justin covers three important lessons I want to highlight, but before we do that, we should ask ourselves a question:
“What exactly is stress eating?”
Stress eating is consuming food in response to negative emotions like fear, anger, or sadness.
When we stress eat, food is being used to solve a problem. Now, unless we’re actually hungry, it’s likely a problem that food itself isn’t meant to solve.
That’s stress or emotional eating.
Here’s what compounds the whole problem:stress eating itself can make us feel guilty. We often feel terrible once our spoon hits the bottom of the pint of ice cream.
This can drive more negative emotions, which can trigger even MORE stress eating.
And the pattern continues.
We’ll talk about ways to break this cycle in a moment, but before we do, we need to create some tools to identify it in the first place.
What Causes Stress Eating? (Lesson #1: Playing Detective)
You may have been surprised in our video above when Coach Justin gives permission to stress eat.
Counterintuitive and seemingly counterproductive, I know. But this is going to be important for two reasons.
How to Approach Stress Eating:
Step #1: we need to curb the guilty feelings about stress or emotional eating.
I started this guide off by highlighting the frequency of stress eating amongst our Online Coaching clients.
You are not the only one struggling with this.
Most humans do.
And robots with human-like emotions and taste buds
We’ll come back to this idea again, because ending the shame of emotional eating will be critical for moving forward.
Step #2: allowing ourselves to stress eat will help us learn why we do it.
We’re going to be playing detective here, to see if we can piece apart your actions and routines.
At the end of the day, our lives are a cumulation of habits. Stress eating is one such habit.
So let’s learn about it!
To do so, we’re gonna record some Emotional Eating Notes.
During an episode of stress eating, it’s important to ask:
What am I doing?
What am I feeling? (Both physically and emotionally)
What am I thinking about?
What time is it?
Where am I?
Who am I with?
Also, gauging these at different times can be helpful too.
How is your stress looking:
An hour or two before the eating episode?
Right before it?
During it?
Right after it?
The purpose of theseEmotional Eating Notes?
To look for patterns!
Perhaps you’ll notice some of the following:
“After my recent Tuesday morning conference call, when I got grilled by my company’s leadership, I grabbed some chocolate chip cookies. This happened the week before too.”
“Around 2pm, when I get the ‘afternoon slumps,’ I normally grab a Coca-Cola. This little boost gets me through the end of the day. This is almost a daily practice.”
“Last Sunday evening, when thinking about the start of the workweek, I had a couple glasses of wine. When looking back at my notes, this takes place at the end of most weekends.”
We’re looking for patterns to help us understand what drives our stress eating.
The most important thing about this process: withholding judgment.
We’re looking at our notes for clues into our psyche. Whatever we captured is okay.
If you order pizza every Thursday after talking with your overbearing mom (of course, she means well), step one is to recognize it.
Oftentimes, this awareness step alone can help shift behavior. “Oh, I’m reaching for a beer like I normally do after ending my workday. Typical Me.”
After creating some notes on what spurs our emotional eating, it’s time to think about some alternatives for coping with stress.
How Do I Stop Mindless Eating? (Lesson #2: The Stress Response Menu)
After documenting what sets off our stress eating, we need to formulate a plan on what to do when our anxiety rises.
That means it’s time to build…a Stress Response Menu!
Our Stress Response Menu will be a list of actions or activities you can do to de-stress outside of eating.
Ideally, you’ll do them before an eating episode, but they can be done during or after the fact too.
In other words, if you only realized you were stress eating when your hand reaches the bottom of the Doritos bag, no problem, you can do your stress response activity right then.
The purpose of the Stress Response Menu is to reward yourself with a small moment of self-love, whenever your anxiety levels are too much.
Examples for a Stress Response Menu:
Close your eyes and take five deep breaths (Coach Justin’s go-to move)
Just make sure it’s something you won’t dread doing.
A combination of a “de-stressor” and a “reward.”
This is important, as Coach Justin mentions that many of his clients only reward themselves with food. The self-love they practice only takes place in the kitchen.
Our menu above will help us develop some more options, not solely based on food.
To make the most of your Stress Response Menu:
#1) Make the activities short and easy.
You should feel confident that you can do every item on your list. So avoid activities that will take longer than 10 minutes to complete.
If you’re going to journal when stressed, keep your diary open on your work desk.
If you’re going to drink water before any emotional eating, keep your full glass near you.
If you’re going to take a short walk, keep your kicks near the door.
Don’t set yourself up for failure by picking overly complicated or burdensome activities.
#2) Place your Stress Response Menu somewhere visible.
Once you make your list, print it out and place it in your kitchen or pantry (or wherever you typically stress eat).
You could also write out a couple of your favorite activities and attach them to your refrigerator.
If it’s right in front of you, it’ll be harder to ignore (however, it’s okay to ignore it from time to time, as we aren’t striving for perfection).
Just please don’t write it and then stick the list in the junk drawer that opens to another dimension.
You never can find anything in that drawer.
#3)Track your usage of the Stress Response Menu.
This will help us in two ways:
First, by tracking your usage, you’ll start to feel better about using the SRM. You’ll see an accumulation of all the times you successfully deployed a stress response, helping you visualize the momentum you’re building.
Second, the data will help you understand your patterns of emotional eating. Maybe five deep breaths steered you away from ice cream but the large glass of water did not. You can then use this information to update and revise your response plan.
For the first point, Coach Justin has his clients keep a “Jar of Awesome.”
Every time they have a small win in the day, like taking five deep breaths instead of chugging soda, they place a marble or small token in a jar. After a while, the jar will have a decent amount of marbles or “small wins” in it.
This will then stand as a visual reminder of all the progress being made, proof of their ongoing wins.
How Common Is Stress Eating? (Lesson #3: Learning Self-Compassion)
The American Psychological Association has found that about a third of Americans respond to stress with food.[1]
This research was done BEFORE our global pandemic.
So if you find yourself binging in response to the stress of our global pandemic, know that you are not alone here.
Our coaching clients, and the NF Coaches themselves, have all found themselves turning to food and alcohol for comfort during quarantine.
Heck, recently I mindlessly devoured an entire tub of Animal Crackers too. It was only when the bag was gone did I understand what just happened.
Many of us, even fitness “experts,” are prone to stress eating.
Now, don’t take this as a free pass to stress eat.
If the behavior goes against your goals, it’s something we want to work towards improving.
But there’s a reason they call it “comfort food.” Food can often be used to make us happier, pandemic or no-pandemic.
At the end of the day, we’re all emotional bags of meat on this floating hunk of space rock, and we’re doing the best we can.
Give yourself a bit of a break, my friend.
You’re here, you’re reading, and you’re trying. That’s great!
This will bring me to my last point with our handy guide:
Is It Okay to Stress Eat? (Next Steps)
There are times when food is the perfect response to stress.
It’s something Coach Justin mentions in his video.
“Stress eating” might be appropriate if:
After a long workday, a glass of wine with cheese helps you unwind.
To celebrate the coming of the weekend, you have an ice cream party on Friday night.
The week already seems long, and it just started, “Taco Tuesday” might help you survive until Friday.
The important thing here?
“We are making a choice.”
We are choosing to deal with stress or anxiety with food. By making it an intentional activity, we can remove the guilt around emotional eating.
Food can be fine as a reward, as long as it’s us controlling the behavior, and not the food itself.
In addition, if we can recognize the action (or plan for it), we can then adjust our calories before and after and not go off the rails.
If it seems like you aren’t quite there yet, start with your Emotional Eating Notes and your Stress Response Menu.
Even just the process of taking notes on specific episodes of stress eating may be enough to slow down the behavior.
Remember, no matter what happens:
You are not a bad person if you stress eat.
You are not a bad person if you forget to take notes.
You are not a bad person if you ignore your Stress Response Menu.
You are not a bad person (unless you’re a Death Eater, but come on, you know what side you’re on).
If you need any help along the way, we are here for you.
We have three specific paths to continue with Nerd Fitness:
#1) Our Online Coaching program: a coaching program for busy people to help them make better food choices, stay accountable, and get healthier, permanently.
As I said before, “stress eating” is the number one issued faced by our coaching clients, so we know exactly how to help recognize and address the habit.
You can schedule a free call with our team so we can get to know you and see if our coaching program is right for you:
#2) If you want an exact blueprint leveling up your nutrition, check out Nerd Fitness Journey! Our fun habit-building app helps you exercise more frequently, eat healthier, and level up your life (literally).
If you follow our Mindset missions, you’ll learn to de-stress while earning XP! Sah-weeeet.
Try your free trial right here:
#3) Join the Rebellion! We need good people like you in our community, the Nerd Fitness Rebellion.
Sign up in the box below to enlist and get our Rebel Starter Kit, which includes all of our “work out at home” guides, the Nerd Fitness Diet Cheat Sheet, and much more!
Get your Nerd Fitness Starter Kit
The 15 mistakes you don’t want to make.
Full guide to the most effective diet and why it works.
Complete and track your first workout today, no gym required.
Alright, I want to hear from you:
Have you been stress eating more over the last year?
Do you have any tips or tricks to interrupt the pattern?
Today we’re going to tell you exactly how to restart your fitness journey.
Whether this is the first time you’ve had to “respawn” or the 50th, you’re in the right place.
We help folks restart their exercise or nutrition routines as part of our 1-on-1 Online Coaching Program…and we’re really freaking good at it! Today, we’ll share with you the same strategies we deploy with them.
Look at your list: this is a combination of variables that don’t work for your lifestyle.
IMPORTANT POINT: Learning from the millions of people that have come through Nerd Fitness over the past decade, my guess is that your experiment didn’t work out for one of two reasons:
#1) Your goals were too vague:
“I should exercise more this year” – For how long? How often? What kind of exercise?
#2) You tried to change ALL the things:
Eat 1,800 calories a day – instead of your normal 3,000.
Go running 5 days a week – when you don’t exercise at all now.
Get 8 hours of sleep a night – when a normal night is 5.
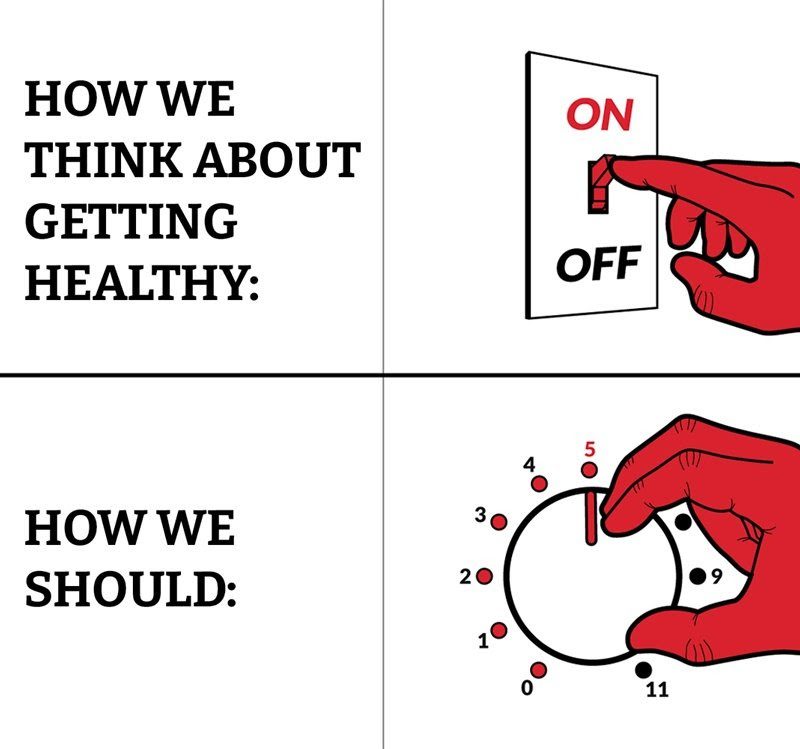
So instead of turning your Fitness Switch “Off” from this unrealistic pace, maybe you just turn it down to a “5” so you can keep going:
STEP 3: CHANGE A VARIABLE IN YOUR EXPERIMENT
You’re reading this guide, which would lead me to believe you’re interested in trying again to lose weight and get in shape.
To avoid getting the same results, we need to change the variables in the experiment to try and get different results.
You know…
For your next attempt consider adjusting one of the following variables.
Remember, any good experiment has accurate measurements for their changing factors! You don’t just put “some uranium” in a nuclear reactor. You know the exact amount.
We need to be exact with your variables.
Let me give you some suggestions:
#1) Change the exercise variable:
Did you actually enjoy the exercise you attempted? If you discovered that you hate running, great! Never do that again. “Exercise sucks,” so I would pick something you actually enjoy.
#2) Try a substitution rather than addition:
ADDING a brand new exercise routine into a busy schedule can be really challenging. Fortunately, you can focus on substituting or adding in a way that doesn’t take up more time: nutrition! How you eat is 80-90% of the weight-loss equation, and you’re already eating every day. So focus on substituting a vegetable for fries once a week, or swapping sparkling water for soda. You can also keep a food journal and change up your breakfast twice a week.
#3) Adjust your “win scenario”:
I get it. You were able to train in your home gym for the first few weeks of this year, going for at least an hour.
But THEN…work got busy. And you only had 30 minutes, which wasn’t enough time to get through your workout. So why not set the win scenario at “30 minutes,” or “15 minutes,” or just “1 exercise”? Lower the bar!
This is a 10-year journey we’re on here, so the exercise itself is not nearly as important as building a routine of working out that fits into your life. Lower the bar for what a “win” scenario is.
Example: if you roll out your yoga mat for 1 set of 1 exercise, it counts as a win. Doesn’t matter if did a full hour workout or just a 5 minute set of push-ups.
It all counts.
Remember, we just don’t want your Fitness Dial hitting “0.”
STEP 4: RESPAWN, GET BACK IN THE FIGHT
When you play a challenging video game, you’re going to die. A lot. (I died literally thousands when playing Hollow Knight, one of my favorite games in recent memory).
What happens after you die in a game?
You respawn, and try again!
You’ve learned a new tactic or pattern. You have a new technique. You’ve uncovered a secret. Or you’ve just gotten better. So you try, again.
And again.
And again.
And when you finally succeed?
Nirvana. Adulation. Pure joy.
There’s no shame in failing when it comes to weight loss. We have hundreds of stories of people who kept failing, but kept reading and trying, and then finally – something clicked.
Focus on building the routine by making the ‘win scenario’ super small.
Write down your plan, and start executing.
STEP 5: SUPERCHARGE YOUR RESULTS
I know hacking your experiments to get better data isn’t exactly “scientifically smart” or “morally responsible,” but I’m the one writing this guide and I have more important stuff to say. So you’re just gonna have to deal with it.
Once you start your new experiment, here’s how you can stack the deck in your favor:
#1) Write everything down. Write down your workouts. Write down what you eat. Treat it like a science experiment, and you’re collecting data! Plan ahead. Be PRO-active (“I will do Strength Training Workout A at 4pm and tonight I’ll have roasted chicken and bacon-wrapped asparagus) instead of RE-active (“What should I do for exercise right now?” and “Ah, what’s for dinner? Oooh, Burger King!”)
Coach Staci provides some additional tips in the video How a Journal Can Help Us Make Our Goals:
#2) Recruit allies to your team. Don’t go this alone, as you’re more likely to succeed based on the people you spend time with and hang around. So recruit allies. Start spending more time with healthy people that empower you (even virtually), rather than unhealthy people that enable you and drag you down. Join a running group online. Find a lifting “accountabilibuddy,” or someone you can check in with.
#3) Hire a professional.
There are two types of coaches worth the investment:
An in-person trainer if you are looking to supercharge your form on specific exercises like Olympic lifts, squats, deadlifts, etc. An in-person trainer can be good for people that need the accountability of somebody they’ve paid to meet them in the gym. Although to be honest, with the ongoing pandemic, gym availability and safety can be hit or miss.
An online coach that represents mobile, worldwide accountability. I’ve had a coach for 7A years and it’s changed my life. Knowing that I have a workout and nutrition strategy to follow each day is game-changing.
As Coach Matt explains below, sometimes “outsourcing” help can be a real game-changer when trying to get in shape (or back in shape):
GET BACK IN THE FIGHT
An old mandrill named Rafiki once taught me: “Yes, the past can hurt. But you can either run from it, or learn from it.”
Okay maybe he taught that to Simba in The Lion King, but I too learned the same lesson:
TO RECAP:
#1) Forgive yourself. You wouldn’t talk to somebody else the way you talk to yourself. So have some freaking compassion! You’re trying.
#2) Identify what experiment you JUST tried. Write down what you believe went wrong over the past few weeks. Congrats – you found a strategy that doesn’t work.
#3) Pick a new path, try a different variable. A good scientist meticulously tracks their data and writes down their hypothesis. I would change one of the following:
Nutrition: change less. If you couldn’t stick with a diet for 3 weeks, it was too restrictive. Try a different path. For help, check out our Guide to Healthy Eating. It’s designed to build on one small tiny improvement over time.
Win scenario: don’t let “perfect” be the enemy of “good.”
#4) And then try again.
Oh, and for #5 (“Supercharge your results”), I have two perfect ways to help you respawn today:
A) If you want step-by-step guidance on how to lose weight, eat better, and get stronger, check out our killer 1-on-1 coaching program.
Many of our clients kept respawning for years, and it was only when working with a trained professional that they finally learned how to maintain progress.
B) If you want an exact blueprint for getting in shape, check out NF Journey. Our fun habit-building app helps you exercise more frequently, eat healthier, and level up your life (literally).
Plus, there’s a nice shiny button you can press so you can respawn in our app whenever you want! No judgement, restart whenever.
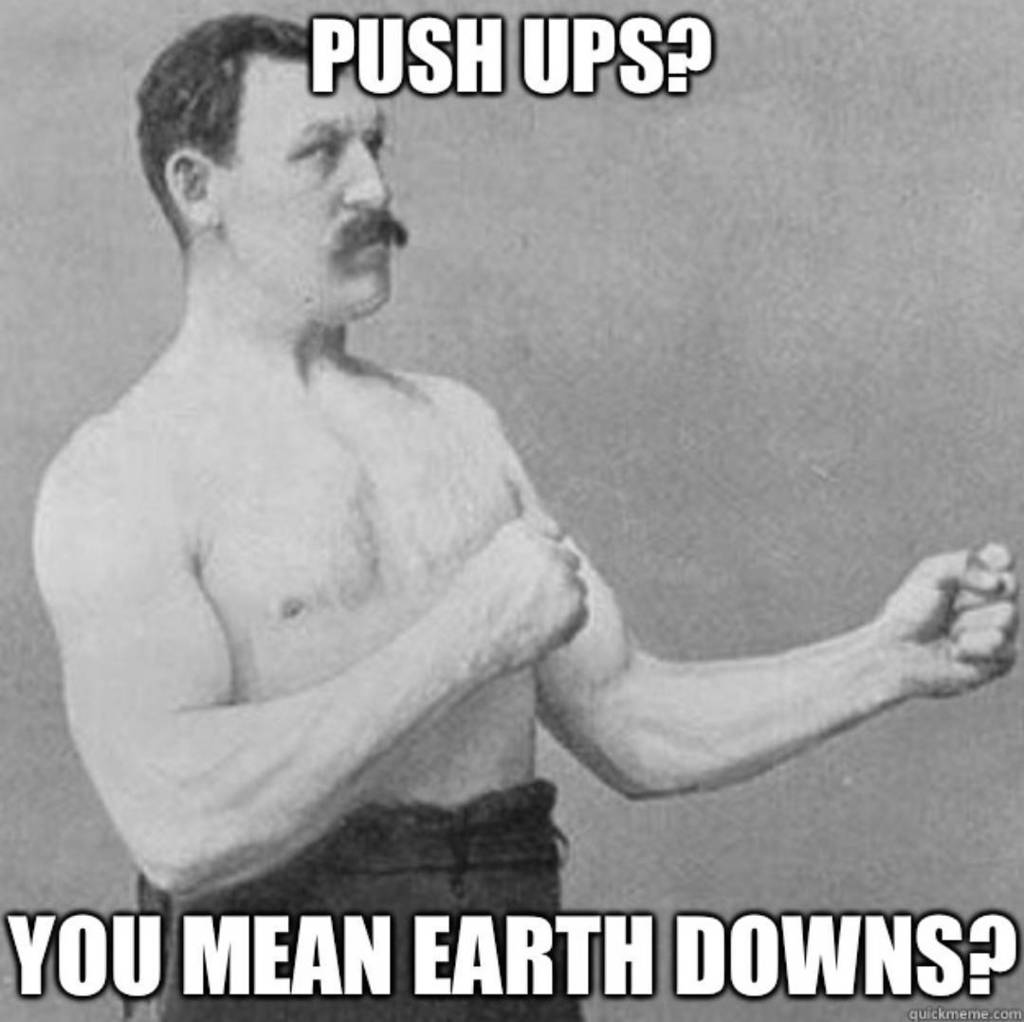
Follow our guide and you’ll be doing “Earth Downs” in no time:
Let’s get started.
What’s the Best Push-up Progression Plan?
As I discuss in the video above, the most important part of your push-up progression plan: consistency.
Yeah, I know, there’s nothing too earth-shattering there.
But no matter what your current strength level is, the best way to work towards a push-up is to train your push muscles consistently. No matter where you’re starting today.
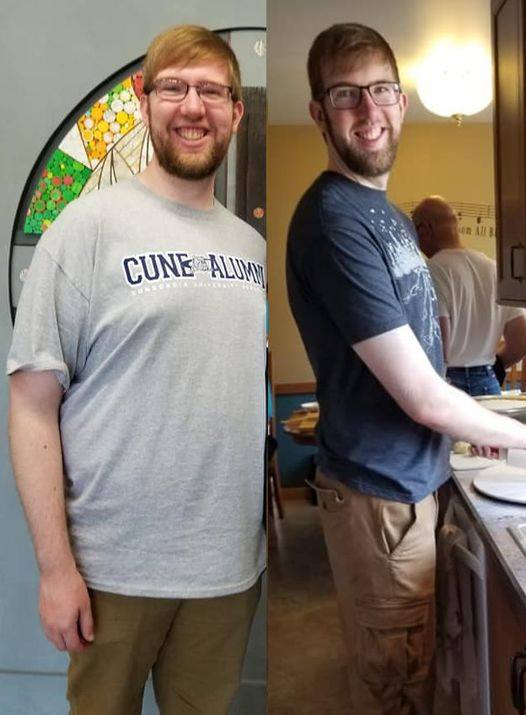
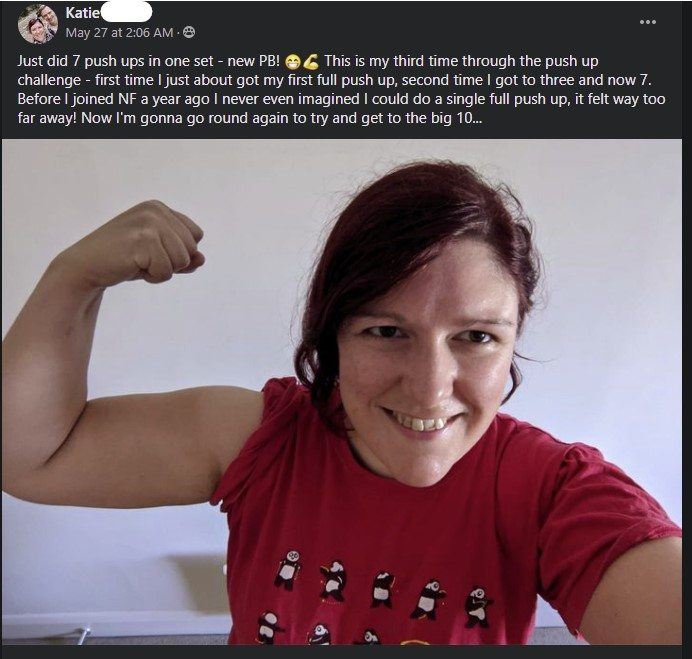
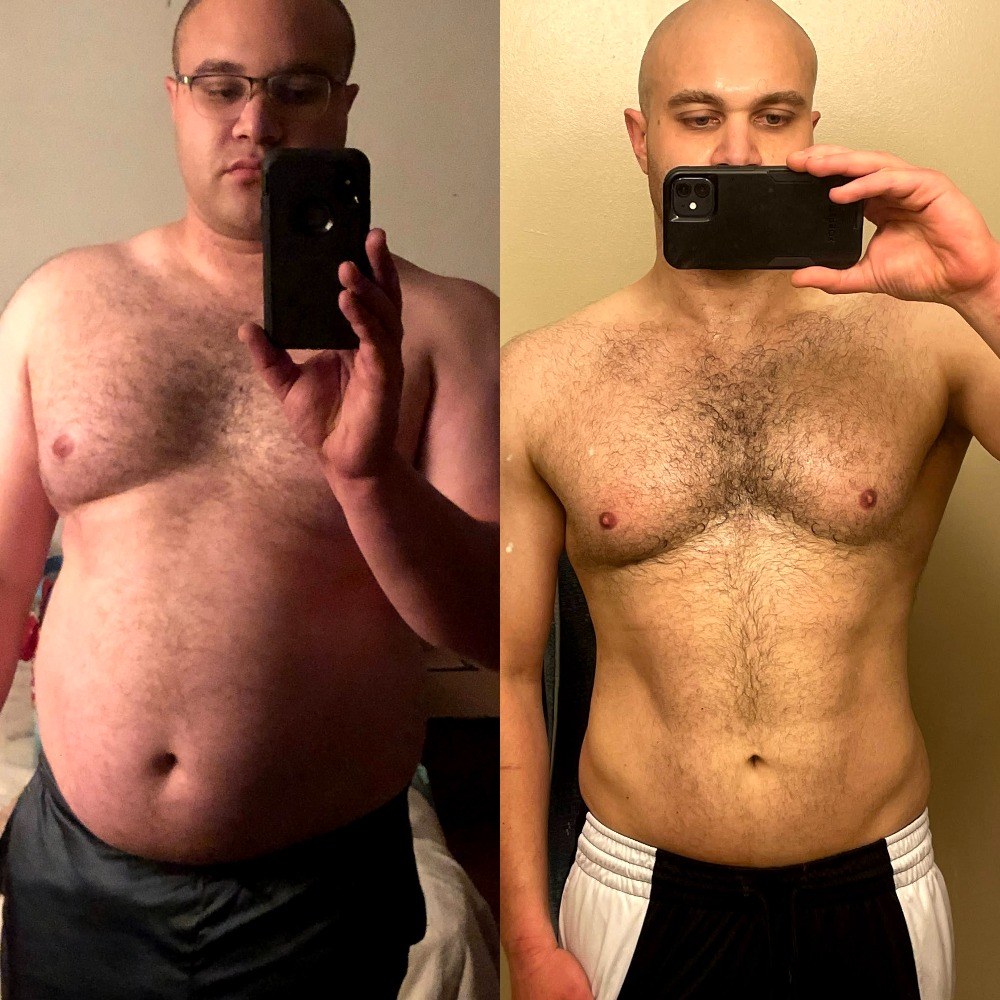
This is how our friend Mason went from wall push-ups to regular push-ups, then all the way to diamond push-ups.
Oh, and he lost like 70 pounds along the way too!
I’ll discuss push-up variations you should start with in the next section. Plus, we’ll wrap up today’s guide by discussing just how often you should train your push muscles.
Just remember, if you want your first push-up (and you should, cause push-ups are awesome), then you’ll need to be consistent with our push-up progression plan.
Cool?
Cool.
Our first stop on the Push-up Progression Plan: finding a push-up variation for you to become comfortable with. Something you can do about 8-10 reps with, for about 3-4 sets.
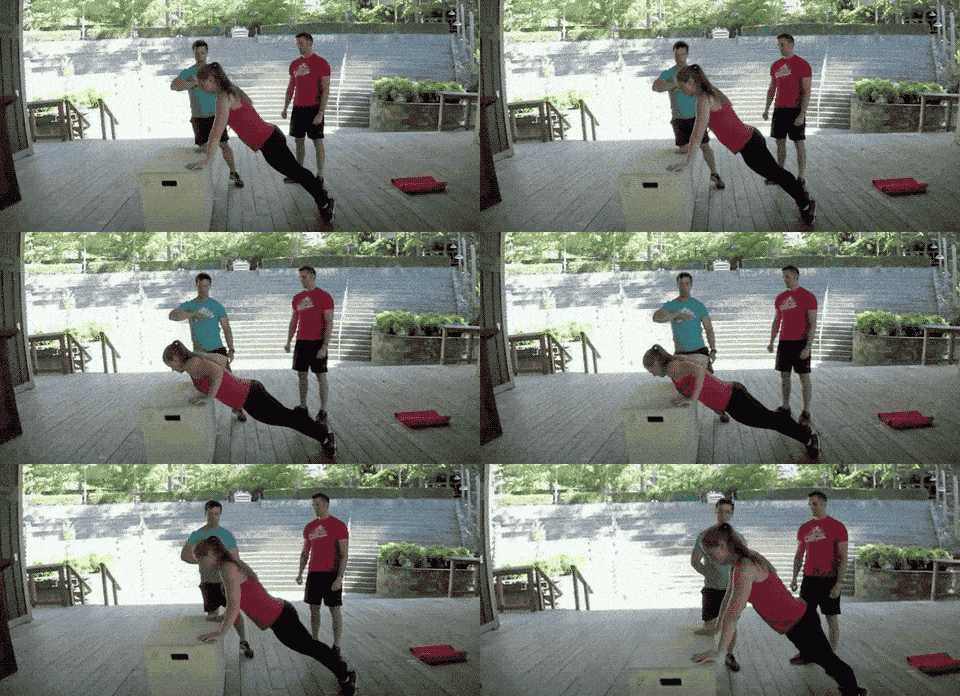
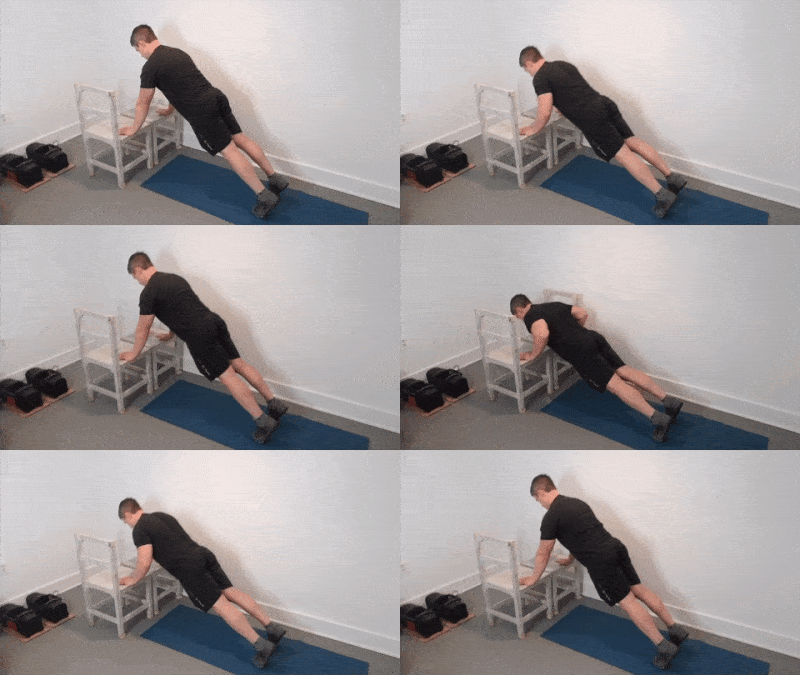
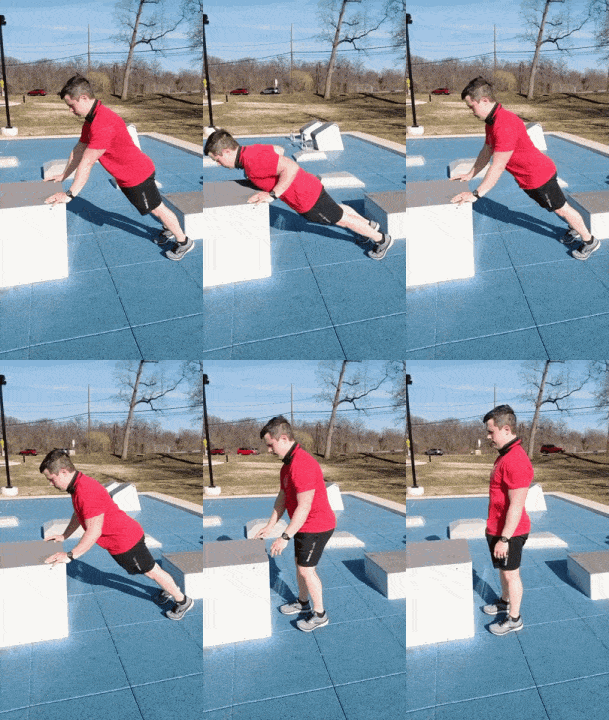
To start, you’ll probably train with an elevated push-up variation:
These will be easier than a regular push-up, since the higher the elevation, the less of your body’s weight you’ll be lifting during the movement.
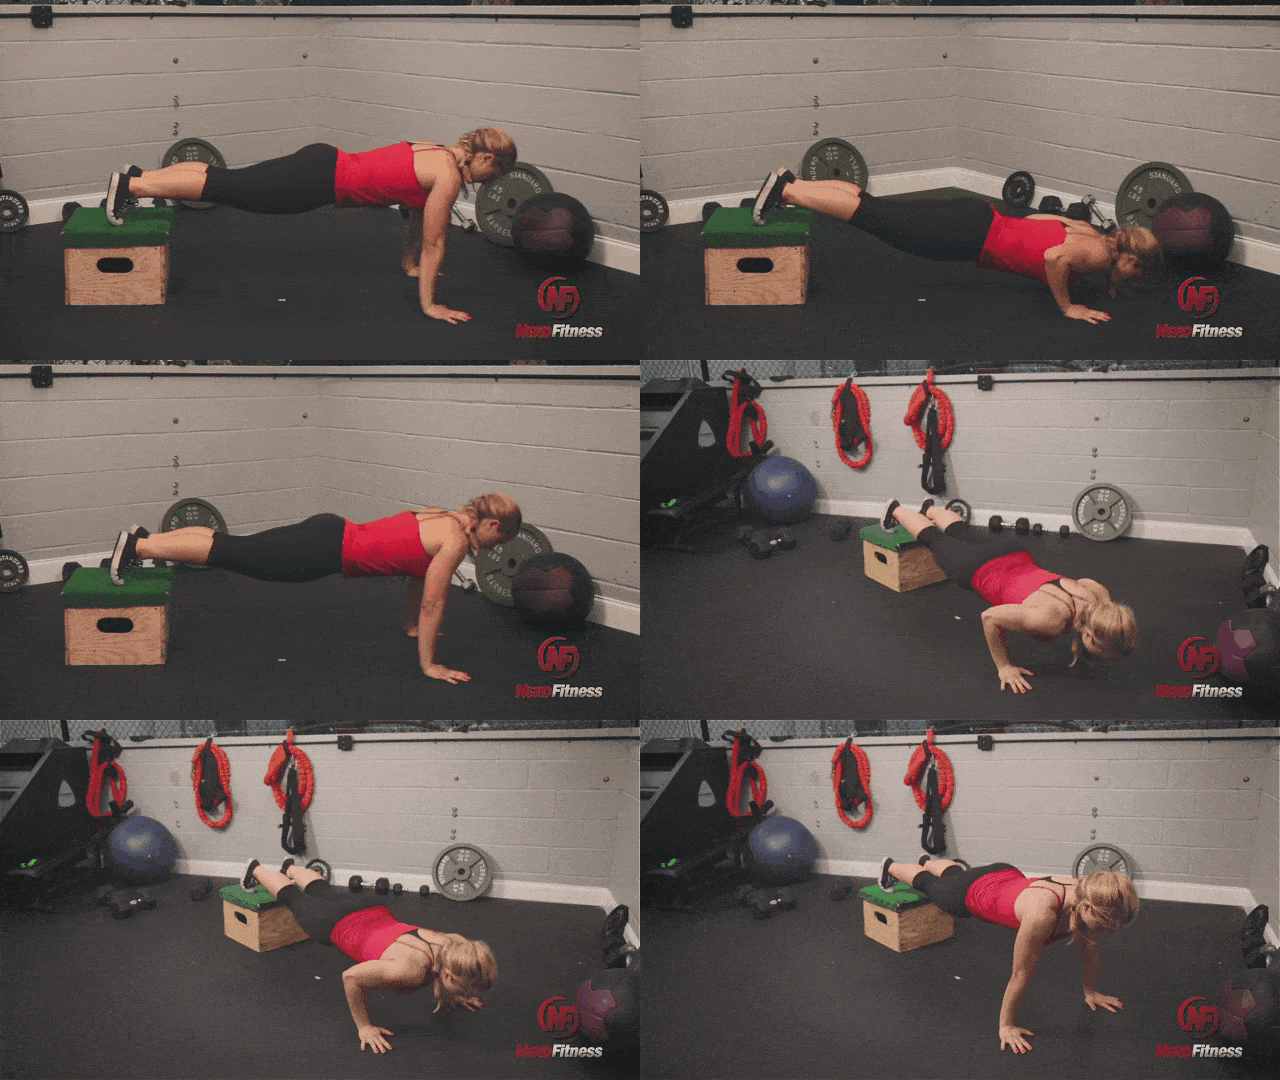
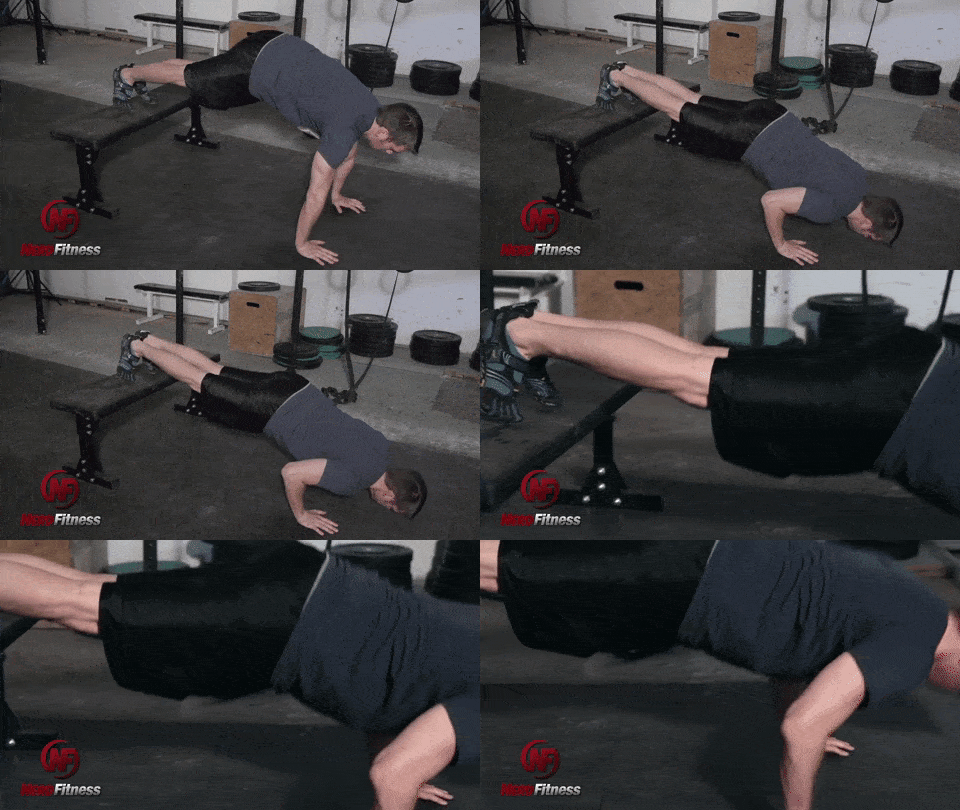
Conversely, if you were to elevate your feet, you’d actually be lifting more than a regular push-up:
Let’s provide a rough breakdown of the percentage of your body’s weight lifted for different elevations of push-ups.[1]
The Percentage of Body Weight Supported by Our Hands During Push-Ups:
4’ Elevated Push-up (Wall): 9%
3′ Elevated Push-up (Countertop): 20%
2′ Elevated Push-up: 36-41%
Knee Push-up: 49%
1′ Elevated Push-up: 54%
Regular Push-up: 64%
The strategy behind our push-up progression plan is to slowly move you down to the ground, lifting more and more of your own weight as you go.
Think of it like gaining XP in a video game, so one day you’ll be able to tackle the final boss: the floor.
It might help to pretend there’s a witch below it.
Alright, let’s show you exactly how to do some of these push-up variations.
4 Push-up Variations (to Progress to a Full Push-Up)
The push-up variations below can be thought of as benchmarks.
If you can’t complete 8-10 reps, nbd.
We’ll have you train at the level below and you’ll move up before you know it.
Here are 4 variations for our Push-up Progression Plan:
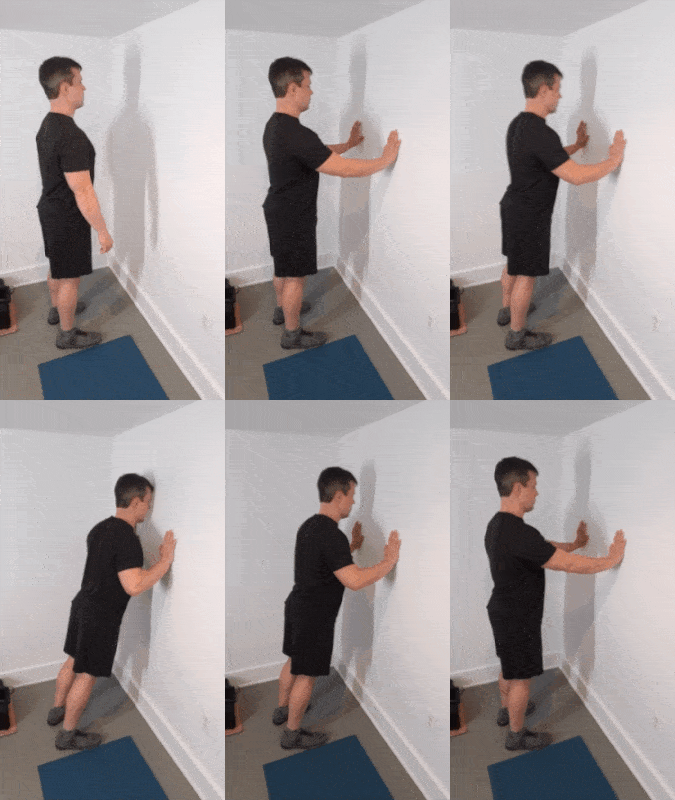
Push-up Progression Level 1: Wall Push-ups
Place your hands on a wall about chest weight (roughly 4′, 48″, or 122 cm). Bend your arms and get as close to the wall before pushing back up.
Push-up Progression Level 2: Waist-High Push-ups
Place your hands on a surface about waist high (roughly 3′, 36″, or 92 cm). Bend your arms and touch your chest to the surface before pushing back up.
Push-up Progression Level 3: Knee-High Push-ups
Place your hands on a surface about knee high (roughly 1.5′, 18″, or 46 cm). Bend your arms and touch your chest to the surface before pushing back up.
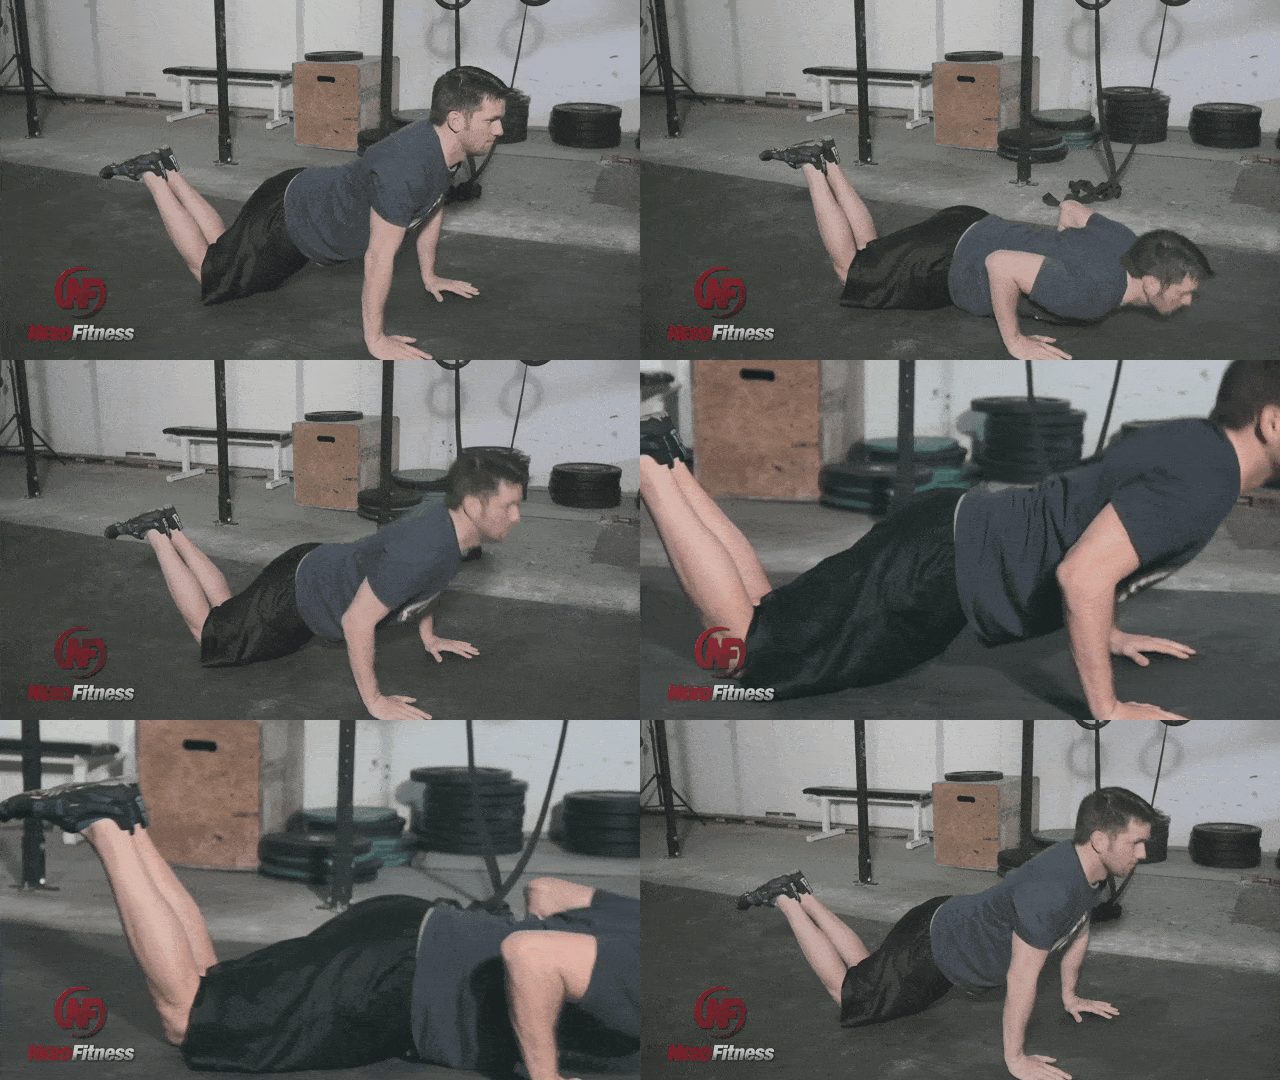
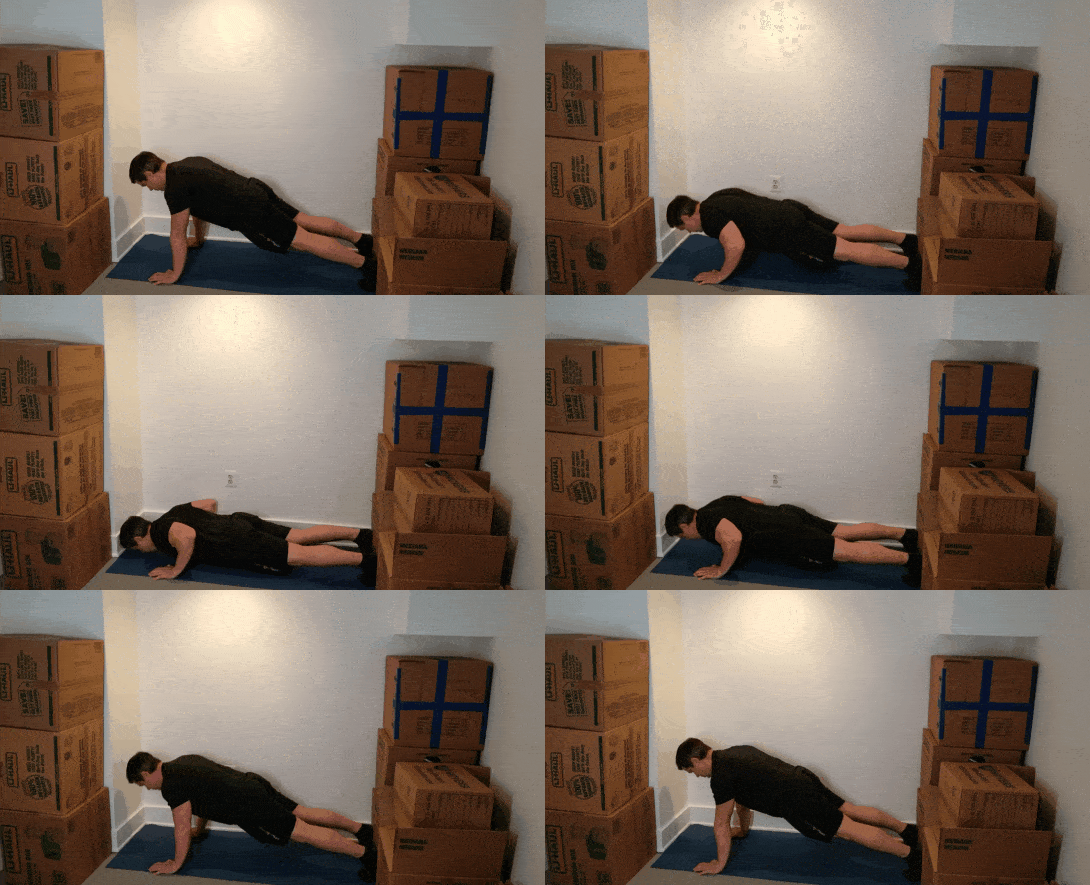
Push-up Progression Level 4: Knee Push-ups
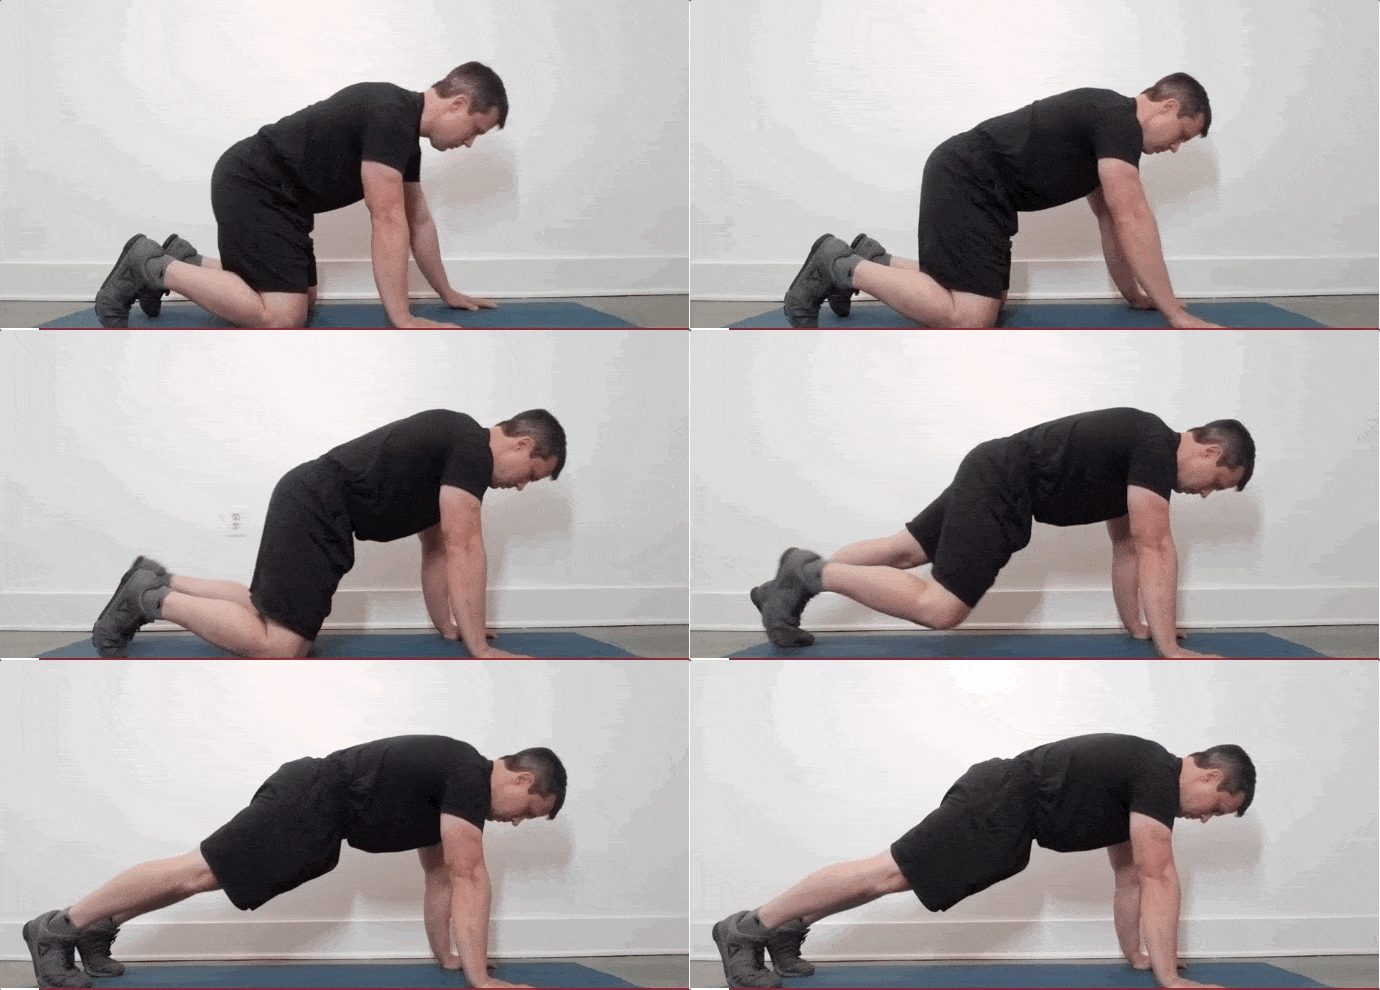
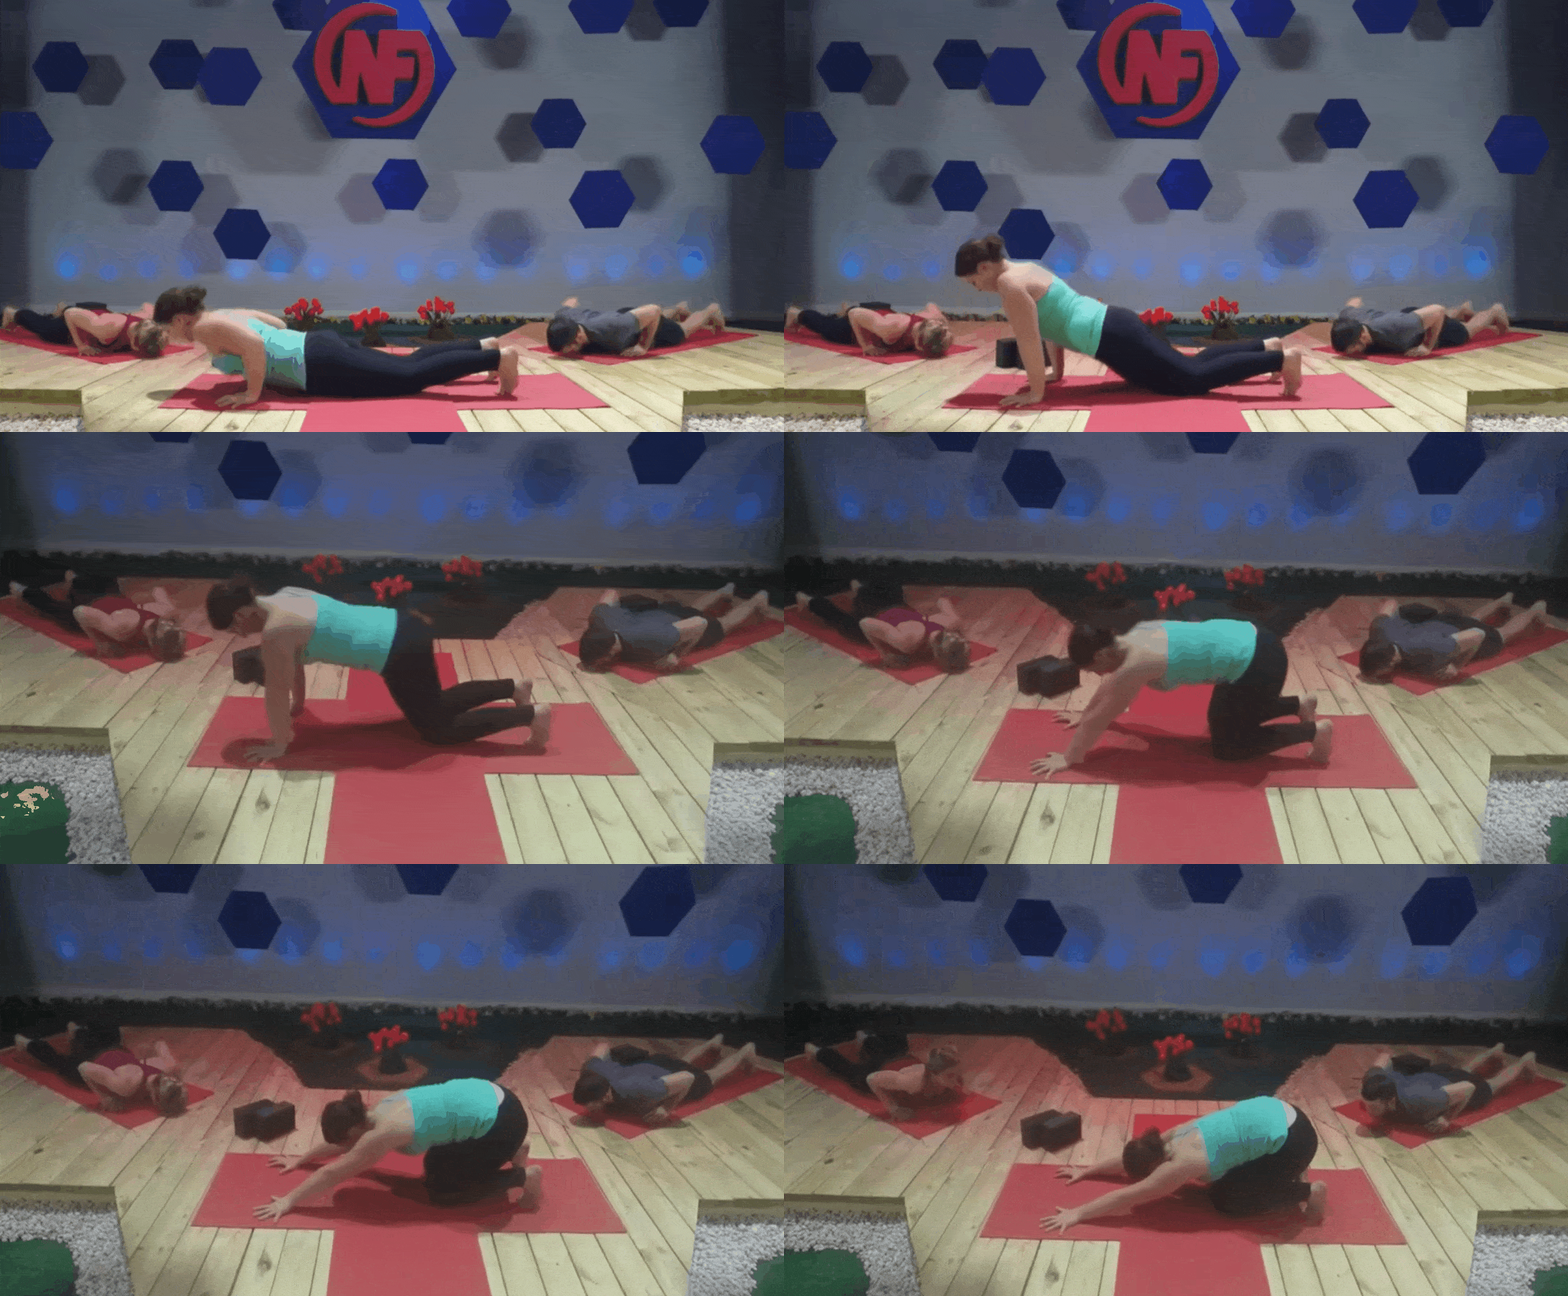
Hold yourself up on your hands and knees, with the body in a straight line from shoulders to knees. Lower down to the ground before pushing back up.
FINAL BOSS: Push-ups!
You made it to a push-up!
Are you doing them correctly?
Our next section will dive into the correct form, since this is a guide on getting your first proper push-up (I wouldn’t hold out on you).
But first, you may be asking yourself a question: when do I progress up to the next level?
For that, I’d recommend downloading our new app (it’s free to try out).
Nerd Fitness Journey will guide you through a workout routine specifically designed to help you get your first push-up, with benchmarks and signals on when to move up.
Plus, you get to earn actual XP so you level up your very own superhero!
You can give it a free test drive right here:
What Is the Proper Form for a Push-Up?
The video above walks you through the correct way to do a proper push-up, and also includes a few well-placed jokes from yours truly.
Here’s how to complete one perfect push-up:
With your arms straight, glutes clenched, and abs braced, steadily lower yourself until your elbows are at a 90-degree angle or less.
Try to keep your elbows relatively close to your body, and keep note of when they start to flare out as you get tired.
Once your chest (or nose/chin) touches the floor (or your arms go down to a 90-degree angle), pause slightly and then push back up until you’re at the starting position.
Here are 4 common mistakes with push-ups:
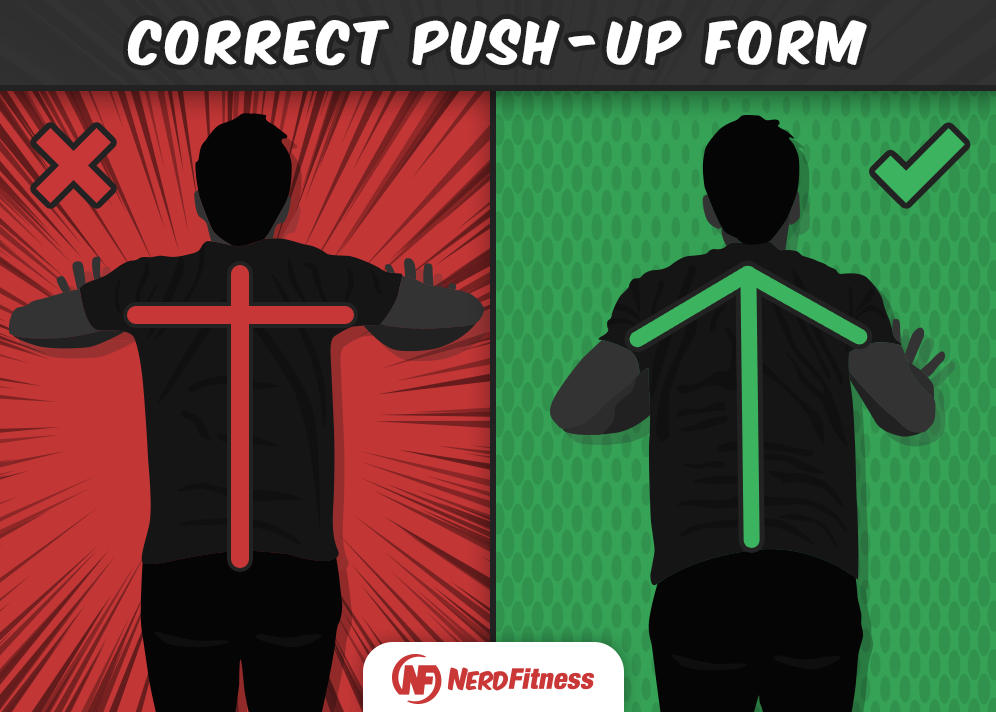
#1) Make sure you keep your elbows in. Often, beginners will flare out their elbows when doing a push-up.
A good way to think of this, is you want your body to appear more like an ARROW from the top, not a T.
This infographic on the proper push-up form shows you want I mean:
#2) Keep your head in line with your body. We don’t want your head shifting forward, which could put unnecessary stress on your neck and prevent a full range of motion.
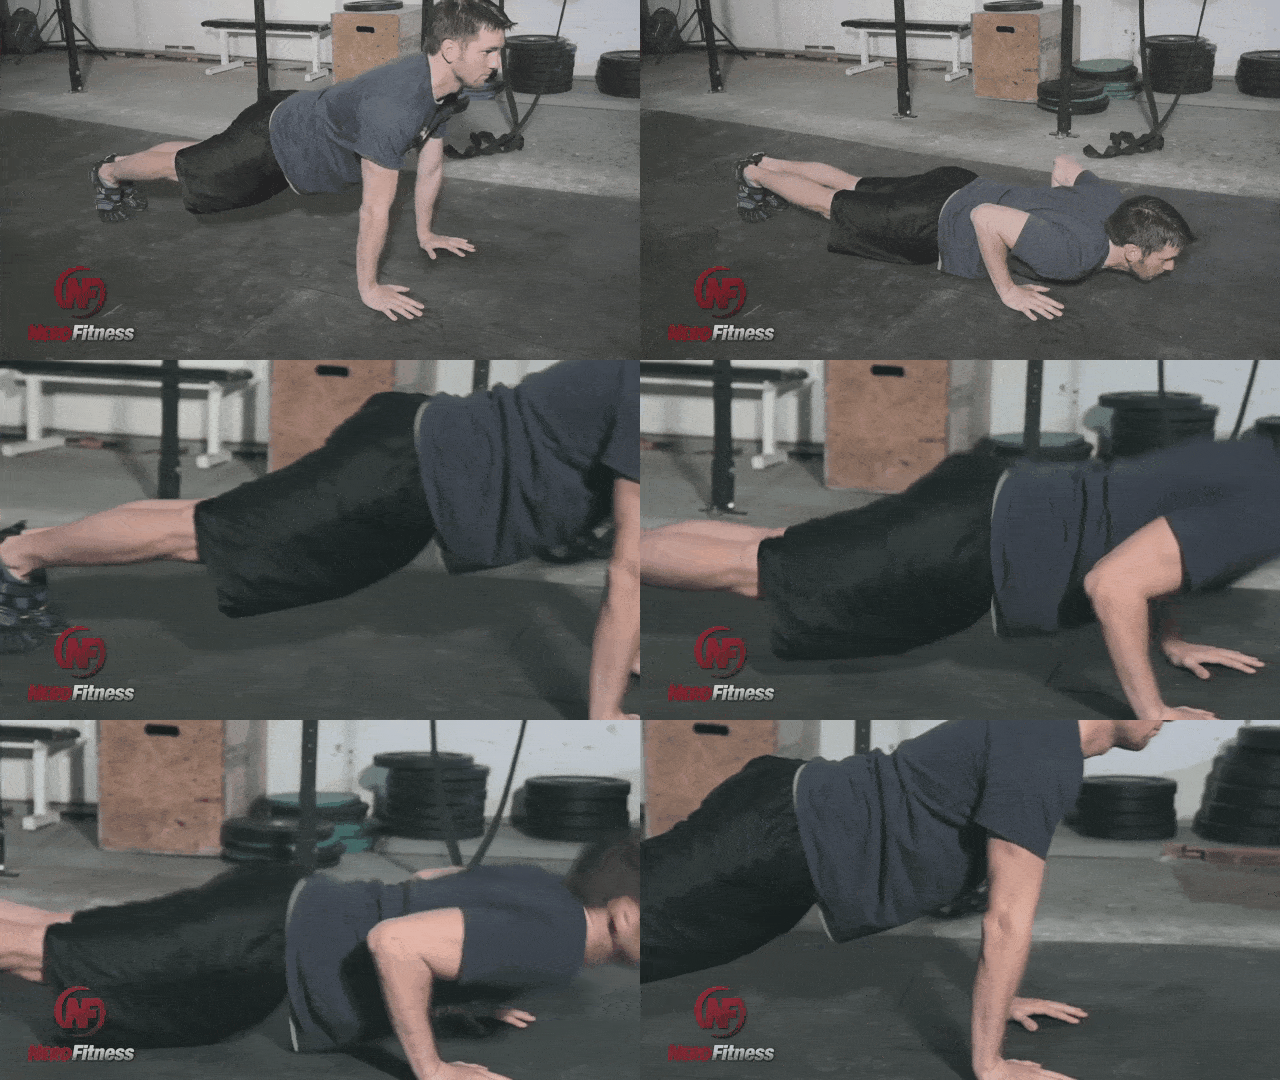
#3) Keep your hips in line with your body (no sagging). We want you in one straight line as you push your body up and down:
#4) Attempt to do a full range of motion with your push-up (as long as it’s pain-free). Shoot to come all the way down, so your chest is touching the ground or the object you’re doing push-ups against.
If you want more help here, we have a full guide on how to do proper push-ups, (including advanced variations to try).
Exercises For Achieving a Full Push-Up
There are two exercises that will go a long way towards achieving your first push-up:
Push-up Negatives
Front Planks or Top of Push-up Holds
First, let’s talk about push-up negatives.
“Negative” in exercise terminology generally means only doing half of a traditional rep, normally lowering the movement.
To do a Push-up Negative:
Hold yourself up at the top of a push-up, with the body in a straight line from shoulders to feet.
Lower down and touch the ground, then let the knees rest on the ground to help you push back up.
You can do a push-up negative from an elevated surface too.
Next, let’s talk about Front Planks or Holding at the Top of a Push-up.
This is important for a few reasons:
Builds a strong midsection. A sturdy core will help a lot when doing push-ups.
If you can’t hold the top of a push-up position, doing one complete rep will prove almost impossible.
Holding a plank might be tough for you, so let’s talk about a few variations you can experiment with.
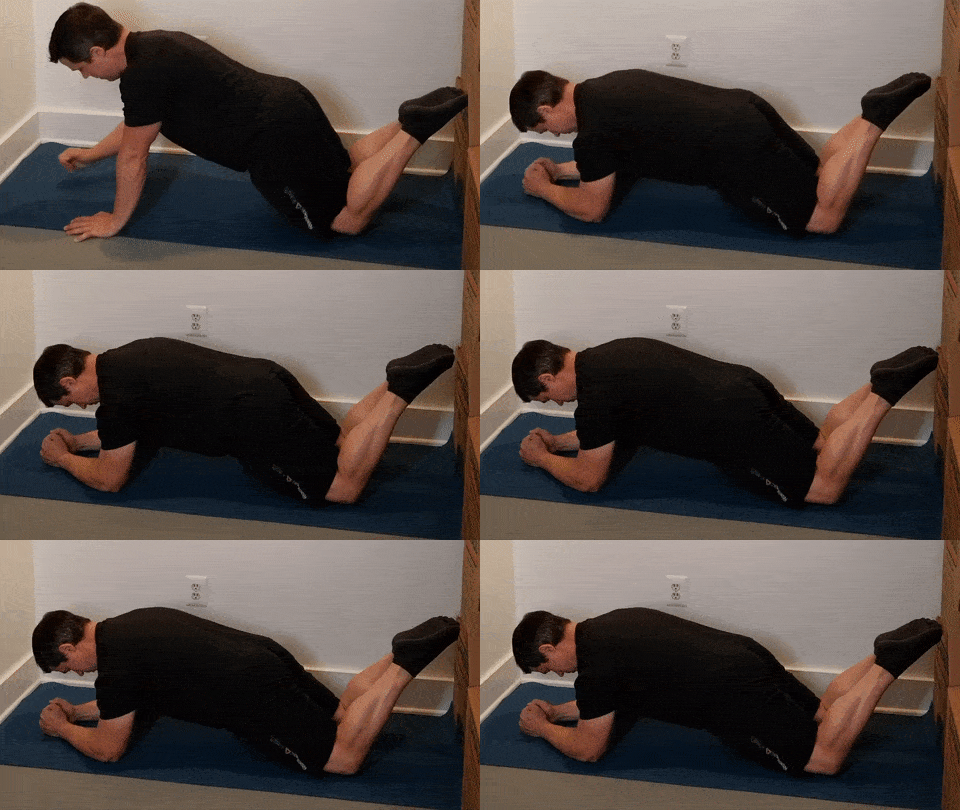
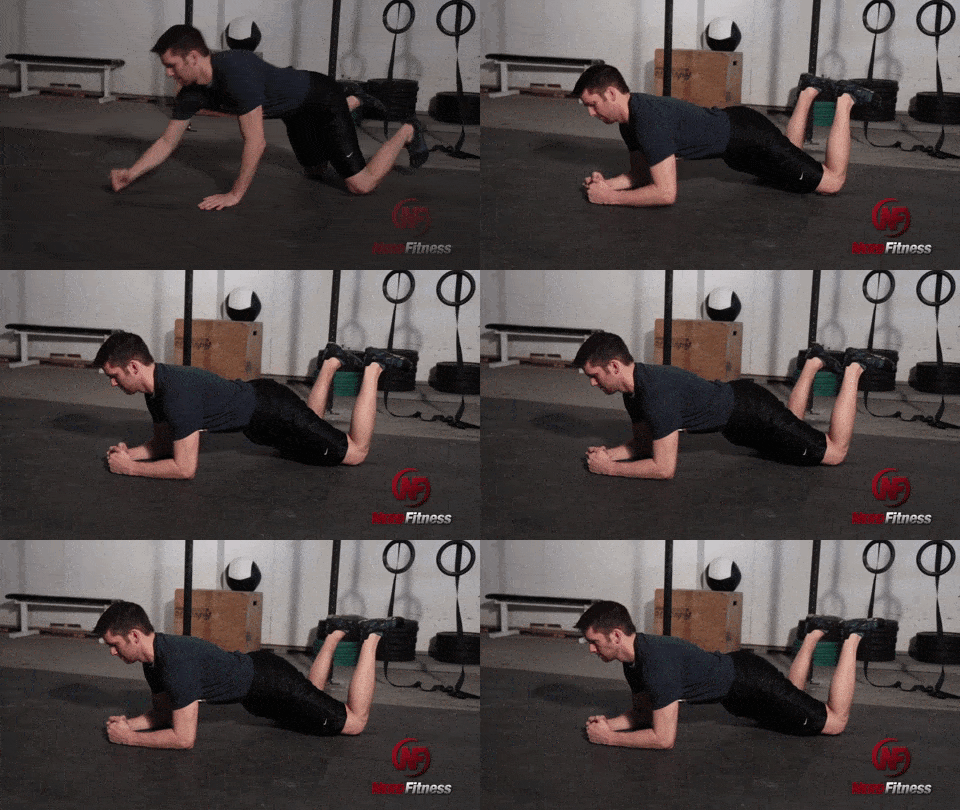
Hold Level 1: Knee Planks
Hold yourself up on your forearms and knees, with the body in a straight line from shoulders to knees.
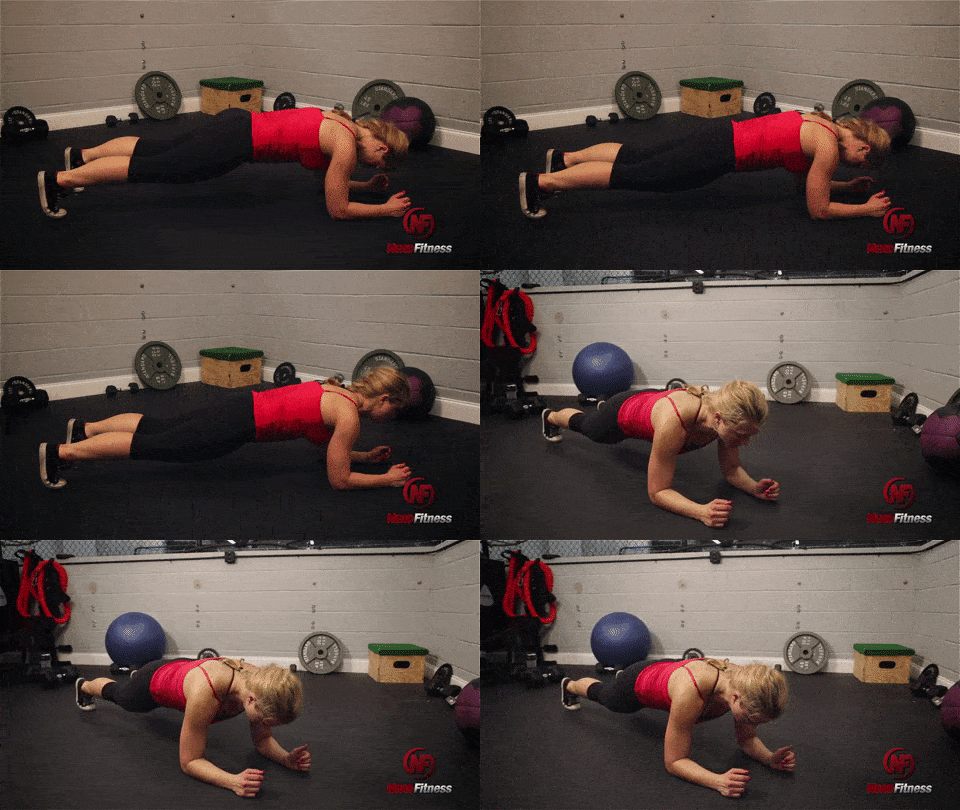
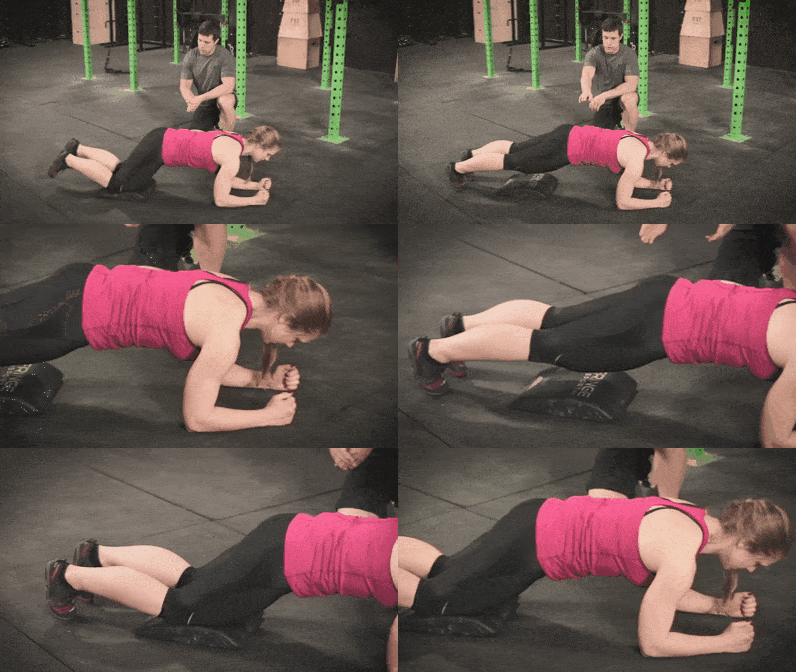
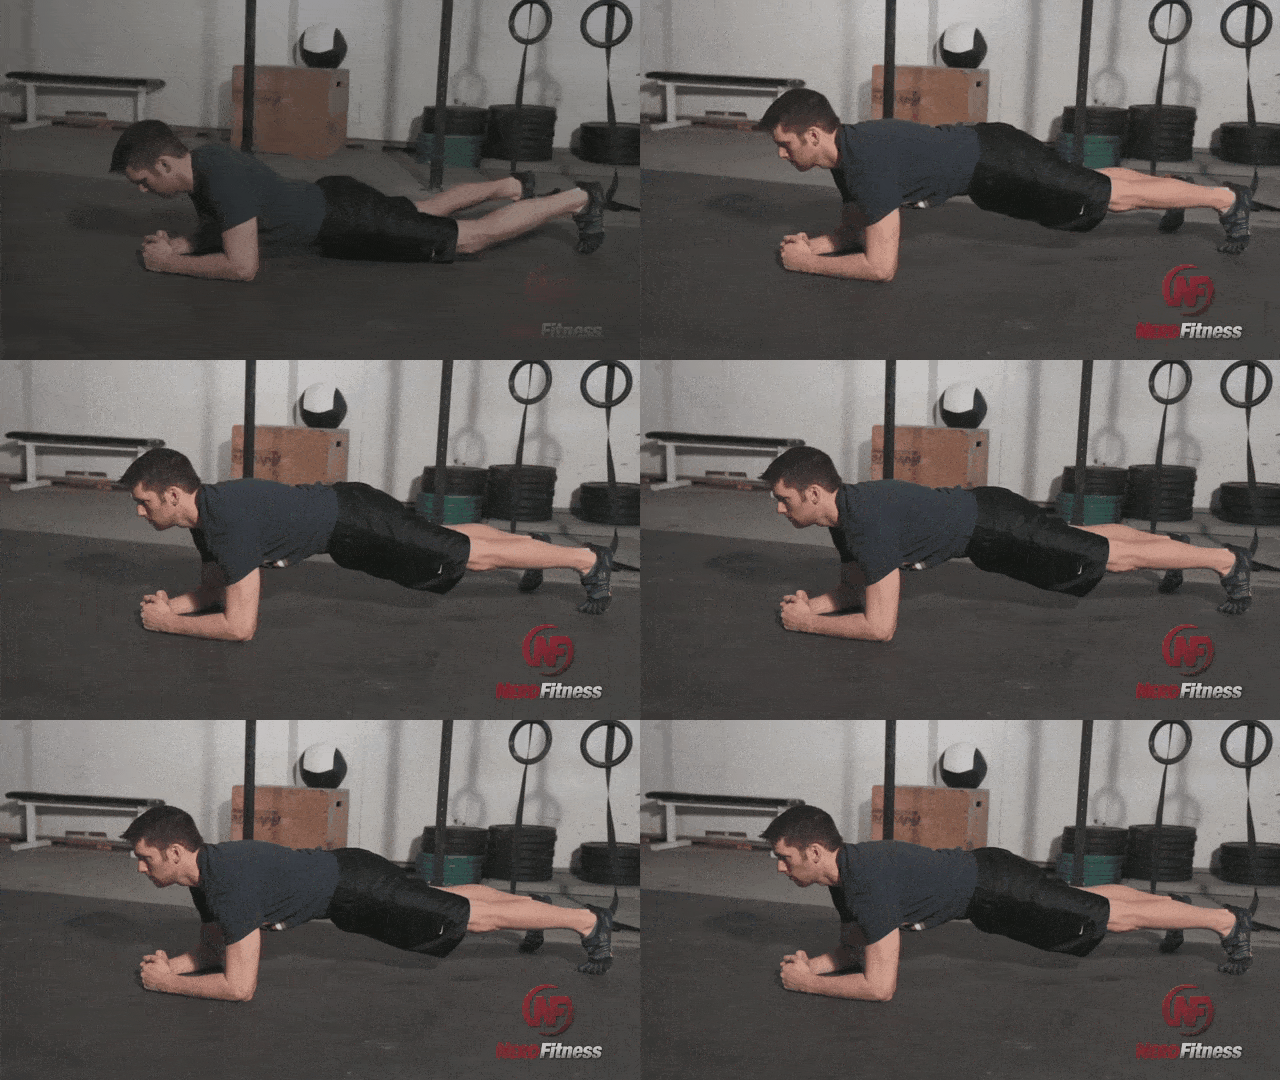
Hold Level 2: Front Planks
Lie on the floor with your forearms flat, making sure that your elbows are aligned directly under your shoulders.
Engage your core and raise your body off the floor in a straight line from head to feet, keeping your forearms planted. Try not to let your hips rise or drop.
Hold Level 3: Push-up Hold
Hold yourself up at the top of a push-up position, with the body in a straight line from shoulders to feet.
If you follow the Push-up Challenge in NF Journey, you’ll notice that pretty much every workout ends with a type of one of these holds, since core strength is so critical for push-ups.
Oh, and if you want to just try Nerd Fitness Journey to see what I mean, you can do so right here:
The Push-up Workout Plan
Remember earlier when I said the name of the game with push-up progression is consistency?
To show you what I mean, it’s time to build a workout for conquering push-ups.
I’d recommend three workouts a week for a Push-up Progression Plan, with a rest day between.
Could be Monday-Wednesday-Friday or Tuesday-Thursday-Sunday.
You can always do a more formal warm-up routine, but just make sure you include some variation of these two moves.
Step #2) Train with a Push-up Variation
Earlier, we went through 4 variations that will help you get your first push-up.
After your warm-up, you should train with one of them.
For our Push-up Progression Plan, I want you to alternate between two variations:
On Day A, do 3 or 4 sets of a push-up variation that you can do 8-10 reps in.
On Day B, do 3 or 4 sets of a push-up variation that you can do 5-8 reps in (so a harder variation).
For example:
On Monday maybe you do 3 sets of waist-high push-ups for 10 reps.
Wednesday, you can do 3 sets of knee-high push-ups for 8 reps.
Then Friday, back to the waist-high variation.
Step #3) Do a Negative
After you train with your push-up variation, I want you to attempt 2-3 reps of a negative push-up.
If these are too tough, simply do an easier variation, like knee push-up negatives:
Any of the 4 variations we discussed earlier can be done as a “negative.”
These negatives will be important, as they’ll go a long way towards building strength for a regular push-up.
Step #4) Plank/Hold for 60 seconds
We’re going to end our “Get Your First Push-up” Workout with a hold:
Front Plank
Holding the Top of the Push-up
Choose whichever variation you like, but attempt to hold the position for a full minute, with as few sets as possible.
If you need to break up the 60-second hold, you could:
Do three sets of 20 seconds each.
Do two sets of 30 seconds each.
Just aim to go longer and longer as you go. If you can’t make it to a full minute, don’t stress. Just work on holding a knee or elevated plank.
These holds will help strengthen your core, which will be critical for doing push-ups with proper form.
Oh, and if you want someone to modify this workout for you (let’s say you also want to do some HIIT for fat loss) our 1-on-1 Online Coaching Program can do just that.
Plus, your coach can review your movements through our app so you’ll know your training correctly and safely.
How to Achieve Your First Push-up (Next Steps)
That should give you everything you need to get started with the push-up progression plan.
Remember…
The “Get Your First Push-up” Workout is:
A Warm-Up
3 or 4 sets of a Push-up Variation for 8-10 reps
2 or 3 reps of a Push-up Negative
60 second Plank or Hold
Do this three times a week, with a day of rest between workouts, and you’ll be good to go.
As you continue on the Push-up Progression Plan, remember to keep pushing harder. We want you slowly but surely increasing the challenge of the workout (known in the biz as “progressive overload.”)
This could be:
Adding another rep (8 reps of waist-high push-ups to 9)
Adding another set (3 sets of knee push-ups to 4)
Moving up to a more difficult variation (waist-high push-ups to knee-high)
Oh, and if you need any help along the way, I gotcha boo.
Here’s how to continue your journey with Nerd Fitness:
#1) Our Online Coaching Program: perfect for someone who wants an expert (like me!) to design the right path for conquering push-ups. We’re all different, so why not have a coach guide you through a program that’s custom-made for you?
You can schedule a free call with our team so we can get to know you and see if our coaching program would be a good fit. Just click on the image below for more details:
#2) If you want an exact blueprint for crushing push-ups, check out NF Journey. Our fun habit-building app helps you exercise more frequently, eat healthier, and level up your life (literally).
Plus, our 6-week Push-up Challenge has helped quite a few Rebels achieve their first push-up!
Try your free trial right here:
#3) Join the Rebellion! We need good people like you in our community, the Nerd Fitness Rebellion. You’ll meet individuals from all different walks of life, all of whom are trying to level up their lives.
Sign up in the box below to enlist and get our “Strength Training 101: Everything You Need to Know” guide, which will teach you exactly how to grow strong enough to rock push-ups:
Download our comprehensive guideSTRENGTH TRAINING 101!
Everything you need to know about getting strong.
Workout routines for bodyweight AND weight training.
How to find the right gym and train properly in one.
Alright, I want to hear from you now:
Can you do a proper push-up?
If not, what level are you on?
Are we missing any helpful suggestions for a beginner?
Let me know in the comments!
-Jim
PS: Check out the rest of our guides on doing push-ups:
So you want to learn about the best core exercises?
Well my friend, you’ve arrived at the right place!
We help men, women, and intergalactic bounty hunters grow strong as part of our 1-on-1 Online Coaching Program, and we always put an emphasis on core muscles when we build client workouts.
You use your core muscles for just about everything:
Getting out of bed in the morning? Not without a sturdy core.
Pushing a grocery store cart across the parking lot? Your core will make that happen.
Fighting off ninjas who just discovered your secret identity? Karate kicks require a strong core.
You get the gist.
So what exactly do we mean when we say “core”?
Contrary to popular belief, your core isn’t just your abs.
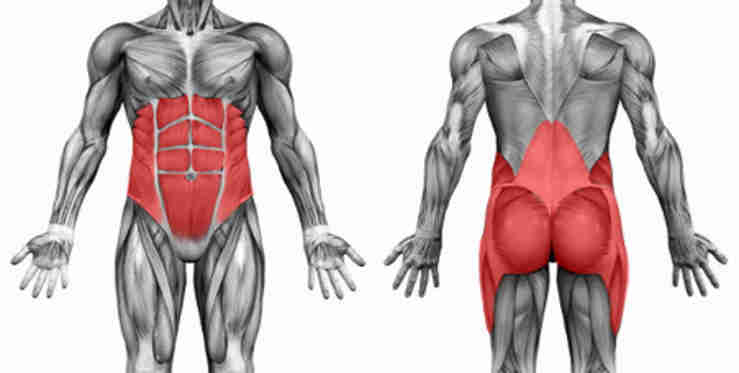
Some of the muscles found in your core include:
Erector spinae: this is the muscle around your spine and helps you stand up straight.
Rector abdominis: better known as your “abs.”
Obliques: these are found on the sides of your torso and help you twist (and shout).
Gluteal muscles: also known as your “glutes” or “butt” or “bum” or “ass” or – okay, you get the point – which connects your legs to your core.
You might also hear your core referred to as your “trunk.” Same thing.
The core muscles really are the foundation of the human body. And much like building a house, when it comes to fitness, you need to start with a strong foundation.
This is why we focus on building a strong core with each of our coaching clients.
What Are the Best Core Exercises for Beginners? How Can I Strengthen My Core at Home?
If you’re just starting your fitness journey, we won’t make you jump into the deep end quite yet.
Here are the Best Core Exercises for Beginners:
#1) Plank
Your entire core is engaged in a plank, as you stabilize yourself in a straight line (don’t sink)!
If you can’t quite support yourself into a full plank, have no fear, you can start with…
#2) Knee Plank
Just like a regular plank, but you have your knees for support. Start with these until you can do the real thing.
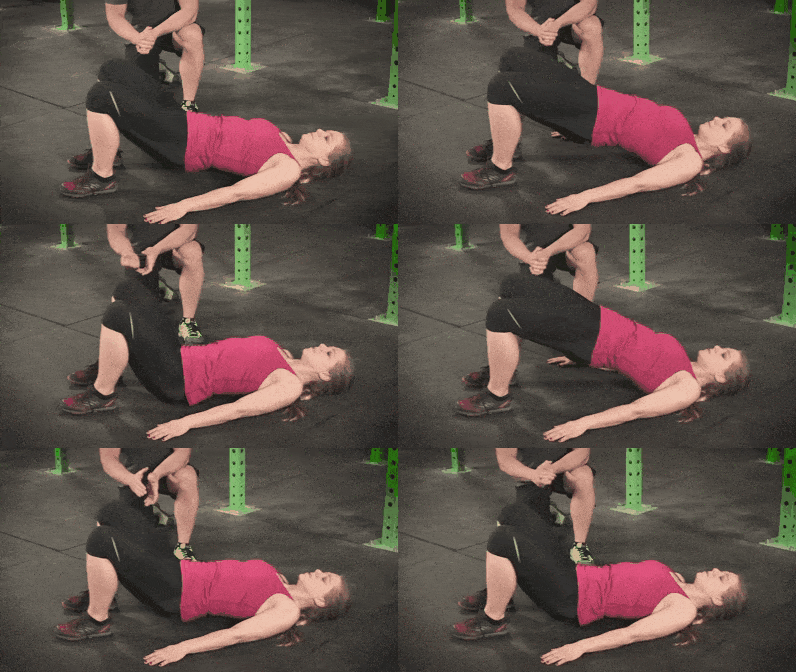
#3) Hip Bridge
The hip bridge will activate the glutes and the rest of your core as you bring your body up.
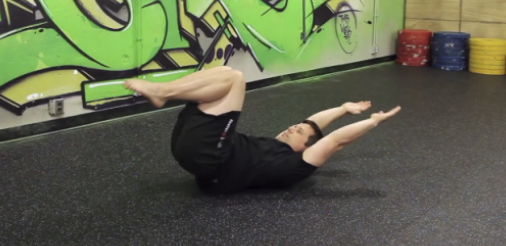
#4) The Hollow Body Hold
The hollow body is one of the best ways to engage the midsection and stabilize the body. We utilize the hollow body exercise as part of our strategy for getting your first handstand.
Once you get comfortable holding the position, try…
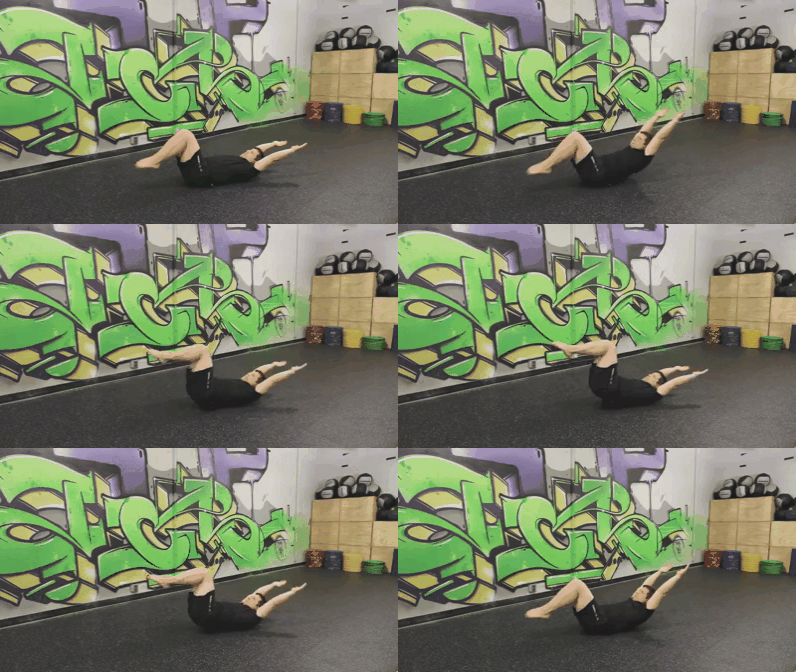
#5) The Hollow Body Rocking
These 5 exercises will go a long way towards developing serious core strength.
“Steve, these moves are easy peezy. What are some advanced core exercises?”
I thought you’d never ask.
The 5 Best Core Exercises
Now the real fun starts.
Here are The 5 Best Core Exercises:
#1) Squats
Squats? Yes, squats.
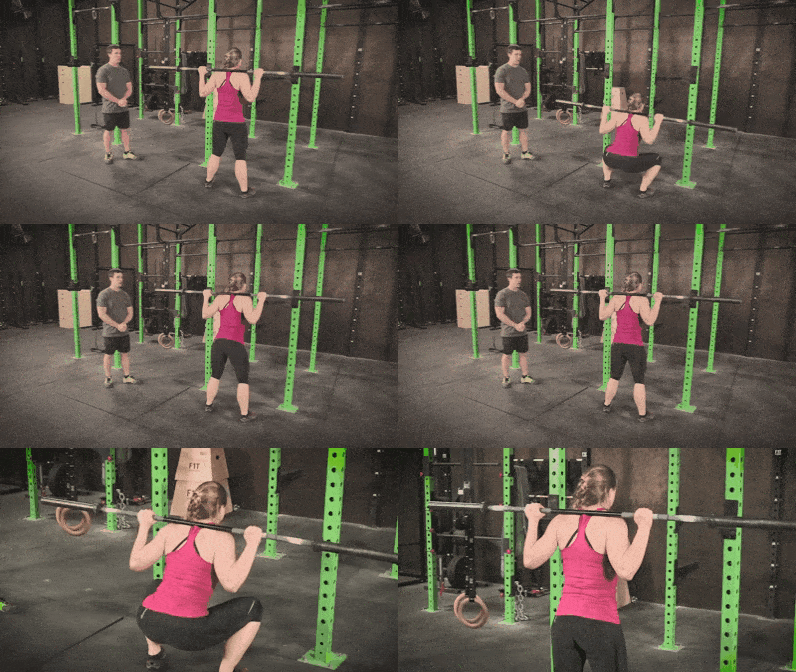
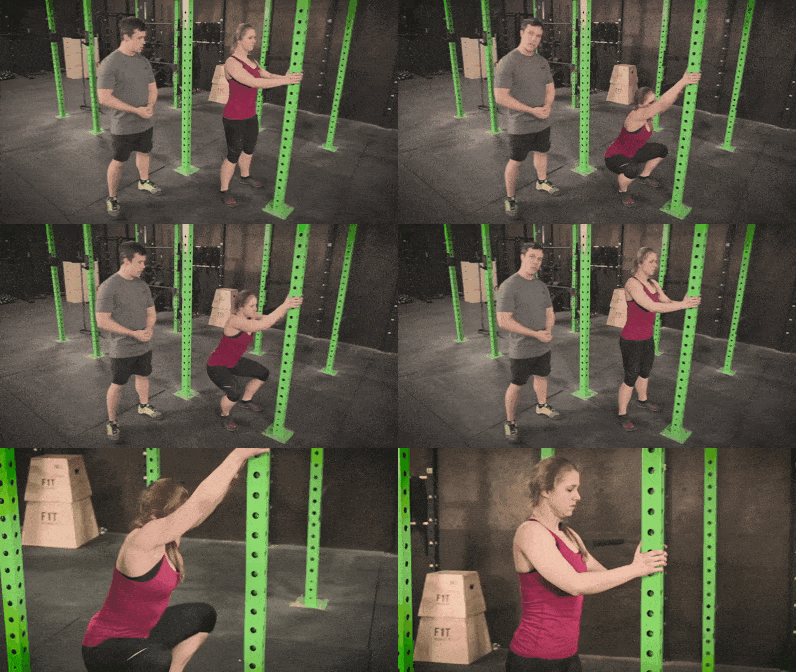
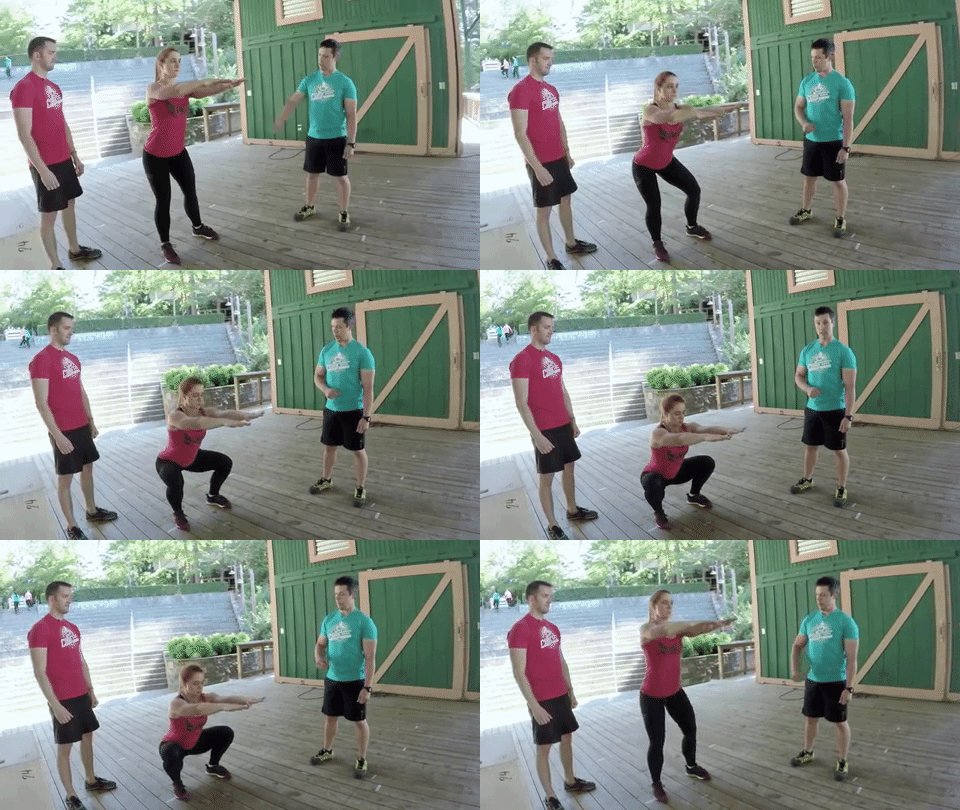
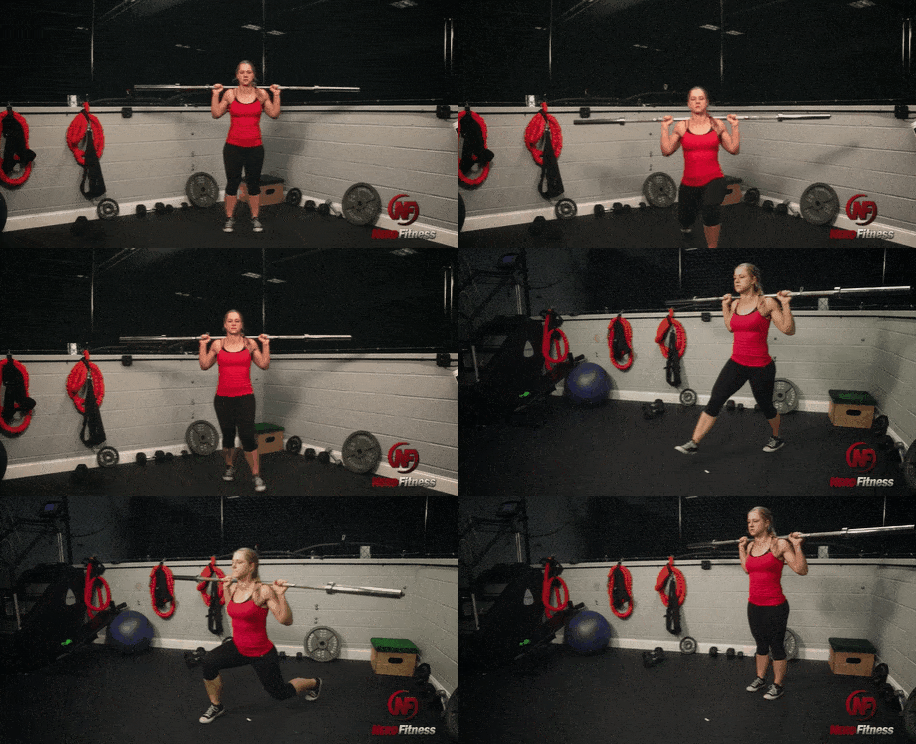
Squats train just about every muscle in your core (and lower body). Your core is engaged as you stabilize yourself up and down. If you don’t currently train with squats, start with a simple assisted bodyweight squat:
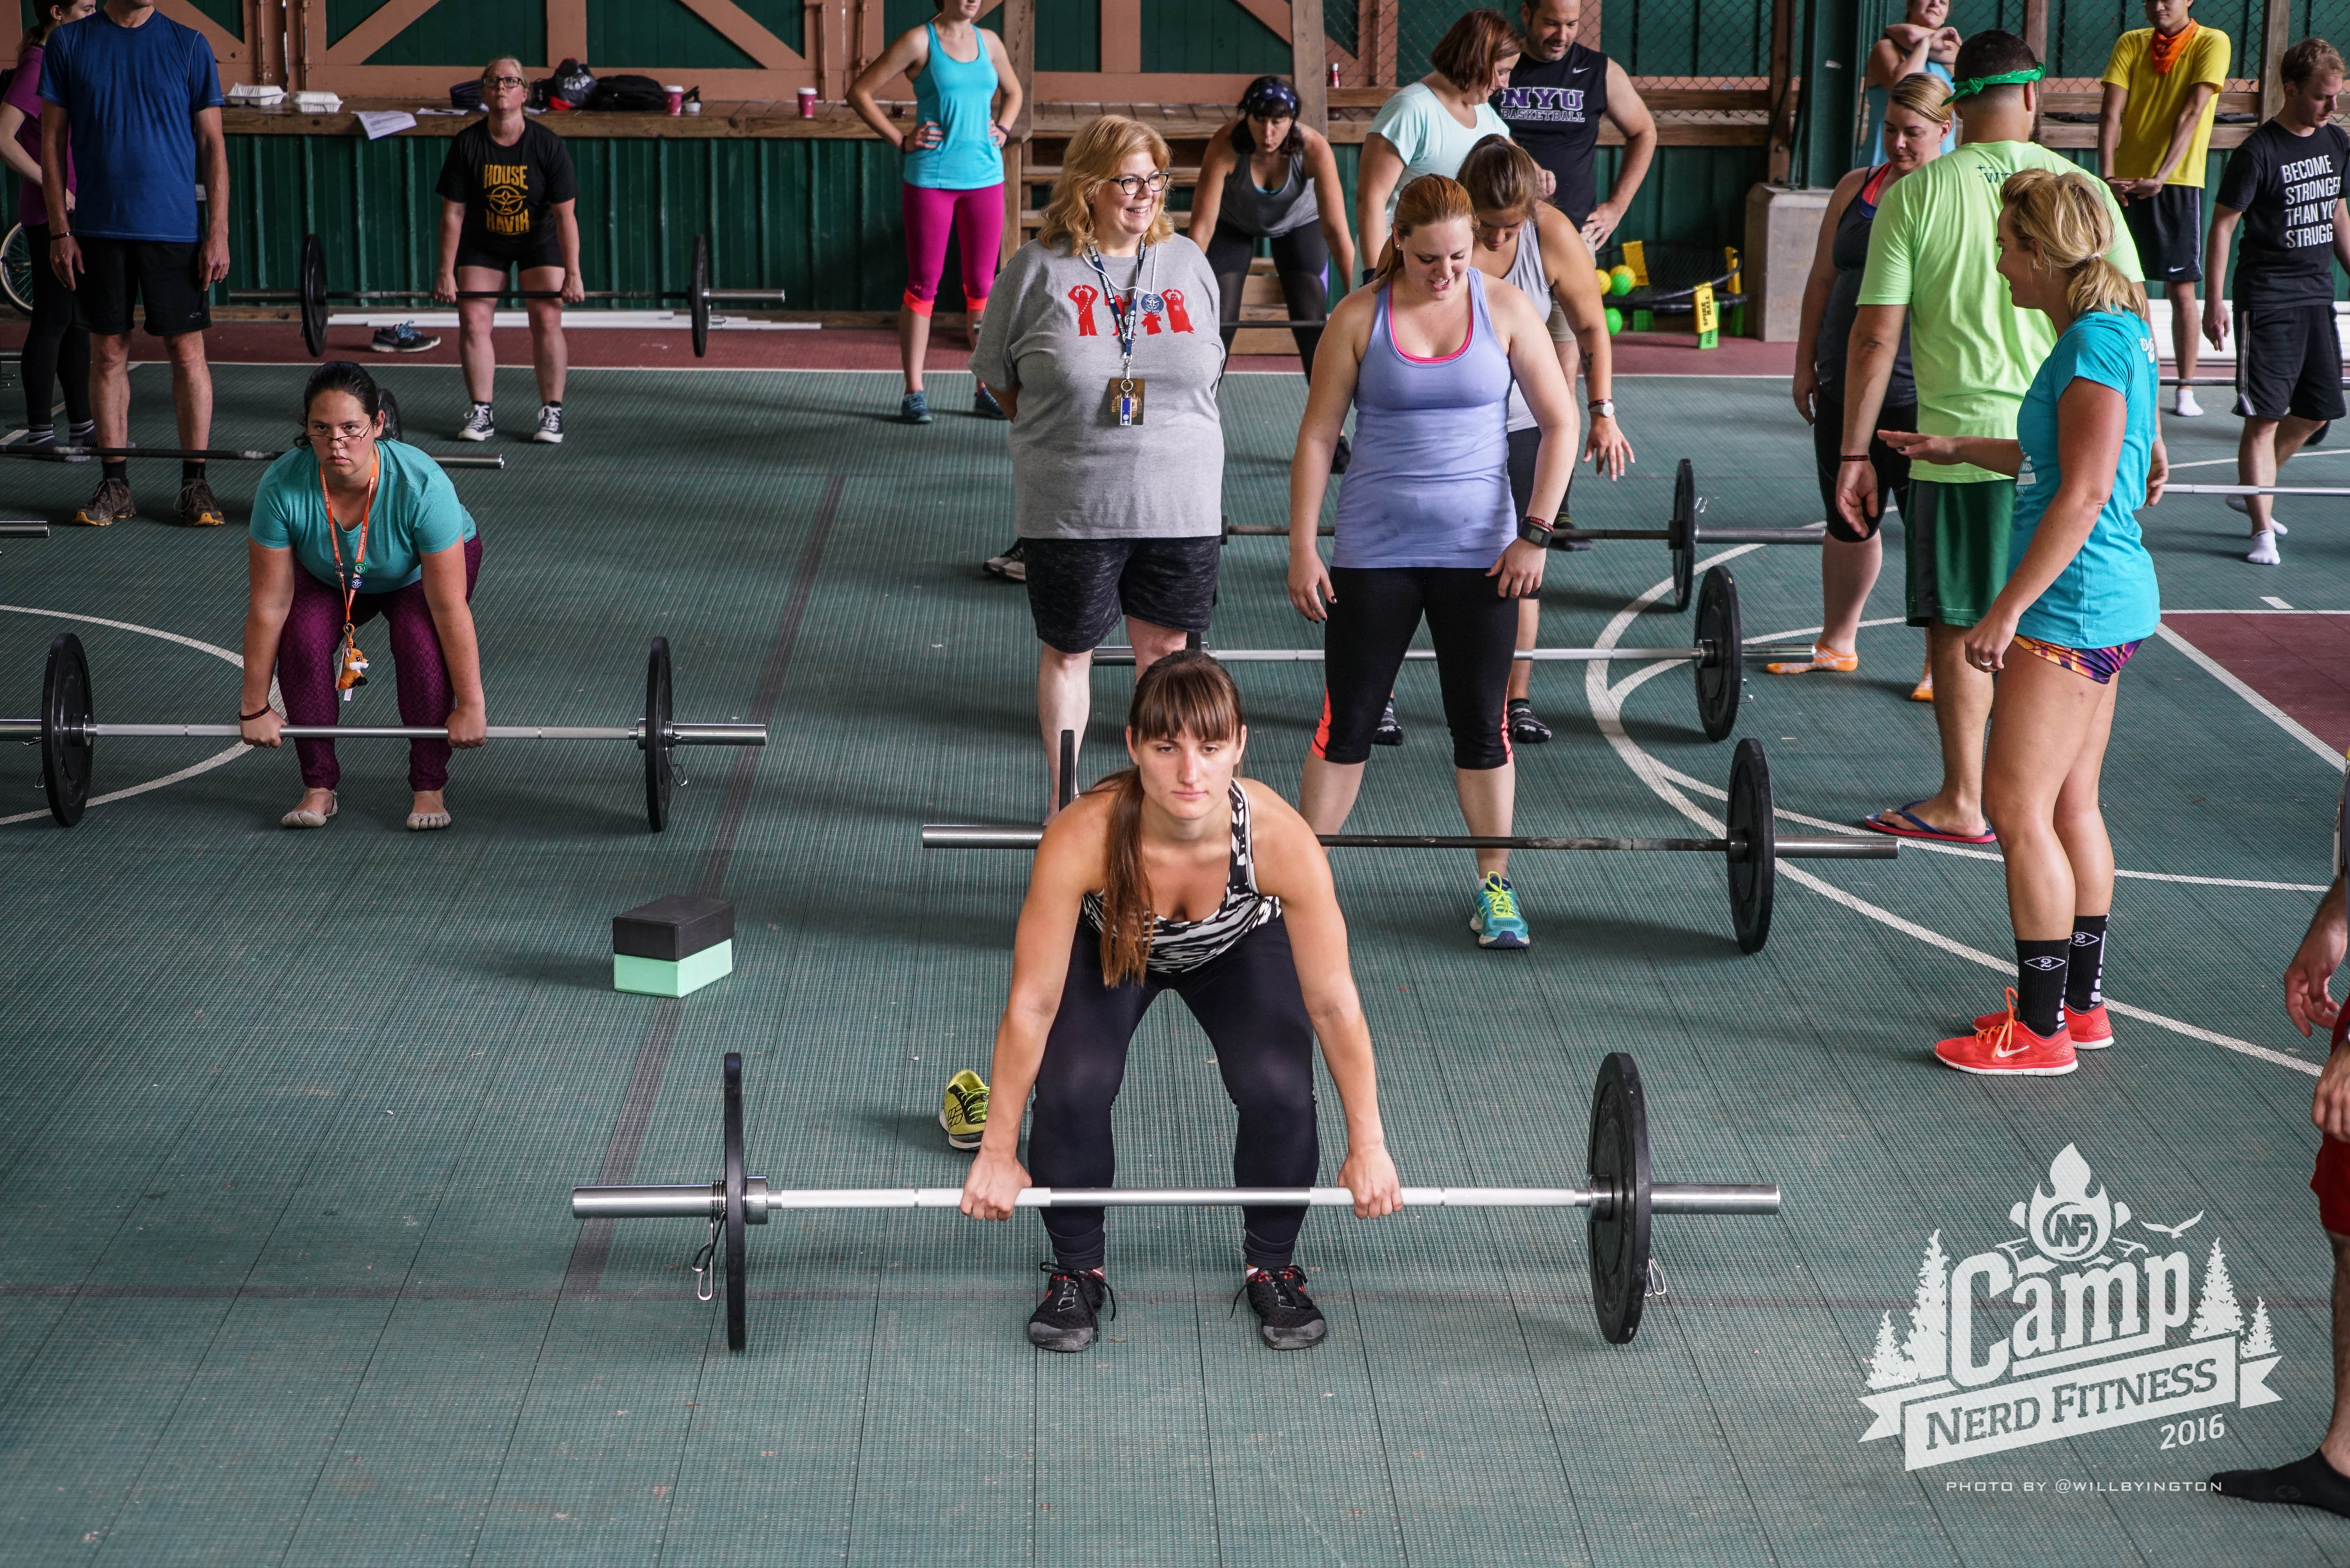
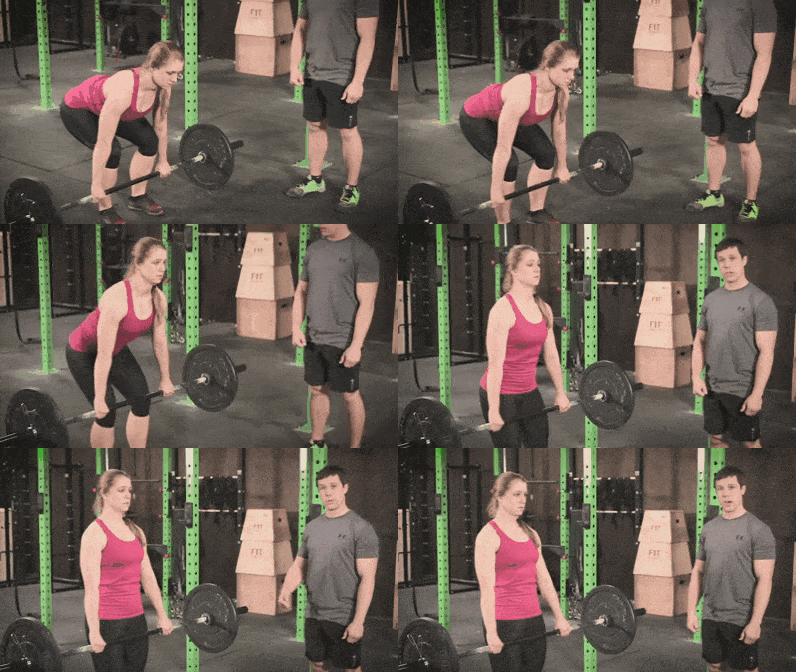
We’re big fans of the deadlift around these parts. Not only is it a core exercise, but it’s really an EVERYTHING exercise (lower body, core, and upper body).
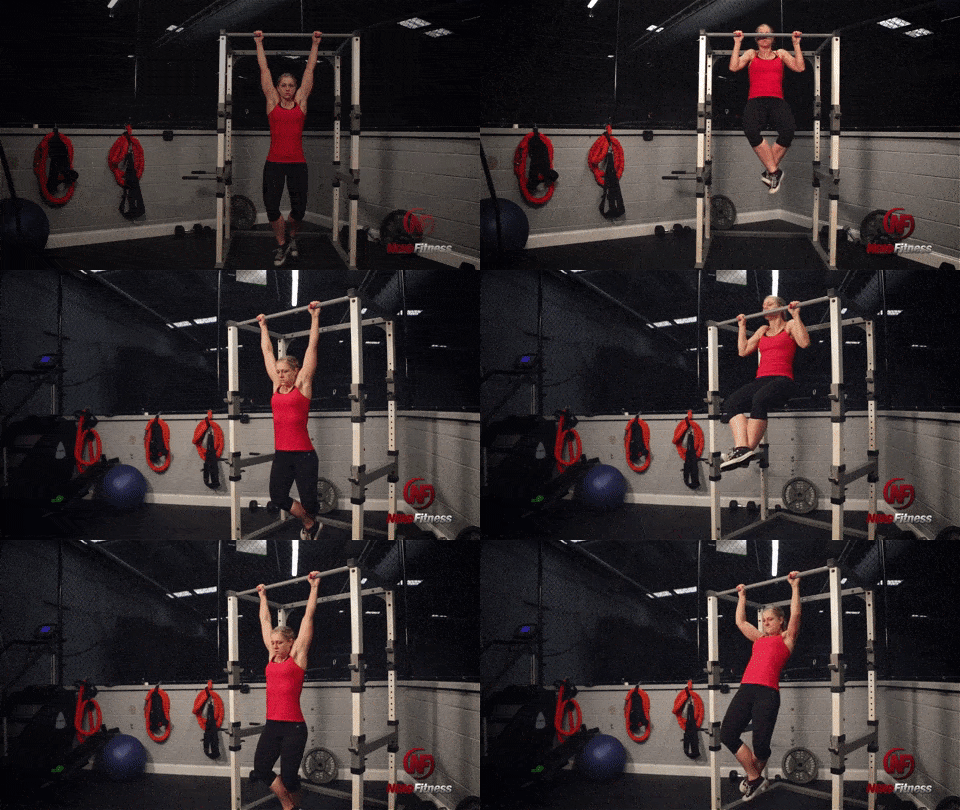
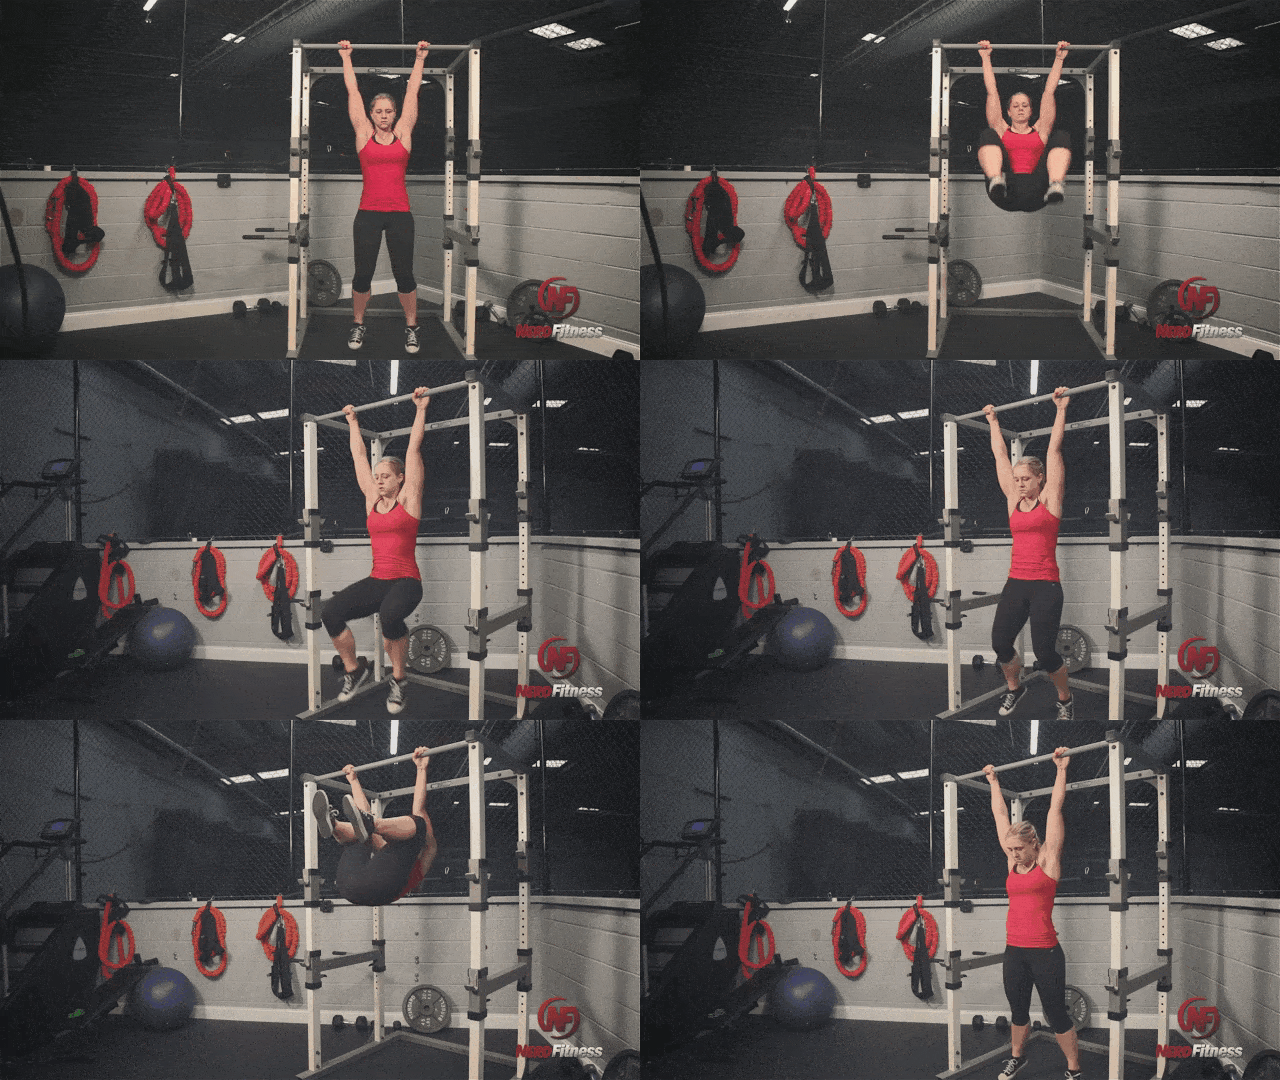
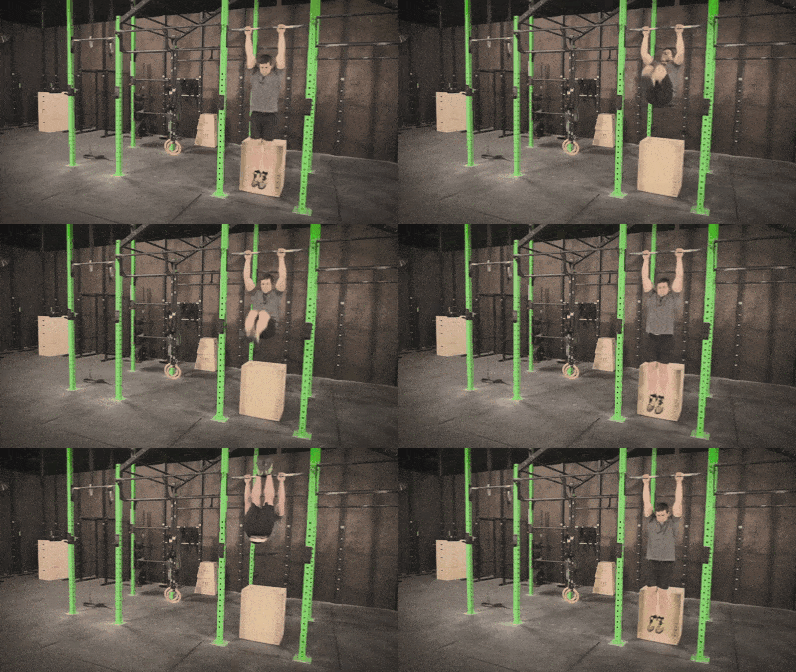
Yes, pull-ups are an upper-body exercise. But you’ll engage your core as you hoist yourself up. The more you keep your body in control (don’t flail about as you go up and down), the more you’ll train your core.
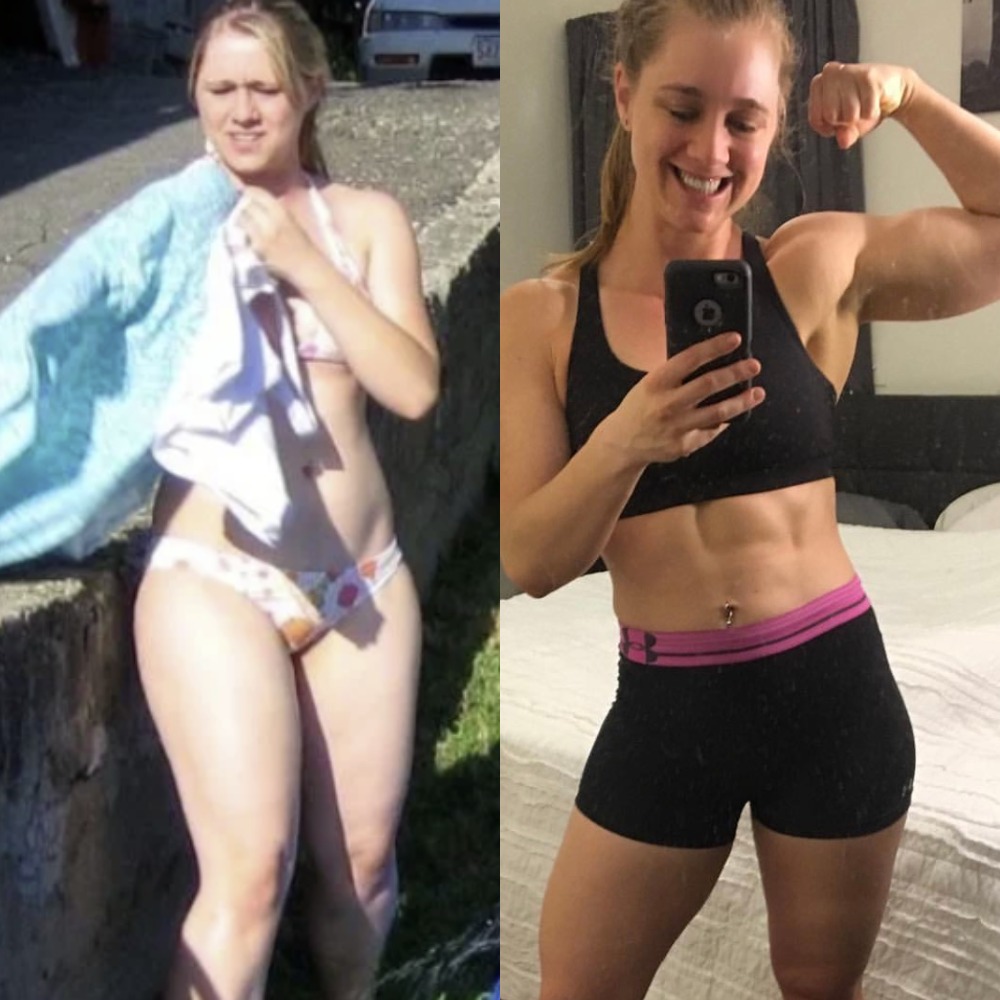
Depending on your age, weight, sex, and genetic makeup, your body will lose fat in a certain order, from certain parts of your body, that you can’t control.
Here are some things to consider:
Everybody has abdominal muscles. Yep, even you! They might be tiny, or weak, but everybody has 6-pack abs. They might just be hidden under a layer of fat. No judgment, just reality.
Fat does NOT turn into muscle – they are two different things. Like oil and water, fat sits on top of muscle. You could have ridiculously strong abs ready to pop out, but if they are buried under a lot of fat, no amount of exercise will give you a flat stomach or make those abs pop, because it doesn’t address the fat on top of your muscles.
A flat stomach only appears when you have a low enough bodyfat percentage.The reason there are 1,000,000,000 ab workouts on YouTube is that people know there’s BIG money in the ab-industry for people desperate to get a flat stomach! And ab exercises are much easier to market as exciting than “eat better, get strong, move more, for a long long time.”
So if you want a flat stomach or six-pack abs, we need to create a plan for sustainable weight loss.
I know, WAY EASIER SAID THAN DONE.
Have no fear, I have a couple of resources for you:
How to Lose Weight Without Dieting (The 5 Rules of Weight Loss): you’ve probably been on a diet before. You might even be on a diet right now. We discuss why they generally don’t work (temporary changes create temporary results) and provide a less conventional but more permanent solution (tiny changes for the win).
That will help you build a practice to grow strong.
Don’t get startled by my comment that you should train “two to three times a week.” If you can only do a full-body workout once a week, that’s WAY BETTER than none a week.
Once you get the practice going, we can always work to increase the frequency later.
The most important thing you can do today: start!
Want a little help getting going? The perfect next step on what you should do now?
No problemo!
Here are 3 options on how to continue with Nerd Fitness:
Option #1) If you want step-by-step guidance on how to lose weight, eat better, and get stronger, check out our killer 1-on-1 coaching program:
Option #2) If you want an exact roadmap for getting fit, check out NF Journey. Our fun habit-building app helps you exercise more frequently, eat healthier, and level up your life (literally).
Plus, we have Missions specifically designed to help you achieve a strong core.
Try your free trial right here:
Option #3) Join the Rebellion! We need good people like you in our community, the Nerd Fitness Rebellion.
Sign-up below and receive our free guide Strength Training 101: Everything You Need to Know. It includes step-by-step instructions for the Best Core Exercises covered in today’s guide.
Download our comprehensive guideSTRENGTH TRAINING 101!
Everything you need to know about getting strong.
Workout routines for bodyweight AND weight training.
How to find the right gym and train properly in one.
Alright, enough from me. Your turn:
Do you agree with my list of the best core exercises?
Do you think I’m missing any?
Am I completely off base on my position on sit-ups?
Let me know in the comments!
-Steve
PS: Many of the exercises covered today came from our post “The 42 Best Bodyweight Exercises.” Give it a read if you’d like to start training without a gym!
You now have a range for the amount of protein you need in a day!
I know…we just threw a lot at you.
Let’s explain some of these numbers and equations in case you want to nerd out on the details.
How Much Protein Should I Eat in a Day?
As we cover in our guide How Much Protein Do I Need to Eat, you’re going to find all sorts of different recommendations for how much protein you should be consuming.
For example, the current international Recommended Dietary Allowance (RDA) for protein is 0.4g per pound of bodyweight (0.8 g per kg of body weight).[1]
Case closed?
Nope.
In our opinion, and as described in this review article[2] the RDA for protein is too low and should be higher regardless of your body composition.
Our calculator actually starts you off at 0.54–0.82g per pound of bodyweight (1.2–1.8 g/kg), which tops out at over twice the level of the RDA.[3]
Also, the amount of protein you eat will depend on your individual goals. That’s why we have so many variables in our protein calculator.
The RDA’s blanket recommendation for protein intake is oversimplified.
We’ll dive into this further in the subsequent sections.
One final point: we gave you a wide recommended range of protein, because people vary quite a bit in their protein needs.
So don’t take our protein recommendation as gospel!
Consider your results here as a starting point. Try one range, see how you feel, and take it up or down from there.
If you respond well to a protein intake that’s not within our recommended range, don’t sweat it!
The protein recommendations here come from studies, and studies are based on averages. You may be an outlier.
Use our calculator as a starting point, and assess your results over time. We give this same advice to our coaching clients when they ask us about protein.
How Much Protein Should I Eat to Build Muscle?
If you’re trying to build muscle, you’re going to want to eat enough protein to induce muscle repair and growth.
Proteins are the building blocks of muscle, so you’ll need plenty if you’re looking to build a muscular physique!
How much?
If you’re of healthy weight, active, and wish to build muscle, aim for 0.64–1.09 g/lb (1.4–2.4 g/kg).[4]
There is some evidence that a higher range might be beneficial. Not so much in gaining more muscle, but to minimize fat gain during a bulking phase.[5]
As we mention in our guide, 12 Tips to Gain Weight Quickly, you might put on a little fat when eating in a caloric surplus to grow muscle.
The Beginner Bodyweight Workout. If you’re looking for an exercise routine that can be done ANYWHERE, look no further. Our beginner routine has jumpstarted many Rebels in their strength training. You’d be surprised how much muscle you can build with your own weight, a milk jug, and a sturdy table.
Build Your Own Workout Routine. After you do a workout or two, it’s time to strategize. What should you train and on what days? When should you rest? Our guide will walk you through building a complete routine.
Another option is to check out our Online Coaching Program, where a trained expert can build you a customized workout, then adjust it each month based on your progress:
How Much Protein Should I Eat to Lose Weight?
If you’re looking to lose weight, eating plenty of protein will be an important part of the equation.
Why is protein important for weight loss?
Think of it this way: protein is the only macronutrient you don’t store.[7]
Carbs are stored as muscle glycogen.
Fat is stored as body fat.
Your body can use either as a fuel source while it’s in a calorie deficit.
Not so for protein.
Meaning most of the protein in your body is currently doing a job: building muscle tissue, making enzymes, strengthening bones, etc.
If you don’t eat enough protein, your body will turn towards your muscles for its needs.
So if you’re not careful when you’re losing weight, you could lose muscle AND fat.
Obviously, from a health and physique standpoint, this is not good.
That’s why you need to eat plenty of protein and strength train when you’re in a calorie deficit – so you lose fat while retaining your hard-earned muscle mass.
This is something Coach Matt covers extensively in the video How to Gain Muscle While Losing Fat:
The other important point about protein and fat loss: protein will help you stay full.[8]
If you’re trying to lose weight, keeping your hunger at bay will be critical. Luckily, studies have found that those on a high-protein diet tend to eat fewer calories overall.[9]
The 5 Rules of Weight Loss. If you’ve ever been on a diet, or are currently on a diet, give this a read. Here we discuss why people succeed with popular dieting programs and why they don’t, plus actionable steps you can take to achieve sustainable weight loss.
Start Eating Healthy Without Being Miserable. If you’re confused about healthy eating (“Should I nix carbs? Do I have to count calories?”), start here. We’ll explain how to consistently build healthy meals while still eating the foods you love. Nobody should be forced to give up pizza forever.
How Many Calories Should I Eat Every Day?We’re not going to make you count calories for the rest of your life. However, we do want you to have some awareness of the number of calories you are eating. We’ll give you a range to shoot for, plus some tips on how to portion control.
You can also download a Free 10 Level Diet Guide too when you join the Rebellion and sign up in the box below:
Download our free weight loss guide
THE NERD FITNESS DIET: 10 Levels to Change Your Life
Follow our 10-level nutrition system at your own pace
What you need to know about weight loss and healthy eating
3 Simple rules we follow every day to stay on target
Can I Eat Too Much Protein?
Now that I’ve drilled it into your head that you should be eating plenty of protein, a natural question will arise:
How much protein is too much protein?
We’ve got good news for you: as long as you’ve got a healthy liver and kidneys, you can eat lots of protein with no ill effects.
As Examine points out in its research on protein:[10]
“Higher protein intakes seem to have no negative effects in healthy people,”**
**Of course, if you have specific kidney or medical issues with regards to protein intake, PLEASE go with your doctor’s recommendation for required protein consumption!
Check out The Ultimate Protein Shake Guide for more protein powder recommendations and recipes on how to make delicious smoothies.
Whether through whole foods or supplements, protein should be a main part of every meal you eat. It’s one of our top recommendations for being a healthy nerd.
You can always adjust up or down based on your results.
If you need any help along the way, we got you.
Here are three ways to continue your journey with Nerd Fitness:
#1) Our Online Coaching program: a coaching program for busy people to help them make better food choices, stay accountable, and get healthier, permanently.
As I said before, we teach portion control to our clients who struggle with overeating, so we’ll provide a non-judgmental expert to help you reach your goals.
You can schedule a free call with our team so we can get to know you and see if our coaching program is right for you:
#2) If you want an exact blueprint leveling up your nutrition, check out Nerd Fitness Journey! Our fun habit-building app helps you exercise more frequently, eat healthier, and level up your life (literally).
If you follow our Nutrition missions, you’ll learn to eat more protein while earning XP! Sah-weeeet.
Try your free trial right here:
#3) Join the Rebellion! We need good people like you in our community, the Nerd Fitness Rebellion.
Sign up in the box below to enlist and get our Rebel Starter Kit, which includes all of our “work out at home” guides, the Nerd Fitness Diet Cheat Sheet, and much more!
Get your Nerd Fitness Starter Kit
The 15 mistakes you don’t want to make.
Full guide to the most effective diet and why it works.
Complete and track your first workout today, no gym required.
Alright, I want to hear from you:
Did you calculate your protein requirements?
Do you generally consume around this target?
Have any tips or tricks for getting enough protein?
Read, “Protein for Life: Review of Optimal Protein Intake, Sustainable Dietary Sources and the Effect on Appetite in Ageing Adults.” Source, PubMed.
Read, “Evidence That Protein Requirements Have Been Significantly Underestimated.” Source, PubMed. This meta-analysis also came to a similar conclusion.
Read, “A systematic review, meta-analysis and meta-regression of the effect of protein supplementation on resistance training-induced gains in muscle mass and strength in healthy adults.” Source, PubMed
Read, “A High Protein Diet (3.4 g/kg/d) Combined With a Heavy Resistance Training Program Improves Body Composition in Healthy Trained Men and Women–A Follow-Up Investigation.” Source, PubMed.
Read, “The Effects of Overfeeding on Body Composition: The Role of Macronutrient Composition – A Narrative Review.” Source, PubMed.
Read, “Protein, weight management, and satiety.” Source, PubMed.
Read, “A High-Protein Diet Induces Sustained Reductions in Appetite, Ad Libitum Caloric Intake, and Body Weight Despite Compensatory Changes in Diurnal Plasma Leptin and Ghrelin Concentrations.” Source, PubMed.
Read, “Controlled Changes in Chronic Dietary Protein Intake Do Not Change Glomerular Filtration Rate.” Source, PubMed.
Read, “Effect of Short-Term High-Protein Compared With Normal-Protein Diets on Renal Hemodynamics and Associated Variables in Healthy Young Men.” Source, PubMed.
It’s time to learn about The CICO (“calories in, calories out”) Diet!
You probably have questions like:
Steve, does CICO work?
Will counting calories help me lose weight?
Okay, what the hell IS a calorie?
Well my friend, you’ve arrived at the right place!
I’ve been writing about this stuff for 13 years, and our team of nerdy experts help our Online Coaching clients with all types of diets (including CICO). We are really flippin’ good at it!
Here’s what we’ll cover to answer the question: “What is CICO?”
The CICO Diet is a weight-loss strategy where the participant tries to tip the balance of what they eat (calories in) against what they burn (calories out).
That’s pretty much it.
It doesn’t really matter what food you eat, because there are no restrictions on any specific food groups with CICO.
It also doesn’t matter what exercise you do (if any).
As long as you get the equation right, and the calories you eat are lower than the calories you burn on a daily basis, you’re good to go.
To lose weight, we need to burn more calories than we consume regularly.
With this knowledge, it makes sense to design a diet specifically around this principle: match the calories you eat (in), with the calories you expend (out).
As long as you meet your calorie goal, you can forget about the rules of any specific diet.
This appeals to me personally, because I’ve created my own guidelines for how to eat, and I don’t pledge allegiance to any particular dieting strategy.
Because I’m a mind-reader, I know your next question is likely…
Does Calorie Counting Work? (CICO and Weight Loss)
In principle, CICO works.
In practice, it becomes a little more complicated.
Okay, fine, A LOT more complicated.
That’s because a lot of things influence “calories in.”
Ditto for “calories out.”
Let’s break some of this down.
Here are some of the things that impact “Calories In:”
Appetite: how hungry we are is going to drastically affect how many calories we consume. Hormones, body composition, and our tastes and preferences will all impact our appetite.[2]
Calories absorbed: the preparation of food will affect the bioavailability of calories. For example, cooking starches (like potatoes) generally increases the calories available.[3] Your own individual gut microbe can also influence the amount of energy extracted during digestion.[4] So will the macronutrient content of the food you eat.
Psychological considerations:your stress levels, sleep quality, and certain conditions like PCOS can all impact the regulation of hormones, which can influence your metabolism and appetite.[5]
Oh, and all of the above assumes we’re actually tracking calories accurately. Which pretty much nobody does. Ever. But I’ll get to that shortly.
And remember, this is only half of the equation.
Here are some of the things that impact “Calories Out:”
Energy burned while resting: your Basal Metabolic Rate is a count of how many calories you burn at rest and will be controlled by your age, weight, height, biological sex, muscle composition, etc.
Energy burned through Non-Exercise Activity Thermogenesis (NEAT): do you fidget a lot? That increases your NEAT, or the energy you burn doing stuff other than exercising. Think tapping your feet, twirling your hair, using your hands when speaking, etc. Even just an hour of this kind of movement can accumulate an extra 300 calories burned.[6]
Exercise:of course, how much you intentionally exercise will impact your calories out, although perhaps not as much as most people think (more on this later).
This is only scratching the surface on what determines “calories in, calories out.”[7]
The important thing to consider here is that none of the above invalidate the basic premise of an energy deficit being necessary for weight loss.
These factors will just influence one end of the equation or the other.
For example, let’s chat about protein and CICO:
Eating plenty of protein has been shown to help keep people feeling full and satiated.[8] So lots of protein can help folks lose weight, not because it changes the requirements for weight loss, but because it might allow them to get through the day less hungry (lowering their “calories in.”)
Adequate dietary protein can help with building and maintaining muscle.[9] The more muscle someone has, the more calories they’ll need to maintain it (raising their “calories out.”)[10]
To recap this section: from a biological perspective, eating fewer calories than you burn is 100% necessary for weight loss.
But all sorts of things impact the number of calories we eat and the number of calories we expend.
This is going to lead us to…
The Problem With CICO (Humans Are Bad Estimators)
The majority of the problems people have with CICO is that it allows nutrient-deficient food to enter the diet, only limiting “how much.”
They’ll argue that people should be eating fruits and vegetables, lean protein, avoiding processed foods, and blah blah blah…
We all know this.
You don’t need someone else telling you to eat your veggies.
This isn’t the problem with CICO.
The problem with CICO is it’s really hard to estimate “calories in” and “calories out.”
Like, REALLY hard. We humans are TERRIBLE at it.
Take “calories in” or how much we eat: people generally UNDERestimate how many calories they consume by about 30-40%.[11] Even dieticians, who are specifically trained in nutrition science, underestimated how much they eat.[12]
“That may be true Steve, but don’t worry about me. I read the label on everything I buy so I know exactly how many calories I’m eating.”
Well, are you aware that the FDA allows a 20% leeway on total calories identified on packages?[13] Meaning that 100 calorie drink of Orange Juice might actually be 120?
If you’re a food manufacturer, which way are you going to lean towards? Especially when you know people might scrutinize the calories of your nutrition label in an effort to lose weight.
This isn’t just paranoia: this study found that packaged snack food generally contains MORE calories in it than advertised.[14]
Yeah…and remember, this is only half of the equation.
It’s about to get even worse.
People are also really bad at estimating “calories out.”
When folks self-assess how many calories they burned by exercising, they’re generally WAY OFF, by as much as 50%![15]
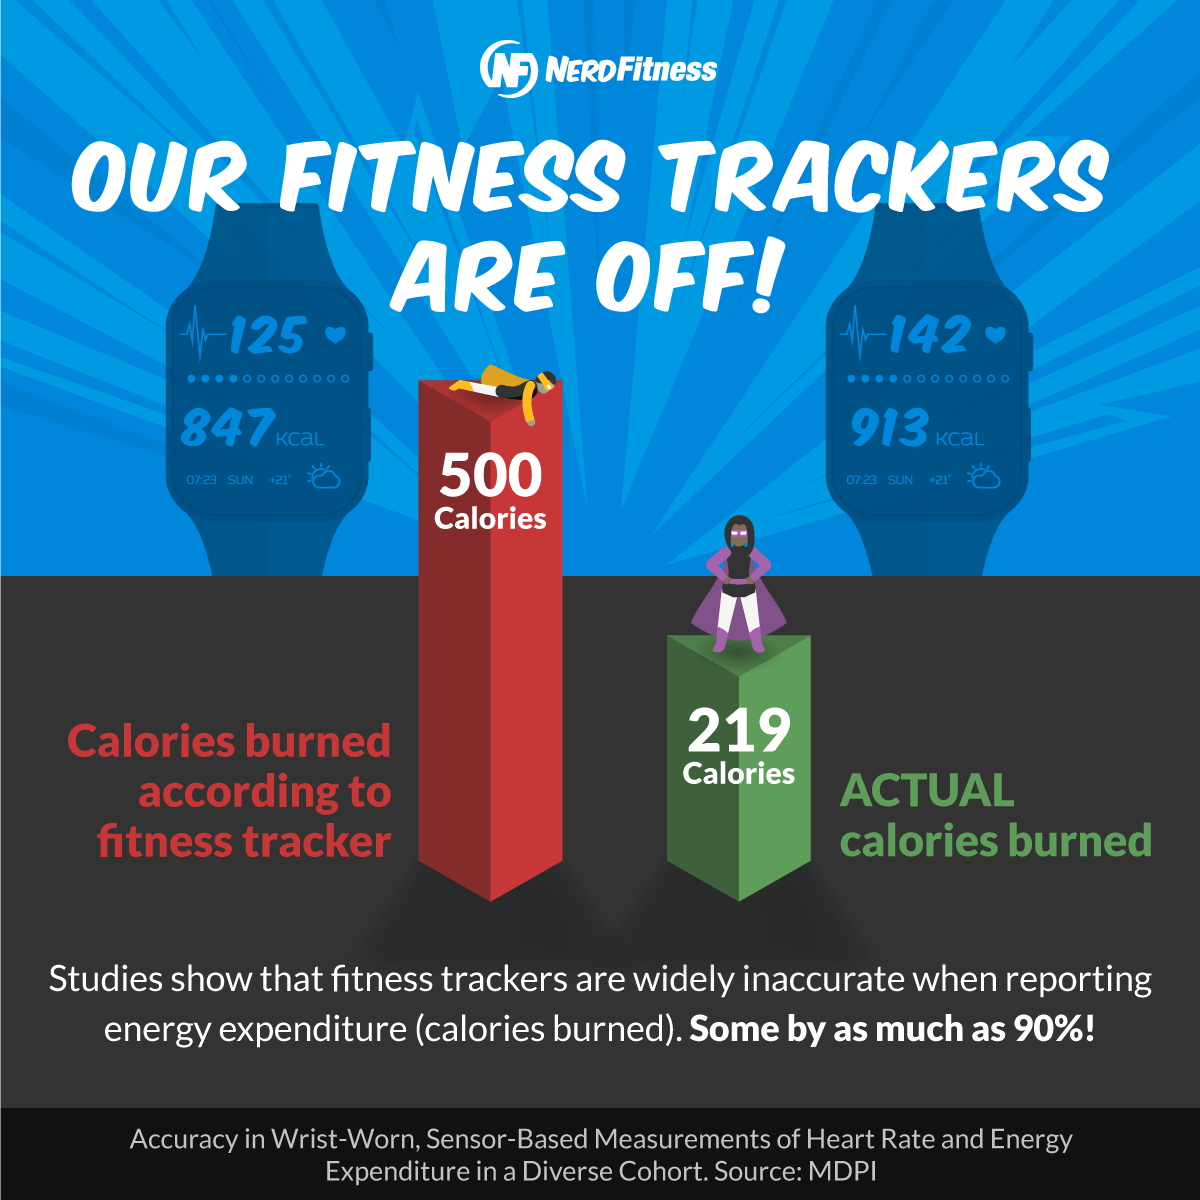
Oh, and those fitness trackers we wear?
They’ve been shown to be inaccurate, some by up to 90%![16]
That’s why we made this infographic on tracking “calories out”:
This is the main problem with CICO: we’re stuck with educated guesses for “calories in” and “calories out.”
So we underestimate the calories we eat by 40%. And then we overestimate how many calories we burn by 50%.
No WONDER we think our metabolism is broken if we can’t lose weight! The truth is we’re unknowingly eating too much, and/or moving too little.
Ugh.
Heck, even how many calories you need a day (your baseline or Total Daily Energy Expenditure) is an estimate, something we acknowledge in our calorie calculator, which you can play with right here:
THE NERD FITNESS CALORIE CALCULATOR
In summary: balancing “calories in against calories out” is really all quite messy when you get right down to it.
This post is not made to dissuade you from trying The CICO Diet.
I actually encourage everyone to track their food and calories for one week, because it’s often an eye-opening experience on how much they’re truly eating.
If possible, take a few days and use a cheap food scale instead of just eyeballing it. You’ll be shocked about the actual portion sizes of some foods!
When it comes to sustainable weight loss, here at Nerd Fitness, we encourage two paths:
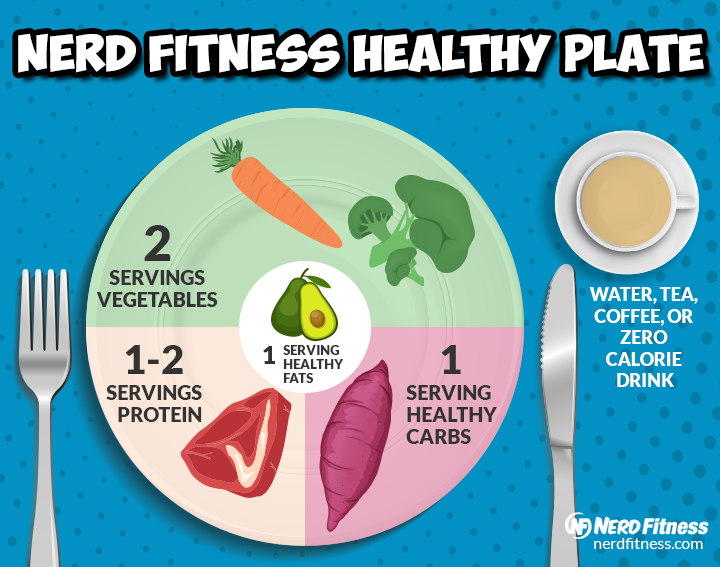
Make small tiny changes towards “real food” (like the Nerd Fitness Healthy Plate above).
Make small tiny changes towards a strength training practice.
Both of these strategies can dramatically – and positively – influence “calories in” and “calories out” respectively.
In our Guide to Healthy Eating, we explain why every website tells you to eat vegetables (which we also tell you): vegetables are full of nutrients, contain lots of fiber to keep you full, and are generally low in calories.
Eating lots of vegetables, or “real food,” will help you naturally lower “calories in.”
How about another example to think about? Here are 200 calories of a blueberry muffin:
Compare it to 200 calories of broccoli (Thanks to wiseGEEK):
Which one do you think you’re likely to accidentally overeat for your calorie allotment?
Right.
For our other strategy, the Strength Training 101 series explains why growing strong is important for fat loss:
Building muscle takes a lot of calories (and so does maintaining it).
In other words, a stronger version of yourself will require more calories.
And will be able to escape from jail easier.
This will naturally raise your “calories out.”
The trick with it all is the “make small tiny changes” bit.
We’ve seen over and over that small steps (eating one new vegetable a week, a simple bodyweight workout) create momentum. Over time, these small changes are the keys to permanently getting healthy.
The exact “small tiny change” doesn’t matter so much, just pick one you feel comfortable with and get going! Once that habit becomes sustainable, pick a new one! And so on and so on…
Still here? Want some more guidance? An exact plan to follow on where to go next?
Alright, you got it, but only because you’ve been nice this whole time.
Here’s how Nerd Fitness can help:
#1) Our 1-on-1 Online Coaching Program: a coaching program for busy people to help them make better food choices, stay accountable, and get healthier, permanently.
You can schedule a free call with our team so we can get to know you and see if our coaching program is right for you. Just click on the image below for more details:
#2) If you want a roadmap for getting in shape, check out NF Journey. Our fun habit-building app will help you exercise and eat better, all while you build your very own superhero.
Interested?
Try your free trial right here:
#3) Join The Rebellion! We have a free email newsletter that we send out twice per week, full of tips and tricks to help you get healthy, get strong, and have fun doing so.
I’ll also send you tons of free guides that you can use to start leveling up your life too:
Download our free weight loss guide
THE NERD FITNESS DIET: 10 Levels to Change Your Life
Follow our 10-level nutrition system at your own pace
What you need to know about weight loss and healthy eating
3 Simple rules we follow every day to stay on target
Alright, I think that about does it for this article.
Now, your turn:
What are your thoughts on The CICO Diet?
Do you have a strategy for balancing “calories in” and “calories out”?
Think I’ve got it all totally wrong?
Let me know in the comments!
-Steve
PS: Make sure you read the rest of our content on sustainable weight loss:
Read, “Food Label Accuracy of Common Snack Foods.” Source, PubMed.
Read, “Individuals Underestimate Moderate and Vigorous Intensity Physical Activity.” Source, PLOS. This study and this study came up with similar results.
Read, “Accuracy in Wrist-Worn, Sensor-Based Measurements of Heart Rate and Energy Expenditure in a Diverse Cohort.” Source, PubMed.
I promise you, if you follow the videos in our guide, you will be more flexible in 30 days.
Let’s get bendy!
What Are the 3 Best Flexibility Exercises? (Intro and Benchmark Test)
The above video comes from Nerd Fitness Prime, kicking off our 30-day challenge “Flexibility for the Inflexible.”
In it, Nerd Fitness Coach Matt discusses the tools he uses for improving mobility with his clients.
The 3 Best Exercises to Improve Flexibility:
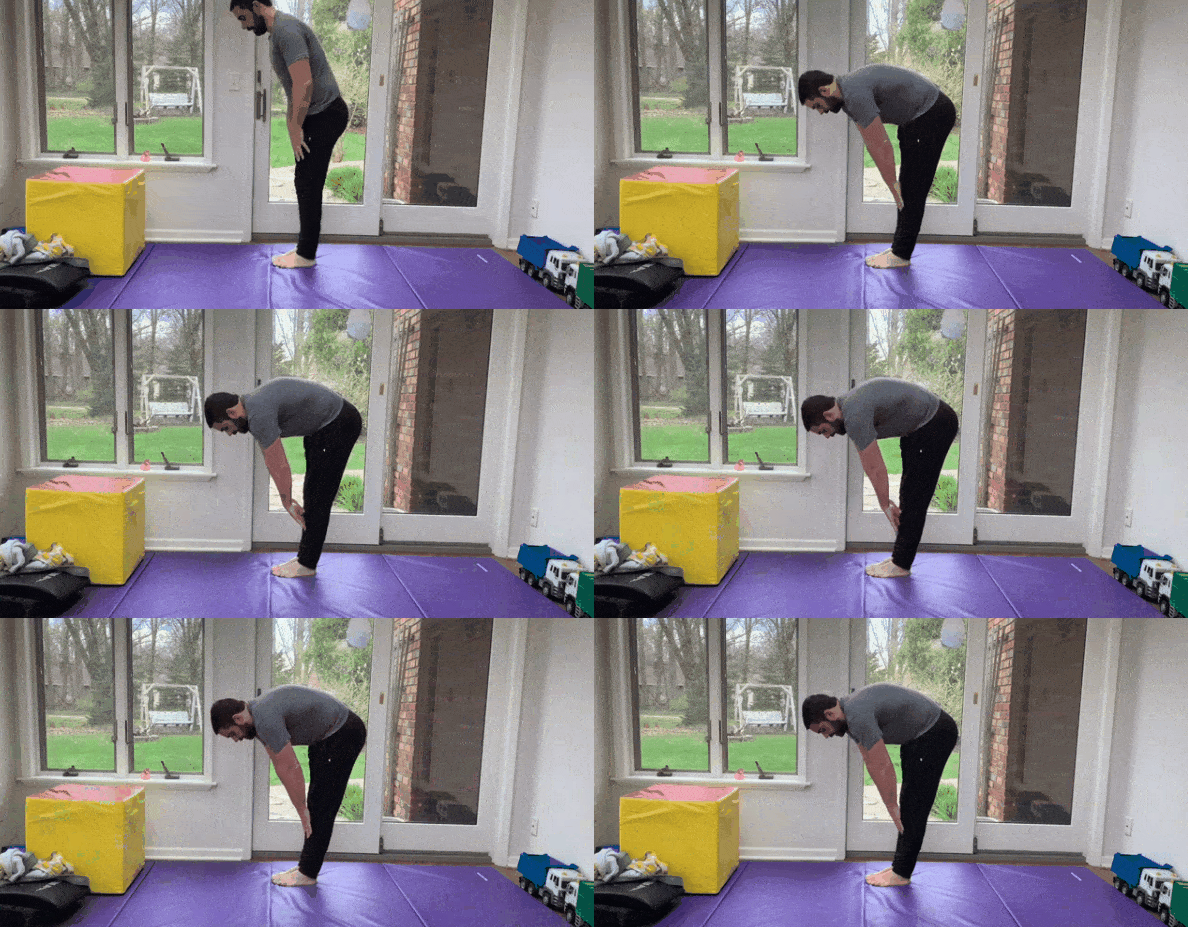
The Toe Touch
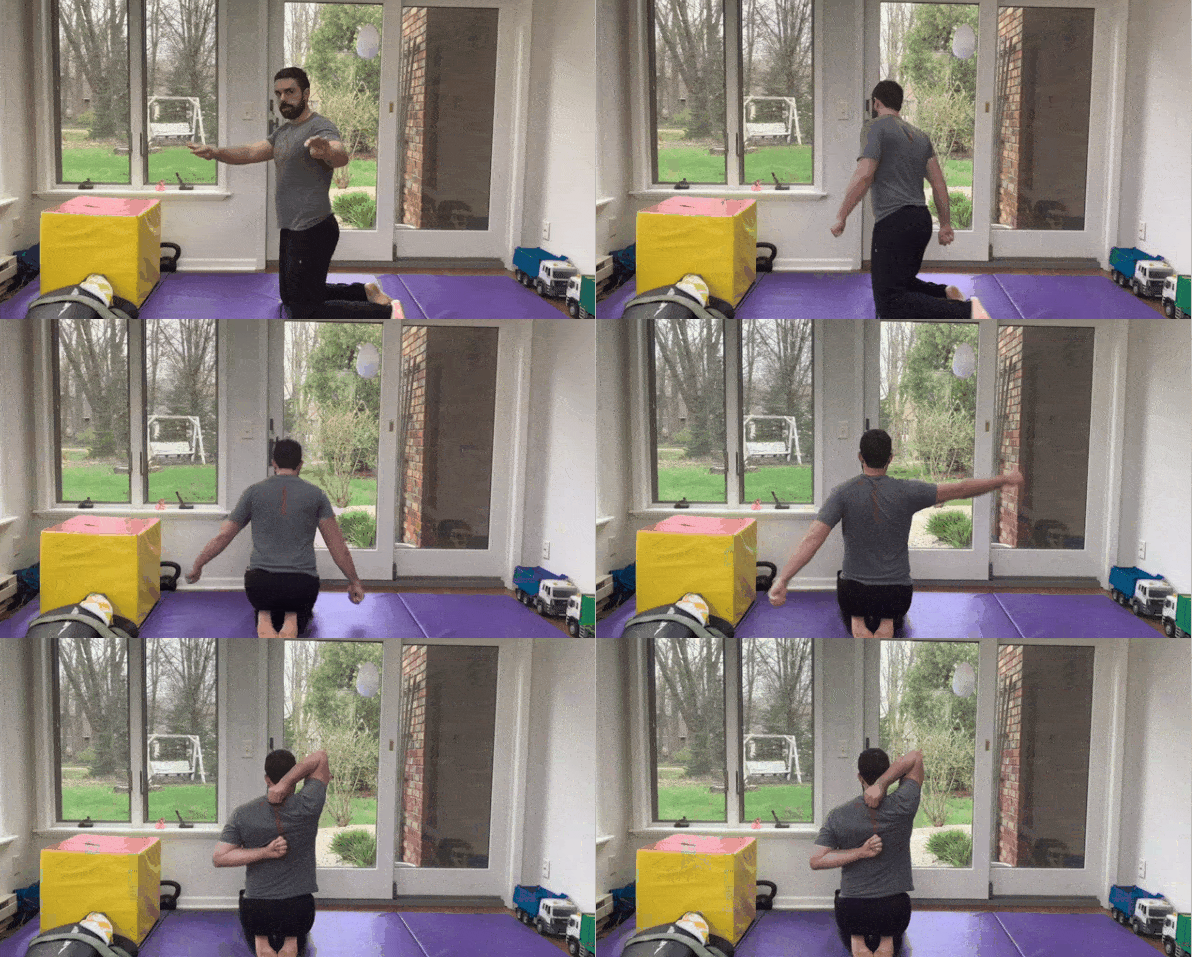
The Back Scratch
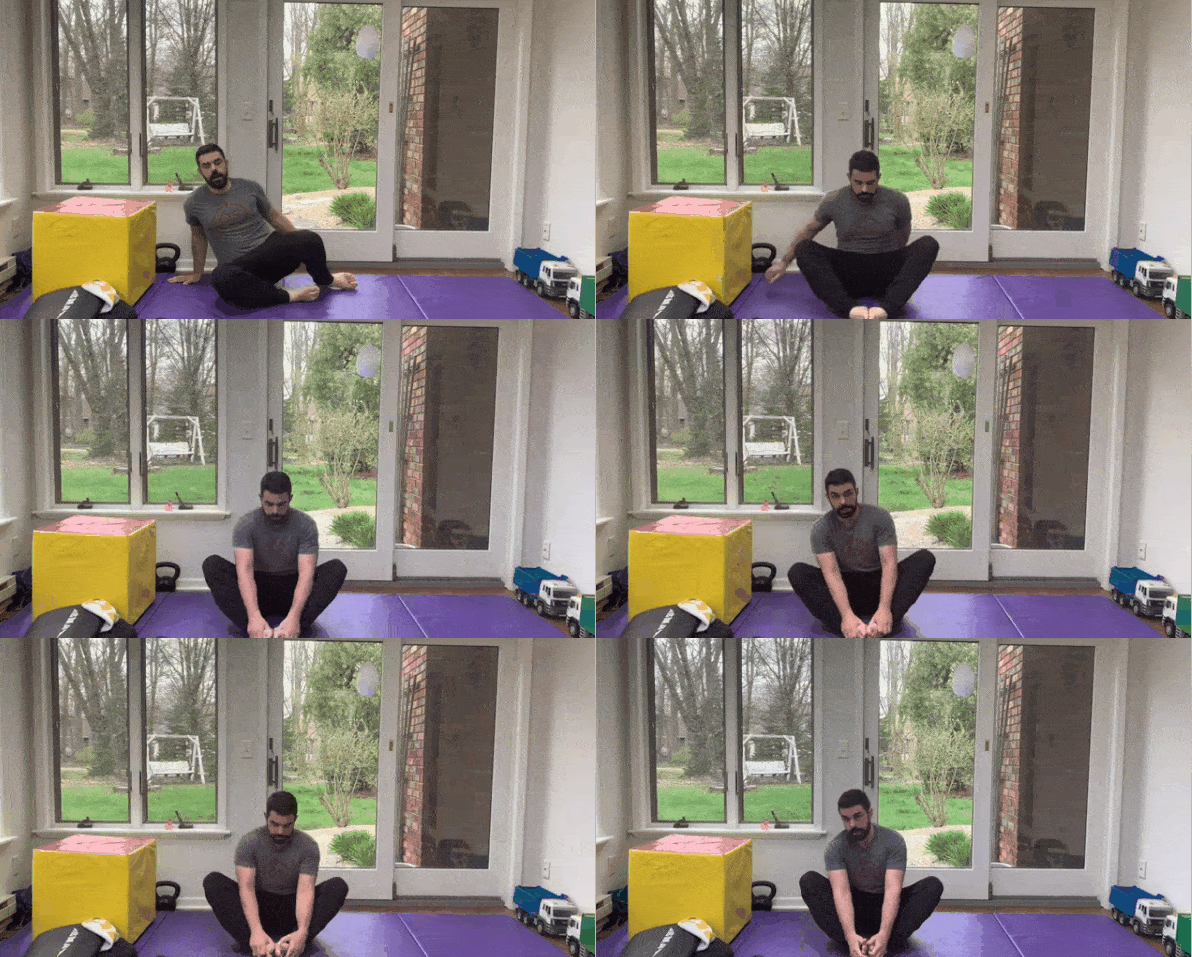
The Butterfly Stretch
Let’s go over each of these moves now.
#1) Toe Touch
To perform a standing toe touch:
Stand straight with your legs about hip-width apart. You want your legs to be straight, but don’t aggressively lock out your knees either (this feels like a “microbend” to a lot of people).
Begin by bending and leaning forward towards the ground with your quads (front of your legs).
Let your body rest naturally, as if you were a ragdoll. Keeping your hands relatively close together, straighten your fingers and begin to stretch down slowly to the ground.
The goal here, ultimately, will be to touch your toes.
Take a comfortable seat (or stand), with your torso and back tall.
Tuck your thumbs inside of your fist.
Place your right hand behind your head, down back over your shoulder. Reach as far down the middle of your back as possible, palm facing you.
Your other arm (left) is going to go behind and up, with your palm facing away. Reach this hand toward your upper hand (don’t strain).
Switch arms and reverse the moment.
Over time, we are going to work to bring your hands closer together.
#3) Butterfly Stretch
To perform a butterfly stretch:
Take a seat, with your legs facing out in front of you.
Bring both of your front feet together, with the bottoms touching, by bending your knees away from each other.
Grab both feet with your hands, with your elbows coming down toward your knee (they don’t have to touch).
Keep your back straight, and allow your knees to come down (if they can, don’t force it).
The goal here will be to bring your knees lower and feet closer to your groin, but don’t fret if this is challenging. Even Coach Matt has trouble with butterfly stretches.
Why these three exercises?
Coach Matt refers to the toe touch, back scratch, and butterfly stretch as “benchmarks.”
If you have decent mobility in these three exercises, you’re probably pretty flexible.
Improving these will be our mission for the next 30 days!
Each week, Coach Matt will provide three different video routines with exercises designed to target these specific benchmarks.
So in Week 1, you’ll find a video for:
Toe Touches
Back Scratches
Butterfly Stretches
You can do these videos all at once if you want, or break them up throughout your week.
Maybe you do a routine Monday, Wednesday, and then on Friday.
We’ll end this guide with some tips on starting a recurring practice.
At the end of our 4-week series, we’ll check in, to see how everything is coming along.
Here’s what we need you to do right now: record where you are with these moves.
How far down can you reach with your toe touch?
How far apart are your hands during the back scratch?
How close are your feet and how high up are your knees during the butterfly stretch?
Coach Matt recommends a few ways to measure these benchmarks in the introductory video above, but even some subjective tracking would be useful:
“On a scale of 1 to 10, this move was tough, so I’d give it an 8.”
Don’t forget about this initial tracking, even if you don’t have a measuring tape. Just go through the initial benchmark tests the best you can.
Before we jump into the series itself, let’s discuss some general tips and tricks for improving flexibility.
Tips and Tricks for Increased Flexibility
First and foremost, all bodies are different.
You might have a great range of motion in your back scratch, but can’t get much range on your toe touch. Or maybe you’re like Coach Matt, where butterfly stretches are challenging.
Our goal here is to improve YOUR flexibility. We’ll all have different mobility ranges on Day 1.
All of us have to start somewhere, so don’t stress if you feel inflexible…
…that’s why you’re reading this guide.
No matter what, by going through this process, you’ll learn more about your body and develop tools for increasing your range of motion.
Next up…
Coach Matt highlights two general ways to increase your flexibility:
Function. This is your technique and awareness of your flexibility. Think of this as maximizing the potential of your current body.
Structure.This would be your body itself, and the range of motion of muscles, tendons, etc. Structure is about changing your body itself through these flexibility exercises.
You’re probably not going to increase the structural flexibility of your body after one stretching session. These things take time
However, you very well may increase your flexibility by improving your function or technique. As you go through the videos, Coach Matt will offer instructions on how to position your body for proper stretching.
This alone may very well increase your range of motion.
We’ll also be using three specific movement tools for improving flexibility:
#1) Active Range of Motion
This would be doing the complete movement of an exercise, fluidly.
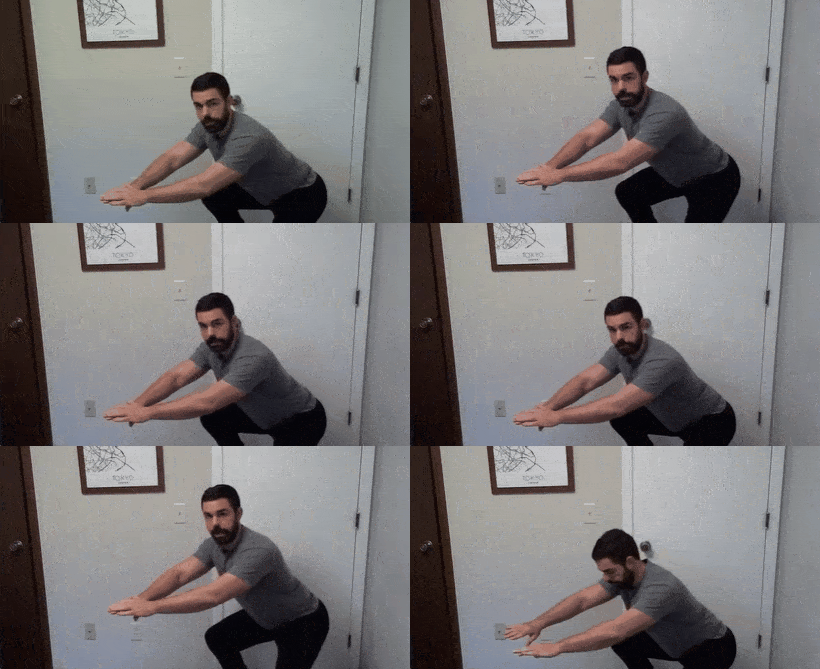
So a normal bodyweight squat would be an active range of motion if you did the entire movement:
By going all the way down and back up with your squat, your muscles are engaged evenly throughout.
#2) Pulses
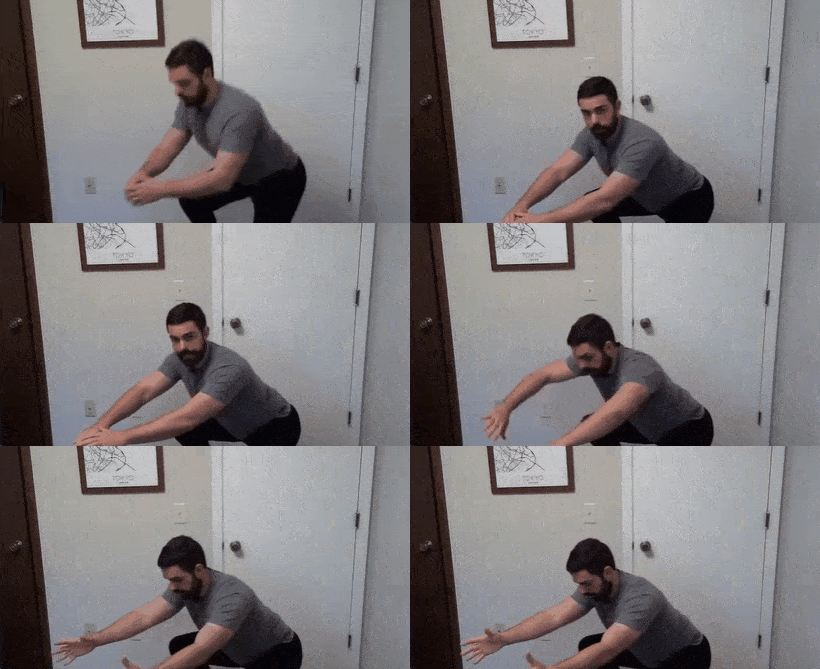
This movement has you stopping at a particular point of an exercise, like the bottom of a squat, and slowly and in control, pulsing slightly up and down:
You’re really only moving about an inch here for your pulses.
This will help you gain control of that particular area.
#3) Holds
As the name would suggest, here you’ll hold the position at a specific point of the exercise.
For example, for your squats, you may pause at the bottom of the movement:
This can help you grow stability during a particular stretch.
During the course of the next four weeks, we’ll be utilizing a combination of active range of motion, pulses, and holds, to increase your flexibility.
And with that, onto week 1!
How to Improve Your Flexibility: Week 1
For our first week, Coach Matt is going to start us off slow.
Here, it’s all about learning the foundations of the movement.
To increase flexibility, it often comes down to properly setting up the stretch.
We’ll begin by teaching you the basics.
Toe Touch Week 1:
Back Scratch Week 1:
Butterfly Series Week 1:
How to Improve Your Flexibility: Week 2
This week, we’re going to identify the edge of your flexibility.
We won’t push or strain ourselves too much, but we’ll use our breath as a sign of difficulty.
The goal here is to understand how flexible you may actually be (you might be able to reach farther than you think).
However, as Coach Matt will continuously reminds, if it feels unsafe, DON’T DO IT!
Toe Touch Week 2:
Back Scratch Week 2:
Butterfly Series Week 2:
How to Improve Your Flexibility: Week 3
In Week 3, it’s all about exploring and expanding your flexibility exercises.
We’ll be testing your movements and begin thinking about ways to “go off the rails” a little here and there.
In our third round of exercises, you’ll begin changing, adapting, and remixing the moves to increase your range of motion.
With flexibility, some creativity can be a good thing, which will be your focus for this stage.
Toe Touch Week 3:
Back Scratch Week 3:
Butterfly Series Week 3:
How to Improve Your Flexibility: Week 4
In the last week of “Flexibility for the Inflexible,” it’s all about building strength.
Muscle will help you hold and expand mobility positions, so this week Coach Matt covers exercises designed to couple strength with your flexibility.
We’ll even mix in some weights into your routine here.
Toe Touch Week 4:
Back Scratch Week 4:
Butterfly Series Week 4:
Next Steps for Becoming More Flexible
The video above is a “re-cap party” with Coach Matt, ending the 30-day Flexibility for the Inflexible challenge we ran for Nerd Fitness Prime members.
Let’s go over some highlights.
#1) Continue to test and retest your flexibility benchmarks.
That which gets measured gets improved, so continue to track your toe touch, back scratch, and butterfly stretch.
Remember, these tests don’t need to be some precise measurement rounded to the nearest millimeter (although if you want to do that, have at it).
Instead, they can be subjective:
“This is really tough, I can’t bring down my knees at all.”
to…
“I could probably sit like this for 15 minutes.”
Don’t stress out over how precise your measurements are, but do keep a record of how these stretches feel. It’ll help us know if you’re improving.
#2) Use your breath as a guide.
Breathing can often be a signal of excretion levels:
If your breath is calm and normal, what you’re doing is within your comfort range.
If you’re huffing and puffing a lot, or even holding your breath, you’re probably exerting yourself too much.
As Coach Matt highlights, during your flexibility exercises, don’t push too far past your comfort zone.
Yes, we should find your edge, but we also want you to feel in control during your stretches so you can really “own” the movement.
If you find yourself having to catch your breath, it could be a sign you’ve gone too far.
Be mindful of your breathing during our flexibility exercises.
#3) You don’t have to stretch every day.
You probably noticed that we provided three 20 minute videos per week to help improve your flexibility.
This was intentional, because you don’t have to stretch every day to increase your range of motion.
Truth be told, you don’t even need to do 20-minute sequences three times a week to improve flexibility. Even just 10 minutes of flexibility exercises a couple of times per week could improve your mobility.
To do so, you can continue to follow the videos in this guide, or I have some other resources for you to check out.
Here are three more guides for improving your flexibility:
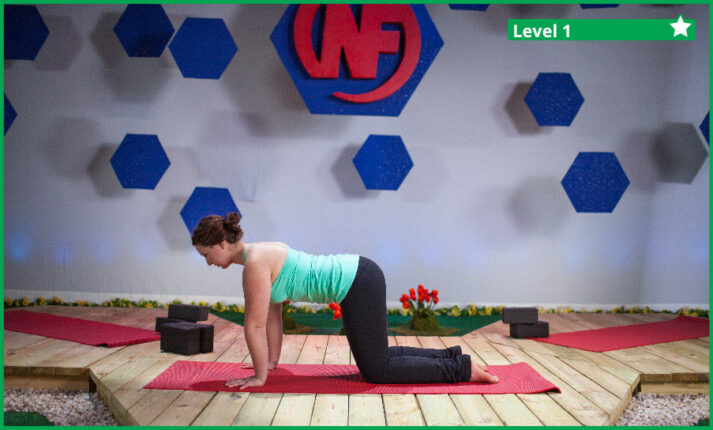
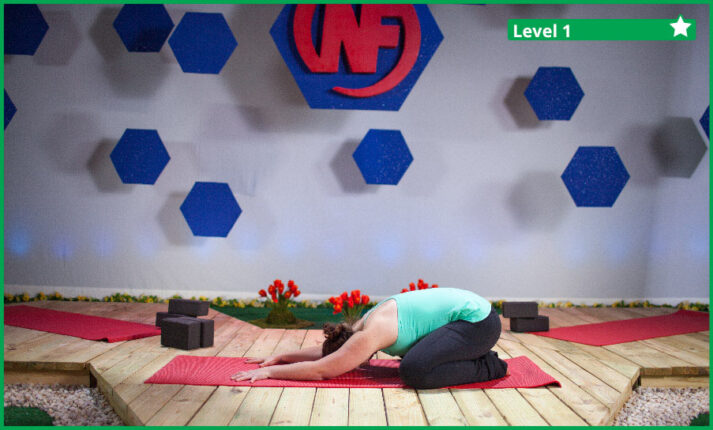
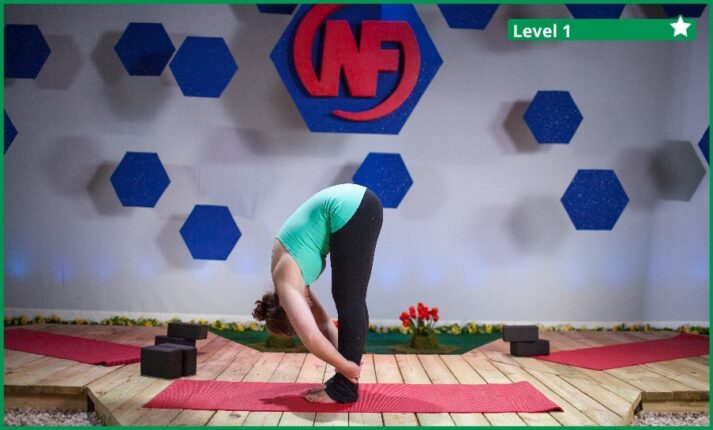
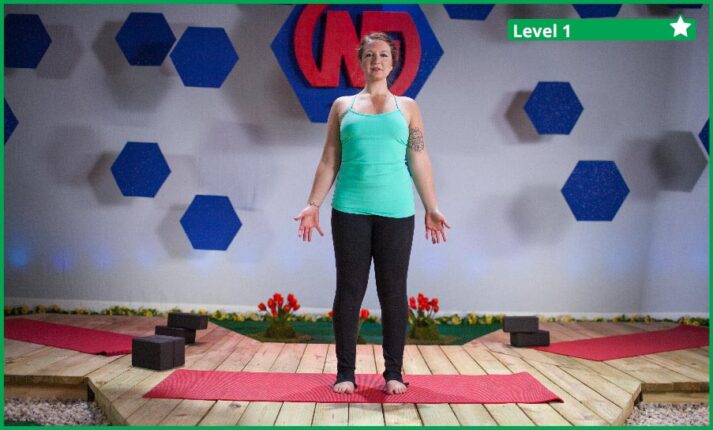
21 Yoga Poses for Beginners. Yoga can be a great practice to improve your flexibility. If you’ve never tried it before, check out our guide. We’ll provide video sequences designed for beginners, so don’t worry if you have no clue what a downward dog is. We’ll teach you.
Three Full-Body Stretching Routines to Cool Down. After a workout, a good stretch can be the perfect way to lower your heart rate. Our guide will offer you three different routines to perform after your workout (or whenever) so you can start improving your flexibility.
How to Touch Your Toes. Since the toe touch is the go-to benchmark to see how flexible you are, we have a complete guide on getting you there. If you’ve always dreamed of being able to reach your little piggy wiggies, start here.
The most important thing you can do now?
Get to it!
You’re not going to get any more flexible by reading articles online, so pick a sequence from today and get going!
If you like our style here at Nerd Fitness, I have three great options on how you can continue your journey with us:
Option #1) If you want a professional coach in your pocket, who can do video form checks, provide feedback, and adjust your workouts based on your experience level, check out our 1-on-1 Online Coaching Program!
For example, let’s say you have an old injury and couldn’t perform one of our flexibility exercises. A Nerd Fitness Coach can work with you to create a customized routine for your exact situation.
Personally, I’ve been working with the same online coach since 2015 and it’s changed my life. You can learn more by clicking on the box below:
Option #2) Exercising at home and need a plan to follow? Check out Nerd Fitness Journey!
Our fun habit-building app helps you exercise more frequently, eat healthier, and level up your life (literally).
Plus, you can take part in flexibility challenges alongside a group of nerds who are all trying to better themselves!
Try your free trial right here:
Option #3) Become part of the Rebellion! We need good people like you in our community, the Nerd Fitness Rebellion.
Sign up in the box below to enlist and get our Rebel Starter Kit, which includes all of our “work out from home” guides.
Get your Nerd Fitness Starter Kit
The 15 mistakes you don’t want to make.
Full guide to the most effective diet and why it works.
Complete and track your first workout today, no gym required.
Alright, now I want to hear from you!
Did you try our “Flexibility for the Inflexible” series?
Did you find any of the exercises easier or harder than the others?
Any tips or tricks to help the “inflexible”?
Let me know in the comments!
-Steve
P.S. Personally, I’ve found a yoga practice to be incredibly helpful in improving my mobility.
These are the exact type of workouts we build for our 1-on-1 Coaching clients, busy business travelers like you that are trying to get fit even while living out of hotel rooms and airports!
Do one exercise right after another – this should take you probably 3-4 minutes.
Next set your watch/laptop for 15 minutes and do as many full circuits as possible in that time frame, using PERFECT FORM for each repetition. Try to move from each exercise to the next without stopping.
I’ve also split the workout into three levels – beginners should start at level 1 until they feel comfortable enough to advance to levels 2 and 3.
LEVEL 1 HOTEL ROOM WORKOUT
Body Weight Squats: 20 reps (you don’t need a chair like in video, that’s just if you need help)
Incline Push-Ups: 15 reps (feet on floor, hands on edge of bed or desk)
One-Arm Luggage Rows: 10 reps (each arm, use your suitcase as your weight)
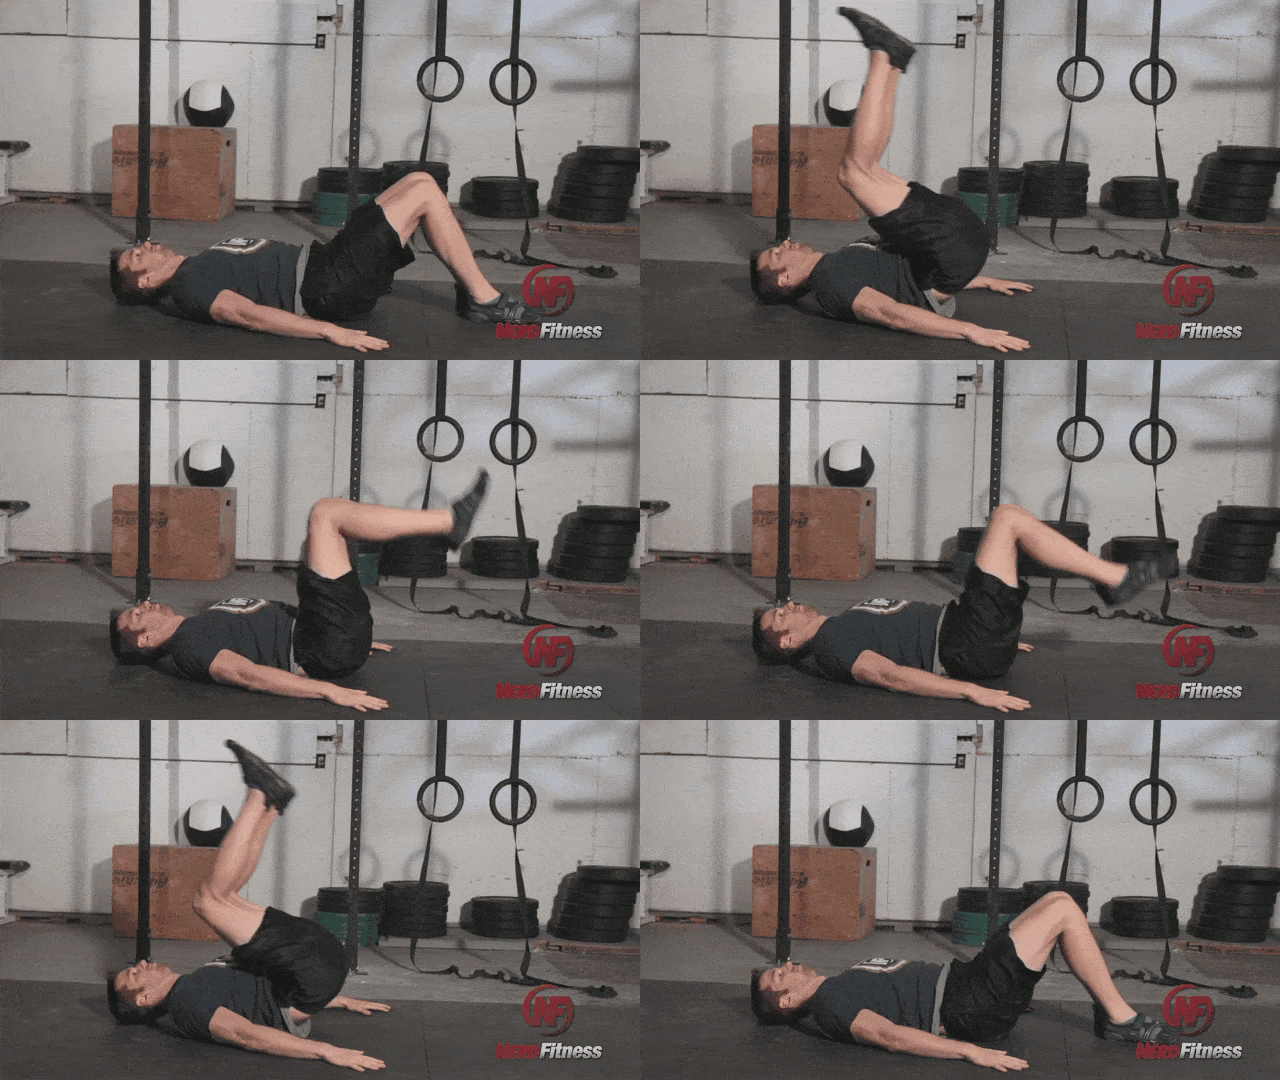
Reverse Crunches: 10 reps
LEVEL 2 HOTEL ROOM WORKOUT
Overhead Squats: 25 reps
Push-Ups: 20 reps
Inverted Rows: 10 reps(using the desk in your hotel room…just don’t break it!)
Reverse Crunches: 15 reps
LEVEL 3 HOTEL ROOM WORKOUT
Jumping Squats: 25 reps
Decline Push-Ups: 20 reps (feet up on bed or desk chair)
So here are the exercises you can do in the comfort of your hotel room while watching guilty pleasure reality shows you’re too embarrassed to watch at home.
Here’s a list of quick exercises you can do in your Hotel Room:
You can always do a little yoga in your hotel room!
Nope, you don’t need a mat. You can just use a towel if you’d like to pad your knees a little.
For instructions on how to do any move in the routine above, check out A Nerd’s Guide Yoga.
WHY YOU SHOULD WORK OUT IN YOUR HOTEL ROOM
Even when I’m living out of hotel rooms, I prioritize working out.
I find that on days when I exercise, I eat better. Something activates in my brain when exercising that says “I’m trying to be healthy, so I’m going to eat healthy.” On days when I don’t exercise at all, I tend to say things like “meh, I’ll do it tomorrow” or ‘it’s only one meal” or “it’s only a few beers.”
That’s why a workout, even if it’s for only 20 minutes, can be very critical while traveling. It really does have a way of stopping you from gorging yourself silly on pizza later. It’ll also help you build momentum.
Speaking of momentum…have you met Jeff?
Jeff is a doctor and start-up founder who travels 2+ weeks out of every month and lives out of hotel rooms too! We helped him lose 30+ pounds and get in the best shape of his life despite the fact he was living out of hotel rooms for the past two years.
Jeff is a proud member of our snazzy 1-on-1 Online Coaching Program, and loves the “global accountability” his coach provides.
If you are somebody that can’t seem to stay healthy while traveling, we’d love to help – we’ll build you a program that works at home, and then adjust your workouts to fit into your travel schedule too. We help our clients with expert guidance, support, and accountability.
Interested?
Click below to learn more:
If that’s too much for you right now, I’ve got two other great options for you:
#1) If you want a roadmap for getting in shape on the road, check out NF Journey. Our fun habit-building app will help you exercise and eat better, all while you build your very own superhero…no matter where on Earth you are!
Interested?
Try your free trial right here:
#2) Join The Rebellion! We have a free email newsletter that we send out twice per week, full of tips and tricks to help you get healthy, get strong, and have fun doing so.
I’ll also send you tons of free guides that you can use to start leveling up your life too:
Download our free weight loss guide
THE NERD FITNESS DIET: 10 Levels to Change Your Life
Follow our 10-level nutrition system at your own pace
What you need to know about weight loss and healthy eating
3 Simple rules we follow every day to stay on target
Okay, that about does it.
The next time you’re in a hotel room, or any room, try our 20-Minute Hotel Room Workout. If you find even Level 3 too easy, try this one instead. I’ll warn you though, I don’t hold back on this more advanced circuit.
Alright, now I want to hear from you:
Do you spend a lot of time in hotels?
Travel a lot for work?
What are your tips and tricks for staying healthy while living in hotels?
Also, if you’re in a hurry, we’ve compiled all our strength and weight training content into one handy guide called (appropriately): Strength Training 101: Everything You Need to Know.
Grab it for free when you join the Rebellion (that’s us!) below:
Download our comprehensive guideSTRENGTH TRAINING 101!
Everything you need to know about getting strong.
Workout routines for bodyweight AND weight training.
How to find the right gym and train properly in one.
Alright, cue the music. Let’s do this thang.
What are Compound Exercises?
Let’s compare “compound exercises” to “isolation exercises”:
Compound exercises require more than one muscle group working together to complete the movement. This replicates the way your body naturally moves.
Isolation exercises more or less train one specific muscle group. For example, the leg extension machine focuses on your quads, so it “isolates” training that muscle.
Front squats would be an example of a compound exercise, because it engages your entire lower body and core, and quite a bit of your upper body too, as you perform the movement:
As opposed to biceps curls, which more or less just trains your biceps:
As we explain in our Guide to Functional Fitness, whenever possible you want to focus on compound exercises.
Why?
Because in everyday life, you don’t use your muscles in isolation!
When you’re placing luggage in the overhead bin, hoisting a bag of dog food from the floor, or hauling your kid to bed, you’re using your muscle groups together.
Just like you would with a compound exercise.
Plus, since you’re using multiple muscle groups at once, you’re taxing your body more when training. This can provide more efficient use of your time in the gym.
In other words, why do three different exercises when you can just do one?
Now that we’ve got that out of the way, let’s get to working out.
The squat exercise serves a dual purpose – it is the foundation for building strength AND helps build proper mobility. If you are going to ever do barbell squats, you need to work on hitting proper depth with a bodyweight squat first!
Once you can support your body’s weight above the bar, the world becomes your playground. No strength training routine should be without pull-up or chin-up work! (Can’t do a pull-up yet? We got you.)
Muscles trained with the pull-up:
All of your back muscles (Latissimus dorsi, rhomboids, trapezius)
This exercise is simple: press a barbell above your head.
Muscles trained with the overhead press:
Pectoral
Triceps
Deltoids
Rhomboid (Back muscles)
Abs
All the muscles in your chest, shoulders, and arms are engaged in order for you to lift the weight over your head. As a bonus, you need to really flex and brace your core, which gets those muscles working too.
Here are step-by-step instructions on how to perform the overhead press:
To do a weighted lunge, have the bar across your upper back and step out with your right leg. Lower your hips until your back leg’s knee almost touches the ground. Explode up and back by pushing off with your front leg. Repeat on your other side.
Muscles trained with the barbell lunge:
Quads
Glutes
Hamstrings
Your core (as you stabilize yourself and the weight)
Note: The above might be tough if gyms are closed around you. If that’s so, here’s how to build a gym at home (using household equipment).
Start Performing the Best Compound Exercises (Next Steps)
Your mission, should you choose to accept it: commit to trying ONE of these compound movements in the next week. Use 20 seconds of courage, recruit a friend who has lifted or trained before, and try your best.
We all start somewhere!
Speaking of starting out…
Have you yet to do ANY of these compound exercises?
Always start out with bodyweight moves and make sure your form is correct!
If it’s a barbell movement, use a broomstick (or PVC Pipe).
You can pretend you’re Harry Potter after:
When it comes to movements like squats, deadlifts, pull-ups, bench press, etc. – your form is crucial. Develop good habits with lighter weight and you will save yourself months of frustration later and will protect you from injury.
If you’re struggling with certain elements of a movement, don’t get frustrated! Just understand that you’ll have areas in which you can improve.
When I started, I really liked practicing all of the movements at home because I could watch a video online at the same time as I was watching myself do it in a mirror.
Still uncomfortable with the movements after that? Look around at some local strength and conditioning gyms and see if you could hire a coach (here’s how to find a good trainer) for one or two sessions just to go over the basic movements (or consider working with an online coach).
No matter what path you take, the most important thing you can do: START NOW!
Don’t overthink it. Just pick a compound exercise and learn how to do it. We can add more exercises to your routine down the road.
Want a little help getting going? The perfect next step to start your strength training journey!
You got it.
Here’s how Nerd Fitness can help you:
#1) If you want a coach in your pocket, who can do video form checks, provide feedback, and adjust your workouts based on your progress, check out our 1-on-1 Online Coaching Program!
I’ve had an online coach since 2015 and it’s changed my life. You can learn more by clicking on the box below:
#2) If you want a daily prompt for doing compound exercises at home, check out NF Journey. Our fun habit-building app helps you exercise more frequently, eat healthier, and level up your life (literally).
Plus, you get to build an awesome superhero in the process!
Try your free trial right here:
#3) Join the Rebellion! We need good people like you in our community, the Nerd Fitness Rebellion.
Sign-up below and receive our free guide Strength Training 101: Everything You Need to Know. It includes step-by-step instructions for the Best Compound Exercises covered in today’s guide.
Download our comprehensive guideSTRENGTH TRAINING 101!
Everything you need to know about getting strong.
Workout routines for bodyweight AND weight training.
How to find the right gym and train properly in one.
Alright, enough from me. Your turn:
Do you agree with my list of best compound exercises?
Am I missing any?
Any tips or tricks for a newbie just getting started?
Whether you’re comfortable on a yoga mat or you think a downward dog is just something your puppy does, you’re in the right place.
We teach yoga in our Online Coaching Program where some of our clients have used it to improve their back pain…like Brain here:
He also switched up his diet and lost 75 pounds!
I can’t wait to help you get started.
Today’s yoga poses will be broken out into three levels, for you to progress in difficulty.
What can I say, we love leveling up here at Nerd Fitness. Most of our poses are basic, Level One, in case you are completely new to yoga. However, we’ll include a few more advanced poses so you can take it further.
We’ll start by discussing a little Yoga 101, in case you are totally lost right now and don’t know yoga from yogurt. If you wanna skip to your desired video or pose, just click on it.
Yoga means lots of different things to different people… like Windfarm Yoga apparently, to the woman in the photo above. As one commenter from Cracked pointed out:
“The only thing I know for sure about yoga is that whatever you’re doing when you practice it, you’ll be assured by someone that it isn’t “real yoga.”[1]
I’m not interested in that particular aspect of the yoga debate: people need things to argue about and get offended over…because Internet. What’s important to me is getting more people interested in trying yoga out because it’s damn fun and can really improve your life.
After all, as Vox explains:
“Yoga seems to help alleviate lower back pain, improve strength and flexibility, and reduce inflammation in the body — which, in turn, can help stave off chronic disease and death.
Emerging research suggests yoga can increase body awareness, or attention to the sensations and things going on inside you. That’s no small matter: Researchers think heightened body awareness can improve how well people take care of themselves.”[2]
Science is essentially telling us: Yoga can help you become more flexible like Black Widow, improve your strength like the Hulk, extend your life like the elves of Rivendell, and give you mental awareness like Yoda.
The jury is still out as to whether or not it grants us telekinetic powers.
Please email me if a yoga practice helps you levitate rocks.
When I approached yoga years ago as an attempt to improve my flexibility and to combat poor posture, I was initially worried about looking foolish or finding some aspect of the exercise that didn’t sit right with me.
Instead, I found a complimentary, enjoyable activity that helped improve my flexibility and mobility, alleviated my lower back pain, opened up my hips to combat a lifetime of sitting, and even helped me quiet my overactive mind!
Plus, it was like a power-up for my strength workouts.
It’s now an activity I do with regularity throughout my week, incorporating yoga stretches during the day in between desk sessions, after working out, and attending the occasional class to level up.
WHY SHOULD I CARE ABOUT YOGA?
If you read Nerd Fitness, you’re probably a skeptic. After all, one of the Rules of the Rebellion is to question everything!
So you might be thinking: “Steve, you’re not going to ask me to start speaking in mantras, chanting OMMMMMM, and work on improving my spiritual chi.”
As somebody who started yoga with the exact same reservations, I sit before you a changed man. For starters, if you decide the spiritual aspects of the practice aren’t for you, you’re not alone: research into yoga’s history can lead down an internet rabbit hole of controversy that is bottomless.[3]
So we’re not going to jump in that fight.
Instead, what you will find when it comes to yoga is study after study showing that this form of exercise rocks.
Here’s why yoga is beneficial:
1) A body prepared to handle anything: at Nerd Fitness, we are huge fans of strength training, and yoga is its perfect compliment. It elongates your muscles, improves your flexibility, can release tension in your neck and shoulders, and helps you do things like touch your toes![4] It can help you build stronger muscles, improve balance and stability (especially for our older rebels[5]), and make you more “antifragile” (one of my favorite terms).
Yoga subjects exhibited increased deadlift strength, substantially increased lower back/hamstring flexibility, increased shoulder flexibility, and modestly decreased body fat compared with control group.
2) Yoga is great for lower back pain: If you’re one of the 31+ million people like myself who struggle with lower back pain, yoga can help.[7] Yoga really helps those of us stuck at a computer all day long as well.[8]
3) Yoga can help meet weight loss goals when combined with a healthy diet. Look, we all know our diet is responsible for 80-90% of our success when it comes to weight loss. The other 10-20% of the equation is participating in physical activities that push your body outside its comfort zone.
Yoga is a great way to burn a few extra calories and keep your brain focused on “I am doing healthy things and thus I should be eating healthy foods!” It can help improve our fight against cardiovascular disease, hypertension, and obesity.[9] It’s also a great rest day activity to keep you on track when you’re not doing your other workouts.
4) Speaking of which…yoga can be done every single day, and can be done anywhere. No gym required, no equipment required – no excuses! On top of that, because it’s a low-impact activity and doesn’t overly tax your muscles like a powerlifting session, you can do yoga every single day, anywhere you can find a soft place to sit down: your living room, a park, a beach, your bedroom, on the moon, etc.
5) Yoga can quiet an overactive mind: We live in a world with a distraction around every corner; we read Facebook or our favorite blog while checking email and texts… while trying to work a day job. If you’re anything like me, your mind races a million miles an hour, and trying to develop a sense of control and calm over your mind is like herding cats. We’ve already explained the benefits of Meditation for Nerds; yoga can be tremendously helpful with becoming more aware of our bodies and help with reducing stress and anxiety.[10]
Lastly, if yoga is good enough for badass Dhalsim from Street Fighter II, it’s good enough for me:
Alright, I’m going to assume at this point you are on board with yoga. If being able to completely demolish a car with your bare hands doesn’t convince you, nothing will.[11]
So let’s go over some yoga poses and routines.
A YOGA ROUTINE FOR BEGINNERS YOU CAN DO AT HOME
We’ll start out our explanation of different yoga poses by showing you what the end result can look like.
Here’s a complete routine covering some basic yoga poses:
The above video (Water Series – A) is taken from our course, Nerd Fitness Yoga (a part of Nerd Fitness Prime). If you like it, I’d encourage you to go browse the page and check it out.
Nerd Fitness Yoga is a course you can follow along within the comfort of your own home, and it’s built specifically for members of the Rebellion: easy to follow instructions, an inviting attitude, and as you can tell… some corny jokes from yours truly.
This course will work for men and women of all shapes, ages, and sizes, giving anybody the confidence to get started IMMEDIATELY. Follow it regularly and you can expect the benefits of the dozens of studies I linked above when it comes to yoga practice.
In addition to a HUGE pose library and step-by-step instructions, it also contains all of the following full-length yoga sessions filmed in HD:
Water sessions: Two beginner yoga videos (25 minutes each, first one was above)
Fire sessions: Two intermediate yoga videos (30 minutes each)
Star sessions: Two advanced yoga videos (40 minutes each)
Deep stretching routine (40 minutes)
6 supplemental mobility videos (that will help with lower back mobility, how to finally touch your toes, and so on. Two of which are below.)
All of these videos can be streamed or downloaded to any device as many times as you’d like so you can practice yoga wherever, whenever.
10 BEGINNER YOGA POSES (LEVEL 1)
#1) Seated Cross Legged
One of the most popular yoga poses is simply Seated Cross Legged.
A seated position helps relax, reset, and open your hips up a bit.
Bring yourself down to a seat on the floor, whatever is most comfortable. Cross one ankle of the other in front of you and sit cross-legged.
Take a big breath in and straighten your spine as if there was a string pulling your head and neck up to the ceiling. Breathe out, but keep that upright posture.
Hands can rest on your knees, but shouldn’t push out or pressure your legs.
#2) Table Top Cat-Cow
This is actually a series of a few poses (Table Top, Cat, & Cow) that is used in almost every yoga session to help reset your spines and warm up your back.
Start in Table Top, with your hands under your shoulders and your knees under your hips. Your spine should be parallel with the floor to start.
Exhale and slowly press into your hands as you abs up towards your spine. Round your spine to the ceiling as you bring your chin towards your chest. Gently push out your shoulders.
Inhale and relax your abs while you bring your hips back down. Lengthen your torso as your head comes up and looks towards the ceiling. Your chest should come forward slightly and your lower back should push into your pelvis.
Relax and return back to a neutral Table Top position.
#3) Child’s Pose
Child’s Pose is considered a resting position. This means that any time you feel overwhelmed, overheated, or stressed about a particular pose or variation while doing yoga, STOP what you are doing and come slowly into a Child’s Pose to rest.
This pose helps lower stress, refocus your mind, and lightly stretch primarily your lower back, hips, and thighs.
Start by kneeling on the floor with your toes touching behind you. Widen your knees so they are just a little wider than your hips. Gently lower your body between your knees and hips.
Your arms will stretch out lightly in front of you and you can drop your shoulders to the sides and down.
A variation you can use (which may be easier or harder for you) is to tuck your toes under your feet, instead of having the tops or side of your feet against the ground. Do whichever variation is most comfortable and natural for your body.
#4) Forward Fold
Forward Fold is another one of our most popular yoga poses. It’s primarily focused on stretching the lower back, hips, hamstrings, and calves.
Start standing and gently bend forward as you lengthen your torso and spine. As you fold towards the ground, keep your knees straight (but not locked out). If you can, grab the back of your calves and gently pull yourself deeper into the fold.
As you breathe in, you can lift slightly and extend your torso and spine forwards. As you exhale, you can fold forward again into the stretch.
To scale this down, you may use blocks to help raise the floor. Keep your knees straight and your spine long, and fold as far as you can comfortably go.
#5) Standing
Standing pose is a resting and centering pose in yoga, but don’t take it for granted.
Even when we are standing in between poses, be sure to stay strong, active, and rooted through your feet. Your feet should also be flat and not rolled in or bowed out.
Activate your hips to prevent locking out your knees and keep your posture and spine tall and elevated.
Finally, your shoulder should be open and your chest broad. Neck in line with your spine (not hunched forward). Stretch tall from your hips through your head.
#6) Standing Mountain
Standing Mountain is a great pose to warm up our shoulders and spine.
Start by staying strong and rooted through your feet (which are flat on the ground). Legs active, but not locked out. Shoulders open and neck in line with spine.
As you take a deep breath, bring both arms straight out in front of you and up overhead towards the ceiling. Make sure your shoulders aren’t hunched and close to your ears, but rather relaxed and released down.
Rooting through your shoulder blades, pull your spine and arms towards the ceiling.
#7) Cobra
Cobra is a popular pose that almost always follows Plank as a transitional sequence in many yoga sessions.
This pose primarily stretches the shoulders, chest, spine, and stomach.
Start by laying flat on the ground on your belly, with the tops of your feet on the floor. Your hands should be positioned under your shoulders (much like you would imagine starting a pushup).
Slowly push down through your hands and straighten your arms to lift your chest up off the floor, but unlike a push-up, keep your hips, thighs, and tops of feet rooted and pushing down towards the ground.
Move your shoulder blades back, lift your chest, and look forward and slightly up. Hold for several seconds and then slowly release down.
To scale this pose down, only raise your chest and head to where you are comfortable. Be sure to keep your hips and thighs pushing down to the floor, even if that means you can only raise your chest a little.
#8) Low Lunge
Low Lunge is a variation of Lunge that is a building block for several more advanced poses. It’s most commonly thought of a Lunge with your knee on the ground.
This pose will primarily stretch and strengthen the groin, hamstrings, and hips.
Often, you’ll get into a lunge by starting in a Forward Fold and slowly stepping one of your legs back behind you. If you need to, you can scoot your foot back several times until you are able to have your front knee directly over your front ankle.
As you bring your leg back, drop your back knee to rest on the ground. This will help support some of your weight, but the majority of your weight should stay pushing forward through your front knee and hips.
Bend your torso over your front knee and lengthen your spine forward. Your weight should be pressing down through your heels.
To scale down, you can use blocks on each side to balance yourself more without having to reach all the way down to the floor.
#9) Knee Hug
This pose is used to compress and tighten your body. It’s often used right before Corpse Pose at the end of sessions to reset.
Start this pose by lying on your back with your arms and legs straight out. Take a deep breath and slowly bring your legs together and your knees lifted toward your chest.
As your knee comes up, wrap your arms around them and clasp your hands together. If you can’t quite wrap your arms you can reach down each hand and gently pull in your kneecaps.
Gently squeeze your knees into your chest, keeping your back flat on the ground and dropping your shoulders down. You can focus your eyes down the center of your body.
If for any reason you have trouble doing this, simply raise your knees towards your chest as far as they will go. Hold for a few seconds and release back down.
#10) Corpse Pose
Everyone’s favorite yoga pose, and often a way to end a complete session! And while at first, it can seem like just lying on the ground, there’s more to it than that.
This poses is fantastic for calming the mind, relieving stress, and relaxing the body back into a neutral position.
You’ll have a desire towards the end of a session to skip over Corpse Pose and move on.
Don’t! Spend a few minutes coming back down and resetting your body in each session.
Start by laying on your back. Your arms should stretch down comfortably to each side, slightly away from your body. Both your legs stretched out and with a little space, as well.
Do your best to “release” your shoulders and neck and let them fall neutral as well (even when on our backs we tend to engage our necks).
Focus on your breathing and on relaxing any tight or sore areas of your body.
If you need to, turn onto your side and bend your knees (laying on your side completely). Wiggle your toes, ankles, hands, or wrists as needed.
7 BASIC YOGA POSES (LEVEL 2)
#1) Downward Dog
This pose primarily focuses on stretching the shoulders, hamstrings, and calves.
The first few times you get into Downward Dog, you’ll want to start on your hands and knees (what we call Table Top), but with your arms a little bit forward of your head. Pushing into your hands and toes, slowly lift your knees off the ground.
If you can, slowly straighten your knees (don’t lock them) as you gently stretch your heels down to the ground. Once comfortable, you can work your shoulders back toward your tailbone.
To scale this down, you can lift your heels further off the ground and/or bend your knees for easy modification. You can also use blocks to elevate your arms as another alternative.
#2) Crescent Moon
Crescent Moon is a variation of Low Lunge where we stretch upright towards the ceiling.
This pose primarily stretches and strengthens the groin, hips, chest, spine, and shoulders.
To start this pose, you’ll want to get into a comfortable Low Lunge. Usually, this means stepping one leg forward from Downward Dog or stepping one leg back from Forward Fold, and then dropping your back knee down rooted on the ground.
As you take a deep breath, bring your torso up from lunge to upright and stretch both hands straight up toward the ceiling.
Instead of arching your back, draw your hips down and forward and lean your shoulder back (keeping it straight and engaged).
To scale this pose down, you can just stay in Low Lunge and work on stretching without extending upward.
#3) Bridge
Bridge is a backbend pose that primarily stretches and strengthens the back and spine, but also the chest, shoulders, and neck.
Start by laying flat on your back. Bring your feet flat on the ground as close to your butt as they comfortably sit. Arms should be flat and down to your sides.
Pushing down through your feet and arms, slowly lift your butt off the floor and into Low Bridge (around when your spine is straight with your legs).
If you are comfortable, you can bring your hands together under yourself. Continue to slowly push your hips and butt towards the ceiling, making sure to keep your knees over top of your ankles. Work towards parallel with the ground for the full Bridge pose.
To scale this down, stop in Low Bridge if going further is uncomfortable. If Low Bridge is difficult, just practice moving your hips slightly off the ground from the starting position. As you gain more flexibility, you’ll work to hold in Low Bridge.
#4) Half Splits
This pose primarily stretches your hamstrings, hips, and lower back.
To start this pose, get into a Low Lunge. Your back knee should be firmly rooted on the ground.
Slowly shift your weight as you move your hips and torso over your back knee. As you do this your front leg will go from bent at the knee to fully extended straight in a line.
If you need them, you can use blocks or a supporting prop on each side now to support your weight (if you can’t reach the ground here).
Slowly fold forward over the top of your extended front leg, with your hips staying rooted back and over top of your knee that’s on the floor.
To scale this down, use blocks on each side as suggested above. You can also stay upright (instead of folding towards the end). Stop in the progression whenever you lose comfort.
#5) Lunge
The Lunge is a major building block for all sorts of yoga poses. Many poses are variations of or come in and out of the Lunge.
This pose will primarily stretch and strengthen the groin, hamstrings, hips, and knees.
Often you will get into lunges starting in a Forward Fold and slowly stepping one of your legs back behind you. If you need to, you can scoot your foot back several times until you are able to have your knee directly over your front ankle.
Bend your torso over your front knee and lengthen your spine forward. Your weight should be pressing down through your heels and your back knee should be active with your knee straight throughout.
To scale down, you can use blocks on each side to balance yourself more without having to reach all the way down to the floor. At any time, you can also drop the back knee down to the ground coming into Low Lunge instead.
#6) Ninja
One of the most fun poses to make sound effects while doing, Ninja is actually a series of movements rather than a single pose. You might also have heard it called a Side Lunge, but this is Nerd Fitness, so we’re going with Ninja.
This pose helps strengthen the entire lower body and stretch out the hamstrings.
Start by lowering yourself into a half squat (Frog Prep).
Choose a foot and turn your toes out a little wider. Walk your hands over to your foot. Bend deep into that side’s knee as you lift up onto the heel of your opposite foot. Point or flex that foot up towards the ceiling.
Bring your hands to prayer in front of your chest. Extend both arms out in an upward-facing arc and look towards your extended leg. Hold the pose and keep your leg muscles engaged.
Slowly come back up to Frog Prep (body in the middle) and slide over to the other side repeating the steps above.
#7) Seated Side Fold
Seated Side Fold is a good, simple combination of a fold and a side stretch in one pose. Sometimes referred to this as “Half Dragonfly” as a nickname.
This pose primarily stretches your spine, lower back, hamstrings, and groin.
Start in a seated position, with your legs outspread wide in a V shape in front of you. About a 90-degree angle between your legs.
Bring one of your feet over to your other thigh, so that the bottom of your foot rests tucked in and touching your thing just above the knee.
Keeping your hips rooted down and your spine extended tall and towards the ceiling, you can gently fold over and use your arms to walk down your chest towards the ground next to the thigh and knee of your fully extended leg.
You should be slightly off-center, in line with your straightened leg (rather than a traditional fold which would come straight to the center).
To scale down this pose, you can stay in the original seated position with both legs out in front of you in a V. Gently fold forward a little to each side and you warm up.
4 INTERMEDIATE YOGA POSES (LEVEL 3)
#1) Chair Pose
Chair pose is the basis for many of the more advanced moves found in yoga. It primarily stretches the chest and shoulders, while helping to strengthen your core and legs.
Start in Standing with your arms out in front of you. Slowly bend your knees, moving them gradually more forward away from your toes. At the same time, drop your hips and butt back as you try to achieve a 90-degree angle with your thighs and calves.
As you sit down, your arms will come straight above your head (next to your ears), pointing up with palms facing in.
To scale this down, you’ll find it a little easier to keep your arms out in front of you – or coming towards your chest forming a “ball of energy.” Like in Dragonball. Drop your hips only as low as you can comfortably maintain for a stable hold.
#2) Warrior 2
This pose primarily strengthens your shoulders, arm, thighs and opens up your chest and shoulders.
Starting in Standing, exhale as you step one foot back. Align your back heel behind the other heel and then turn your back foot out 90 degrees.
Turn your hips out and align your forward thigh with your forward knee. Slowly raise your arm, one forward and one back, both parallel to the ground.
As you exhale, bend the right knee forward until it lines up straight over your right heel. Press your heels into the floor.
To scale this pose down, you can bring your legs slightly in closer together. You also have the option to bend forward a little less or bring your hands back down onto your hips.
#3) Extended Side Angle
Extended Side Angle is one of our broader Warrior-sequence poses, often done together in pairs or sets with other poses from the same group.
This primarily stretches your groin, back, and torso. It also strengthens your thighs, hips, and legs.
Starting in Standing, spread your legs slightly apart with hips facing forward. Choose one side and rotate that foot outward about 45 degrees.
Bend the knee over the rotated foot and shift your weight to that side. Keep your stretched-out back leg in place and keep pushing down through that foot.
Bring your elbow (same chosen side as the bent knee), down to rest on your bent knee. Your hand and arm coming out in front of you. Your opposite arm now extends high into the air straight overhead.
To scale this pose down, you can narrow your stance a little bit more and bring your hips a little higher in the air. Move deeper down as you get more comfortable.
If you are comfortable enough here to scale up, you can switch your eyes to look at your arm overhead and gently stretch that arm to the side (so it falls in line with your torso and spine).
This will deepen the stretch even further.
#4) Rebel Warrior
Rebel Warrior is another pose in our Warrior-sequences that are often used in pairs or sets as transitions to one another. You’ll sometimes hear it referred to as “Peaceful Warrior,” but, you know…
This pose primarily stretches the groin, hips, and shoulders.
Start in Warrior 2. Bring the rear hand down to the back leg, palm facing down. Turn the front palm facing upwards towards the sky.
On an inhale, extend the front arm up towards the sky, palm facing towards the back of the room. Keep your hips open, but reach your heart up towards the sky. Keep the back of your neck long and your eye gaze pointing in the same direction as your heart.
Keep bending deeply into your front knee; try to keep the weight evenly distributed on your front foot.
To scale this pose, bring your legs in a little closer together to shorten the depth of the stretch. As you get comfortable you can ease back down into the full pose.
YOGA STRETCHES FOR DESK WORKERS
Work a desk job? Consider these two additional videos:
#1) Yoga for Wrist Mobility
Wrists are an often overlooked area of stiffness and soreness for many people. Whether you type on a keyboard daily or are looking to improve front squats and handstands you’ll benefit from this 6-minute yoga session:
#2) Yoga for Proper Posture
Hours hunched over a computer, stuffed into a car, or playing various games can cause some pretty awkward posture habits. This 6-minute yoga session will help you reset and improve your posture as you go through your day:
When you’re able to escape from your desk for a few, these short sequences are perfect to help stretch out your body and help prevent injury.
If you do find yourself stuck at a computer for most of the day, with seemingly no time to work out, we can help! We offer a 1-on-1 private coaching program to help busy people just like you level up their lives.
We will get to know you, your goals, and your lifestyle, and develop a workout plan that’s specific to not only your body, but also to your schedule and life. We can design workouts for at your desk, or a quick session before dinnertime. If you want to learn more about the program, click on the big image below:
TRY A YOGA POSE TODAY
If this kid can do Yoga, so can you!
I don’t care if you’re at home, in a cubicle, or an office, I want you to use 3 minutes of courage to hold a few of the poses above!
Even if you’re not interested in checking out NF Yoga and never attend a yoga class, try these four movements right now. Like, this very moment.
A big reason Nerd Fitness and the Rebellion are successful in getting people healthy is that we encourage people to take action immediately. Not tomorrow, not after breakfast, RIGHT NOW!
Try to hold each of the following positions for 30 seconds. Yes, even if you’ve never done yoga before and have no intention of doing it again… I’m challenging you to give this a shot right now!
I personally get up every 15-20 minutes and go through a few movements (Downward Dog is my favorite) to stay limber.
Crushed those four poses? Take it to the next level and run through our full sequence from the Water Series. It’ll take you a little over 20 minutes.
Want a little more help getting going?
You got it!
I have three great options on how you can continue your journey with us:
Option #1) Liked the yoga videos contained in today’s guide? Want to follow them in an app that also allows you to build your own superhero?
Then check out Nerd Fitness Journey!
Our fun habit-building app helps you exercise more frequently, eat healthier, and level up your life (literally).
Plus, you can join our Yoga Adventure so you can learn poses and grow strong while battling wiley supervillians!
Try your free trial right here:
Option #2) If you want a professional coach in your pocket, who can do video form checks, provide feedback, and adjust your workouts based on your experience level, check out our 1-on-1 Online Coaching Program!
For example, let’s say you have an old injury and couldn’t perform one of our flexibility exercises. A Nerd Fitness Coach can work with you to create a customized routine for your exact situation.
Personally, I’ve been working with the same online coach since 2015 and it’s changed my life. You can learn more by clicking on the box below:
Option #3) Become part of the Rebellion! We need good people like you in our community, the Nerd Fitness Rebellion.
Sign up in the box below to enlist and get our Rebel Starter Kit, which includes all of our “work out from home” guides.
Get your Nerd Fitness Starter Kit
The 15 mistakes you don’t want to make.
Full guide to the most effective diet and why it works.
Complete and track your first workout today, no gym required.
Alright, your turn:
I’d love to hear from you: did you REALLY complete the 4-movement yoga routine above? And where did you do it? An office? In your cubicle?
Remember, who cares if your coworkers think you’re weird – getting judged for doing something healthy is a badge of honor you should be proud of!