Categories
Uncategorized

#holistic #getfit #nutrition 7 Emergency Hacks to Stay Healthy in the Winter

A picture of a Games of Thrones bobblehead, who is about to slay the SAD monster.

“Winter is coming”

– House Stark.

Like the White Walkers of the old stories our Gran used to tell us, winter is descending upon us mere mortals, and we must prepare! This endless onslaught of vicious attacks on our brains and our bellies will leave us ripe for slaughter if we’re not careful:

Cold weather that encourages us to sleep in, avoid the elements, and say “maybe tomorrow.”

A sun that rises too late and sets too soon means we often go days without seeing the damn thing!

Cookies and candies bombarded us from everywhere we look.

Oh, and a f’ing global pandemic that has left us isolated and alone. 

These and more challenges are just begging us to go off the rails. And a built-in excuse called January 1st where we promise to “start over” helps us rationalize us “pausing” until then. Black Friday has come and gone. Cyber Monday is now in the rearview. Thanksgiving is now a distant memory.

And yet…the challenges are still just getting started.

Luckily, we have 7 “hacks”  to survive these trying times. If you want, you can try them too!

Here’s what we’ll cover with our guide on surviving winter:

Alright, let’s do this thang.

Winter Hack #1: Don’t run in the wrong direction

Warning traffic sign on a ice road

We need you back in the fight, right now.

We all see January 1st as the “reset,” and there’s nothing wrong with a reset to start out the year. The problem is when you compound your issues by digging yourself deeper into a hole that you have to eventually climb out of!

Eat very poorly for long enough, and the hole will start to resemble Bruce Wayne’s prison in The Dark Knight Rises:

A scene of Batman climbing out of a hole

Think of it like you’re on the starting line of a race for a healthy life that starts Jan 1st. You have two options:

  • A) Hang around the starting line: Hang out and wait for the gun to fire. Then start running.
  • B) Run in the opposite direction. Run farther away from the starting line, so when the gun goes off you have even FARTHER to run in the race.

So, Step 1 is not running in the opposite direction. This means you can’t skip all your workouts and eat like crap and give up til January. This is you going the wrong way, and will make the task of “starting over” on January 1st that much more brutal.

Instead, do what you can to “tread water” and hang out around the starting line. If you CAN, stay on target. One bad meal doesn’t ruin things. One missed workout isn’t the end of the world. If you have an awful day, respawn and get back in the fight. Immediately.

A four-week freefall is a hole you’d rather not be in. You also don’t want to be in THIS hole:

A gif of Bruce falling into a cave

But that’s beside the point…

So forget B. Let’s aim for A.

Winter Hack #1: Never Two in a Row

A hand stopping a row of dominos.

I first talked about “Never Two in a Row” back in like 2012, and it’s a mantra I’ve been living by ever since.

You’re human. And life happens.

What SHOULD NOT HAPPEN is missing two days in a row. Or eating TWO bad meals in a row. Or having TWO bad days in a row.

Why? One bad day can feel like a speed bump if you’re trying to get healthy. Get back on track right away and there’s no problem.

However, missing two days in a row is like turning that tiny speed bump into the Misty Mountains. If you miss one day in a row, no problem! Just act like it didn’t happen and get back on track.

But once you miss two days in a row, you are now 67.42% more likely to fall into a multiple week hole. Okay, I made up that statistic, but two days very easily becomes three, which very easily becomes a week, which easily becomes “I’ll wait til January.”

That’s running in the wrong direction. 

A gif of someone saying "don't do that."

So AIM TO NEVER EVER EVER miss two workouts in a row. If you miss a workout on Monday, go on Tuesday and get right back on track. If you eat pie for lunch, because it ain’t gonna eat itself, make your dinner healthy AF. Do that, and you’ll be fine.

So whenever you have a bad day or do something against your plan, I need you to respawn right away (“start over” in video game lingo) and make the next day the best day you possibly can.

Winter Hack #3: Consider Skipping a Meal

A photo of thai noodles from Noel

Spoiler alert: you’re going to eat lots of decadent food this upcoming month. (Unlike Noel’s delicious Thai Zoodle recipe above)

I know it. You know it. So we can do one of two things.

  • We can pretend like it’s not going to happen, and then be surprised and beat ourselves up when we put ourselves in a carb coma and go on a calorie-induced bender.
  • Or we can be smart about it and negate the impact these days have on our waistlines. Better yet, we can make these additional calories work FOR us.

For starters, our metabolisms aren’t that smart. Your weight will fluctuate based on total calories consumed over many many days, not after ONE power-bomb of a meal.
Joey saying "I ate way too much"

So, if you know you are going to eat a monster lunch and dinner (I see you, Christmas), eat a stupidly light breakfast, and a light breakfast tomorrow – the calories will average out in the long run.

Or, if you’re willing to dig in and do the research, SKIP breakfast (and maybe lunch) before your monster meal. It’s called “intermittent fasting,” and it’s what I do to stay on track during weeks when I know I’m going to eat poorly.

First, I skip breakfast every day (I haven’t eaten breakfast for years now).

Second, I might choose to skip lunch as well the day after a monster meal. Again, dig in and do the research (or just read this), and you’ll find that missing a meal isn’t the end of the world. In fact, it can lead to a healthier lifestyle for the right person.

If you’re interested in skipping a meal here or there, our snazzy new app has an intermittent fasting adventure in it that you can try RIGHT NOW.

Sign-up for a free trial right here:

Winter Hack #4: Strength Train Before Big Meals

A Christmas dinner

Whether or not you take advantage of intermittent fasting, you can time your workouts to coincide with your unhealthy meals.

As I mentioned in our article on The 5 Rules of Weight Loss, think of all the calories you eat as first-year wizards at Hogwarts.

Your body is a lot like the Sorting Hat.

They need to be sorted into one of three houses (“Burn as Energy,” Store as Fat,” or “Rebuild Muscle.”)

The extra calories you eat over the holidays always go towards “store as fat” unless you give them a really good reason to head to the “build muscle” common room. Politely asking them won’t help.

You need to give them a reason. And that wonderful reason is STRENGTH TRAINING.
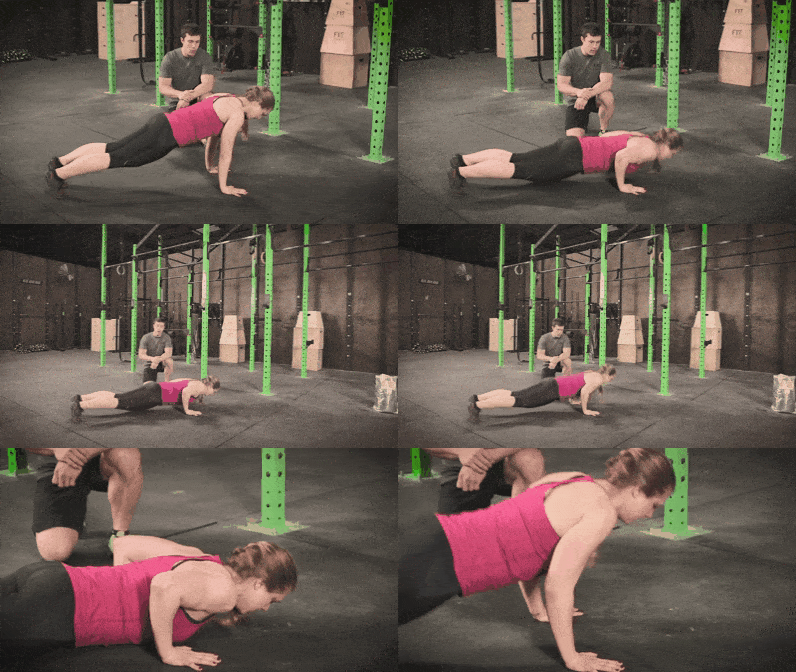
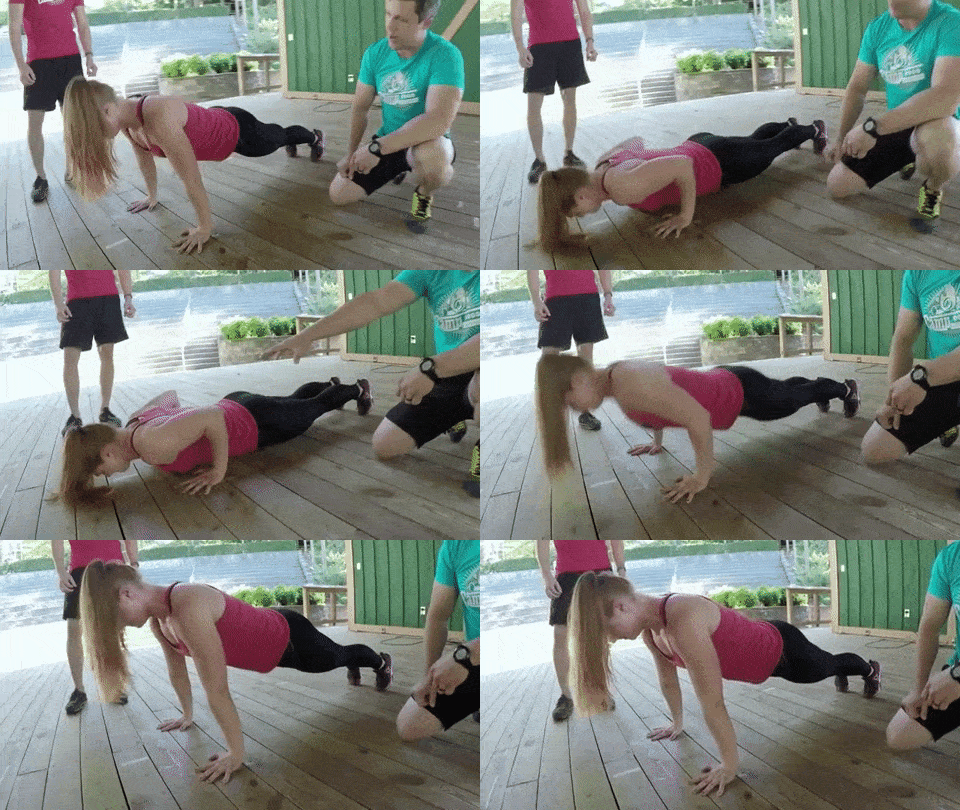
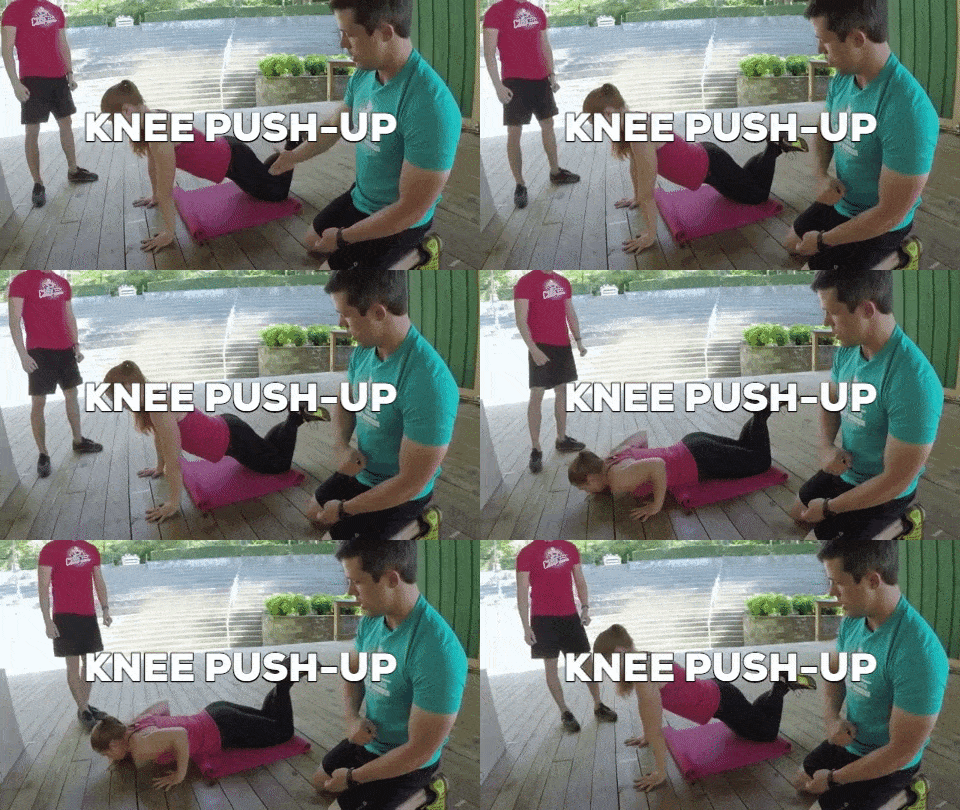
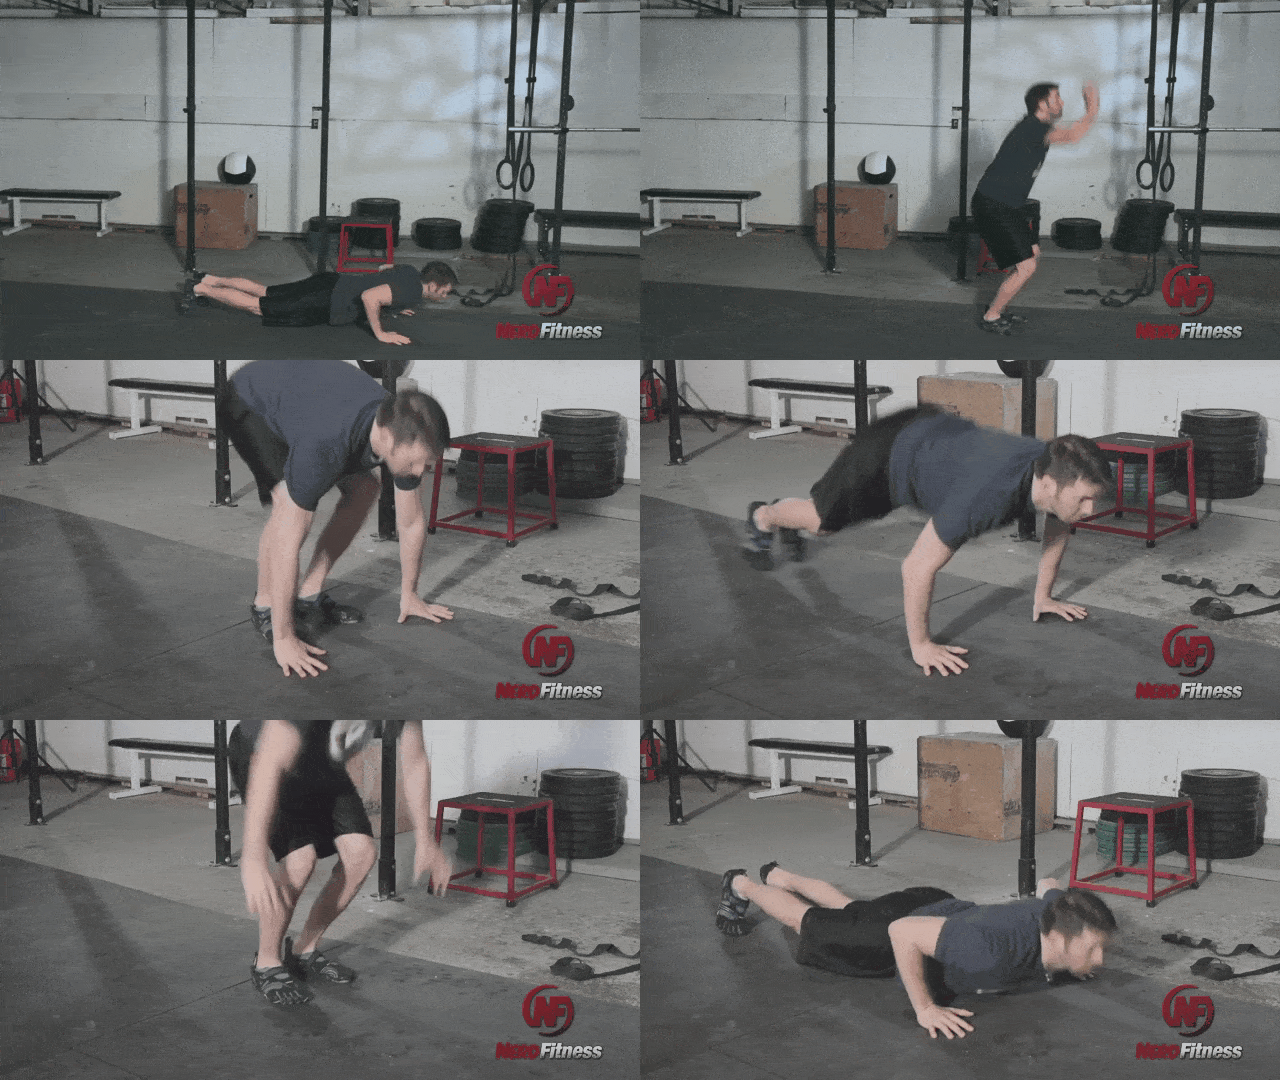
Coach Staci showing you how to do an explosive push-up

When you strength train before a big meal, the muscles you trained are broken down and need to be rebuilt. So, over the next 48+ hours many of those extra calories will be diverted to rebuilding (stronger) muscles instead of becoming fat.

Yeah, our gyms are probably closed because of the pandemic. But that doesn’t mean we can’t do bodyweight training from our living room.

Try a heavy strength training workout just a few hours before a holiday mean, then proceed to eat with everybody else. While they all lament “I’m so full, I ate too much, wahhhh,” you’ll know your calories are being used to rebuild muscle. So internally, you can start doing an evil villain laugh… Muahahahah, you know the one.

Work smarter (like a nerd).

Winter Hack #5: Don’t rely on motivation

A cat Bored and Yawning

Here’s another spoiler for you: you are NOT going to want to work out this month. It’s going to be dark and cold, and your nose is going to run (better catch it!), work is going to suck, you’re going to be hungover, and so on.

The amount of motivation you’ll need to get over these obstacles is gargantuan. So don’t force yourself to try and “dig deep” and just “work harder” and feel guilty when you’re “not motivated.”

Instead, do whatever you can to never, ever ever rely on motivation. Your body won’t say, “oh that’s okay, I’ll stay in shape because I feel bad for you.” There are 31 days in December just like there are 31 days in August.

Which means you need to stay on track even though it’s much easier to do in the summer. So instead of motivation, build fail-safes to make sure you are staying healthy. Schedule your workouts in your calendar and set up alerts so you are reminded. Recruit a buddy so you can check-in on each other.

Or go with one of these more diabolical examples:

Take a really really embarrassing photo of yourself, or type up a tweet with an embarrassing secret. Schedule it to post at 6:15 (or whatever time is early for you) every morning before you go to bed. Put your phone in the other room. If you don’t wake up on time, and run in the other room and cancel that tweet, it goes out! Better just get out of bed and train before work.

Give your co-worker $250. Tell him/her that you will work out 3 days per week, and text him a photo of your workout. If he/she does not receive that photo, they’ll donate $50 of your money to a political cause you can’t stand.

Set your credit card alerts to email you and your wife/husband every time it’s used. Agree ahead of time you’ll never use that card to buy fast food or else you’ll have to be on diaper duty for the next 3 months straight (or something that fits your situation).  

In each of the instances above, you’re going to do exactly two things:

  1. Get really mad at yourself. Probably curse a lot. Swear vengeance on your past self.
  2. Do the damn thing you know you need to do while also being mad at yourself.

Never ever ever rely on motivation. Now, motivation doesn’t hurt. It’s just not reliable. So if you are in need of some motivation to get started, try this watching this video to remind you that training in the winter makes you a badass:

Just don’t rely on it, or feel guilty when you don’t have it! Whenever you DO feel a burst of motivation, use that extra energy to build systems. Here’s how to use motivation properly.

Winter Hack #6: Have a Plan B

A pic of frozen mixed vegetables in freezer bag

“Too cold today! Can’t go to the gym and do my workout, DAMN! Looks like I’ll just have to sit here and eat ice cream.”

“Ran out of groceries, and it’s snowing. I guess I’ll just have to order pizza.”

The problem with winter is that it makes the unhealthy option always the easiest. We’re lazy, and I have to imagine we’re a bit like bears in that we want to hibernate and store fat when it gets cold out.

We have this tiny voice in our head subtly nudging us to pick the path of least resistance: aka pizza and skipped workouts.

And we can’t let that voice win. Then, the White Walkers win. And we’re all screwed. So, instead, we’re going to MacGuyver the sh** outta our winter by having a Plan B prepared.

For example:

A Workout PLAN B: Have a place in your house or apartment that you can go to and do the Beginner Bodyweight Workout, a workout from Nerd Fitness Prime, or some yoga.  It might not be as great as the gym (which may or may not be open), but it’s still a workout. It might mean investing in a door frame pull-up bar or a yoga mat, but a small investment for maintaining momentum through the winter is worth any amount of money. Here’s How to Build a Home Gym if you’re interested. 

A Nutritional PLAN B: Have a healthy meal in your freezer that has already been prepared and ready to be heated up. We make horrible decisions when the fridge is empty and we’re hungry. The Sirens of Dominos and Pizza Hut beckon us to call them for a 30-minute delivery.

So use your own laziness to help!

Here are some things to consider:

  • Have a meal in your freezer that’s all ready to go.
  • Store SteamFresh veggies for emergencies.
  • If you use delivery apps for crap food, delete them from your phone.

Do what you need to do to make it more difficult to make the wrong choice.  

Winter Hack #7: It All Counts

A baby taking a small step

So you can only train for 15 minutes today instead of 20.

So you have time to do a few yoga poses instead of working out for an hour.

So your ONLY option at the holiday party (if it’s even going on) is pizza and you didn’t have a great breakfast.

THIS DOES NOT MEAN YOUR WINTER IS RUINED.  80% IS STILL 80% BETTER THAN ZERO PERCENT.

Every little bit counts. It REALLY, REALLY does. Every small change, or even living off pie HALF of the time is FAR better than living off pie all the time. Swap ONE beer for ONE glass of water, and it’s a victory that will translate to your waistline. Do 5 push-ups as soon as you get out of bed, and it’s a victory.

Batman stoked you want to track your calorie intake.

Winter is a problem not because people make one bad mistake, but because one bad mistake quickly sets off a chain reaction of disasters justified by the fact that folks can’t do something 100%. So they opt for 0%.

If you don’t have time for a full workout, do half a workout! If you have to eat from a drive-through, no problem. Drinking water or a Diet Coke and grab some fruit as your side. 

Here’s something else to try:

Every morning when you wake up, do 20 bodyweight squats, 10 push-ups, and if you have access to a pull-up bar (or gymnastic rings), hang from them for 30 seconds. No bar? No problem, here are 5 pull-up alternatives.

Make this the FIRST thing you do every day (using systems built back in point #6). That way, at least every day during the winter you’ve done something.

Together we can Brave the Winter

There you have it. 

While you don’t have to follow all 7 hacks this winter, even just adopting one or two might help you build some momentum between now and the new year.

And as always, if you need any additional help, we’re here for you.

What kind of help?

Well, you could consider:

#1) Our Online Coaching Program: a coaching program for busy people to help them make better food choices, stay accountable, and get healthier, permanently.

You can schedule a free call with our team so we can get to know you and see if our coaching program is right for you. Just click on the button below for more details:


#2) Exercising at home and need a plan to follow? Check out Nerd Fitness Journey!

Our fun habit-building app helps you exercise more frequently, eat healthier, and level up your life (literally).

Try your free trial right here:

#3) Join the Rebellion! We need good people like you in our community, the Nerd Fitness Rebellion.

Sign up in the box below to enlist and get our Rebel Starter Kit, which includes all of our “work out at home” guides, the Nerd Fitness Diet Cheat Sheet, and much more!

Alright, that about does it.

But real quick, before somebody yells at me in the comments, yes I know a lot of Aussies and Kiwis are NF Rebels, and I know it’s nearly summer down there. You can laugh at us all you want, your winter will come soon enough. Oh, it will.  

Now, let’s hear from you:

What do you do when the going gets tough, when the temperature drops, and life gets busy as hell?

How do you fight back?

What are your favorite specific tricks or systems you use to stay on track?

Leave your comment below and share with your fellow Rebels.

-Steve

P.S. If the cold weather is bringing you down, this guide on overcoming the winter blues may help.

###

Photo source: Joerg Huettenhoelscher © 123RF.com, Михаил Ð?ханов © 123RF.com, Ivanko Brnjakovic © 123RF.com

from Blog – Nerd Fitness https://ift.tt/2fPie2Y
via IFTTT

Categories
Uncategorized

#holistic #getfit #nutrition Does the Military Diet Actually Work? Yes, but don’t do it.

Do Army LEGOs follow the Military Diet?

So you’re interested in enlisting in the Military Diet, eh cadet?

Not so fast there.

This is a seriously controversial diet – and that’s not including the fact it has NOTHING to do with the military.

What’s even worse? It works (temporarily).

Though you’ll hate yourself, I promise.

We advise all our Online Coaching Clients to avoid this like the plague.

We also advise them to avoid the plague, but that’s less relevant here.


So let’s discuss the Military Diet (click to go to that answer):

Before I make you fall in line, if you’re interested in changing the way you eat to get in shape, you may like our fun new habit-building app!

NF Journey helps you exercise more frequently, eat healthier, and level up your life (literally).

Try your free trial right here:

What is the Military Diet? How does the Military Diet work?

Your commanding officer will make you do push-ups for trying the "Military Diet."

If the Military Diet could be described in two quick words, those words would be “short term calorie restriction.”

Crap, that’s four words.

Ahem.

The diet focuses on ruthlessly cutting out calories in order to spur weight loss.

There are some claims out there that you can lose up to ten pound in one week on the Military Diet. Which would be impressive – and should also be setting off your skeptical spidey-senses.

So I can understand your curiosity, recruit.

You can now stand at ease.

Now you’re thinking: “What exactly does ‘extreme calorie restriction’ look like Steve?”

How about one meal consisting of just a single piece of bread, a half cup of tuna, and some black coffee?

That’s it.

If you ask for more food you’ll be forced to climb a rope.

The Military Diet is broken into two stages, one for three days and the other for four.

  • 3-day plan on the Military Diet. For three days, breakfast, lunch, and dinner is picked out for you. You get this meal only soldier, nothing more! Forget about snacking. For three days, every single crumb is accounted for. I’m only slightly exaggerating. And these three meals only add up to 1,000 calories per day. Ouch. That’s not much chow.
  • Four days of leave. The Military Diet does go easy on you after the three days, with four days of slightly more food. And by that I mean 1,500 daily calories. How generous. You’re on your own on what to eat for these four days, with the only guidance being to “eat healthy” and keep it at “1,500 calories.”

Three days on, four days off. You repeat this three day and four day rotation until you reach your ideal weight.

That’s the Military Diet in a nutshell.

Cap wants you to know he's proud of you for trying to better yourself, even if it's with the Military Diet

Okay, you probably want to know, to the crumb, what you get to eat on the Military Diet? Sure.

But it ain’t pretty.

What does the Military Diet plan look like?

Grapefruit, and not much else, is allowed on the Military Diet.

As I mentioned, the Military Diet provides strict orders on what to eat for three days. Your mission looks like this:

DAY 1

Breakfast:

  1. Half a grapefruit
  2. One slice of toast
  3. Two tablespoons of peanut butter
  4. One cup of coffee or tea

Lunch:

  1. Half a cup of tuna
  2. One slice of toast
  3. One cup of coffee or tea

Dinner

  1. 3 ounces of any type of meat
  2. 1 cup of green beans
  3. Half a banana
  4. One small apple
  5. One cup of vanilla ice cream

DAY 2

Breakfast

  1. One egg
  2. One slice of toast
  3. Half a banana

Lunch

  1. One cup of cottage cheese
  2. One hard boiled egg
  3. Five saltine crackers

Dinner

  1. Two hot dogs (no bun)
  2. One cup of broccoli
  3. Half a cup of carrots
  4. One banana
  5. Half a cup of vanilla ice cream

DAY 3

Breakfast

  1. Five saltine crackers
  2. One slice of cheddar cheese
  3. One small apple

Lunch

  1. One egg (cooked however)
  2. One slice of toast

Dinner

  1. One cup of tuna
  2. Hald a banana
  3. One cup of vanilla ice cream

If you find yourself thinking, “That’s not much for rations, Steve.” You’d be right.

Not only that, but I bet your normal serving of peanut butter is significantly larger than 2 tablespoons. Yikes.

This woman is confused and sad about the military diet ration!

But I’m getting ahead of myself here.

I’ll keep filling you on the details and then share my real opinion at the end here.

Substitutions?

Some websites will guide you through substitutions to stick with in case you’re vegetarian or lactose intolerant, etc.

Think tofu dogs for hot dogs.

But you are told to match calories exactly for replacement, since the name of the game here is restriction.

For the most part however, substitutions are discouraged on the Military Diet.

What about after these three days? 

If you haven’t gone AWOL, you get a pass for four days. Some websites suggest you can enjoy a meal of shrimp fried rice or a black bean burger on your leave.

To stick with the strict Military Diet strategy, you would keep it to 1,500 calories for each 24 hour period.

Eating only 1,000 calories a day is really difficult.

1,500 isn’t exactly easy peezy either.

Is this actually worth it?

Will the three day Military Diet help me lose weight?

Will the Military Diet help with weight loss?

In the short term, the Military Diet will most likely cause you to lose weight.

Why, you ask?

Because science.

It’s the reason “all diets work in the short term.”

If you eat more calories than you burn in a day, you will gain weight over time. If you do the reverse, and burn more than you consume, you will lose weight[1].

Granted, there’s some finer details in that equation. Muscle, fat, body fat, etc.

But for simplicity sake, it works.

The Military Diet works by practically guaranteeing you will burn more calories than you consume.

If an overweight person who usually eats 2,500-3,000+ calories in a day, suddenly switches to ONLY eat 1,000 calories for multiple days in a row, their body will operate at a caloric deficit while it seeks the energy required for drills, push-ups, and cleaning the mess hall.

This cartoon is forced to do the military diet, But does he live off crackers?

When this is repeated for a few days, the number on the scale will get smaller!

So will YOU (specifically you, in the green hat) lose weight?

Depending on where you are now and your current intake, that deficit (and thus the accompanying weight loss) could be DRAMATIC.

But will you lose 10 pounds in one week like some sites claim? I highly doubt it. Unless you have 100+ pounds to lose and usually eat 5,000+ calories per day, you can only lose so much water weight in a short time period.

Rome wasn’t built in a day. People don’t get overweight in a day. And people won’t lose all the fat they want to lose in a day either.

Here’s another truth bomb that needs to be said: Even if the number on the scale drops significantly in a week, most of it is water weight.

Your body contains a lot of water, especially if you normally eat very salty, carby foods. So when you remove those foods from your system, the amount of water your body holds can decrease significantly too.

So if somebody strictly followed the Military Diet down to the calorie for a week they could lose maybe one to two pounds of actual fat.

They could lose multiple pounds of water weight too, but that won’t continue from week to week.

ATTENTION!

This cat doesn't follow the Military Diet.

It’s time to hit you with more knowledge: Any weight you lose while on the Military Diet will only remain lost if you stay on the Military Diet.

Temporary changes create temporary results.

This is super important and will be stressed again later.

Are there any benefits to the Military Diet?

This sniper is skeptical of the Military Diet.

Any kind of calorie restricted eating program, if adhered to consistently, will likely result in weight loss.

Remember that guy who lost weight eating Twinkies[2]?

It worked because he made a strict protocol of his calorie requirements. Then, he followed it.

Yeah, he filled a lot of his diet with junk food.

Yeah, you can lose weight on junk food. But it's a bad idea, kind of like the Military Diet.

But the point is he managed his food intake according to a plan to lose weight, and then stuck to it.

And it worked!

Before you get all mad at me, I too believe that the quality of calories is as important as the quantity.

One of the FEW things I like about the Military Diet is that it provides a strict protocol to follow. You don’t have to worry about what to eat. It’s breakfast time on Day 2.

That means you eat one egg, one slice of toast, and half a banana.

It’s the same reason why many people love the Paleo Diet or Intermittent Fasting or Keto Diet or the Mediterranean Diet: there are specific rules to follow that removes all guesswork from “what should I eat, and how much?”

I won’t lie to you and claim that a guide on what to eat has no benefits. Lying will get you court-martialed.

Hell, we even have our own free 10-level diet blueprint that tells you exactly what to eat to help cut out the guesswork (you can get yours when you sign up in the box below):

But as your friend, I can’t give you only one side of the story.

Are There Any Drawbacks to the Military Diet?

Warnings on following the Military Diet.

DON’T DO THE MILITARY DIET!

Sorry, I’ve been holding that in this whole post. Literally. I typed this whole post up to this point while holding my breath so that I could then blurt this out.

I won’t deny that you could lose weight following the Military Diet. But can any diet telling you to eat bread, crackers, and ice cream actually be good for you?

I know you know better.

Seth knows you shouldn't do the Military Diet!

You’re an adult with a good head on your shoulders, and you’re probably considering the Military Diet because you want a quick weight loss win without having to make any permanent changes.

Unfortunately, things like “science,” “thermodynamics,” and “reality” will keep getting in the way.

The Military Diet is what we in the fitness world call a “crash diet.” Crash diets are designed for quick weight loss in a short amount of time.

These diets – and I can included “cleanses” here – prey on people’s desperation to “get fit quick.”

They know that if you follow a short term diet, lose a bunch of water weight, and see a lower number on the scale – you’re convinced it worked and then you can go back to how you were eating before.

Then when you quickly put all of that weight back on…you’ll come running back to the diet that got you short term results.

This is how they make their money, get your attention, and ultimately leave you sad and right back where you started.

House won't promote the Military Diet.

Other examples of terrible crash diets include the Cabbage Soup Diet, the Baby Food Diet and just about any juice cleanse on the market.

I won’t even link to them, that’s how annoyed I am about their existence.

The reason these diets are short term is because they are not sustainable. Can you eat nothing but cabbage soup for a week? Sure. For an entire year? No way.

Crash diets are temporary diets. Which means their results will be just that, temporary.

The Military Diet is extreme and short term. Why do people in the military do this to themselves?

Spoiler alert: they don’t.

Where did the Military Diet come from?

Who invited the Military Diet? Not the Armed Forces.

Here’s another crappy bit of info: The Military Diet has absolutely nothing to do with any branch of the Armed Forces.

As quoted in CNN, Patricia Deuster explained, “In my 30 years working with the military, I’ve never heard of it.”

And she would know, because Deuster helped write the nutritional guide for the U.S. Special Operations Forces[3].

So if it doesn’t come from the actual military, where does the Military Diet come from?

This three days crash diet has gone by different names before, the Cleveland Clinic Diet 3-Day Diet, the Kaiser Diet, the American Heart Association Diet, and the Birmingham Hospital Diet[4].

Despite the different names, the three day meal plan is exactly the same.

And guess what?

None of the organizations claim to have created or support their namesake diet.

So where did it come from? Honestly, I don’t care.

It’s silly and I don’t need to meet the person who created a three day crash diet, that co-opts the military name to make itself sound reputable and legitimate.

SHAME! The Military Diet has nothing to do with the actual military.

Is the Military Diet safe?

Can you hurt yourself following the Military Diet?

There’s nothing inherently dangerous about the Military Diet. It’s just eating moderately healthy/unhealthy food in small quantities.

Which, depending on your current diet – could be a big improvement from eating unhealthy food in large quantities.

I don’t know you or your situation, but if you want to practice Karate kicks in the garage and become best friends, I’m down to clown.

Now, based on my 10 years of running Nerd Fitness, helping hundreds of thousands of people lose weight safely and in a sustainable way, I’m gonna tell you that this is probably not the diet you’re looking for.

Obi Wan says the Military Diet is not the diet you're looking for

Why?

Because this diet will make you miserable, and sticking to the portion sizes will make you unhappy and hangry.

As soon as your 7 days are up, you’re gonna gorge yourself and probably end up even worse off than where you started!

This probably isn’t your first rodeo, nor is it the first quick fix you’ve sought out for weight loss. How have the previous attempts worked out for you in the long run?

I’m not saying this to be a jerk, but rather to make a point:

I like you, your friends like you, and the world needs you to be the healthiest superhero version of yourself you can be.

And that will never happen if you keep chasing extreme short term diets.

I’d rather see you make changes you can stick with. Even if it’s one small change. Gradually reduce the calories you eat, by switching to REAL food.

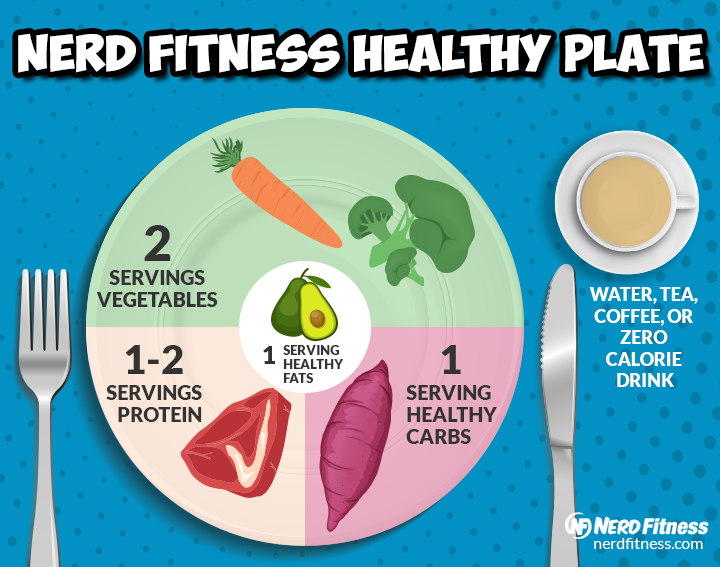
Things like veggies, fruits, and good quality meat. Build a plate that looks like this:

If your meal plate looks like this, you're doing a lot of the heavy lifting for weight loss.

If you make one change, like eggs and avocados for breakfast, you’ll be making a great step in the right direction.

Small changes are something you can live with.

Studies have shown that decreasing your caloric consumption by 25% can be fine for your mood[5]. Perhaps even beneficial. But dropping down to 1,000 calories? There’s no way that can, or should, be maintained.

I wouldn’t recommend you reduce calories by reducing the quantity of food, like ordering you to eat a meal of five saltine crackers, a slice of cheddar cheese, and one tiny apple.

Instead, I want you to make small changes to REAL food. That’s the ticket to long term weight loss. We’ve seen it over and over again here at Nerd Fitness.

Want help making the switch to REAL food?

Not sure how to make all of that work in your busy lifestyle?

I hear ya. It’s brutally difficult to stick with any diet, and that doesn’t even factor in when your kids get sick or work sucks or there’s two feet of snow on the ground.

It’s why we launched our 1-on-1 Online Coaching Program: to help create specific solutions and accountability for people that want guidance on how to eat, how to train, and the confidence to know they’re doing it correctly!

Nerd Fitness Coaching Ad


Frequently asked questionS on the Military Diet

Answering your questions on the Military Diet.

1) Do foods in the Military Diet help boost your metabolism?

There’s some debate on this. For example, can coffee help you lose weight by raising your metabolism?

I’ll go with: HIGHLY unlikely.

Any effect of caffeine to your metabolic rate isn’t enough to make a substantial impact[6]. If anything, it might act as an appetite suppressor[7].

Which isn’t nothing. But don’t count on it to raise your resting caloric expenditure like magic.

However, here are two things outside of diet that will help keep your metabolism high:

  • Strength training. The more muscle you have on your frame, the more energy you will use at rest[8]. It’s one of the reasons we recommend it so much. I have no problem playing drill instructor and demanding push-ups.
  • Stand up and move more. Any movement helps and even just standing up, outside of any walking, can help raise your metabolism[9]. A standing desk, for those long hours in the office, might be a good move.

Do either of these strategies, or better yet both. It’s better than relying on grapefruit powers to burn calories.

2) Will I enter starvation mode on the Military Diet?

Most likely not.

Sure, if you go without food for a lonnnng period of time, your metabolism might slow down slightly, though this requires EXTREME nutritional restriction over a long period of time[10].

This makes sense from an evolutionary perspective. If there’s nothing to eat in sight, it might be that way for a while.

Don't worry about starvation mode on the Military Diet, or really any diet for that matter.

Depending on how often you repeat it, the Military Diet might reduce calories to a point where this slow down of metabolism kicks in.

However, it’s more likely that as you lose weight, your body doesn’t need to burn as many calories because there’s less of you to manage every day!

So your metabolism WILL slow down as you lose weight, but it’s not due to you eating fewer calories in a day.

Now, some would say the climb up to 1,500 calories might help prevent this, but each person is different.

My take: The fear of “starvation mode” is overblown, and it should be the least of your concerns while eating bread and ice cream and calling it a “diet”

3) Is the Military Diet a form of intermittent fasting?

Not really:

  • The MIlitary Diet focuses on restricting calories at a specific meal, by counting the amount of hotdogs you can have, for example.
  • Intermittent fasting centers on making a strategic decision to skip certain meals on purpose.

With intermittent fasting, you narrow the size of your eating window, or you occasionally do fasts of 24 hours.

For instance, you can start eating at noon and finish up by 8pm, essentially skipping breakfast.

I wrote all about it in our “Beginner’s Guide to Intermittent Fasting,” where I outlined the benefits of teaching your body to consume food more efficiently, and also reduces the total number of calories you are probably eating.

Conversely, the Military Diet teaches your body to run on hot dogs.

I’ve personally been utilizing intermittent fasting for three years. But I have never, nor will I ever, follow the Military Diet.

Shots fired.

Luke does battle with the Military Diet.

If you’re interested, Nerd Fitness Journey has an intermittent fasting adventure that you can start today!

You can give it a whirl for free right here:

Why you should not do the Military Diet, and What to do Instead.

The Military Diet is a "crash diet" that you should not try.

We all want instant gratification. Unfortunately when it comes to fitness and diet, instant gratification will always fail you.

Short term changes only lead to short term results and heartbreak.

IF YOU ARE GOING TO DO THE MILITARY DIET: Godspeed, soldier.

Don't do the Military Diet, run away like these soldiers.

Good luck with your 7 days, and let me know how it goes in the comments below.

My only request: use those 7 days to learn about yourself and nutrition (maybe by reading this post?), and do what you can implement permanent adjustments to how you choose to eat after.

I’d imagine most people who do this diet are hoping for a permanent fix with minimal work in just a few days time, and I’m here to caution you against that line of thinking.

LIFE DON’T WORK THAT WAY.

DON’T DO THE MILITARY DIET. DO THIS INSTEAD:

  • Eat real food when possible.
  • Eat a damn vegetable every once and awhile. Yes, even if you hate them.
  • Cut out liquid calories like soda and juice (essentially sugar water). Drink water, black coffee, tea, or diet soda.

If you can eat real food, minimize liquid calories, and eat veggies, and do so consistently for months and months – you’re going to have permanent success.

Making these changes too tough to do permanently? Change fewer things!  

Start thinking in terms of “days and years,” not “weeks and months:”

Try one meal, based on REAL food. Forget the crackers and ice cream.

If you want a strict diet to follow with rules, create your own.

Or find one that already exists.

Try Keto. Or intermittent fasting.

Maybe Paleo. Or Mediterranean.

But don’t waste your time with the Military Diet or any other crash diet. Instead make lasting changes like I lay out in that video above.

If you read all of this and you’re overwhelmed, and you’re just looking for guidance on how to eat for your situation, you’re not alone!

We had so many people ask us for specific advice that we built an Online Coaching Program to help them get results.

Our professional coaches are regular people like you, with families, hobbies, and struggles – but they spend all day helping busy people like you live better, lose weight, and feel better about themselves.

If you’re like “hey I want somebody to tell me what to do,” schedule a free call with our team to learn more by clicking in the big box below:

Nerd Fitness Coaching Ad

Back to the post: You don’t need to do the Military Diet.

The people in the military certainly don’t.

INSTEAD, YOUR MISSION, SHOULD YOU CHOOSE TO ACCEPT IT:

  • Cut back on your liquid calories. If it’s not water, tea, or coffee (black), try cutting back in a deliberate fashion. Switch to diet sodas. Switch to coffee instead of lattes. Realize that juice is just sugar water.
  • Prepare one healthy meal. Consider my healthy go-to option. Just make sure it has a vegetable, okay? Don’t overthink this.

If you can do those two things this week, and then repeat that week after week, you’ll be 10X better off a year from now than if you had followed the Military Diet for 7 days.

And lastly, remember, THE MILITARY DIET HAS NOTHING TO DO WITH THE MILITARY!!!

Ahem.

Any questions?

-Steve

PS: Check out the actual guide for Special Operations Forces – Special Ops Forces Nutrition Guide. But those folks work out A LOT. Adjust your caloric intake accordingly.

PPS: And if you already did the Military Diet, please drop and give me 20 push-ups 🙂

Not sure how to do them correctly?

Our new app will teach them to you!

ALL Photos Sources can be found in this footnote here[11].

from Blog – Nerd Fitness https://ift.tt/2OGiLqg
via IFTTT
Categories
Uncategorized

#holistic #getfit #nutrition Does the Military Diet Actually Work? Yes, but don’t do it.

Do Army LEGOs follow the Military Diet?

So you’re interested in enlisting in the Military Diet, eh cadet?

Not so fast there.

This is a seriously controversial diet – and that’s not including the fact it has NOTHING to do with the military.

What’s even worse? It works (temporarily).

Though you’ll hate yourself, I promise.

We advise all our Online Coaching Clients to avoid this like the plague.

We also advise them to avoid the plague, but that’s less relevant here.


So let’s discuss the Military Diet (click to go to that answer):

Before I make you fall in line, if you’re interested in changing the way you eat to get in shape, you may like our fun new habit-building app!

NF Journey helps you exercise more frequently, eat healthier, and level up your life (literally).

Try your free trial right here:

What is the Military Diet? How does the Military Diet work?

Your commanding officer will make you do push-ups for trying the "Military Diet."

If the Military Diet could be described in two quick words, those words would be “short term calorie restriction.”

Crap, that’s four words.

Ahem.

The diet focuses on ruthlessly cutting out calories in order to spur weight loss.

There are some claims out there that you can lose up to ten pound in one week on the Military Diet. Which would be impressive – and should also be setting off your skeptical spidey-senses.

So I can understand your curiosity, recruit.

You can now stand at ease.

Now you’re thinking: “What exactly does ‘extreme calorie restriction’ look like Steve?”

How about one meal consisting of just a single piece of bread, a half cup of tuna, and some black coffee?

That’s it.

If you ask for more food you’ll be forced to climb a rope.

The Military Diet is broken into two stages, one for three days and the other for four.

  • 3-day plan on the Military Diet. For three days, breakfast, lunch, and dinner is picked out for you. You get this meal only soldier, nothing more! Forget about snacking. For three days, every single crumb is accounted for. I’m only slightly exaggerating. And these three meals only add up to 1,000 calories per day. Ouch. That’s not much chow.
  • Four days of leave. The Military Diet does go easy on you after the three days, with four days of slightly more food. And by that I mean 1,500 daily calories. How generous. You’re on your own on what to eat for these four days, with the only guidance being to “eat healthy” and keep it at “1,500 calories.”

Three days on, four days off. You repeat this three day and four day rotation until you reach your ideal weight.

That’s the Military Diet in a nutshell.

Cap wants you to know he's proud of you for trying to better yourself, even if it's with the Military Diet

Okay, you probably want to know, to the crumb, what you get to eat on the Military Diet? Sure.

But it ain’t pretty.

What does the Military Diet plan look like?

Grapefruit, and not much else, is allowed on the Military Diet.

As I mentioned, the Military Diet provides strict orders on what to eat for three days. Your mission looks like this:

DAY 1

Breakfast:

  1. Half a grapefruit
  2. One slice of toast
  3. Two tablespoons of peanut butter
  4. One cup of coffee or tea

Lunch:

  1. Half a cup of tuna
  2. One slice of toast
  3. One cup of coffee or tea

Dinner

  1. 3 ounces of any type of meat
  2. 1 cup of green beans
  3. Half a banana
  4. One small apple
  5. One cup of vanilla ice cream

DAY 2

Breakfast

  1. One egg
  2. One slice of toast
  3. Half a banana

Lunch

  1. One cup of cottage cheese
  2. One hard boiled egg
  3. Five saltine crackers

Dinner

  1. Two hot dogs (no bun)
  2. One cup of broccoli
  3. Half a cup of carrots
  4. One banana
  5. Half a cup of vanilla ice cream

DAY 3

Breakfast

  1. Five saltine crackers
  2. One slice of cheddar cheese
  3. One small apple

Lunch

  1. One egg (cooked however)
  2. One slice of toast

Dinner

  1. One cup of tuna
  2. Hald a banana
  3. One cup of vanilla ice cream

If you find yourself thinking, “That’s not much for rations, Steve.” You’d be right.

Not only that, but I bet your normal serving of peanut butter is significantly larger than 2 tablespoons. Yikes.

This woman is confused and sad about the military diet ration!

But I’m getting ahead of myself here.

I’ll keep filling you on the details and then share my real opinion at the end here.

Substitutions?

Some websites will guide you through substitutions to stick with in case you’re vegetarian or lactose intolerant, etc.

Think tofu dogs for hot dogs.

But you are told to match calories exactly for replacement, since the name of the game here is restriction.

For the most part however, substitutions are discouraged on the Military Diet.

What about after these three days? 

If you haven’t gone AWOL, you get a pass for four days. Some websites suggest you can enjoy a meal of shrimp fried rice or a black bean burger on your leave.

To stick with the strict Military Diet strategy, you would keep it to 1,500 calories for each 24 hour period.

Eating only 1,000 calories a day is really difficult.

1,500 isn’t exactly easy peezy either.

Is this actually worth it?

Will the three day Military Diet help me lose weight?

Will the Military Diet help with weight loss?

In the short term, the Military Diet will most likely cause you to lose weight.

Why, you ask?

Because science.

It’s the reason “all diets work in the short term.”

If you eat more calories than you burn in a day, you will gain weight over time. If you do the reverse, and burn more than you consume, you will lose weight[1].

Granted, there’s some finer details in that equation. Muscle, fat, body fat, etc.

But for simplicity sake, it works.

The Military Diet works by practically guaranteeing you will burn more calories than you consume.

If an overweight person who usually eats 2,500-3,000+ calories in a day, suddenly switches to ONLY eat 1,000 calories for multiple days in a row, their body will operate at a caloric deficit while it seeks the energy required for drills, push-ups, and cleaning the mess hall.

This cartoon is forced to do the military diet, But does he live off crackers?

When this is repeated for a few days, the number on the scale will get smaller!

So will YOU (specifically you, in the green hat) lose weight?

Depending on where you are now and your current intake, that deficit (and thus the accompanying weight loss) could be DRAMATIC.

But will you lose 10 pounds in one week like some sites claim? I highly doubt it. Unless you have 100+ pounds to lose and usually eat 5,000+ calories per day, you can only lose so much water weight in a short time period.

Rome wasn’t built in a day. People don’t get overweight in a day. And people won’t lose all the fat they want to lose in a day either.

Here’s another truth bomb that needs to be said: Even if the number on the scale drops significantly in a week, most of it is water weight.

Your body contains a lot of water, especially if you normally eat very salty, carby foods. So when you remove those foods from your system, the amount of water your body holds can decrease significantly too.

So if somebody strictly followed the Military Diet down to the calorie for a week they could lose maybe one to two pounds of actual fat.

They could lose multiple pounds of water weight too, but that won’t continue from week to week.

ATTENTION!

This cat doesn't follow the Military Diet.

It’s time to hit you with more knowledge: Any weight you lose while on the Military Diet will only remain lost if you stay on the Military Diet.

Temporary changes create temporary results.

This is super important and will be stressed again later.

Are there any benefits to the Military Diet?

This sniper is skeptical of the Military Diet.

Any kind of calorie restricted eating program, if adhered to consistently, will likely result in weight loss.

Remember that guy who lost weight eating Twinkies[2]?

It worked because he made a strict protocol of his calorie requirements. Then, he followed it.

Yeah, he filled a lot of his diet with junk food.

Yeah, you can lose weight on junk food. But it's a bad idea, kind of like the Military Diet.

But the point is he managed his food intake according to a plan to lose weight, and then stuck to it.

And it worked!

Before you get all mad at me, I too believe that the quality of calories is as important as the quantity.

One of the FEW things I like about the Military Diet is that it provides a strict protocol to follow. You don’t have to worry about what to eat. It’s breakfast time on Day 2.

That means you eat one egg, one slice of toast, and half a banana.

It’s the same reason why many people love the Paleo Diet or Intermittent Fasting or Keto Diet or the Mediterranean Diet: there are specific rules to follow that removes all guesswork from “what should I eat, and how much?”

I won’t lie to you and claim that a guide on what to eat has no benefits. Lying will get you court-martialed.

Hell, we even have our own free 10-level diet blueprint that tells you exactly what to eat to help cut out the guesswork (you can get yours when you sign up in the box below):

But as your friend, I can’t give you only one side of the story.

Are There Any Drawbacks to the Military Diet?

Warnings on following the Military Diet.

DON’T DO THE MILITARY DIET!

Sorry, I’ve been holding that in this whole post. Literally. I typed this whole post up to this point while holding my breath so that I could then blurt this out.

I won’t deny that you could lose weight following the Military Diet. But can any diet telling you to eat bread, crackers, and ice cream actually be good for you?

I know you know better.

Seth knows you shouldn't do the Military Diet!

You’re an adult with a good head on your shoulders, and you’re probably considering the Military Diet because you want a quick weight loss win without having to make any permanent changes.

Unfortunately, things like “science,” “thermodynamics,” and “reality” will keep getting in the way.

The Military Diet is what we in the fitness world call a “crash diet.” Crash diets are designed for quick weight loss in a short amount of time.

These diets – and I can included “cleanses” here – prey on people’s desperation to “get fit quick.”

They know that if you follow a short term diet, lose a bunch of water weight, and see a lower number on the scale – you’re convinced it worked and then you can go back to how you were eating before.

Then when you quickly put all of that weight back on…you’ll come running back to the diet that got you short term results.

This is how they make their money, get your attention, and ultimately leave you sad and right back where you started.

House won't promote the Military Diet.

Other examples of terrible crash diets include the Cabbage Soup Diet, the Baby Food Diet and just about any juice cleanse on the market.

I won’t even link to them, that’s how annoyed I am about their existence.

The reason these diets are short term is because they are not sustainable. Can you eat nothing but cabbage soup for a week? Sure. For an entire year? No way.

Crash diets are temporary diets. Which means their results will be just that, temporary.

The Military Diet is extreme and short term. Why do people in the military do this to themselves?

Spoiler alert: they don’t.

Where did the Military Diet come from?

Who invited the Military Diet? Not the Armed Forces.

Here’s another crappy bit of info: The Military Diet has absolutely nothing to do with any branch of the Armed Forces.

As quoted in CNN, Patricia Deuster explained, “In my 30 years working with the military, I’ve never heard of it.”

And she would know, because Deuster helped write the nutritional guide for the U.S. Special Operations Forces[3].

So if it doesn’t come from the actual military, where does the Military Diet come from?

This three days crash diet has gone by different names before, the Cleveland Clinic Diet 3-Day Diet, the Kaiser Diet, the American Heart Association Diet, and the Birmingham Hospital Diet[4].

Despite the different names, the three day meal plan is exactly the same.

And guess what?

None of the organizations claim to have created or support their namesake diet.

So where did it come from? Honestly, I don’t care.

It’s silly and I don’t need to meet the person who created a three day crash diet, that co-opts the military name to make itself sound reputable and legitimate.

SHAME! The Military Diet has nothing to do with the actual military.

Is the Military Diet safe?

Can you hurt yourself following the Military Diet?

There’s nothing inherently dangerous about the Military Diet. It’s just eating moderately healthy/unhealthy food in small quantities.

Which, depending on your current diet – could be a big improvement from eating unhealthy food in large quantities.

I don’t know you or your situation, but if you want to practice Karate kicks in the garage and become best friends, I’m down to clown.

Now, based on my 10 years of running Nerd Fitness, helping hundreds of thousands of people lose weight safely and in a sustainable way, I’m gonna tell you that this is probably not the diet you’re looking for.

Obi Wan says the Military Diet is not the diet you're looking for

Why?

Because this diet will make you miserable, and sticking to the portion sizes will make you unhappy and hangry.

As soon as your 7 days are up, you’re gonna gorge yourself and probably end up even worse off than where you started!

This probably isn’t your first rodeo, nor is it the first quick fix you’ve sought out for weight loss. How have the previous attempts worked out for you in the long run?

I’m not saying this to be a jerk, but rather to make a point:

I like you, your friends like you, and the world needs you to be the healthiest superhero version of yourself you can be.

And that will never happen if you keep chasing extreme short term diets.

I’d rather see you make changes you can stick with. Even if it’s one small change. Gradually reduce the calories you eat, by switching to REAL food.

Things like veggies, fruits, and good quality meat. Build a plate that looks like this:

If your meal plate looks like this, you're doing a lot of the heavy lifting for weight loss.

If you make one change, like eggs and avocados for breakfast, you’ll be making a great step in the right direction.

Small changes are something you can live with.

Studies have shown that decreasing your caloric consumption by 25% can be fine for your mood[5]. Perhaps even beneficial. But dropping down to 1,000 calories? There’s no way that can, or should, be maintained.

I wouldn’t recommend you reduce calories by reducing the quantity of food, like ordering you to eat a meal of five saltine crackers, a slice of cheddar cheese, and one tiny apple.

Instead, I want you to make small changes to REAL food. That’s the ticket to long term weight loss. We’ve seen it over and over again here at Nerd Fitness.

Want help making the switch to REAL food?

Not sure how to make all of that work in your busy lifestyle?

I hear ya. It’s brutally difficult to stick with any diet, and that doesn’t even factor in when your kids get sick or work sucks or there’s two feet of snow on the ground.

It’s why we launched our 1-on-1 Online Coaching Program: to help create specific solutions and accountability for people that want guidance on how to eat, how to train, and the confidence to know they’re doing it correctly!

Nerd Fitness Coaching Ad


Frequently asked questionS on the Military Diet

Answering your questions on the Military Diet.

1) Do foods in the Military Diet help boost your metabolism?

There’s some debate on this. For example, can coffee help you lose weight by raising your metabolism?

I’ll go with: HIGHLY unlikely.

Any effect of caffeine to your metabolic rate isn’t enough to make a substantial impact[6]. If anything, it might act as an appetite suppressor[7].

Which isn’t nothing. But don’t count on it to raise your resting caloric expenditure like magic.

However, here are two things outside of diet that will help keep your metabolism high:

  • Strength training. The more muscle you have on your frame, the more energy you will use at rest[8]. It’s one of the reasons we recommend it so much. I have no problem playing drill instructor and demanding push-ups.
  • Stand up and move more. Any movement helps and even just standing up, outside of any walking, can help raise your metabolism[9]. A standing desk, for those long hours in the office, might be a good move.

Do either of these strategies, or better yet both. It’s better than relying on grapefruit powers to burn calories.

2) Will I enter starvation mode on the Military Diet?

Most likely not.

Sure, if you go without food for a lonnnng period of time, your metabolism might slow down slightly, though this requires EXTREME nutritional restriction over a long period of time[10].

This makes sense from an evolutionary perspective. If there’s nothing to eat in sight, it might be that way for a while.

Don't worry about starvation mode on the Military Diet, or really any diet for that matter.

Depending on how often you repeat it, the Military Diet might reduce calories to a point where this slow down of metabolism kicks in.

However, it’s more likely that as you lose weight, your body doesn’t need to burn as many calories because there’s less of you to manage every day!

So your metabolism WILL slow down as you lose weight, but it’s not due to you eating fewer calories in a day.

Now, some would say the climb up to 1,500 calories might help prevent this, but each person is different.

My take: The fear of “starvation mode” is overblown, and it should be the least of your concerns while eating bread and ice cream and calling it a “diet”

3) Is the Military Diet a form of intermittent fasting?

Not really:

  • The MIlitary Diet focuses on restricting calories at a specific meal, by counting the amount of hotdogs you can have, for example.
  • Intermittent fasting centers on making a strategic decision to skip certain meals on purpose.

With intermittent fasting, you narrow the size of your eating window, or you occasionally do fasts of 24 hours.

For instance, you can start eating at noon and finish up by 8pm, essentially skipping breakfast.

I wrote all about it in our “Beginner’s Guide to Intermittent Fasting,” where I outlined the benefits of teaching your body to consume food more efficiently, and also reduces the total number of calories you are probably eating.

Conversely, the Military Diet teaches your body to run on hot dogs.

I’ve personally been utilizing intermittent fasting for three years. But I have never, nor will I ever, follow the Military Diet.

Shots fired.

Luke does battle with the Military Diet.

If you’re interested, Nerd Fitness Journey has an intermittent fasting adventure that you can start today!

You can give it a whirl for free right here:

Why you should not do the Military Diet, and What to do Instead.

The Military Diet is a "crash diet" that you should not try.

We all want instant gratification. Unfortunately when it comes to fitness and diet, instant gratification will always fail you.

Short term changes only lead to short term results and heartbreak.

IF YOU ARE GOING TO DO THE MILITARY DIET: Godspeed, soldier.

Don't do the Military Diet, run away like these soldiers.

Good luck with your 7 days, and let me know how it goes in the comments below.

My only request: use those 7 days to learn about yourself and nutrition (maybe by reading this post?), and do what you can implement permanent adjustments to how you choose to eat after.

I’d imagine most people who do this diet are hoping for a permanent fix with minimal work in just a few days time, and I’m here to caution you against that line of thinking.

LIFE DON’T WORK THAT WAY.

DON’T DO THE MILITARY DIET. DO THIS INSTEAD:

  • Eat real food when possible.
  • Eat a damn vegetable every once and awhile. Yes, even if you hate them.
  • Cut out liquid calories like soda and juice (essentially sugar water). Drink water, black coffee, tea, or diet soda.

If you can eat real food, minimize liquid calories, and eat veggies, and do so consistently for months and months – you’re going to have permanent success.

Making these changes too tough to do permanently? Change fewer things!  

Start thinking in terms of “days and years,” not “weeks and months:”

Try one meal, based on REAL food. Forget the crackers and ice cream.

If you want a strict diet to follow with rules, create your own.

Or find one that already exists.

Try Keto. Or intermittent fasting.

Maybe Paleo. Or Mediterranean.

But don’t waste your time with the Military Diet or any other crash diet. Instead make lasting changes like I lay out in that video above.

If you read all of this and you’re overwhelmed, and you’re just looking for guidance on how to eat for your situation, you’re not alone!

We had so many people ask us for specific advice that we built an Online Coaching Program to help them get results.

Our professional coaches are regular people like you, with families, hobbies, and struggles – but they spend all day helping busy people like you live better, lose weight, and feel better about themselves.

If you’re like “hey I want somebody to tell me what to do,” schedule a free call with our team to learn more by clicking in the big box below:

Nerd Fitness Coaching Ad

Back to the post: You don’t need to do the Military Diet.

The people in the military certainly don’t.

INSTEAD, YOUR MISSION, SHOULD YOU CHOOSE TO ACCEPT IT:

  • Cut back on your liquid calories. If it’s not water, tea, or coffee (black), try cutting back in a deliberate fashion. Switch to diet sodas. Switch to coffee instead of lattes. Realize that juice is just sugar water.
  • Prepare one healthy meal. Consider my healthy go-to option. Just make sure it has a vegetable, okay? Don’t overthink this.

If you can do those two things this week, and then repeat that week after week, you’ll be 10X better off a year from now than if you had followed the Military Diet for 7 days.

And lastly, remember, THE MILITARY DIET HAS NOTHING TO DO WITH THE MILITARY!!!

Ahem.

Any questions?

-Steve

PS: Check out the actual guide for Special Operations Forces – Special Ops Forces Nutrition Guide. But those folks work out A LOT. Adjust your caloric intake accordingly.

PPS: And if you already did the Military Diet, please drop and give me 20 push-ups 🙂

Not sure how to do them correctly?

Our new app will teach them to you!

ALL Photos Sources can be found in this footnote here[11].

from Blog – Nerd Fitness https://ift.tt/2OGiLqg
via IFTTT

Categories
Uncategorized

#holistic #getfit #nutrition How to Do a Bodyweight Row or Inverted Row

The inverted bodyweight row is a great way to grow your strength training practice.

The Inverted Bodyweight Row is one of the BEST, simple, most effective exercises you can do for your “pull” muscles.

If you’re trying to get to your first pull-up, or even if you are already doing pull-ups, adding bodyweight rows to your workout routine is a great idea!

This is one of our favorite exercises to program for our Online Coaching Clients, and we use this exercise as a stepping stone to help people get their first pull-up!


When you do proper bodyweight rows, you build strength and muscle in your back, your biceps, your forearms, your grip, and even your core.

As part of our Strength 101 series, this guide will cover everything you need to know about this awesome exercise:

Before we jump in, if you’re looking for ways to do inverted rows in your very own home, we have an adventure in Nerd Fitness Journey that will help you do just that!

Our fun habit-building app helps you exercise more frequently, eat healthier, and level up your life (literally). You can test-drive it for free right here:

What is an Inverted Bodyweight Row?

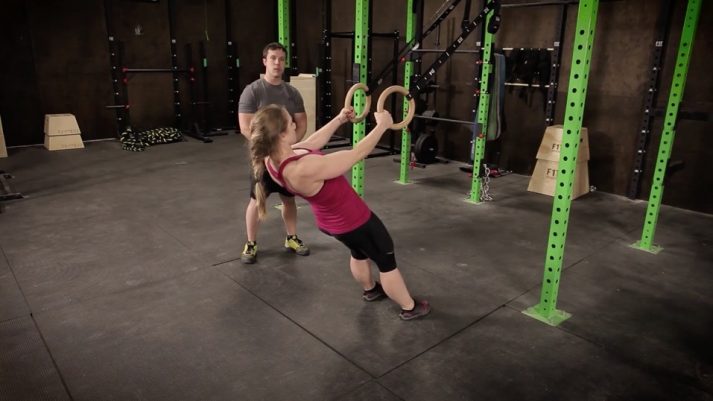
If you have gymnastic rings you can do an inverted bodyweight row like Staci here.

You’ve probably heard of the regular barbell row. You pick up a barbell, bend over at the waist (keeping your back straight), and pull the weight up towards your chest.

It looks something like this:

With proper form, there's nothing dangerous about the bent-over row.

This can be a great exercise, but improper form could cause complications or you might not have access to a barbell and plates.

Luckily, the bodyweight row (or inverted row) takes care of all of that.

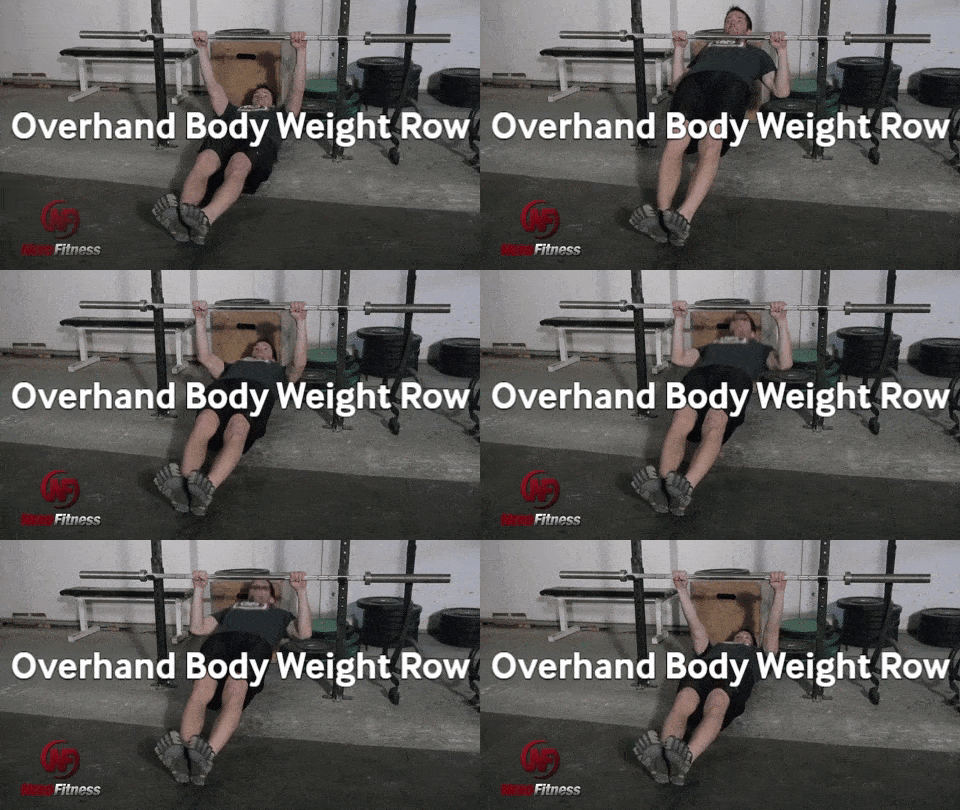
Alternate between an overheand and underhand bodyweight row.

By the way, I’ll be using “bodyweight row” and “inverted row” interchangeably in this article.[1]

To-may-to, To-mah-to.[2]

When doing this movement, you only need a bar to lean back from and your body weight. There’s also no extra stress on your back, like with a traditional barbell row.

As an added bonus, you get a decent core workout too.

And there was much rejoicing. 

These final fantasy characters think bodyweight rows are great.

Think of it like this: “bench press” is to “pushing” as “inverted row” is to “pulling.”

Balance FTW!

Why the inverted bodyweight row is so great: 

I’m a huge fan of compound exercises (like the squat and deadlift, pull-ups and push-ups), and I’m also a huge fan of exercises that don’t require expensive machines or lots of extra bells and whistles.

An inverted row works all of your pull muscles:

  • All of your back muscles
  • Your biceps
  • Your forearms
  • Your grip
  • All the stabilizer muscles in between that make those muscles work together.

If you’ve been doing bench presses regularly, start doing an equal amount of work with your pull muscles to stay in balance and away from injury.

Oh, and if you want to eventually be able to do pull-ups THIS is the exercise you need to add into your routine until you can do a full pull-up.

When we created our pull-up adventure in Nerd Fitness Journey, we start off by teaching rows. If you want, you can try the app right now for free:

How To Do An Inverted Bodyweight Row

Add bodyweight rows to your workouts

Let’s start with the people who have access to a gym (see a no-gym variation here): 

How to do an inverted row or bodyweight row:

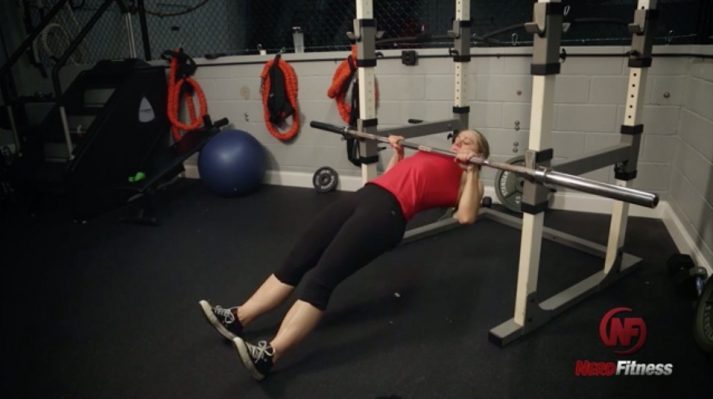
  1. Set the bar (or your rings) around waist height. The lower the bar, the more difficult the movement becomes.
  2. Position yourself under the bar lying face up. Lie on the floor underneath the bar (which should be set just above where you can reach from the ground).
  3. Grab the bar with an overhand grip, slightly wider than shoulder-width (palms facing AWAY from you).
  4. Contract your abs and butt, and keep your body a completely straight line. Your ears, shoulders, hips legs, and feet should all be in a straight line (like you’re doing a plank).
  5. Pull yourself up to the bar until your chest touches the bar.
  6. Lower yourself back down with proper form.

If this movement is TOO difficult, no big deal, we just need to back up a few steps.

Set the bar higher so that when you lean back, your body isn’t down on the ground; maybe it’s only at a 45-degree angle.

We’ll walk you through a row progression right here.

Here’s Staci again demonstrating it at a higher angle:

Start with inclined inverted rows for your pull-up workout. Then drop lower for more required effort.

By setting the bar higher, it takes more of your body’s weight out of the equation.

As you get stronger (and/or lose weight), you’ll be able to drop the bar until you’re parallel when pulling yourself up.

I grabbed a video of Senior Coach Staci from Team NF demonstrating a bodyweight row with gymnastic rings, but the instruction you’ll get in the video will really be helpful too.

How to do a bodyweight row with explanation:

Here are some tips and tricks for doing a proper inverted bodyweight row:

  • Don’t let your butt sag (squeeze your buttcheeks, flex your stomach, and keep your body rigid from head to toe).
  • Don’t flail your elbows. Grab the bar with your hands a little closer than you would if you were doing a bench press, and keep your elbows at that angle from your body.
  • Pull the bar towards the middle of your chest. Don’t pull the bar up towards your throat, or down towards your belly button. Right in the middle!
  • Keep your abs tight. Keep your abs tight throughout the whole routine. Your body should be a straight line the whole time, and the only thing moving is your arms.
  • Pull your shoulder blades down and back towards each other through the movementDon’t shrug your shoulders. Imagine you’re trying to pinch a pencil between your shoulder blades to keep it from falling!
  • GO all the way. Don’t half-ass it. Lower yourself until your arms are completely extended, and raise yourself until your chest touches the bar.


How to Progress with Inverted Bodyweight Rows

Let’s provide a blueprint on how you can level up your inverted bodyweight rows.

#1) Doorway Rows

At first, just start doing some rows in your doorway:

This will help you start training your “pull” muscles.

#2) Towel Rows

Still utilizing your doorway, you can use a towel to lean back even further to increase the challenge here:

A towel can help you do a bodyweight row, as shown here.

Coach Jim walks you through setting up your towel row in this video, “No chin-up bar?? No problem! Five alternatives!!

#3) Inverted Row (High)

Next, try doing an inverted row, but set the bar high so it’s easier to perform:

Start with inclined inverted rows for your pull-up workout. Then drop lower for more required effort.

#4) Inverted Row (Low)

Once your inverted rows become easy, lower the bar to increase the challenge:

Add bodyweight rows to your workouts

#5) Elevated Inverted Row 

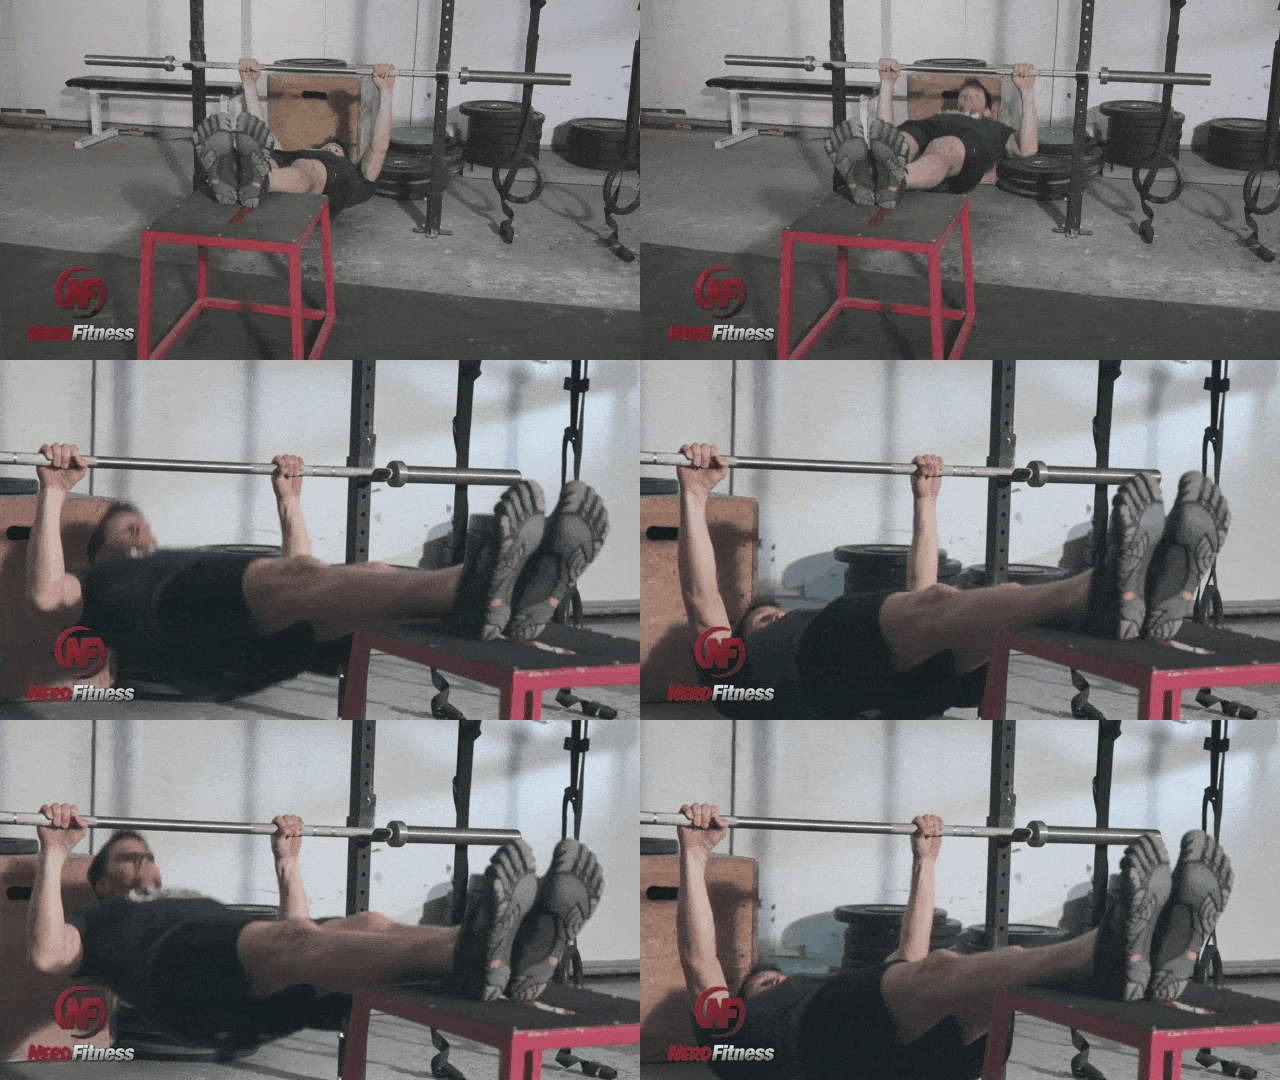
If you place your feet in the air, you’ll make this exercise even tougher:

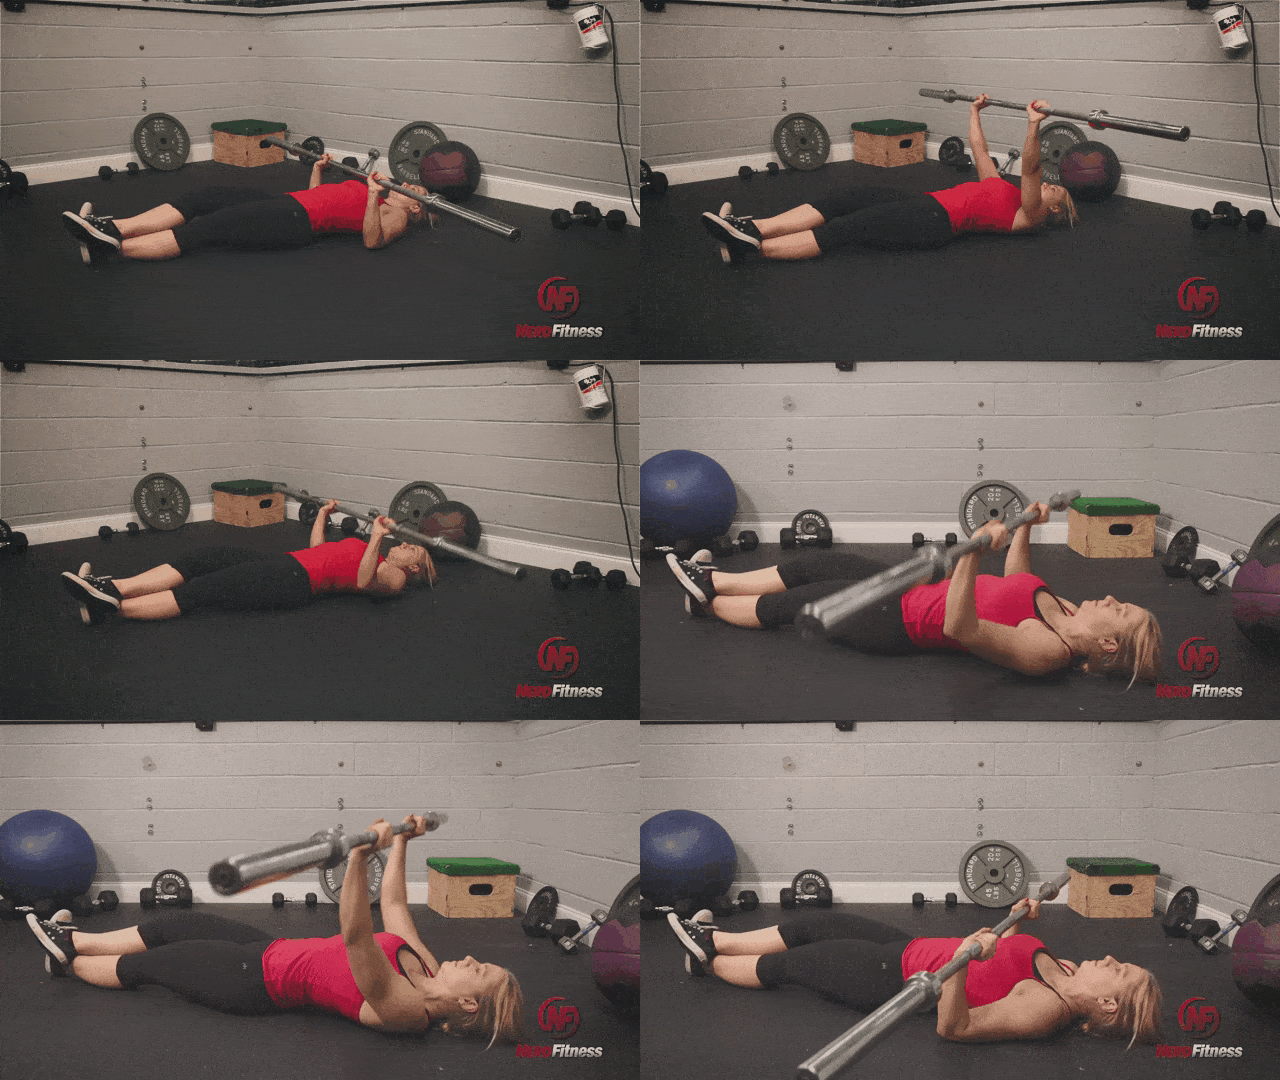
Raising your feet will make rows more challenging.

#6) Inverted Row (Weighted)

If you really want to up the difficulty of your inverted rows, try doing it with a little bit of weight attached to you:

Steve doing a weighted row

When Should I Do Inverted Bodyweight Rows?

Inverted rows are a great exercise to work on doing your first pull-up.

If you are building your own workout plan, you can mix Inverted Bodyweight Rows in wherever you normally do your pull exercises (pull-ups, pull-downs, rows, etc.).

When I go into a gym, my time is extremely limited, and I’m working towards developing strength.

Here’s a sample two day split for me:

Both days work my full body, I can do a full routine in less than 40 minutes, and I’m building strength.

  • If you can’t do dips on Day 1, you can do push-ups.
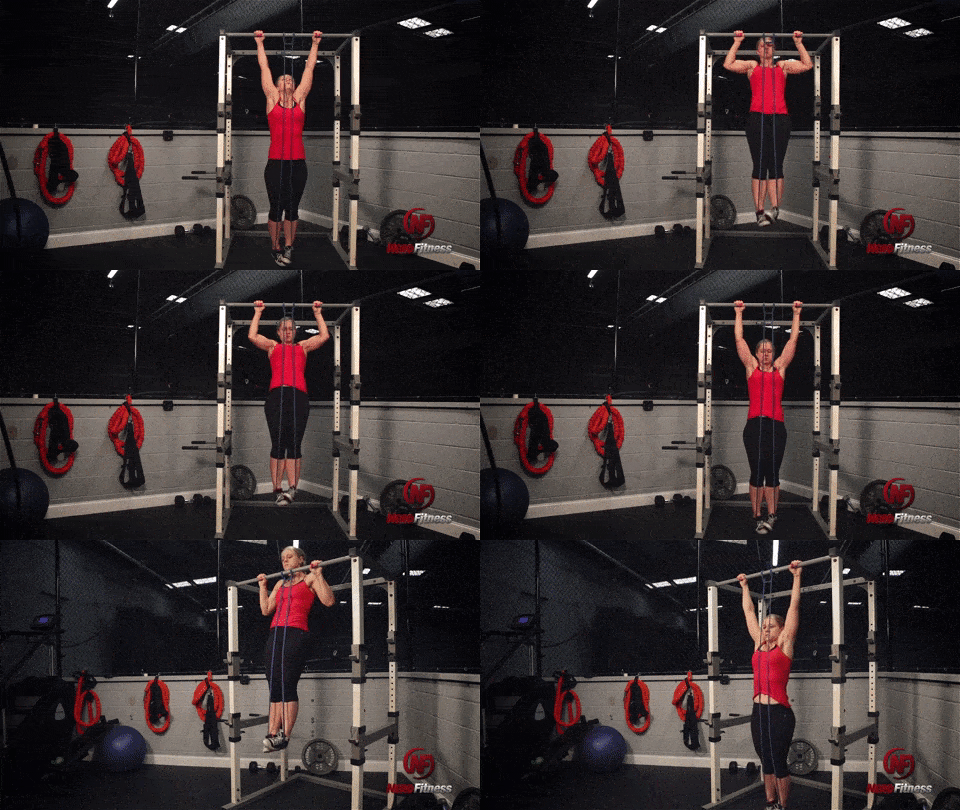
  • If you can’t do pull-ups on day 2, you can substitute assisted pull-ups.

Staci using a band for an assisted pull-up, a great exercise for a bodyweight circuit.

On the rows, aim for 3 sets of 10. We cover this in our “sets and reps” article, but you can never go wrong with 3 sets of 10!

If you can’t do that, do 3 sets to however many reps you can do, and build your way up to 3 sets of 10.

Once you can do that, put your feet up on a chair, throw some weights in a backpack, put it on reverse (so the bag is hanging in front of you), and then do the rows.

You got this!

Overwhelmed? I personally know how that feels. It can be scary embarking on a strength training practice for the first time.

Are you doing your moves correctly? Should you be lifting more weight or less? What do you eat to reach your goals?

We created the Nerd Fitness Coaching program to tackle these questions directly. Your own coach will get to know you, build a program based on your experience and goals, and check your form on each movement (via video):

Nerd Fitness Coaching Banner

HOw to Do Inverted Bodyweight Rows at Home

Just because you don’t have access to a gym doesn’t mean you can’t work out your back, you just need to get VERY creative.  

Here’s how you can do Inverted Bodyweight Rows at Home:

PATH ONE: Use your kitchen table. Or your desk. Be very careful with this one.

Lie underneath your table so your head and shoulder are sticking out above it.

Grab the table edge with an overhand grip, and pull yourself up (just like it’s explained above).

Warning, don’t pull the table over with you, and make sure you don’t break the thing!

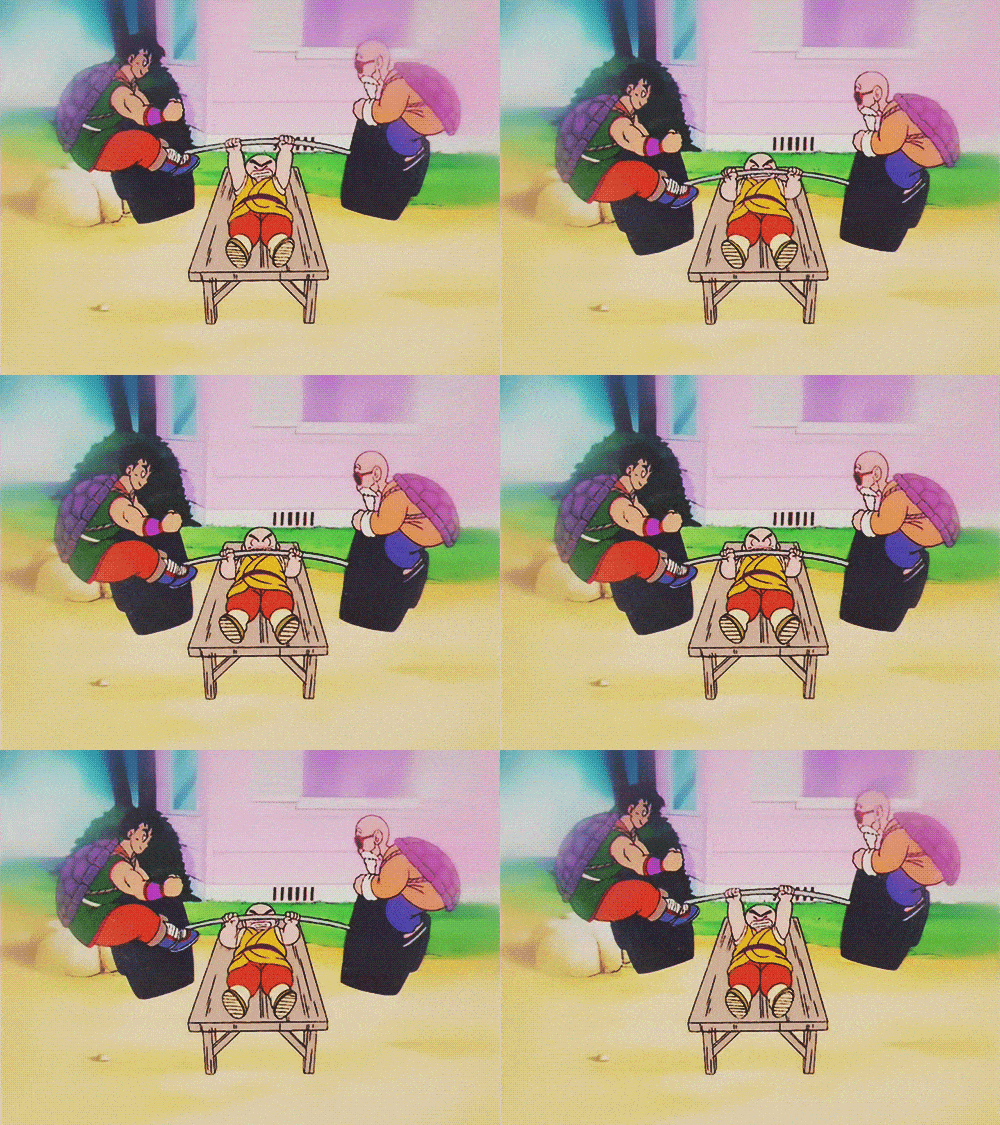
PATH TWO: Get a really thick wooden dowel or pipe, something strong enough to support your weight. Lie it across two of your kitchen chairs, and then lie down underneath it.

This gif shows Jim doing a row on chairs

Make sure it’s sturdy, and the bar isn’t going to break/move on ya, and pull yourself up.

Don’t forget, you want to stay in balance.

If you don’t have a pull-up bar and gymnastic rings, find a way to do some bodyweight rows whether it’s between two chairs or under a table.

You’re smart, get creative!

This should allow you to start mixing in bodyweight rows into your Strength Training Routine!

Any more questions about the inverted bodyweight row?

Leave em below!

-Steve

PS: Our new app Nerd Fitness Journey will walk you through doing simple rows, all the way up to a full pull-up! Instead of worrying about what to do next, simply follow the workouts built into the app!

PPS: Be sure to check out the rest of the Strength Training 101 series:

You can also get the guide free when you sign up in the box below and join the Rebellion!

###

from Blog – Nerd Fitness https://ift.tt/2EEg83S
via IFTTT
Categories
Uncategorized

#holistic #getfit #nutrition A Beginner’s Guide to Training with Gymnastic Rings (Do a Ring Workout Today)

After today, you'll know everything you need to get started with gymnastic rings!

If you want to get started training with gymnastic rings, you’ve come to the right place!

We teach many of our coaching clients how to incorporate gymnastic rings into their workout, and today we’ll share with you the same lessons!


Here’s what we’ll cover so you can get started training with gymnastic rings:

If you’re interested in training with gymnastic rings (which you are, ’cause you’re here), you may want to try our new app! It contains workouts that will have you level up to working out with rings. No guesswork needed, just log into the app and follow the next steps.

You can sign-up for a free trial right here:

What Are the Benefits of a Gymnastic Ring Workout?

Everyone can train with gymnastic rings! If you can reach the ring, you're good to go!

Show me somebody, male or female, who trains with rings and I’ll show you one healthy, bad-ass individual!

I used to think rings were only for gymnasts. But much like other bodyweight exercises, rings are great tools for beginners, too.

Young or old, male or female, big or small, you can start simply by spending a few bucks on a set of gymnastic rings and working on some very basic movements.

It doesn’t matter if you’re a complete beginner or a super-advanced fancy person (and it certainly doesn’t matter if you’re “skinny” or “stocky”, male or female, Gungan or Wookie): Anyone at any experience-level can train successfully — and safely — with rings.

How do I know so much about rings? Because I never leave home without them!

Steve always travels with rings, so he can do his training from any part of the world.

My love affair with gymnastic rings began as a simple crush many many years ago. I watched Olympic Gymnasts doing crazy stuff on the rings and said, “I also want to do crazy stuff on the rings some day, but I don’t know how.”

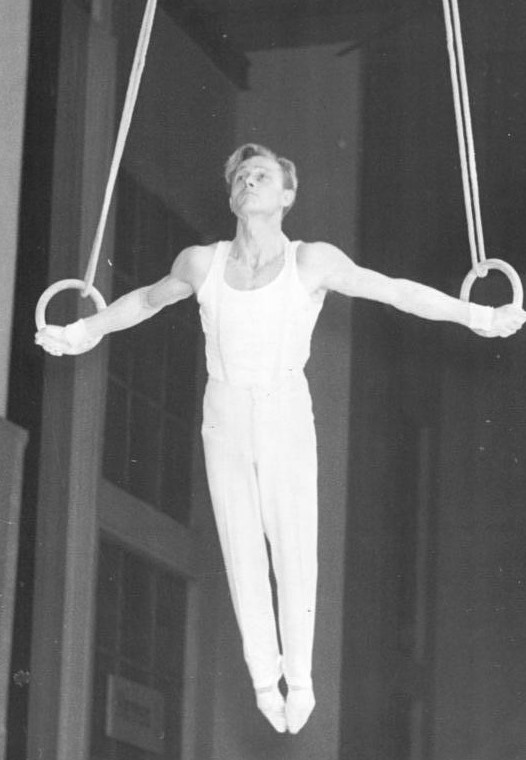
Displays like this are what first inspired Steve to train with gymnastic rings.

It was around this time that I had just moved to Washington, DC, and discovered that one of my fitness heroes, Jim Bathurst of BeastSkills fame, ALSO lived in Washington, DC. Eventually, I sheepishly asked him if he could show me around the rings, and he taught me how to get started with them.

In fact, he helped me get my first muscle up (flash back to Skinny Steve in 2011):

After that, I’ve been in love with ring training and they never leave my side. For the past four years, I’ve been using my rings and training under the guidance of an online coach (my friend Anthony Mychal) – the results have absolutely blown me away.

Which is why anytime I travel, I throw a set of rings and some chalk in my suitcase and I know I have a portable gym anywhere I can find a tree branch or swing set to hang them from!

I firmly believe that my quest to become Captain America has been aided by my ring training – it’s helped me build functional strength, bigger arms, broader chest, wider shoulders, and more. Plus I can now do cool things like this:

And rings aren’t just for dudes! You know Staci from Team NF, right? Here she is doing muscle-ups with added weight:

In addition to ring push-ups:


View this post on Instagram


A post shared by Staci Ardison (@staciardison) on

And ring l-sits:


View this post on Instagram


A post shared by Staci Ardison (@staciardison) on

Now, you might have watched all those videos and then looked down at your stomach and said, “Uh, yeah. There’s no WAY I could ever do that stuff!”

WRONG!

Like any video game, there’s a leveling system you can follow. You start with basic movements like hanging from the rings:

You can start your gymnastic ring training by simply hanging from the rings!

Or holding yourself up in the push-up support position:

Holding yourself up at the peak of a push-up is another great beginner move with gymnastic rings.

You can then progress to slightly more difficult things like a chin-up:

If you own some rings you can use them like so for some advanced pull-ups.

Or full push-up:

Staci showing you how to complete a push-up using gymnastic rings.

And eventually end up doing all sorts of crazy stuff like muscle-ups:

Staci incorporates muscles up in her training, which is an advanced move for gymnastic rings.

And iron crosses:

The iron cross would be an advanced gymnastic rings move. We'll build-up to this one.

If I haven’t scared you off yet, let’s get you started down your path to ring domination. You know my friend/hero Jim that I mentioned earlier? He’s now on Team Nerd Fitness (and our Head Coach!), and he helped us put together a pretty killer resource to help you become…

THE LORD OF THE FLIES RINGS

[cue the Rivendell music]

What Are the Best Gymnastic Rings to Buy? (4 Things to Consider)

Gymnastic rings come in all shapes and sizes, but let's point you in the right direction on what to buy.

You might be lucky enough to train in a Crossfit Gym or a commercial gym that happens to have gymnastic rings available.

However, if you’re like me, you might train at home or in a gym that doesn’t have rings, which means you’ll need to buy your own.

Don't worry if you don't have much money, gymnastic rings are cheap!

That’s okay!

Rings are cheap (especially when you’re just starting and don’t need anything fancy). I’ve probably gone through 6-10 different pairs of rings to test them all out, and I’ll share my thoughts with you below.

For starters, you can either go with plastic/composite rings, or wooden rings. Jim, Staci, and I agree that wooden rings provide a better experience than plastic ones, but if plastic is your only option, make do with what you have!

Here are 4 things to consider when buying gymnastic rings:

#1) CHEAP AND EASY: If you’re not sure if rings are for you, but you’re ring-curious, I would consider starting with a set of wooden rings like these Peak Fitness Wooden Rings for less than $30. I guarantee the last thing you spent $30 won’t change your life the way these rings will.

#2) HIGHER QUALITY: My friend Peter runs FringeSport.com, and I can testify that his wooden rings are the highest quality rings I’ve ever used. If you KNOW you’re going to love rings and want to have a great pair that will last forever, go with these.

#3) FAST SET UP AND TAKE DOWN: These days, I use Rogue Competition Rings for one reason above all others. I have to set up and take down my rings each time I train, and the carabiners and segmented straps make for a quick set up and take down.

#4) SMALLER HANDS?: Look for rings that are in “FIG” size. These International Gymnastics Federation rings are a bit smaller and thinner, which allows for better control for smaller hands.

How to Set up Gymnastic Rings (How to Hang Your Rings)

You can definitely install your gymnastic rings yourself...just be careful!

Now, if you’re responsible for hanging your own rings, either at home or in the gym, there are a few key things you need to be aware of.

For starters, where will you be hanging them from?

Depending on your clearance or where you choose to train, ANY of the following could be anchor points for you to hang them:

  • A tree branch in your local park (Be safe. If there’s any doubt of stability, move on!)
  • The top bar of a swingset in the playground down the street
  • The highest pull up bar at your gym
  • The bar on the top of your squat rack in the gym
  • Two eye-bolts in your garage ceiling or use rafters/ i-beams in your basement or garage.
  • Hanging from your door frame pull-up bar

THE FIRST THING you need to do, if you have rings with proper clips, is learning how to hang them properly! I’ve seen MANY people hang rings improperly and can be very dangerous.

Here’s a video on how to hang your gymnastic rings, step-by-step:

If you are hanging them over something square or rough, it’s recommended to lay down some old towels first to minimize wear to the straps.

What’s that? You don’t have a place to hang your rings at home? Do you have a door frame? If so, you can MacGuyver a set up like Jim has done here in his home with a door frame pull-up bar! (His pull-up bar is this one.)

View this post on Instagram

"I shall either find a way or make one." . . I learned handstands + handstand pushups in my bedroom, which was about the size of a walk-in closet (plenty of kicked furniture). . . I got my first one arm chin-up in a musty basement next to a washing machine. . . Now that I work from home for @nerd_fitness, I bought a doorway pull-up bar and some rings for workouts and to keep myself sane during the work day (h/t @caseyneistat) . . Now I know that not everyone is going to feel comfortable with this combo on a home set-up (stay safe!) – and a big, fancy gym is always awesome – but just understand that it's the Wizard, not the Wand. You don't need perfect conditions to get after it! . . L-sit muscle-up to forward roll. Your move @stevekamb! . . Also, @Nerd_Fitness is going to be releasing a Rings/Handstand course soon! Buy your equipment and get excited!! . #NerdFitness #CampNF #Gymnastics #Rings #Bodyweight #Calisthenics #MuscleUp #Hannibal

A post shared by Jim Bathurst (@beastskills) on

Depending on how much clearance you have, you might need to adjust the ring height a few times so that you can do work above or below the rings. (Exercises like dips, supports, and l-sits require different heights than rows and front lever holds).

WHAT ABOUT GLOVES? Working with rings (and barbells) will inevitably build up some callouses on your hands. While we here at Nerd Fitness will simply pumice or shave off the extra skin, that might not appeal or be an option for you.

You can certainly wear gloves during your ring work, but we recommend against it.

A better alternative?

Take care of your hands and use some chalk to hold on tight!

Gymnastics chalk can be applied lightly to the points of contact (fingers, palm, and wrist) in order to absorb sweat and oil and give a better grip. There is even a “liquid chalk” product if your gym doesn’t allow regular chalk!

  • Chalk bag (this is what I use on my hands when I train)
  • Liquid chalk (what Jim uses in Gyms that don’t allow traditional chalk)

The 7 Best Gymnastic Ring Exercises for Beginners

Metal rings can be tough to handle. What's a better alternative?

The exercises below can help anyone get started TODAY with rings; you don’t need a childhood full of gymnastics practice.

Here are the 7 best gymnastic ring exercises for beginners:

#1) Hang From the Rings

You can start your gymnastic ring training by simply hanging from the rings!

One of the simplest exercises to do? Hang from the rings! This exercise is accessible to beginners, but is no joke.

It will help build up the grip strength necessary for future skills, and you may not be able to go long at the beginning.

If hanging from your ring is too difficult for you:

  • Simply adjust the rings so that you can hang from your arms and have part of your feet on the ground.
  • Don’t worry if you feel like 99% of your weight is still in your feet, there is still that 1% in your hands and arms, and that will definitely improve over time!

For those hanging from the rings with no problem, you can practice hanging scapular retractions. This is a fancy way of saying that we’re going to pull our shoulders and shoulder blades (scapulae) down away from our ears.

The scapular retraction is a simple but important workout to build shoulder strength.

Do this with elbows totally straight, so all movement is going through the shoulders. Retract, relax, repeat. Tough stuff!

Here’s a video of Jim and myself going over the movement:


#2) Support Position

This looks easy, but actually requires decent strength to hold yourself up on rings.

If you have never used rings before, even just holding yourself up with straight arms will be challenging! The rings will want to move all different directions.

Just like the hang from the rings, you can also set the rings up to a height where you can assist with your feet on the ground.

If you can't do a regular straight arm support hold, no problem! Lower the rings and assist yourself with the floor.

And again, even if you feel like 99% of your weight is in your feet, we can still work and improve the 1% that you are putting into your arms!

#3) Ring Rows

When starting off, keep yourself at a higher angle like so.

Ring rows are a classic exercise to build yourself up to a pull-up. You can set the rings up somewhere around hip to knee height. Then grab the rings and lean back to start the exercise.

By moving your feet forward or away from the anchor point, you can position your body in an infinite number of angles (which will adjust the difficulty).

  • Make it easy by leaning back just slightly,
  • Make it hard by putting your feet up on a bench and starting horizontal.

Ring row with feet on box

With an infinite number of angles you can position your body (to adjust difficulty), they are for absolutely everyone.

Make sure whatever your rings are attached to is solid before leaning back with straight arms and body. Then puff your chest up and pull it to the rings!

The closer you get to the ground, the tougher your ring row will be!

#4) Ring Chin-ups

If you own some rings you can use them like so for some advanced pull-ups.

Chin-ups on rings work the same as they do on the bar. You can also move your hands around easily to different positions (palms forward, inward, and backward).

Not quite at a chin-up pro yet?

Adjust the height of the rings to be able to assist with your feet! Or use a box like so:

A box or sturdy chair can help you do chin-ups at first.

#5) Ring push-ups

Staci showing you how to complete a push-up using gymnastic rings.

Push-ups on the rings will be much more challenging than ones on the ground, because you have to stabilize the “ground” before you even move!

Just like rows, you can adjust your body at an infinite number of angles to the ground to make the exercise easier or harder.

#6) Ring Dips:

The ring dip is a great way to build back and shoulder muscle.

Ring Dips are one of my favorite exercises for the awesome challenge they provide. Lower yourself down until your chest touches the rings (yes, that low!) and then push up until you are in a straight arm support position.

As with many of the other ring exercises, you can easily adjust the height of the rings so that your feet can assist a little or a lot.

The floor can help a lot when doing ring dips!

#7) False Grip Practice

The false grip is a way to hold onto the rings so that the wrist is in contact with the inside edge of the rings. This will allow us to build up to more advanced skills like the muscle-up! (Aka a ring chin-up that transitions into a dip!):

The muscle-up is one of the most badass exercises you can do!

Think of the false grip like a hook on the rings: between your forearm and hand.

To perform a false grip:

  • Place your wrist, pinky side and just below the crease of the wrist, on the inside edge of the ring.
  • Flex the forearm hard.
  • The support point is on the wrist, with the hands grabbing firmly to the ring.

The false grip will help you when you advance to more difficult gymnastic rings.

Any of the pulling and hanging exercises we went over can be done with a false grip, just be warned that they’ll be a lot harder!

Want help pulling this all together for a full-body workout? Our new app will do all that for you, so you can start using your rings to their full potential:


4 Tips and Tricks for Using Gymnastic Rings

See! Even cartoons can use gymnastic rings!

Keep the following four points in mind as you begin your gymnastic ring training:

#1) Your relationship with rings isn’t going to be a “do this for a month and be done”. This is a lifelong relationship – if you like it then you should put a ring on it. Get it? Because Beyonce and also Gymnastics.

Get used to playing with rings as often as you can… wake up your inner kid again and just enjoy moving around on the rings.

You didn’t think about a structured workout when you were a young kid on a playground; you just moved around and had fun. And while you’re discovering that fun again, your grip, muscles, and joints will be getting stronger.

#2) “What if I don’t have rings?” Well, if you want to learn to swim, you’ll have to eventually get into a pool, right!?

Like this dog, sometimes you just gotta go for it. So buy rings!

But if you’re at home, waiting for your rings to arrive, you can still perform a number of these exercises! Pushing and support exercises can be done on two sturdy chairs or the ground. Pulling and hangs can be done at a jungle gym (even the false grip can be practiced on a bar!). Be safe, but get creative!

#3) GO SLOW AND BE PATIENT! I know people who started doing violent kipping muscle-ups before their body, joints, muscles, ligaments, and tendons were ready… and they injured themselves pretty seriously.

I even struggled with elbow tendonitis for a bit thanks to pushing myself too hard too soon on the rings. So slow down, build up your strength in each exercise slowwwwwly, and…

#4) Have fun with them. Remember, our goal is to find a workout that is not only something we don’t dread, but something we can look forward to! Working out without realizing it is a sure way to commit for the long term.

I’ll mention that helping people find workouts they enjoy is one of the benefits of our coaching program. If you dread heading to the gym to jump on a treadmill, maybe we can help!


How to Get Started Training with Gymnastic Rings

You are now ready to start your ring training!

You now know everything you need to get going with gymnastic rings: what rings to buy, how to set them up, and how to train with them!

It’s time to shine my young Padawan!

Anakin is ready to start training with gymnastic rings...as soon as he wraps up this podrace!

Want help progressing with your gymnastic ring training from here? I’ve got 3 great options for you!

#1) Exercising at home and need a plan to follow? Check out Nerd Fitness Journey!

Our fun habit-building app helps you exercise more frequently, eat healthier, and level up your life (literally).

Try your free trial right here:

#2) If you want step-by-step guidance on how to build a gymnastic ring workout, get stronger, and even eat better, check out our killer 1-on-1 coaching program:

Your NF Coach can help you lose weight and get healthy!


#3) Join The Rebellion! We have a free email newsletter that we send out twice per week, full of tips and tricks to help you get strong, get healthy, and have fun doing so. 

I’ll also send you tons of free guides like our Strength Training 101 ebook when you sign up:

Okay, your turn!

I’d love to hear from you:

  • What sort of questions do you have about getting started with rings?
  • What is the biggest thing holding you back from giving them a chance?
  • Have you already trained with them?

-Steve

PS: I enjoy this gif way more than I should:

See! Anyone (like this panda) can use gymnastic rings!

I told you gymnastic rings were for everyone!

Photos: Gymnastic Rings, Small Child Gymnastic Rings, Iron Cross, Gymnastic Rings, three rings, Gymnastic Murals Rings, Rings.

from Blog – Nerd Fitness https://ift.tt/2h9uDD1
via IFTTT

Categories
Uncategorized

#holistic #getfit #nutrition How to Bench Press Safely: The Ultimate Guide for Proper Form and Technique

These LEGOs are working the bench and doing some deadlifts. Nerd Fitness approves.

Let’s get you comfortable using the bench press, starting today!

We specialize in helping people pick up barbells for the first time. Our new app centers on helping people train, with any and all equipment available!

You can give it a test-drive if you want right here:

Here’s what we’ll cover so you can start using the bench press:

This guide is part of our Strength Training 101 series. I would encourage you to check out the rest of the articles if you’re just starting your weight training. 

If you’re in a rush, you can download the entire guide for free when you enlist in the Rebellion (that’s us!), by joining our free bi-weekly newsletter: 

How Important is the Bench Press?

Make sure you always bench with a spotter. Seriously.

For the last 30-40 years, the bench press has become the universal lift for bros everywhere to determine how strong someone truly is. 

The questions are things like:

  • How much do you bench?
  • Do you even lift?

A clever take on a popular meme.

As popular as it is, the bench press in its current form is really less than 100 years old.

Until the 1930’s, people did a movement called the “floor press”, which was similar to a bench press only done from the floor.

If you don't have a bench press, you can 100% try a floor press.

In fact, at first many people did a movement called a “belly toss” – where the bar would come down and bounce off the belly to help the lifter get it back up.

The three movements – bench press, belly toss, and floor press were all popular until the 40’s and 50’s, when the bench press started to become more and more popular, as bodybuilders liked how the bench worked their pecs (better than the other two movements).

Arnold utilized the bench press (amongst other tools and lifts) when competing for his Mr. Universe title.

As the bench press became more and more popular, powerlifting emerged in the 1970’s and separated itself from weightlifting as a sport of its own.

What Muscles Does the Bench Press Utilize?

I can't even begin to imagine what Superman must be able to bench.

The bench press is a great movement to have as a part of your strength program, and one move we consider to be a part of the “big 4” basic lifts. 

As shown, always have a spotter when doing the bench press!

The other three lifts? 

  1. The Squat
  2. The Deadlift
  3. The Overhead Press

Some of the issues coaches have with the bench press (such as a tight chest creating bad posture) don’t come from benching itself, but come from bench being one of the ONLY movements in your program, and can disappear when incorporated as a part of a well-rounded strength program.

In other words, don’t JUST train using the bench press.

Vada is ready to start bulking up!! And torment her Dad's GF.

The bench press is widely known as a “chest” exercise, however, that’s definitely not all it is. The bench strengthens your:

  • Shoulders
  • Triceps
  • Forearms
  • Lats
  • Pecs
  • Traps
  • Rhomboids
  • Plus pretty much every muscle in your upper body

However, the bench press doesn’t JUST use your upper body.

When you bench properly, you use your lower back, hips, and legs as well. Just like our other main lifts (the squat, deadlift, and overhead press), the bench press, while putting an emphasis on specific muscle groups, is a full body movement.

Think about it – while you’re benching, the rest of your body is not just lying there doing nothing.

I'm not saying DON'T bench press your friends, but ah, yeah...

Your entire body should be working your shoulders are pinched together and your lats are engaged, while your back, hips and legs are tight, stabilizing your entire body to create a solid base and help you generate drive from the round.

How to bench press: The Setup

Setup is everything when performing the press, as we will learn.

There are a lot of different ways to perform the bench press.

We’ll start you out with a standard and basic bench press variation, which we believe is the best (and safest) method for general strength.

Remember: just because you see someone benching a ridiculous amount of weight at the gym does not mean they are using proper or safe form.

They could be an advanced athlete who is making compromises to their form (knowingly or unknowingly) in order to bench higher numbers.

Stay consistent like this mouse and you'll bulk up. Maybe eat a little cheese too.

What do you need to perform the bench press?

  1. A weight bench with uprights:We don't need to make this complicated. A simple weight bench like this will be perfect for the press.
  2. Barbell – the standard weight is 45 lbs, but this may be too heavy to start. No matter how strong you are, I recommend starting with a PVC pipe or broomstick to learn proper form.
  3. Spotter – once the weight gets heavy (we will discuss options later in case you just don’t have someone else to spot you)
  4. If you like to learn via video, please watch “How to Bench Press Safely” from Jim Bathurst, our lead coach from the Nerd Fitness Coaching Program:

How to Set Up A Bench Press

There are many different ways to set up for a bench press – as you’ll see by watching any powerlifting competition, or even by spending just 20 minutes in your local gym.

Some people get on the bench and curl themselves under the bar, some enter the bench from the back and slide in under the bar, and others just lie down and then get tight.

Your first step on proper bench press form looks like this.

The key here is to set up in a way that helps you get your body tight and ready for the lift.

Before you begin, it might be a good idea to roll the bar forward on the uprights, as this is where you will be lifting it off from.

Having the bar in the same spot in the uprights will help you with a standard set up that is the same every time.

Here’s how to position yourself during the bench press:

  1. Squeeze your shoulder blades together (as if you were trying to hold a pencil between them), press your lats into the bench, and raise your chest up slightly towards the bar.
  2. While you’re doing this, squeeze your butt and plant your feet into the ground. Your entire foot (heels included) should be on the ground, on either side of the bench.
  3. Keep your entire body tight. The raising of your chest to the bar, squeezing your shoulders together, squeezing your butt, and driving your heels into the ground will create a tight arch in your back. (more on this later).
  4. Imagine you are a superhero and pretend you are sucking all the energy out of the room and absorbing it. As you the bar descends, absorb that energy and get ready to explode upward with the bar.
  5. Your shins should be perpendicular to the ground and directly below your knees. If they are out in front of you, your feet are too far forward and you won’t be able to generate proper drive.

Engage your entire body while performing the bench press.

When you look up, your eyes should be just north of the bottom of the bar – you should see the bar directly above your eyes. Your head, upper back, and butt should never leave the bench.

Note: Some people (including myself) find it easier to get tight in their upper back if they put their feet up on the bench, grab the bar, get tight in their upper back, and then place their feet on either side of the bench one at a time.

Some (like Staci) find it easier to keep form with their feet up. You do you.

This is just another method and something you can try out after you get the hang of the bench!

Next, take your arms and put them straight up, and grab the bar. Your grip should be with your thumbs around the bar.

Make sure your thumb wraps around, we don't want you to lose control of the bar.

A thumbless grip is not to be used on the bench press, as it is unsafe, and often nicknamed the “suicide grip,” as it is far too easy for the bar to fall off of your hands and land on your body (warning: hard to watch).

When you hold the bar, it should be in the heel of the palm (the same spot in your hands as for the overhead press.) Your wrists will not be extended, and your forearms are under your wrists, forming a solid line of support.

If you hold the bar in the upper half of your hand or the fingertips, not only are you not in a strong position, but you could hurt your wrists.

Bench Press Grip

Staci shows you the correct way to hold a barbell during the bench press.

Bring the bar (or, preferably PVC as we are just learning) down to your chest. At your chest, the width of your grip should make your forearms straight up and down (as perpendicular to the floor as you can).

This is roughly the width of the bench grip you are shooting for.

Get a friend to help you (as you won’t be able to see on your own), or tape yourself so you can see. Don’t stress too much about getting your forearms 100% perfectly vertical.

Once you get comfortable with the movement, you may change the width of your grip, as there is wiggle room for personal preference, but this is a great place to start.

Also, keep in mind that your grip may seem way wider or narrower than your friends based on the width of your shoulders. This is normal!

Try and keep your arms vertical. This will give you a good grip when performing the bench press.

Why would people alter their bench press grip?

  • A wider grip is more pec-focused
  • A narrower grip is more tricep focused

You will see powerlifters use a super wide grip because it reduces the range of motion and therefore allows them to lift more weight in competition.

However, more weight does not always mean stronger, and our goal today is safety and strength!

Which is why we recommend a grip with your forearms in a vertical position, it’s the most well-rounded and safest version for overall strength.

If you’re worried about whether you have the right grip in place, record yourself and match it against the videos in this guide. If it’s close, you’re doing great.

Our new app also contains loads of videos and gifs for you to compare your workout too. You can try it out right now (for free) if you want:

The Most Important Bench Press Tip (Keep Tight)

Jim and Staci will walk you through the most important tip when using the bench press.

If you’ve set up correctly, your entire body should be tight.

Focus on the following when performing your bench press

  1. Think of your body as one single unit, not single muscle groups.
  2. Drive your feet into the ground, tighten your entire lower body and core, squeeze your shoulder blades together, and squeeze the bar. You should feel like one solid, single unit.
  3. When you tighten your body, your neck, upper back, and butt should be on the bench (and your feet and heels on the ground).
  4. When you drive your heels through the ground, squeeze your shoulder blades together, and raise your chest to the bar, it will form a small arch in your back – this is natural and what we’re aiming for.
  5. You don’t want to push your lower back into the bench to create a “flat back,” or try to not create an arch. If you have heard people talking about not using an arch in the bench press, they are most likely referring to the extreme arch used by many powerlifters:Don't start benching like this. This is an advanced move only.
  6. That is not what we are going for here – that is a way to help you lift more weight by reducing the range of motion, and is only safe to look into when you have been benching for a long time and really know what you are doing. For overall strength, we recommend benching with a full range of motion instead of trying to reduce it.

Now, feel how tight your body is? It is very important that you keep this tightness throughout the entire movement.

Proper Bench Press Form

Camp was great, for lots of reasons, but mainly because we benched.

Now that we are set up and have our hands around the bar, we want to think about having our elbows tucked in and not letting them flare out.

One way to do this is that when you grab onto the bar, think about trying to bend it in half upwards towards the sky.

This “upward bending” cue will also help you engage your lats, which doesn’t actually help you with the press, but do help you keep your body tighter.

We review how to bench press with proper form in this video (taken from NF Prime): 

Here’s how to perform the bench press:

#1) Unrack the bar and position the bar directly above your shoulders (without losing tightness – keep squeezing your shoulder blades together!).

#2) Continue to look up at the ceiling, unlock your elbows and lower the bar to your chest. Don’t just drop the bar to your chest – you want to pull it down towards you with control.

#3) At the bottom of the movement, you want the bar to touch a few inches below your clavicles. If it’s up by your throat or on your stomach, it’s in the wrong position.

As shown, we don't want to the bar too high or too low. You want the bar to touch a few inches below your clavicles.

#4) Once the bar touches your chest, press up to put the bar back to its starting position.

Note that unlike the deadlift and squat, the bench press movement will not be in a straight up and down motion.

This picture shows you the bar path of the bench press

Because of our anatomy, the bar will follow a slightly diagonal path down, and then follow the same path back up.

#5) While pressing, remember to keep your elbows tucked in, and don’t let them flare out. 

As Staci shows here, keep your arms vertical (as much as you can).

Think about squeezing so that your biceps touch the side of your chest (though you won’t be close enough to have this happen), or try to get your elbows under the bar.

You don’t want to be too tucked though – the goal is about a 45-degree angle: 

Staci with elbows at about 35 degrees.

#6) As you press, the same parts of your body that were touching the bench before should still be touching the bench, and your feet should still be on the floor. Don’t let any part of you (the most common is your butt) come off the bench.

To help prevent your butt from coming off of the bench, instead of pushing up when you drive with your heels, think of pushing up and back, towards the front of the bench (where your head is).

#7) To re-rack the bar, move the bar backwards to the uprights and touch them with the bar, and then let go of the bar. Don’t look at the racks, you know that they are there! For beginners, it’s great to have a friend help you guide the bar back to the right position in the rack.

What’s a Beginner Bench Press Weight? (Determining Your Starting Weight)

As we will teach, having a spotter can be critical when using the bench press.

Okay okay, you’re wondering how much you should put on the bar as a beginner who is starting out with bench pressing. 

This is a very important question, and for somebody that is trying to level up as quickly as possible, you’ll be tempted to put WAY more weight on the bar than you can probably handle.

In other words, your ego is writing checks your body can’t cash.

So here is what you are going to do.

Check your ego, and start with:

The bar. And ONLY the bar.

Yes, really start with just the bar. No matter how much the dog is benching.

Your ego will survive. I promise.

As we cover in our extensive guide: “How Much Weight Should I Be Lifting?“, you should ALWAYS start every session with just the bar.

Hell, even veteran powerlifters who can bench press 500+ pounds will always start out by just bench pressing the bar.

You can too. Nobody in the gym cares. I promise you.

NOTE: The bar STILL weighs 45 pounds, which MIGHT be too heavy for you. That’s okay! You don’t go to show people how strong you are at the gym, you go to the gym to get stronger.

So start by making sure 45 pounds isn’t too heavy for you.

If you are even SLIGHTLY concerned that it might be, consider using dumbbells or finding a smaller/lighter barbell in the gym and using that to build up to the strength with the bar.

dumbbells can help you build strength until you start using a barbell.

HOW TO BENCH PRESS MORE:

Now, if you can bench press the bar safely, great.

Do 3 sets of 10 on your first day in the gym.

When it’s time to bench press again, add 2.5 lbs (1.2KG) to each side of the bar, and repeat.

You’ll then be lifting a total of 50 lbs.

Each week, add 5 pounds total (2.5 to each side) to the bar. This will be “slow going” at first. However, even at a paltry 5 pounds per week, you’ll rapidly reach a point in the next 6-12 months where you’ll approach a weight you can no longer lift.

“BUT STACI, I CAN LIFT WAY MORE THAN THE BAR, WHY START THERE?”

Because you need to train your body correctly, and we’re looking to build momentum. When you practice perfect form with light weight, your body starts to learn the proper pathway for the bar. Your muscles, tendons, and joints all learn how to bear the load of a weighted bar.

And each week, you get slightly stronger.

Repeat this week after week, combine it with a diet to get stronger, and you will build muscle like a superhero!

The entire strategy of our new app, Nerd Fitness Journey, is based off this strategy: slow progress over time. And because we’re nerds, you’ll actually build a superhero along the way (because why not!).

5 Common Bench Press Mistakes

Don't flare out your elbows, instead keep them tucked in during your bench press.

  1. Not keeping body tight – As soon as you lose tightness, you have the potential for missing the rep. Make sure even when you are warming up and the weight is light, that you keep your entire body tight.
  2. Butt coming up – make sure your butt stays on the bench at all times! It’s easy to let it come up off the bench once the weight gets heavy and you really start driving through your heels. Instead of thinking about driving upwards through your heels, think about driving up and backwards. If you’re struggling with your butt coming up, either try putting plates under your feet or re-evaluating your foot position (or lower the weight).
  3. Bouncing off your chest – when you come to the bottom part of the lift, don’t bounce! Lower the bar to slightly graze your shirt, and then press.
  4. Half reps – One of the most common faults I have seen in the gym! Make sure you are hitting full range of motion every single rep (down to chest!).
  5. Wrong starting, middle, and ending positions (pictured below) – we’ve learned in the past that a vertical line is the most efficient way to move a bar, but with the bench press, the safest is to move the bar at a slight curve. The bar will start and end above your shoulders, but the middle point of the bar will be below your clavicles. If your middle position is above your shoulders, in a vertical line, your middle position is too high.

As shown here, the bar actually travels at an angle, not straight up and down.

How to Ask for A Spotter with the Bench Press

Always have a spotter when you bench press, otherwise you'll upset Vader.

Spotting is a very important part of bench pressing – not only having someone spot you, but having you spot other people. It can be extremely dangerous to bench press alone.

We don't have a sword to give you, but we can teach you how to ask for a spotter for when you bench press.

A spotter’s purpose is to ensure the safety of the lifter – not to help the lifter with reps.

The spotter always watches every rep while staying out of the way.

The only thing they may help with is giving you a lift off, but after that, it is all you!

*A lift off is when you help the lifter take the bar out of the rack, and then let go of it when it is in the correct starting position.

You don’t need a spotter for your warm-up sets, but everyone should have one for their work sets.

How do you ask someone to spot you? “Hey, will you spot me real quick?” usually works (it’s really that simple!). I’ve never had anyone turn me down.

If you’re always at the gym at the same time as someone else, make friends and spot each other.

New friends are always great, especially if you can bench press together. Even if they might be imaginary rabbits.

That way you’re not always nervous asking someone random to spot you.

If someone asks you to spot them, always ask:

  • How many reps they are going for?
  • Do they want a lift off?
  • How would they like to be spotted?

Some people don’t want you to touch the bar unless they tell you to; others want you to help them guide the bar up if they start to fail, and others want you to take the bar immediately if they fail the rep.

Some want a lift off, and some don’t.

When you ask someone else to spot you, they will probably ask you the same questions!

What if I don’t have a spotter? Can I bench press without a spotter?

We'll discuss some tips if you find yourself alone like LEGO and don't have a spotter for the bench.

If you don’t have a spotter, you can use the power rack to bench.

A power rack would look like so:

If you see this as the gym, you have a great tool for the bench press.

NF Coach Jim demonstrates how to bench press using a power rack here:

Just set the pins at a level just barely below your chest, so if you miss a rep you can get out.

If you don’t have a power rack, and absolutely don’t have a spotter – you can either not put clips on the bar, and then let the weight slide off one side at a time, or do the “Roll of shame,” where you roll the bar down your body, sit up, and pick up the bar.

Our preference would be for you to get a spotter, but this roll can work in a pinch.

However, both of these methods are dangerous and you’re risking injury by doing them. Please do not bench press alone – especially when just starting out. Even if the weight seems light, it’s very possible to injure yourself.

The best thing you can do is to ask someone at the gym to spot you.

There’s nothing weird about it all – in fact, it’s normal and expected!

If that’s not an option, consider dumbbell presses or another chest exercise until you can find a spotter.

If you don't have a spotter, the dumbbell press can be a great chest alternative.

Frequently Asked Questions about The Bench Press (Plus Tips to Get Started)

One of the many things taught at NF camp was the bench press.

1) “I see people with their feet up on the bench – what’s going on?”

Here is Staci showing you a more advanced way to do the bench press.

This isn’t technically correct – but it’s really a completely different movement than your standard bench press. It eliminates the use of the lower body in the movement, and can be good for people with injuries or as an assistance exercise.

I’ve seen it the most in bodybuilding routines. We recommend you stick to the bench press form we presented until you master the movement.

2) “If the bench is one of the ‘big 4’, why do some people not bench press?”

The bench press is a great way to build strength. But out of the big 4, it is the lift that has the most alternatives available.

While it’s hard to replace a heavy deadlift, you can easily replace the bench press with push-up and dip variations and continuously get stronger with just your own bodyweight for a very long time.

Push up:

This gif shows Staci doing a push-up in perfect form.

Dip:

Bodyweight dips are a great exercise to include in an strength training practice.

Here are the best 42 bodyweight exercises if you want to start training that way first!

I personally keep the bench in my program because I enjoy it, but also because it’s a competed lift in powerlifting.

Steve, however, has chosen to not bench press and replaces it with bodyweight variations of push-ups and a lot of gymnastics ring work.

The muscle-up is one of the most badass exercises you can do!

3) “Okay, I get it! What do I do now?”

I’m glad you asked! I have three great options for you:

Option #1) If you want step-by-step guidance, a custom strength training program that levels up as you get stronger, and a coach to keep you accountable, check out our killer 1-on-1 coaching program:


Nerd Fitness Coaching Banner

Option #2) Exercising at home and need a plan to follow? Check out Nerd Fitness Journey!

Our fun habit-building app helps you exercise more frequently, eat healthier, and level up your life (literally).

Try your free trial right here:

Option #3) Join the Rebellion! We need good people like you in our community, the Nerd Fitness Rebellion. 

Sign up in the box below to enlist and get our guide, Strength Training 101: Everything You Need to Know. It’ll help you start incorporating the bench press into your training:

So that’s all there is to it! Next time you are in the gym, give the bench press a shot!

Start with just the bar, and add weight each time when you hit your weights. Just don’t forget to have a spotter!

So, what kind of benching questions do you have for us!?

-Staci

PS: Don’t forget to check out our other articles in the Strength 101 Series!

###

photo source: leg0fenris: legos, Alexander Danling: Benches, Christian Hernandez: Superman , Arch in bench press, LEGO bench press, Beam me up, please.

from Blog – Nerd Fitness https://ift.tt/2ZLl6cl
via IFTTT
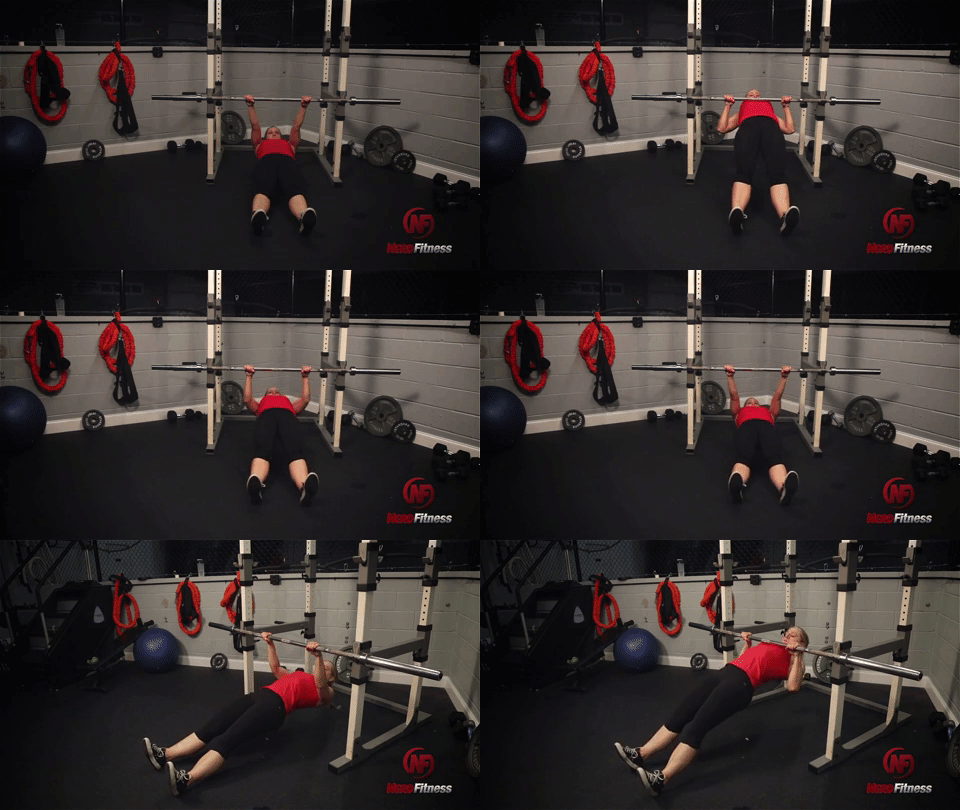
Categories
Uncategorized

#holistic #getfit #nutrition Proper Push-Up Ultimate Guide: How to Do Push Ups with Correct Form

Rebel Leader Steve doing a push-up near some water.

The push-up is one of the best exercises on the planet.

It’s a foundational movement in strength training, and an exercise EVERYBODY should be doing regularly.

However, it’s also an exercise that about 95% of people get wrong and do incorrectly.

Fortunately, after reading today’s ultimate guide, you’ll know exactly how to do a proper push-up with correct form:

Before we jump in, if you’re looking for a way to train anywhere (like with push-ups), you may be interested in the new app we built!

Nerd Fitness Journey will guide you through a workout routine that can be done anywhere, all while creating your very own superhero!

You can give it a free test drive right here:

How to Set up for a Proper Push-up (Staging)

Steve is setting up a proper push-up in this photo.

When it comes to push-ups, your form is crucial. Each push-up needs to be done with proper form so that your total reps measured from workout to workout are on equal footing.

This gif shows Staci doing a push-up in perfect form.

If you did 20 push-ups two days ago, and then today you did 25 push-ups by only going down halfway, sticking your ass up in the air, etc., it’s absolutely impossible to tell if you got any stronger.

Another angle of showing how to setup a proper push-up.

Here’s how to get into proper push-up position:

1) On the ground, set your hands at a distance that is slightly wider than shoulder-width apart. 

Draw a straight line from your chest/nipple down to the floor – it should be directly over your thumbnail.

Depending on your strength and experience, your hands should be angled in a way that feels comfortable to you. For me, my hands are set up so that my middle finger points straight up and away from me.

2) To alleviate wrist pain (if you have poor wrist flexibility) do your push-ups holding onto push-up handles (so your wrists aren’t as compromised), or a bar:

Staci showing you an elevated push-up

If you’re hardcore, you can do them on your knuckles (as long as you’re on a semi-soft surface like grass or carpet or broken glass. Wait, scratch that last one).

3) Your feet should be set up in a way that feels right and comfortable and in balance. For some, that might be shoulder-width apart.

For others, it might be with your feet touching. Generally speaking, the wider apart your feet, the more stable you’ll be for your push-ups.

4) Think of your body as one giant straight line – from the top of your head down through your heels. Your butt shouldn’t be sticking way up in the air or sagging. You’re essentially holding a plank throughout the entire movement.

Here Rebel Leader Steve shows you the classic push-up.

5) If you have a problem getting the proper form with your body, try this: clench your butt, and then tighten your abs as if you’re bracing to get punched.

Your core will be engaged, and your body should be in that straight line. If you’ve been doing push-ups incorrectly, this might be a big change for you.

Record a video of yourself to make sure you’re doing it correctly.

6) Your head should be looking slightly ahead of you, not straight down.

I read somewhere that said “if you’re doing them right, your chin should be the first part of your head to touch the floor, not your nose.”

Looking up helps you keep your body in line, but feel free to look down if that helps you concentrate more.

7) At the top of your push-up, your arms should be straight and supporting your weight. You’re now ready to do a push-up.

8) I want to draw special attention to that first step with hand position: nearly EVERYBODY does push-ups with their arms out far too wide and their shoulders flared. This is bad news bears. 

If I was looking down at you from above, your arms and body should form an ARROW, not a T.

As you can see, you want your arms to be like an arrow, not a T when doing push-ups.

WARNING: If you have been doing push-ups with your arms flared, doing them with proper form will be significantly more difficult!

How to Do a Proper Push-Up (Correct Push-Up Form with Video).

In the 5-minute “Perfect Push-Up” video above, featuring yours truly and two of our coaches, we take you through EACH of the steps of a push-up, including some variations!

Here’s how to complete one perfect repetition of a proper push up:

  • With your arms straight, butt clenched, and abs braced, steadily lower yourself until your elbows are at a 90-degree angle or less. Depending on your level of experience, age, and flexibility, 90 degrees might be the lowest you’re able to go. Personally, I like to go down until my chest (not my face), hits the floor. That way, I know I’m going the same distance each and every time.
  • Try not to let your elbows go flying way out with each repetition. Keep them relatively close to your body, and keep note of when they start to fly out when you get tired.
  • Once your chest (or nose/chin) touches the floor (or your arms go down to a 90-degree angle), pause slightly and then explode back up until you’re back in the same position.

Once you get down like so for your push-up it's time to...push...up.

Do as many as you can until you start to feel your form slip (even slightly); you are done for that set.

Here’s why you should focus on form over quantity:

  • 10 good push-ups and 5 crappy ones are tough to quantify against eleven good push-ups.
  • If you can only do 10 of something, write down your results and aim for 11 next time.
  • Perfect form allows you to keep track of your improvements week over week.

Want to know where push-ups should fall into your workout routine? I have three options!

1) Try Nerd Fitness Journey!

Nerd Fitness Journey will guide you through a bodyweight workout routine that can be done anywhere (yep, even there). You can try it for free right here:

2) Do them as part of our Beginner Bodyweight Workout Routine! This workout has been done by hundreds of thousands of people as their first strength training workout.

3) Make your own workout with push-ups by following our Build Your Own Workout” guide! It’ll walk you through everything you need to build an exercise program for your goals in 10 steps.

How Do You Train to Do Push-Ups? (Where to Start If You Can’t Do a Push-Up.)

These LEGO characters love to stay fit doing the beginner bodyweight workout

Don’t worry if you can’t do a push-up yet. We have a plan that will help you get there.

You need to start with an easier push movement, and work up to progressively more difficult types of moves that will eventually result in you doing true push-ups.

This is a similar type of progression we use for the workouts in Nerd Fitness Journey

We’ll progress from Level 1 Push-ups to Level 4 Push-ups:

  • Wall Push-Ups: Level 1
  • Elevated Push-Ups: Level 2
  • Knee Push-ups: Level 3
  • Regular Push-ups: Level 4

LEVEL 1: HOW TO DO WALL PUSH-UPS

Stand in front of a wall. Clench your butt, brace your abs, and set your hands on the wall at slightly wider than shoulder-width apart.

Walk backwards with your feet until your arms are fully extended and supporting your weight (generally one decent sized step back with both feet will suffice). Keeping the rest of your body in a straight line, steadily lower yourself towards the wall until your nose almost touches the wall, and then explode back up to the starting position.

HOW TO TRAIN WALL PUSH-UPS:

Do 4 sets of wall push-ups with a 2-minute rest between sets, every other day. Keep track of how many repetitions you can do WITH PROPER FORM for each set in a notebook for easy comparison to previous workouts. Once you can do 4 sets of 20 repetitions of wall push-ups, you can progress to knee push-ups.

LEVEL TWO: HOW TO DO ELEVATED PUSH-UPS

As we demonstrate in this video above from Nerd Fitness Prime, elevated push-ups are just what they sound like – your hands are on an elevated surface, whether it’s something as tall as a kitchen table or as low as a few blocks that are inches off the ground. This will depend on your level of strength and experience.

If you’ve just progressed from wall push-ups, pick something that is at a level that’s right for you – I generally find the back of a park bench or the side of a picnic table to be a perfect height for doing incline push-ups. Like so:

HOW TO TRAIN ELEVATED PUSH-UPS:

Do 4 sets of elevated push-ups with a 2-minute rest between sets, every other day. Again, keep track of all of your stats for how many proper form repetitions you can do in each set. Once you can do 4 sets of 20 repetitions, it’s time to either move to regular push-ups, knee push-ups, or a lower height for your hands to be supported.

Once you can do 4 sets of 20 repetitions, it’s time to either move to regular push-ups, knee push-ups, or a lower height for your hands to be supported.

To work on progression, try to doing your elevated push-ups on the stairs in your house. As you get stronger, you can move your hands to lower and lower steps until your hands are on the ground.

LEVEL THREE: HOW TO DO KNEE PUSH-UPS

Knee push-ups like this are a great way to progress to a regular push-up!

Once you’re comfortable doing wall or elevated push-ups, proceed to knee push-ups. Your shoulder and hand placement will look just like a regular push-up (an “arrow”, not a “T”), but you’ll stabilize yourself on your knees instead of your feet. As demonstrated here:

HOW TO TRAIN KNEE PUSH-UPS

Once you can do 4 sets of 20 repetitions on your knees, you can start thinking about doing regular push-ups.

To recap, if you can’t do a regular push-up, move from:

  • Wall Push-Ups: Level 1
  • Elevated Push-Ups: Level 2
  • Knee Push-Ups: Level 3
  • Regular Push-ups: Level 4

How do I know the above progression will work? Well, it’s the exact plan we use with Nerd Fitness Journey!

You can see how we scale our bodyweight workouts right here:

What Are Other Types of Push-Ups? (Push-Up Variations)

These stromtroopers need some variety in their push-up routine...if this drill instructor ever lets up.

Basic push-ups can get boring…

Fortunately, there are dozens upon dozens of variations to make things more difficult for you.

Once you’re cranking out perfect form push-ups like it’s your job,[1] try some of these advanced variations on for size.

Click on each for a video demonstration (these are some of the push-up variations pulled from NF Prime):

#1) One-legged Push-ups: introducing some variety and balance by removing one of your legs for less stabilization:


#2) Side-to-Side Push-Ups Get into the classic push-up position and move your hands farther apart. Now, lower yourself down towards one arm only – you should feel like you’re supporting a lot of your weight. 

To complete the rep, slide horizontally over to the other arm, and push-up. The farther apart your hands, the higher percentage of your bodyweight will be supported by that side of your chest/shoulder and arm (thus getting harder)!


#3) Decline Push-Ups – these work your shoulders and triceps more so than normal push-ups.


#4) Diamond Push-Ups – keep your arms tight at your side, rotate your hands outward, and keep your elbows tight as you lower your body. Works your triceps like crazy.


#5) Dive-Bomber Push-Ups – funky, difficult, but oh so fun. I’d explain it, but just watch the video


#6) Plyometric Push-Ups – these are brutal and will wear you out just after a few repetitions. Just don’t hurt yourself and smash your face during a failed attempt (not that I’ve ever done that. Shut up my face always looks like this)!


#7) Handstand Push-Ups – This goes without saying, but you should be able to do a proper handstand before attempting these!

Kick up against a wall, and without flailing your elbows way out to the side (which can wreak havoc on your shoulders and elbow joints), slowly lower yourself down until your head touches the ground softly.

Then raise yourself back up.

Rotate some of these advanced push-ups into your workout routine and you’ll be well on your way to a great strength training practice.

If you want more strength building tips, we also have a comprehensive guide, Strength Training 101: Everything You Need to Know, when you sign up for the Rebellion (that’s our community) below:

How to get better at push-ups

Notice how Steve's arms are angled like an arrow? This is the correct form for a push-up.

So you’ve learned how to do a push-up, you can do a few of them, but you want to get better! 

Here are some tips to help you along the way:

  1. Get healthy! As you lose weight (which is 80% nutrition!), you will have to move less weight around than before, which will make your push-ups easier to manage. Have you had trouble losing weight in the past? Check out our article “Why Can’t I Lose Weight?” to find out why.
  2. Don’t cheat on the last few push-ups – when you’re tired, it’s easy to skip out on good form for your last few reps. As soon as you do one bad form push-up, you’re done. Finish up your four sets, write down your numbers, and try to beat those numbers next time.
  3. When starting out don’t do push-ups two days in a row. You need to give your muscles time to rebuild and recover – take off at least 48 hours in between your push-up adventure. However, when push-ups became a warm-up exercise for you – you can do them every day if you want. If you’re advanced, you can consider a PLP program.
  4. Get enough protein into your system after finishing up your workout – protein helps rebuild the muscles you just broke down doing push-ups, and it helps them rebuild those same muscles stronger than before. You can read our ultimate guide on protein for some tips on how to up your protein intake.
  5. If you can do 4 sets of 20-25 perfect form push-ups no sweat, then it’s time to start looking into push-up variations to keep things interesting.
  6. Build up your core with planks – this will help keep your core strong so that it’s not the weakest link in your proper form push-ups.

Coach Staci showing you the front plant

These 6 tips will be a great addition to your strength training plan. Keep at it and before you know it you’ll be doing one-arm push-ups like Batman.

One arm push-ups are hardcore, which is why Batman does them.

What’s that? You don’t have a strength-building plan!!! Well then…

What’s Your Strength Building Plan?

Once you get comfortable with regular push-ups, you can try plyometric push ups like this.

It makes me sad when we get emails from people who struggle and try and work hard to get healthier, and to be better at push-ups, and just can’t seem to make any progress.

If that’s you, you’re not alone!

1) Consider working with an online coach (or in-person trainer).

Helping people learn push-ups and other bodyweight exercises is why we built our 1-on-1 Online Coaching Program: We build programs for busy people to cut through the noise and just get results


2) Exercising at home and need a plan to follow? Check out Nerd Fitness Journey!

Our fun habit-building app helps you exercise more frequently, eat healthier, and level up your life (literally).

Try your free trial right here:

3) Join our community! We have hundreds of thousands of people, and I send out two free emails every week to help them level up their lives. Join our free community today, and I’ll send you a dozen free ebooks, including TONS of workout plans you can do anytime, anywhere. 

Join the community by signing up in the box below:

YOUR MISSION, SHOULD YOU CHOOSE TO ACCEPT IT: go home, set up a camera, and check your form on your push-ups.

I hope you’ll find that your form is as good as you expected, but it’s okay if it’s not, it’ll give you something to work on.

Go do some push-ups, and work on getting better with them every day.

You’ll be moving from Level 1 to Level 4 push-ups and beyond!

-Steve

PS: Not to brag, but I typed this entire article while doing 1-handed push-ups. 

PPS: Okay no I didn’t. But it would have been cool if I did, right?

PPPS: No? Fine. Sigh.

###

Photo source:[2]

from Blog – Nerd Fitness https://ift.tt/2gXPG8b
via IFTTT
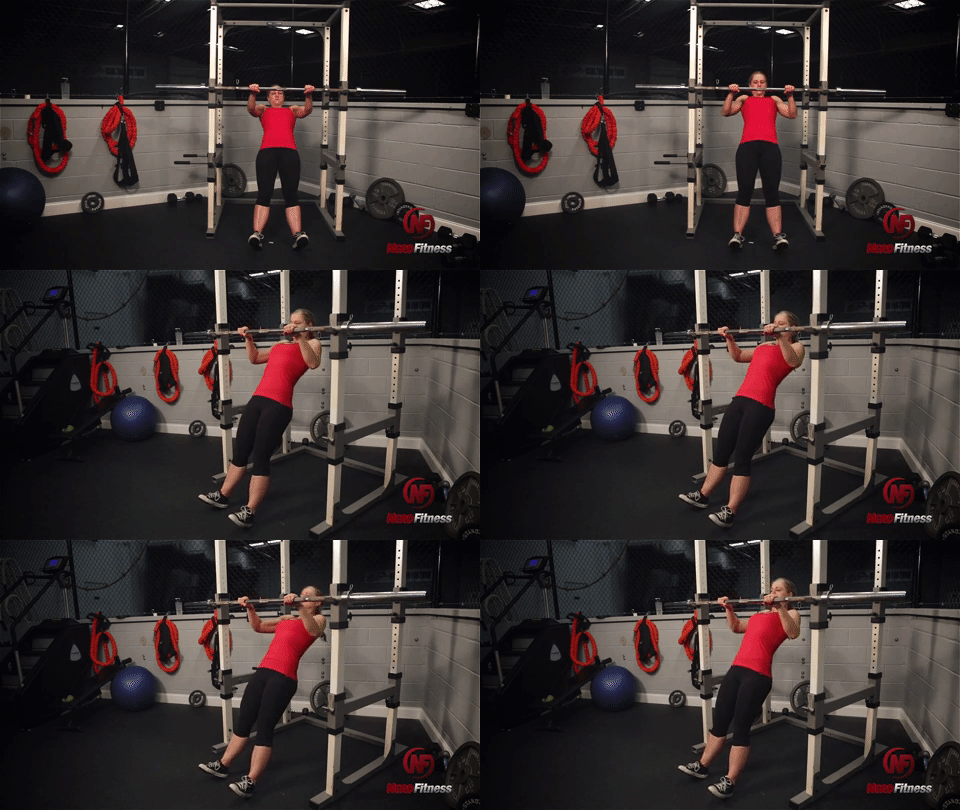
Categories
Uncategorized

#holistic #getfit #nutrition How to Improve Your Grip Strength & Wrist Mobility: The 6 Best Exercises

Improve your grip strength and wrist mobility with barbells

Do you find your grip a limiting factor in the gym (I see you chin-ups and deadlifts)?

Or in everyday life (looking at you, pickle jars)?

If so, don’t worry! We’ve got a handle on this (pun 100% intended).

As the lead trainer of our 1-on-1 Online Coaching Program, I’m going to outline a number of helpful, handy (sigh) stretches and exercises to help eliminate pain and build you some powerful, useful hands and a strong grip.

Now, it goes without saying that the hands and forearms are anatomically complicated areas.

I am also not your mother, or your doctor. If anything in the article below causes pain, or your pain is not alleviated by these stretches – call in the pros!

See a physical therapist or sports massage practitioner.

Lastly, if you’re here because you’re trying to grow overall strength, you might be interested in our newest app, Nerd Fitness Journey!

Our fun habit-building app helps you train anywhere (and improve your grip strength), all while building your very own superhero!

You can try it for free right here:

Why Grip Strength And WRist Mobility Is So Important: Basic Holds.

Grip strength is crucial for exercises like the deadlift

We use our hands for EVERYTHING. 

Whether it’s everyday tasks like carrying groceries, opening jars, and lifting suitcases, or gym-related activities like chin-ups, rows, and deadlifts.

Of course, you probably also type at your computer for hours – with resulting aches and pains at the end of the workday.

Guess what?

Stretching out the hands and building up a strong grip can help in all of those areas.

A strong grip has even been correlated to lower mortality rates – and you can also imagine the usefulness of a stronger grip for aging individuals if they happen to slip.

Our point is that it’s always better to have a stronger grip!

This is a favorite area of expertise for me. I’ve worked my grip for years and years, and recently won a local grip competition:

Jim won the local grip strength competition

In fact, I’m currently typing this one-handed while squeezing coal into diamonds with my other hand.

Not really, but I promise my grip strength is above average.

SO WHERE TO START?

The hands are complex, and training them can seem just as complicated.

We’ll simplify matters a bit and you can categorize the grip exercises into the following general types:

#1) CRUSH

You can improve your grip strength with captains of crush grip crushers

This is what you probably think of when you think of a “strong grip”. This is the whole hand closing in around something. A strong handshake. None of that dead-fish handshake stuff!

#2) PINCH

Try the pinching movement to improve grip strength

Think of making an alligator mouth with your hands, and chomping down. In this grip, there tends to be a lot more work/stress on the thumb. This is important to work, as the thumb is a vital part of a strong grip!

#3) SUPPORT

Can you hang from a bar? You can train this to improve grip strength

This is similar to crush, but rather than the ability to close, this type of grip tests the ability to hold.

#4) EXTENSION

You can do hand extensions to balance your grip training

Every action has an opposite reaction, right? This type of grip work is all about strengthening the opposing muscles. We were built to grab and hold onto things, so these muscles will not be as strong.

#5) WRIST WORK

View this post on Instagram


A post shared by Oleksiy TOROKHTIY (UKR🇺🇦) (@torokhtiy) on

Wrist movement and wrist stability is the focus here. In order to be able to transfer energy from the body through the hands (for opening those pickle jars) we need to make sure every link in the chain is strong.

PUTTING IT ALL TOGETHER

When putting together a grip routine of your own, it’s a good idea to cycle through these different types of grips over the course of the week, in order to work different muscles and different angles.

If you have to pick just a few, I’d put my money on stretches, crushing, and extension to get your hands strong and keep them healthy!

Before we go further, I want to mention that if you’re improving your grip as part of a strength training practice, you’ve come to the right place! We have a free guide Strength Training 101: Everything You Need to Know, that will walk you through every aspect of building muscle and growing stronger. Want in?

Grab it for free when you join the Rebellion (that’s us!) below:

How to Improve Your Grip Strength and Mobility Quickly.

Here are the best exercises you can do to strengthen your grip quickly:

  1. Dumbbell head grab: Put a dumbbell on its end and pick it up by the head. Could anything replicate a pickle jar more? Be careful with this exercise if the dumbbell is too big, as the thumb can easily be strained if it’s stretched too far. Hold for time (~30 seconds) or go for heavier weight.
  2. Farmer’s walks: Grab a pair of heavy dumbbells (heavy for you) and walk around! Don’t have space to walk? Just stand there! 30 seconds minimum!
  3. Plate curls: A wrist strengthener that works the biceps too! Anything past 25 lbs becomes insanely hard. ~10 repetitions. Watch the face!!
  4. Plate pinches: If you’ve got a pair of smooth metal plates, you can sandwich them together with the smooth side out. You can also use thick bumper plates. Pick them up with one or two hands and hold for time (~30 seconds) or go for heavier weight. World class grip athletes can pick up a pair of 45 lb plates with one hand!
  5. Barbell finger rolls: How to work the crushing grip without grippers. You can use an empty bar or load up some weight. Get the bar to your fingertips, then squeeze and crush! ~10 repetitions.
  6. Towel chin-ups: Regular chin-ups too easy? Throw a pair of gym towels over the bar and challenge that grip. A great exercise to prepare for rope climbing!

STRETCHES AT THE GYM

The only addition I have to your stretching routine that can be done at the gym is banded wrist stretches. The addition of the band can help open up your wrist joint a bit more. The band should be pulling in the opposite direction of the stretch (fingers face one way, band pulls the other way).

10-15 repetitions.

you can do banded wrist stretches to improve wrist mobility

EXERCISES AT THE GYM

While we recommend picking up some grippers as specialized grip equipment, there are TONS of options to work the grip at the gym with existing equipment! This is certainly not an exhaustive list, but should give you plenty of ideas.

The one warning I give for any of these exercises is WATCH YOUR TOES. The grip can give out fast and unexpectedly, so we don’t want to crush any little piggies!

This list is certainly not exhaustive, but it’ll get you started!

Other easy grip exercises to integrate:

  • Bar hang: Simply hanging from the bar or gymnastic rings will build up your grip strength! If you can’t hang freely, put your feet on the ground for an assist. Couldn’t be simpler! Work up to one minute or more!
  • Wrist curls/Reverse wrist curls: What many may think of when they think of “grip strength” exercises. Not bad for some wrist strength. ~10 repetitions. Pictured – Left: Wrist curls, Right: Reverse wrist curls.

do wrist curls and reverse curls for mobility

  • Barbell levering: We’re getting into crazy town with this one. An unbelievable wrist exercise that is not for the beginner. Grab the bar with one hand, off-center, and lift it to parallel. You can lift to the front and the back. I would also recommend using a 15 lb/5 kg bar, or one of those lighter “bodypump” bars for this. The leverage is crazy! This can also be done at a faster pace with PVC pipe.

Do barbell levering to improve grip strength and mobility

Things can get really crazy when you start combining exercises…Plate pinch farmer’s walks with bumper plates, anyone?

…and speaking of NF Coaching, if you’re worried that your grip strength is holding back your training, we can help!

Our certified coaches can do an assessment, design a program to increase your grip and overall strength, and provide support and accountability. It’s kind of like having Jim in your pocket (not literally – via an app).

Plus, our coaching app lets you record and send a video of your movement directly to your coach, so you can take comfort knowing you’re training correctly:

How To Improve Grip Strength and Mobility At The Office.

Alright, you’re ready to jump into grip strength training!

I’ve outlined a number of stretches and exercises for you to do, no matter where you are and what equipment you have. Skim over and see what you can add into your daily mix or gym training!

STRETCHES AT YOUR DESK

You might be reading this while sitting at your computer right now.

We put a LOT of stress on our hands and wrists over the course of a day, so take the time to take care of these hard workers!

Below is a quick and dirty stretch routine, just three moves. This is good for a warm-up or just for overall hand health. We spend a lot of the day at our computer with our elbows bent and our hands in a pronated position (palms turned down), therefore stretches with our elbows extended and hands supinated (palms turned up) is a good idea.

A post shared by Nerd Fitness (@nerd_fitness) on

The stretches from the video:

  • Fingers back, palms on desk: You can stretch straight backwards, or rock gently left to right. 10-15 repetitions.
  • Finger back, palms lifted off desk: You can lift the palms and get a bit more stretch through the fingers and first knuckle. Again, stretch straight backwards, or rock gently left to right. 10-15 repetitions.
  • Fists together, back of hands on desk: Make two fists, with the thumbs on the outside of your fingers. Bend your elbows and put the knuckles together like two cogs in a machine. Bend your elbows and put the back of your hands fully on the desk. Keep your fists together (this will be tough) and fists tightly closed (this will also be tough) as you bend and flex your elbows. 10-15 repetitions.

Give it a shot, I bet your hands feel noticeably different (and better) afterward.

If you have additional time, the first two stretches can also be done with your fingers forward!

You can also stretch the thumbs out on the desk. Moving into and out of the stretch shown below. You may be surprised how good this feels if you’ve never done it before. Again, 10-15 repetitions.

Do thumb stretches to improve hand health

A final stretch, if you have the time between updating Excel and checking Facebook for the 100th time (I kid, I kid), is stretching your wrists in the direction of your thumb.

If you think about how your hands are often oriented on your keyboard, you’ll see that they are often bend toward your pinky.

Avoid keyboard wrists by practicing grip strength and wrist mobility!

So let’s stretch them in the opposite way! Make like you’re about to karate chop someone with one hand. With the other hand, grab the chopping hand and pull it sideways in the direction of your thumb.

Do the ulnar stretch to improve hand health

Going gently into and out of this stretch for 10-15 repetitions. It may not feel as intense as the previous stretches, but it will still help.

This is certainly not an exhaustive list of hand and wrist stretches, but it should give you plenty to work with!

EXERCISES AT YOUR DESK

Do you know there’s already an excellent piece of grip strengthening equipment present in many offices? What is that?

The rubber band!

Snag one off that rubber band ball in your desk and do these simple rubber band extensions:

Do rubber band extensions for hand health

If one band gets too easy, put two or more on! This is a super easy exercise to do while you’re on a phone call or that conference call (that you’re not paying attention to anyway) that gets the blood moving through the hands and helps balance out your vice-grip like hands.

Another grip exercise that can easily be done at your desk is closing grippers. Now, this does require an investment (~$20/gripper), but you’ll find that these grippers last FOREVER (I still use some grippers that are over a decade and half old!)

You can improve your grip strength with captains of crush grip crushers

I would personally recommend Ironmind’s “Captains of Crush” grippers.

They are built to last and strong.

Consider the following when making your gripper purchase:

  • If you are just starting out with your grip, I would look at the Guide and/or the Sport (60lb and 80lb respectively).
  • If you have a bit of strength, the Sport and/or the Trainer is the way to go (80lb and 100lb).

If you can close the Guide, you’ve got a pretty solid grip. If you can close the Sport, you have way above average grip strength, in my experience.

A fun bonus with these grippers at your desk is that EVERYONE who sees them will try and pick them up and close them. Great way to start a conversation with your coworkers!

You may be thinking, “eh, I’ve already got a gripper I bought from the store”. I’ll tell you that the strength in that gripper is probably minuscule compared to Ironmind’s. Time to upgrade!

You may also be thinking, “eh, I’ve got a tennis ball/stress ball that I can keep by my desk and crush”. Both of those might be better than nothing, but not by much. The grippers will allow a smoother movement and quantifiable progress. Did I mention they’re just $20 a pop?

“Jim, I can’t wait. I want to work my grip NOW.” Ok, ok, grab the biggest, heaviest book in the office you have. Grab it in that pinch grip position (fingers on one side, thumb on the other). This may be easy, if so, then “walk the book” in your hand by moving your fingers up and down the spine while you hold it in mid-air. Do this for several trips. Tough!

Do the book walk for hand health and grip training

How to Improve your Grip Strength and Wrist Mobility At Home.

If you work out at home, there are still a few things you can do.

  • Bar hang: A home chin-up bar is one of the most useful pieces of equipment to have. Just like the gym version, you can put your feet on the ground to assist. Work up to one minute!
  • Grocery bag farmer’s walks: What’s better than taking only one trip to bring your groceries inside? Absolutely nothing. You can use those tough, reusable bags and load them up with anything. Stand in place or walk around the neighborhood.

Never make two trips carrying groceries again thanks to grip training

  • Sledgehammer/Barbell/heavy bar levering: As with the barbell levering at the gym, this is a tough exercise and should be approached slowly. Grab closer to the sledgehammer head to make it easy, farther to make it tough.

You can do levering with a sledgehammer and you're strong as hell

Get Started With Rings And Handstands, Level Up Your Grip!

No (wo)man is an island, and no exercise exists in complete isolation. These grip exercises are a blast, but we hope you can also use them to help strengthen a deadlift, or work toward your first chin-up.

There are also various bodyweight exercises that will help strengthen your upper body AND build your grip strength at the same time.

THE FALSE GRIP HANG

For example, here is a video from our rings course in Nerd Fitness Prime on doing a false-grip hang – and then doing scapular retractions. This is a killer grip strength exercise:

The false grip is an incredibly challenging grip variation that one must learn to build up to a muscle-up (a pull-up that transitions into a dip). Just like before, you can put your feet on the ground to assist this exercise.

CROW POSE

Here’s a video of an exercise that builds up grip and wrist strength, pulled from Nerd Fitness Prime (which contains a course on doing handstands):

A staple of yoga classes everywhere, though we’ll be focusing on it for a different reason than a yogi might. We’re using this exercise as a foundational exercise to build up into the handstand. You won’t believe how much grip strength is involved in the crow pose until you are digging your fingers into the ground!

A Strong Grip Is Always Helpful!

It’s been said “There’s never been a strong man (or woman) with weak hands.”

We’d have to agree wholeheartedly. There is never going to be a point in life where you say “Boy, my grip was too strong!”.

You might have some questions about how to mix these exercises in with your normal routine, or how you can use these things to improve your lifts safely and without injury. Or maybe all of the above just overwhelmed the heck out of you and you’re trying to make sense of it all.

If that sounds like you, you’re in the right place.

I’m the lead trainer of the 1-on-1 NF Coaching Program, where we help busy, normal people like yourself build muscle, lose weight, and level up their lives!.

You can learn more about our coaching program by clicking on the image below and scheduling a call with us to see if we’re a good fit!

You have a pair of incredibly useful tools at arm’s length, might as well make the most of them!

We hope you now have a handle on things (have to bring it back full circle). Go out and get a grip!

Leave any questions you have on grip strength or wrist mobility below in the comments.

-Jim

PS: What should you do after you improve your grip and wrist strength? Get started on doing muscle-ups and downward dogs, which you can learn all from our new app!

Try it for free right here:

###

Photo Source: Reece & Emma Meins Chalky bar grip

from Blog – Nerd Fitness https://ift.tt/2mQ5TQG
via IFTTT
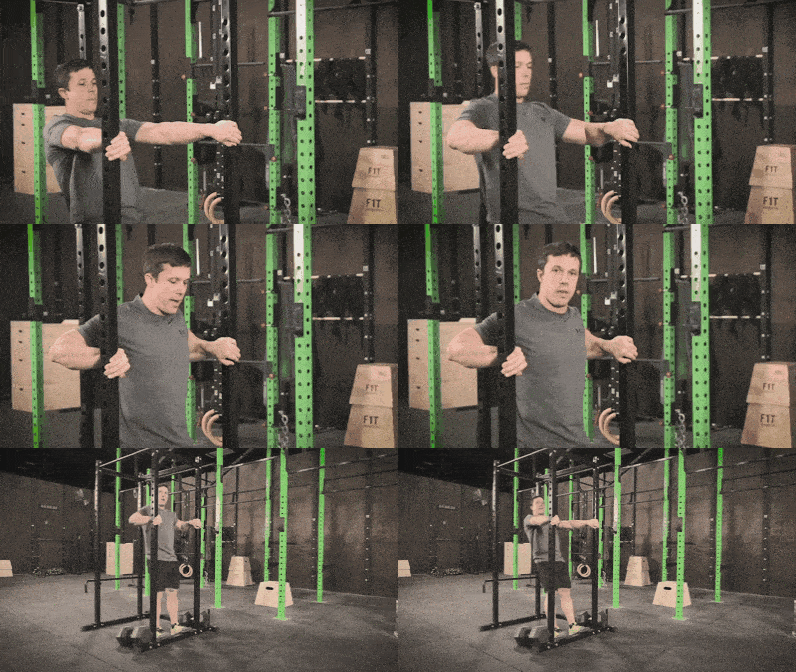
Categories
Uncategorized

#holistic #getfit #nutrition Warm Up Properly: The 15 Best Dynamic Warm Up Exercises & Routines To Prevent Injury

Today, you’re gonna learn all about the importance of warming up, and how to warm up with specific video routines! 

We think this is so critical for training safely that whenever we design a workout for our coaching clients, it always starts with a proper warm-up. So I’m excited to share these warm-up tips and tricks with you too.


In this guide we’ll cover the following (click to go to that section):

This stuff is so important because getting injured sucks.

And every single day I watch people wander into the gym, immediately lie down on a bench, and start cranking out their workout with a heavy weight within seconds.

This makes me weep for humanity.

These people are just WAITING to get injured. They’re essentially playing with dynamite (also not recommended).

Playing with dynamite is not recommended

So you’re reading the right article.

Also, if you’re interested in a program that tells you exactly how to warm-up and workout, you may like our new app!

Nerd Fitness Journey will set you on an adventure that will tell you exactly when to workout, when to warm-up, and when you should rest. No guesswork needed. 

You can sign-up for a free trial right here:

Should I stretch Before A Workout? No. Warm Up Instead

Above all else, the most important thing you can do when working out is warming up properly.

Now, you might be saying to yourself, “Come on. Surely it’s not the MOST important thing…”

To which I’d reply: “First, don’t call me Shirley. Secondly, if you don’t have enough time to warm up, then you don’t have enough time to work out.”

Boom!

So WHY is it so important? 

Think of your muscles like rubber bands.

Your muscles are kind of like this.

If you spend all day sitting at a desk, hunched over a keyboard, those rubber bands have gone almost completely unused.

Then, if you go to a gym and immediately start lifting heavy weights or sprinting really fast, those cold, unstretched rubber bands get pulled apart very quickly and can get snapped or pulled out of shape.

#Fail.

So, what about just regular, static stretching before working out? 

Nope.

As we point out in “Should you stretch before or after your workout?“:

A consolidation of studies showed there aren’t many benefits to static stretching before workouts. 

For starters, static stretching will not result in the reduction of the chance of injury.

Also, static stretching can actually decrease your potential for strength gains and performance.”

However, dynamic warm-ups – what you’ll learn in this article and what we focus on with our 1-on-1 coaching clients – are AWESOME for prepping you to get ready to strength train:

Think of it like a pregaming for your muscles – except replace “alcohol” with “awesome.” By jumping around and getting your muscles loose, active, warm, and ready for action, you are putting your muscles through their full range of motion and getting them ready to start handling heavier loads (strength training).

As pointed out in this study, “warming up” can also help reduce soreness after a workout.

On top of that, doing a dynamic warm-up can help activate your central nervous system, priming your muscles for a great workout that produces your best effort.

Add “improved blood circulation” to the list of benefits of warming up, which will help you perform well in each exercise.

Need another reason? When your body is properly warmed up, your muscles and joints are ready for maximum flexibility, which means you can perform each exercise with PROPER form (like deep barbell squats, for example) that maximize results and minimize the risk of injury.

So, whether you are running or strength training…a proper warm-up is probably the most important 5-10 minutes of your day. 

Still with me? 

Great. If you have been injured in the past, and you’re learning to warm up so you can stop stalling out on your progress, let us help!

We create custom workout solutions with nutritional guidance for busy people like you.

In other words, we help you get strong and eat better, every step of the way. 


Beginner Dynamic Warm-Up Video And Exercises

The above video comes from Senior Coach Staci Ardison, whose success story is here (and she’s now a lead trainer in our NF Coaching Program)

Don’t overthink this: Your goal is to elevate your heart rate, put your muscles and joints through their range of motion to warm them up and make sure everything is functioning properly, and preparing your body to strength train!

This will get you prepped for a day of getting stronger.

If you read the above paragraph and thought: “Yes I am doing strength training, please tell me more Steve! More!”

Firstly, thanks for saying please – your mom taught you well.

Next: let us help get you strong, safely! We help busy people go from strength-training-newbie to strength training badasses.

Whether you’re doing bodyweight or new to weight training, we create a workout program and provide food guidance that’s specific to YOUR life.


3 Advanced Dynamic Warm-Ups And Videos

#1) Here is an Advanced Warm-up Circuit you can do anywhere:

  • Jump rope: 2-3 minutes (optional)
  • Jumping jacks: 50 reps(pull your shoulder blades back, extend arms and really focus on the movement)
  • Bodyweight Squats: 20 reps
  • Lunges: 5 reps each leg
  • Hip extensions: 10 reps
  • Hip rotations: 10 reps each leg (like you’re stepping over a fence)
  • Forward leg swings: 10 reps each leg.
  • Side leg swings: 10 reps each leg
  • Push-ups: 10-20 reps
  • Spider-man steps: 5 each leg

This particular warm-up might be more difficult than your actual workout, especially if you’re following something like The Beginner Bodyweight Workout.

Yes, there is a lot of work put on your hips, butt, legs, and core. As nerds/desk jockeys, these tend to be the muscles that are the tighest and least active, and thus most susceptible to an injury.

If your arms and chest are particularly tight or sore, you can throw two more movements as well: 

  • Arm swings (holding your arms straight out to the side, and then swing them and cross them in front of your chest)
  • Shoulder rotations (holding your arms straight out to the side, and move your arms in a circular motion, making bigger circles each time)

Are you a runner? 

#2) Check out our warm-up routine specifically designed for runners:

You can also check out our Beginner’s Guide to Running for more tips on how to run safely.

#3) Here’s another advanced dynamic warm-up video from my coach, Anthony, which also covers a lot of Mobility:

When it comes time for your workout, if you are doing heavy strength training (with barbells or dumbbells), make sure you do some warm-up sets before jumping into the weight you’ll be training with for EACH EXERCISE.

Always start with a set using just the bar to work on your form and get your body used to the movement.

Then, do a few sets of just a few reps with increasing weight (but won’t tire you out) and THEN start your workout.

It’s something we bring up before every workout in Nerd Fitness Journey. If you want, you can test drive it right now for free!

15 Best Dynamic Warm-Up Exercises To Prevent Injury

This LEGO man warms up so he doesn't get injured during exercise

These are our favorite quick warm-up exercises that can help you prevent an injury during your workout! 

  1. Marching in place while swinging your arms.
  2. Jumping jacks
  3. Walking jacks
  4. Arm circles and shoulder shrugs.
  5. Mountain Climbers
  6. Swinging toe touches.
  7. Leg swings (forward and side to side).
  8. Hip rotations (like stepping over a fence)
  9. Hip circles (like you’re hula hooping)
  10. Bodyweight squats.
  11. Push-ups.
  12. Lunges.
  13. Hip extensions.

Get into the habit of doing these exercises before doing any workout. They’ll help keep you mobile and limber and injury free. If you’re not sure how to do any of these movements, watch the videos for them below.

1. MARCHING IN PLACE WHILE SWINGING ARMS

2. WALKING JACKS (If You Can’t Do Jumping Jacks)

Do walking jacks if you can't do jumping jacks!

3. JUMPING JACKS

Jumping Jacks are a great cardiovascular bodyweight exercise

4. ARM CIRCLES AND SHOULDER SHRUGS

Arm circles like so are a great way to get your heart rate up before doing HIIT.

5. MOUNTAIN CLIMBERS

6. SWINGING TOE TOUCHES

7. LEG SWINGS (FORWARD AND SIDE)

8. HIP ROTATIONS

9. HIP CIRCLES

10. BODYWEIGHT SQUATS

Do a proper bodyweight squat to work out your legs

11: KNEE PUSH-UPS

Knee push-ups like this are a great way to progress to a regular push-up!

12: REGULAR PUSH-UPS

This gif shows Staci doing a push-up in perfect form.

13. SUPPORTED LUNGES

Do the assisted lunge until you can do regular lunges

14. REGULAR LUNGES

Do Lunges to strengthen your legs for the beginner bodyweight exercises!

15. HIP RAISES

Raising your hips of the floor, like so, is how you do the bridge bodyweight exercise.These exercises are the PERFECT movements you should be doing before any strength training program.

Oh, what’s that? You’re new to strength training and not sure what you’re doing? No problem!

We help people exactly like you.

Well, not exactly. You’re a unique snowflake, your mom loves you, etc.

What I mean is we help people like you to start strength training.

We do form checks, create custom workouts based on your equipment and time commitment, and more.


To answer your first few questions…

“Steve, I can’t do jumping jacks/I live on the second floor.” 

That’s okay – the reason I love jumping jacks is that they work out all four of your limbs at once and get you bouncing around.

Instead, channel your inner Chuck Norris and do punches and kicks with each leg. I don’t care if you can’t kick higher than your shins and your punch wouldn’t kill a fly…just get those limbs flailing and warmed up!

You could also just do “Walking Jacks.”

Do walking jacks if you can't do jumping jacks!

“Um, your warm-up is tougher than my actual workout!” 

The dynamic warm-up above is designed for people who are doing serious training.

If you are doing heavy deadlifts and squats and overhead presses, a proper warm-up could keep you out of a career-ending injury.

However, if you are just getting started with exercise and you’re only doing bodyweight exercises, obviously 20 real push-ups during your workout isn’t possible…

THAT’S OKAY. Think of the above as the warm-up you aspire to complete. In the meantime, do the best you can. Let’s say:

  • Jump rope for 30 seconds
  • Leg swings and arm circles: 20 reps
  • Squats: 10 reps
  • Lunges: 5 each leg
  • Eelevated push-ups wall push-ups: 5 reps

Follow the rest of the routine as planned if possible.

In this routine, your warm-up will act as part of your workout, as you’ll be doing the same functional movements.

Do the BEST you can, keep track of your results for your warm up too, and improve with each workout.

With enough consistency and persistency (not a word, but rhymed better and sounded way better than persistence), you’ll be busting out the full warm-up routine before kicking ass at your actual workout!

Don’t have a program to follow? Or tired of following a random plan online that’s not getting you results?

Check out our Online Coaching Program – we’ll take care of all the heavy lifting (except the actual “heavy lifting,” that’s your job).


Warm Up Properly And Avoid Injury!

Hopefully, this is a post you bookmark, as it’s probably one of the more important ones I’ve ever written.

If you want to stay injury-free, put your body through a dynamic warm-up before you start your exercise.

If you are somebody that wants to follow a program that is tailor-made for their life and situation and goals, check out our popular 1-on-1 Coaching program.

You’ll work with our certified NF instructors who will get to know you better than you know yourself, answer any and all fitness questions you have, and program your workouts and nutrition for you.


What other questions can I answer for you about warming up properly?

I’m here to help!

-Steve

PS: Still here, but not sure what to do after your warm-up? Why not let our app tell you exactly what to do!

PPS: The companion post to this guide is “How to Stretch After a Workout.” Give it a read if you’re wondering about what post-workout routines you should try.

###

All photo sources can be found right here.[1]

from Blog – Nerd Fitness https://ift.tt/2kAEsNt
via IFTTT

Categories
Uncategorized

#holistic #getfit #nutrition 3 HIIT Workouts for Beginners: Start Interval Training and Sprint Running!
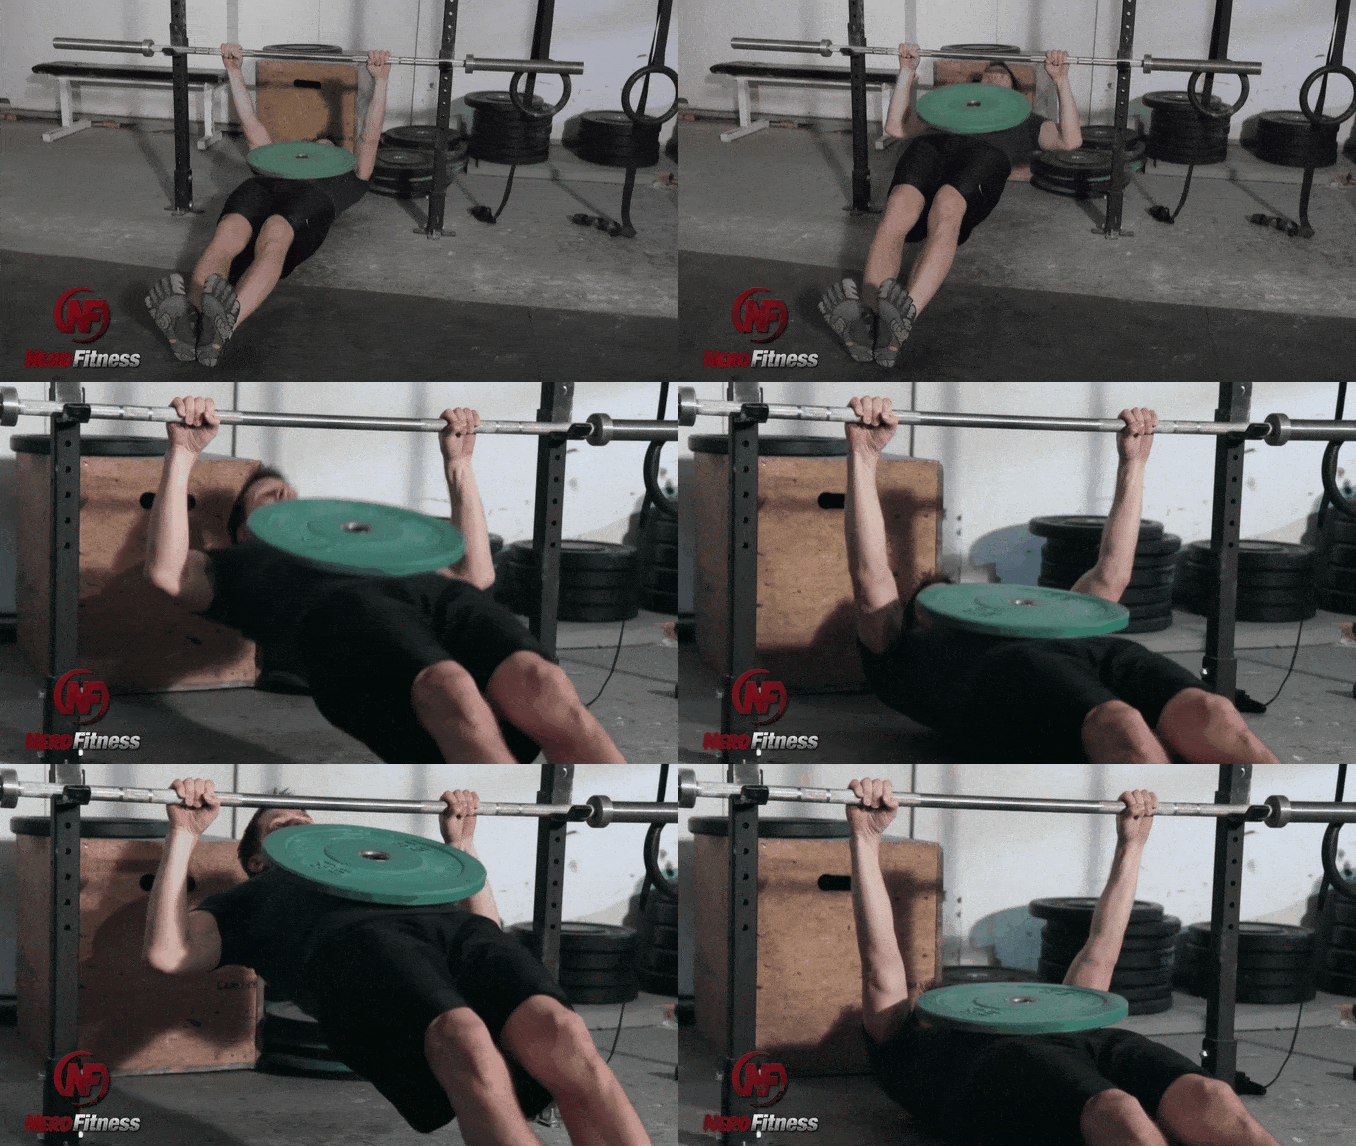
This biker loves interval training.

This High-Intensity Interval Training (HIIT) guide is probably the best interval training guide in the galaxy.

My justification for such a bold claim?

We’re really good at this stuff, AND we have dinosaurs and Muppets.

Plus, lots of great gifs:

This runner can't do interval training.

We build custom interval training programs just like the ones in this guide for our 1-on-1 Online Coaching Clients, including workouts for at home, the gym, or even while traveling.


In this Ultimate Guide to Interval Training, we’ll cover:

If you’re interested in starting a HIIT practice (which you are, ’cause you’re here), you may want to try our new app! It contains a fun adventure that will take you from sitting on your couch to a full HIIT workout – with plenty of benchmarks in between for you to find your groove. No guesswork needed, just jump into the app and follow it’s next steps.
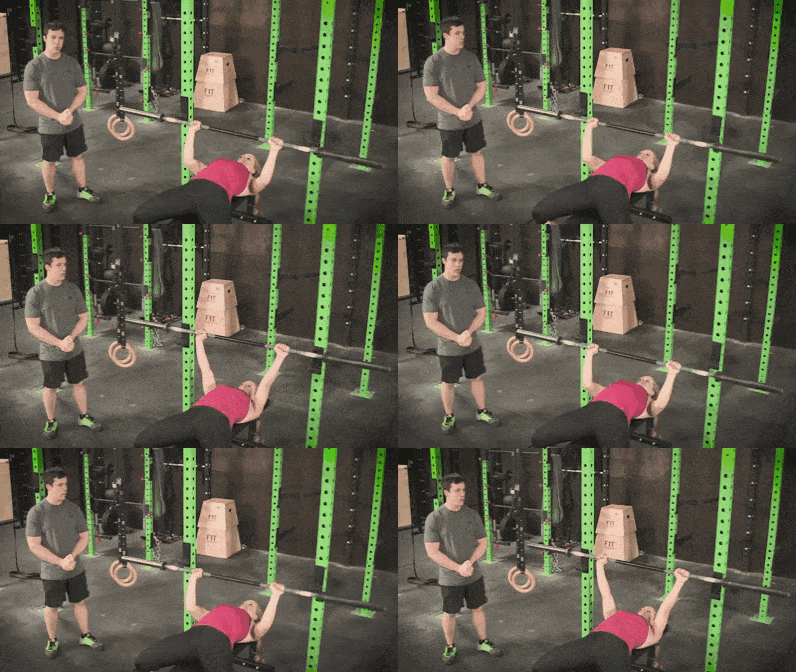
You can sign-up for a free trial right here:

What is Interval Training? What is HIIT?

These bikers love doing HIIT.

In 2018, High-Intensity Interval Training (HIIT) was ranked the number one fitness trend by American College of Sports Medicine.[1]

Essentially, HIIT is just following a specific regimen where you vary your speeds and intensity throughout a shorter run, swim, bike, or row.

Any exercise can be a form of HIIT, but here’s a common routine:

  • Jogging lightly for three minutes.
  • Pushing yourself harder for a minute (run or sprint).
  • Repeating this cycle 4 more times.

Because everybody is busy and overwhelmed, fast results in the least amount of time leads to most people discovering HIIT. 

Wayne appreciates both HIIT and Stairway to Heaven.

You may be asking, “Steve, just how short and intense are we talking about here? Also, your new haircut looks spiffy.

Thank you, you’re very kind.

So let’s explore the pros and cons of intervals.

What are the Benefits of HIIT? Why Should You Do Interval Training?

This man is currently doing sprint running.

The 1996 landmark Tabata study demonstrated the benefits of extreme HIIT.[2]

Dr. Izumi Tabata, from Japan’s National Institute of Fitness and Sports, was obsessed with interval training.

The doctor sought to see exactly what kind of gains were obtained from short, intense, periods of exercise. He conducted an experiment with Olympic athletes on stationary bikes and put them through intense bouts of exercise followed by short periods of rest.

The results were fascinating.

Compared to regular cardio, HIIT had a greater impact on improving BOTH:

  • Aerobic increases (endurance).
  • Anaerobic increases (power).

Even crazier? Tabata was able to demonstrate improvements in his athletes with just four minute bursts.

So what’s happening here?

Simple: your heart is a muscle.

Yes, the heart is a muscle.

If you keep your heart beating at a constant rate, never expanding it outside of its comfort zone, it will never grow stronger.

By introducing chaos and pushing your muscles outside of their comfort zone, they must adapt and grow more resilient in order to survive.

Intense interval training challenges your heart by constantly forcing it outside of its comfort zone.

In other words: progressive overload – the same concept behind building strength.

Since Tabata’s 1996 study, many other trials have shown the positive impact of interval training. 

Here are some of the benefits of High-Intensity Interval Training:

#1) HIIT for Weight loss. A study in the Journal of Obesity found participants were able to lose more body fat following a HIIT program compared to regular cardio.[3]

This makes sense, because other studies suggest high-intensity interval training burns more calories than a “steady state” workout.[4]

Revving up your effort requires more out of you, including calories. If you’re interested in HIIT for weight loss, you might be on the right track.

Keanu wants you to know weight loss with interval training can work!

Plus, interval training can take less time than steady-state cardio.

The average interval training workout is 20 minutes or less.

However, I should note that a meta-study (a review of multiple studies) found no real difference in fat loss between HIIT and steady-state cardio.[5] We’ll talk about this, and the impact of diet for weight loss later. 

#2) HIIT for lowering blood sugar. Managing blood sugar is really important for health, not just for diabetics.

Those trying to lose fat should be aware of their blood sugar and corresponding insulin levels.

The good news for our current discussion? HIIT has been shown to help lower and manage blood sugar levels.[6]

#3) HIIT for heart health. Touching on the “antifragile” topic again, HIIT has been shown to help with overall cardiovascular health.

It does so in the same way traditional endurance training does, but at a fraction of the time (almost half).[7]

Now, before you accuse me of being a shill for Big HIIT, I will mention that many of the comments that “HIIT is the secret to fat loss” are overblown.[8]We’ll touch on more of that later.

For now, let’s chat about how to actually do some interval training.

What’s an example of Interval Training? How to do interval running

This man is climbing stairs for HIIT.

The key to HIIT is being able to go from “easy” to “difficult.” All sorts of different exercises can get you there:

  • Aerobic (cardio).
  • Bodyweight (strength training).
  • Resistance (weight training).

HIIT is generally associated with running (aerobic), so we’ll devote this section to just that.

The easiest way to experiment with HIIT would be to run.

Here’s how to start with a basic HIIT running workout. Go to a park in your neighborhood. Warm-up with some light jogging, high knees, and mobility – leg swings, arm swings, etc,

And then begin your workout!

  • Run/jog at a brisk pace for 30 seconds.
  • Jog/walk at a slower pace for 2 minutes.
  • After your rest, shoot for another 30-second run/jog.
  • Continue until you get tired or after about ten “push/rest” intervals.

And BAM! You just did HIIT.

Don’t get disheartened if you find yourself stopping a lot during your first week of HIIT training. 

Andy Dwyer hates running, but I bet he'd like HIIT more.

You’ll be surprised how quickly you get better at this!

Also, “running” or “jogging” is subjective. Whatever walking fast means to you is great. Do that for your periods of intensity.

It should be noted, that the entire “Couch to 5K” concept rests on interval training through running.

It’s all broken down into “walking,” “jogging” and “running.”

If you’re curious, check out our in-depth Couch to 5k review. If you want to start interval training, “Couch to 5K” could be a good way to do it.

More of an indoor person?

Consider a treadmill, where it actually sets intervals for you based on your desired difficulty.

Just be careful on it…

Pay attention to your running technique or things can go wrong!

We’ll be talking about machines a lot more in the next section, but a treadmill is all you need to do a HIIT workout.

Experiment with the speed and incline to find a setting that you would consider “intense.” Many machines can be programmed to flip between this and an “easy” setting.

And you know what that means… boom! It’s built for HIIT.

When we designed NF Journey, we used this “intense” and “easy” interval switch for much of the workouts within the app.

If you want, you can sign-up for a free trial right here to see what I mean:

How do HIIT Workouts Work? (More HIIT cardio to choose from)

Biking is perfect for HIIT.

There are a lot of different aerobic exercises for HIIT cardio.

For example, you could jump on a bike, which is like HIIT running but with wheels (duh):

Kermit loves interval training on his bike.

Every spin class is based on HIIT cycling (SoulCycle, Flywheel, or even your local gym now has spin classes).

They’re popular for a reason, and you can make a friend or two!

Here are some more examples of interval training:

  1. Elliptical. If it has a dial for resistance, it can be used for interval training. For a couple of minutes, go on low resistance (0-2 level). Then crank up the resistance for one minute (up to 8-10). Repeat this process 12 times, which will give you a 20-minute workout.
  2. Stair Climber. Much like the elliptical, alternate between periods of low intensity for two minutes, then one minute for high intensity. The difference with the climber is the dial will control the speed of the stairs. Be careful.
  3. Rowing machine. Start with a two minute warm-up. On minute three however, row like you’re being chased by the Kraken for a full 60 seconds. Then catch your breath. The rowing machine might be hard to do for a full 20 minutes, since it’s a lot of upper body. Shoot for ten minutes at first.
  4. Jumping rope. Jumping rope is a full-body exercise. Also, it’s fun. There’s no dial here, your own body controls the pace of the jump. Follow the same two minute easy, one minute intense as above. Jump rope can also be done with friends!

This dino loves jump rope for HIIT.

So far we’ve just been talking about aerobic exercises.

Let’s cover our other categories, of bodyweight and resistance.

What Are the Best HIIT Exercises? (Two Other Forms of Interval Training)

Rowing can be a great way to do interval training.

“Steve, this all sounds great. But I hate running!”

Confession: So do I.

So I get my cardio in other forms!

Here are some bodyweight exercises to get going on HIIT:

  • Burpees. Stand up, then squat down, kick your legs out, do a push-up, bring your legs back in, and explode up into a jump. Try to do 20 repetitions, then rest for two minutes. Repeat until you hate yourself:

  • Push-ups. For 20 seconds, do as many push-ups as possible. Rest. Then do it again. If you’re worried about proper form, check out our push-up guide and watch this:

  • Pull-ups. Same idea as above, do pull-ups for 20 seconds, then rest. If you can’t do a pull-up, we got you covered in our pull-up progression guide:

Let’s now chat some Weight Training Examples for HIIT:

  1. Kettlebell swing. For ten minutes, do 20 kettlebell swings on every minute. This will be intense, and worthy of congratulations when you’re done. Check out our 20 Minute Beginner Kettlebell Workout for everything you’ve ever wanted to know about kettlebells.
  2. Battle ropes. If your gym has battle ropes, they’ll be a great tool for HIIT. For intensity, the amount of slack in the rope determines the load. The more slack on the rope the tougher, and more intense, the workout. Also, don’t get stuck in just up and down movements. Some variation will help target different muscles.
  3. Weight lifting. The critical piece will be moving from one exercise to another, for example the bench press to the lat bar: we call this circuit training!

You can also do circuit training as a form of HIIT.

Circuit training is going through a sequence of exercises, or stations, back to back.

Push-ups to pull-ups, back to push-ups, only resting briefly from one exercise to another.

Circuit training would be perfect to mix into a HIIT workout, since you can design your circuit to be very intense.

Check out our post for 15 Circuit Training Routines to choose from.

Plus, there’s a Batman workout hidden in there. You’re welcome.

We create custom HIIT programs for busy people like you that are ACTUALLY fun. If you’re looking for a supportive coach to guide you and tell you exactly what to do each day, we got you covered!

Nerd Fitness Coaching Banner


If you just want a beginner circuit to get started with, you can try out our Beginner Bodyweight Workout Routine. Plus you can download a free worksheet to track your progress with this circuit when you join the Rebellion below:

Oh, what’s that? You want to have even MORE fun while getting the benefits of HIIT? Let’s think outside the box:

Let's get crazy with Interval Training

Basketball, tennis, soccer, and Ultimate (frisbee) are AMAZING styles of exercise that use interval training (it’s all start and stop!).

Run here, catch this, and wait for the next round to start.

That’s what we’re looking for in a HIIT workout.

So pick a form of FUN exercise that gets your heart racing faster and slower throughout the activity (yes, I suppose even THAT activity would count).

Is HIIT Good for Losing Weight? Is Interval Training Good for Losing Weight?

This mermaid is interested in HIIT for weight loss.

My guess is that you’re reading this article because you’re trying to get the most efficient “bang for your buck” when it comes to getting in shape.

And HIIT is a great form of exercise and COULD help with weight loss.

I will, however, lower some of these outlandish claims that exist in the media.

For example, Time magazine calls HIIT “miraculous” in one article.[9]

That’s a little much, even for me, who writes for a living on why you should work out and likes using hyperbole for effect.

Seriously, I’m better at it than ANYBODY ON THE PLANET.

Ahem.

Cardio, strength training, and HIIT all have many benefits.

HIIT deserves praise, but exercise in general deserves praise. As we discussed in our “Cardio vs HIIT vs Weights” post, all three forms of training have their place, and the best one for you is the one you actually do.

And strength training. Always strength training.

This Muppet knows strength training will help him gain muscle and lose weight.

So to answer your question, is HIIT the secret and only weapon for weight loss?

Nah, it’s just great exercise.

And exercise is important.

But if you want to lose body fat, how you eat will be responsible for 80% of your success or failure.

This means that I don’t care how many intervals you do, it’s not gonna help you lose weight if you don’t also fix your nutrition.

You can read our Beginner’s Guide to Nutrition if you want more information.

And if you want to download our free 10-level Nutrition Guide to help you fix your diet starting today, you can do so by signing up in the box below:

Getting Started with Interval Training

These pirates are ready to do some HIIT.

When it’s time to advance your high-intensity interval training, think about the following:

  1. Frequency. This would be the number of intervals in your workout.
  2. Intensity. How hard are you going in each interval?
  3. Time. How long are your intervals and rest periods?

Maybe you start out doing 3 intervals of intense running.

Once it becomes routine, bring it up to 4.

Maybe you crank the resistance on your stationary bike to “8” during your intense interval. When it becomes normal, bring it up to “10.”

Maybe you do pull-ups for 20 seconds. When you’ve got a good handle on that, aim for 30 seconds.

This mindset will keep you advancing in interval training.

Consistency is the name of the game. Even just doing a HIIT workout once a week will help you progress in all three categories.


Mistakes to Avoid When Doing High-Intensity Interval Training

Don't anger people by doing HIIT wrong.

There’s a lot to consider when embarking on a HIIT practice.

No matter which routine you end up starting with, make sure you follow these words of wisdom:

  1. Ease into it. As the saying goes, “you must walk before you can run.” The importance is building a HIIT practice. If you need to go “less intense” before progressing to “intense,” that’s fine. It’ll help build your aerobic capabilities (endurance), which will be important when working on intensity. Start with walking.
  2. Keep proper form. Doing your movements correctly will help prevent injury. Here’s how to run properly. This is even more critical in your later intervals, where you may be exhausted and tired. If you find yourself breaking form, go ahead and slow down. Intense isn’t worth an injury.
  3. Get rest. Our bodies actually build muscle while we are resting. So take some “off days” from your HIIT practice. Want to stay active on these days? Do some fun exercise!

Take it easy, focus on your form, and make sure to prioritize rest.

HIIT Timer Recommendations

A timer is great for doing interval training.

HIIT centers on doing intervals.

One moment it’s intense, the next you’re onto a short rest break.

A good way to know when it’s time to go from one sequence to the next is a timer. A loud “beep” can tell you when it’s okay to catch your breath or when you have to kick it in gear.

Here are 5 HIIT timers you can try out:

  1. Runtastic. Don’t let the name fool you, this free app is for more than just running. You can customize for many different interval workouts, depending on what exercise you go with. And the interface looks slick.
  2. Seconds. It’s free and customizable to any form of HIIT. It can also integrate with your music, which is pretty sweet.
  3. Seven. If you’re new to HIIT, Seven would be a good app for you. It’s free, plus it has illustrations for exercises. You also get to customize your own virtual personal trainer, which may be the future of fitness. The bots are coming…
  4. Sworkit. First off, it’s a clever name (taken from “Simply Work It.”) Second, it’s free. Third, it can display your workout, goals, and calories burned. I like it.
  5. J&J Official Seven Minute Workout. This free app from Johnson & Johnson is actually really awesome. It has premade workouts you can choose form based on your fitness level, or tweak them to make it your own.

Also, we need to talk about interval timers. Most of the apps referenced are completely customizable.

For example, you can change the intense interval from 120 seconds to 90 seconds.

This is critical because it’s up to you to decide how long you can do intense vs. rest.

Generally, folks recommend one minute of intensity and then two for rest when doing HIIT.

However, this all depends on the individual, and exercises performed.

For example, burpees are tougher to do than jumping over a rope:

The infamous burpee bodyweight exercise!

So feel free to make changes like 30 seconds of intensity and three minutes of rest. Make it your own.

Whatever way you chose to do HIIT, is fine, as long as you actually do it. The benefits of HIIT kick in when going HARD for you.

In other words, you don’t have to be an Olympic athlete to get the benefits of HIIT.[10]

A light jog totally works. Just don’t do it in a mascot costume.

Running - just don't fall over!

As we discussed, if you’re consistent, you’ll improve.

So don’t stress about where you have to start.

For now, download an app and get going.

I hate multiple choice. Pick a HIIT workout for me!

This lego loves running for HIIT.

Let’s power walk as our form of HIIT. 

This is an example of a beginner HIIT workout we might prescribe for our Coaching Clients who are starting to train for their first 5K.

Let’s do seven intervals, two minutes each:

  1. Warm-up. For three minutes, walk at an easy pace.
  2. Intervals. For the first 60 seconds, power walk, like you’re trying to beat someone to the front of the line at Starbucks.
  3. For the next 60 seconds, just walk.
  4. Repeat six more times.
  5. Cool down. You can do some more light walking, or a little bit of stretching here would be great.

Total time: 20 minutes.

I want to stress, that you can do just about any exercise in exchange for this routine. Just minus “power walk” and add “push-ups and bodyweight squats”

It’ll still be a great HIIT workout.

“But Steve, that’s still multiple choice!”

Right, right… sorry. Stick to power walking! Done!

How to Start Interval Training now

These two girls jump for their interval training.

Do our power walking routine above. It’s a great place to start.

Remember, our goal at this stage is “build the habit.

We can work on “whoa, that was intense” later.

If you’re looking for EVEN MORE stuff to do, we have a few options for ya:

1) Check out our popular 1-on-1 coaching program. You’ll work with our certified NF instructors who will get to know you better than you know yourself and program your workouts and nutrition for you.


2) Exercising at home and need a plan to follow? Check out Nerd Fitness Journey!

Our fun habit-building app helps you exercise more frequently, eat healthier, and level up your life (literally).

Try your free trial right here:

3) Enlist in the Rebellion! We need good people like you in our community, the Nerd Fitness Rebellion. 

Sign up in the box below to enlist and get our guide, Strength Training 101: Everything You Need to Know. It’ll help you start incorporating interval training into your workouts.

There are a zillion ways to do HIIT, so don’t let the options paralyze you.

Pick one, any one, and get to it.

Interval training, in any form, is a solid fitness choice and a great practice to have in the workout arsenal.

Any questions?

Which HIIT workout style is your favorite?

Leave it in the comments below!

-Steve

PS: Make sure you check out the rest of our content on interval training:

  1. The HIIT Workout for Home
  2. How to Do Tabata Sprints
  3. Should You Do Couch to 5K?

###

All photo credits can be found in this footnote.[10]


from Blog – Nerd Fitness https://ift.tt/2U0I8Xa
via IFTTT