With today’s Advanced Bodyweight Routine, you can burn fat, build muscle, and get a great workout in! All with no gym membership required!
It’s the kind of workout we build through our online coaching program. If you’re in a hurry, sign-up for our free weekly newsletter and we’ll send you PDFs of our “Work Out at Home” guides!
If you’re ready, click the sections below to get right into the action:
Don’t forget to warm up. You can run in place, jump rope, do a few push-ups, pedal on a stationary bike, jog up and down your stairs, etc. Since we are doing advanced movements here, the warm-up becomes even more critical.
If you are following this bodyweight workout plan because you’re trying to get in great shape without needing a gym, download our free-guide: Strength Training 101: Everything You Need to Know. It’ll provide an exact plan to follow for growing strong.
Download our comprehensive guideSTRENGTH TRAINING 101!
Everything you need to know about getting strong.
Workout routines for bodyweight AND weight training.
How to find the right gym and train properly in one.
If you don’t have a resistance band, you can do negative pull-ups instead. Jump and hold yourself above the bar, and then slowly, under control, lower yourself to the ‘starting position’ of a pull-up. Then repeat!
This is a great way to build up enough strength to eventually get your first pull-up.
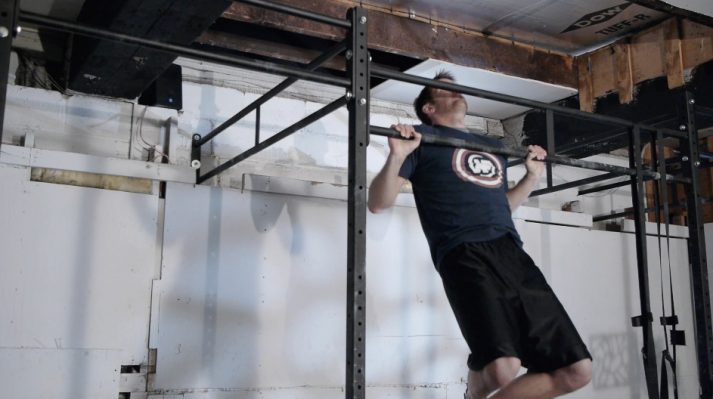
8) PULL-UP
We have a full guide on proper pull-up form so you can hone in your technique.
9) CHIN-UPS
Much like a pull-up, but with your palms facing toward you.
Here’s a video going over proper pull-up and chin-up form:
If you can’t do pull-ups or chin-ups, you have another option…
10) INVERTED BODYWEIGHT ROW (OVERHAND)
An inverted bodyweight row can be a great “pull” exercise if you can’t do a pull-up yet, or if you don’t have a proper pull-up bar nearby. Because a good sturdy table can be used for inverted rows:
11) INVERTED BODYWEIGHT ROW (UNDERHAND)
12) ASSISTED BODYWEIGHT DIPS
With a resistance band, you can start performing assisted dips. A great exercise while you build up strength for normal dips.
13) BODYWEIGHT DIPS
14) KNEE PUSH-UP
15) ELEVATED PUSH-UP
16) REGULAR PUSH-UP
We have a whole article on how to do a proper push-up, but we also cover it extensively in this 5-minute video:
17) DECLINE PUSH-UPS
18) KNEE PLANK
19) PLANK
20) SIDE PLANK
21) JUMPING JACKS
If you are looking for even MORE bodyweight exercises you can use in your workouts, make sure to check out our mega-resource:
Full guide to the most effective diet and why it works.
Complete and track your first workout today, no gym required.
How to Scale Your Bodyweight Routine
As I said earlier, this whole routine is scalable based on your ability. For example, here is a sample routine for somebody who has conquered the Beginner Bodyweight Workout but can’t do the full routine above:
“HOW OFTEN SHOULD I DO THE ADVANCED BODYWEIGHT WORKOUT?”
Do this routine 2-3 times a week, but never on consecutive days. It’s a message we really strike home in our guide, “How Often Should I Work Out?”
You don’t build muscle when you’re exercising, you build muscle when you’re resting, so try not to do a strength training routine (of the same muscle groups) two days in a row.
If you’re still uneasy about this advanced workout, start with our Beginner Bodyweight Workout instead. You can download a worksheet to get started when you sign-up for our free weekly newsletter:
Grab Your Beginner Bodyweight Routine Worksheet. No Gym Required!
Complete this workout at home, no equipment required
Avoid the common mistakes everybody makes when doing bodyweight exercises
Learn how to finally get your first pull-up
After the Advanced Bodyweight Workout: Next Steps!
This should help you get started with a really powerful bodyweight training routine. But we hear frequently that people want MORE instruction, MORE guidance, and MORE workouts.
If that’s you, we have MULTIPLE options to take the next step. Pick the option below that best aligns with your goals and timeline:
1) If you want step-by-step guidance, a custom bodyweight training program that levels up as you get stronger, and a coach to keep you accountable, check out our killer 1-on-1 coaching program:
2) If you want a daily prompt for doing workouts at home, check out NF Journey. Our fun habit-building app helps you exercise more frequently, eat healthier, and level up your life (literally).
Try your free trial right here:
3) Enlist in the Rebellion! We need good people like you in our community, the Nerd Fitness Rebellion.
Sign up in the box below to enlist and get our guide, Strength Training 101: Everything You Need to Know. It’ll help you start incorporating these advanced bodyweight moves into your training.
Download our comprehensive guideSTRENGTH TRAINING 101!
Everything you need to know about getting strong.
Workout routines for bodyweight AND weight training.
How to find the right gym and train properly in one.
4) Level Up Your Workout! If you’re looking for more workout routines to follow, I got you covered:
How to Do Your First Handstand: now we’re talking! Learn the different progressions that will eventually have you getting your first freestanding handstand!
6 Levels of Gym Workouts: never wonder what to do in the gym again! Follow these 6 levels of workouts to go from Newbie to Gym Hero!
I’d love to hear how this workout was for you.
Leave a comment below with your results or any questions you have on advanced bodyweight training and how else we can help.
For the Rebellion!
-Steve
PS: Where do you go after you’ve crushed the Advanced Bodyweight Workout? Well, have you ever heard of the PLP Progression? There’s really no limit on how challenging that can get.
If you can already do a pull-up (woot!), you might want to check out our article on proper pull-up form, although we’ll cover a lot of the same material here.
Let’s do this thang.
Tips on How to Start Doing Pull-Ups
In the video above, Coach Jim walks you through the exact progression system we use with our coaching clients who want to get their first pull-up (or chin-up).
Before we get into exercises to progress into a pull-up, let’s chat about some general strategies.
Consider the following three points when attempting to get your first chin-up or pull-up:
#1) This should hopefully be obvious, but the more you weigh, the more you have to lift in order to complete a pull-up.
If you’re truly serious about completing a pull-up, start by getting your diet under control.
Here are some resources to help you with weight loss:
Tried to lose weight in the past without success? I hear you, weight loss is super tough. Learn why in our article “Why Can’t I Lose Weight?” for a deep dive into the subject. We also have the 5 Rules of Weight Loss to help you get going.
Not sure what a proper diet looks like? Check out our guide on healthy eating for a full lesson on nutrition.
In the above guides, you’ll find me stating that losing weight comes down to eating fewer calories than you burn. Not sure how many calories you need? Check out our guide on calculating your daily caloric requirements.
#2) MAKE YOUR “PULL” EXERCISES A PRIORITY. A lot of people do every other exercise before doing any back-related exercises, if they do any at all.
After warming up properly, your first exercise should always be the stuff that you want to work on the most – in this case, it’ll be your back muscles.
Until you get your first pull-up done, focus on the back exercises detailed in the levels and workouts in this guide.
#3) The progression we outline is a path that works for most people, but does NOT need to be followed to a T.
We give sample sets and reps and when to move up, but if you feel like you can progress sooner or want to try doing full pull-ups sooner than we recommend, that’s OKAY.
This is the slower progression method, where some people will want to do fewer reps and progress to the next levels sooner – that’s okay.
We recommend moving up to the next level when you can do 3 sets of 8 reps of a particular exercise. If you want the accelerated path, move on up as faster as you can do 3 sets of 5 reps. You do you boo.
Want someone to build you a custom made progression plan for doing your first pull-up? Our 1-on-1 Online Coaching Program will do just that, plus your coach can review your movements through our app so you’ll know your training correctly and safely.
Level 1 Pull-up Workout: Bent Over Dumbbell Rows
We’re going to start with bent-over dumbbell rows, the most basic of back exercises, in case you’re starting from ABSOLUTELY square one.
Level 1 Pull-up Workout:
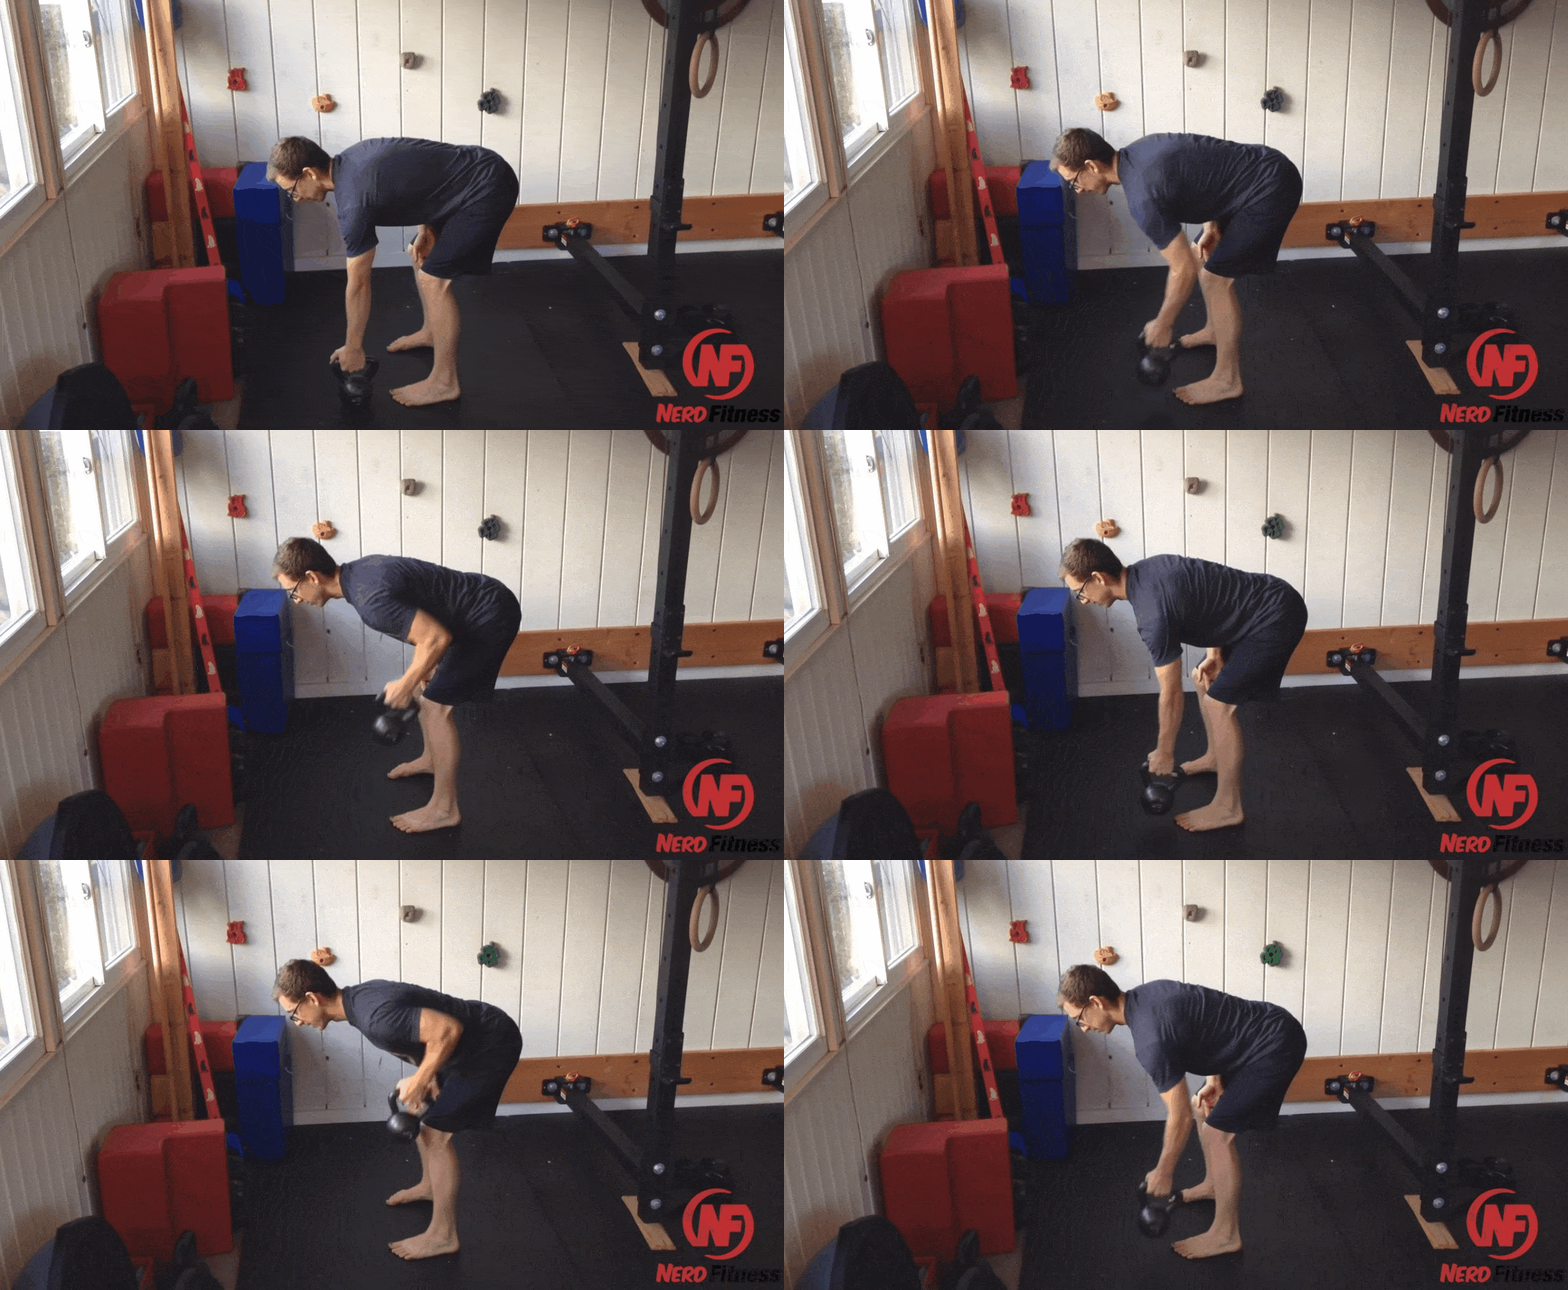
Bent-over dumbbell rows: 8 reps each arm (or as many as you can do)
Whatever allows you to get to at least 5 reps a set.
Once you can do 3 sets of 8 reps (each arm), it’s time to pick up a heavier dumbbell.
This will allow you to get stronger and stronger.
Make sure you give yourself at least 48 hours until you do the Level 1 Dumbbell Rows again, so you can include these dumbbell rows for your workouts on:
Monday
Wednesday
Friday
As soon as you can do 3 sets of 8 reps, it’s time to move up to a heavier dumbbell.
Once you can lift a 25-pound (10kg) dumbbell or heavier, consider moving up to the next level.
If you are a little bit bigger than the average bear, you might want to stick with this step until you lose a little bit more weight and get stronger – maybe go to 35 or 40-pound (18kg) dumbbells.
Want help designing your own workout routine? I’ve got two options for you.
The first is to head over to “Build Your Own Workout Routine” and get your hands dirty. Our guide will walk you through building a full-body exercise program in 10 simple steps.
The second is to have a Nerd Fitness Coach do all the heavy lifting for you (not really, you still have to lift stuff), by having them build you a tailor-made workout routine:
Level 2 Pull-Up Workout: Inverted Bodyweight Rows
Bodyweight rows are the PERFECT precursor to pull-ups – they work the same muscles, and have you lifting your own bodyweight, just at a different angle.
For this level, we’ll provide you with two options: You can also make adjustments.
OPTION A: IF YOU HAVE ACCESS TO A GYM OR WANT TO JOIN A GYM:
You can follow the rest of this workout as part of our 6-Level Gym workout guide, which will help you go from total gym newbie to pull-up progressing badass!
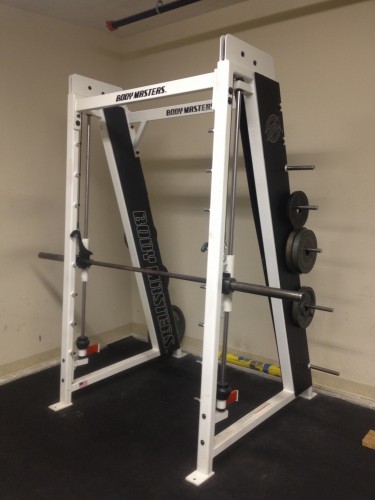
At your gym, find your Smith Machine and set the bar at about chest height.
A higher bar makes the exercise easier to start:
And as you get stronger, you can set the bar lower:
Here’s how to do an inverted bodyweight row (here is a video demonstration with gymnastic rings, but you can start with a bar as displayed in the images below).
Set the bar at a height where it’s challenging for you to complete 3 sets of 8 reps with two minutes of rest between sets.
Clench your butt and keep your abs tight and body straight throughout the exercise.
Pull your shoulder blades down and back towards each other (like you’re trying to pinch a pencil between them behind your back).
Focus your mind on PULLING with your arms.
Pull until your chest touches the bar (not your neck).
As soon as you can complete all 3 sets of 8 reps, set the bar heigh lower to make the exercise more difficult.
If you need to make the exercise less challenging, bend your knees and put your feet flat on the ground:
Level 2 sample workout routine:
Monday – 3 sets of 8 reps of overhand bodyweight rows
Wednesday – 3 sets of 8 reps of underhand bodyweight rows (hands reversed)
Friday – 3 sets of 8 reps of overhand bodyweight rows
(And then go underhand, overhand, underhand the following week)
As soon as you’re doing bodyweight rows where your body is at a 45-degree angle or lower, you can progress to Level 3.
OPTION B: IF YOU DON’T HAVE ACCESS TO A GYM FOR INVERTED ROWS:
You have 4 paths here:
1) Purchase a door frame pull-up bar, hang a pair of gymnastic rings from them. And then follow the same advice as above!
4) Move up to Level 3 and progress with caution there.
If you are struggling with rows, you’re not sure you’re doing them correctly, or you’re not sure how to progress to the next level, check out our 1-on-1 coaching program.
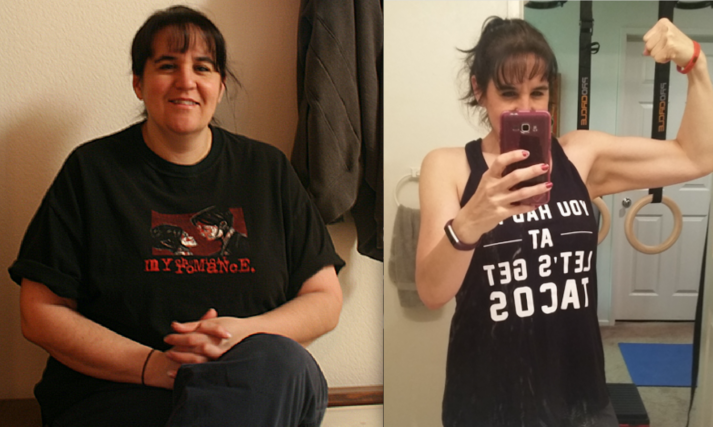
It’s the type of program that helped single mom Leslie lose 100+ pounds and start training with gymnastic rings and handstands!
Level 3 Pull-Up Workout: Assisted Pull-Ups
Okay! It’s time to get to ACTUAL pull-ups here! Personally, I don’t like using the assisted pull-up machine in a gym as it doesn’t give you the full feeling of a pull-up, but it’s certainly better than nothing.
Instead, I recommend doing one of these alternatives:
#1) Assisted Pull-ups with chair
Either one foot or two on the chair, depending on your needs. Your feet are ONLY there for support, use your upper body as much as possible.
You can also use a box or similar sized object for the same result:
#2)Assisted Pull-ups with exercise band:
You can get different types of exercise bands with different levels of strength, or a variety pack for easy progression.
Put your foot in the exercise band and pull yourself up.
#3) Assisted pull-ups with a partner:
Have a friend hold your feet behind you and help you complete each rep. Have them use the least amount of help possible to get you through your workouts.
Here’s how to do an assisted pull-up:
Clench your butt and keep your abs tight throughout the exercise – try not to swing like crazy.
Keep your shoulder blades pinched behind you throughout the movement and focus on PULLING the bar down with your arms.
Use the least amount of assistance that you can handle – as soon as you can do multiple pull-ups with both feet on the chair, switch to just one foot.
If you’re using an exercise band, try to get a few bands of varying tension so you can decrease the resistance as you get stronger.
As soon as you can do 3 sets of 8 with assistance, it’s time to move on to Level 4.
For another reference, Coach Jim and Staci show you how to do a variation of assisted chin-up right here:
This is probably the TOUGHEST level before getting your pull-ups. If you get stuck on “assisted pull-ups” and “assisted chin-ups”, you’re not alone. This is where most people get stuck.
We work hand-in-hand with people like you to get them their first pull-up in our Online Coaching Program. If you don’t know how to fit these movements into your workouts, or you just want somebody to give you the exact workout to follow every day, we got you!
Finally, a workout that includes Level 3 pull-up exercises
Alright, so we’ve started off great! We’re working those pulling muscles and assisted variations – but an actual chin-up might feel miles (or kilometers) away. Heck, just even holding onto the bar may be a challenge without some assistance.
What should we do now?
How about we work on holding onto the bar!?!
Before we work on doing full range, unassisted chin-ups or pull-ups, it’s really helpful to be strong and confident in holding unassisted parts of the movement. This is where Top Holds and Bar Hangs come in! #1) A Top Hold is exactly what it sounds like – we hold the top position of the chin-up or pull-up for several seconds (5 to 10). You’ll likely find holding the top of the chin-up (palms facing you) easier than the pull-up.
This is definitely something that you want to first do assisted. We’ll then work to transfer more weight – bit by bit over several workouts – off our feet and onto our arms until we’re holding ourselves unassisted at the top.
Using a band is a good option for assisted chin-ups, but using a box, bench, or another sturdy object will be a better option here.
It will allow you to shift that weight onto your arms a little easier.
That said, if all you have is a band for this exercise then that’s ok! Look to use thinner and thinner bands, while lifting the feet and knees up a bit to further reduce assistance (as the band won’t be stretched as far).
#2) On the other side of the movement, we have the Bar Hang…which is pretty much what it sounds like too!
To perform a bar hang:
Grab the bar with palms facing towards you or away from you. You’ll likely find hanging with palms facing away from you to be a bit more comfortable. Either direction will help strengthen up your grip.
Just like with the top hold, you’ll want to start assisted then work to shift your weight from your feet onto your arms until you’re hanging unassisted.
To further supercharge this exercise: once you are hanging unassisted, work on retracting your shoulders down away from your ears.
Like so:
And so:
This small movement is TOUGH (and you can even practice it assisted) but getting strong here will set your shoulders in an even better position for your first chin-up/pull-up.
We’ll look to hang from the bar (assisted or unassisted) for a total time of 30 seconds to 1 minute. At first this time may be broken up into several sets (e.g., 10 seconds, 10 seconds, 10 seconds), but you should eventually work up to one full set.
So how should we integrate either of these into our training?
#1) For the Top Holds, do this at the start of your workout (after your warm-up) for 3 sets of 5 seconds. Make sure you give it your all! Really squeeze the muscles tight and put as much weight on the arms as possible!
With all that effort, you’ll want to give yourself 30 seconds to a minute rest in-between. I know that sounds like a lot for just 5 seconds of work – but if you were working hard enough, you’ll need it!
#2) For the Bar Hang, do this at the end of your workout for 30 seconds to a minute. Again, look to complete this in as few sets as possible, while making the exercise as challenging as possible. Move from assisted to unassisted, with the shoulders retracted downwards.
If you have to take a break during the bar hang time, then take enough rest so that the next hold is productive.
Here Are the Exercises You Can Include for Your Level 4 Workout Routine:
Monday:
Top Hold (Assisted or Unassisted) – 4 sets of 5 seconds
Assisted Pull-ups – 3 sets of 8 repetitions
Bar Hang (Assisted or Unassisted) – 30 seconds total time
Wednesday:
Top hold (Assisted or Unassisted) – 4 sets of 5-10 seconds
Bodyweight Rows – 3 sets of 8 reps
Bar Hang (Assisted or Unassisted) – 30 to 60 seconds total time
Friday –
Top Hold (Assisted or Unassisted) – 4 sets of 5 seconds
Assisted Chin-ups – 3 sets of 8 reps
Bar Hang (Assisted or Unassisted) – 30 seconds total time
When you’re able to perform the Top Holds and Bar Hangs unassisted, then it’s time to move to the next level!!!
LEVEL 4.5 PULL-UP WORKOUT: (THE HIDDEN LEVEL)
What’s this??? Secret hidden exercises?
I just wanted to bring your attention to a great addition to any of these workouts – especially as things really ramp up.
Ready for it?
It’s . . . the front plank!
The front plank (or any of your favorite midsection stabilization exercises) is a great exercise to do, should holding a Top Hold or a Bar Hang prove tough.
If you haven’t already felt it during the the previous pull-up workouts – your middle needs to be involved too!
During a pull-up or chin-of, if we squeeze through the midsection and glutes, the nearby muscles are able to contract stronger through a phenomenon known as muscle irradiation.
Besides sounding like something the Fantastic Four encountered in space, this cool “trick” can helps engaged nearby muscles in the midsection, including those big back muscles that pull us up!
You can see muscle irradiation for yourself if you’ve ever been asked to flex your biceps for someone. You’ll instinctually squeeze your hand tight, because it helps the biceps engage stronger!
If needed, throw in some front planks work near the end of your workout.
You can even start on your knees:
Look to hold 30 seconds to one minute of total time.
Alright, back to our regularly schedule programming!
Level 5 Pull-Up Workout: Negative Pull-Ups
Okay! We are now DANGEROUSLY close to getting our first pull-up!
The big step at this level is doing a negative pull-up:
Grab onto the bar with an overhand grip
Jump so your chest is touching
Slowly lower yourself under control until you’re at the bottom of the movement.
WARNING: This can be very dangerous if you’re very overweight, which is why I’d recommend moving slowly through steps 1-3 first.
However, once you have a decent amount of back strength (which you got from Levels 1, 2, and 3), doing negatives is a great way to build arm and back strength.
You have two options for negative pull-ups:
Hop up on a chair to get above the bar and then lower yourself back down. The name of the game is “in control.”
Jump above the pull-up bar, and then begin to lower yourself back down IN CONTROL.
You don’t need to lower yourself so slowly that one repetition destroys you…lower yourself at a controlled speed – Counting to “three Mississippi” during the movement is a good tempo.
Here are the exercises you can include for your Level 5 Workout Routine:
Alternatively, we can do all of the heavy lifting for you (well, not ALL the heavy lifting) – we’ll create a specific workout so all you have to do is log into your NF Coaching App each morning and do the workout your coach prescribed!
Level 6 – Doing Your First Pull-up or Chin-up
OH BOY! My dear Rebel, it’s time for a…
At this point you have two options:
A chin-up is when you grab the bar with an underhand grip with your palms facing towards you.
Many find chin-ups slightly easier than…
A pull-up is when you grab the bar with your palms facing away from you. Seeing as this is a pull-up guide…
HOW TO DO A PULL-UP, STEP-BY-STEP:
Grab the bar with a grip slightly wider than shoulder-width, with your hands facing away from you.
Start from a dead hang.
Engage your shoulders, pull them down and back towards each other (like you are pinching a pencil between your shoulder blades!)
Flex your stomach, pull your body until your chest touches the bar.
Slight pause, yell out “I’m a champion!”
Lower yourself all the way back down to a dead hang.
We cover all of this and more in our post “How to Do a Proper Pull-Up,” but the above will get you started
Depending on your weight, your level of fitness and strength, and how far along you are in these progressions, you might be able to start with even more than one pull-up.
At this point, you can be a full Gym Class Hero by following a Gym Workout with these movements in there for your “pull” exercises:
Level 6 routine weekly schedule:
Monday:
Pull-ups – 4 sets of 1-2 reps (move onto the next exercise if you can’t perform a rep)
Assisted Pull-ups – 3 sets of 8 reps
Bar Hang (Unassisted) – 60 seconds total time
Wednesday:
Negative Chin-ups – 4 sets of 1 rep
Bodyweight Rows – 3 sets of 8 reps
Bar Hang (Unassisted) – 60 seconds total time
Friday:
Chin-ups – 4 sets of 1-2 reps (move onto the next exercise if you can’t perform a rep)
Assisted Chin-ups – 3 sets of 8 reps
Bar Hang (Unassisted) – 60 seconds total time
Congratulations! You’re now doing pull-ups. Make sure you watch that video above to make sure you’re doing pull-ups with proper form. Nearly everybody does them incorrectly, with bad form.
Want to make sure you have proper form with your pull-ups? Check out our 1-on-1 Coaching program! Our spiffy mobile app lets you send video of your pull-ups directly to your coach, who will provide feedback so you can perfect your technique.
They’ll also build a workout program that’s custom to your situation, which will have you doing sets of 10 pull-ups in NO time!
Level 7 – Advanced Pull-up Moves
Once you’re able to do 3 sets of 10 pull-ups or chin-ups, you have a few options:
OPTION #A: Continue to get better at doing more reps – 3 sets of 12, 3 sets of 15, 4 sets of 20, etc.
OPTION #B: Start doing other types of pull-ups.
Here are some advanced pull-ups you can try:
#1) WIDE GRIP PULL-UPS (grab the bar WAY out with both hands):
OPTION #C) Add weight with a weight belt and do weighted pull-ups or weighted chin-ups:
Personally, my favorite thing to do in a gym is weighted pull-ups; if you’re at this level and interested in doing so, here’s what you need to do:
Get a weight belt. I bought this one on Amazon and it’s worked out incredibly well for me. I’ve tried doing the whole “put weights in a backpack” and it certainly works, but the angle of the weights hanging off your back is weird. With a weight belt, the weight hangs down between your legs (not a euphemism) so it feels more natural.
Add small amounts at a time. Most gyms will have 2.5 lb (roughly 1kg) weights; you might feel stupid putting on a big weight belt and only hanging a tiny weight off it, but you need to start somewhere.
Consistently add more weight. I’ll warm up with two sets of 5 pull-ups with no extra weight, and then do 3 sets of 5 weighted pull-ups. If I can complete all 3 sets of 5 reps (with my chin over the bar for every rep), I’ll make a note to add 2.5 or 5lbs (1 or 2kg) to my weight belt for the next time.
Here’s how to incorporate these Level 6 exercises into your gym workout routine:
Friday – Wide Grip Pull-ups – 3 sets of maximum repetition
(The following week, I’d alternate by doing the chin-ups without weight, and then doing weighted pull-ups
Where do you go from here? How about working towards one of the most impressive exercises of all time? The MUSCLE UP (warning: uber advanced)!
Our new app, Nerd Fitness Journey, not only has an adventure to get you your first pull-up, but we’ll also show you exactly how to do cool bodyweight tricks like the muscle-up too. No guesswork needed here, just jump into the app and follow the missions and workouts for the day.
You can try your free trial TODAY, right here:
Lift Yourself Up (A Life With Pull-Ups)
No matter your starting point, you CAN do pull-ups.
And you WILL do pull-ups with this guide.
You don’t need to follow the progression above exactly – it’s merely one path that you can take in order to reach the promised land…where the pull-ups flow like wine and the women instinctively flock like the Salmon of Capistrano.
Or Bronwyn, who lost 50+ lbs and now does chin-ups with her daughter on her back!
For people looking for the next step, we’ve built 3 options that might float your boat:
1) If you are somebody that wants to get results like the women above and follow a tailor-made pull-up strength program designed around their life and goals, check out our popular 1-on-1 Online Coaching Program.
You’ll work with our certified NF instructors who will get to know you better than you know yourself, check your form, and program your workouts and nutrition for you.
#2) Exercising at home and need a plan to follow? Check out Nerd Fitness Journey!
Our fun habit-building app helps you exercise more frequently, eat healthier, and level up your life (literally). We even have an awesome adventure to help you get your first pull-up!
Try your free trial right here:
3) Join our free community, the Nerd Fitness Rebellion, and we’ll send you our free Strength 101 Guide, which you can get when you sign up in the box below:
Download our comprehensive guideSTRENGTH TRAINING 101!
Everything you need to know about getting strong.
Workout routines for bodyweight AND weight training.
How to find the right gym and train properly in one.
Follow the path that works for your schedule, your experience, and your level of comfort with this movement – there’s no shame in going slowly and progressing safely.
And if you’re gung ho about pull-ups, ready for negatives and trying to squirm for that first rep, feel free to go for it. Just be safe.
When you DO finally do a pull-up, I want to be the first to know – email me at steve@nerdfitness.com and tell me about it!
For the Rebellion,
-Steve
PS: Check out our other three articles on pull-ups:
As Coach Lauren mentions above, the “circuit” in circuit training comes from the fact that you do a sequence of exercises back to back to back, and then you repeat the sequence.
And then again.
You cycle through the planned sequence of exercises, or circuit, multiple times.
That’s circuit training.
Generally, you hit each major muscle group during one full circuit. You may do a lower body for one exercise. Then the upper body the next.
You’ll find all sorts of different circuit training sequences. Here are some things most will have in common:
Several different exercises. A normal circuit will have five to ten different movements per circuit. You’ll often hear these referred to as “stations.” Overhead press station, squat station, etc.
Little to no rest in between.The goal of circuit training is to keep your heart rate up. Ideally, if you’re physically able, you go from one exercise to another without stopping. Maybe you rest after the whole circuit. Maybe.
Rinse and repeat.Generally, you’ll run through your circuit a few times. Three rounds are common.
Make sense?
The point here is to work different parts of your body with different exercises, and then while those parts are recovering, you’re working on your other movements! This helps build cardiovascular health, while also improving muscular endurance and strength.
More importantly, for somebody with limited time, doing a strength training circuit is more effective at building strength and burning fat than an equivalent amount of cardio.
In other words, if you are trying to lose weight, you should be doing circuit training.
Our Beginner Bodyweight Circuit would be a great place to begin, and you can download a worksheet to help you get started right here:
Grab Your Beginner Bodyweight Routine Worksheet. No Gym Required!
Complete this workout at home, no equipment required
Avoid the common mistakes everybody makes when doing bodyweight exercises
Learn how to finally get your first pull-up
Why Should I do circuit training?
Generally, you’ll hear exercise divided into strength training or aerobic exercise (cardio).
What’s the difference, you wonder?
Strength training. Strength training is also referred to as anaerobic exercise, which would be a short burst of energy for movement. Think of a push-up or pull-up. These exercises help build and tone muscle.
Aerobic Exercise.“Aerobic” means “needs oxygen.” Your heart rate increases to get oxygen where your body needs it, thus the word “cardio.” Running, biking, or jumping jacks would be examples of aerobic exercise.
The thing about a circuit is, you actually do both categories. Presses and lunges fall into strength training. Jumping jacks are cardio.
And since you aren’t stopping much in between stations, you’ll need more oxygen, and voila. Even more cardio.
With circuit training, you build muscle and burn fat WHILE building stamina.
As Michael Scott would say, “that’s a win, win, win.”
There’s some debate on what kind of exercise is better for weight loss: aerobic or anaerobic.
My thoughts?
If you’re limited on time and only can pick one, I would pick strength training: when you strength train, you break your muscles down, and your body needs to work extra hard over the next 24-48 hours to rebuild those muscles (with increased calories burned).
We work with our 1-on-1 Coaching Clients to create programs that combine both strength and cardio in a fun way – it really comes down to a program that you actually WANT to do.
Before and after your circuit training: Warm up and stretch
No matter which circuit you pick, I want you to start with one important thing:
Warm-up!
I cover why you should always warm up in an article found right here. It doesn’t have to be much though, give it about five minutes to get your muscles active and your heart rate up.
This will help you do exercises properly and help prevent injury. You can run in place, do air punches and kicks, or some jumping jacks.
Here is NF Senior Coach Staci (you might know her incredible story) showing you many beginner options you can use to warm up as well:
Did I just tell you to prepare for circuit training, with a circuit?!
If you’re curious, here’s my personal (advanced) warm-up:
Jump rope: 2-3 minutes
Jumping jacks: 25 reps
Bodyweight squats: 20 reps
Lunges: 5 reps each leg.
Hip extensions: 10 reps each side
Hip rotations: 5 each leg
Forward leg swings: 10 each leg
Side leg swings: 10 each leg
Push-ups: 10-20 reps
Spider-man steps: 10 reps
Our goal isn’t to tire you out. Instead, we want to warm you up.
That’s step one.
Completing your chosen circuit training routine would be step two.
Below, you’ll find 15 workouts you can follow along with! And if you like our style of workouts, you might like our new app, Nerd Fitness Journey!
Our fun habit-building app helps you exercise more frequently, eat healthier, and level up your life (literally).
Right now, you can try it for free for a full week (no credit card required). Jump in below:
Once you’ve done the above three times, go ahead and put your kettlebell away for your final step: stretches.
If you want a kettlebell worksheet for this workout, grab one by signing up in the box below:
Grab Your Beginner Kettlebell Routine Worksheet!
Complete this workout at home or gym with 1 kettlebell.
Avoid the common mistakes everybody makes when doing kettlebell exercises.
Build strength, burn fat, level up your life!
We also have a fun new adventure in our app that will allow you to train with your kettlebell right alongside Hack Morris (this will make sense more sense when start).
Jump in right now for your free trial:
Beginner Gym Circuit Training
If you have access to a gym, you have a lot of circuit options.
If it’s your first time stepping foot in a fitness facility, check out our Beginner’s Guide to the Gym. The gym can be a scary place, but we’ll give you a strategy to get comfy.
We’ll also walk you through each movement for both Days A and B below. I would recommend picking one of our 5 Beginner Gym Workouts, going through the leveled progressions, and working your way up to the circuits below:
Alternate your circuits on different days. Rest in between. “Day A” could be Monday. Rest Tuesday. Wednesday could be “Day B.”
We LOVE helping people get started in the gym, as we’re huge fans of barbell training and helping beginners build confidence with weight training! If that sounds like you…
And you can download our full Strength 101 guide too, which has this routine along with other circuits to help you start building strength today:
Download our comprehensive guideSTRENGTH TRAINING 101!
Everything you need to know about getting strong.
Workout routines for bodyweight AND weight training.
How to find the right gym and train properly in one.
The Hotel Workout Circuit: For Travelers that Train
Sometimes, you just plain find yourself stuck in a hotel room. Maybe you can find the hotel gym, but I bet it’s terrible! It probably has 2 machines, a broken treadmill, and no free weights.
Ugh.
Instead, how about a workout circuit you can do in the room itself! Utilize the furniture to its full potential.
Gimli “Shall I get you a box?” jumps: 7 box jumps – REALLY explode
Helm’s Deep-Squats: 9 bodyweight squats – get your ass to the ground
Tower of Orthanc Holds: 1 minute (Kick up against a wall and hold a handstand for as long as you can until 1 minute is complete, in as few as sets as possible. Check out our Guide to Handstands.)
“Army of Dead”lifts: 9 lightweight reps, barbell or dumbbell
Samwise Gamgee Carries: 1 minute (Demonstrated here by AKLulu carrying me at a NF meetup) A heavy sandbag over the shoulder works too. No sandbag? Just carry two dumbbells around the gym for a minute.
If you can get through a superset three times, consider yourself an honorary Ranger. Nothing found in Mordor can faze you.
Barbell Deadlift / Dumbbell RDL / Banded Good Morning / Regular Good Morning: 10 reps
Medicine Ball Slam / Quick Downwards Bodyweight Squat: 10 reps
Push-up to Renegade row (push-up, row left, push-up, row right, repeat): 5 Rows per side
Transverse Lunge and Chop: 5 reps each side
How many times do you do this circuit? AMRAP, or, As Many Rounds As Possible. I suggest setting a 12-minute timer and getting to work. Be careful though, because only Wolverine can heal automatically.
You’ll need actual rest.
Boom!
There are your nerdy circuits. Feel free to rock the soundtrack of the referenced movies during your workout. If you own a cape, now’s the time.
Complete List of Circuit Training Exercises
You can do any of the workouts in this article and get a great workout, but if you want to build your own workout, you can totally do that too!
Here is a list of exercises you can use to create your workout.
Simply pick a few, and do one after the other in as many circuits as you want!
Do 3 circuits with 10 reps of each exercise, one after the other!
Have fun and keep things interesting. And if you don’t want to build your own workout, that’s cool too! We have 15 free workouts in this article, and we can also do all the heavy lifting for you.
(Well, not literally DO the heavy lifting, but you know what I mean.)
We create custom workout solutions for busy people just like you in our 1-on-1 Coaching Program. Let us create a workout and help you make better food choices.
It’s like having a Yoda in your pocket (again, not literally).
How to Stretch After Circuit Training
Once you finish your workout, the final step (three) would be stretching and cool down. No matter what circuit you go through, stretch after a workout. It can help a lot with muscle recovery.
Scope this video for an awesome stretching sequence to follow:
You could also do some yoga poses. For stretching, find what feels good and take your time. Let your heart rate come down while you stretch.
You could even do some foam rolling too if you’re a glutton for punishment!
YOUR MISSION: Complete one of the above circuit training workouts! If you don’t know which one to pick, start with the Beginner Bodyweight Circuit. It’ll get you used to the idea of hustling from one exercise to the next.
And you can do it in your living room!
If you’re looking for more hands-on instruction and customized guidance, check out our 1-on-1 Coaching program. You’ll work with our certified NF instructors who get to know you better than you know yourself, and then build a workout program that is specific to your exact goals.
Simply put, we tell you exactly what to do every day, and how to eat. And then, we check in with you regularly to make sure you’re doing it!
If you got this far in the article, I really want you to try one of these workouts. Right NOW. I always mention the most important step in a fitness journey is starting it. Today, start circuit training.
Once completed, I’d love for you to share your story with the community in the comments:
How’d it go?
Did you get through three full circuits?
Which routine did you pick?
Find a circuit you’re comfortable with, and do it.
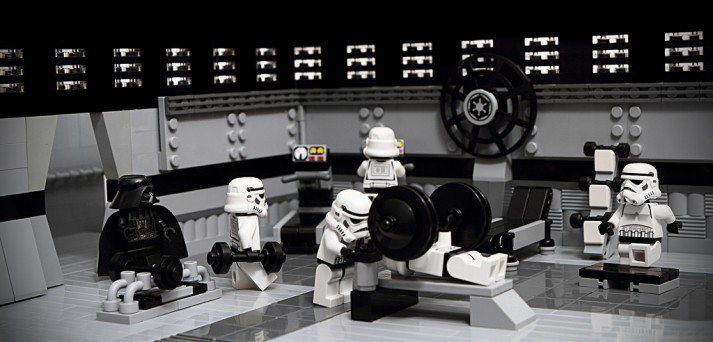
Want to get strong like these LEGO lifters but don’t how to start?
In this Beginner’s Guide to Strength Training (part of our Strength 101 series), you’ll have both the confidence to start getting strong with resistance training AND a plan to follow.
These are the exact strategies we use with our Online Coaching Clients to help them start strength training, and I’m excited to cover everything you need.
By the way, we’ve combined this article along with the rest of our strength articles into a “Strength Training 101: Everything You Need to Know” guide.
Grab it free when you join the Rebellion by putting your email in the box below.
Download our comprehensive guideSTRENGTH TRAINING 101!
Everything you need to know about getting strong.
Workout routines for bodyweight AND weight training.
How to find the right gym and train properly in one.
How Do I Start Strength Training?
Welcome to the first day of the rest of your life.
You’ll look back years from now and thank “Past You” for starting strength training today.
And I promise, you WILL strength train today.
After all, strength training or resistance training doesn’t need to be scary or overcomplicated!
Strength training really comes down to two things:
#1) Movement of any weight against “resistance”(including your body weight) – Doing ANY exercise that pushes your muscles outside of their comfort zone, forcing them to rebuild stronger to prepare for the next challenge.
#2) Progressive overload: doing slightly more than last time (lift heavier weight or do 1 more rep) consistently. Your muscles will constantly have to adapt and rebuild themselves. These microscopic tears (that don’t hurt) force your muscles to go through hypertrophy, meaning they grow bigger and stronger so they can meet the demands of the exercise.[1]
Coach Jim explains the ins and outs of progressive overload in this video:
That’s all there is to it:do some resistance training and attempt to make it more and more challenging, and you’ll grow stronger.[2]
This means if you drop down and do ONE knee push-up right now, technically you’ve done a strength training workout.
It also means if you then do TWO knee push-ups tomorrow, then you are officially following a strength training routine.
In other words…
Now, there are many different “strength training” and “resistance training” paths.
Like a “skill tree” in a video game (with branching paths and progressions), you can progress up one path, and mix and match movements from others depending on the situation.
These paths depend on your goals and what equipment you have available to you.
What Are Some Examples of Strength Training?
Let’s chat about a few different types of strength training.
BODYWEIGHT TRAINING
Bodyweight training is simply doing an exercise in which your own body is the “weight” you are “lifting.”
Duh.
This is the BEST place for anybody – regardless of weight or age – to start their strength training journey.
Why is this the best place to start? Two big reasons:
#1) You always have your body with you (unless you are a ghost, in which case, this is awkward). This means you can work out ANYWHERE with bodyweight training:
#2) Using your body for resistance training is the most “human” thing ever! By learning to push and pull and hang and squat and lunge, you are doing what your body is literally designed to do.
By getting strong with bodyweight movements, you’re making yourself antifragile and less injury-prone.
Now, it’s SCIENCE TIME!
While learning the movements with bodyweight exercises, you are allowing for proper communication to develop between your neuromuscular systems.
More efficient communication between your neuromuscular systems will result in something known as “proper motor unit recruitment.”
You may be asking yourself: what is a motor unit?
That’s okay because I was asking myself this same question.
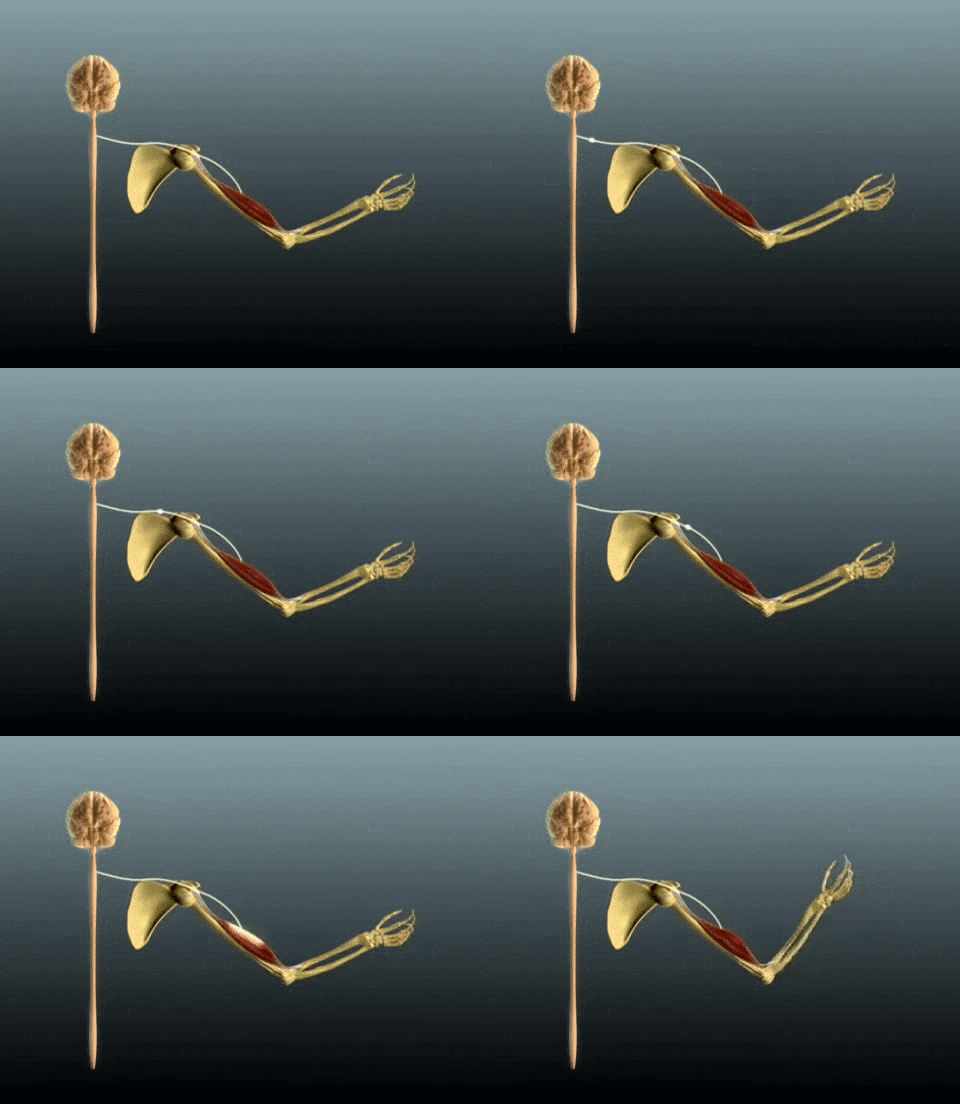
A motor unit is a single motor neuron and the muscle fibers it innervates.
You can think of two different types of motor units:[3]
We all have small motor units, meaning that a single motor neuron innervates relatively few muscle fibers, and these smaller motor units are good for precise and detailed movements (e.g., moving your fingers).
We all also have large motor units, meaning that a single motor neuron innervates hundreds of muscle fibers, and these larger motor units are good for generating a lot of force (e.g., getting larger muscle groups like the quads to generate a lot of force to help in sprinting).
When you start strength training, you really are helping your muscles communicate bettertogether.[4] This is why we recommend starting with bodyweight exercises, to help start this process.
However, bodyweight training isn’t as easy to ‘scale’ the difficulty as some of the other strength training methods (“put more weight on barbell”), but you can get REALLY strong with just bodyweight training.
For example, you can start with knee push-ups, then go to regular push-ups, then elevated push-ups, then even up to things like handstands and handstand push-ups.
You just have to know HOW and WHEN to scale up (we can help there too).
DUMBBELL TRAINING
Dumbbells are a great first step into the world of weight training and strength training:
Most gyms will have dumbbells, even if it’s a basic gym in your apartment complex.
A set of dumbbells doesn’t take up a lot of room, which means you can have a pair at home without a large footprint.
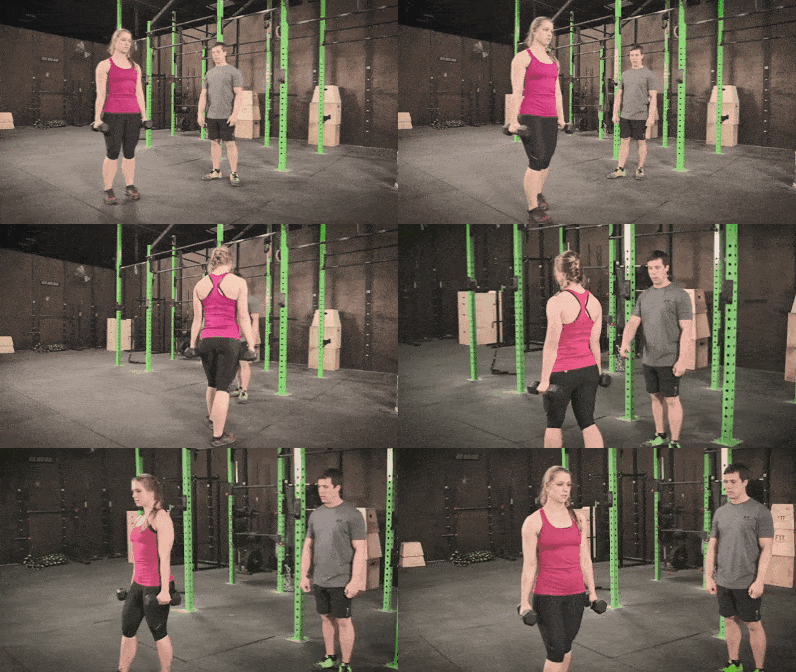
Dumbbells make it easy to add difficulty to a bodyweight movement: holding dumbbells while doing lunges, for example.
Dumbbell exercises can be less intimidating than barbell training for some, and are a step towards barbell training.
Dumbbells have an added stabilization challenge,[4] and will point out muscle imbalances pretty easily (“oh my right arm is stronger than my left arm.”).
Dumbbells allow for single-arm and single-leg exercises to be performed. This can allow you to strengthen any muscle imbalances and can come in handy especially after an injury.
You can scale easily. Once the 10-pound weights become too easy, pick up the 15-pound ones!
KETTLEBELL TRAINING
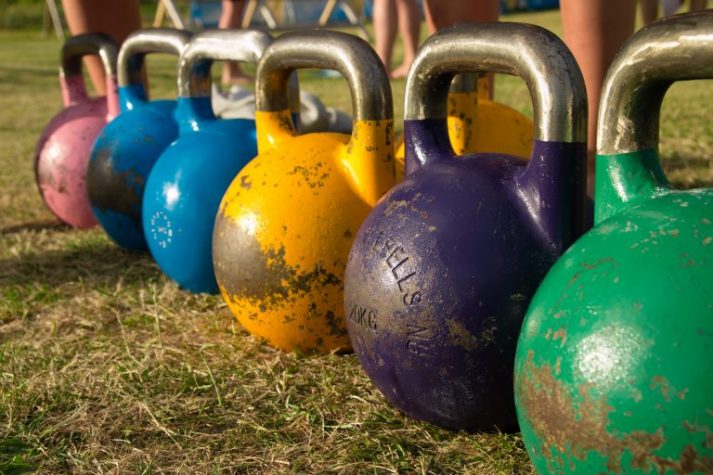
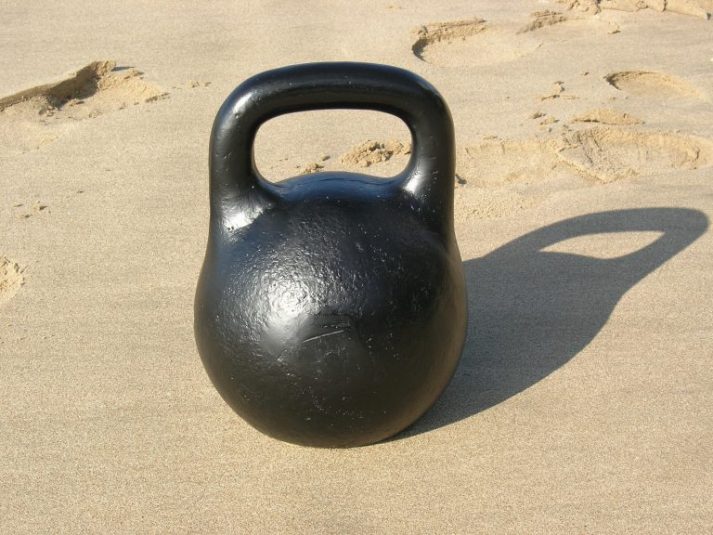
A kettlebell is essentially a cannonball with a handle on it. They come in any weight imaginable, they don’t take up a lot of room, and can be used in dozens of ways for a great compact workout.
Our 20-minute kettlebell workout has 8 simple exercises you can do with just one weight.
Although there are “adjustable kettlebells,” you’ll most likely be working with a single kettlebell, and then adjusting your movements for “progressive overload” (making the workout slightly more difficult each time).
If you are a member at a gym, they’ll probably have multiple kettlebells that you can use to level up.
BARBELL TRAINING
Regardless of sex or gender age, if your goal is to get strong quickly, use 20 seconds of courage and get comfortable training with a barbell (I’ll help you, I promise):
“Progressive overload” is easy – you simply add weights to either side of the bar, allowing you to progressively lift more and more weight each week.
It’s much easier to go heavy safely – especially for lower body movements like the squat and the deadlift.
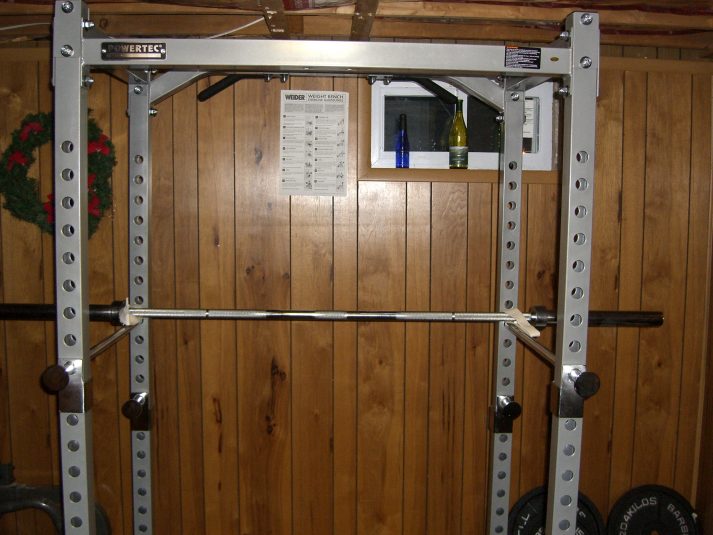
The biggest downside to barbell training is that in order to train at home, you need to have purchased a squat rack, a barbell, a bench, and enough weights for your house or garage (which can be an expensive investment, especially when starting out!).
Not sure which path to pick? You’re not alone – this stuff can be overwhelming. Check out our 1-on-1 Coaching Program. We get to know you and your goals, will check your form via video, and make adjustments based on your progress!
Which Strength Training Program is Right for Me?
So, what’s the best workout program to start as a beginner?
Realistically, it’s the one that you will ACTUALLY do.
Barbell training might be optimal in terms of building pure strength quickly, but if you don’t see yourself getting to the gym regularly – or you’re too self-conscious to enter the free weight section (for now) – no problem!
Conversely, bodyweight training might seem convenient and easy to start now, but if you can’t motivate yourself to work out at home, you might be better off joining a gym.[6]
So let’s get you a workout program!
As we cover in our “How to Find the Perfect Workout Plan (for you)”: MOST beginners will be best served by following a “full-body” or “total body” routine, 2 to 3 times per week, with a day of rest in between each workout.[7]
This full-body workout will have 4-5 big compound movements.
A compound movement is an exercise that recruits LOTS of muscles simultaneously and forces your body to work in unison. These compound exercises are considered multi-joint exercises meaning that they involve more than a single muscle group.[8]
An example would be the barbell squat, which recruits every muscle in your core, butt, and legs to work together to lift the weight.
This is WAY more efficient – and effective at building pure strength – than doing 5 different isolated leg exercises.[9]
Why do 5 exercises when 1 exercise will get you better results in 20% of the time?
To answer your next question, let me tell you about how many sets and reps you should do as a beginner!
Reps in the 1-5 range build super dense muscle and strength.
Reps in the 6-12 range build equal amounts of muscular power, strength, and size.
Reps in the 12+ range primarily build muscular endurance and size and also cardiovascular health.[10]
If you want more, Coach Jim breaks down different set and rep ranges in this video:
Many beginner strength programs will encourage you to keep things simple, doing just 5 sets of 5 reps for each exercise.
Personally, I encourage people to aim for a weight that they can lift for 8-10 reps. This gives you a chance to really work on your form and lift safely!
The max lifts will come later, my friend. You gotta learn to walk before you can run!
If your main goal is to get stronger and/or put on muscle, following a more traditional, pure-strength-style gym workout is going to get you there faster.
TRUTH BOMB: ANY strength training workout will help you reach nearly any goal provided you do two things:
Increase the difficulty of your workouts. This is that “progressive overload” stuff we were talking about earlier. Doing 1 more bodyweight squat, lifting 5 more pounds, or completing your circuit 10 seconds faster than last workout. By forcing your body to constantly adapt, your muscles will never get complacent and have to keep burning extra calories and rebuilding themselves stronger.
Depending on your current situation, and how quickly you’re looking to cut through the “trial and error” and get expert guidance, I might have an interesting solution for you.
We have a pretty killer 1-on-1 Online Coaching Program here at Nerd Fitness. You’ll work with a coach that will build a workout program for your body type and goals, check your form to make sure you’re doing them safety, and even help plan out your nutrition too.
The 5 Best Beginner Strength Training Programs
“Alright Staci, are there any ‘out of the box’ beginner workout programs I can start following now?”
Yup! Let me share with you some of our suggestions:
Here are 5 resistance training workouts you can follow TODAY. Pick the level that you feel most comfortable with, and then level up when you feel ready:
#1) BEGINNER BODYWEIGHT WORKOUT:
Our Beginner Bodyweight Workout has a variety of rep ranges to promote endurance, strength, and cardiovascular health.
Complete one set of each exercise and then moving directly to the next exercise:
Otherwise, you can move onto weight training when you feel comfortable!
#2A) BEGINNER NERD FITNESS DUMBBELL WORKOUT
If you are just getting started with dumbbells and you’re looking for a beginner workout program to follow, this is our Level 3 Gym Workout, “Dumbbell Division”:
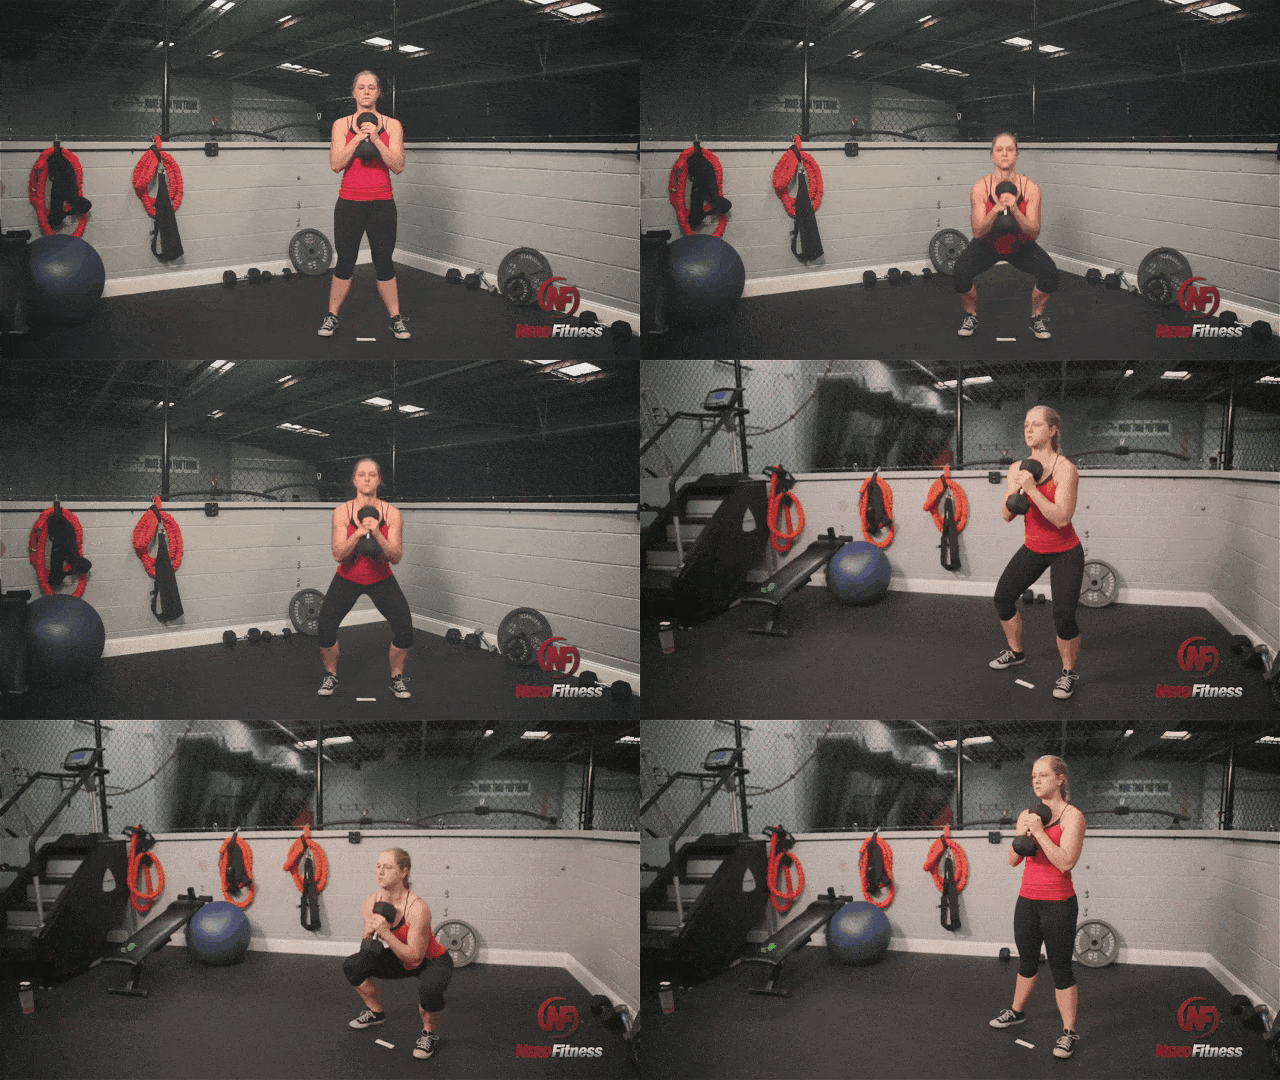
10 goblet squats
10 push-ups
10 dumbbell rows per side
I knew you’d ask, so here is Goblet Squat video explanation (from Nerd Fitness Prime):
So, probably not in a phone booth or a closet or a bathroom stall. But other than that, pretty much anywhere else.
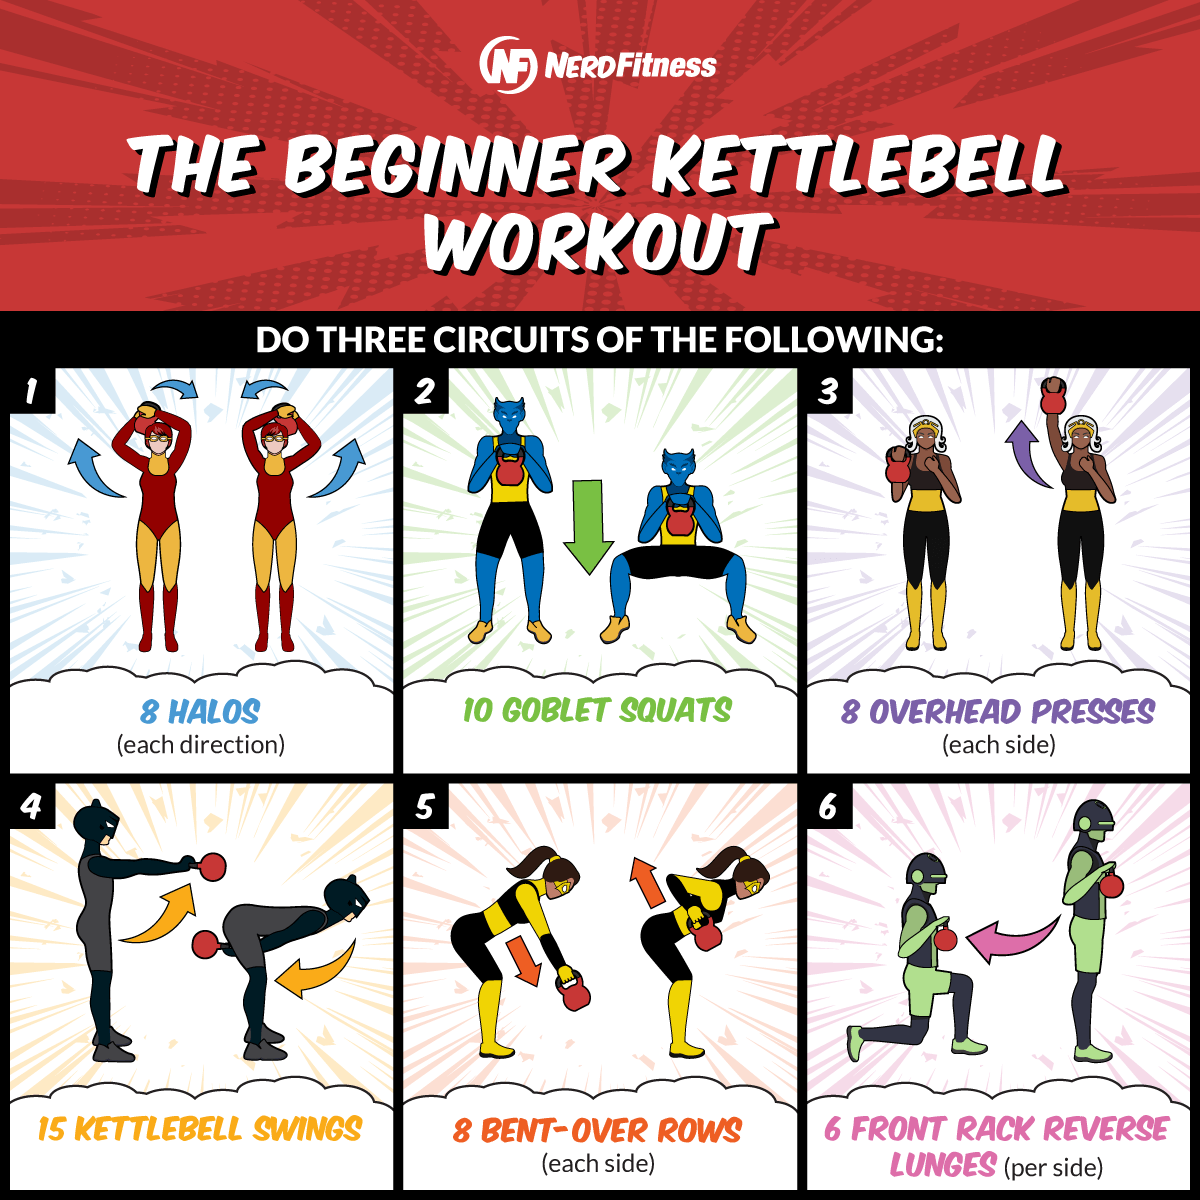
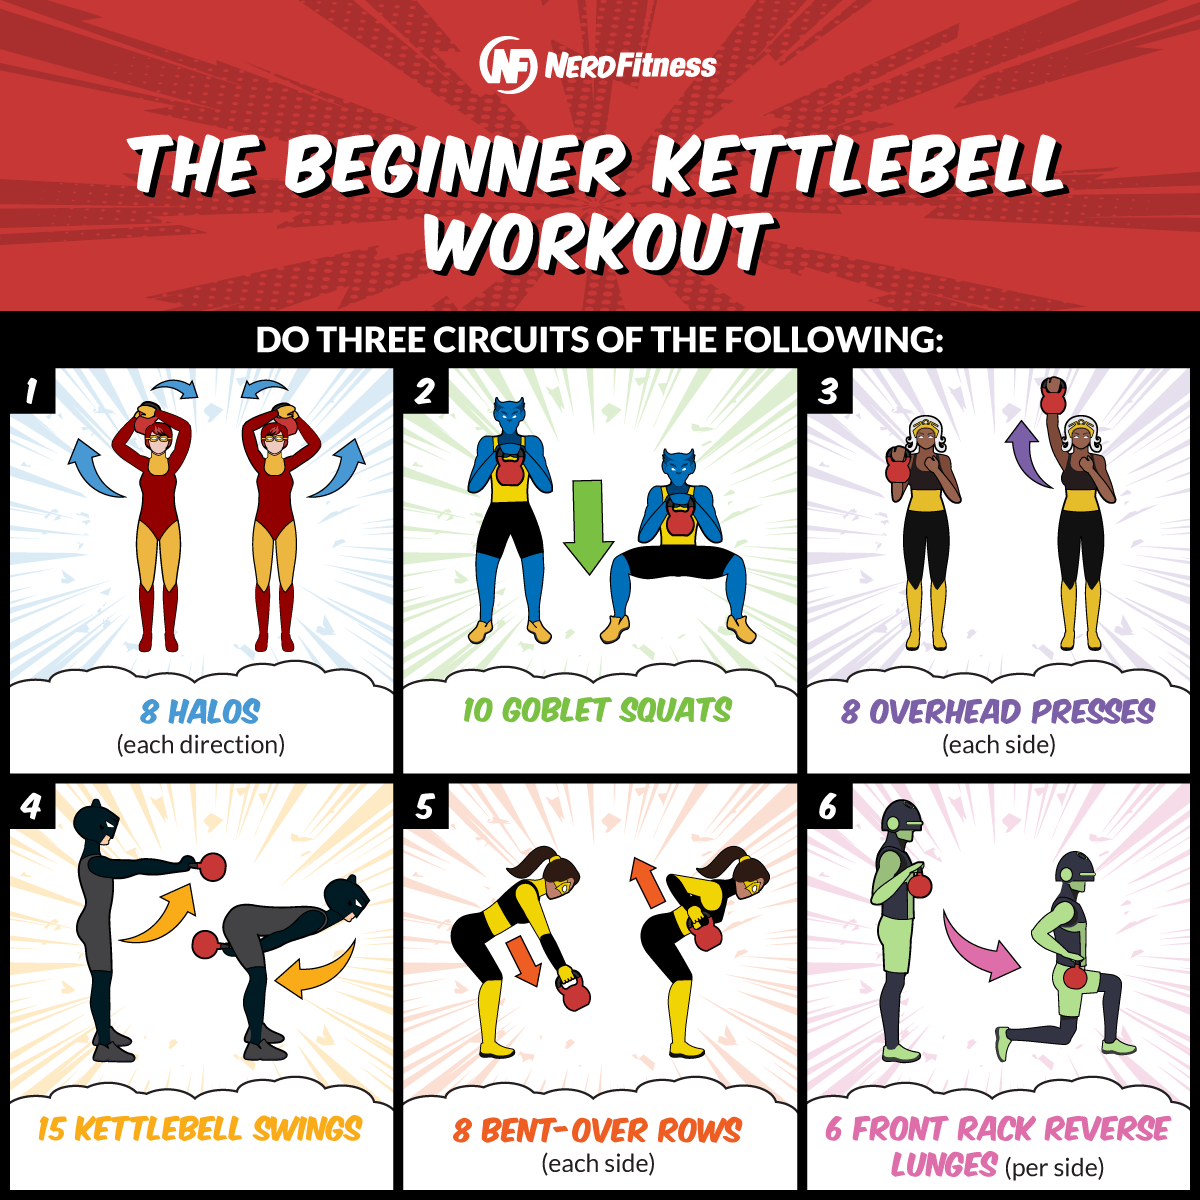
Complete 3 Kettlebell Workout Circuits:
8 Halos (each side)
10 Goblet Squats
8 Overhead Presses (each side)
15 Kettlebell Swings
8 Bent Over Rows (each side)
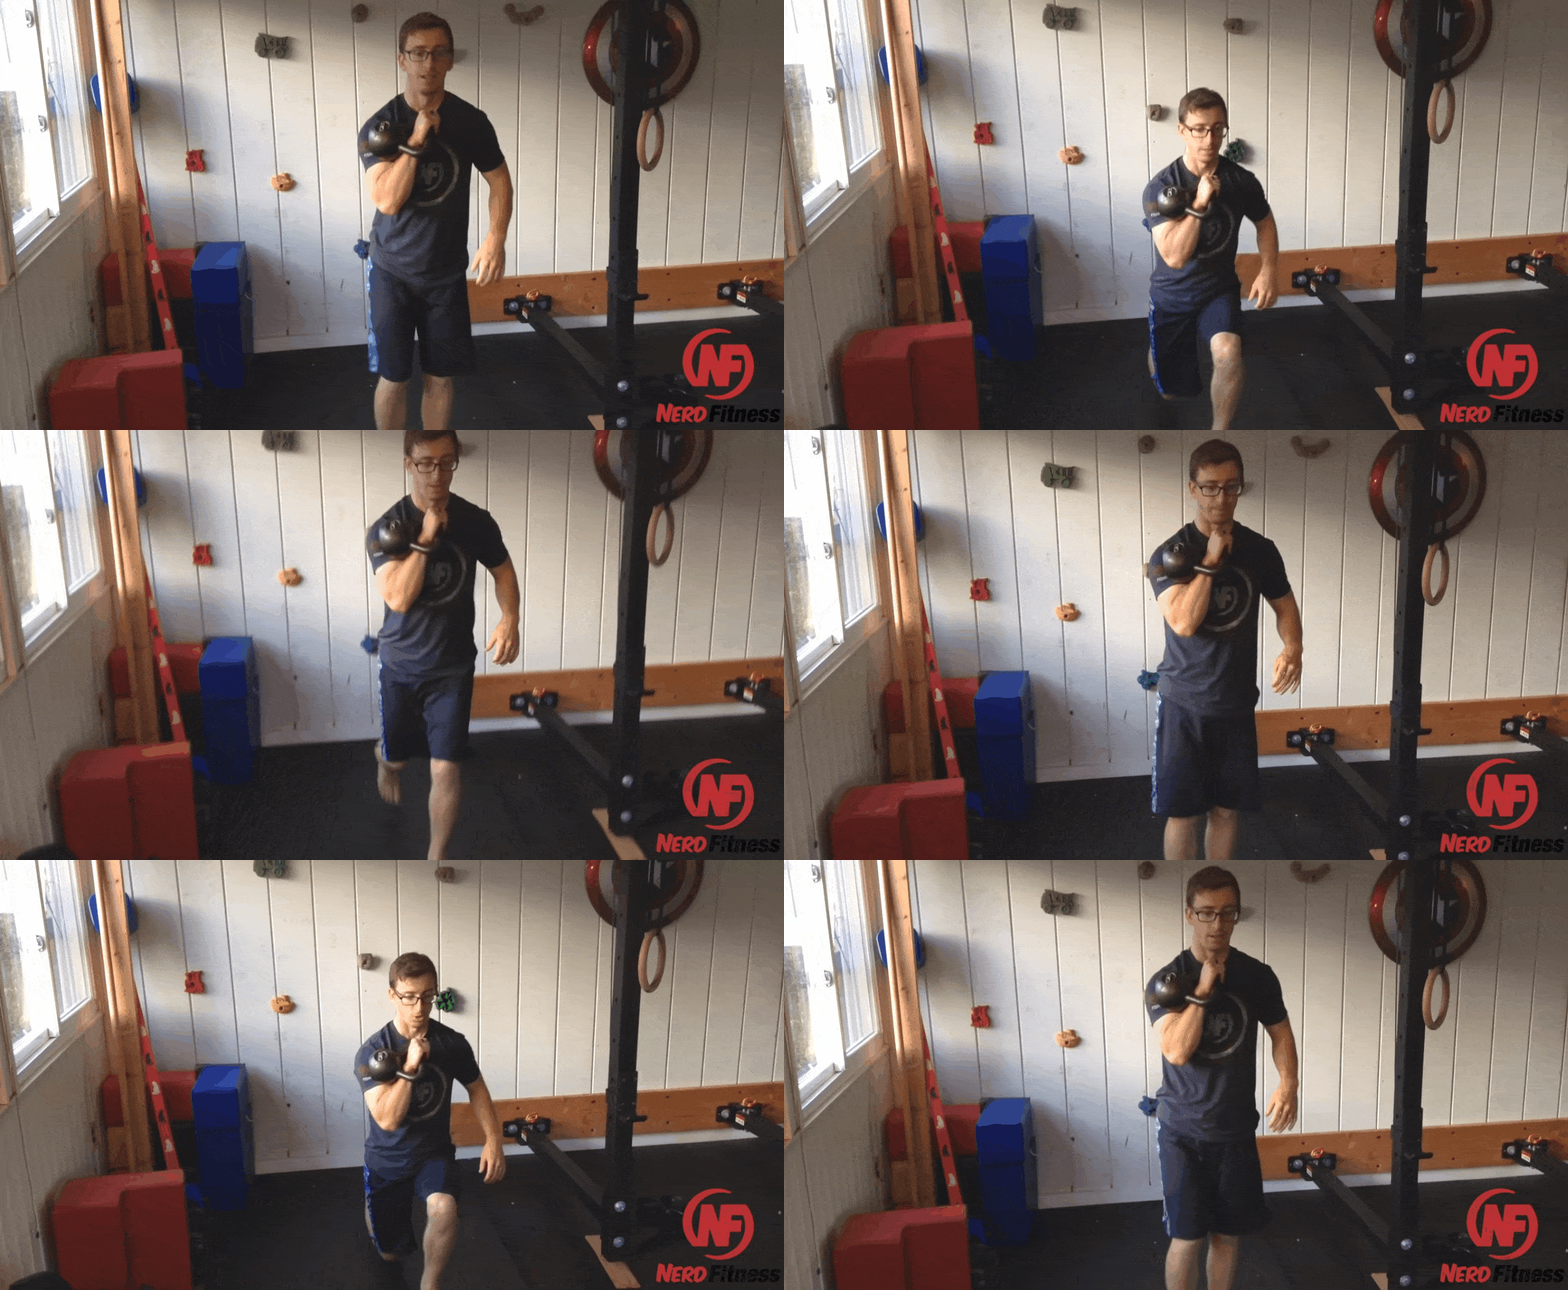
6 Front Rack Reverse Lunge (per side)
#3) BARBELL TRAINING: 2 DAY WORKOUT SPLIT
As we cover in our “How to Train in a Gym” guide (where we take you from “lost sheep” to “barbell badass”), this routine is a much more focused weight training, strength building workout that gets your feet wet with barbell training. Click on ANY exercise to learn how to do it properly.
WHAT ARE SOME OTHER POPULAR STRENGTH TRAINING PROGRAMS?
#1) “Starting Strength” is considered the gold standard beginner barbell weight training program by many. We highly recommend you pick up the actual book if you are serious about barbell training – it’s one of the most important training books you can ever read.
#2) Strong Lifts 5X5:A solid workout program that starts you out very slow, with just the barbell, and helps you master form before you get too heavy. It also keeps things VERY easy with “do 5×5.” Strong Lifts has been around for a long time and is a solid program.
#3) Jim Wendler’s 5/3/1: This program allows you a little more freedom to do exercises that you enjoy, or work on personal weaknesses, because you choose some of the assistance work.
Note: You can modify any of the barbell training programs to be done with dumbbells, if that’s what you have at home!
Lastly, you can always write your own workout plan! I wrote my own workouts for a decade and it taught me a LOT about training and health.
We do have our own 1-on-1 Online Coaching Program where you’ll work with a coach that will build a strength training workout program for your body type and goals, check your form on each exercise via video, and even help you plan out your nutrition too.
The simple to learn but tough to implement answer: lift enough so that you can get through the set, but not too much that you have NO fuel left in the tank at the end.
And then, try to lift sliiiightly more than last time.
Here are two common questions on strength training:
#1) How much weight should I start with?
If you are using dumbbells or a kettlebell, always err on the side of “too light” versus “too heavy.” You want to learn the movement correctly and build correct form.
If you are training with a barbell, ALWAYS start with JUST the bar, no matter the exercise (By the way, a standard barbell weighs 45 pounds).
#2) How fast should I add weight to the bar?
Here’s what we teach all of our coaching clients: add the minimum amount of weight each week you can, even if you THINK you can lift more. It’s better to finish a workout full of momentum and say “I can do more!” than defeated and saying “that was too much, crapola.”
Think of it this way, even if you are adding just 5 pounds per week to the bar, within a year you would be lifting 300+ pounds!
The National Strength and Conditioning Association (NSCA) recommends a similar approach:[14]
For less trained people (i.e., beginners), it is recommended that for upper body exercises you increase the load by 2 – 5 pounds and by 5 – 10 pounds for lower body exercises.
For more trained people (i.e., advanced), it is recommended that for upper body exercises you increase the load by 5 – 10 pounds or more and by 10 – 15 pounds or more for lower body exercises.
So go SLOW. Even slower than the NSCA recommends if needed.
Team NF’s Steve even bought little half-pound weights and increases many of his lifts by just 1 pound per week. It’s a big part of how he transformed (jokingly) from Steve Rogers to Captain America.
And if you are looking for this content in easily digestible form, make sure you download our free Strength 101 Guide when you join the Rebellion below:
Download our comprehensive guideSTRENGTH TRAINING 101!
Everything you need to know about getting strong.
Workout routines for bodyweight AND weight training.
How to find the right gym and train properly in one.
The 9 Best Strength Training Exercises to Learn
If you’re new to all this “strength training” stuff, hopping into a program and going from zero to sixty might be a recipe for failure.
Instead, be patient, and take the time to learn these movements first.
I’m going to share with you the 9 best strength training exercises that every beginner should master (scroll down for full video and explanations!):
1. Push-up: uses every push muscle in your body (chest, shoulders, triceps)
2. Bodyweight squat: uses every muscle in the lower body (quads, hamstrings, glutes, core)
3. Bodyweight row: works every “pull” muscle and helps prepare you for a pull-up!
4. Pull-up or chin-up: the best “pull” exercise in history! Everybody should have a goal to get their first pull-up.
5. Bodyweight dip: advanced “push” movement that targets your push muscles (chest, shoulders, triceps) in a different way than push-ups.
6. Barbell squat: the best bang for your buck on muscle building. recruits nearly every push muscle in your whole body, and great core workout.
7. Barbell deadlift: the favorite exercise of every coach at Nerd Fitness. Uses every “pull,” leg, and core muscle in your body.
8. Barbell benchpress: as basic and powerful as they come. Uses every “push” movement in your upper body and can get you strong as heck!
9. Barbell press: press the bar above your head! Targets shoulders and triceps more than the chest.
All of the exercises listed above are considered functional (closed-chain) exercises. That means they relate to our everyday movements and can be used to predict our success in sports, recreational and occupational activities, and activities of daily living.[15]
When attempting all of these above listed exercises, aim to master the movement and perform the exercise through its entire range of motion (ROM).
Why?
Because it will decrease your risk for injury, activate all of the appropriate muscle groups, and result in greater muscle hypertrophy.[16]
Let’s go over these now.
Click on any of these exercises to get a FULL explanation of the movement, step-by-step:
1) The Push-Up: The best exercise you could ever do for yourself when it comes to using your bodyweight for push muscles (your chest, shoulders, and triceps):
2) The Bodyweight Squat: This exercise serves a dual purpose: it is the foundation for building strength AND helps build proper mobility. If you are going to ever do barbell squats, you need to work on hitting proper depth with a bodyweight squat first!
3) The Inverted Bodyweight Row: Until you can get your first pull-up or chin-up, these exercises are GREAT to start building your pull-muscle strength: your back, biceps, and forearms.
4) The Pull-Up and Chin-Up: Once you can support your bodyweight above the bar, the world becomes your playground. No strength training routine should be without pull-up or chin-up work! (Click here if you can’t do a pull-up or chin-up yet?)
5) The Bodyweight Dip: As you start to get stronger with push-ups and need to find a way to increase the challenge, consider doing dips – warning: these are very advanced, but incredible strength building exercises.
And now we’re into the best weight training exercises:
6) The Barbell Squat: Probably the best exercise when it comes to building strength and muscle throughout your whole body. It also burns crazy calories and makes life better. This is a MUST:
7) The Barbell Deadlift: Maybe the best exercise of all time. Actually no, it IS the best exercise of all time. It’s certainly the most primal: “pick the weight up off the ground. Done.”
This is a very technical lift, so make sure you read our article on how to do it with proper form:
8) The Barbell Press: Press a barbell above your head. This recruits all of the muscles in your chest, shoulders, and arms in order for you to lift the weight over your head.
As a bonus, you need to really flex and brace your core, which gets those muscles working too.
9) The Barbell Bench Press. Lie on a bench, and lower a barbell until it almost touches your chest. Pause, and press it back up towards the sky. Repeat! And get strong.
NOTE: All exercises were explained according to the guidelines that have been established by the NSCA.[17]
Your mission, should you choose to accept it: commit to trying ONE of these movements in the next week. Use 20 seconds of courage, recruit a friend who has lifted or trained before, and try your best.
And if you want somebody to help you put these into a workout program, teach you HOW to do these movements properly, and have the confidence to know you’re training correctly for your goals…
How to Know You’re Doing a Strength Training Movement Properly (Form Checks)
Always start out with just your body’s weight and make sure your movement is correct!
If it’s a barbell movement, use a broomstick (or PVC Pipe).
If it’s a dumbbell movement, use two sections of PVC or something else that is light and small to simulate a dumbbell.
When it comes to movements like squats, deadlifts, pull-ups, bench press, your form is crucial. Develop good habits with lightweight and you will save yourself months of frustration later and will protect you from injury.[18]
If you’re struggling with certain elements of a movement, don’t get frustrated! Remember, proper communication between your neuromuscular systems needs to develop.
Do regular video form checks! Record yourself and watch the video.
Alternatively, an expert reviewing your specific movement can be invaluable.
If you’re looking for someone who can do video form checks, provide feedback, and adjust your workouts based on your progress, you can check out our 1-on-1 Online Personal Training!
I’ve had an online coach for 4 years and it’s changed my life.
You could also get expert guidance in person: Look around at your local strength and conditioning gyms and see if you could hire a coach (here’s how to find a good personal trainer) for one or two sessions just to go over the basic movements.
If you can’t do either of those two options, no big deal! Videotape yourself and compare it to the videos here in the articles. You can also post your video to the form check section of the Nerd Fitness Forums.
When I started, I really liked practicing all of the movements at home because I could watch a video online at the same time as I was watching myself do it in a mirror. Studies have found this can actually help![20]
Not only that, but you can find study after study after study that shows you the benefits of strength training for weight management when combined with “calorie restriction.”[22]
As we cover in our “Why Can’t I Lose Weight?” article, here’s why eating a caloric deficit and strength training is SO magical when combined:
When you strength train – by picking up something heavy – your muscles are “broken down” during the exercise itself, and then they rebuild themselves stronger over the next 24-48 hours.
Guess what happens during those 24-48 hours?
Your body will divert as many calories consumed as necessary to “Rebuild Muscle!”[23]
It also diverts additional calories to “Burn as Fuel” to handle this increased “muscle rebuilding” activity.
This means two amazing things:
Your metabolism is revved up for this time period, burning more calories than normal.
Rebuilding muscle is a calorie-taxing activity!
Not only that, but when you eat a caloric deficit, your body doesn’t have enough calories to fuel all the day’s activities. In these instances, your body will pull from your stored fat to make sure all the work still gets done.
This is the trifecta of physical transformation victory:
You get stronger and keep the muscle you have.
You burn through the fat you’re trying to get rid of.
You’re decreasing your body fat percent and keeping your muscle = look good naked.
In other words, strength training + eating right is the BEST path for weight loss out there! And yes, in certain situations, you can actually lose weight AND build muscle at the same time.
Coach Matt explains how to gain muscle WHILE losing fat in this video:
So how do you put this into practice? Pick one of the strength workouts in this article. Calculate your daily caloric needs. Learn about healthy eating. And start.
These are the types of things we work on with our 1-on-1 Coaching Clients: helping them lift weights confidently and eat correctly for their goals! Let us help you:
“Just Tell Me What Strength Training Program to Follow!”
Okay! Unless you are collecting underpants, you should now have a workout program you want to try out!
“Staci, this is a lot, can you just TELL me what to do?”
Okay fine.
Here are the steps again for you:
STEP #1: PICK YOUR WORKOUT PATH:
A) If YOU ARE TRAINING AT HOME. Pick one of these 3 based on what equipment you have:
STEP #2: TRY A NEW EXERCISE: In addition to following a workout program, I’m gonna push outside of your comfort zone – that’s where real growth happens.
STEP #3) HIRE A YODA: If you are somebody that just wants to be told exactly what to, how to train for your goals, and are good at following direction, consider hiring a coach.
I’ve been working with an online coach since 2014 and it has changed my life – and I do this stuff for a living!
STEP #4) JOIN THE REBELLION! If you like how we do things around here at Nerd Fitness, we’d love to have you in our community of misfits, mutants, and rebels!
Sign up in the box below and I’ll send you our free Strength 101 guide:
Download our comprehensive guideSTRENGTH TRAINING 101!
Everything you need to know about getting strong.
Workout routines for bodyweight AND weight training.
How to find the right gym and train properly in one.
No matter what you do today:
Don’t be afraid of doing anything wrong – truth be told, the majority of the people in the gym don’t have any idea what they are doing, and are just as nervous as you are!
Muster up your 20 seconds of courage if you need to, and let me know in the comments how it goes!
What questions do you have about getting started?
So, what’s the biggest thing holding you back from starting strength training?
-Staci
PS – Check out the rest of the articles in our Strength Training 101 series:
Powers SK, Howley ET. (2011). Exercise physiology: Theory and application to fitness and performance. New York: McGraw-Hill Humanities/Social Sciences/Languages.
in order to achieve your training goals or to see improvements, your training must gradually and constantly increase. (Haff G, Triplett NT. (2016). Essentials of strength training and conditioning. Fourth edition. Champaign, IL: Human Kinetics.)
When you first start strength training, your motor units don’t fire as quickly and smaller motor units that don’t generate a lot of force are recruited. This results in poor technique, you not being able to lift a lot of weight, and an increased risk for injury. However, as you continue working out and become more trained, your motor units fire more rapidly and your brain recruits larger motor units that results in improved technique, greater force generation allowing you to lift heavier weights, and a decreased risk for injury.
This study found that when the chest press exercise required higher stability requirements (dumbbells), it resulted in similar pectoralis major and anterior deltoid activation, lower triceps brachii activation, and higher biceps brachii muscle activity. These findings show that different modes of strength training will result in different patterns of muscle activation, with free weight modes (barbell and dumbbells) having more muscle activation than machine (Smith machine)
As you may recall, this will initially allow you to learn the movements and also allow for proper communication to develop between your neuromuscular systems.
Or maybe grab a friend. Research has shown that exercising with a partner has the potential to increase exercise motivation, adherence, intensity, and/or duration.
The American College of Sports Medicine (ACSM) simply recommends that a strength training program should be performed a minimum of two non-consecutive days each week, with 2 to 4 sets of 8 to 12 repetitions for healthy adults or 10 to 15 repetitions for older and frail individuals. Eight to 10 exercises should be performed that target the major muscle groups.
Haff G, Triplett NT. (2016). Essentials of strength training and conditioning. Fourth edition. Champaign, IL: Human Kinetics.
To be fair, both compound (closed-kinetic chain) and isolation (open-kinetic chain) exercises all have their time and place. Isolation exercises are better served to target muscle imbalances and to reverse the effects of muscle atrophy after sustaining an injury or having a surgical procedure.
For reference, the National Strength and Conditioning Association (NSCA) recommends 6-12 reps for 3-6 sets for muscle hypertrophy and more than 12 reps for 2-3 sets for muscular endurance.
Circuit training results in a higher excess post-exercise oxygen consumption (EPOC) resulting in great caloric expenditure when compared to traditional strength training with longer rest intervals in-between sets and exercises.
As we touch on in other articles, the two main drivers of muscle protein synthesis (i.e., muscle hypertrophy) are strength training and ingestion of protein.
We also recommend trying to minimize the rest interval in-between each exercise as much as possible. Why? As mentioned earlier in this article, circuit training results in a higher excess post-exercise oxygen consumption (EPOC) resulting in great caloric expenditure (decrease fat mass and increase fat-free mass) when compared to traditional strength training with longer rest intervals in-between sets and exercise.
Haff G, Triplett NT. (2016). Essentials of strength training and conditioning. Fourth edition. Champaign, IL: Human Kinetics.
Haff G, Triplett NT. (2016). Essentials of strength training and conditioning. Fourth edition. Champaign, IL: Human Kinetics.
Performing an exercise through its full ROM relates to the length-tension relationship, which states that muscles should be stretched to 100-130% of its resting length. The importance of stretching a muscle to 100-130% of its resting length is to ensure maximal cross-bridge interaction between actin and myosin. When one has maximal cross-bridge interaction that will result in more force being produced by the muscle and eventually greater improvements in muscle hypertrophy. Some examples of stretching muscles to 100-130% of its resting length include when the barbell touches the chest during the bench press exercise or when your thighs are parallel to the floor during the descent phase of the squat. Additionally, it is also recommended to perform the appropriate sequence of exercises to decrease your risk for injury (e.g., large before small muscle group exercises, multiple-joint exercises before single-joint exercises, and higher-intensity before lower-intensity exercises). Performing exercises in this sequence will ensure that the higher-intensity exercises will be performed with minimal muscle fatigue.
Haff G, Triplett NT. (2016). Essentials of strength training and conditioning. Fourth edition. Champaign, IL: Human Kinetics.
Both research investigations and clinical experiences have indicated that strength training is safe for healthy adults and older adults, frail older adults, and individuals with disorders and/or diseases. Cases of injuries associated with strength training have been found to be related to heavy and repetitive workload, unfavorable positioning or incorrect technique, and exercise selection.
Also keep in mind how you are practicing and learning the exercise. You can learn exercises by utilizing the whole method of practice, in which the whole technique is practiced intact. Or you can utilize the part method (AKA the whole-part-whole method). With this method, you practice the exercise in parts, and then recombine the parts back into the whole technique. The whole method is best used for simple movements (e.g., biceps curl), while the part method is best used for more complex lifts (e.g., power clean).
Observing the performance of another who is successful at performing a certain exercise is known as a vicarious experience. It has been found that vicarious experiences can enhance self-efficacy (i.e., belief in your own abilities) when observing successful performances.
More specifically, you want to seek a calorie deficit (hypocaloric diet) and this can best be established by subtracting 250-500 less kcal/day from what you normally consume. Additionally, you want to make sure you are still consuming adequate amounts of protein (1.2-1.6 g/kg bodyweight spread evenly throughout the day) to be protective of lean mass loss. Finally, carbohydrates and fat may be reduced from your normal intake to satisfy the needed caloric deficit at the expense of protein. However, make sure you are still consuming enough carbohydrate to maintain exercise performance and not cause a hypoglycemic response.
Like this study and this study and this one. Another research investigation found that during a 40% calorie deficit diet, consumption of a diet containing 2.4 g/kg/day of protein was more effective than consumption of a diet containing 1.2 g/kg/day of protein in promoting increases in muscle mass and losses of fat mass when combined with a high volume of resistance and anaerobic exercise (exercise 6 times per week [2 sessions of resistance training, 1 session of plyometric training, and 3 sessions of HIIT cycling]).
ATP is needed to power the synthesis of proteins that are used for muscle hypertrophy and a higher amount of oxygen is needed post-exercise to produce ATP. This results in two things: muscle hypertrophy happening and additional caloric expenditure. Additionally, without sufficient oxygen, our bodies have the potential to activate proteins that increase muscle fiber degradation and limit hypertrophy.
If you’ve ever asked yourself “Am I doing too little or too many reps and sets?” then this guide is for you.
This article is part of our Strength 101 series, and we’ll show you exactly how to determine the number of repetitions and sets for specific exercises, so you can build your own workout routine.
It sounds easy, but depending on your goals, the answer to “How many reps and sets should I do?” can vary greatly.
We work hand-in-hand with our Online Coaching Clients to create the correct workout program that suits their goals, needs, and available equipment
In today’s guide on workout programing, we’ll cover (click each to get right to that answer):
As Coach Jim mentions above, “Rep” stands for “repetition” and defines one complete motion of an exercise.
And one “set” is a consecutive number of reps without stopping.
And one “smorgasbord” is a buffet of food.
(This has nothing to do with this article, but it’s a fun word to say.)
As we mentioned throughout our Strength Training 101 series, how many reps and sets you should do is really going to be dependent on your goals.
For example, is your goal to improve:
Muscular endurance
Muscular hypertrophy
Muscular strength
Muscular power
Depending on what your goal is, the sets, reps, and rest intervals will change.
Oh, you’re just starting your strength training journey?
Well, make sure you grab our free guide, Strength Training 101: Everything You Need to Know. I’ll send it to you for free when you join the Rebellion (that’s us!).
Download our comprehensive guideSTRENGTH TRAINING 101!
Everything you need to know about getting strong.
Workout routines for bodyweight AND weight training.
How to find the right gym and train properly in one.
Alright, let’s break down reps and sets for you, because I can see you still have questions.
How Many Reps Should I Do?
Remember, “Rep” stands for “repetition” and is more or less one complete exercise.
Like a push-up:
So “2 sets of 5 reps of push-ups” means, “5 consecutive push-ups, a rest, then another 5 consecutive push-ups.”
Cool?
Cool.
When deciding on how many sets and reps to do, it begins by asking“What am I trying to get out of this workout?!“
We’ll group different rep ranges into different goals, for:
Muscular endurance
Muscle size
Overall strength
I’m going to share with you the commonly accepted answers, but they ALL come with a HUGE caveat that I’ll share at the end of this article.
I’m going to start with the “widely accepted numbers here.”
Let’s chat about the following:
1) MUSCULAR ENDURANCE (long-lasting muscle) – Endurance means encouraging and training your muscles to perform for an extended period of time. This means doing a LOT of repetitions.
People targeting muscular endurance will aim for a range from 12 to 20+ reps.
Obviously, you won’t be able to lift heavy amounts of weight for 20+ reps, so you’ll be lifting lighter loads.
Also, because you’re targeting endurance improvements, you want to decrease the amount of rest between sets: 30 seconds to a minute.[1]
If you are a runner or cyclist, strength training with higher repetitions can help your muscles develop more endurance as well![2]
Reps for increased muscular endurance: 12+
2) MUSCLE SIZE (“sarcoplasmic hypertrophy”) – This is for guys or gals looking to build larger muscles.
The scientific term here is “sarcoplasmic hypertrophy,” as it focuses on increasing the amount of sarcoplasm, the non-contractile fluid found in your muscle.
Up to 30% of your muscle’s size is attributed to the sarcoplasm, so focusing on this type of hypertrophy helps build overall size (i.e., increased cross-sectional area of the muscle).
3) STRENGTH AND POWER (“myofibril hypertrophy”) – If you’re training for specific sports and just want to get stronger with more power – but not necessarily get bigger, this is the strategy for you.
This type of training focuses on strengthening the myofibril, the contractile part of the muscle, hence the name “myofibril hypertrophy.”
For this, target reps in the 1-5 range. And yep, that means you’re going to be picking up heavy weights, focusing all that concentrated effort into just one or a few reps.[4]
Something to note when lifting for strength and power: not only are you shocking your muscles, but you’re also putting a lot of pressure on your body’s central nervous system (CNS).
So what does this mean?
In a way, it means your body’s ability to communicate with its muscles has grown fatigued, and performance may suffer.
That’s why you may want to rest between 2-5 minutes in this range.
Oh, and your CNS will adapt and become stronger, which will be critical for building strength and power.[5]
Since powerlifting really taxes the central nervous system, you may be waiting 3-5 minutes between sets when training in this fashion.
TO RECAP, these are the rep ranges you should be considering:
Reps in the 1-5 range build super dense muscle and strength.
Reps in the 6-12 range build equal amounts of muscular power, strength, and size.
Reps in the 12+ range primarily build muscular endurance and size and also cardiovascular health.
I realize this is a lot to figure out, so if you are somebody – like me – who just wants to be told what to do and outsource all the worry of “am I doing the right workout for my goals?” I got you covered!
I’d love to learn your story, and then build a custom program that fits your goals. We’ll help you with your nutrition, your workouts, and even check in regularly to keep you accountable!
How Many Sets Should I Do?
As explained above, a “set” describes a group of repetitions performed for an exercise without stopping.
For example, if you do 10 squats right now, you just did 1 SET of 10 reps of squats.
So let’s talk about the “correct” number of sets per exercise.
The simple answer: “Do 3-5 work sets of a given exercise.”[6]
Just make sure you’re not compromising your form.
At least he’s trying!
The National Strength and Conditioning Association (NSCA) will break this down, suggesting the following set ranges:[7]
2-3 will help build muscular endurance (12 to 20+ reps)
3-6 build muscular hypertrophy (6 to 12 reps)
3-5 build muscular power (3 to 5 reps)
2-6 build muscular strength (less than 6 reps)
“STEVE, JUST TELL ME WHAT TO DO.”
FINE! Pick a weight that feels light to you, and then do 3 sets of 10 reps.
If you’re not sure if “3 sets of 10” or “5 sets of 5” is right for you, we got you covered.
We’ll build a program that fits your goals, and then adjust it each month based on your progress. Never guess or wonder what you should be doing again.
How to Build a Workout Routine!
Now that you have “edumacated” yourself on how your specific goals influence the number of reps per set, and what sets actually are, you can build your workout program around this info.
TO RECAP, aim for 3-5 sets in the following rep rangers per exercise based on your goals:
Endurance: 12+ reps per set.
Hypertrophy (bigger muscles): 6-12 reps per set.
Strength (dense, powerful muscle): 1-5 reps per set.
Two points worth mentioning:
A recent study showed that heavier weight for low reps created more muscle mass than a higher volume (lower weight for more reps).[8]
Studies show that bodyweight training exercises can build muscle, but require a LARGE number of sets per rep, and pushing oneself to absolute failure.[9]
What this means: studies suggest targeting heavier weight with fewer reps for big lifts like squats and deadlifts to build muscle, while targeting high reps to absolute failure with bodyweight exercises for muscle building.
Just remember to rest enough between sets so you don’t fatigue your central nervous system too bad.[10]
One last point: Nutrition is still 90% of the equation!
Your rep range doesn’t matter nearly as much as you think, so don’t overthunk it!
It doesn’t matter if you train like a bodybuilder, you ALSO need to eat enough food to provide your muscles with enough calories to rebuild themselves bigger and stronger! This is the biggest mistake I see skinny people make when trying to bulk.
This brings me to my final point: because nutrition is 90% of the equation, your sets and reps don’t matter nearly as much as you think they do!
All that matters? Doing MORE this workout than the last workout.
Remember, how you build muscle and strength and burn fat: “progressive overload.”
One more rep than last time.
Doing one more set than last time.
Picking up a weight that’s 5 lbs. heavier than last week.
So get out of your own head, and START TODAY:
1) GET HELP: If you want expert guidance and accountability so you don’t have to figure out all of this stuff on your own, I got you.
Click the red button below to get the details about our amazing online coaching program:
2) FIGURING IT OUT OUT ON YOUR OWN!
Download our free Strength Training 101 Guide! You get it free when you join our Rebellion (the name of our awesome free online community). Sign up in the box below:
Download our comprehensive guideSTRENGTH TRAINING 101!
Everything you need to know about getting strong.
Workout routines for bodyweight AND weight training.
How to find the right gym and train properly in one.
BRAND new to any training? Start with this bodyweight routine, and aim for 3 sets of 10. Work on your form!
Remember: the goal should be to get stronger each workout.
Write down what you did last time, and then do MORE this time.
By continually challenging your muscles to do more, they’ll have to adapt by getting bigger, stronger, burning more calories, etc.
There’s a lot of different truths and fallacies on plateaus and how your muscles can get “used” to working out and stop growing.
If that’s something you’re battling, here’s a way to continue making progress:
Spend a week in a different rep range with different amounts of weight.
This will introduce a little chaos into the system, which could be a good thing…unless you’re Batman.
What we’re talking about is muscle confusion theory, which is a preplanned period of variation.[13] Not, you know, wandering into the gym with no plan and just doing something different every time (whatever you feel like doing at that moment).
That won’t help.
But spend a week deliberating mixing it up. Then go back to your regularly scheduled routine and you’ll be right back on track.
Make sure you know what you want, and then design a plan to get there.
-Steve
PS: If you want a nice shiny app to tell you EXACTLY how many seps and reps to do, our shiny new app will do just that!
You can sign-up for a free 7-day trial to Nerd Fitness Journey, which will build a workout around your experience level!
More specifically, the National Strength and Conditioning Association (NSCA) recommends executing more than 12 reps and having a rest interval in-between sets of 30-seconds or less for muscular endurance. Additionally, you want to focus on a load of 67% or less of your one-rep max (1RM). For example, if you squat 225 pounds for 1 rep, then 67% of that is ~150 pounds. (Haff G, Triplett NT. (2016). Essentials of strength training and conditioning. Fourth edition. Champaign, IL: Human Kinetics)
In one of the earliest studies examining the effects of concurrent strength and endurance training, Hickson and colleagues demonstrated that moderately trained runners and cyclists had improvements in treadmill running (13% improvement) and ergometer biking (11% improvement) to exhaustion at maximal work rates. In a more recent investigation by Aagaard and colleagues, highly trained national team cyclists improved their average power output and total distance covered in a 45-minute cycling test (8% improvement). Strength training has been reported to increase musculotendinous unit stiffness his results in an enhanced ability to store elastic energy during eccentric muscle actions (i.e., muscle lengthening), which in turn increases concentric muscle force (i.e., muscle shortening). This is thought to be one of the reasons why improvements in running economy, cycling economy, and cross-country skiing economy have been observed after a period of combined strength and endurance training.
More specifically, the NSCA recommends executing 6-12 reps and having a rest interval in-between sets of 30-seconds to 1.5-minutes for muscular hypertrophy. Additionally, you want to focus on a load of 67-85% of your one-rep max or 1RM. (Haff G, Triplett NT. (2016). Essentials of strength training and conditioning. Fourth edition. Champaign, IL: Human Kinetics).
Again, we can provide some specifics from the NSCA. They recommend executing 6 or less reps and having a rest interval in-between sets of 2-5 minutes for muscular strength. Additionally, you want to focus on a load of 85% or more of your one-rep max (1RM). The NSCA also recommends executing 3-5 reps and having a rest interval in-between sets of 2-5 minutes for muscular power (multiple-effort event). Additionally, you want to focus on a load of 75-85% of your one-rep max (1RM).
If you’re interested, check out this article from Science Daily on the role the central nervous system plays in strength training.
A work set just means a set where you’re training with your heaviest weight. This doesn’t include any warm-up sets.
Haff G, Triplett NT. (2016). Essentials of strength training and conditioning. Fourth edition. Champaign, IL: Human Kinetics.
The effect of training volume and intensity on improvements in muscular strength and size in resistance-trained men: study
Effects of Low- vs. High-Load Resistance Training on Muscle Strength and Hypertrophy in Well-Trained Men: analysis
Other ways to mitigate wearing down your CNS include prioritizing the most important exercises by placing them first in a workout, use moderate-to-heavy loads, since these involve performing fewer total reps to achieve the hypertrophic stimulus, and be aware that adding extra volume of work (e.g., adding extra exercises, sets, and/or reps) to a workout may not necessarily produce superior effects, and dividing a single workout into more frequent workouts over the week may sometimes lead to better results.
To gain muscle mass it is recommended that you seek a calorie surplus (i.e., hypercaloric diet). This can be achieved by consuming an additional 250-500 kcal/day or 10-20% above your typical diet. You may also need to increase your protein intake to 1.6-2.2 g/kg of bodyweight spread evenly throughout the day. And finally, carbohydrates should be the focus of the remaining calorie surplus demands when considering fat intake levels should remain at 20-35% of kcals. This will result in a realistic gain in lean muscle mass of about 0.5 pounds per week.
If you’re trying to lose weight it is recommended that you seek a calorie deficit by consuming 250-500 less kcal/day or 10-20% below your typical calorie intake. Your protein intake should be 1.2-1.6 g/kg of bodyweight spread evenly throughout the day. And finally, carbohydrates and fat should be reduced from baseline to satisfy the needed caloric deficit at the expense of protein. However, enough carbohydrate should still be consumed to maintain performance because carbohydrates (muscle and liver glycogen) are the primary energy sources for higher-intensity exercise. This will result in a realistic weight loss goal of 1-2 pounds per week.
Numerous studies published in various exercise science, sports conditioning, and physiology journals have found that the pre-planned variation of acute program variables (changes in exercises, sets, reps, rest intervals, percent 1RM) is more effective at producing strength and lean body mass improvements than non-periodized programs.
However, as I mentioned in the intro, you’ll often hear that losing fat while gaining muscle is impossible. The argument goes that you should just focus on one or the other, because doing both at once is destined to fail.
Let’s explore this claim.
Losing Fat and Gaining Muscle at the Same Time (The Controversy)
To understand why losing fat while gaining muscle can be problematic, we need to explore both processes.
To gain muscle, your body needs to be in a caloric surplus. This surplus provides the energy your body requires to repair and build bigger muscles.
Given this, losing fat (caloric deficit) at the same time one is gaining muscle (caloric surplus) seems impossible.
However, if we go a few steps deeper into the science, it IS possible!
To appreciate the nuance here, let’s get into some specifics on losing fat and gaining muscle separately, and then we’ll combine them.
HOW DO YOU LOSE FAT?
There is a simple answer and a slightly less simple answer when it comes to losing body fat.
The simple answer: “consume fewer calories than you expend or burn.”[1]
Eight words, and one or two of those could probably be thrown out.
When your body needs more calories than the amount you are eating, you are in a “caloric deficit.” Your body doesn’t have the calories it needs as fuel, so it’ll start breaking down parts of itself for its energy requirements.
The hope is that your body will mostly pull from fat stores, though depending on how you are training it will also break down muscle too.[2]
Said again: when you are eating a caloric deficit, your body will pull from both its fat stores AND existing muscle for energy.
From a physique and health standpoint, obviously we’d prefer that your body doesn’t break down muscle when in a caloric deficit, and instead really focuses on using fat stores instead.[3]
I make this point for a reason: your goal in fitness shouldn’t only be “weight loss,” despite the common vernacular used.
Who cares what the scale says, right?
The goal instead is to reduce body fat while also keeping the muscle you have (or even building more muscle).
That leads to a better physique and a healthier body.
This is why there is a big market for devices that supposedly assess your body fat percentage.
By reducing your total fat on your body, OR increasing muscle mass, you’ll end up with a lower body fat percentage (it’s just a simple ratio of fat to everything else).
And lower body fat percentages are where “toned arms” and “6-pack abs” hang out.
We’ll discuss tips on keeping and growing your muscle while in a calorie deficit later in this guide. For now, remember you need fewer calories “in” compared to calories “out” for weight loss to occur, from either fat stores or muscle.
You may be asking, “Steve, what’s easier to do? Burn more calories or consume less?”
Good question.
Numbers will help tell the story: though this is a gross oversimplification – let’s use the ‘widely accepted’ starting point of “3,500 calories equals roughly one pound of fat.”[4]
If you want to lose one pound – or half a kilogram – of body fat in a week (a worthy, sustainable goal for some), you need to create a caloric deficit of 500 calories per day.
Your options to create this caloric deficit include:
Consuming 500 fewer calories
Burning 500 more calories
A combination of the two
Which is easier?
Here are both halves of that equation. 500 calories equals:
The number of calories found in a Big Gulp of Mountain Dew.
When it comes to maintaining a caloric deficit, it really comes down to diet.
It’s significantly more effective and time-efficient to consume 500 fewer calories than it is to burn 500 additional calories.
As Time magazine controversially pointed out – with tons of cited studies – “exercise alone won’t make you thin.” It’s too easy to add more calories in, and requires too much work to effectively influence “calories out.”
This brings us to our slightly less simple answer on getting in shape:
To lose body fat, you need to watch what you eat, and do so in a sustainable way.
Here at Nerd Fitness, we are firm believers that 80-90% of the fat-loss equation comes down to diet (check out Rule # 4).
Here’s another idea we focus on: EAT MOSTLY UNPROCESSED FOOD.[5]
Meat, fish, eggs, vegetables, fruits, nuts are all great examples.
These foods are very nutrient-dense and often low in calories compared to their processed counterparts. Which means you get filled up without overeating.
Win-win-win.
Have you ever seen the difference between 200 calories of broccoli and 200 calories of a bagel? WiseGEEK does a great job of displaying this, so we’ll borrow a couple of their photos.
200 calories of broccoli:
200 calories of a bagel:
That’s why REAL food is the answer to creating a sustainable caloric deficit.
Most people can eat an entire bagel, no problem. Plates of broccoli, with all of the fiber, are much tougher to overeat.
We lay it all out in our Beginner’s Guide to Healthy Eating. It’ll provide tips on how to gradually create habits that get you to a “REAL food” way of eating, including proper portion sizes, tips on batch cooking, and a cameo from Winnie the Pooh.
With all of this, we advise you to take it slow, so new habits of healthy eating become permanent.
Something you can do for the rest of your life.
It’s a strategy we work closely with our coaching clients on: small nutritional adjustments they feel comfortable making. It’s how some of them have been able to lose 50-100 pounds!
Let me explain again: what you eat will be 80%-90% of the equation to lose body fat.
The other 10-20%? Exercise.
Of course it’s exercise.
That’s a pretty good segue into…
HOW DO YOU GAIN MUSCLE?
If you want to build muscle, you’ll have to lift heavy things and ensure that your body has enough calories and protein to adapt by building more muscle.
1) Lift heavy things. I will always be on Team Strength Training. If you’re looking to build muscle, you’re gonna need to lift heavy things.
When you lift an object (or your own bodyweight) enough times, your muscles reach the point of failure. This causes your muscles to tear and breakdown.
When your muscle rebuilds itself following the workout, it’ll be bigger and stronger than before. Then you do it again.
And again.
And again.
As long as you are eating enough to rebuild your muscle, you’ll get stronger!
Not sure where to start on a Strength Training practice? No problem! You can download our free guide Strength Training 101: Everything You Need to Know when you join the Rebellion (our free community) below:
Download our comprehensive guideSTRENGTH TRAINING 101!
Everything you need to know about getting strong.
Workout routines for bodyweight AND weight training.
How to find the right gym and train properly in one.
2) Eat a diet based on your goals. Because your muscle needs to be rebuilt after exercise, the calories are gonna need to come from somewhere. I’ll talk a lot about proper diet in the next section (with a Harry Potter analogy), so I won’t spend too much time on it here.
Just know that eating the right quantity of foods will be a big part of gaining muscle.
3) Rest. Your body rebuilds itself while you sleep, so make sure you get plenty of rest each night. I’m talking 7-8+ hours. This will help ensure your body has the time it needs to grow stronger.
If you’re strength training and only getting 6 hours of sleep a night or less, you’re really doing yourself a disservice. Go to bed!
That’s the short gist of how to build strength: challenge your muscles, eat well, and get some rest.
Let’s narrow in on our second point, “Eat a diet based on your goals.” It’ll become very important when balancing both losing body fat and gaining muscle.
To do that properly, grab your owl, and let’s chat about Hogwarts.
How to Lose Fat WHILE Gaining Muscle (The Science)
To answer the question of losing body fat and gaining muscle at the same time, I’d like to introduce an analogy from the world of Harry Potter.
Recall the “Sorting Hat:” The Sorting Hat’s job was to determine which of the four houses kids will call their home.
It’s almost like a traffic director: “Harry, you will go to Gryffindor! Draco, you will go to Slytherin!”
Your body operates on a VERY similar operation: every day it receives new calories (when you eat), and it needs to decide what to do with them!
For example:
You eat a chicken parm sub with fries and a 20-ounce soda. Your body then has to know where to route all those calories.
To keep things simple, it has three choices. It’ll sort those calories into one of three houses:[6]
A. Burn for Fuel.
B. Rebuild Muscle.
C. Store as Fat.
Right now, when you eat food, your body sorts most of those calories into “Burn for Fuel.”
There’s a number of calories your body needs each day just existing: to keep your liver functioning, your heart pumping, your brain operating, to regulate your body temperature, and so on – it burns a good chunk of calories just keeping the lights on.
This is your “Basal Metabolic Rate” which you can calculate for yourself in our TDEE calculator.
There’s also “B. Rebuild as Muscle” and “C. Store as Fat,” which I devoted entire sections to above.
This is where the problems arise: When you overeat calories and your body doesn’t need anymore to fuel itself, it takes those extra calories and stores them as fat.
However, our goal is the OPPOSITE of this.
We want to keep the muscle we have (or grow it) while getting rid of the fat!
So let’s imagine a scenario where we pull all this together by strength training heavy AND reducing our caloric intake:
You strength train regularly, and your muscles break down and need to be rebuilt.
You don’t consume enough calories to both rebuild muscle and fuel itself. There’s not enough to go into the “Burn for Fuel” and “Rebuild Muscle” houses.
Does your body just shut down?
NOPE!
Your body has been preparing for this, by storing any excess calories over the years in the “Store as Fat” house.
This means your body can pull from “Store as Fat” to make sure all the work still gets done, including your daily functions as a human and rebuilding the muscle you tore apart.
Said another way:
If you have fat stores (and we all do), you do not need to be in a “caloric surplus” to rebuild muscle. The calories stored in your fat cells act as this required energy.
There is also evidence that muscle can even be grown while in a caloric deficit.[7]
However, if you want to skip all the experimentation and trial and error, you can have a Nerd Fitness Coach do all the heavy lifting for you (not really, you’ll still need to work out).
TIPS TO LOSE BODY FAT WHILE GAINING MUSCLE
Let’s bring this all together and create some actionable steps to losing body fat and building muscle at the same time.
1) Sustain a caloric deficit while eating enough protein. You need your body to burn more calories than you consume, and also provide your body with enough protein to rebuild its muscle.
You can only lose fat if you’re in a calorie deficit.
Remember the Sorting Hat analogy:
If you’re eating too much, your excess calories are being sent to the “Store as Fat” house.
We want to pull from this house instead. So eat less than you burn consistently.
To help here, I have 3 resources for you:
Beginner’s Guide to Healthy Eating. If you want tips and tricks to create habits based on REAL food, that guide will help get you there.
You don’t have to follow some predetermined blueprint like “low-carb.” You can create your own diet (which is what I do). Learn all about it right here.
2) Strength train. If you could sell a pill that could be prescribed to every single person on Earth to make them healthier, it would look something like a strength training routine in a bottle.
It is one of the best things you can do for your body.[9]
And really, if you want to build muscle, you’re gonna need to lift something! Either weights or your own bodyweight.
You need to challenge your muscles in order for them to get stronger. Now, as we discuss in our article on the correct number of reps and sets, there are multiple ways to do so.
To build muscle:
Lift lighter weights for lots of reps.
Lift really heavy with fewer reps.
The important thing: pick a strategy and get started.
To recap: if you train heavy and eat a caloric deficit, your body will pull from its fat stores to both fuel itself and potentially also build muscle. This is a double whammy of AWESOME.
3) Prioritize protein. Outside of being in a caloric deficit and lifting weights (or yourself), eating enough protein is one of the key components of both losing body fat and building muscle.
Protein is the number one nutrient for creating new tissue.[10]
So when you cut out calories to create a caloric deficit, don’t cut them from protein sources.
Studies have shown that participants can gain muscle, even while in a caloric deficit, as long as they eat enough protein.[11]
It’s important enough that I’ll say it again:
If you don’t want your body cannibalizing its muscles while you are in a caloric deficit, you need to eat plenty of protein.[12]
How much protein?
As we point out in our Guide to Protein, roughly 1 gram for every pound of your weight, with an upper limit of 250 grams.[13] Or two grams for every kilogram if you are on the metric system. This means:
If you weigh 300 pounds (136 kg), eat 250g of protein.
If you weigh 250 pounds (113 kg), eat 250g of protein.
If you weigh 200 pounds (91 kg), eat 200g of protein.
If you weigh 180 pounds (82 kg), eat 180g of protein.
The gist: don’t skip out on protein. It should be on your plate for every meal (we’ll show you exactly how much in the next section).
If these generalized recommendations stress you out, and you want to know exactly what to do, we can help!
I’ll remind you of Nerd Fitness Coaching, where we help clients lose body fat, gain muscle, and level up their lives. We provide tailored and specific recommendations based on your body and lifestyle, plus accountability and mindset changes to help ensure your new habits stick.
WHAT SHOULD I EAT TO LOSE FAT AND GAIN MUSCLE?
Remember, your eating strategy needs to include two points to lose fat while gaining muscle:
Sustain a caloric deficit.
Prioritize protein so you can build muscle even while in a deficit.
You may be thinking, “That’s all well and good Steve, but what’s that actually look like?”
A serving of protein is about the size and thickness of your palm.
*The 4 oz serving is for an uncooked piece of meat. Cooking reduces about 25% of the weight, bringing it down to about 3 oz.
If you’re curious, here’s how much protein is in a serving of food:
4 oz (113 g) serving of chicken has around 30 g of protein.
4 oz (113 g) serving of salmon has 23 g of protein
4 oz (113 g) of steak has 28 g of protein.
While all of the Healthy Plate above is important, I want you to pay extra attention to your protein intake since we are trying to build muscle.
If you’re having trouble making your protein intake goals, check out our Guide on Protein Supplements for some tips and tricks to up your intake, including some awesome smoothie recipes.
If you are NOT losing weight, it means you are still eating too many calories. Keep your protein intake high, and reduce your fat and carbohydrate intake.
Eventually, you’ll reach a status where there just isn’t enough fat on you to help with “Rebuild Muscle.” At this stage, you can no longer stay with a caloric deficit. You’ll need to flip to a slight “caloric surplus” to build more muscle.
Which means you’ll have to eat more.
It’s debatable when this will actually occur, and we are all different. Reaching 8% body fat for men and 16% body fat for women is a good place to start.
It covers ways to increase your calories for muscle gain, from eating plentiful amounts of Paleo foods to drinking enough milk to make Santa Clause jealous.
Go check it out if you’ve been having trouble putting on muscle.
I want to stress that if you are lifting heavy, and not gaining muscle, diet is likely the culprit.
It was my problem for years, and I’ve seen it amongst countless readers of Nerd Fitness who have trouble gaining muscle.
HOW TO TELL IF IT’S ALL WORKING (Continuing to Lose Fat While Gaining Muscle)
If you’re trying to improve something, it’s important to track it. This also holds true of body composition.
Most people do this by jumping on the scale. This can be “okay,” but it’s only going to tell part of the story.
If you’re building muscle while losing fat, the scale might not go down. You might even weigh more!
Despite weighing more, you could potentially have a better physique.
That’s why in addition to jumping on the scale, I would also encourage you to take progress photos.
Take front and side photos in your mirror, wearing underwear or a bathing suit. Each week, take new photos, and record the number on the scale under the same scenario. Two forms of tracking here allow us to get the full picture.
The scale sometimes lies!
If you eat for a caloric deficit, strength train, and prioritize protein, see what happens.
You may find yourself losing some fat and gaining muscle.
Are you lifting enough? Perform resistance training consistently and track your workouts to determine whether or not you’re progressing via increased weight or repetitions.
The tips outlined above will get you started losing fat while building muscle, but if you’re looking to go a bit further…
#1) If you want step-by-step guidance on how to lose weight, eat better, and get stronger, check out our killer 1-on-1 coaching program:
#2) If you want an exact blueprint for getting in shape, check out NF Journey. Our fun habit-building app helps you exercise more frequently, eat healthier, and level up your life (literally).
Try your free trial right here:
#3) Enlist in the Rebellion! We have a free email newsletter that we send out twice per week, full of tips and tricks to help you get healthy, get strong, and have fun doing so.
I’ll also send you tons of free guides that you can use to start leveling up your life too:
Download our free weight loss guide
THE NERD FITNESS DIET: 10 Levels to Change Your Life
Follow our 10-level nutrition system at your own pace
What you need to know about weight loss and healthy eating
3 Simple rules we follow every day to stay on target
Alright, I think that about does it for this guide.
Did I miss anything? Do you have any tips and tricks when it comes to shedding body fat and building muscle?
Share it with us!
-Steve,
PS: Make sure you read the rest of the articles in our “How to Lose Weight 101” Series!
Check out this study on energy deficits and fat loss and.
You can read a study on calorie deficits causing muscle loss right here and here.
Here’s a study on the importance of lean muscle right here.
3,500 calories in a pound of fat was determined in this 1958 report, although as Today’s Dietitian points out, it’s likely more complicated than that. However, it’ll work for our intent and purpose.
People are far more likely to over-consume ultra-processed foods due to their palatability, and as such, we should be consuming them in smaller quantities with less frequency if we’re looking to lose weight. For more, read “Ultra-Processed Diets Cause Excess Calorie Intake and Weight Gain: An Inpatient Randomized Controlled Trial of Ad Libitum Food Intake.” Source, PubMed.
Technically, there’s a fourth with “Store as Glycogen,” but we can skip that for now.
You can read this study for more. Although it should be said that if you’re already relatively lean, and have been lifting weights for a while, you may not grow much muscle in a deficit.
Check out this interesting study on gaining muscle while in a caloric deficit. It should be noted that the participants drank milk. We’ll touch on macronutrient breakdown being key to muscle growth below.
A study on resistance training benefits can be read here.
You can check out this report for a look at protein intake and muscle growth.
That study on protein and muscle gain is right here.
Here’s a systematic review on protein being critical for muscle retention. You can also check out these studies here, here, and here.
Welcome to the Ultimate Beginner’s Guide to the Gym!
As part of our Strength 101 series, this guide will dive deep into everything you need to know about working out properly in a gym.
By the time you finish reading, you’ll never have to wonder “what should I do in the gym?”
I bet I also make you laugh once or twice with bad jokes or perfect gifs.
We’ve helped thousands of Online Coaching Clientsbuild confidence and start strength training in the gym, so I worked with our coaches to create today’s Ultimate Beginner Gym Guide!
Okay, time to start working out. Let’s hit the gym and explore the following:
Note: Nervous about heading to the gym with the novel coronavirus on the loose? Make sure you dead this guide on Gym Safety During the Pandemic.
Scared to Work Out in a Gym? Read This First.
Regardless of your physique, if you are 400 pounds or 100 pounds, going to a regular commercial gym for the first time can be intimidating as hell.
And that’s only if you can get yourself to use 20 Seconds of Courage to walk in the door!
I explain exactly what I mean by it in this video:
I know many people who say “gyms are not for me,” or “gyms are dumb” and never even go into one, simply because gyms can be scary/not welcoming/not cool.
Now, if you CAN work up the courage to walk through the door, you’ll be faced with the following:
People with pained looks on their faces dutifully using machines that somewhat resemble medieval torture devices.
Others on cardio machines, treadmills, and ellipticals, and you can already picture yourself wiping out and ending up in a YouTube fail montage.
Really strong jacked people picking up heavy free weights so effortlessly that you can’t help but instantly compare yourself to them…and get intimidated.
If you struggle with self-confidence, or you don’t love how you look, you might assume that everybody around you will be judging you the whole time and don’t want to subject yourself to this torture.
In fact, you might think that somehow you need to get in shape FIRST, and THEN you can go to the gym…
Wrong!
You go to the gym TO get in shape. And I will get you there.
If you are going to start using a gym, here are some truths you need to know:
Everybody around you is just as self-conscious as you are. Yes, that super jacked dude. Or that thin (or jacked) fit woman on the elliptical. They aren’t focused on you, because they’re too busy living inside their own head wondering if everybody is thinking about them.
Everybody starts somewhere. You don’t look good so that you can then go to the gym. You go to the gym to get stronger, more confident, and then look good.
MOST will applaud you for trying. When I see somebody who is severely overweight at the gym, it makes me happy – they’re trying to better themselves! That’s freaking AWESOME. This is the mentality 90%+ of the people will have.
MANY will be too self-focused to even notice you. These are the dudes lifting up their shirt in the mirror to check their abs, doing bicep curls in the squat rack, and/or making sure they take photos to post on Facebook to prove they did in fact go to the gym. #Fitspo #Instagram #OtherNonsensicalHashtags
A RARE few will judge. Though, they’re not just judging you, I promise. They’re judging EVERYBODY around you, because they can’t help but compare themselves to others and they’re terrible people. This is no different than in real life. Screw these people, haters gonna hate, slaters gonna slate.
Sure, you can say “people are mean, the gym is scary, I just won’t show up.” But then, the terrorists win. And so do those people. So f*** that!.
Instead, this is going to be your gym mentality:
Accept that some people suck (like anywhere in life), and most people are indifferent or focused on being self-conscious themselves. Everybody else will applaud you for trying and being there.
Make an epic Spotify playlist that makes you feel heroic.
Wear clothes that you feel comfortable in.
Keep your headphones on, zone out everybody, and go about your business. Imagine you’re the only one there.
We work with all of our Online Coaching clients who are worried about looking foolish in the gym. We know this is a huge challenge, so we create small levels and missions for our clients to get them comfortable in the gym.
We’ve helped people just like you go from sheepish beginner to barbell-wielding badass. Let us help you!
Sign up in the box below and I’ll send you this workout free (along with some other goodies):
Grab Your Beginner Bodyweight Routine Worksheet. No Gym Required!
Complete this workout at home, no equipment required
Avoid the common mistakes everybody makes when doing bodyweight exercises
Learn how to finally get your first pull-up
How Often Should I go to the Gym?
Many people think they need to hit the gym 6 days per week, dutifully alternating weight training with cardio and bootcamps to get that jacked/toned body they’re after.
That sounds exhausting and miserable to me…
…and I LOVE the gym!
So here’s what you need to know about gym frequency:
Go as much as you can, or as little as you want.
All of the workouts in this guide are “full-body workouts” which means they work out all of the muscles in your body.
And as we lay out in “Strength 101: Beginner Strength Workouts,” your muscles get broken down in the gym and then they rebuild themselves stronger over the next 48 hours.
For that reason, we recommend you hit the gym 2-3 times per week, with a day off or more in between each session.
This advice comes with a few caveats:
If you’re a single mom or working two jobs or just busy living your life and you can only go to the gym once, great! Once a week is better than zero times a week!
If you have specific athletic or cardiovascular goals you’re training for, then hitting the gym more frequently might get you faster results.
We craft our workout routines for our coaching clients around their schedules – some people hit the gym 5 days per week, while others only go once a week. We’re all unique snowflakes!
Okay! Now that we got THAT out of the way, are we ready!?
Great! Let’s level up in the gym!
Level One Gym Workout: First Day At the Gym
The toughest part about going to a gym for the first time is just walking through the door.
If you do that, you’ve already gone farther than 74% of the population (a totally made-up statistic that I’m using to prove my point), so give yourself a pat on the back.*
So on your first day in the gym, just GOING to the gym is a big step in the right direction. And I’m proud of you.
Note: You might need to also change into gym clothes if you’re coming from work. I know walking out onto the floor in gym clothes might be intimidating too (another chance to use 20 Seconds of Courage).
But now you’re wondering, “Steve you half-witted, scruffy-looking nerf herder, what do I DO on my first day at the gym?”
If you haven’t already done so, ask somebody at the front desk the following:
“Hey I’m new here, could I get a tour of the gym?”
“Excuse me, today’s my first day, can you point me in the direction of a place I can stretch?”
“Can you help me work the treadmill?”
Go full YOLO and try to figure these things out on your own.
If you’re able to get a personal tour, great! Ask the treadmill question when you get to them. If they can’t walk you through, just do a lap yourself and see where things are and who is doing what.
Pro tip (also works outside of the gym): pretend like you’re confident – even if you’re dying inside – walk with purpose, and nobody will question why you’re doing what you’re doing.
So, when you’re ready, walk over towards the stretching area, and do a few basic mobility/warm-up stretches while continuing to get the lay of the land and see what people are doing (don’t stare excessively, cool? cool).
Roll your head in half-circles slowly, from shoulder to shoulder. 5 circles in each direction
Slowly roll your shoulders forwards and backwards. 10 each way.
Keep your legs stationary, and twist your torso, left and right. 10 twists on each side.
Quad stretch: Hold each stretch for 5 seconds. Do 3 on each side:
Cross one arm in front of your chest, then the other, as demonstrated here by lead coach Jim: Hold each stretch for 5 seconds. Do 3 on each side:
These movements have the awesome side-effect of you being able to look around the gym and get the “flow” of things, while still looking busy. Jim STILL uses this “trick” when checking out new gyms.
Really, just get your body moving. We don’t have to make you a gym warrior on Day 1. Some stretches and sightseeing will be good enough.
LEVEL 1 MISSION: Take a lap around the gym and do your stretches.
If you walked out right now after doing these things, it’s still a win for Day 1 in a gym. Seriously – I don’t care what you do on Day 1 – as long as it leaves you feeling good enough to come back for a Day 2!
LEVEL 1 RECAP:
Walking through the door makes you a winner.
Ask for a tour if you need to know where things are!
Change into workout clothes.
Stand in one spot, do a few stretches, get the lay of the land.
If you’re up for MORE or ready to level up consider going to the next level, become a cardio cadet!
Level 2 Gym Workout: Join the Cardio Cadets
Get on the treadmill and start it up, based on the staff’s instructions.
If you weren’t able to get instructions, many treadmills have a “quick start” button that will start things up.
Why start with just walking?
It gets you moving and out of your head! I know you’re smart – you’re reading NERD Fitness. But you also probably deal with paralysis by analysis a lot by overanalyzing everything, so we need to get OUT of our heads and get moving!!
So, for your first 10-15 minutes, just walk. Set the treadmill at 3mph or 3.5 or whatever speed is comfortable but not too strenuous.
A speed that gets you moving and gives you a chance to decide what you’ll do next while you look around the gym. (Aka, it gives you a chance to get out of your head and stop thinking everyone is looking at you. They’re not)
LEVEL 2 MISSION: Do your Level 1 stretches, then spend 15 minutes walking, and then you are free to go home.
Repeat this as many days in a row that you need to until this starts to feel comfortable and you stop feeling self-conscious.
Scientists, Benedictine monks, and German scholars refer to such a thing as a “routine.”
As you get more comfortable, you can increase your walking speed or length of walking (20 minutes, 60 minutes, whatever)
If I’m gonna walk, I like to crush podcasts while doing so (My favorites: Watch out for Fireballs, Pardon My Take, and Bill Burr). Maybe you listen to Harry Potter on Audible.
Whatever floats your boat.
LEVEL 2 RECAP:
What you do in the gym doesn’t matter – build the habit of going regularly.
Develop confidence at the treadmill with just walking.
Start to realize you have just as much of a right to be there as anybody else.
Give yourself a high five for being you.
This routine of walking and stretching might only be one day in the gym for you, or it might be two months of this before you finally feel like you don’t want to jump out of your own skin while in the gym.
Going to the gym is the habit I want you to build, so this is a great start. Remember, you should be thinking in terms of “days and years,” not “weeks and months”:
We have many coaching clients who spend MONTHS just walking and working up the courage to move beyond the treadmill. That’s cool. We’re all on our own journey, at our own pace, so go at the pace that fits YOUR schedule.
Level 3 Workout: Join the Bodyweight Brigade!
After getting comfortable with the stretching/treadmill routine, you may want to hop on a weight lifting machine at this point like the leg press or chest press machine.
Is this progress? Sure!
Can you do this? Absolutely!
But, but, but… we are going to recommend you try some bodyweight exercises instead as your next step.
Controlling your body through space (not outer space) is going to be more beneficial in the long run than strapping into a machine and moving through a set path.
If you can do bodyweight exercises proficiently, then stepping into a machine is “easy.”
The reverse is not always the case.
So, if we’ve convinced you to try some bodyweight exercises, then next thing is to identify a place in the gym you can do bodyweight exercises where you’re not in the way. This oftentimes might double as the place that some people are doing stretches, where you’ve already been before!
If you don’t know, ask the front desk or find a trainer! That’s what they’re there for!
LEVEL 3 MISSION:
After your 5 minutes of warm-up (Level 1) and 10 minutes on the treadmill (Level 2), your next step is to go to a place you can do the Level 3 Gym Workout:
10 bodyweight squats
10 push-ups
10 bodyweight squats
10 push-ups
10 bodyweight squats
10 push-ups
Can’t get through it all? No worries, do what you can.
This style of alternating one exercise with another is called a circuit workout, by the way!
If you don’t know how to do those movements well, watch coaches Jim, Staci, and myself show you how!
If you just did the above mini-workout for a month, you’d be off to a great start! If you’re feeling frisky and starting to find some confidence in the gym, it’s time to branch out more!
LEVEL 3 RECAP:
Warm-up on the treadmill with a 10-minute walk
Find a place where you can do bodyweight movements out of the way
Complete 3 circuits of 10 push-ups and 10 bodyweight squats each at a pace that works for you
Stay at this stage as long as you need, until you can move on!
Note: If you enjoy the bodyweight brigade, or you’re not quite ready to start doing weight training yet, that’s cool too.
We have tons of 1-on-1 coaching clients who have gotten in GREAT shape without ever picking up a weight. It all comes down to constantly increasing the challenge and making progress each week.
Level 4 Gym Workout: Join the Dumbbell Division
It’s time to wander into the place that strikes fear in the heart of most gym goers:
The free weight section.
Gulp.
DO NOT FORGET THIS:If you are a 400 pound woman, or 85 years-old, or a 100-pound man, you have just as much of a right to be in the free weight section as anybody else.
It might take yet another 20 Seconds of Courage to wander in there, so I’m challenging you to try it.
LEVEL 4 MISSION:
After you do 10 minutes of walking on the treadmill, go to the dumbbell section, grab a single 10 lb (4.5kg) dumbbell, and find a flat bench like this:
Stand next to that bench, and make sure nobody is using it. If somebody is at a bench nearby, ask them “is anybody using this bench?” If they say no, put your towel on the bench, your 10 lb dumbbell on it, and stand next to it.
We’re going to add a 1-arm dumbbell row to our circuit above:
The last dumbbell exercise to learn is the dumbbell Romanian deadlift (RDL). This is like a cousin of the bodyweight squat where we move through the hips more than the knees.
Grab a pair of dumbbells now, push your hips back and bow forward like you’re being polite. Or, you’re like one of those novelty “drinking birds.”
Bring the dumbbells down to about your knees, not to the ground, then stand back up.
You can see the exercise right here:
Every other workout, swap out the goblet squat for the dumbbell Romanian deadlift.
So our circuit is now alternating with each gym workout.
Do 3 circuits of each if you can! If the weight is too light, use heavier dumbbells the next time you train.
Level 4 Gym Workout: Dumbbell Division C:
10 goblet squats OR 10 dumbbell Romanian deadlifts
10 push-ups
10 dumbbell rows per arm.
LEVEL 4 RECAP:
Remember you have just as much a right as everybody else to use the free weights.
Take a deep breath, go into free weights section, and get a 10 lb. dumbbell.
Learn to do a bent over row and goblet squats.
Learn to do dumbbell Romanian deadlifts.
High five yourself for weight training.
Training with dumbbells opens up infinite possibilities.
Okay, probably not INFINITE possibilities, but close enough.
If you are somebody that wants to learn how to train with dumbbells even more seriously, or you’re looking for ways to put that dumbbell set you have in your garage to proper use, let us help!
If you have a great program to follow, you can get in incredible shape with just a set of dumbbells.
Level 5: Enlist in the Barbell Battalion
The two final pieces of the puzzle are things I want for you so badly, I can taste it. These two exercises have changed my life, our lead coach Jim’s life, Staci’s life, and the lives of hundreds of thousands of people in the Nerd Fitness Rebellion:
And here is a quick video demonstration of the Squat, but I would REALLY read our full article!
And then I want you to find a squat rack:
THIS IS ONE TYPE OF SQUAT RACK (the barbell is NOT connected to the apparatus). USE THESE:
THIS IS A SMITH MACHINE (bar is attached to apparatus). THIS IS DIFFERENT FROM A “SQUAT RACK”:
Note: if you are training in a hotel gym, an apartment gym, or at some locations like Planet Fitness, they might NOT have a squat rack!
This can be for a variety of issues (liability, lack of space, most people just want to use a Smith Machine, etc.). They might even tell you, “A Smith Machine is the same thing.” It is not, in fact, the same thing. You hopefully can find a gym that has an ACTUAL squat rack with a free barbell.
If your gym doesn’t have a squat rack, and you want to start barbell training, I would consider finding a new gym or just hanging out in the Level 4: Dumbbell Division!
If using a squat rack scares the crap out of you: wait to attempt your FIRST trip to the squat rack when the gym is nearly empty, or recruit a buddy who knows what they’re doing. If there’s a special day you can go VERY early to the gym, or VERY late, or during the workday, do it then.
Watch this video from The Nerd Fitness Prime about how to set the ‘pins’ in the squat rack to put the bar at the proper height!
YOUR NEXT LEVEL 5 MISSION:
Attempt 1 set of a 5 barbell squats with JUST the bar (first ask the staff or a trainer how much the bar weighs: most standard barbells weigh 45 lbs (20Kg) but your gym might not have standard barbells).
You can then complete our tried and true circuit – replacing goblet squats with barbell squats.
So our circuit is now 3 circuits.
Level 5 Gym Workout: Barbell Battalion A:
10 barbell squats or 10 dumbbell Romanian deadlifts
10 push-ups
10 dumbbell rows/side
(See Level 4 for explanations on the Dumbbell deadlifts and rows)
Congrats! You’re using barbells! If you haven’t already read NF’s Senior Coach Staci’s transformation story of how she went from barely being able to lift a 10 lb dumbbell to now deadlifting 425 lbs, it’s a really inspiring story!
Speaking of Staci, let’s move on to her favorite exercise (and mine!)…
The deadlift movements starts with the weight on the ground, and ends with it back on the ground.
If you’ve got regular, large weights (usually 45 lbs/20 kgs) on each side then the bar sits the proper height off the ground.
Some facilities have lighter plates at that same large diameter. Use them.
If you are lifting less weight (or just using the bar to start off) then DON’T do the deadlift from the ground. The bar will be too low to the ground and mess up proper technique.
Instead, do the following to start your deadlifts at proper height:
1) Use blocks to adjust the barbell starting height:
2) Use the safety bars in a squat rack to set the height of the bar correctly!
3) Do the Romanian deadlift instead! (Whew, glad we learned that!). It’s the exact same movement as the dumbbell Romanian deadlifts, you’re just using a barbell instead.
START WITH A LIGHT WEIGHT – JUST the bar. As we cover in our “How much weight should I lift?”, you should ALWAYS start with just the bar.
And work on technique.
Only then should you start adding more weight, and add it slowly – you’ll be picking up heavy weights in no time, so don’t rush it.
Here’s Staci demonstrating a proper barbell Romanian deadlift from Nerd Fitness Prime:
Once you’ve started doing these two movements in your routine, your two alternating gym days will look like this. Simply alternate every time you go to the gym (with a day off in between sessions).
Focus on proper form, and slowly start to add weight to the bar.
You are now a gym “regular” and I salute you!
Now, I know the barbell squat and barbell deadlift are two complex, potentially scary exercises. It’s important to get your form correctly now when you are just lifting the bar, so that you don’t hurt yourself once you start adding weight!
If you want a professional to check your form, tell you when to add weight to the bar, and teach you other barbell movements, check out our online coaching program!
Level 6 Gym Workout: Gym Class Hero
Did I tell you that I’m proud of you yet? I really am, I promise. Your mom is proud too. So is your dad, but he just doesn’t know how to express it.
So now you’re thinking: “Steve, I did a barbell squat. It was terrifying but I did it. I tried deadlifts too and those are kind of fun.
What’s next? Give me MOAR!!”
It’s like you’ve finally learned to cook, and now you’re asking for more spices.
So, here in Level 6, we’re going to turn you into a full Gym Class Hero. And it requires you to learn a super standard, incredibly challenging exercise that also happens to be amazing for you…
Alternate inverted bodyweight rows with pull-ups or an easier pull-up variation every other workout.
So our circuit will be alternating these movements on your A and B Days:
LEVEL 6 DAY A CIRCUIT – 3 rounds of:
10 barbell squats
10 push-ups
10 pull-ups or pull-up alternatives!
LEVEL 6 DAY B CIRCUIT – 3 rounds of:
10 barbell Romanian deadlifts/regular deadlifts
10 push-ups
10 inverted bodyweight rows
Spice it up further! If you’ve read up to this point, and put the work in, we hope you feel like a Gym Class Hero, and you can start to build your own workout!
SO what can you do to add some variety? Throw in or replace another exercise!
Want to do some planks? Put them in the circuit after your other movements!
Lunges to replace the squats or deadlifts one day? Sounds good!
There are a ton of different options for what to do and where to go.
If we’ve gotten you more comfortable in the gym, we’ve done our job!
WANT MORE HANDS-ON INSTRUCTION? If you’re looking to get out of the generic workout programs and follow along with a routine that fits your goals and lifestyle, consider checking out our 1-on-1 Coaching Program!
Sure, we help beginners get started with strength training. But we also help seasoned gym-goers take their training more seriously, and even help some folks start competing in powerlifting competitions.
I personally hired an online coach in 2014, and I’ve been with him ever since. It’s the best money I spend every month, and the best investment I make in myself.
We’ve worked with men and women like Leslie here, a single mom that lost 100 + pounds thanks to following Coach Jim’s program.
She now works on things like gymnastic training and handstands and deadlifts and squats!
Interested in having expert guidance in your pocket? Click on the image below to book a free call with our team!
Gym Etiquette: Tips and Tricks
I asked the entire 15-person staff in our Online Coaching Program – most of whom have trained clients in a gym for 5+ years – what information they would share with new gym-goers:
#1) Take your time. The above 6 level workout plan might take you 12+ months to move through, and that’s okay! I would rather you slowly wade into the water instead of terrifying yourself with the thought of cannonballing into the deep end and never even starting a gym routine.
Stick with what you know, and then bit by bit, one movement at a time, branch out and try new things.
Remember: “days and years,” not “weeks and months.”
#2) Do what makes you happy. You might have noticed above I didn’t mention things like bicep curls, bench press, cardio classes, spin class, etc.
If those things make you happy, start adding them to the mix. However, if you are only doing those things because you think you are supposed to, don’t!
The above 6-Stage strategy combined with a healthy nutritional strategy will get you 95% of the way to where you want to go.
I promise. Nerd’s honor.
#3) Write down everything you’re doing and track your progress. Keep a simple note on your phone, write in a notebook, use Evernote, whatever. Write down what you do so that you know what to do next time.
When you get stronger and things feel too easy, you know to move up in weight slowly (and record that too!).
Keeping track of everything is one of the easiest and most important ways to make progress. Staci, Jim, and I ALL still record every workout and never stop trying to get a teeny, tiny bit stronger with each session.
#4) It’s better to lift a TOO LIGHT weight than try one that’s TOO HEAVY. You want to finish the workout saying “hey I could do more, this is encouraging” rather than “that was too much, I hurt myself/failed/and I’m demoralized.”
#5) If you don’t know, ask somebody who works there. If you’re worried that you’re using a machine incorrectly, and you’re sheepish and self-conscious about it, ask somebody who works in the gym.
Usually, there will be trainers that work there walking around the floor – ask them! That’s what they’re there for.
They can help you set the safety bars and pins on the squat rack if you’re not sure how. They can tell you how to adjust the seat on a machine, or how the treadmill works. That is what they are there for!
#6) If you want to hire a trainer for a few sessions, it might be a great investment! Good trainers are hard to come by, but if you happen to like our style of doing things here at Nerd Fitness, we have our own 1-on-1 Coaching Program that will program your workouts and help you fix your diet:
#7) Work out with what you can work with.
If you are a member at a Planet Fitness or similar gym: Your gym might not allow you to do barbell deadlifts, might not have a squat rack, or ONLY have a Smith Machine. If this is true of your gym, this is okay!
Do the best you can with what you have. Like MacGyver.
You can still get quite strong with the dumbbell workouts and bodyweight movements in Stage 4! And you’ll be that much more prepared when you do start working with barbells if you eventually join a different gym.
#8) Don’t let perfect be the enemy of the good. Just going to the gym takes courage.
Trying a machine for the first time takes courage.
Picking up a dumbbell takes courage.
Using the squat rack takes a lot of courage.
Don’t worry about perfect, or having perfect form or the perfect routine after you finish this article, just START! It’s how we all learn: like scientists trying new experiments and subtly tweaking the variables.
These are our favorite tips and tricks with regards to the gym. But I’d be remiss if I didn’t also mention something equally important:
Gym etiquette!
We’ve created another article in this gym series called “29 Unwritten Rules to the Gym,” to make sure you don’t be an accidental ass in the gym.
This list includes some obvious things like wiping down the bench after you use it, or not monopolizing a squat rack, but then some other more subtle things that will keep you in everybody’s good graces!
How to Build the Routine of Going to the Gym.
If you read this far, 6000 words later, I have to imagine it means you’re really interested in getting started with strength training!
The first time going to a gym can be nerve-wracking and exciting, but it’s the 100th, 500th, 1000th trip to the gym where results get made.
1) Accountability! If you’re new to going to the gym, it’s really easy to fall off the wagon once life gets busy. For that reason, I encourage you to be accountable to somebody other than yourself.
2) Focus on hacking into the Matrix and setting up your system! Put your workout time and place into your Google Calendar so that you always know when your next workout is. Focus on creating an environment where you are more likely than not gonna DO THE THING you want to do (go to the gym). We call this “Building your Batcave.”
3) Cultivate a love of constant improvement. Imagine this: you’re no longer going to the gym just to lose weight or look good. Those things are a happy consequence of what you’re really there for:
Because you ACTUALLY like to work out!
I cannot tell you how many NF Coaching Clients I’ve seen message me and say “Holy crap Steve, I don’t know how it happened, but I actually LIKE working out now!”
Every week, you’re excited to hit the gym because:
You’re adding more weight to your squats.
You are attempting a new personal best for the deadlift.
You get to see your gym friend and hear how his day went.
You LOVE how you feel after the gym.
Getting there takes time and energy, but that’s really when life changes and sh** gets magical with regards to your health and fitness.
These are the tools we’ve created to help you turn the gym into something you look forward to:
1) Our popular 1-on-1 coaching program. No more guesswork, no wondering if you’re doing the right program, no shame or guilt. Just results that don’t suck, and a plan that doesn’t make you miserable.
We keep you accountable to make sure you actually do your workout, we answer any questions you have, and we cheer you on every step of the way:
2) If you want a daily prompt for doing workouts at the gym (or at home), check out NF Journey. Our fun habit-building app helps you exercise more frequently, eat healthier, and level up your life (literally).
Try your free trial right here:
3) Join the Rebellion! Our free community numbers in the hundreds of thousands scattered throughout the globe, and we need good people like you!
You can join by signing up in the awesome yellow box below, and I’ll send you a bunch of free guides and printable workouts, including our Strength 101 guide!
Download our comprehensive guideSTRENGTH TRAINING 101!
Everything you need to know about getting strong.
Workout routines for bodyweight AND weight training.
How to find the right gym and train properly in one.
PHEW!
Okay, by now you should have all of the tools you need to get started in the gym, but maybe you have more questions. If you do, I have answers!
Simply leave a comment below and I’ll do my best to answer it soon!
I’d love to hear from you too if you found this article helpful. Which gym workout are you following?
Have you made it all the way to Level 6 yet!?
-Steve
PS: Make sure you read the other 3 articles in our gym series:
These are the types of programs that we create for our 1-on-1 Online Coaching Clients, and we’re getting amazing results for people.
And make sure you download our Kettlebell Worksheet! It’ll come in handy in just a moment.
Grab Your Beginner Kettlebell Routine Worksheet!
Complete this workout at home or gym with 1 kettlebell.
Avoid the common mistakes everybody makes when doing kettlebell exercises.
Build strength, burn fat, level up your life!
The 20 Minute Beginner Kettlebell Workout (with Video Demonstration)
Once you’ve watched the video above (featuring Matt Shortis, a lead trainer in our 1-on-1 Coaching Program) here’s a quick recap with repetitions for the workout here:
COMPLETE THE FOLLOWING CIRCUIT 3 TIMES:
8 Halos (each side)
10 Goblet Squats
8 Overhead Presses (each side)
15 Kettlebell Swings
8 Bent Over Rows (each side)
6 Front Rack Reverse Lunge (per side)
And because we like to have fun around here, we made a graphic where superheroes do the workout.
Here’s the Beginner Kettlebell Workout as an infographic:
Our Beginner Kettlebell Workout is what’s called a circuit (you can learn all about circuit training here). That’s just a fancy term for doing a workout like so:
1 set of exercise A, go immediately to
1 set of exercise B, go immediately to
1 set of exercise C, and so on…
Repeat from the top!
Your long-term goal should be to do 3 full circuits, back to back, for a complete workout.
4 if you’re on fire, like in NBA Jam.
If you can only go through it once or twice, that’s okay too!
And if you need to take a break at any time between sets or after a circuit, do it! You do you.
Prior to jumping into the kettlebell circuit, don’t forget to do some mobility warm-up (you can see our warm-up routine here):
Nothing too crazy, just something to “grease the groove” and get your body used to movement so you don’t pull any muscles once you start swinging the kettlebell.
In other words, preparing your muscles and joints to move some weight around!
A few minutes of running in place, air punches and kicks, some jumping jacks, and arm swings, should get your heart rate up and your muscles warmed for the Kettlebell Workout.
You can do all of the Beginner Kettlebell Workout with one single bell, from anywhere.
We’ll go over each more in our next section, so you can perfect your kettlebell technique.
Tip from Coach Matt: for the goblet squat, focus on depth. It’s more important to practice doing a full squat than to pump out reps. If you can’t make 10, don’t stress it. Do what you can.
#3) KETTLEBELL OVERHEAD PRESS
Grab the kettlebell with one hand, with the handle going down your palm (if the handle is too close to your fingers it’ll pull your wrist down).
Press straight up with your fist driving the movement (your fist would be pointing up the entire time).
Reverse the movement and bring the kettlebell back down. Then repeat.
Tip from Coach Matt: when doing the overhead press, get tight. Tightening your muscles will engage your core, offering a fuller body workout.
#4) KETTLEBELL SWING
Get down into a bent-over, flat-back position and grab the kettlebell with both hands from the handle.
Swing the kettlebell behind you, then get ready to jump up.
Jump up (without leaving the ground) and swing the kettlebell up. You should be standing tall at the peak of the movement.
Reverse the movement and bring the kettlebell back down and behind you.
Repeat.
Tip from Coach Matt: during the kettlebell swing, focus on hinging your hips. The swing is like a deadlift movement, so you should feel it in your hamstring and glutes.
#5) BENT OVER ROW
Get down into a bent-over, flat-back position and grab the kettlebell with one arm.
Pick up the kettlebell by driving your elbow up into your rib cage.
Lower the kettlebell back down by reversing the movement.
Tip from Coach Matt: try to keep your back straight and stomach tight during the row. This will help engage your legs for stabilization as you pull the kettlebell towards your stomach.
#6) FRONT RACK REVERSE LUNGE
Grab the kettlebell with one hand and rest the weight between your arm and chest.
Step your leg back (the same side your kettlebell is on) and lower down until your shin is parallel-ish with the ground (or as low as you can).
Spring back up to your starting position.
Tip from Coach Matt: for the lunges, again keep your back straight. By keeping your shoulders back, you’ll get a fuller body workout when you come in and out of your lunge.
Boom! There you have it.
The 6 best kettlebell exercises for beginners.
If you want someone to review your form on any of these kettlebell movements, or you’re looking to level up your kettlebell game, our coaches can do just that! Our spiffy mobile app lets you send a video of your exercises directly to your coach, who will provide feedback so you can perfect your technique.
In case you’re still on the fence about grabbing a kettlebell, let’s dig into them a little bit more.[1]
What Type of Kettlebell Is Best? What Is the Best Kettlebell Weight for Me?
So you want to buy a kettlebell, eh?
They come in all sorts of materials, in all sorts of shapes, and in all sorts of sizes.
Which one you pick will come down to your personal preference, your budget, and your experience with kettlebells.
Let’s contemplate the following when picking the right kettlebell:
#1) Standard vs.Competition. A standard traditional kettlebell will be cast iron, and as the weight goes up, the dimensions go up.
For example, a 16kg (35 lb.) bell will be larger than a 6kg (15lb) bell. This isn’t true for competitive kettlebells.
No matter their weight, competitive kettlebells will have the same dimensions for bell shape, base, and handle width.
So the 16kg will look just like the 6kg. This can be helpful to make sure you are consistent with technique.
#2) Weight. In general, pick a weight that allows you to complete a workout with good form.
When in doubt, start with a lighter weight, as you can always increase the weight/size later. If you’re forcing me to pick one for you, knowing NOTHING about you, I’d say consider purchasing a 16kg if you’re a male or 8kg if you’re a female.
Now, this isn’t an exact science, and we are all unique snowflakes. If you think you’re stronger than average, go heavier. Not quite there? Go lighter.
#3) Ballistic vs. Grind. You’ll often hear the terms ballistic and grinding in kettlebell workout discussions, for fast and slow movements respectively.
Ballistic movements would be quick, like the kettlebell swing.
Grinding movements would be slow, like the overhead press. For ballistic movements, you might actually want a heavier kettlebell, to help with momentum.
For grinding movements, less weight might be in order to help with control.
For now, if you are just starting out, go ahead and stick to one kettlebell. Branch out as you advance in experience.
#4) Handle. This is where quality comes into play. You’ll be doing many, many repetitions with your kettlebell.
If the handle has rough edges, you’ll feel each and every one of the movements cut into your hand.
Not fun.
Quality matters when it comes to handles. So we’ll chat about ideal brands in a moment. I’ll end our discussion on handles by saying they are generally standardized at 35mm for thickness.
Use this as your baseline for differences when comparing bell grips.
Okay, let’s talk about kettlebell brands:
#1) Cap Barbell. This would be an ideal first kettlebell. Not too expensive and decent quality, Cap Barbell kettlebells can be found on Amazon or at any Walmart.
The Cap Barbell is the most highly reviewed and reasonably priced kettlebell we have encountered. Do you have any experience with one?
Let us know in the comments if you like it!
#2) Kettlebell Kings. You see Kettlebell Kings ranked as some of the best bells out there. Not a bad price for the quality.
Plus, they offer free shipping in the US, which is nice since you’re essentially mailing a cannonball.
#3) Dragon Door. Some call Dragon Door the gold standard of anything and everything “kettlebell.”
I wouldn’t disagree, but expect to pay for it.
#4) Onnit. Onnit rocks, and they offer good quality bells that are quite popular.
Check out Craigslist or a used sporting goods store like Play it Again Sports for a previously owned kettlebell from a person who no longer needs it.
A used kettlebell is still a kettlebell.
Crafty? Build your own!
Here’s a video on how to make a kettlebell:
If you make your own kettlebell (be careful – you don’t want it breaking mid-swing!), please email me. I would be so pumped!
And if you need help with ALL of this and just want somebody to tell you how to train, I got you covered too.
Can You Lose Weight with Kettlebells?
If you’re trying to lose weight, a kettlebell and the workout routine above would be a great part of the plan!
The other part of the plan should be your nutrition.
As we lay out in our Coaching Program and our massive guide on “Healthy Eating,” we believe that proper nutrition is 80-90% of the equation for weight loss.
No joke.
It’s by far the biggest factor for success.
So will you lose weight training with kettlebells?
Maybe!
If you fix your diet AND begin to incorporate our kettlebell routine a few times per week, you’ll will find yourself building muscle, losing fat, and getting stronger!
If your goal is weight loss, you have to eat less than you burn each day. This can be through eating less and burning more (from the kettlebell workout above)
Processed foods and junk food make it really tough to lose weight: They have lots of calories and carbs, low nutritional value, don’t fill you up, and cause you to overeat.
Liquid calories are sabotaging your efforts. Soda, juice, sports drinks: they’re all pretty much high-calorie sugar water with minimal nutritional value. Get your caffeine from black coffee or tea, fizzy-drink fix from sparkling water.
Not losing weight? Track your calories and work on consuming slightly less each day. We tackle this point in-depth in our article “Why can’t I lose weight?”
Eat more protein! Protein helps rebuild muscle, and can help you stay under your calorie limit because it’s satiating and filling. Here’s exactly how much protein you should be eating every day.
Those tips should get you started, but if you want more specific instruction and guidance, check out the NF Coaching Program – Your Coach will build a routine tailored to your individual needs and what equipment you have available:
DoWnload the Kettlebell Worksheet!
Like most things in life, the important aspect of any exercise regimen is starting it.
No matter what strength training program you choose, start TODAY.
You don’t need to get strong before you can play with a kettlebell. You can play with a kettlebell to get stronger!
Here’s that Beginner Kettlebell Workout one more time to recap:
Halos: 8 reps each side
Goblet Squats: 10 reps
Overhead Presses: 8 reps
Kettlebell Swings: 15 reps
Bent Over Rows: 8 reps each side
Front Rack Reverse Lunge: 6 reps each side
Here are the next two steps you can take with our community if you dig what we do!
1) Check out our 1-on-1 Online Coaching program. Our coaches can work with you to pick up a kettlebell for the first time or to learn more advanced moves.
Whether you are brand new to your fitness journey, or ready to take it to the next level, we have your back!
2) If you want an exact blueprint for growing strong, check out NF Journey. Our fun habit-building app helps you exercise more frequently, eat healthier, and level up your life (literally).
We even have a fun kettlebell adventure that you can follow!
Try your free trial right here:
3) Join the Rebellion! Join our free community with a biweekly newsletter, and I’ll send you our Beginner Kettlebell Worksheet.
Simply sign up in the box below, and let us know what you think of it!
Grab Your Beginner Kettlebell Routine Worksheet!
Complete this workout at home or gym with 1 kettlebell.
Avoid the common mistakes everybody makes when doing kettlebell exercises.
Build strength, burn fat, level up your life!
I’d love to hear how this goes for you! Simply leave a comment below.
Hell, leave a comment if there’s anything else we can help you with too.
For the Rebellion!
-Steve
PS: If you are using Kettlebells to get started with Strength Training, make sure you read the other articles in our Strength Training series!
Today we are going to teach you everything you’ve ever wanted to know about body fat percentage but were too afraid to ask.
We’ve been helping thousands of people get their body fat percentage to their desired level through our 1-on-1 Online Coaching Program, and I’m pumped to share with you our strategies in this guide.
Plus, lots of cute animal videos as rewards for reading each section.
Fair warning: lots of half-naked people of all different shapes and sizes in this guide!
In this Body Fat Measurement Ultimate Guide, we’ll cover:
If you have been struggling with your weight (and having too high of a body fat percentage) for a while, I know how frustrating that can be.
It’s why we built our popular 1-on-1 Online Coaching program, so this time things can be different. Your NF Coach will help you track the right metrics (like body fat percentage) and set the right goals.
What is body fat percentage?
In its simplest form: body fat is the amount of fat in your body, compared to everything else:
your organs
muscles
bones
tendons
water
any demons currently possessing you
and so on
Both men and women carry different amounts of body fat percentage due to…you know…being different.
A super ripped male bodybuilder who is minimizing body fat percentage could have a percentage down as low as 3-4%, while a super ripped female bodybuilder who is minimizing body fat percentage would only get as low as 8-9%.
A male athlete could be in fantastic shape and have 10% body fat, while a women at a comparable level of athleticism and appearance might be at 18-20% body fat.
To take the comparison to the other end of the spectrum, an overweight male at 30% will look vastly different than an overweight woman at 30%.
Feel free to take a break with this video of a lion cub hanging out with a puppy and a rabbit.
What are some examples of body fat percentage?
Below, you’ll see images of what people look like with different amounts of body fat.
Men:
Women:
A quick note: your body fat percentage is just the amount of body fat you have.
It has nothing to do with the amount of muscle mass you have, which means you can have two people with the same amount of body fat percentage that look WAY different from each other.
Are you surprised about what you thought and what the actual percentages look like?
If so, don’t worry about it – most people have no idea what their body fat percentage is, and will often over or underestimate it pretty dramatically.
We’ll get into what’s a good number to AIM for, and how to measure it next.
We work with both men and women in our Online Coaching Program, and help them reach a level of body fat that they’re happy with.
More importantly? We do it sustainably, and without making you only eat chicken and broccoli.
You have unlocked this video of a baby sea otter trying to sleep on mom:
What should my body fat percentage be?
Here is the “generally accepted” (yeah, I don’t like this term either) chart for women and men when it comes to body fat percentage:
Women
Men
Essential fat
10-12%
2-4%
Athletes
14-20%
6-13%
Fitness
21-24%
14-17%
Acceptable
25-31%
18-25%
Obese
32% plus
26% plus
In what I’m sure is news to nobody, body fat is essential to survival – fat protects your internal organs, provides you with necessary energy stores in times of peril, and more.
“Essential fat” means the minimal amount of fat required for survival – Anything less than this amount would mostly likely result in organ failure, but even approaching this amount of body fat is dangerous.
It’s for this reason that bodybuilders, who can minimize their body fat to the “essential fat” level only do so when prepping for a show – during the rest of the year they maintain a higher body fat percentage so that they can stay healthy and function properly.
If you are looking to have that “ripped” or “toned” look, you’ll want your body fat percentage to hover in the “athletes” section.
If you’re just looking to get healthy and look in the mirror with pride, aim for the Fitness range.
Once you get into the upper ends of “acceptable” and “obese,” a decrease in body fat percentage would benefit your health.
Now, I’m going to GUESS you’re reading this article because you’re interested in reducing your body fat percentage.
For starters, you need to determine what’s an optimal goal for you:
If you are trying to look like Ryan Reynolds or Jessica Beil in Blade III, good luck! You’ll need to aim for a body fat percentage of 6-8% (men) or 13-15% (women). Note: your athletic/strength gaining performance will most likely suffer at this percentage, and can be really really challenging to maintain. Your call.
If you are interested in getting that coveted six pack, drop your body fat down to the 8-11% range for men and 15-17% range for women.
If you are an athlete and interested in optimal athletic performance, aim for a body fat percentage around 15% (men) or 20% (women). NF team member Staci trains much better at 20% body fat than at 15% body fat.
If you are just interested in looking pretty good and feeling pretty good, anything less than 18% for men and anywhere in the 20-23% range for women should get you the “hey, lookin pretty good!” response from your friends.
Ladies: if you are concerned about menstruation or fertility, it has been said not to drop below 15% body fat. Studies are conflicted on this, your results may vary, but I thought it was worth mentioning!
Want a step-by-step plan to follow that will help you lower your body fat percentage safely and permanently? Great!
You’ve unlocked the “cute baby pigmy goat jumping around” video:
How do I calculate or Measure my body fat percentage?
This question I get asked above ALLLLLL others.
There are seven main methods that you can use, each with varying levels of accuracy and cost:
1) Take a Look – This might be my favorite method, although it requires a trained eye and isn’t exact. By having an accurate progression of pictures from week to week and comparing a picture of yourself, you can determine somewhat closely what your body fat percentage is.
Make sure to note the difference in the two men, both at 10% body fat further down the page.
2) Body Fat Calipers – Pick up a set of calipers for $5. Pull the fat away from your muscles, pinch them with the caliper, take the measurements, and look at a chart to figure out your body fat percentage. Some recommend using one test site, some multiple.
In my experience, I have found that these calipers tend to slightly underestimate body fat percentage (mine tell me that i’m 9 or 10% when I’m really 12%, and Staci’s say she’s 17% when she’s more like 20%), but are surprisingly accurate considering how cheap they are.
However, the accuracy isn’t as important as the fact that you pinch and measure the same area, under the same conditions, from week to week. By doing so, you can track overall trends in how the measurement changes to make sure you’re on the right path.
3) The measurement method – By taking measurements (like the US Navy measurement or the YMCA measurement), you can calculate your body fat percentage. I have found, as have others, that this method isn’t incredibly accurate as it can very easily overestimate your body fat.
Considering it only takes a few points of data, this is not surprising.
4) Body fat scales and monitors– An electrical current is sent through your body and uses “biometrical impedance analysis.” I don’t really like this method, as I find the number that it spits out can be horribly inaccurate.
Because they send an electrical current through your body, the amount of water you are carrying can drastically adjust this number too.
5) The Bod Pod – The method calculates your body fat percentage by using air displacement to measure your body mass, volume, and density. This is also pretty darn accurate, but also pretty darn expensive at usually around $75 per session. Find a bod pod location by putting in your location in the right hand column.
6) Water displacement – Although very accurate (within 1-3% percent), it’s expensive, tedious, and a huge pain in the butt. If anybody has any experience with a water displacement test, please share your story in the comments.
7) DEXA Scanning– This is considered the most accurate method, as it actually takes a full dual X-ray of your body composition and gives you numbers. You can get this done at a health facility, and involves you lying on an X-Ray table for about 10 minutes. It’s typically expensive, anywhere from $50-150 per session depending on where you are located.
VERY IMPORTANT: If you are going to start testing your body fat percentage, do whatever you can to test yourself under the same conditions each and every time.
For example: every Monday morning, on an empty stomach, while drinking a single glass of water. This way, even if you’re not getting the correct body fat percentage (due to user error), you’ll at least get a consistent incorrect body fat percentage and can calculate how much you lost or if you are progressing in the right way.
“Steve, just tell me the best method!”
If you have the money, and you have a Bod Pod center close to you, then I’d say this would be the best combination of practicality and accuracy.
If you don’t have the money, then I would go with a simple body fat caliper, along with the “take a look” method of taking weekly photos. Take a photo of yourself each week and compare the photos week to week to see if you can notice more definition in your muscles (which happens when you start to reduce your body fat percentage!).
Here’s the thing with body fat percentage: although it’s fun to know and fun to see it getting lower as you get leaner, methods to track it can often be inaccurate.
Take multiple tests with your preferred methods and understand that even then it might be off by 1-3% in either direction. So, track overall TRENDS and go off how you look, and that will get you 95% of the way there.
It comes down to this: Look in the mirror, and compare your progress photos: do you like how you look and are you moving in the right direction? Awesome.
DON’T like what you see?
Let us help!
Our Online Coaching Program is changing people’s lives every day. We help folks like you make better food choices, follow the right workout program for your goals and keep you accountable!
Another section, another reward.
You’ve unlocked the “baby otter attacks a stuffed animal walrus” video:
What’s the best way to lower body fat percentage?
Alrighty! Let’s say you’re interested in dropping your body fat percentage, like my childhood friend Saint above.
Staci (follow her full success story) also followed the principles of Nerd Fitness to get her results and significantly reduce her body fat percentage:
I’m sliiiiiightly biased, but both Saint and Staci, along with 35,000+ other students, reduced their body fat percentage by following the methods we teach all clients in our 1-on-1 Online Coaching Program.
Not only that, but Staci is now one of our Lead Coaches!
As you’ll read below, the biggest piece of the puzzle to getting to a low body fat percentage is having the right nutritional strategy of consistent caloric restriction, the right mental attitude, a supportive network of people to help you, and a plan to follow.
We know how tough it can be to change your diet. If you’re not sure what to eat, or you’re sick of trying a diet only to give up a few weeks later, I got you covered.
It’s something I’m really proud of, and I know it’s helped a lot of people: our 10-level Nerd Fitness Diet Cheat Sheet. Pick the level you’re comfortable with, stick with it for at least 2 weeks, and then level up when ready and follow the next level! Simple.
Grab your cheat sheet free, along with 4 other free guides, when you sign up in the box below – I’m confident it can help you reduce your body fat percentage permanently.
Download our free weight loss guide
THE NERD FITNESS DIET: 10 Levels to Change Your Life
Follow our 10-level nutrition system at your own pace
What you need to know about weight loss and healthy eating
3 Simple rules we follow every day to stay on target
I can’t teach you everything in a quick article, though I can absolutely give you some overall tips and tricks below to get you started.
Here are the Nerd Fitness methods we recommend to all coaching clients get down to a lower body fat percentage.
Note: these are JUST suggestions, your results may vary!
If you only want to drop a few percentage points (to a healthier weight), you can start with the advice at the top, and work your way down towards the bottom as you get lower and lower – the closer you get to single digits (dudes) or low double digits (ladies), the more strict you need to be with your diet and training.
Don’t forget to calculate your daily caloric needs first! If you are not strength training while eating a caloric deficit, you will most likely be losing muscle along with fat, which is not optimal but will help you lose body fat.
Do this consistently and you’ll start to lose body fat.
2. Lift heavy thingsand move frequently – When you strength train with heavy objects (or with intense bodyweight training), you get stronger and keep the muscle mass that you already have.
3. Incorporate sprints into your off days – When you run sprints, you create a similar afterburner effect with strength training, meaning extra calories burned after the completion of your workout.
4. Consume enough protein, experiment with lower carb or lower fat – Set your caloric intake to be low enough that your body must pull from fat stores to fuel itself, resulting in fat loss.
I’d recommend consuming enough protein to keep your muscles growing and rebuilding, while determining what’s best for your body to make up the rest of your calories each day: many people work better on a low carb diet.
5. Work out in a fasted state, consider intermittent fasting – Although advanced techniques to get to super low body fat percentages are beyond the scope of this article, here’s another tactic if you want to drop the last few percentage points:
Strength train in a fasted state, and don’t consume your first meal of the day until AFTER your workout.
Added bonus: by skipping a meal occasionally, you’re more likely than not to end up in a caloric deficit compared to when you were eating 6 meals per day.
I’ve been training in a fasted state for 5 years with zero issues on energy, but your results will vary.
6. Not losing weight? You’re eating too much! Get more accurate with your tracking. Consider a cheap food scale to make sure you’re actually eating the number of calories each day you think you’re eating.
Example: I eat 1 serving of oats each day. If you look at a container of oats, it says “1 serving = 1/2 cup, or 40 grams.” I then put half a cup of oats on a food scale, and it weighed 60 grams. This means that every day, I was eating 1.5 servings of oats, not 1 serving.
7. Hire a Coach! Doing all of this stuff alone is absolutely manageable, it just requires a lot of trial and error. If you are somebody that wants to work with a trainer, here’s how to find a good trainer!
Oh what’s that? You want a coach you can take with you everywhere, that will check your form AND help you with food and essentially do everything except the actual heavy lifting of weights?) Sure!
Along with the above, keep reading Nerd Fitness articles, join our community, and start to implement the philosophies here and you’ll be on the right track.
The important thing to remember: this is NOT an overnight process. The best thing you can do is start treating yourself like a science experiment.
Implement the suggestions above, track your bodyfat and see how it changes, and then course-correct and adjust based on results!
And another big thing to remember:
TEMPORARY CHANGES GET TEMPORARY RESULTS.
If you starve yourself to get shredded but then rebound aggressively by eating buckets of ice cream when you’re “done,” say goodbye to those abs!
Also, here’s a video of a wombat. Because, wombats:
Is BMI the same as body fat percentage?
When you go to a doctor, they will most likely ONLY calculate your Body Mass Index (BMI).
Body Mass Index looks at your height and your weigh; based off this ratio, it tells you whether you are underweight, normal, overweight, or obese.
Seems pretty straightforward right? Obviously, as your weight increases disproportionately compared to your height, you are more likely to be overweight.
Notice I just said “more likely.”
Here’s why: Your BMI isn’t directly correlated to your body fat percentage – it only factors in your height and weight. It will give you the same reading if you’re made of 180 pounds of pure muscle, or 180 pounds of pure Cheetos.
For example, if I was six feet tall and 185 pounds with a body fat percentage of 10%, I would be put in the same “overweight” category as a guy who was six feet tall, 185 pounds, and a body fat percentage of 25%.
If two women have the same amount of body fat, and one tends to carry more water weight or have bigger bones than the other, one woman could be considered “overweight” while the other might be “average.”
For example: LeBron James is considered borderline obese when measured on the BMI scale, at a height of 6’8″ and 250 pounds.
Of course, unless you look like LeBron James, or you can see your abs, disregarding BMI is missing the point.
I do believe BMI can be helpful if you are above 20% body fat (men) or 25% (women). Both your BMI and your body fat percentage would tell you that fat loss can be a worthwhile goal.
HOWEVER, as soon as you start to get serious about your body weight and training and drop down to flat stomach levels of body fat percentage, then BMI becomes less of an accurate indicator of health.
If you like our style here with cute animal videos and fun content, let us help you reach your body fat and BMI goals with our 1-on-1 Online Coaching Program!
You’ve unlocked the final reward: “the hedgehog boat”:
What other questions do you have on body fat percentage?
And that concludes today’s lesson on body fat percentage, friend!
I do most of my work in coffee shops these days, so I hope you understand the amount of work and the ridiculous number of awkward Google searches that had to happen in order to bring this post together.
Now, I know this is one of those super complicated topics, so I’d love to help any other way than I can.
You’ll work with our certified NF instructors who will get to know you better than you know yourself, and program your nutrition and workouts for you.
If you are fired up and want to start reducing your body fat percentage in a healthy, sustainable way, consider trying our 10 Level Nerd Fitness Diet – we’ll send you a cheat sheet telling you exactly how to change your diet each week so you don’t get overwhelmed!
Grab your NF Diet sheet along with four guides to help you reduce your body fat percentage when you sign up in the box below:
Download our free weight loss guide
THE NERD FITNESS DIET: 10 Levels to Change Your Life
Follow our 10-level nutrition system at your own pace
What you need to know about weight loss and healthy eating
3 Simple rules we follow every day to stay on target
We’ve helped tens of thousands of people transform into real life superheroes.
Either way, continue to poke around Nerd Fitness – all of our content is focused on helping you get results in a fun, non-condescending, supportive, and (most importantly) effective way.
Also, if you’re willing to put in the time, you WILL get the results you’re after.
Okay, time to watch more cute animal videos 🙂
-Steve
PS: Admittedly this article took 10 hours longer than it needed to, because I kept getting lost in YouTube watching cute animal videos!
If you’re interested in running a 5k (which you are, ’cause you’re here) you may want to try our new app! It contains a fun adventure that will take you from sitting on your couch to running a full 5k – with plenty of benchmarks in between for you to find your groove. No guesswork needed, just tie your shoes and follow along with the app.
You can sign-up for a free trial right here:
What is Couch to 5K? Why is the Couch to 5K Plan so popular?
“Couch to 5K” is a free program that takes people from their couch to running a 5K race in 9 weeks.
5K is short for 5 kilometers, or 5,000 meters or 3.1 miles.
This running program was invented by Josh Clark of CoolRunning WAY back in the day.
It has since been co-opted and copied by every running blog out there, so we’re going to be referring to a generic “Couch to 5K” program when we talk about it.
(When people ask the question “How long does it take to complete Couch to 5K,” it really depends on which program they pick.
It might be 6 weeks, or 12 weeks, or 9 weeks. The original Couch to 5K plan created by Cooling Running took 9 weeks).
Here’s the Couch to 5K plan a nutshell:
The program utilizes an uber-popular concept called interval training – moving at different speeds throughout a running session – and lays out exactly what to do every day for 6-12 weeks after starting.
By varying your pacing, your body is forced to adapt to different speeds, your heart and lungs have to adapt to various levels of strenuous activity (and get stronger/healthier as a consequence).
As a result, you actually burn more calories and get better prepared for a race then compared to just training at a constant speed.
Over the weeks, Couch to 5K slowly ramps up the amount of time you spend running and cuts back the time you spend walking until you’re at the point where you can actually run a 5K without stopping.
“STEVE, I’M INTRIGUED. WHY IS COUCH TO 5K SO DANG POPULAR?”
#1) It’s simple and clear. Print out a PDF or download an iPhone app and for the next 9 weeks you simply do what it tells you:
Today, do this.
Tomorrow, do that.
Repeat.
We’re all busy. Most of us lead hectic lives. And programs that tell us EXACTLY what to do allow us to follow instructions without needing to figure it out ourselves.
#2) Most people think running = weight loss. If you’re brand new to health and fitness, and you’re trying to lose weight, you’re most likely overwhelmed at what you should start with and how you should train.
As much as I would WISH that was the answer (it’s probably the fastest path to changing one’s physique), it’s often a bridge too far for many folks.
So a majority of newbies equate running with weight loss (which MIGHT be true, but MIGHT not, I’ll explain here), and decide to start with a jog around the block.
#3) Couch to 5K is not overwhelming. It’s a free program (or inexpensive app), and it’s very approachable.
Programs like P90X and Insanity are designed to appeal to people that consider themselves hardcore (whatever the hell that means).
Couch to 5K appeals to people who are overwhelmed at the idea of doing P90X or Insanity or mustering up the courage to go to Crossfit.
Couch to 5K makes you think “maybe I can actually do this…” which is the most important part of any fitness journey: starting.
#4) Everybody wants to “have run a 5K.” If you’re new to health and fitness and working on setting a good obtainable goal, “run a 5K this year” is a great place to start.
It’s a short enough distance that with some training you can pull it off, even if you have to walk some or all of it.
There are 5Ks practically every weekend, many of which raise money for charity or are themed in a fun way,
So in completing Couch to 5K, you train and get to see yourself progress weekly, you get to finish a race and feel a sense of accomplishment, and you go home with a medal you can hang on your wall reminding you of the proud moment.
Plus, it might get you in shape!
Maybe…we’ll explore in just a moment.
If you are trying to get in shape, I’ll mention our 1-on-1 Online Coaching Program. I know of no better way to transform yourself than through the help of an expert who knows exactly what to do. We’ve helped hundreds of people run their first 5K and helped others train for triathlons!
Does Couch to 5K actually work? Will I lose weight Doing Couch to 5K?
“Steve that’s all fine and good. But what do you REALLY think about running 5Ks and Couch to 5K?”
Okay, you got me. I got thoughts. I also got jokes (they’re bad).
RANT INCOMING!
Will the Couch to 5K program help you run a 5k? YES! If you actually stick with it for the entirety of the training program.
Will the Couch to 5K program help you lose weight? MAYBE.
Is Couch to 5K a program that will get you healthy permanently? MAYBE.
Will Couch to 5K make me sexy and look damn good in a bathing suit? MAYBE, but probably not.
Here’s the truth about Couch to 5K: It’s the same truth with popular programs like P90X or Insanity or any other structured workout program:
It totally works and will help you lose weight if you do two things:
MISTAKE #1: Couch to 5K totally doesn’t work and won’t help you lose weight if you do two things:
You actually complete the program, BUT
You don’t fix your diet.
As sexy as it is to think that just going for a run will help you lose weight, the data doesn’t back it up. In fact, as Time Magazine rightly pointed out years ago and got yelled at for telling the truth, exercise alone won’t make you lose weight.
This is Common Mistake #1: not fixing your nutrition if you’re running for weight loss!
If this were a movie, nutrition would be Tom Cruise in Mission: Impossible and exercise is that funny sidekick who helps Tom. Let’s be real here, Tom is doing all of the heavy lifting to make that movie what it is.
Couch to 5K helps people run a 5K.
That’s it.
It’s not designed to help you lose weight or build a body you’re proud of. It’s also a temporary program that lasts a certain number of weeks until you run your 5K.
For Couch to 5K to be successful for you long term, and for it to help you lose weight, it needs to be the catalyst that causes you to build a consistent long term habit of exercise and changes how you think about food.
Remember:you never get to be “done”, so you need to enjoy the journey and look forward to exercising daily.
You also need to train the right way to build the type of body you want! And eat the right way.
That’s priority numero uno.
I know nutrition is a really challenging, complex, controversial topic (Keto? Paleo? Ah!), which is why we make it stupidly simple for smart, good looking, modest people like yourself.
In addition to our online coaching program that guides you on making healthier food choices, we also created a free 10-level NF Diet blueprint you can hang on your fridge next to your Couch to 5K PDF.
Print it out, hang it on your fridge, and follow the instructions to level up every 2 weeks! You can get yours free when you sign up in the box below:
Download our free weight loss guide
THE NERD FITNESS DIET: 10 Levels to Change Your Life
Follow our 10-level nutrition system at your own pace
What you need to know about weight loss and healthy eating
3 Simple rules we follow every day to stay on target
Now that we have the “will I lose weight?” stuff out of the way, I have two BIG questions to ask you:
Do you like running?
Are you healthy enough to run?
Do I even like running?
Bodybuilder Ronnie Coleman said it best: “Everybody wanna be a bodybuilder, don’t nobody wanna lift no heavy ass weight.”
In other words: “Everybody wants to be in shape, and look great, but nobody wants to put the work in to actually GET in shape and look great.”
And yup, getting in shape is tough; if it were easy we’d all look like Captain America and Wonder Woman.
Instead, 70% of America is overweight and 30+% are obese. Crap.
Which brings me back to the most crucial question of this entire 5K process:
Do you even LIKE running?
The world is split into three groups:
People that like running and want to run.
People that don’t like running but eventually learn to love it.
People that don’t like running and will never like running.
Here’s that Ronnie Coleman quote, slightly adapted: “Everybody wants to have run a 5K, but many people don’t actually enjoy running.”
Running a 5K is a great achievement and a worthwhile fun goal, but it’s only one way of thousands to “get in shape.”
Many people feel like Andy Dwyer in Parks and Rec when they go running.
Some people love that feeling of anguish or pushing beyond the limits, and that’s awesome!
But for everybody else, they make Mistake #2: they force themselves to run even though they don’t like it!
So before you start Couch to 5K, think of it as a science experiment:
“I hypothesize that following Couch to 5K will help me run a 5K. I also hypothesize I’ll enjoy the process, enjoy how I feel after a run, enjoy running a 5k, and/or enjoy the achievement of having run a 5k.”
And that’s all this is: an experiment to see if running is the type of exercise you want to continue doing consistently for the next few years.
If 2 weeks into Couch to 5K you’re miserable and hate it: fantastic!
You just discovered that you hate running and are now free to NEVER RUN EVER AGAIN FOREVER. It doesn’t make you a failure.
It means your science experiment produced a result that you can now use to inform future exercise decisions.
Again, it doesn’t make you a failure.
It just means you found a type of exercise that doesn’t work for you.
If you discover you LOVE running and how it makes you feel: fantastic! You can now make running part of your regular exercise routine. Combine this with a good nutritional strategy, and you will build yourself a runner’s physique. And you’ve found something you can do for the rest of your life.
If you are running to prove something to yourself, because a friend is doing it, because you’re raising money for charity, or anything else: fantastic! Do Couch to 5K and then decide after if this is the strategy that you enjoy and want to stick with permanently.
Don’t make Mistake #2: If you’re ONLY doing this to lose weight and it’s making you miserable, quit. Don’t run. Ever.
Instead, pick an exercise you actually enjoy. But not because the exercise is going to help you lose weight – because doing an exercise you love is a constant reminder of “I’m making healthier choices, and thus I should probably eat healthier!”
If weight loss above all else is your goal, I’d recommend our Beginner Bodyweight routine you can do at home and combine it with our “beginner’s guide to healthy eating.” I can promise that if you read those strategies and start to implement them in your life, you’ll see results without ever having to set foot on a treadmill.
Phew! Okay, that covers “do you actually LIKE running?”
There’s another massive question you should be asking yourself before you start…
Are you healthy enough to run a 5K?
Just because you WANT to run doesn’t mean you SHOULD necessarily start running just yet.
It could be a fast track to injury, disappointment, and misery!
Those are literally three of my least favorite things. The fourth being brunch.[1]
Back to your health: are you physically ready to run?
If you’re at or close to your goal weight, then starting a running program is a good idea.
If you are obese or very overweight, I think (power) WALKING a 5K is a great goal for the immediate future.
However, I think Mistake #3 would be running a 5K before properly preparing your body for it! In fact, running prematurely without addressing your weight might cause damage to your joints and ligaments and cause you to backslide a whole bunch.
This will build you a solid foundation of strength, core strength, and endurance.
Download our free Bodyweight Workout Worksheet when you sign up in the box below:
Grab Your Beginner Bodyweight Routine Worksheet. No Gym Required!
Complete this workout at home, no equipment required
Avoid the common mistakes everybody makes when doing bodyweight exercises
Learn how to finally get your first pull-up
Here’s why you should focus on strength and nutrition before pounding the pavement with hours of running:
As you begin to drop weight, a lot of the stress on your joints, organs, bones, etc. will start to decrease.
As you strength train, the ligaments that hold your body together will become stronger and more adequately prepared for the rigors of running.
As you refine your running form to minimize resistance and jarring shocks throughout your body, your body will learn to become more efficient.
When you start to approach your goal weight, you can start to introduce increase your speed from power walking to jogging – with correct running technique (see below) – and staying healthy.
“STEVE, I was all excited to run a 5k, and now you have me demoralized. I’m overweight but I still want to run!”
Okay okay okay, fine! I don’t want to keep you from exercising, I want to help you build momentum and make you antifragile.
Obviously, you’re going to do what you’re going to do, and if running before your physically ready is what you want to do, go for it!
If you want any help getting in shape to run your 5K, we got you! We help men and women and self-aware robots with our 1-on-1 Online Coaching Program. We offer nutritional guidance, professional accountability, and custom workouts!
How to start the Couch to 5K Program
“Steve I’m in. I read all of that jazz above and I am ready to get started. Whether I’m walking or running, I want to start Couch to 5K!”
If you’re ready to do the Couch to 5K program, you can download the following which I believe is the Original Couch to 5K Program (they’ve made it quite tough to find!).
The reason it’s tough to find is they’re pushing people towards the official Couch to 5K App.
For us Nerds, I’d be remiss if I didn’t mention the super fun Zombies Run! app, which uses interval training combined with fun audio cues and video game mechanics throughout your running sessions.
What I would do next after downloading the program? Do the first day of training!
I would also recommend finding a race that’s 2-3 months from now, and sign up for it even if you’re not ready.
Recruit a friend or two to join you in training and the race!
HOW TO FIND A 5K IN YOUR TOWN: Let me google that for you. Type “5K + [your town]”, and I bet there’s a 5k every weekend for the rest of the year coming up. The Couch to 5K app also lists local races for you.
To recap:
Pick a race that looks fun that raises money for a good cause
Recruit a friend or two
Go for your first day of running!
It’s gonna suck, and you’re going to be fine. You’ll get better!
This is exactly what I did years ago when I dressed up like a Caveman with 20 of my friends and raised thousands of dollars for kids with cancer to go to summer camp!
How to Not Get Injured Training For a 5K
If you don’t learn how to run correctly, you’re doomed to develop an overuse injury and that’s going to negate the whole reason you started running in the first place!
This is Mistake #4: Crappy running form!
When you run, you’re putting hundreds of pounds of pressure on your joints and ligaments with each bounding step down the road.
This is then repeated thousands of times over the course of training and a race.
No wonder nearly every runner has tons of stories of injuries they’ve had to deal with. It can be a brutal activity that can wreak havoc even with good running mechanics.
With poor running mechanics, the results are compounded.
And not the GOOD kind of “compounded” like compound interest like you learned in 2nd grade with the story about starting with 1 penny a day and doubling it every day for 30 days.
The BAD kind of “compounded” like plantar fasciitis and stress fractures and sore IT bands and torn ligaments and crazy soreness all the time.
We don’t want that.
I’m going to get super granular into proper running technique in this section, so if you already have perfect running form, you can skip this section. But I’d still read it.
Yeah, you should probably read it.
Here are the “5 Steps to Not Sucking at Running a 5K,” thanks to my friend Jason Fitzgerald of Strength Running:
1) Lean from your ankles.
Lean from your ankles, and keep a straight line from your ankle, through your butt, and up to your head.
If you’re standing still with this slight forward lean, you should feel like you’re about to fall forward.
When you start running, gravity will help keep you progressing forward. A proper lean from the ankles keeps your body in alignment and loads your muscles properly and efficiently.
2) Increase your cadence. Cadence is your stride rate, or the number of steps you take per minute. It will probably seem weird at first, but you’re putting less stress on your legs with shorter foot strikes.
Your cadence should be at least 170-190 steps per minute when you’re running at an easy, conversational pace. It will probably increase once you start running faster—that’s normal.
“Steve, what the hell do I do with “170-190 steps per minute?”
Great question. Go to Spotify and look for 170-190BPM playlists, like these which I found here:
Not on Spotify? Cool. (But like, why?) To get a cadence, try running to Outkast’s “Hey Ya” and time your strides to match the beat. That’s the cadence you’re looking for:
Research has shown[2] that increasing your cadence and taking more steps (around 180 per minute) provides many of the same benefits of barefoot running: less impact shock that goes up your legs, improved running economy (or your efficiency, which means you’ll run faster with less effort!), and a reduced chance of injury.
You’ll feel like you’re taking way more steps than normal – that means you probably had poor form before and now you’re fixing it!
If your legs get to the point where they’re going this fast, let me know:
3) Foot strike at the right time. When your foot comes down and makes contact with the ground, it should be underneath your body, not in front of it.
Combined with a quick cadence and a slight forward lean from your ankles, you’ll be distributing impact shock evenly—and efficiently.
This aspect of running form is often skipped over by beginning runners.
Instead of focusing on where the foot is landing in relation to the rest of the body, they focus too much on running on their forefoot. If you don’t first land in the right place, a midfoot or forefoot strike will only do more damage.
As you’re running, a good mental cue is to think that you’re just “putting your foot down” in a straight line underneath your body.
There’s no reaching or stretching your leg out in front of you. Practicing this mental cue will have your leg touching down almost exactly underneath your center of mass, distributing your weight evenly and safely.
4) Land on your mid-foot. While not as important as landing underneath your center of mass, becoming a mid-foot striker has a host of benefits.
It can help you avoid a lot of injuries by absorbing impact shock and preventing a severe heel striking running stride.
Heel-striking can’t be entirely blamed for injuries and labeled “bad.”
Even elite athletes heel strike when they run races! It’s not entirely bad— especially if you’re putting weight down on your foot just after you heel strike, instead of directly on the heel.[3]
What you should focus on is having a higher cadence, landing underneath your body, and not aggressively heel striking.
Try to land with your foot flat on the ground, instead of with your toes angled upwards.[4]
5) Symmetrical arm swing. Nobody wants to look at you running if you’re flailing your arms wildly all over the place like Elaine dancing from Seinfeld.
An ideal arm swing has your arm bent at about 90 degrees and a front to back swing (not side-to-side).
Imagine a pretend line that goes down your mid-line or center of your body. When you run, your hands should not cross over this imaginary line.
Cup your hands loosely together (no clenched fists!) and if you want to use your arms for momentum, pump your elbows, not your hands.
Once you incorporate these changes into your running form, you’ll feel a lot more comfortable and your injury risk is going to plummet.
For extra credit, learn to run softly and quietly. Foot stomping isn’t allowed and gets increasingly more difficult as you approach 180 steps per minute.
A few other things you want to keep in mind:
Keep a tall back, chest up. No slouching.
Look 30-50 meters in front of you – not head down looking at your toes.
Both are easy cues to keep an athletic posture and good running form.
Go back through and read this section a few more times. We know it’s a LOT to think about while running, but it is incredibly important. If you get a chance, have somebody film you running, and then watch your tape back to see how you’re doing.
I should note that we provide form checks to our coaching clients. Through our awesome app, you can record a video of your running form or exercise technique and send it right to your coach! That way you can know your running and training safely and correctly!
10 Tips and Tricks for Training for Your 5K
Although the Couch to 5K Program covers specifically how you should be training, it still leaves out quite a few important things (like technique, which I covered above!).
Once you’ve picked your 5K training program, here’s how to get yourself to ACTUALLY follow through on your training!
#1) Recruit an accountability partner. Have somebody that trains with you (or at least somebody you tell about your training), so that each day you can check in with each other.
Wanna be diabolical?
Give somebody else $100 of your money. And tell them you’ll check in with them after your training every day – if you don’t do your run, they’ll donate $50 of that money to a political cause you HATE.
While you’re building the habit of running, you need to make the pain of skipping your run greater than the pain of doing the run.
Do this enough times until you build up enough momentum and get hooked on that runners high so that you actually look forward to training.
#2) Warm-up before, stretch after. Don’t do static stretches before your runs. It’s not doing what you think it is[5]. Instead, you’re going to warm up your muscles through active movement.
Do a dynamic warm-up before you run. Continue this by going for a light jog, high knees, and warming up your muscles through movement.
#3) Make it the first thing you do each day. Build the habit of doing your run first thing in the morning when life hasn’t had a chance to get in the way.
Sleep in your running clothes.
Put your alarm clock/phone across the room. Put your running shoes by the door. By hacking your Batcave, you’ll minimize the steps between you and the new habit you’re trying to build.
#4) Strength training makes running easier. Doing 1-2 sessions of strength training per week (on days you’re not running) will help you burn fat, build muscle, and stay injury-free.
Follow our Beginner Bodyweight Routine, no equipment required. We’ll have you training with your furniture instead:
If you sign-up for our free weekly newsletter, I’ll send you a PDF of the workout so you can track your progress.
Grab Your Beginner Bodyweight Routine Worksheet. No Gym Required!
Complete this workout at home, no equipment required
Avoid the common mistakes everybody makes when doing bodyweight exercises
Learn how to finally get your first pull-up
#5) Don’t worry about your shoes when you start. Wear whatever shoes you have so that you can just get started building the habit immediately. If you START to love running, read our article on proper footwear and get yourself some better kicks.
The same is true for “running clothes.” Do not let this be a barrier to entry.
Start running first and make sure you like it before you go spending any hard-earned cash on stuff you’re not gonna use.
Oh, and as Coach Jim mention in the video below, DON’T RUN IN BRAND NEW SHOES!
Trust us on this one.
#6) Sign up for your race as far in advance as possible. Use 20 seconds of courage if you need to, but commit to the race.
If you don’t sign up, you’re going to be much more likely to back out when life gets busy.
But if you pay for it ahead of time, and get other people to run with you, you’re going to be using positive peer pressure to follow through on your commitments.
#7) Your race time doesn’t matter! Who cares if you’re the last person to finish? Like the Rock taught us, it doesn’t matter.
What’s important is that you finish something that you started. That’s a huge accomplishment in itself.
#8) Start a running club or join one at work – the more people you surround yourself with that are doing the things you want to do, the better. Hang out with runners that are faster than you.
You’re the average of the 5 people you associate most with, so you might as well start associating with faster, healthy runners.
#9) Don’t have an in-person running community? That’s cool! Join the Scouts Guild in the Nerd Fitness Rebellion.
It’s the section of our community that does running, biking, swimming, and other distance-based activities!
#10) Hire a coach. Outside of having a group of friends or co-workers keeping you accountable, a coach who routinely checks in with you and your progress can be a godsend. We’ve helped tons of people build the habit of running!
What Do I do After the Couch to 5k?
You made it through the training, and you ran/walked your first 5K! I’m so proud of you.
Gold star.
A+.
So after successfully completing your first 5K, you may be wondering what you should do next. To run again or not…
Many new runners absolutely love the atmosphere at a race; the number pick- up, pre-race motivational speech, cheering crowds, and crossing that finish line.
Oh, and the post-race beer and meal is the best food and drink you’ve ever tasted.
So after the excitement settles down, you need to ask what you want to do next.
Your three options:
Run Faster: Sign up for another 5K, keep training, and try to beat your previous race time.
Run longer: Maybe you want to run a longer race like a 5 miler, a 10k, or go slay a bigger dragon, like half-marathons or marathons.
Pick a different activity: Going from Couch to 5K to Couch doesn’t help you at all. Temporary changes create temporary results.
Notice there wasn’t a 4th option, the option that usually everybody picks:
“Go back to sitting on the couch”
That’s Mistake #5: not having a plan to CONTINUE exercising after Couch to 5K!
As we say at Nerd Fitness: “Temporary changes create temporary results.”
So you have to do SOMETHING next, otherwise all that hard work and training will have been for naught!
Want help figuring out exactly where you should go from here? I got you!
Pick the option below that best aligns with your goals and timeline:
#1) We have a bunch of NF Coaching clients that are training for 5Ks, 10Ks, half-marathons, and tough mudders. If you want step-by-step guidance on how to lose weight, eat better, and train for races, check out our killer 1-on-1 coaching program:
2) If you want a fun way to start running 5ks, check out NF Journey. Our fun habit-building app helps you exercise more frequently, eat healthier, and level up your life (literally).
Try your free trial right here:
3) Join the Rebellion! We need good people like you in our community, the Nerd Fitness Rebellion.
Sign up in the box below to enlist and get the Nerd Fitness Starter Kit, including the 15 fitness mistakes you don’t want to make and our guide to the most effective diet and why it works
Get Your FREE Nerd Fitness Resource Kit
15 Fitness traps you should avoid
Comprehensive beginner’s guide to Paleo diet
BONUS: How to level up your life and be the hero of your own story
4) Check out these other sweet running resources:
Beginner’s Guide to Running: Covering everything you need to start a running practice, including technique, proper footwear, and a training schedule.
To recap our guide on the Couch the 5K plan, these are the 5 Mistakes to avoid:
Running a 5K might be a good way to lose weight. It is entirely dependent on your nutrition. The same is true of literally ANY workout program. (Mistake #1: Not changing your nutrition)
Couch to 5K may or may not be a great program for you. It depends on how much you enjoy running, and what you are hoping to get out of the program. (Mistake #2: not actually enjoying running)
Make sure you are fit enough to endure the rigors of running! If you’re severely overweight, let’s get you in shape FIRST before we put stress on your knees and joints for thousands of running steps. (Mistake #3: Running before you’re ready)
Make sure your running technique is solid. It’ll save you years of pain and injury. (Mistake #4: Running with improper form)
Recruit a friend or find a way to stay accountable so you actually do the race!
Who cares about your race time! Just completing the race should be your goal.
Once you finish the race, decide if you want to keep running or if you are going to pick a different activity. (Mistake #5: Not having another goal after completing your 5K)
Okay, it’s your turn. I’d love to hear your experiences when it comes to training for a 5K, and if you enjoyed the process.
Have you DONE Couch to 5K? Did you stick with it?
What challenges did you run into along the way?
Share it in the comments below!
-Steve
PS:I’ll leave you with a final reminder of our 1-on-1 Coaching Program. If you’re blown away by the fact that you don’t have to run to get in shape, but don’t know where else to begin, we got you.
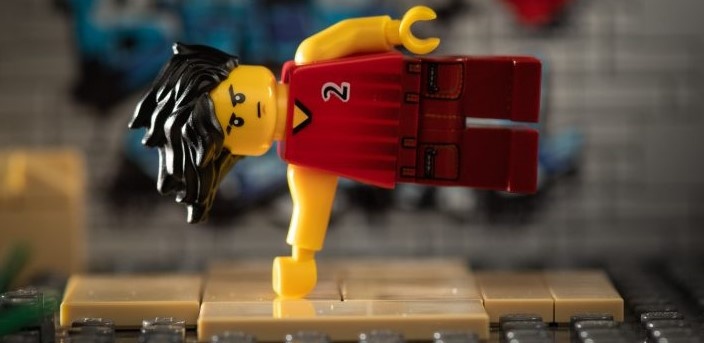


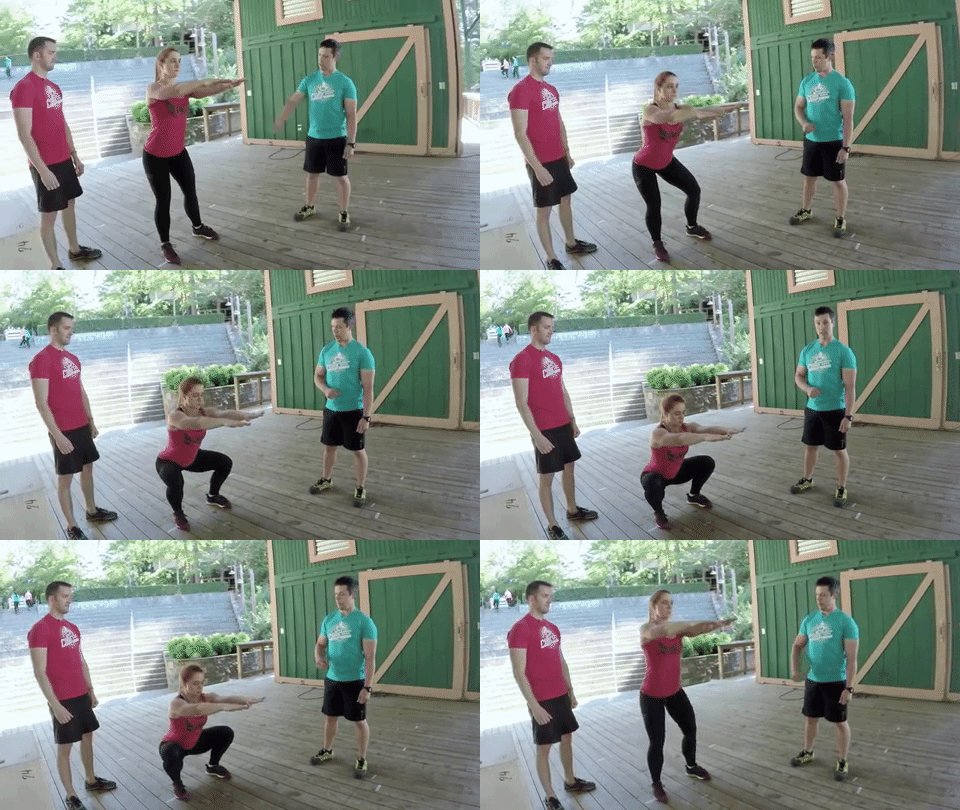
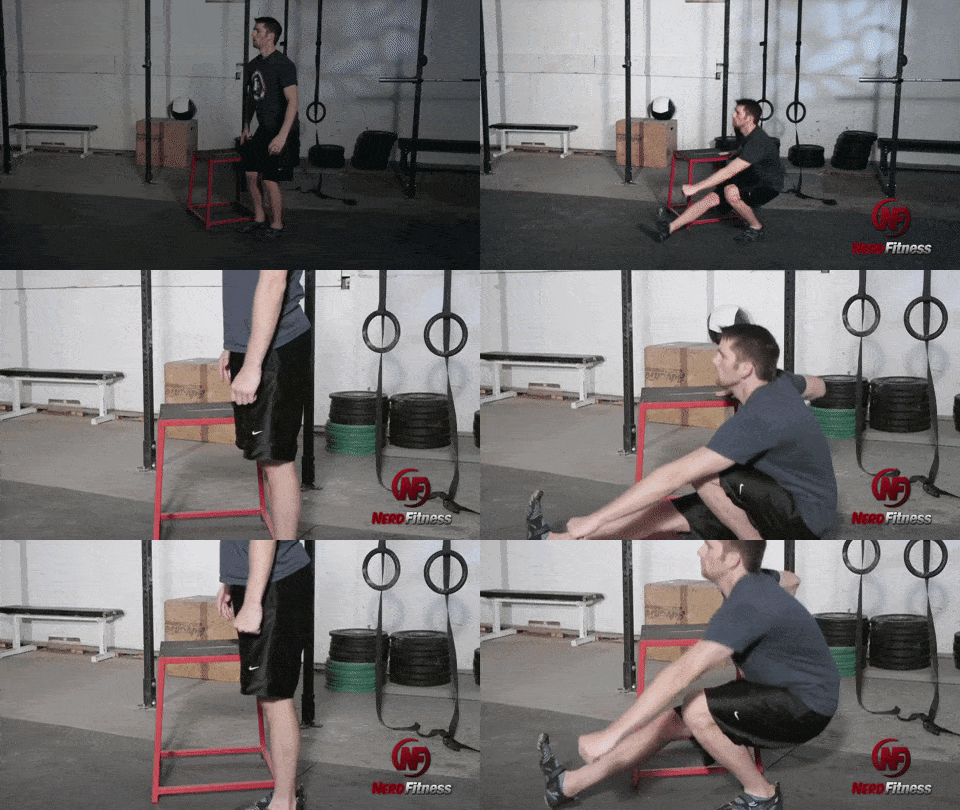
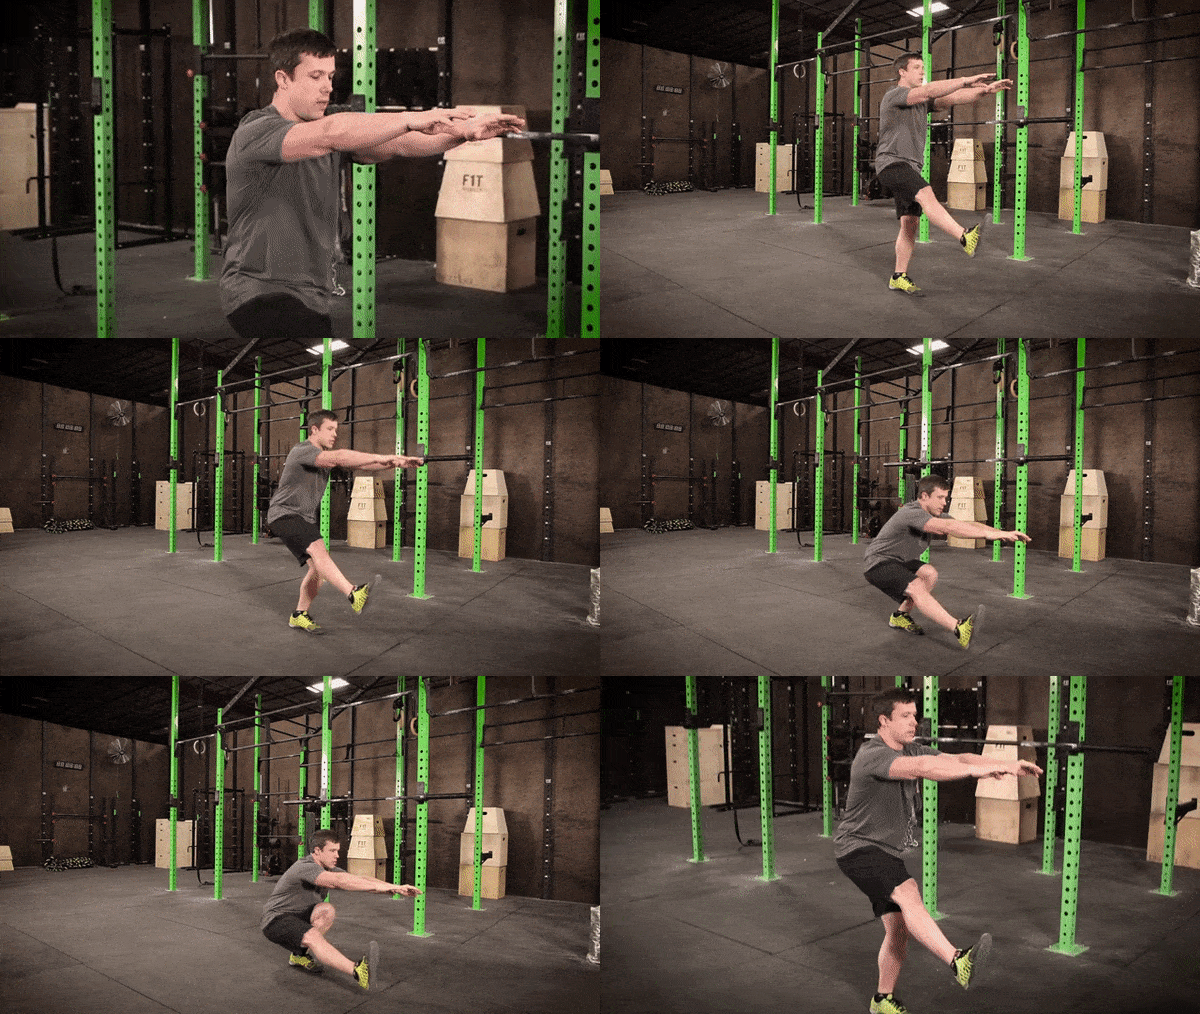
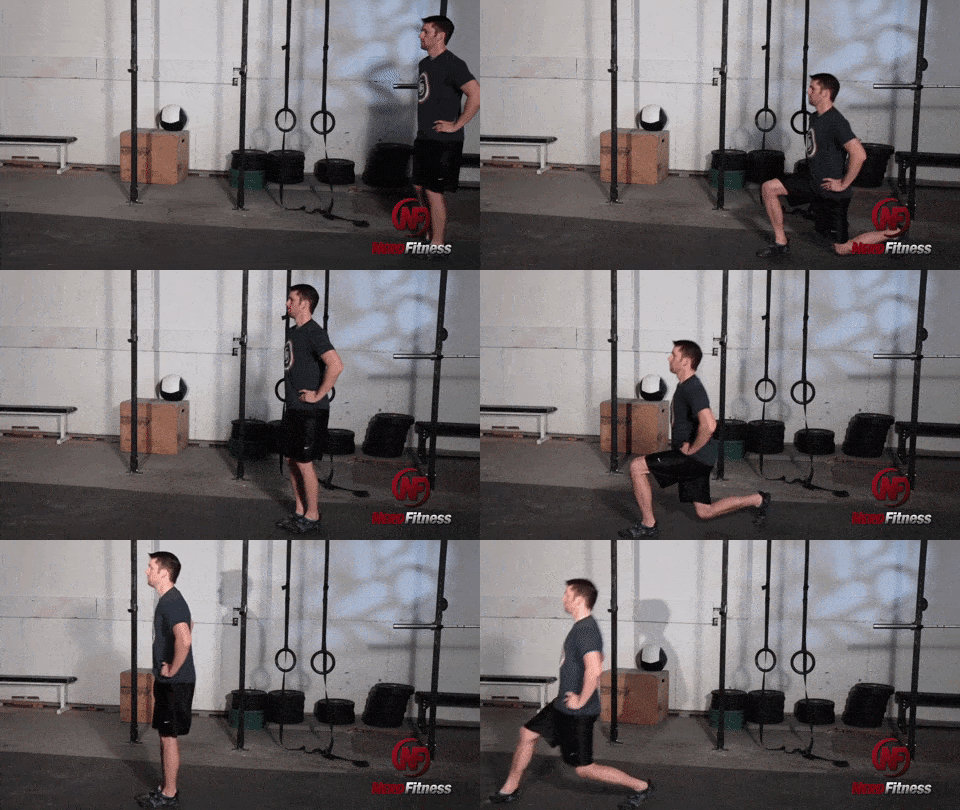
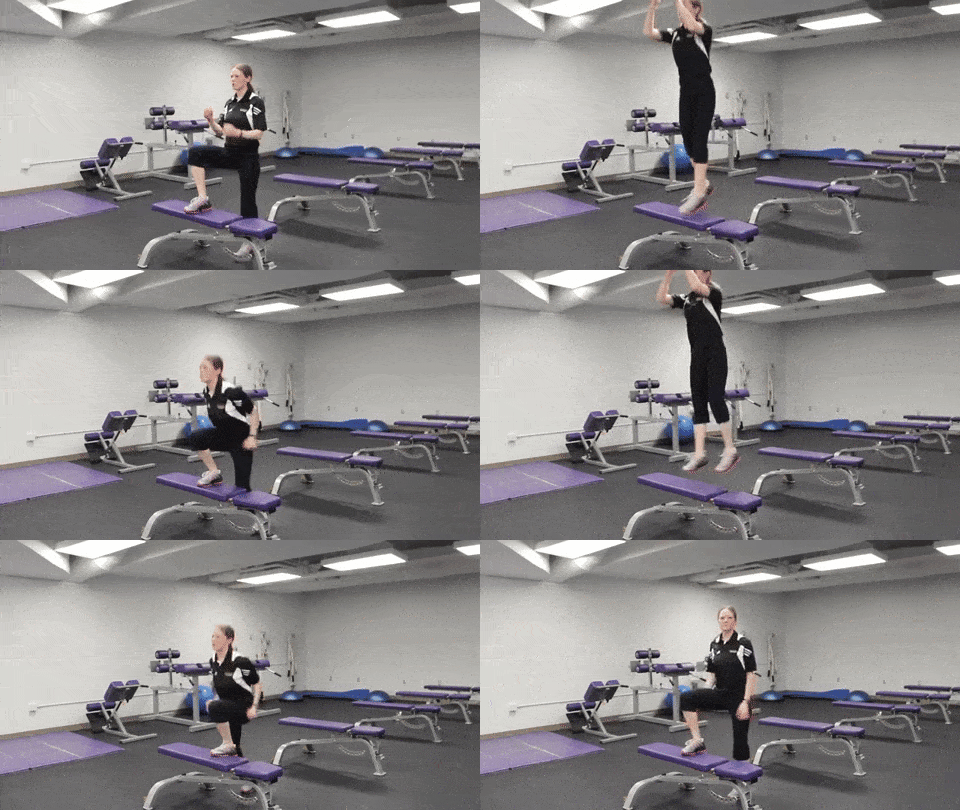
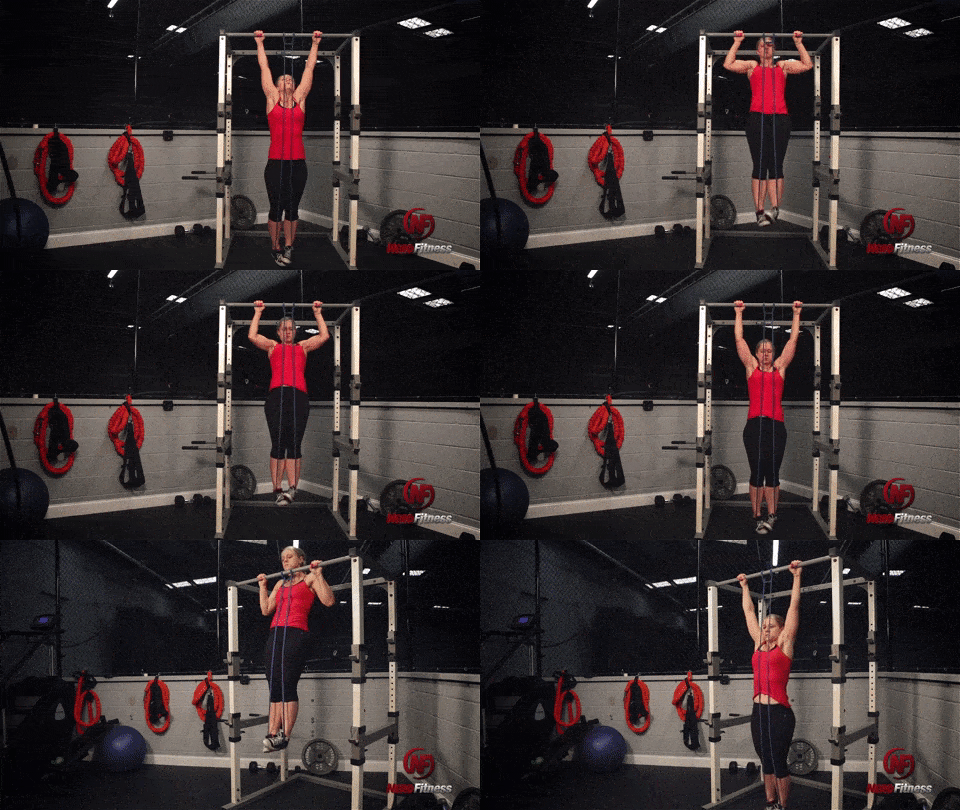
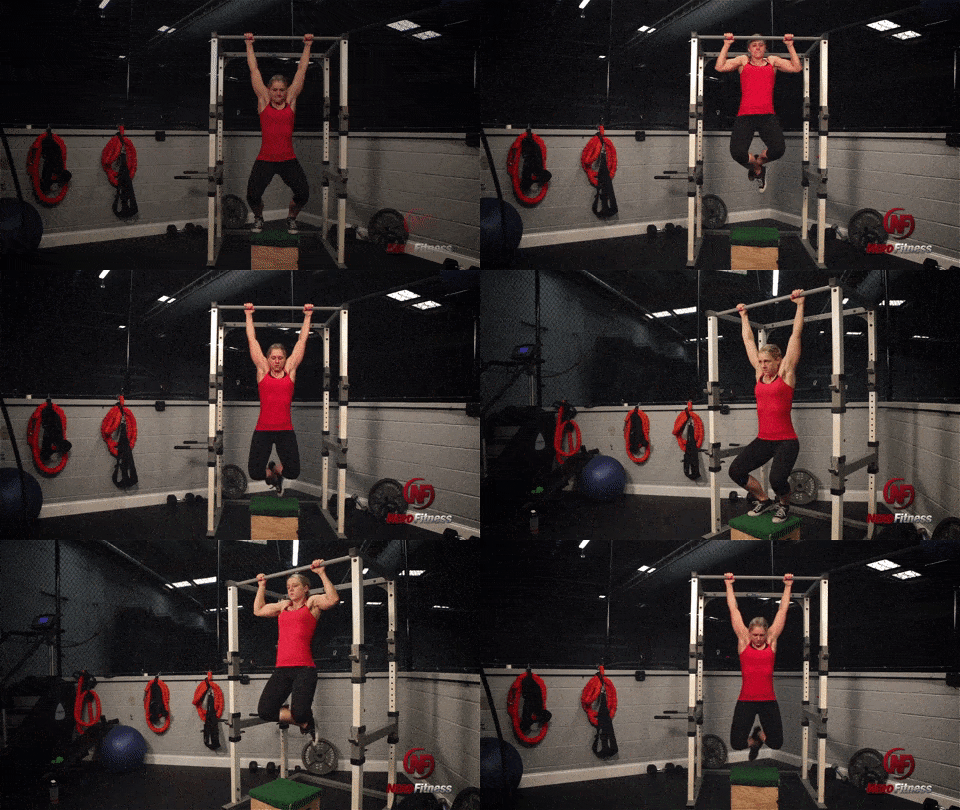
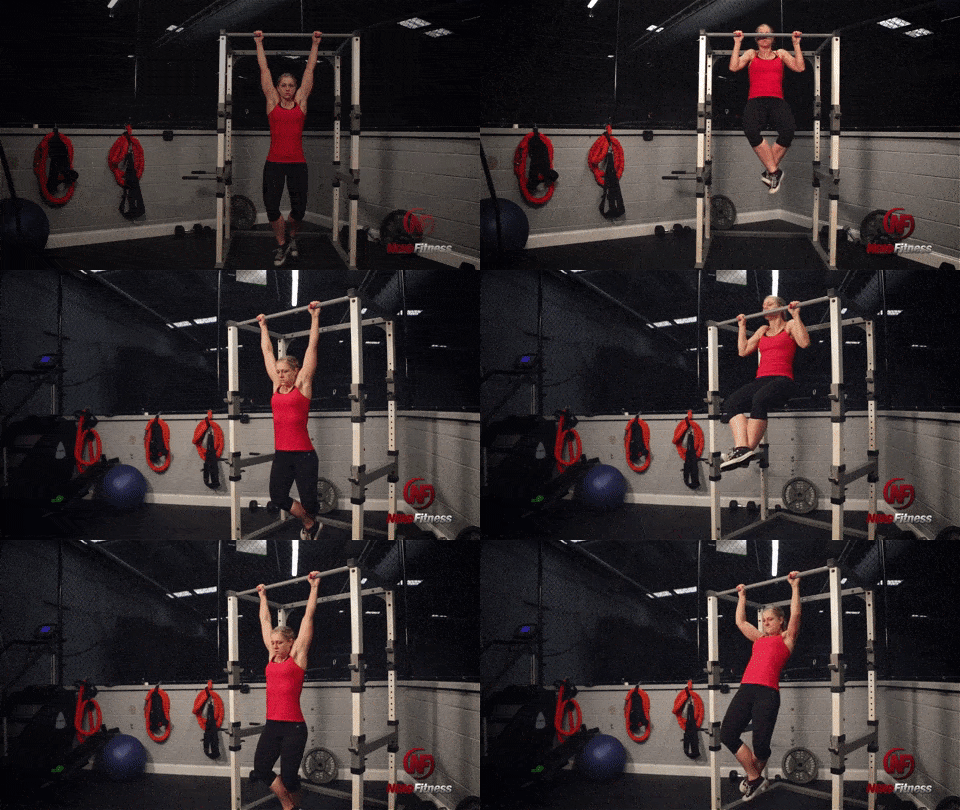
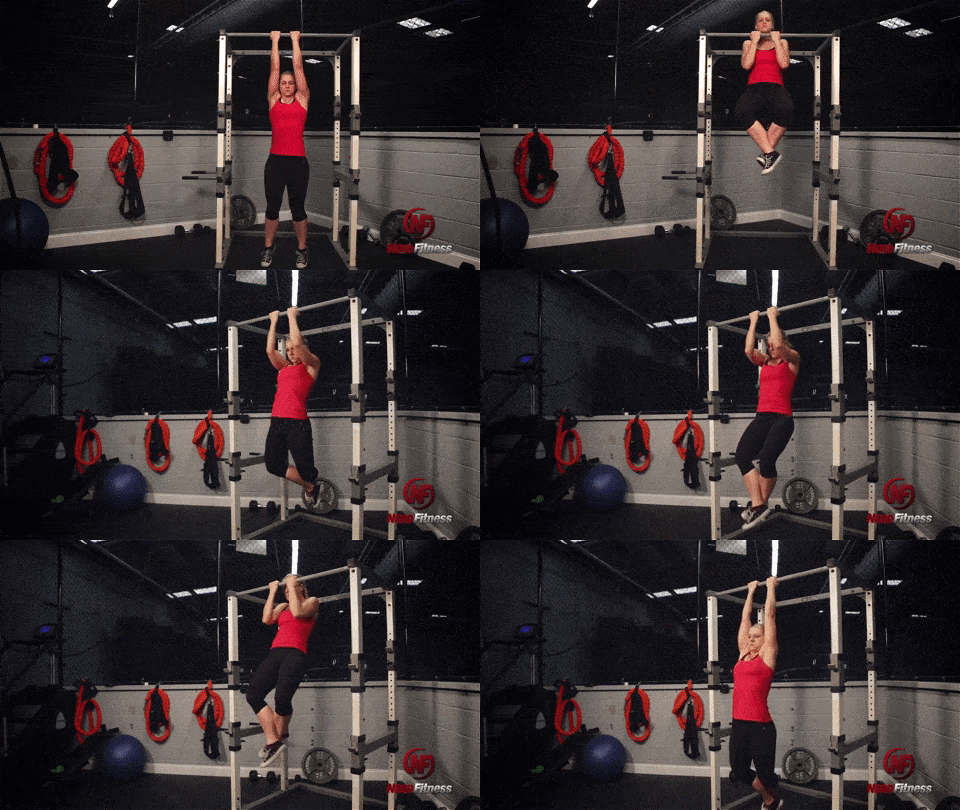

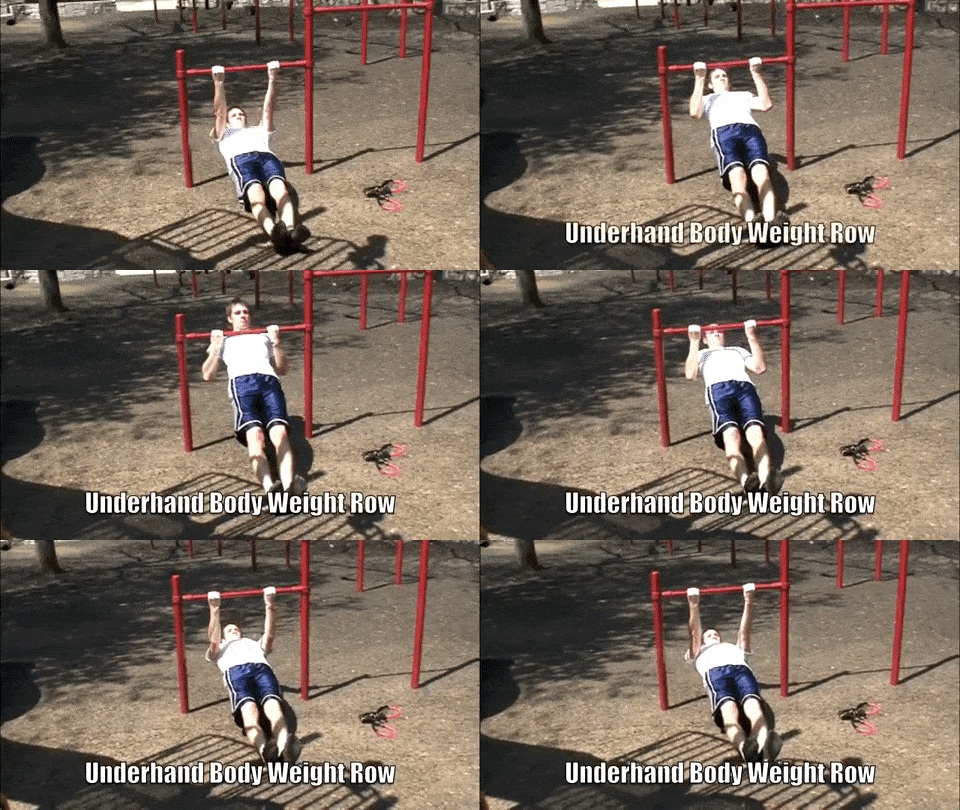
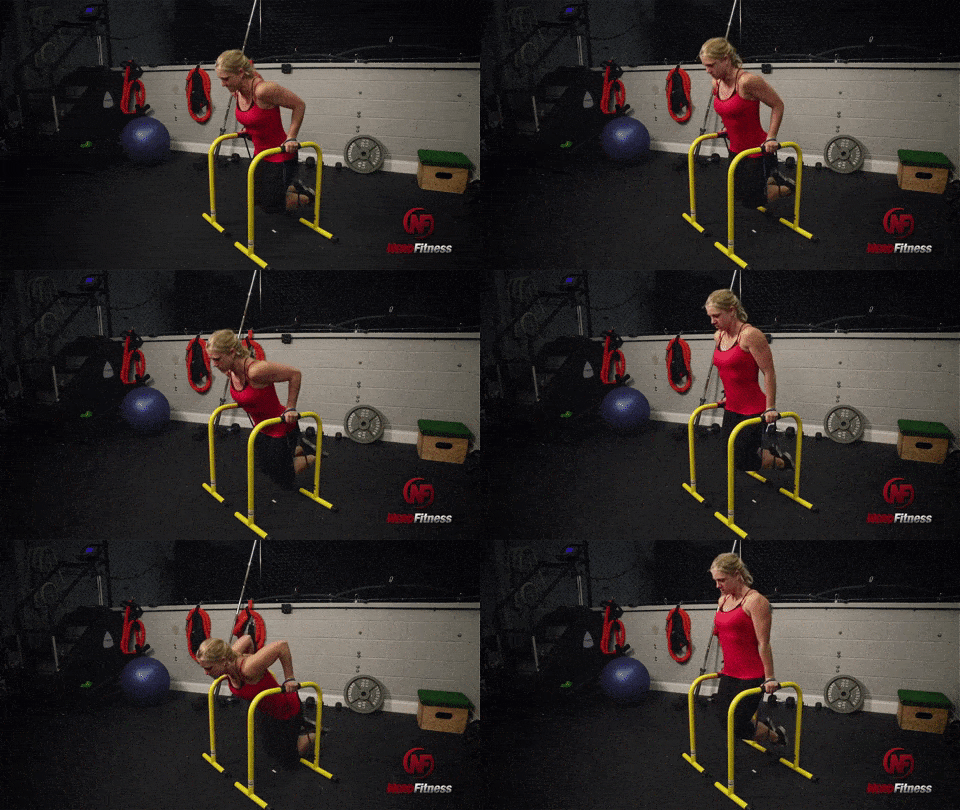

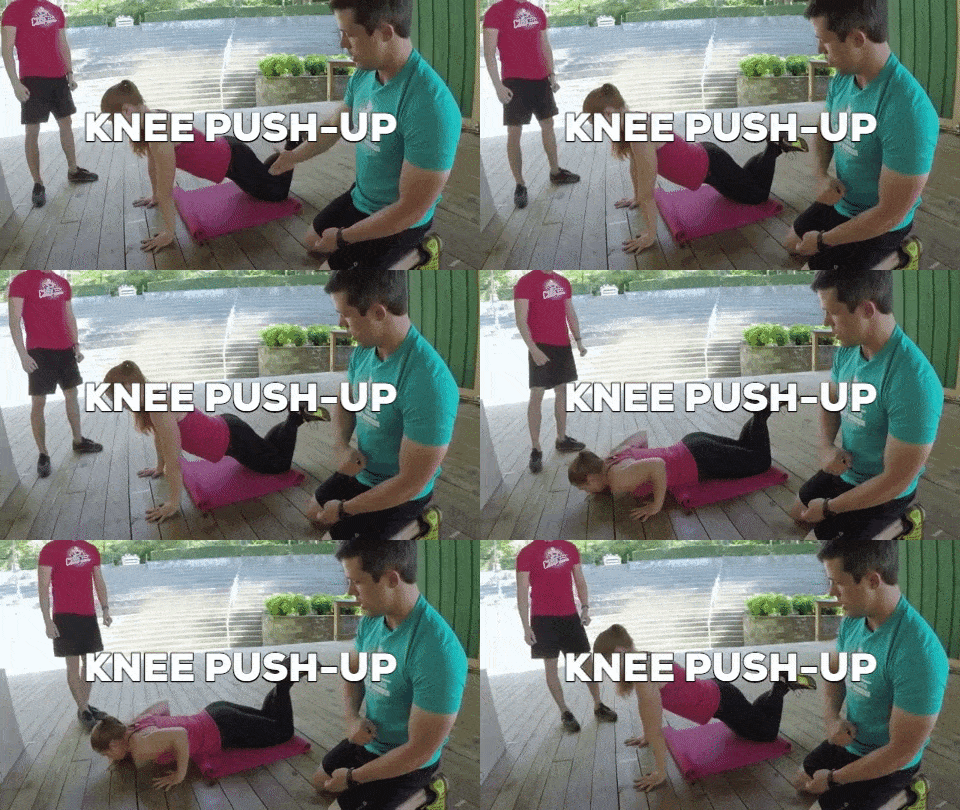
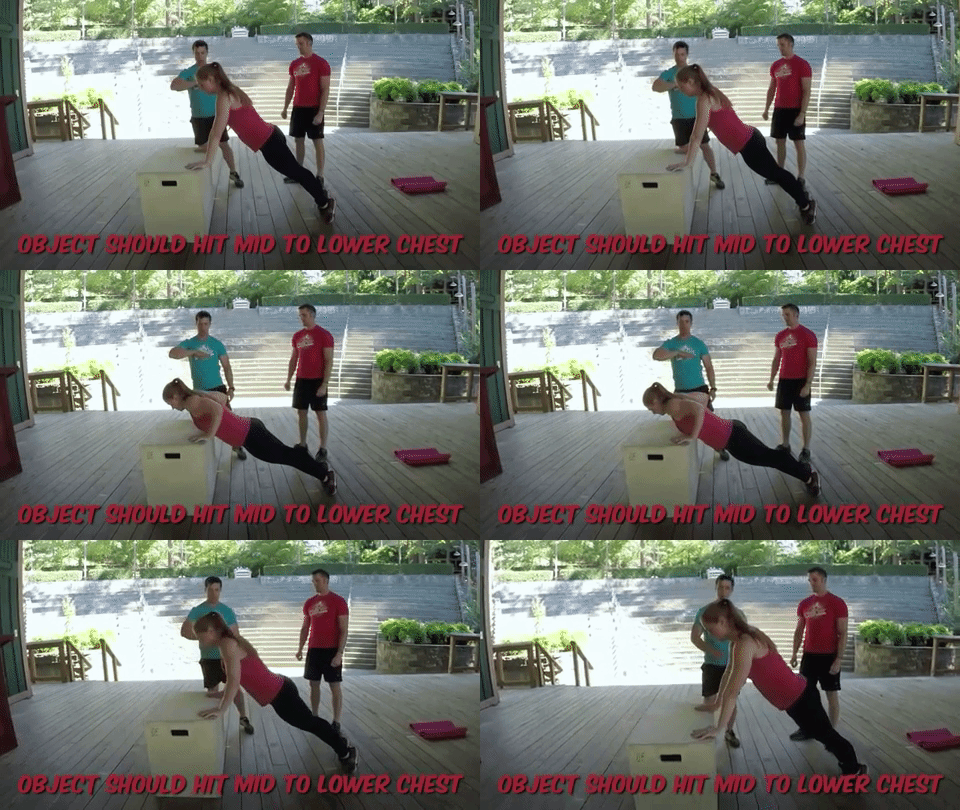
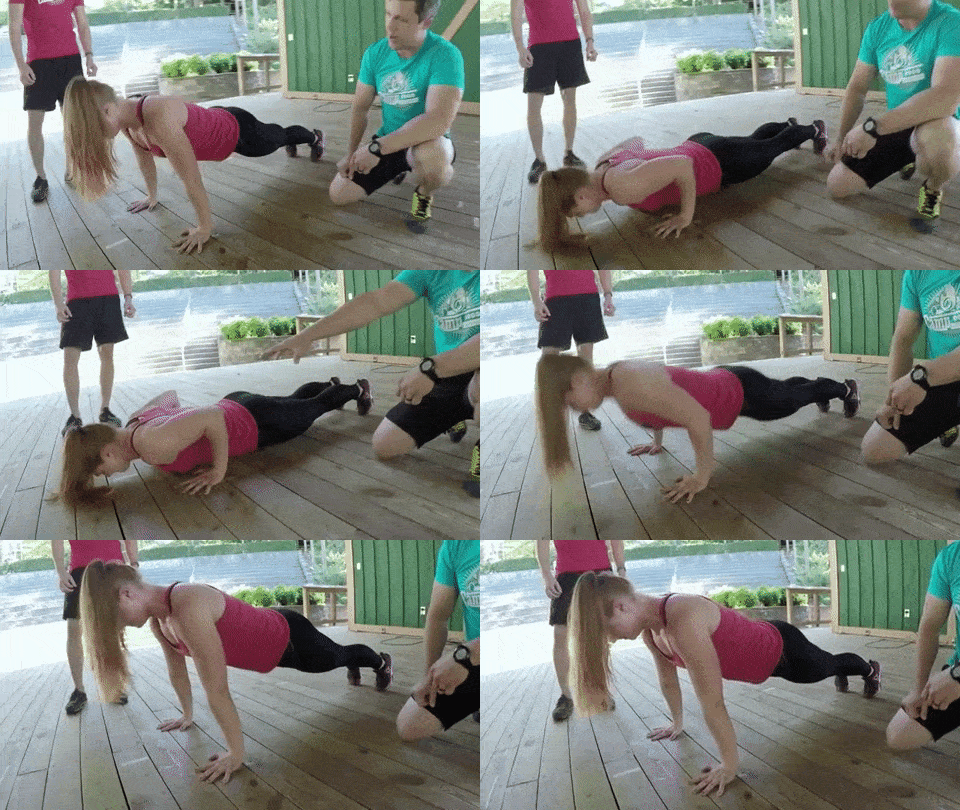
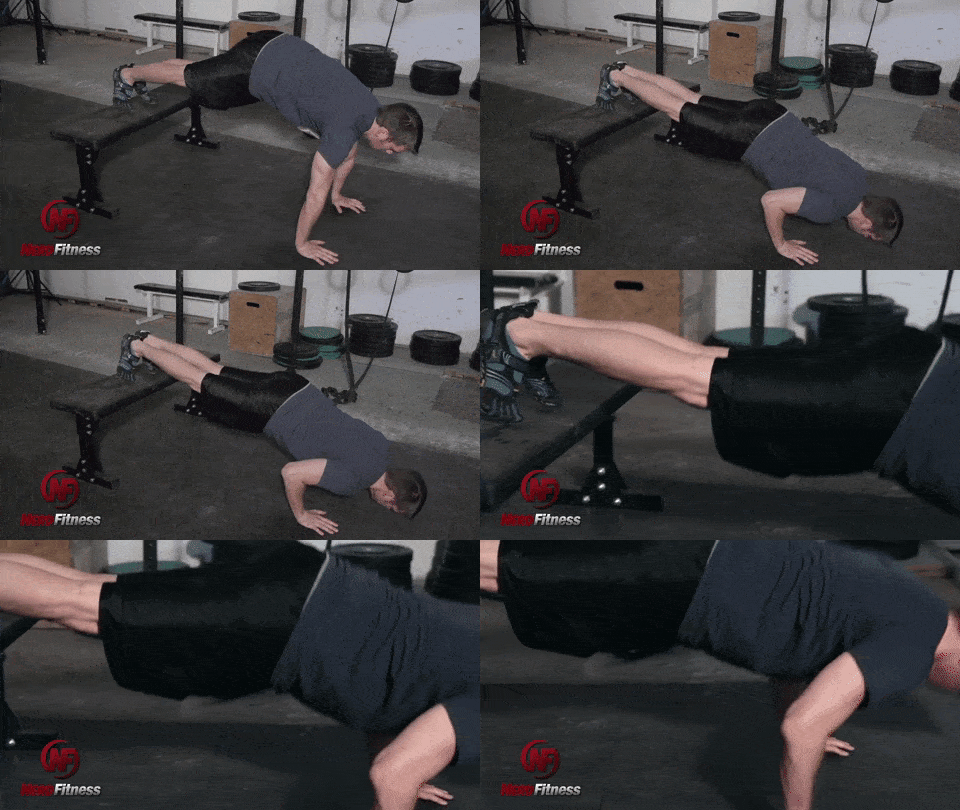
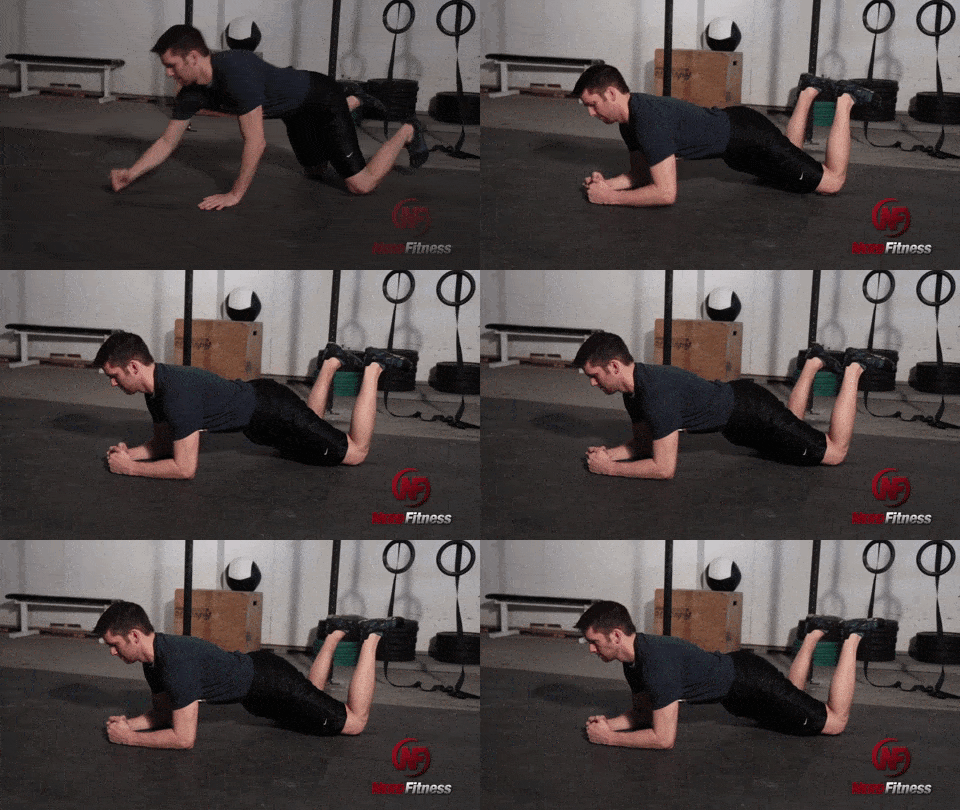
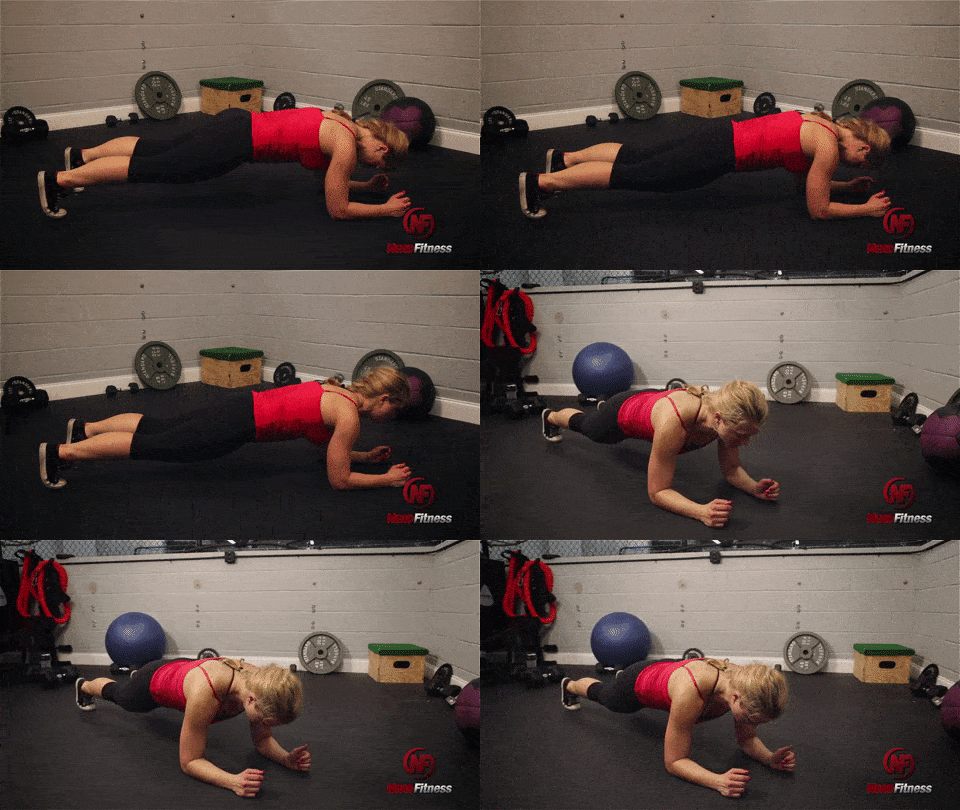
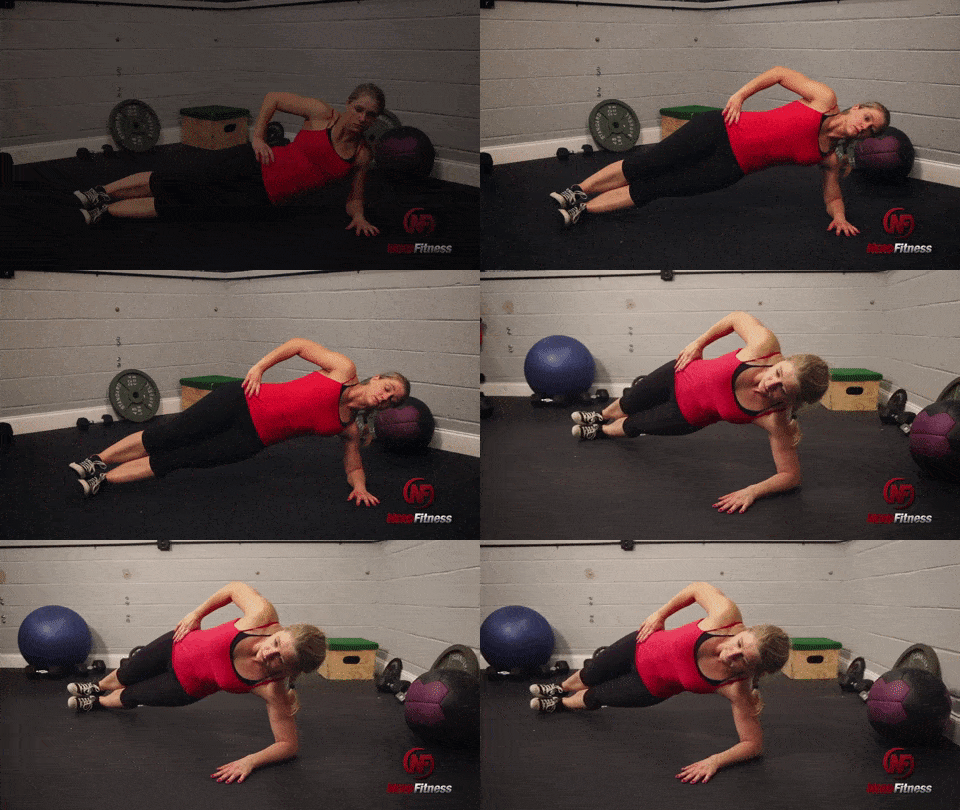
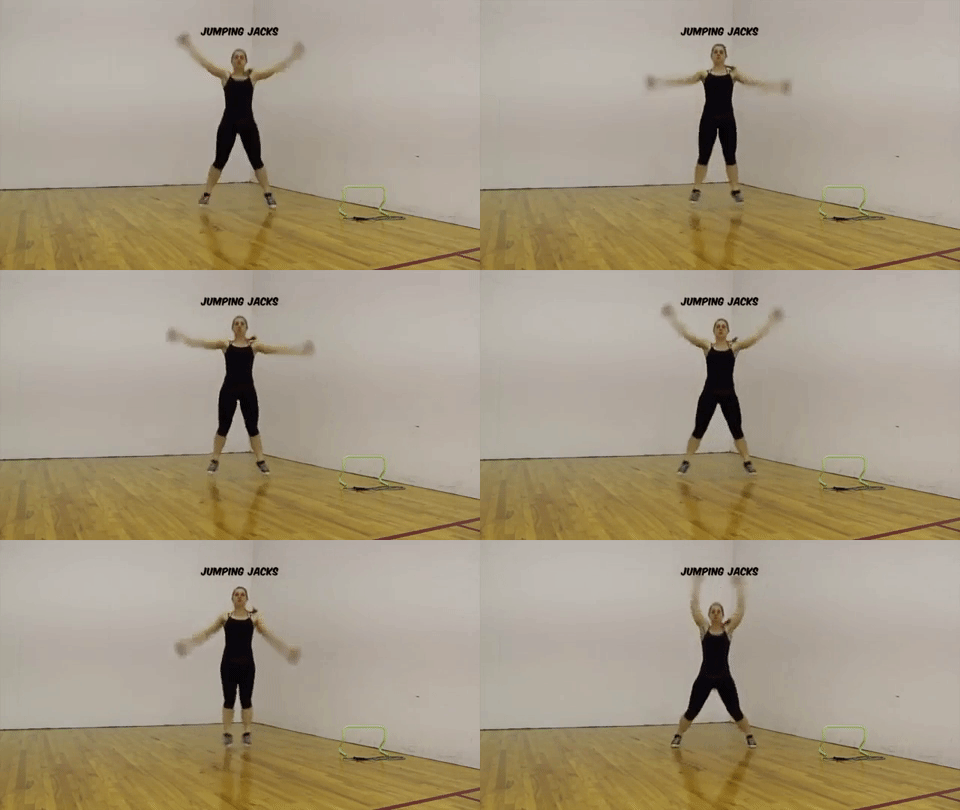





 Pull-ups are my favorite exercise of all time.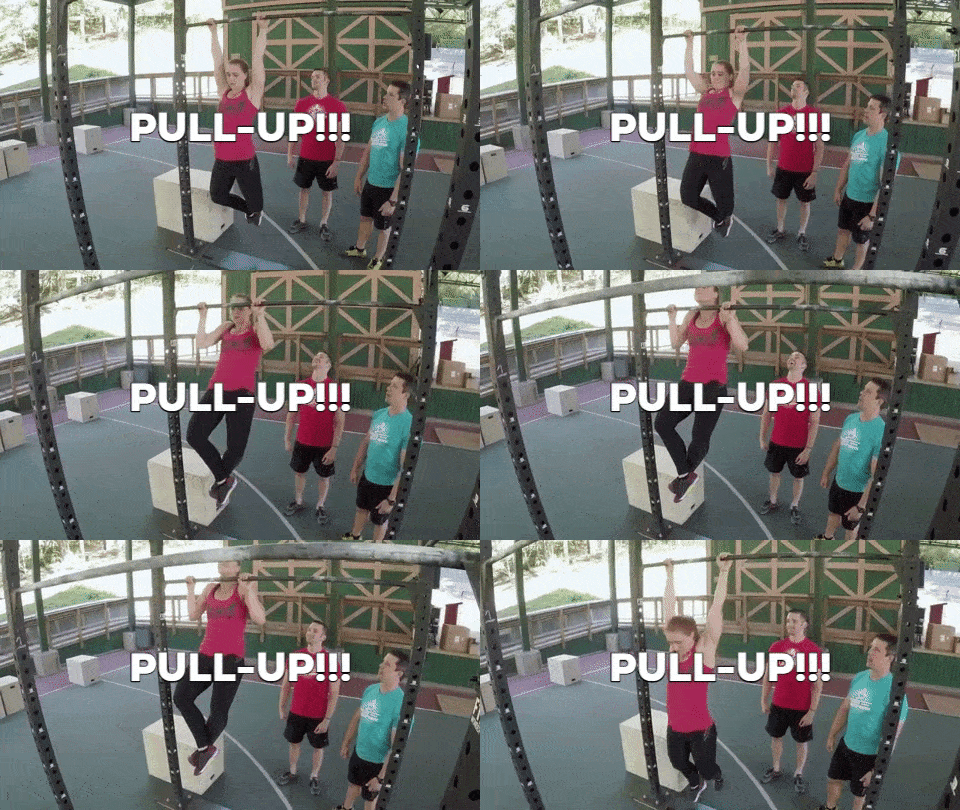

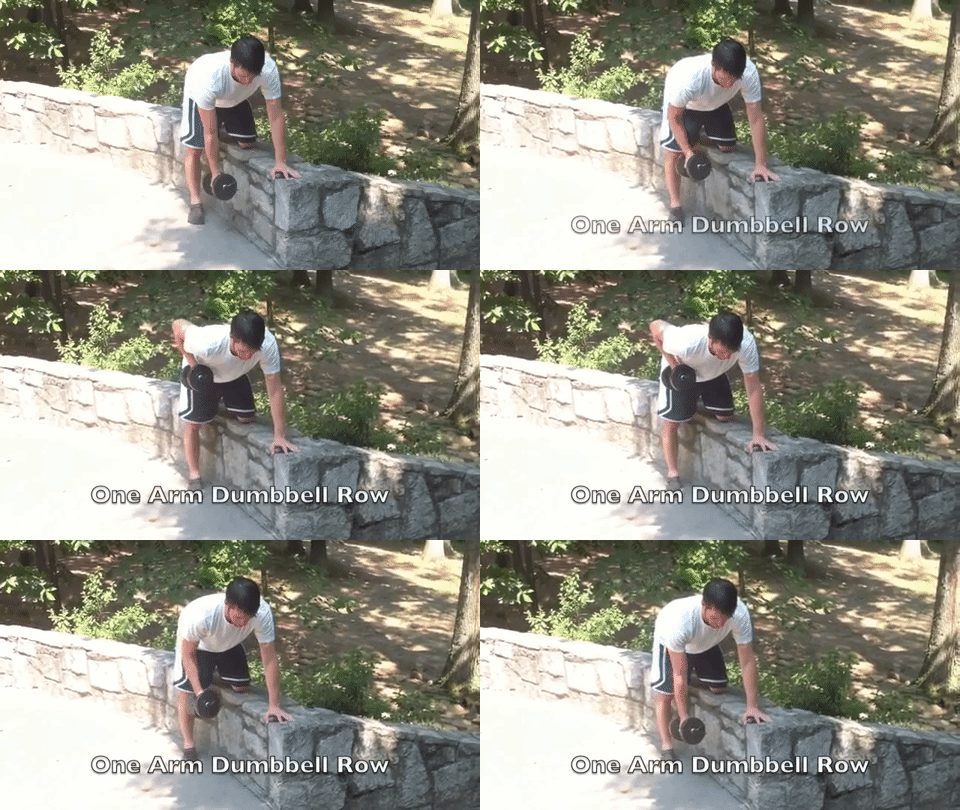
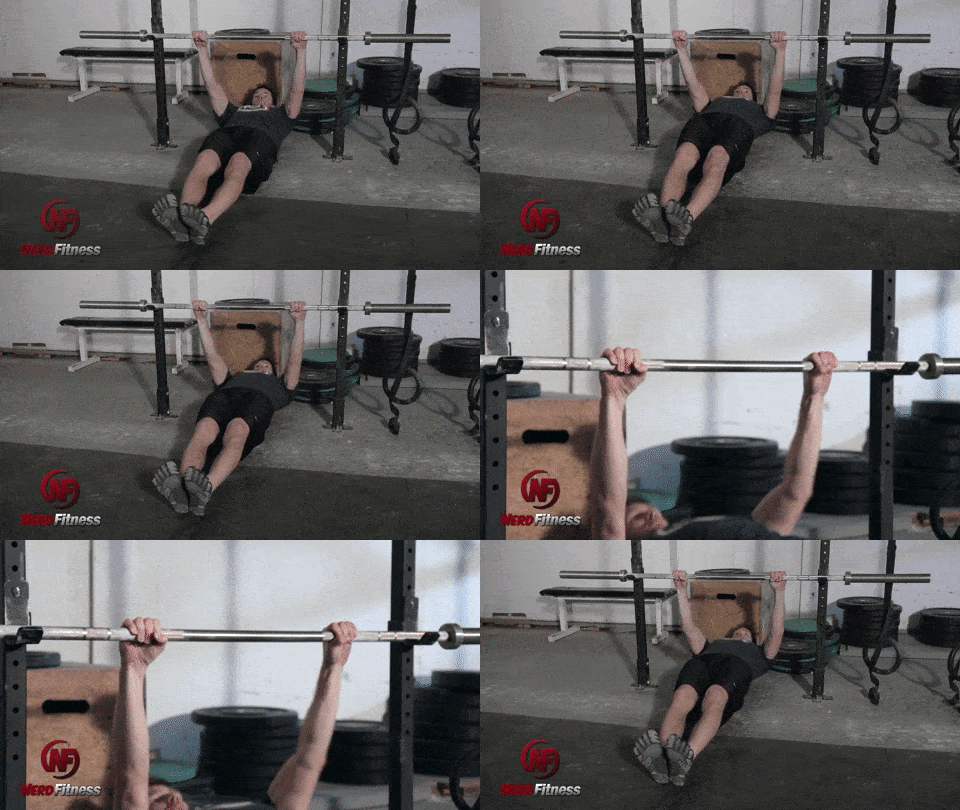
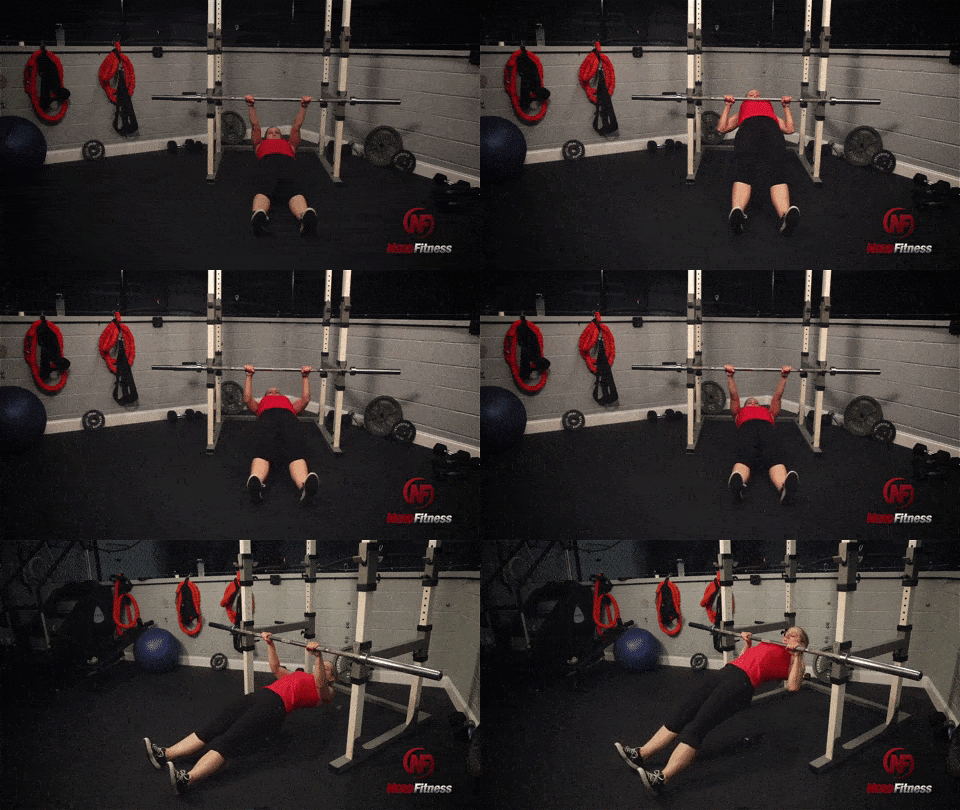
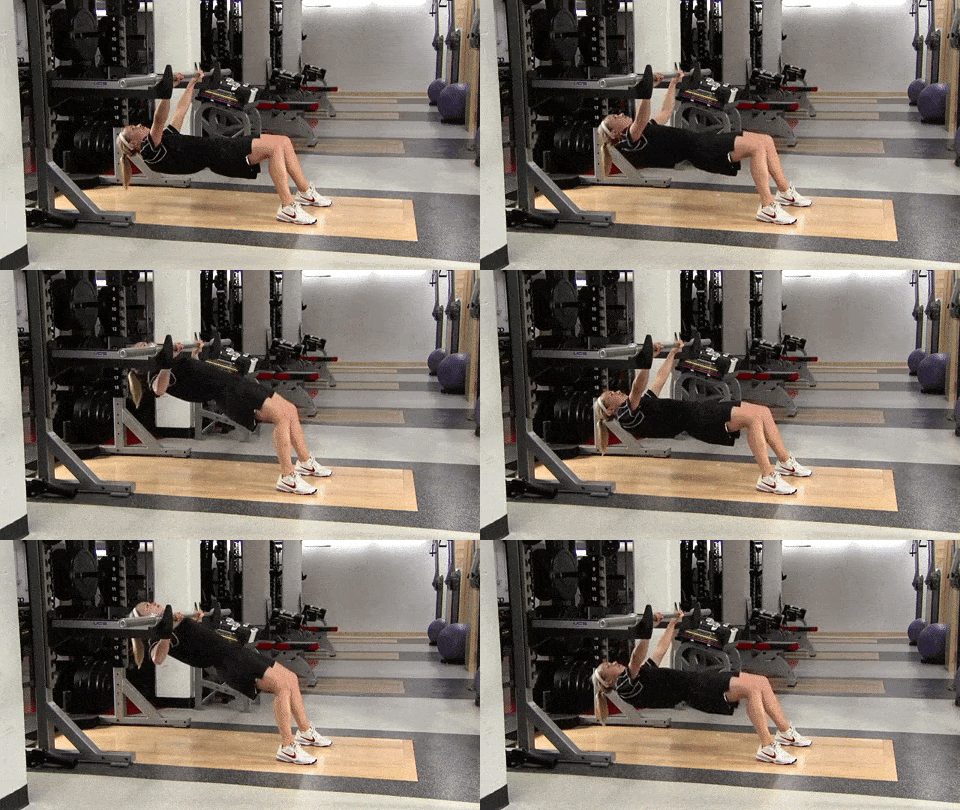
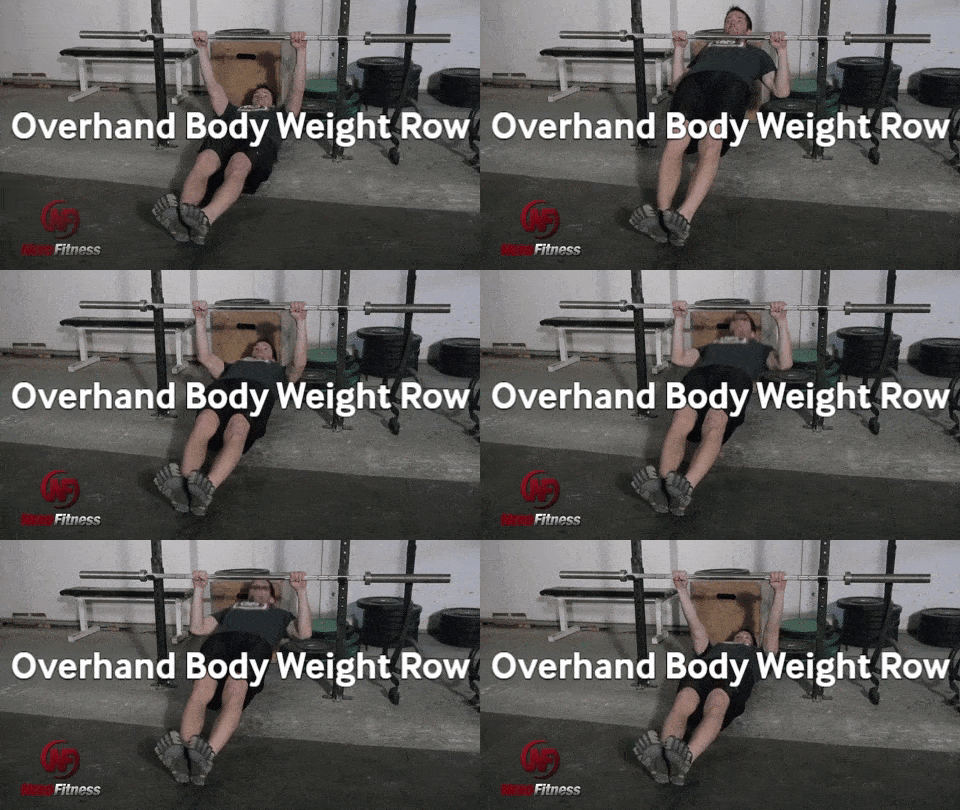
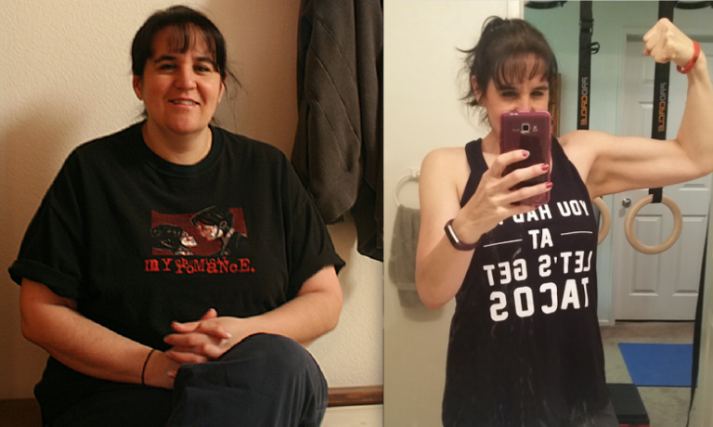
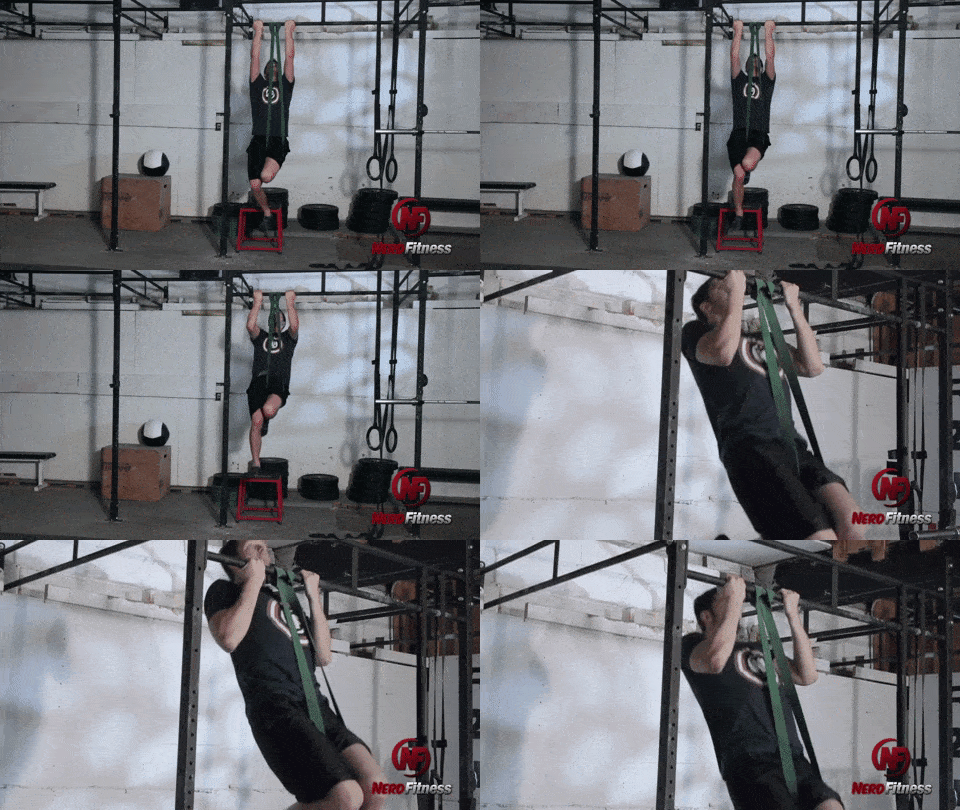
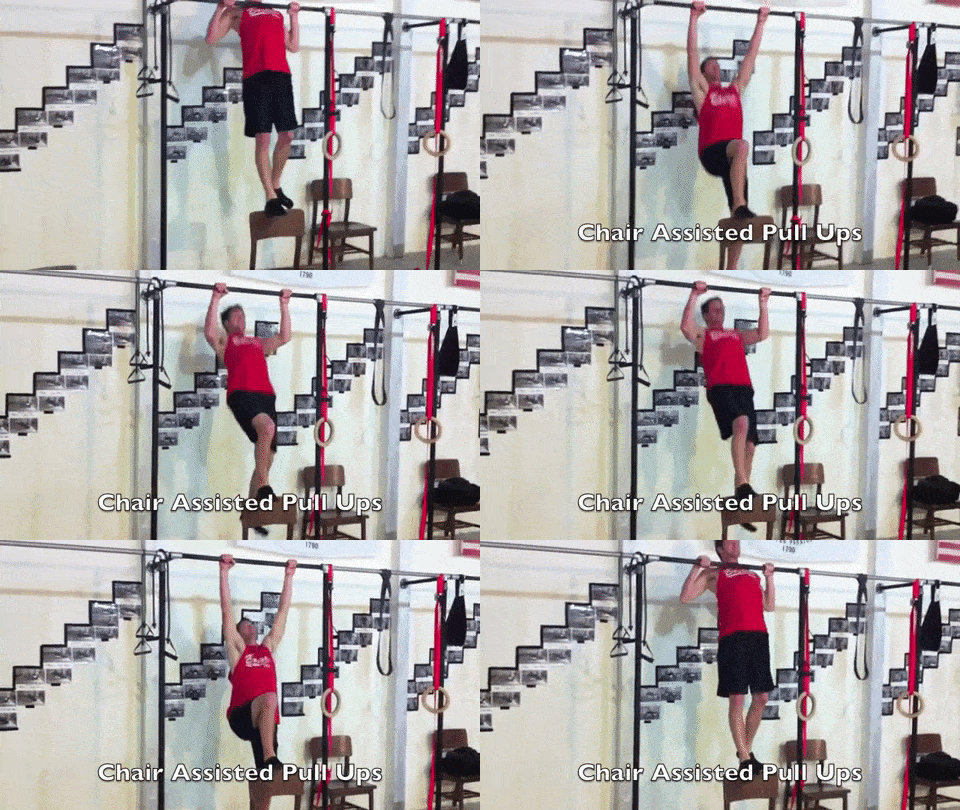
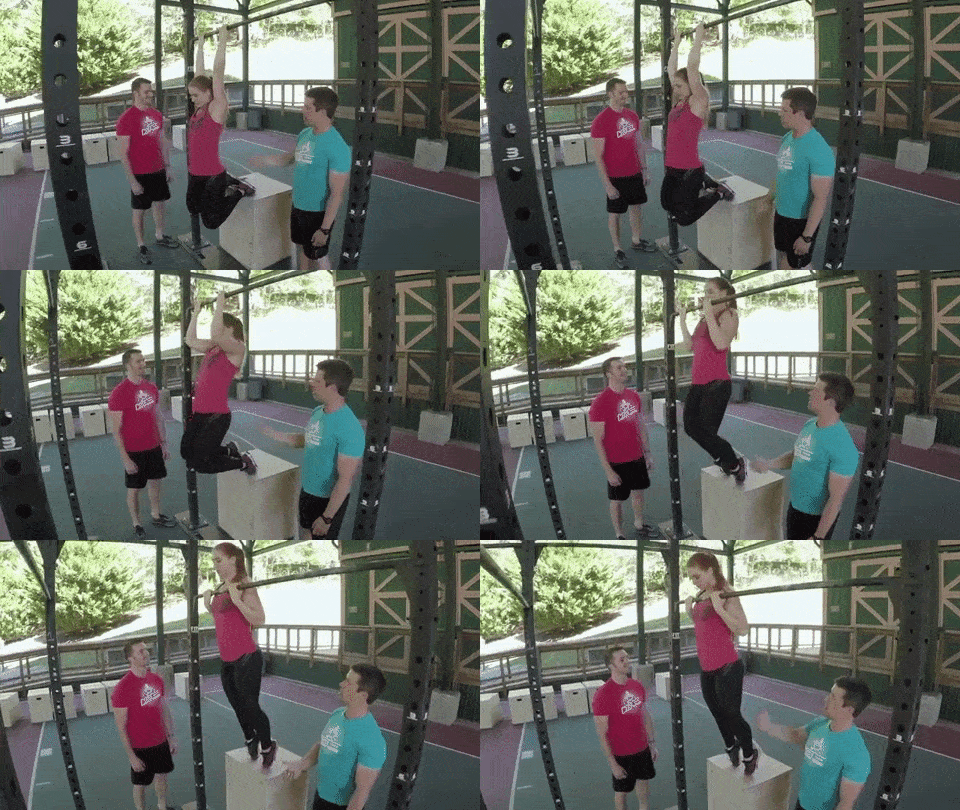
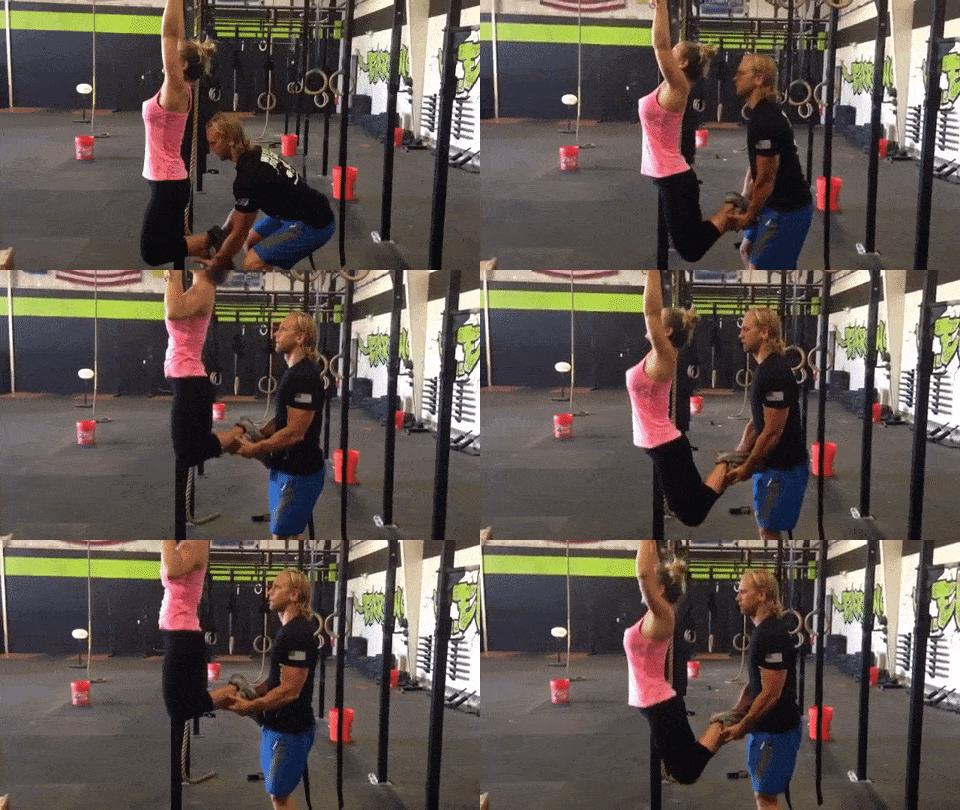
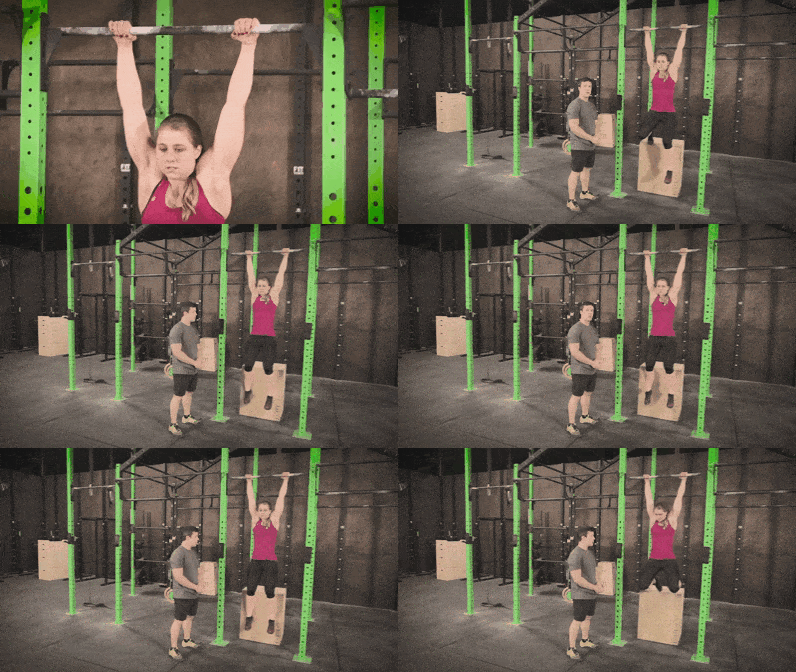
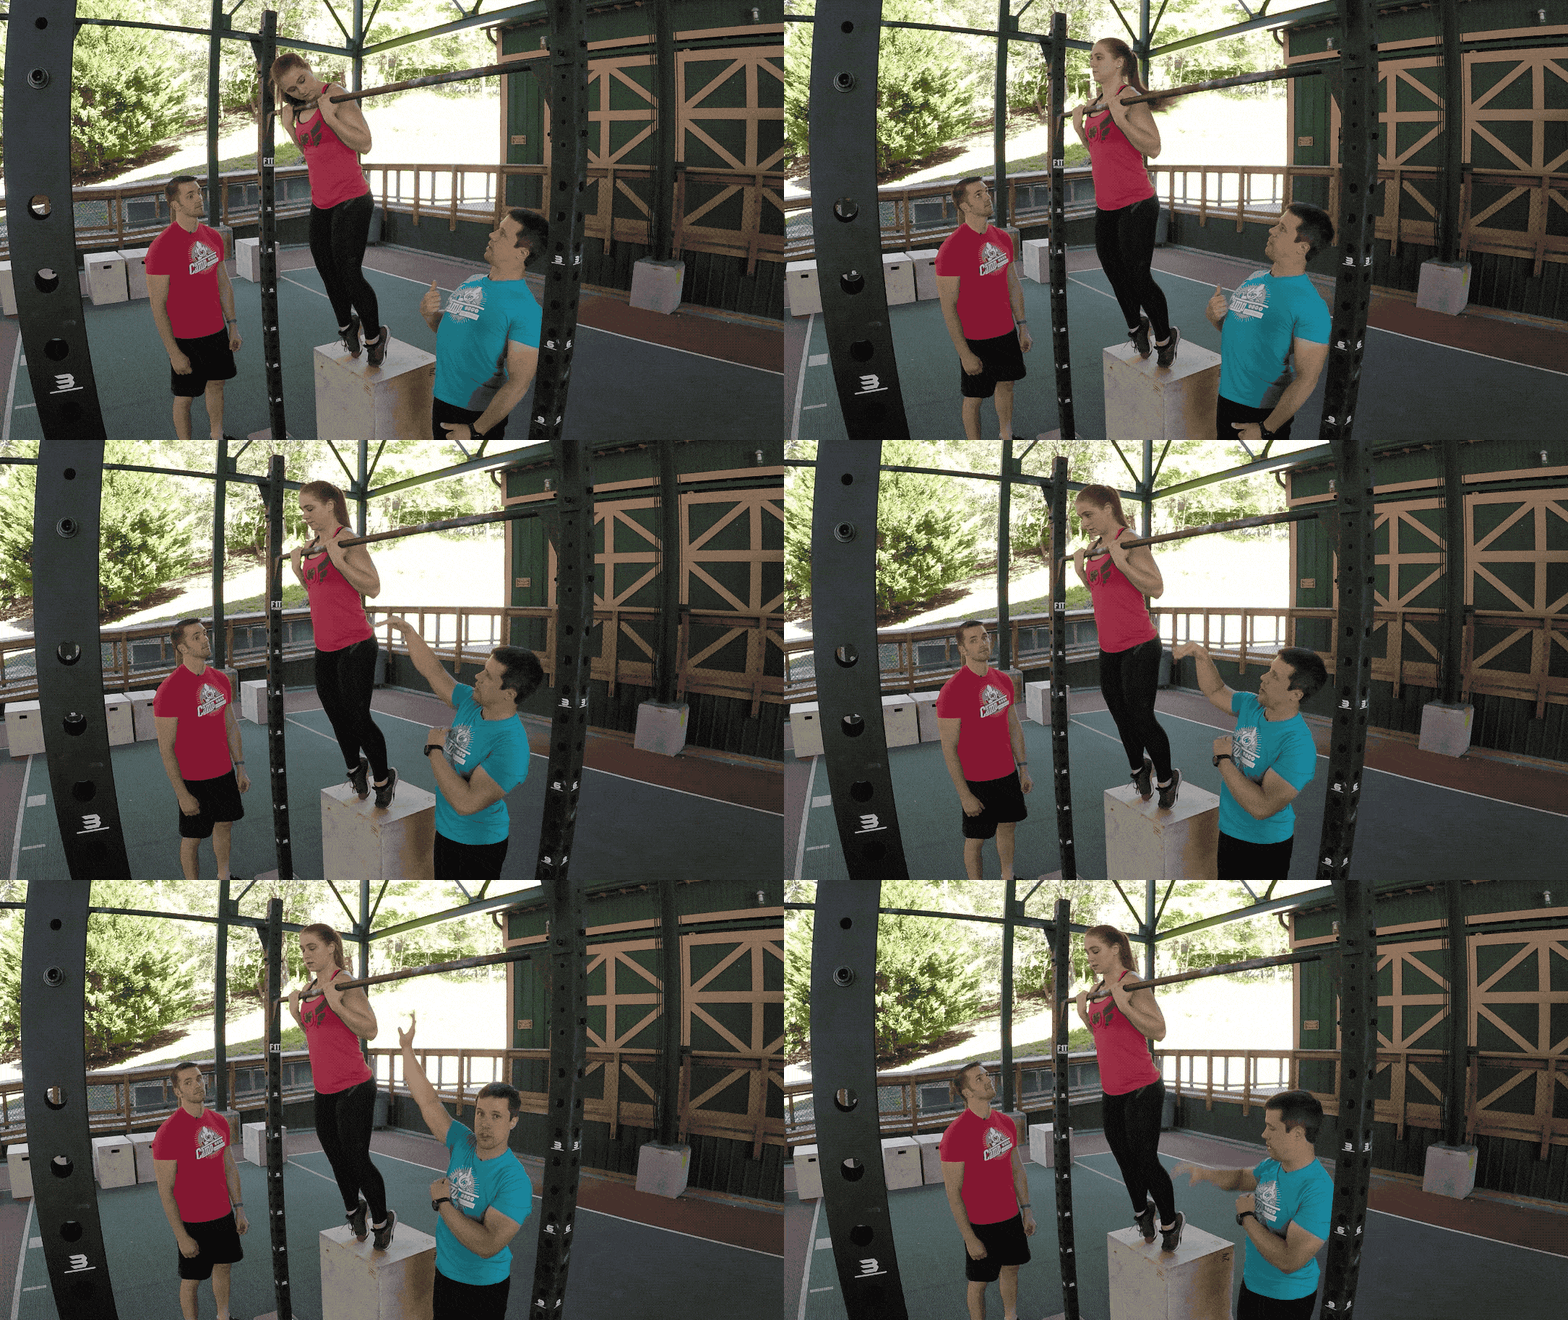
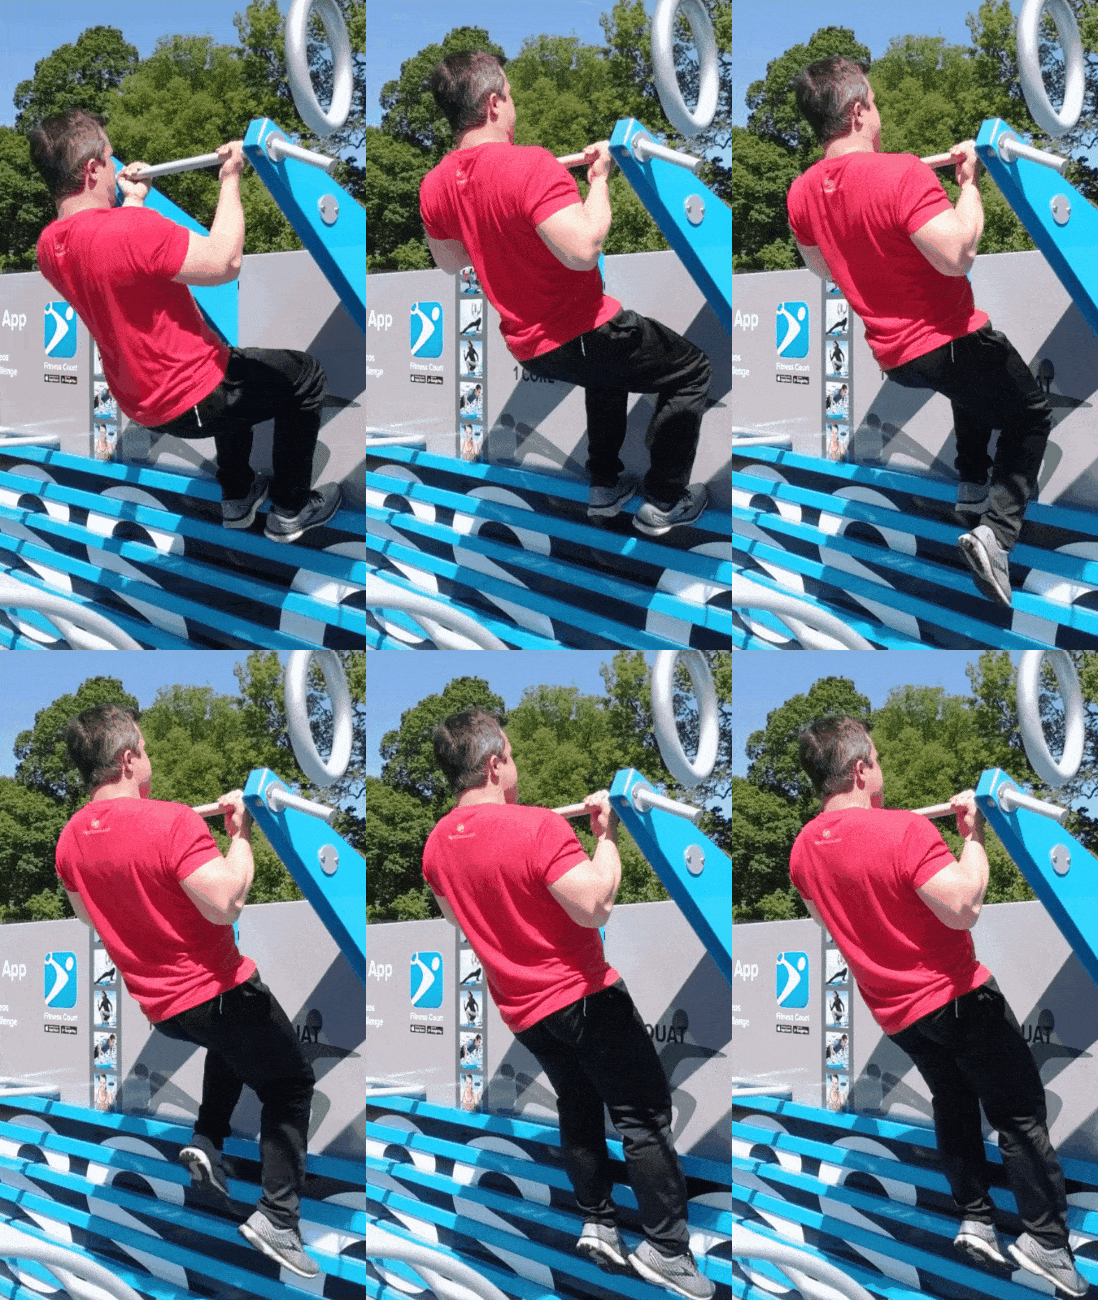
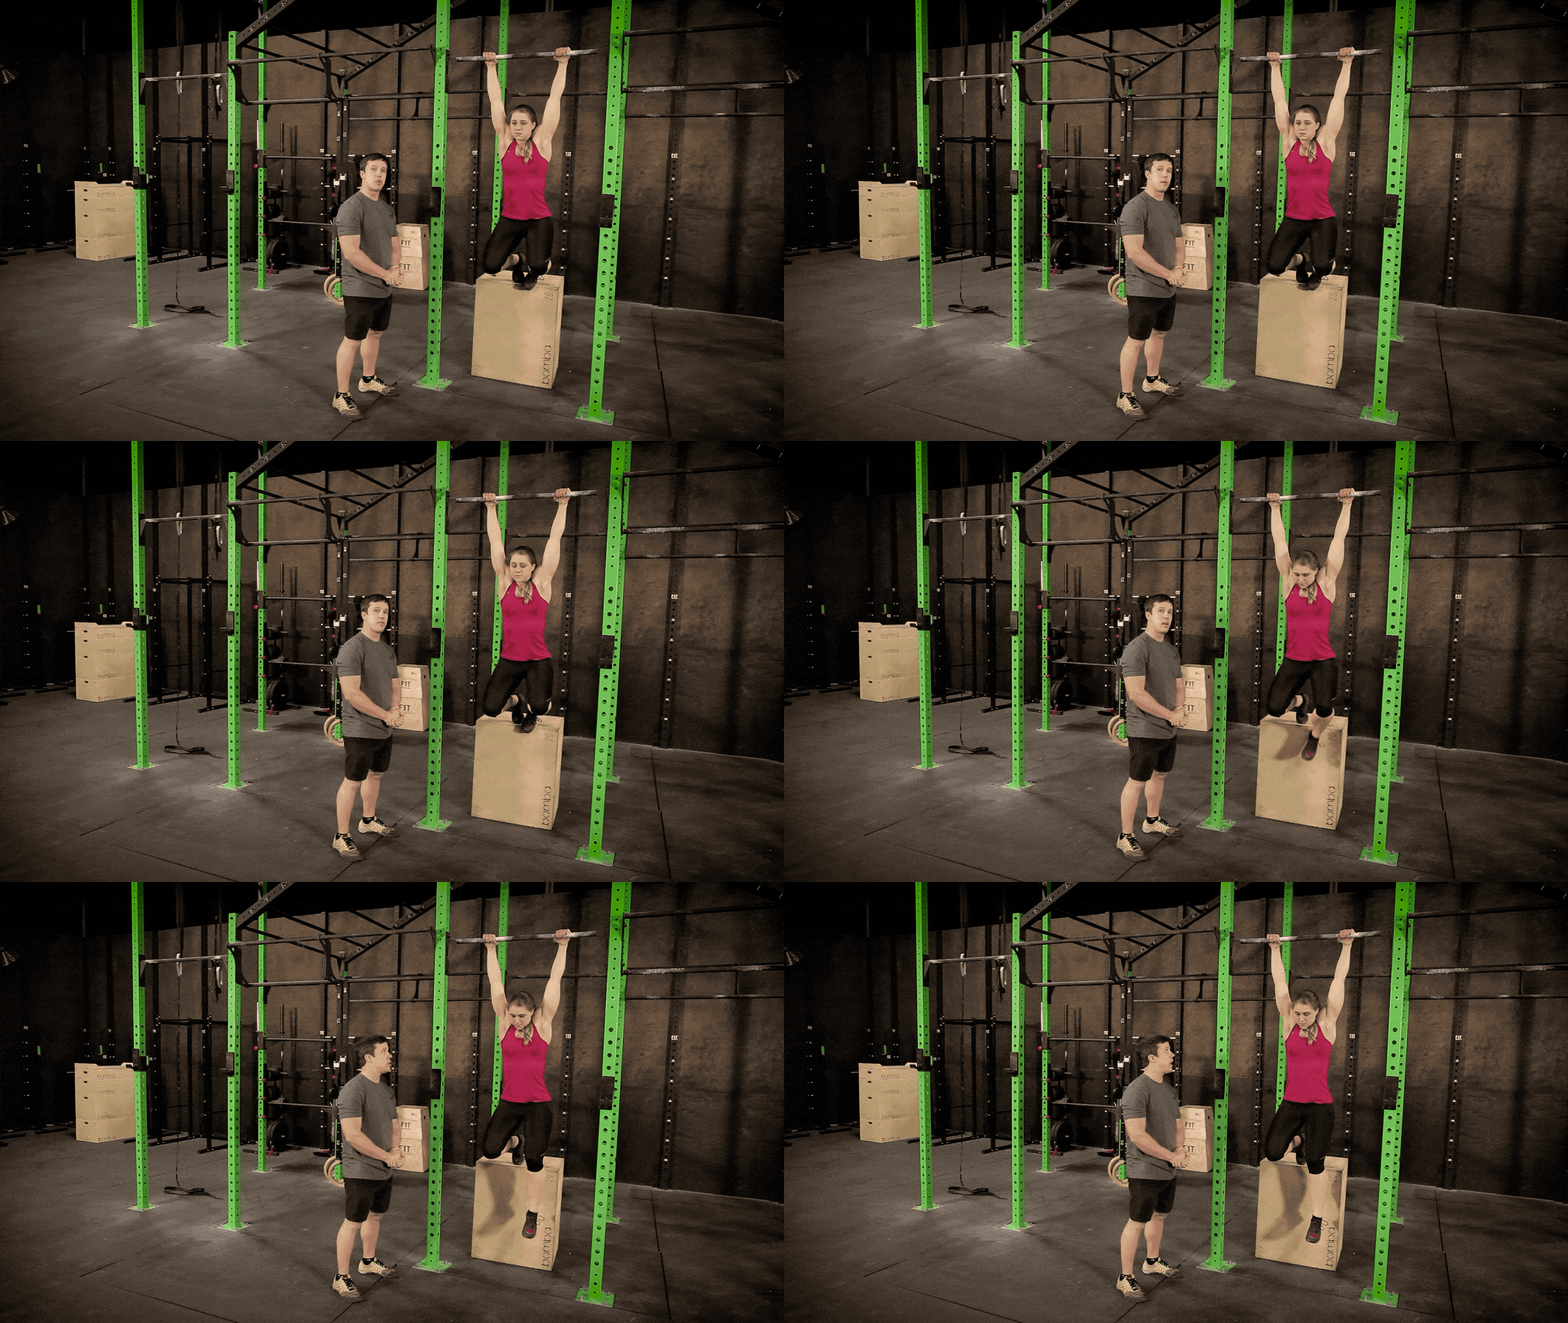
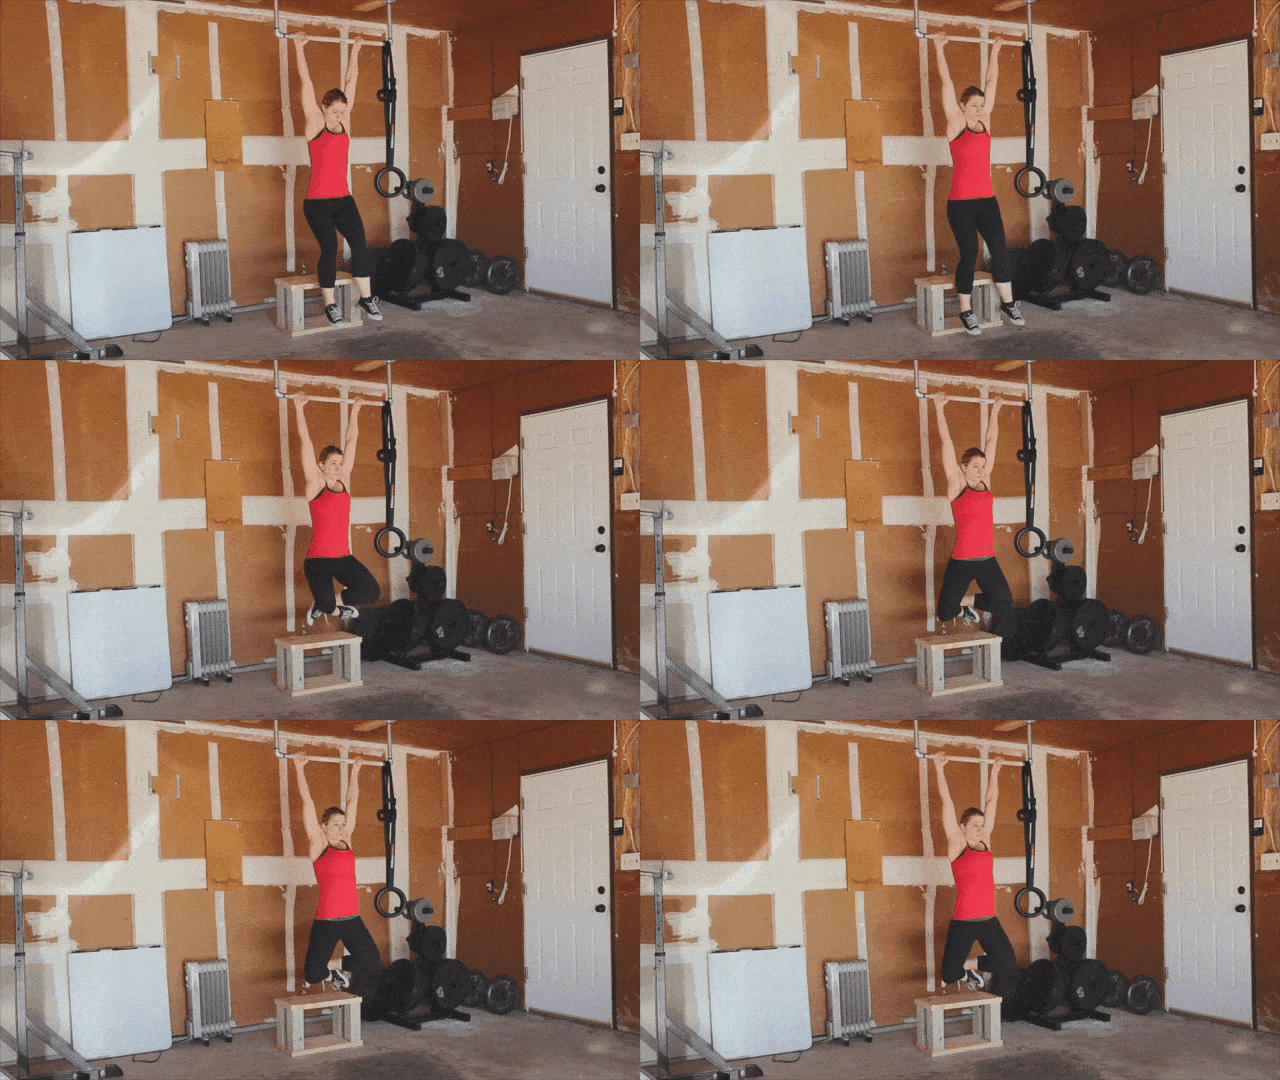
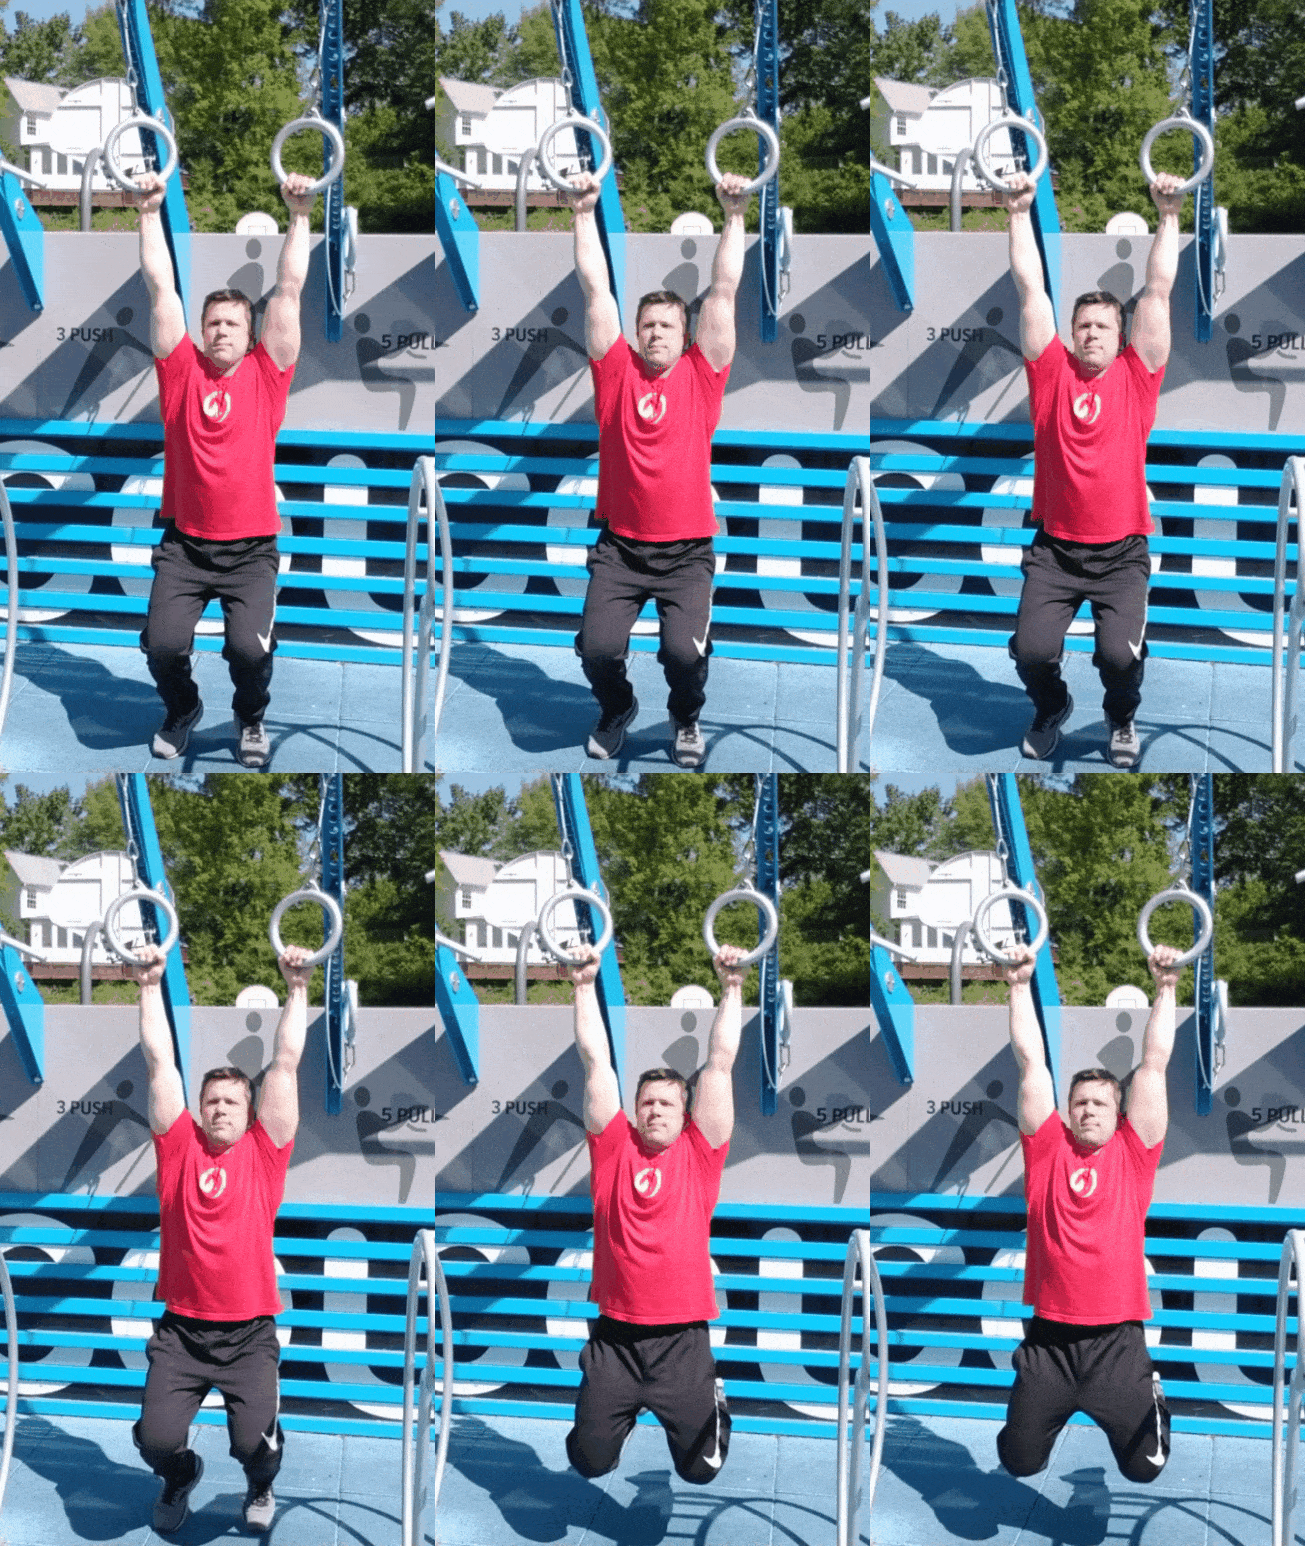
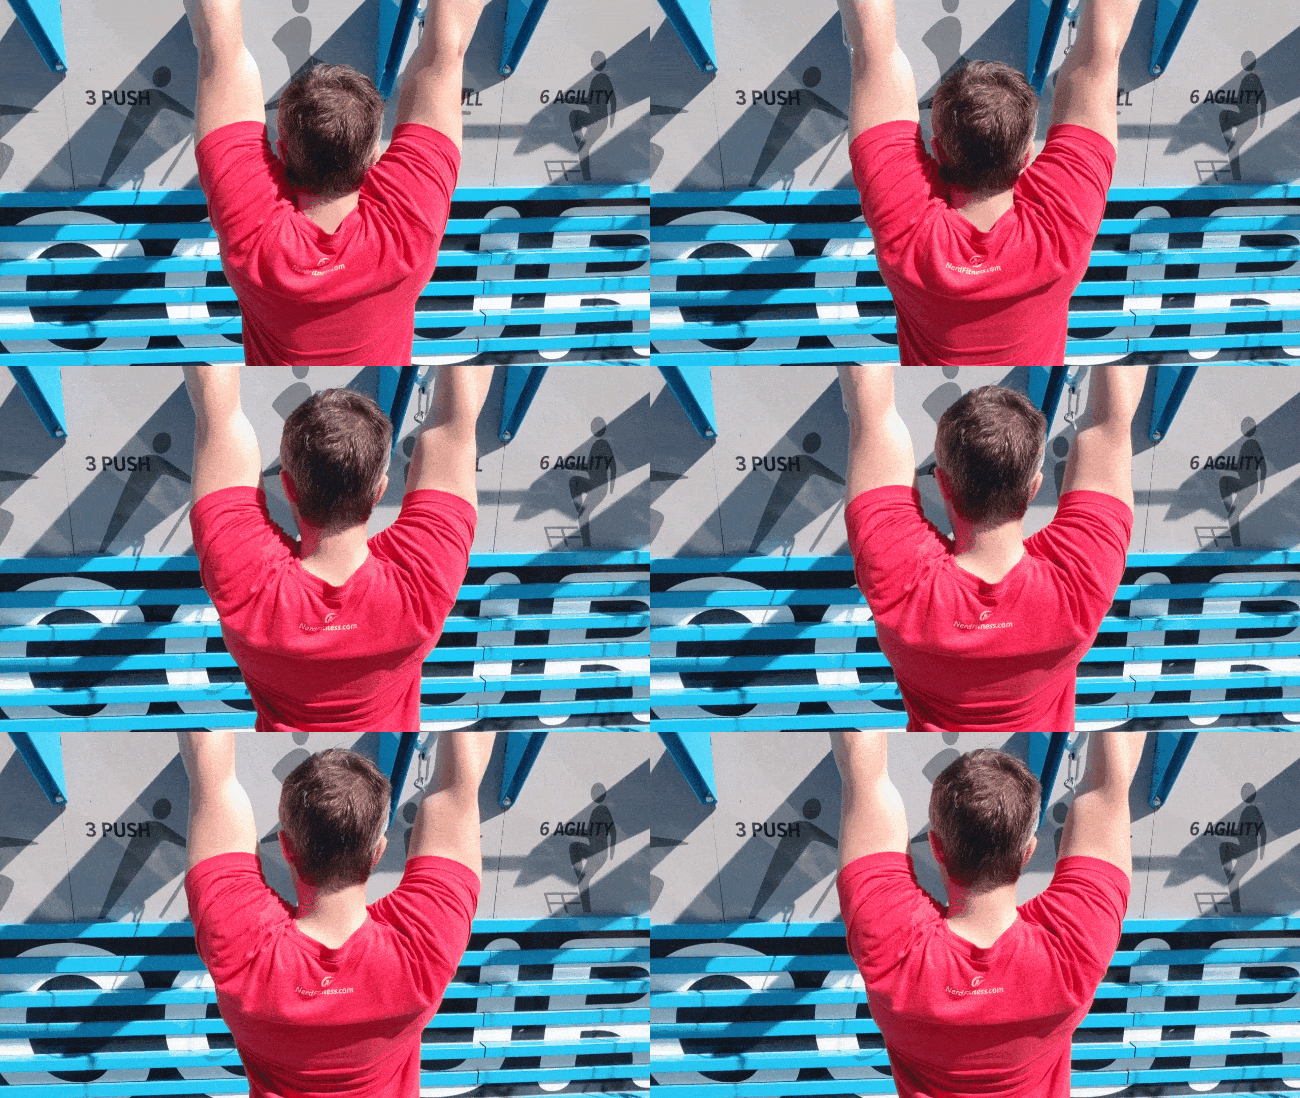
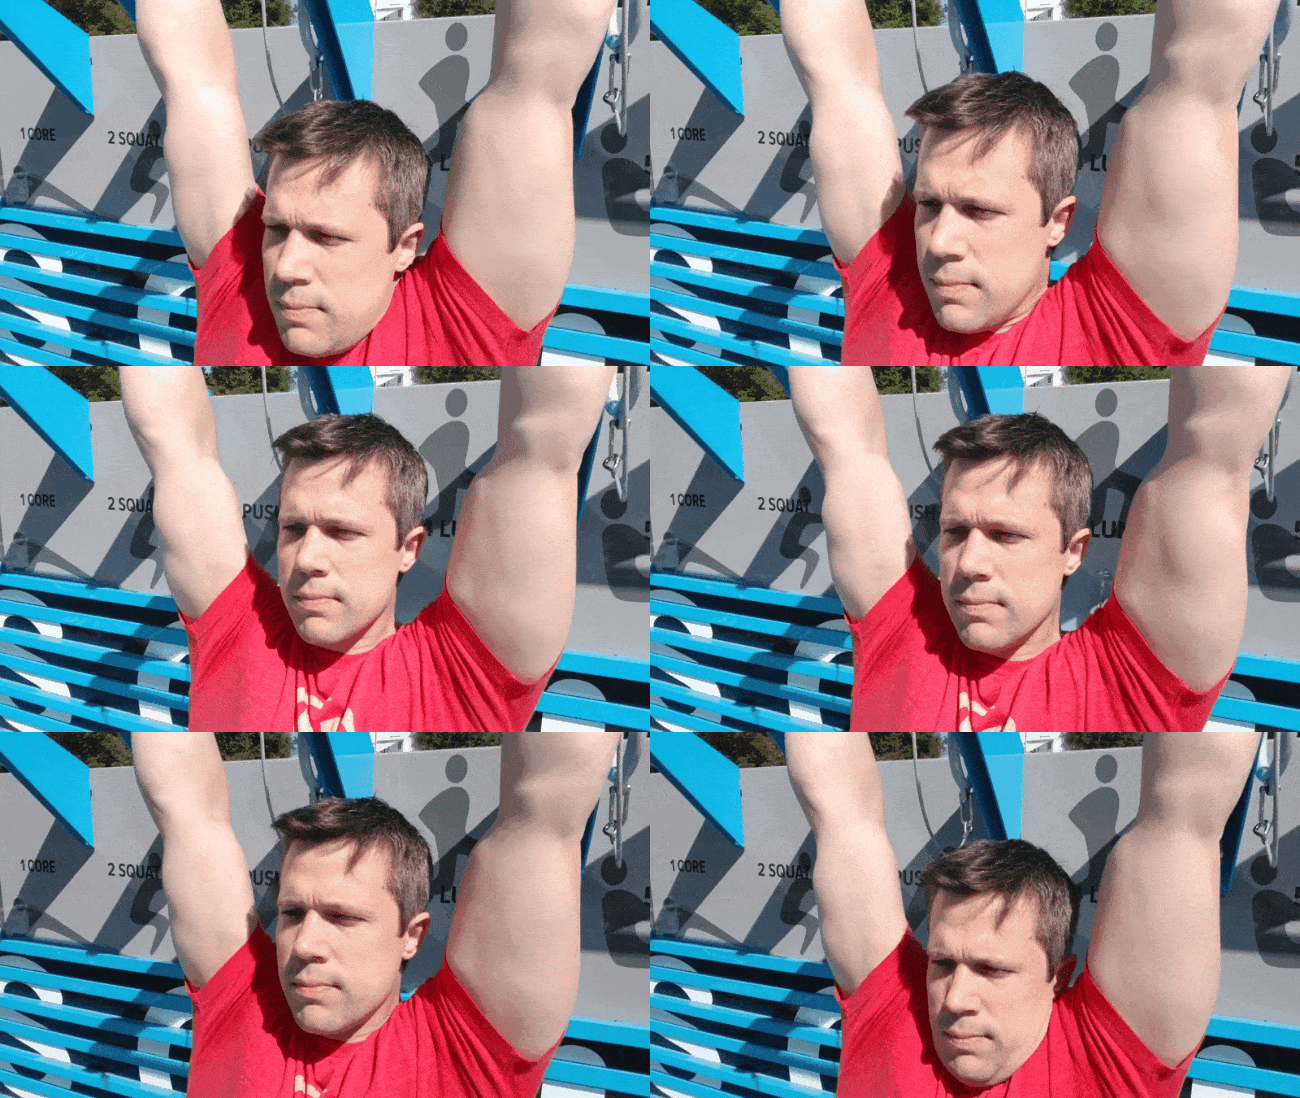
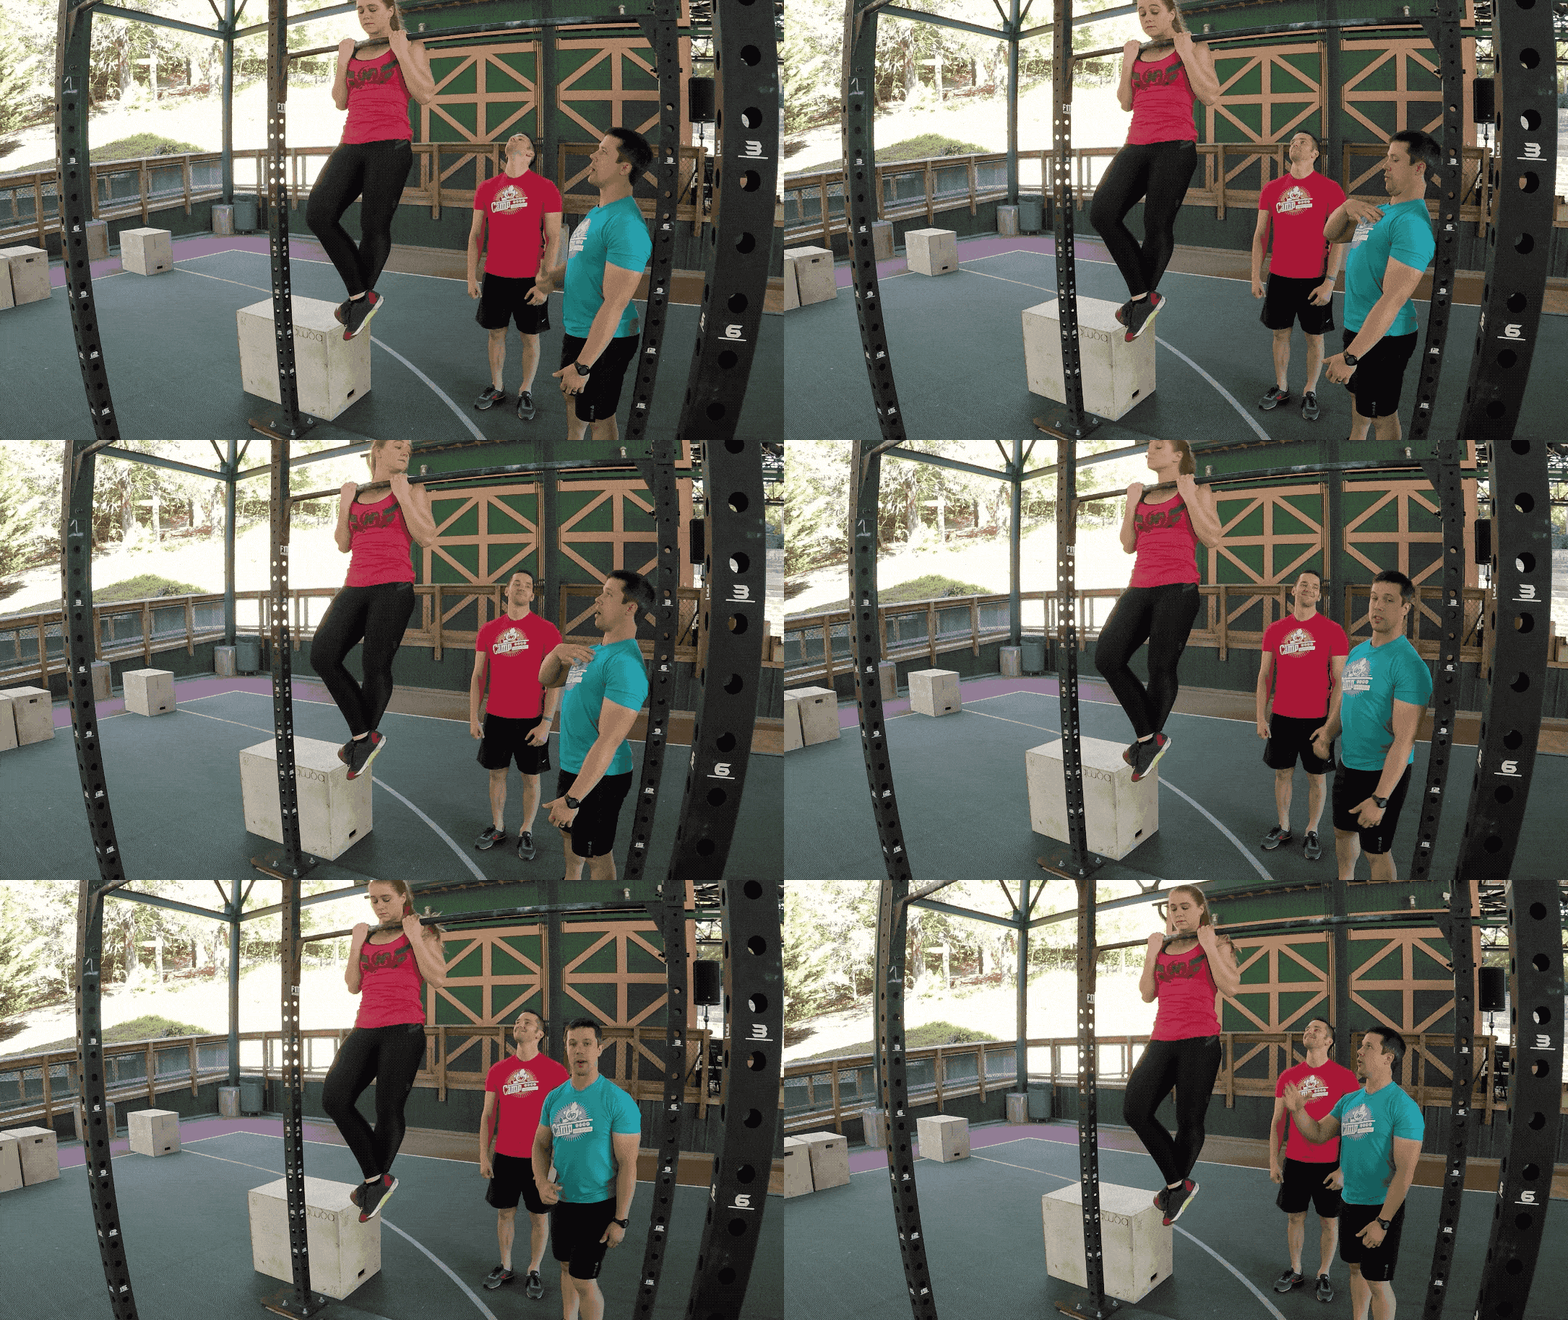
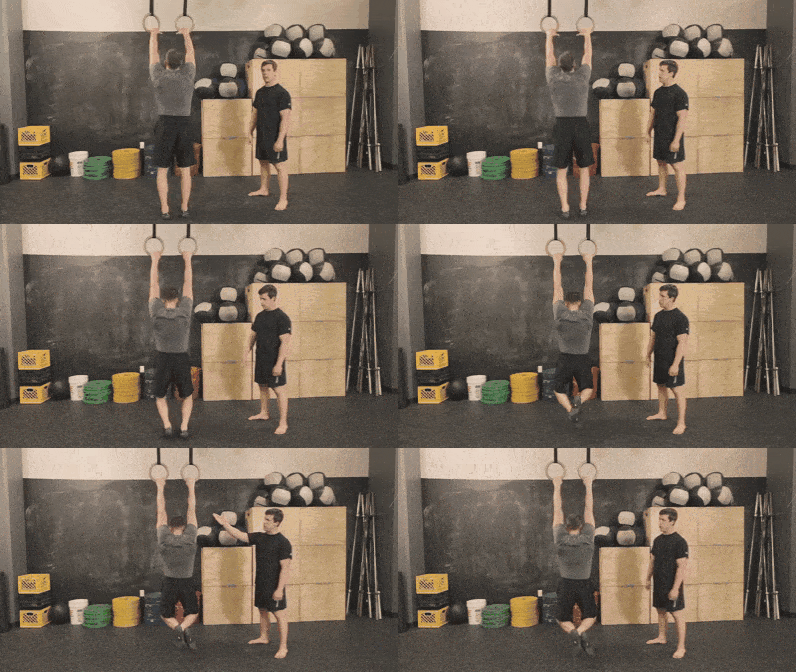
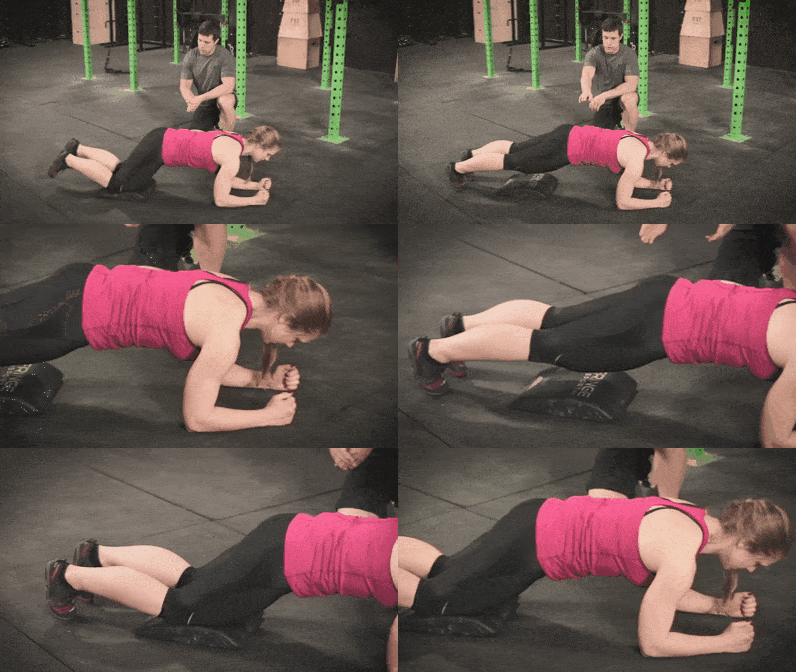
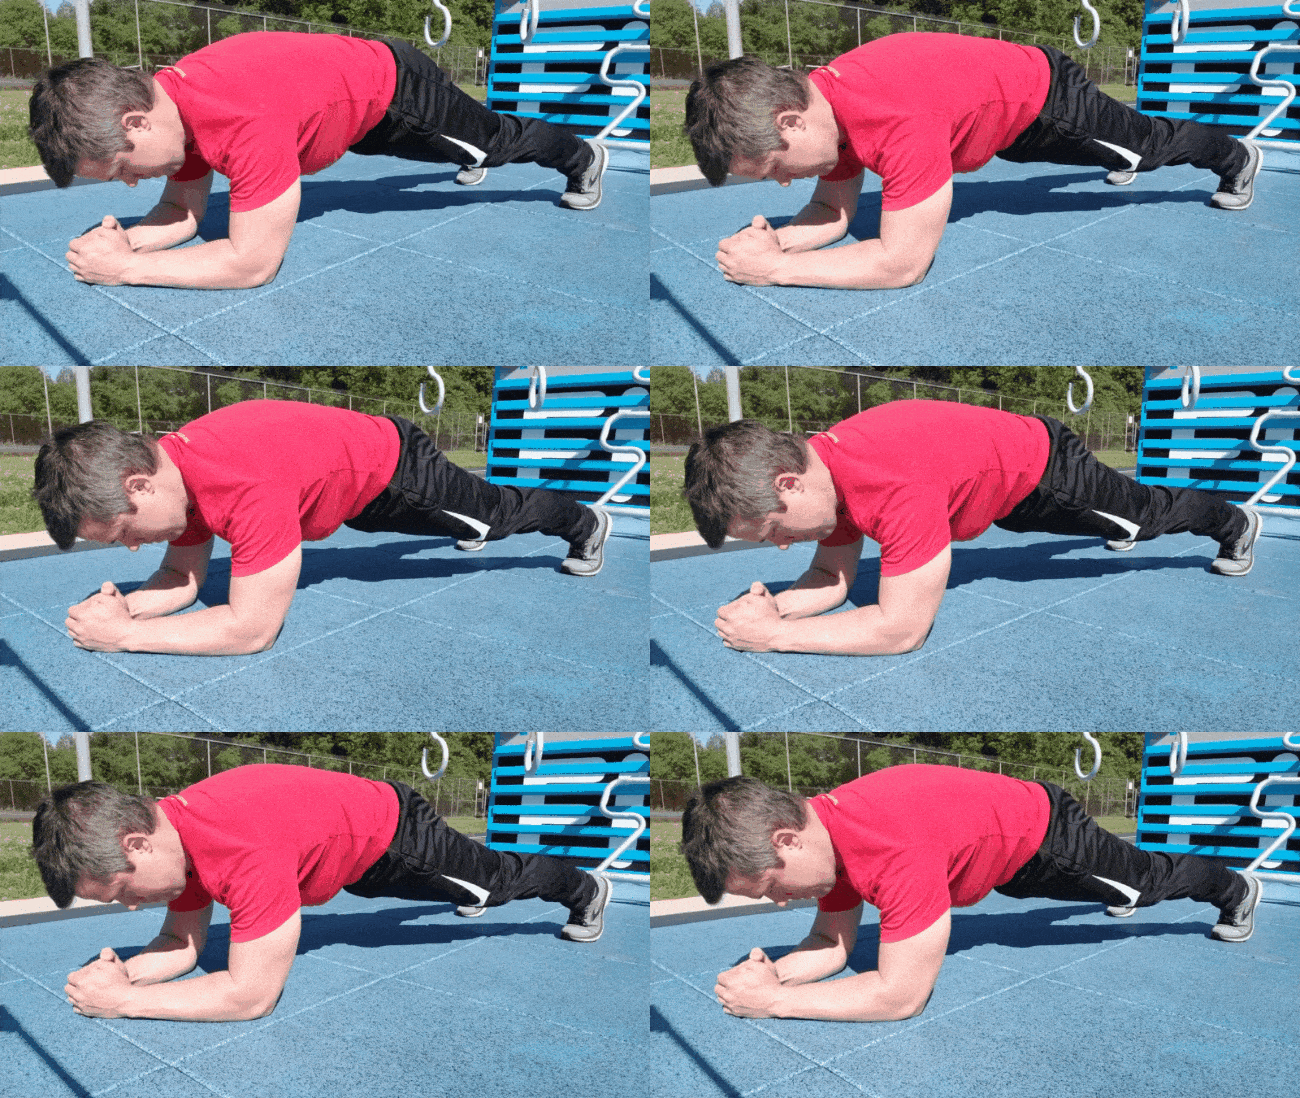
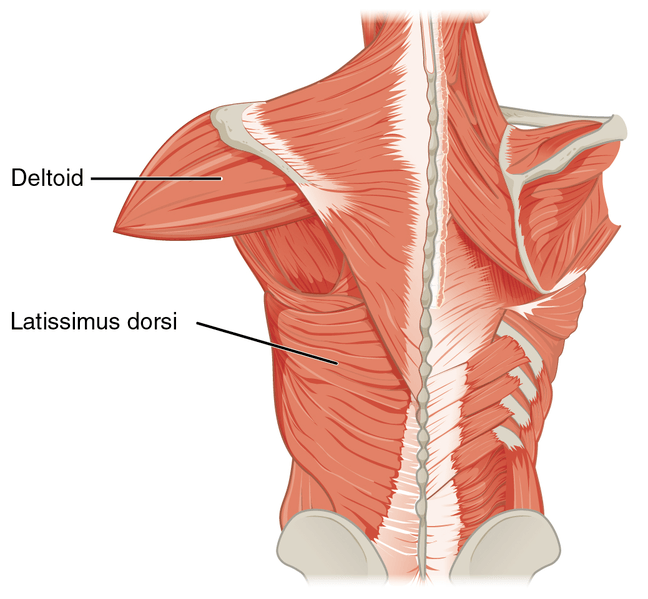
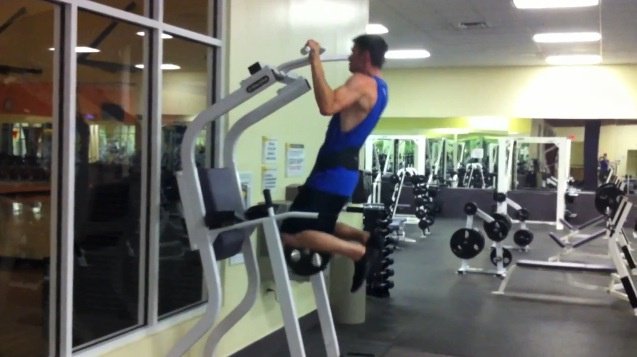
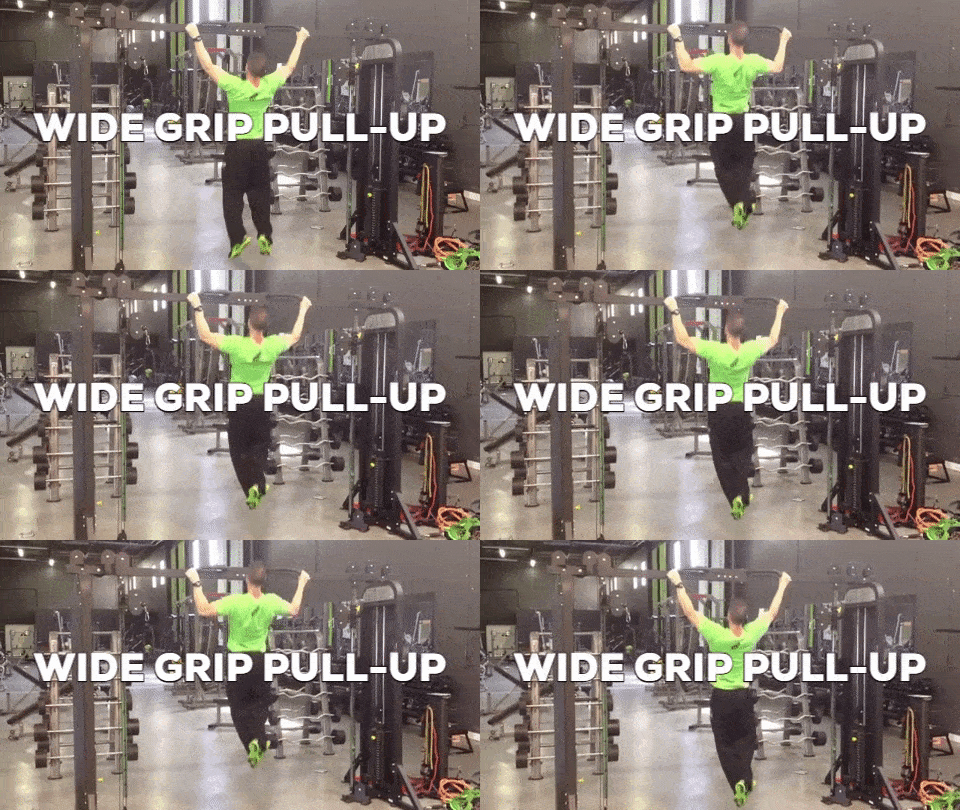
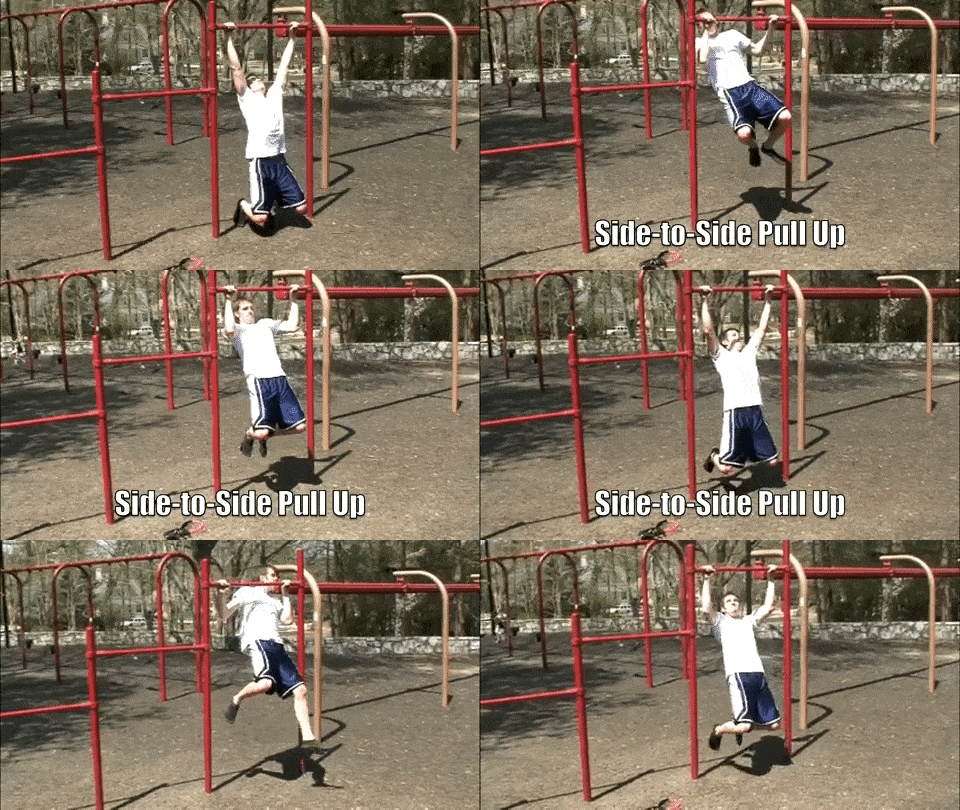
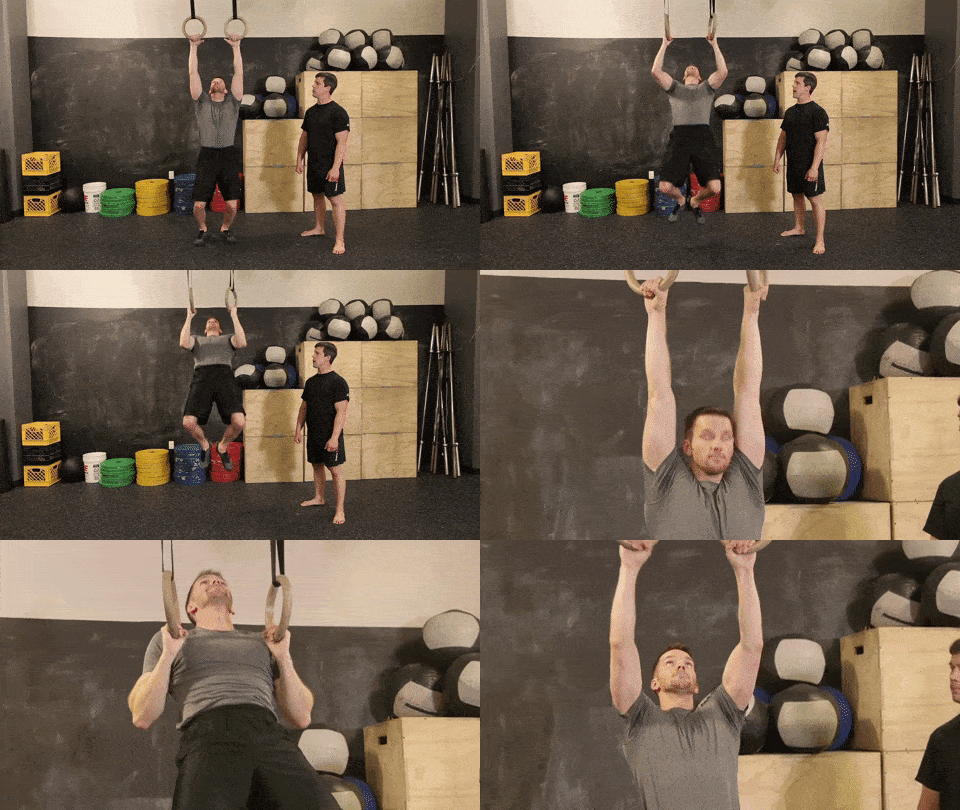
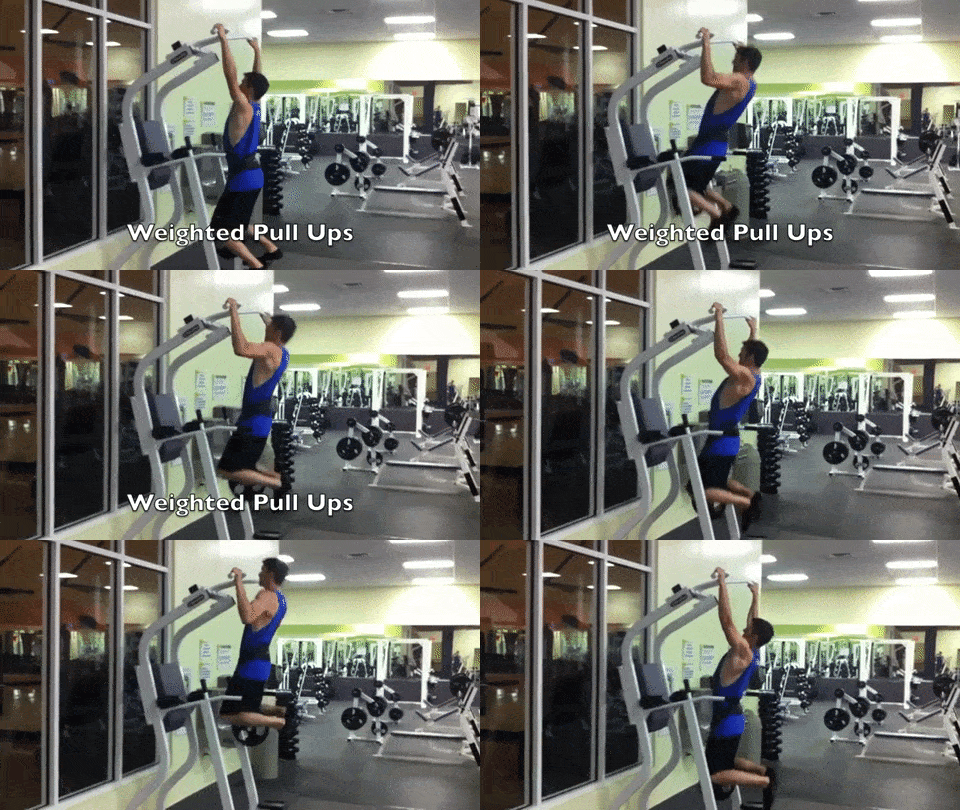

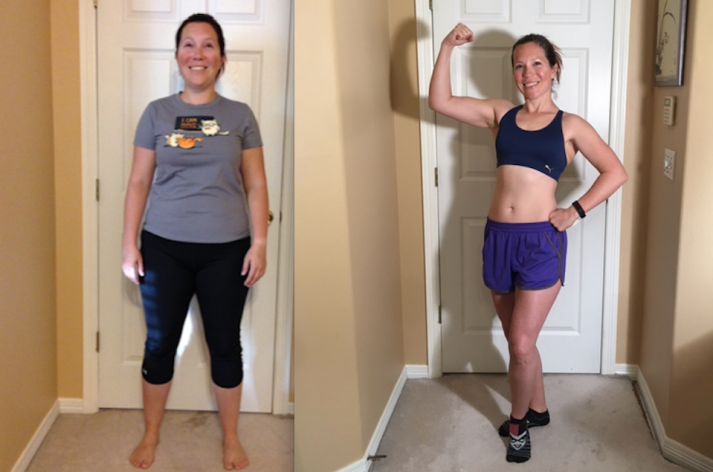







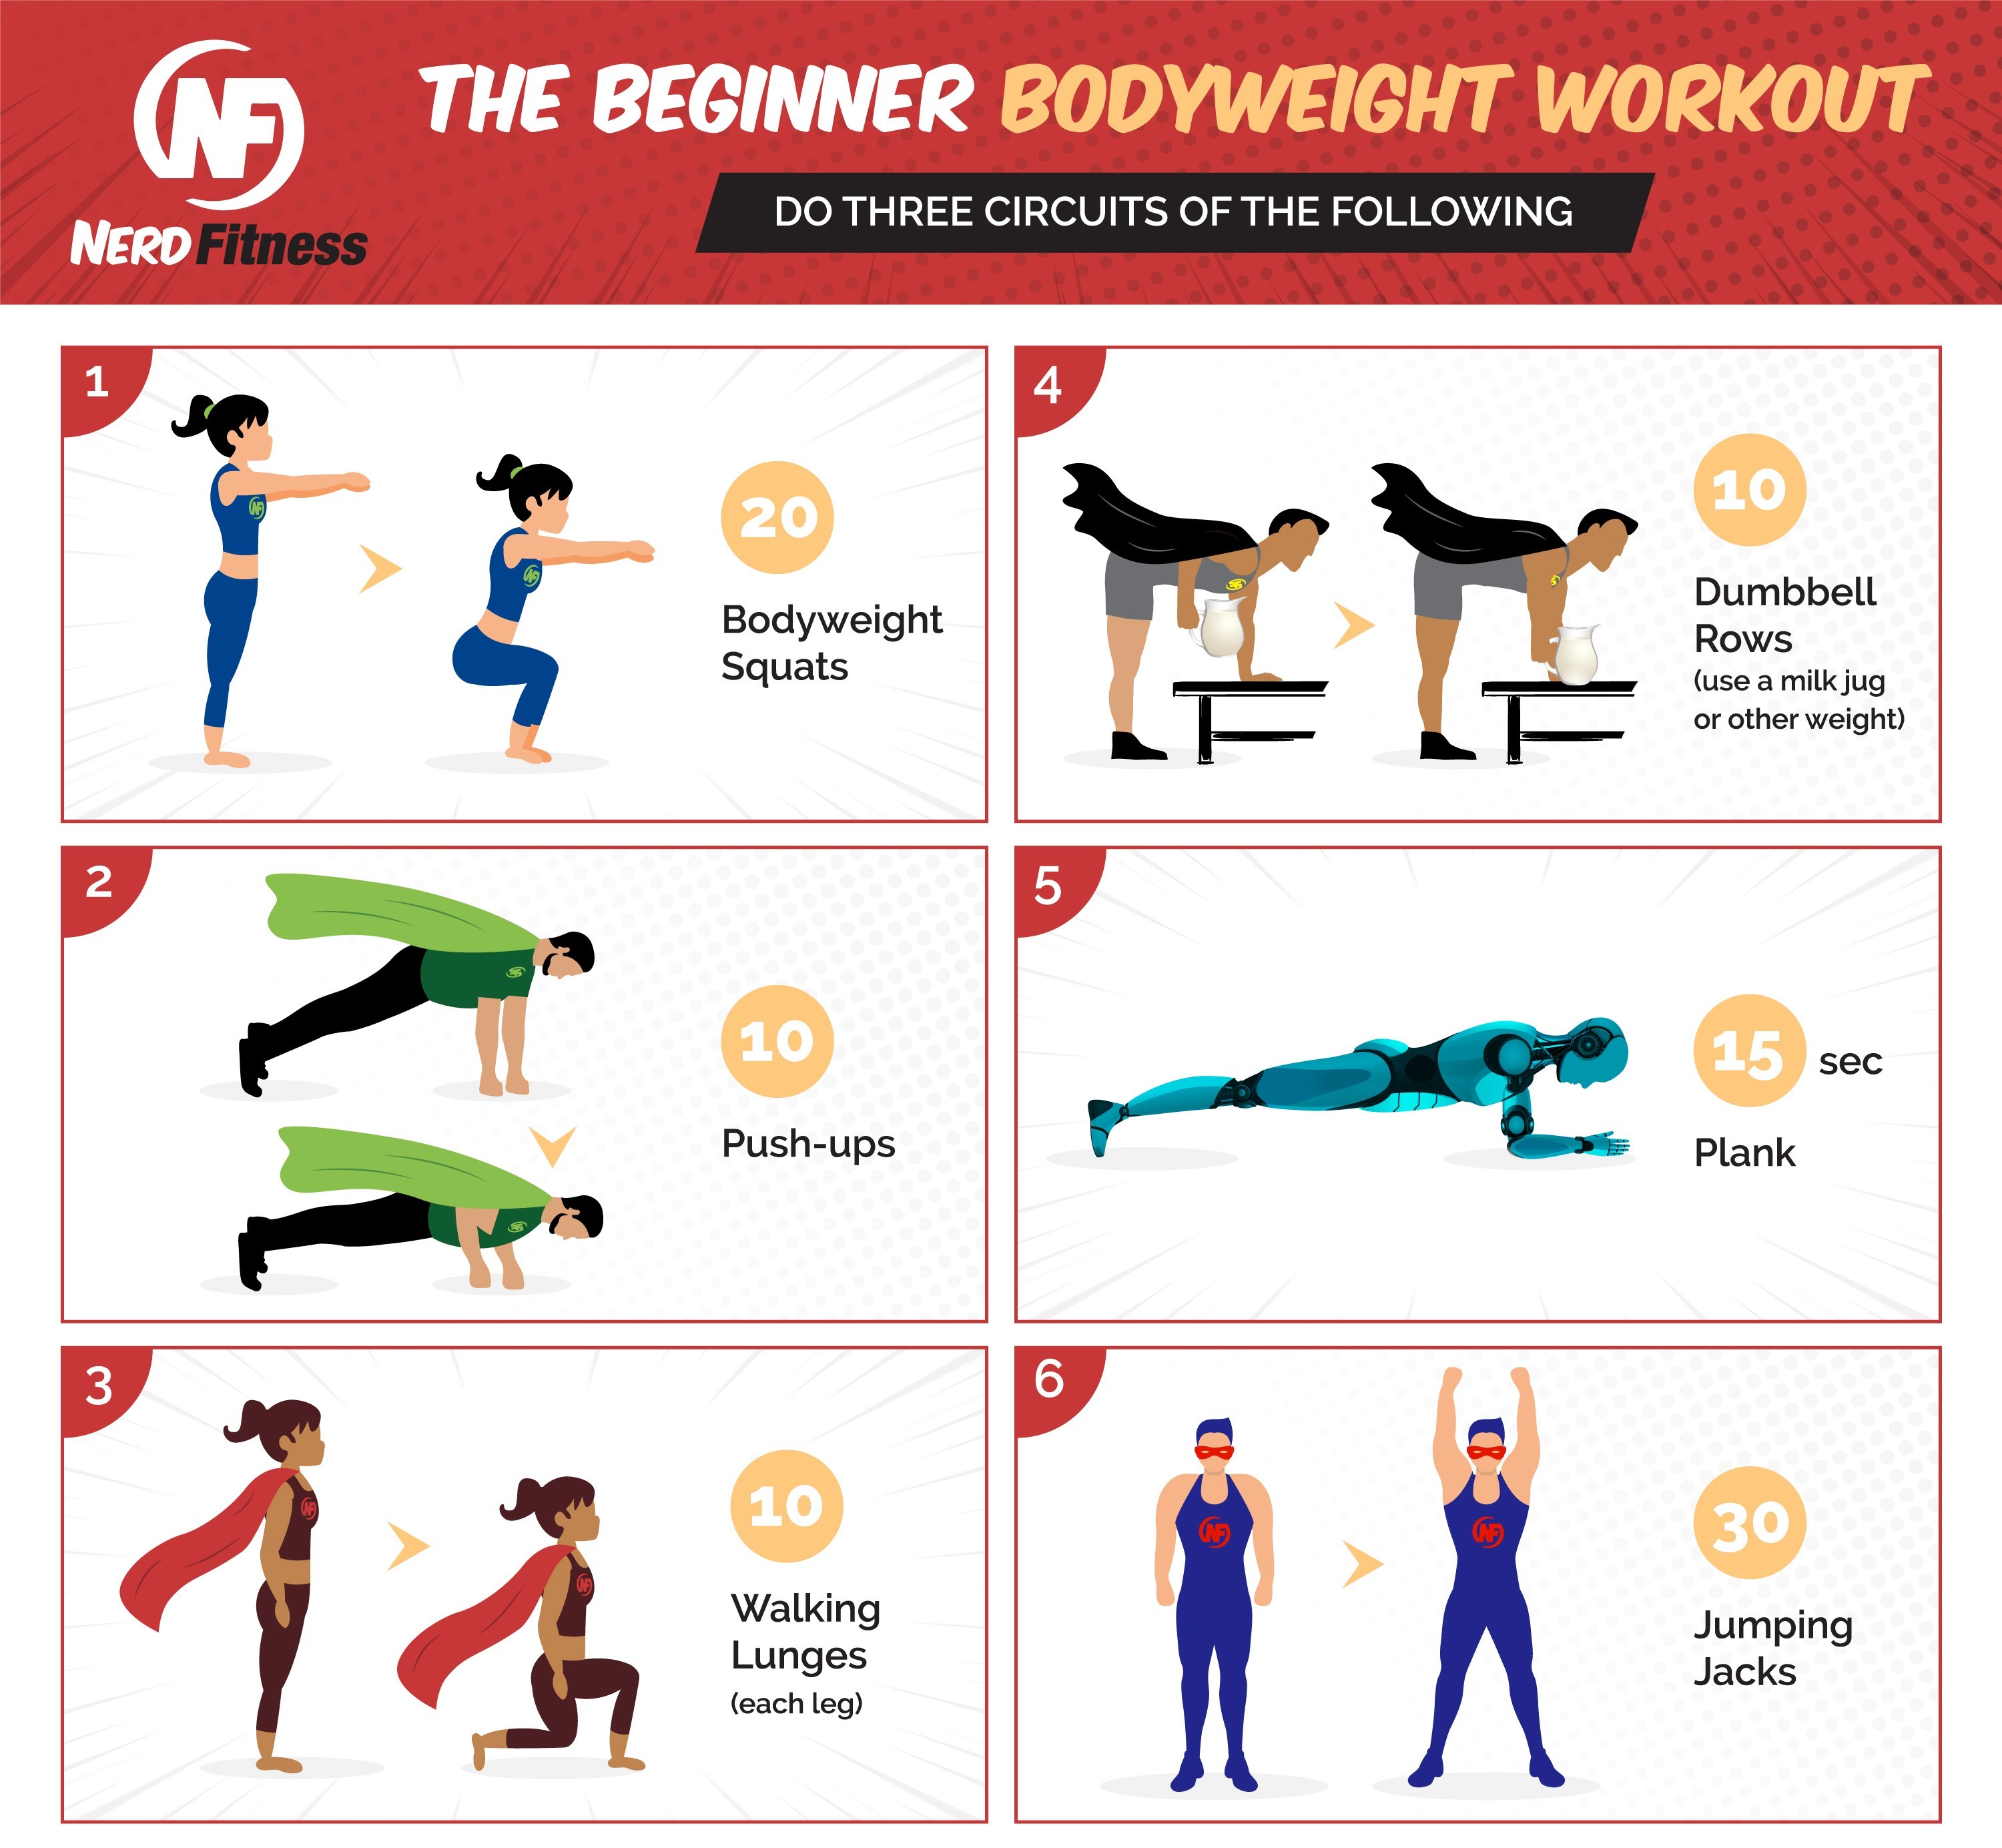
 If you have access to a gym, you have a lot of circuit options.