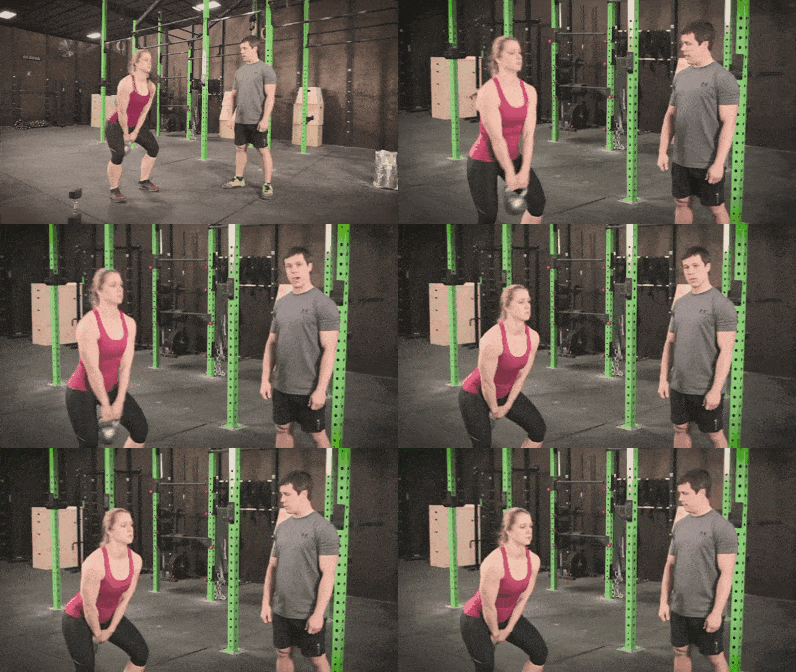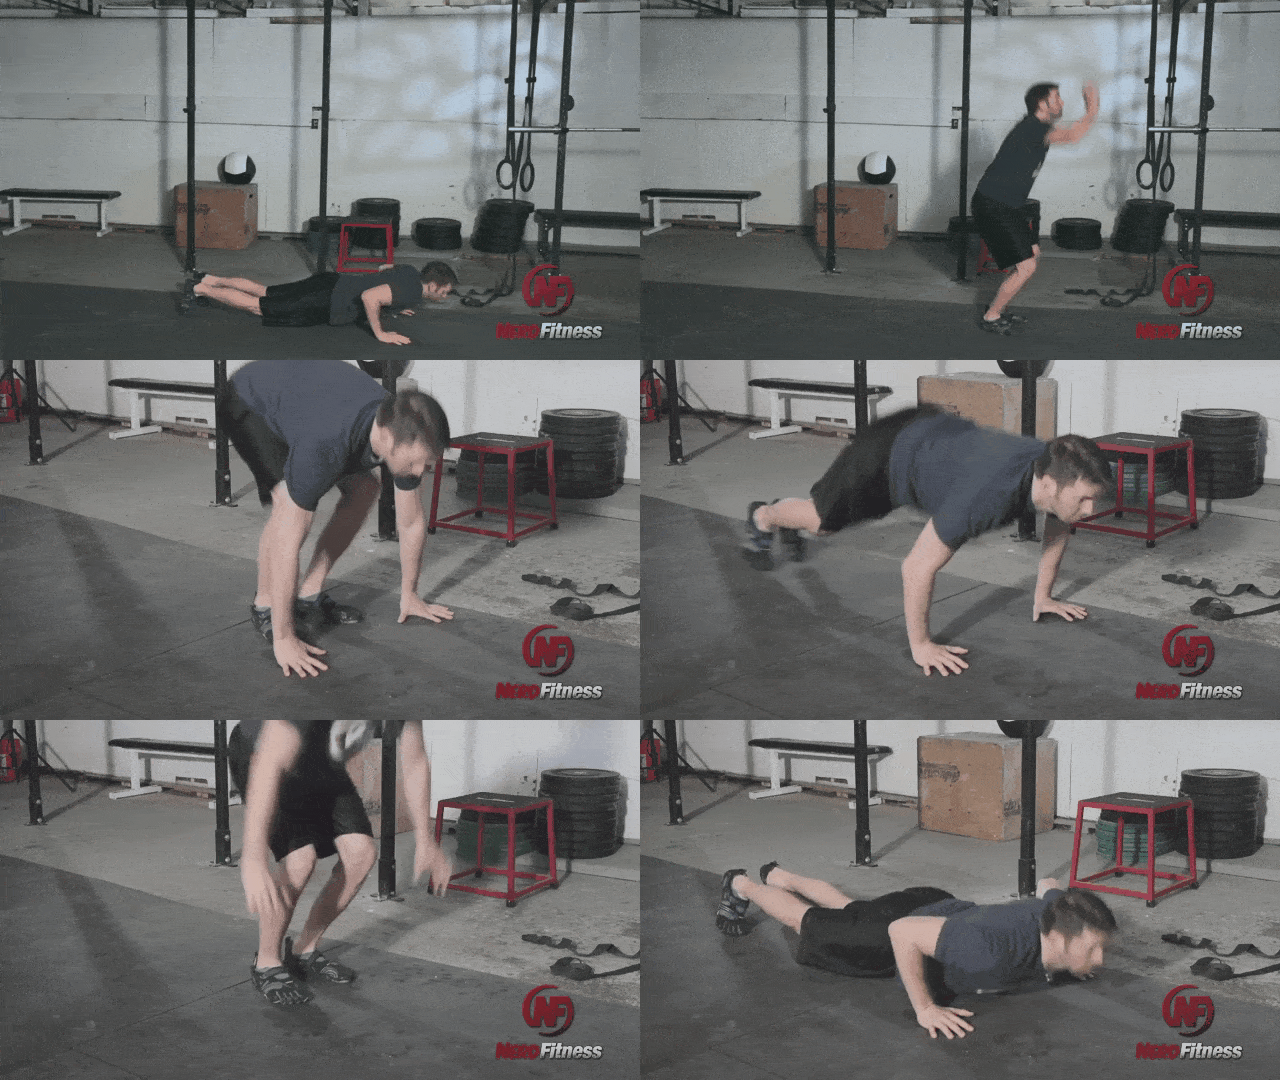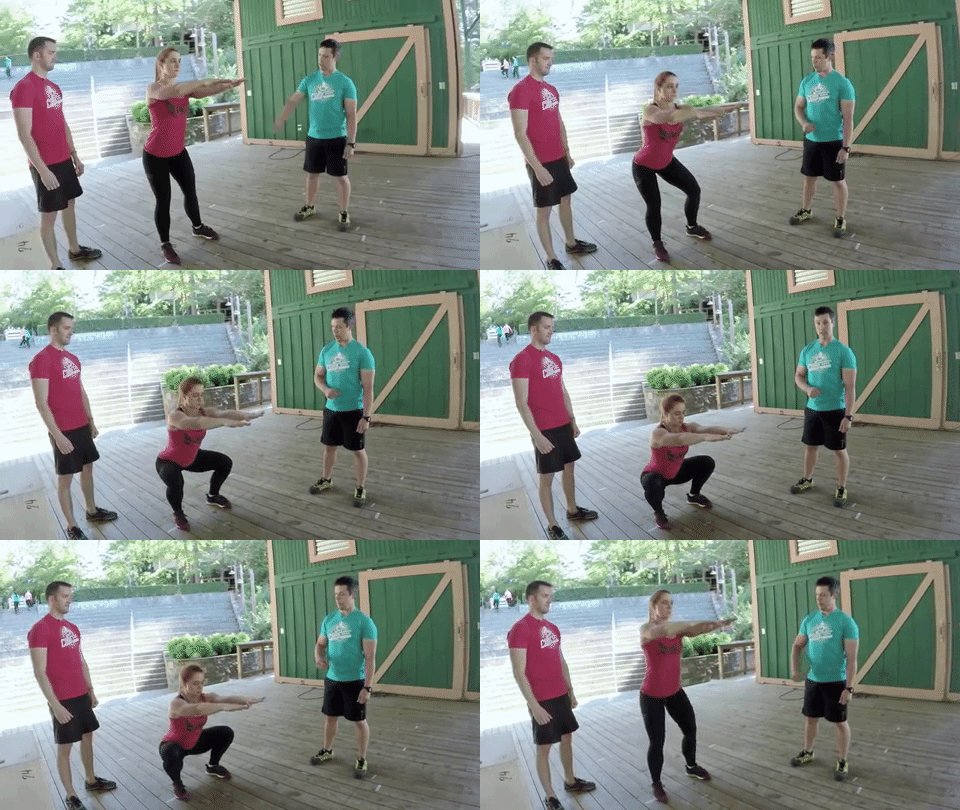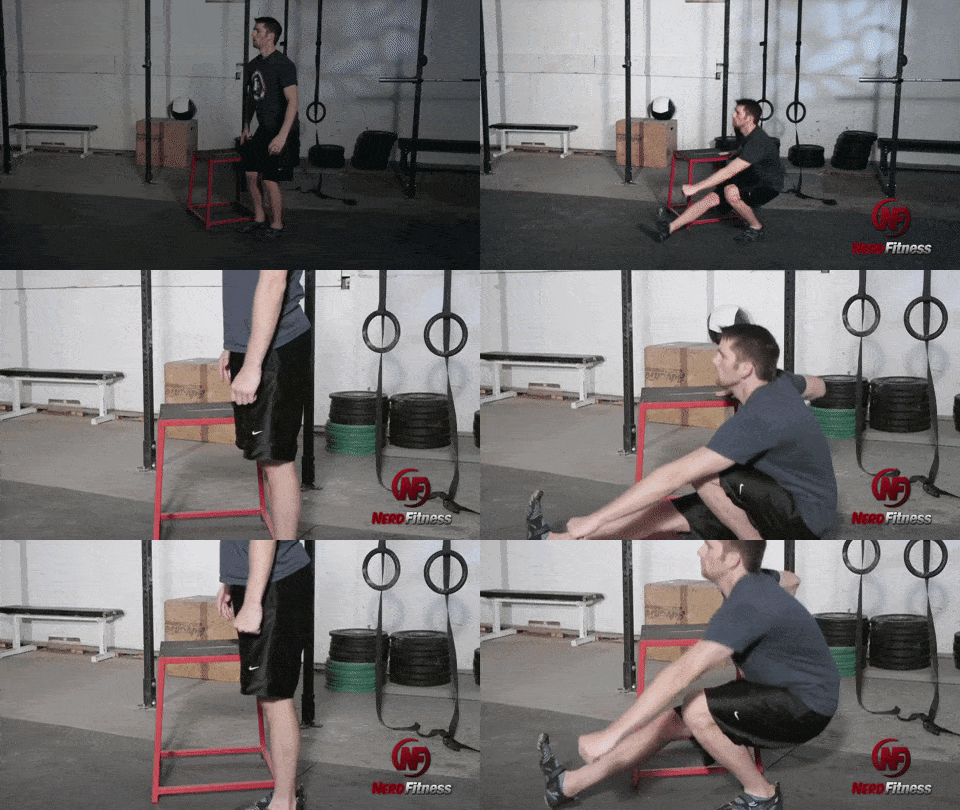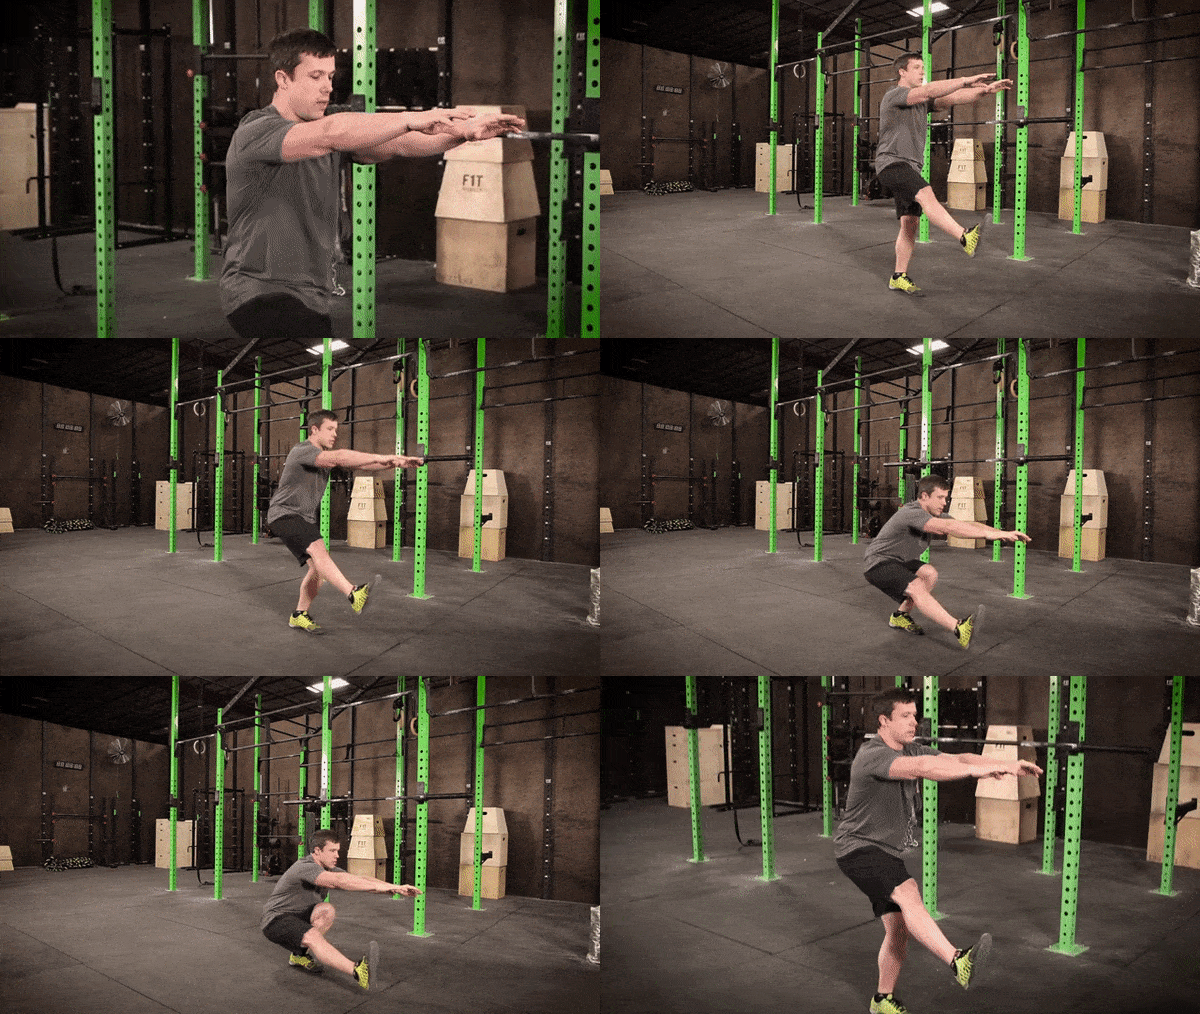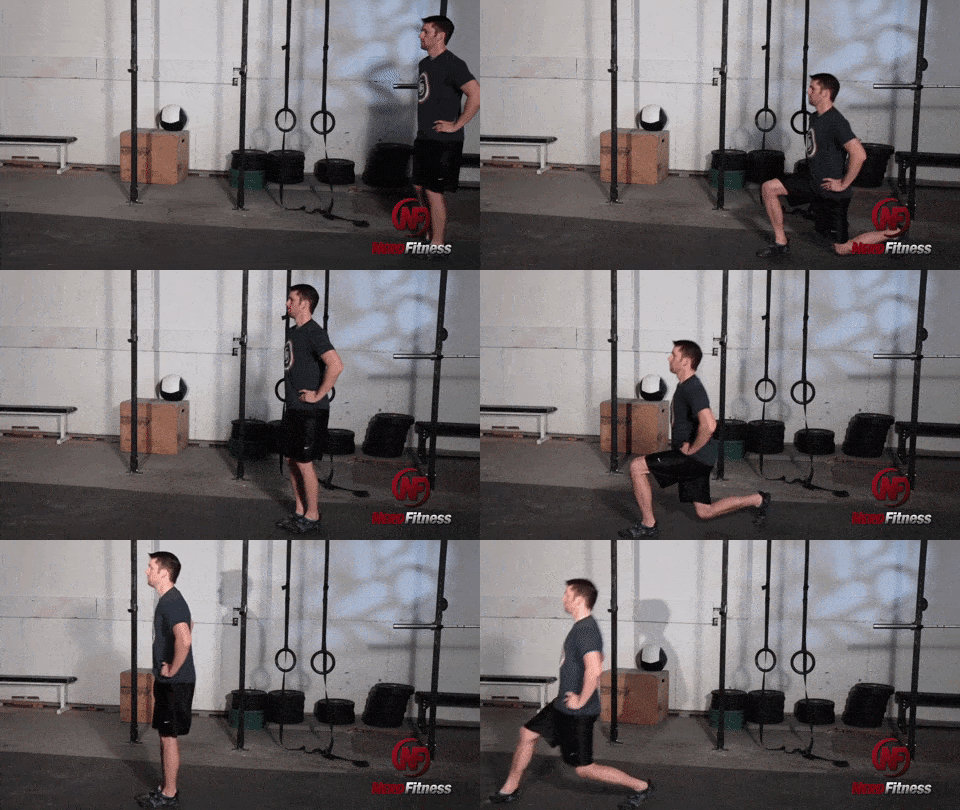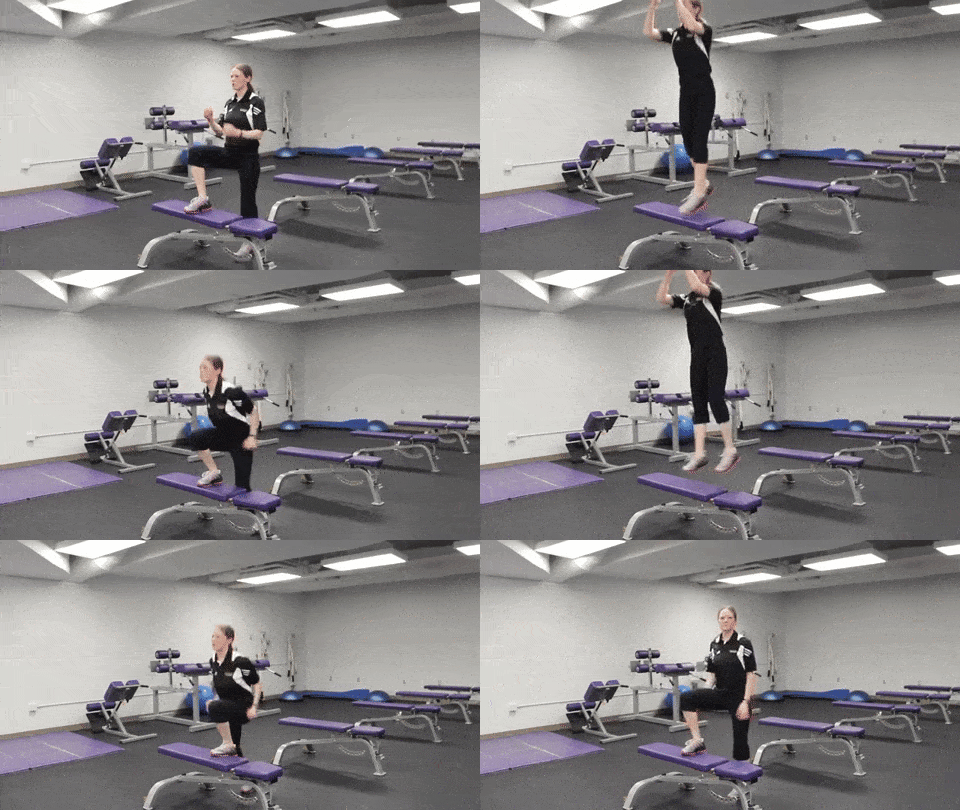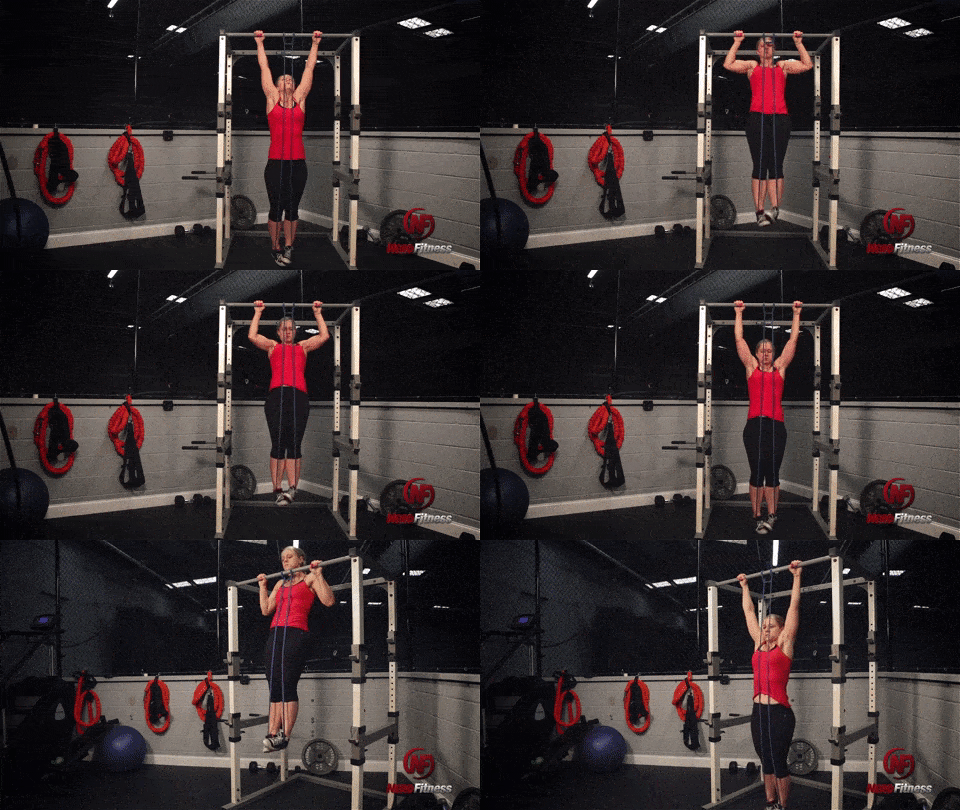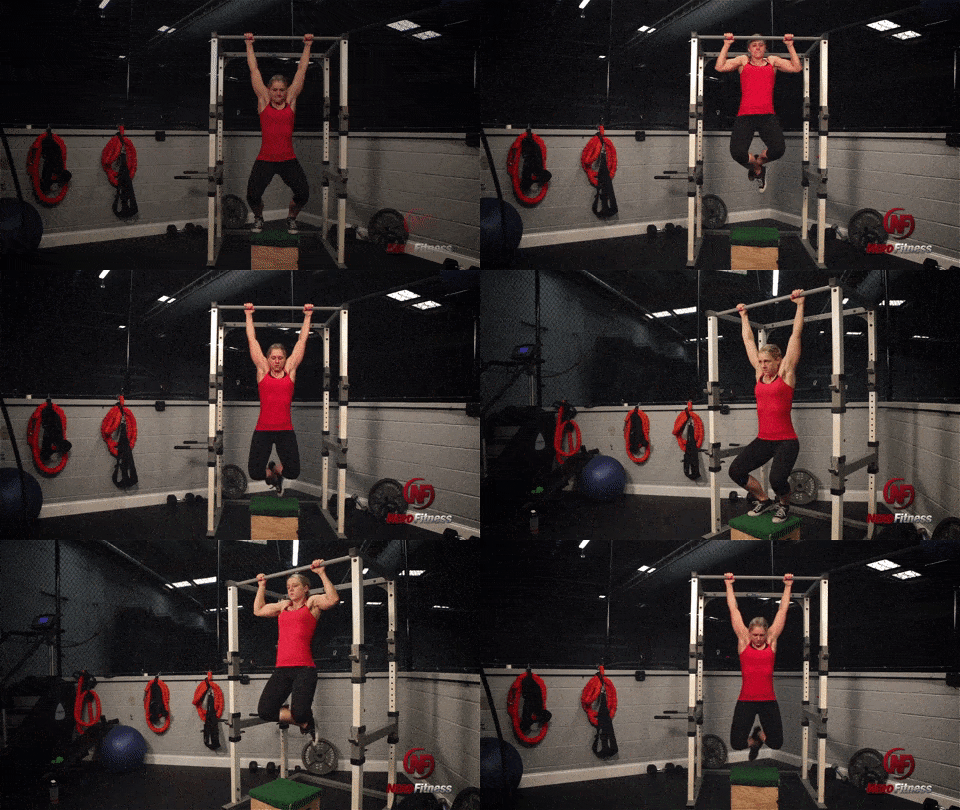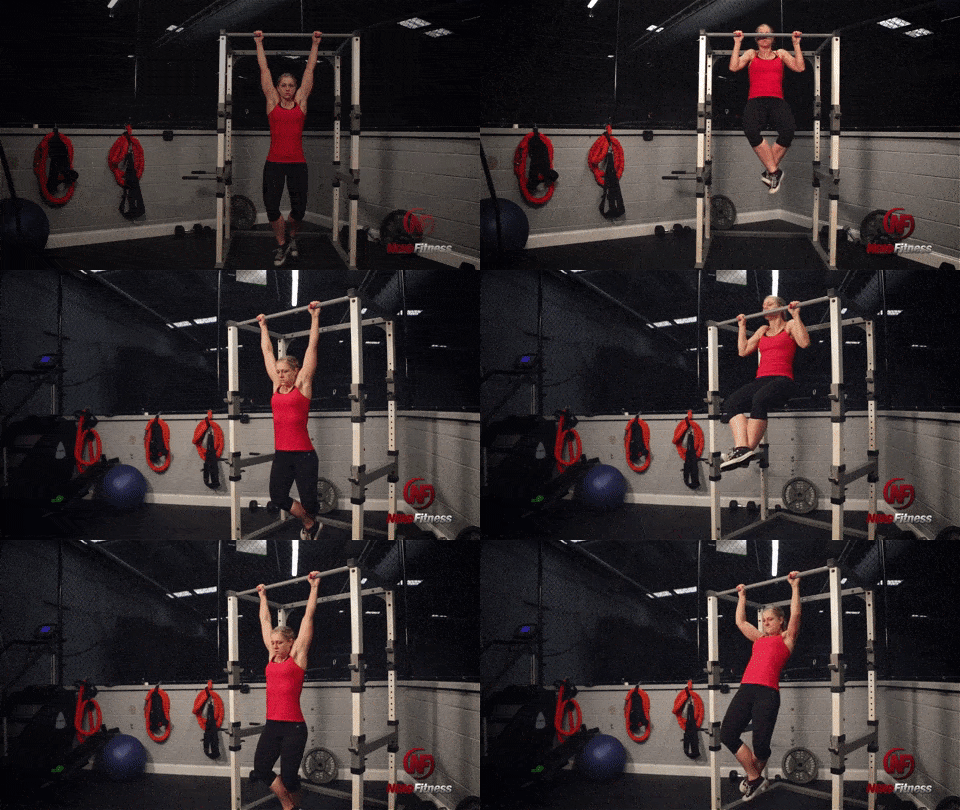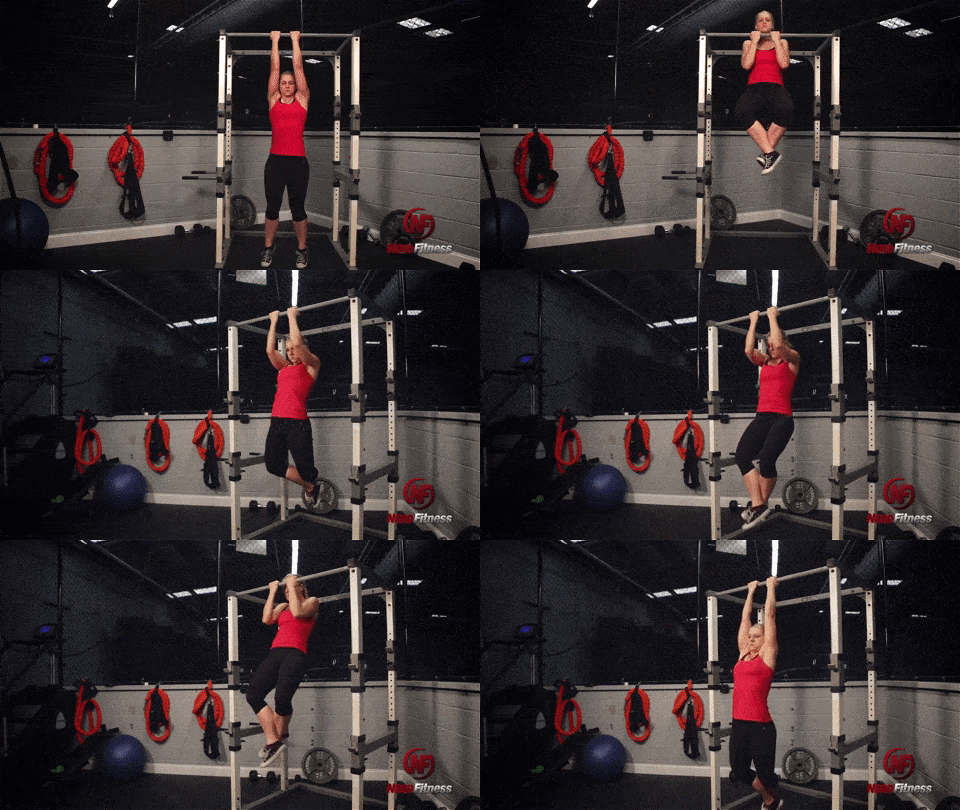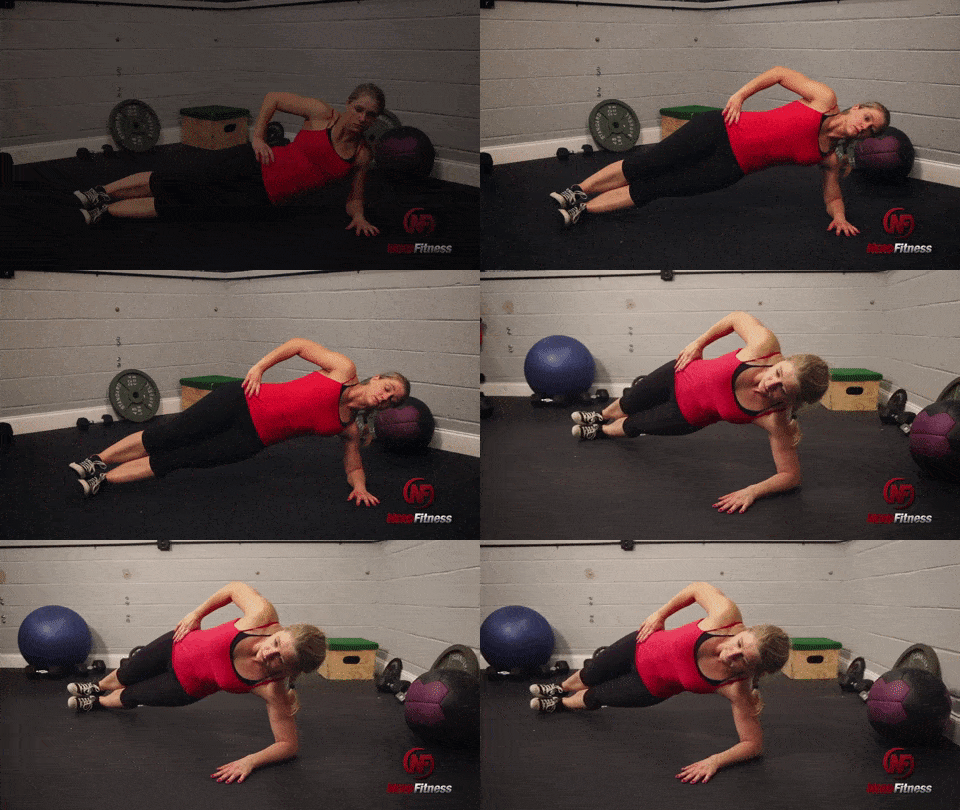
I’ve got another mobility class for you! If you missed the last one focused on shoulders, check it out HERE. Today we’ll focus on hip mobility, strengthening through the glutes as we do.
If you love this type of work, you can get access to more mobility classes by becoming a Patreon member. Patreon members not only get additional classes, but a monthly workout calendar. It’s $9.99/month with no commitment.
Hip Mobility + Glutes Class
We’ll pretty much flow from one hip mobility sequence to the next, moving continuously through the class. At the end, however, we’ll hold a few static stretches. If you’re using this class as an extended warm up/start of a longer strength workout, I recommend skipping the static holds at the end.
Mobility work is so important for a body that functions its best and remains injury-free. And as you work on mobility, you’ll notice improved performance in your other workouts as well.
“If you want to gain weight, eat more calories than you burn regularly. Want to put on the right KIND of weight? Exercise and eat the right way too.”
Now, there’s plenty of nuance to this when comparing men and women:
Due to our natural hormones, itâs generally more difficult for people with typical female anatomy to gain muscle than people with typical male anatomy.[1]
We have a lot of factors (such as hormonal birth control) that have been proven to make it even harder as well.[2]
But that doesn’t mean it’s impossible!
It just means we have to work harder for it.
Ugh, I know.
Now, one thing I want to touch on quick: if you see a woman who is absolutely jacked and at an extremely low body fat percentage, I guarantee she has been working her butt off for a very long time with the goal of building muscle.
Itâs not something that happens overnight, or by mistake.
In addition, some women with larger amounts of muscle mass choose to take steroids to help assist them in gaining muscle, because we simply donât have the hormones naturally to get to that size.
So if youâd like to build muscle, but not as much as a professional bodybuilder – donât worry, itâs not something that happens by accident.
With that out of the way, let’s talk about body fat and body types:
As we point out in that body fat percentage guide, we women can look very different at any weight depending on our body shape and how much muscle we have. It comes down to our own personal goals!
This guide is going to primarily focus on two things:
How to eat to gain weight and build muscle.
How to strength train to build muscle.
We’ve helped thousands of women with our online coaching program, many of whom are trying to gain weight and strength train for the first time in their lives.
Everybody is on their own journey, at their own pace, and everybody will end up with different results too!
Should women build muscle? (7 Reasons Women should Grow Muscle)
If it can be harder for women to gain muscle (compared to men), why go through the trouble?
I’m glad you asked!
Here are the top 7 reasons why women should strength train:
#1) When you’re stronger – everyday life is easier. No need to call for help to get that 50lb bag of dog food off the top shelf, or carrying an air conditioner unit up a flight of stairs. LIFE is easier when you’re stronger.Â
#2) Less injury risk – when you build strong muscles, youâre also building stronger bones, ligaments, and tendons, making you less prone to injury doing things you love (like playing in a quidditch league).[3]
#3) Helps combat age-related muscle loss,[4]Â allowing us to remain independent longer as we age:
#4) Muscle is harder to maintain, which means you need to eat more just to hold on to it.[5]
#5) Reduce pain – having a strong body makes living easier on your joints, as well as allows you to hold a better posture, and reduce back / hip pain.[6]
#6) Appearance – this is a personal preference! Some women like to have a lot of muscle, and some donât. While you canât spot reduce fat, you can choose to build more muscle in specific areas, changing your body shape. Growing up, I was an extreme pear shape, but due to strength training, I now have more of an hourglass shape.Â
#7) Live longer – want to spend more time on Earth? Strength training and growing muscle will help you do just that.[7]
How to Eat to Gain Muscle as a Woman
As we said above, gaining weight comes down to thermodynamics and science.
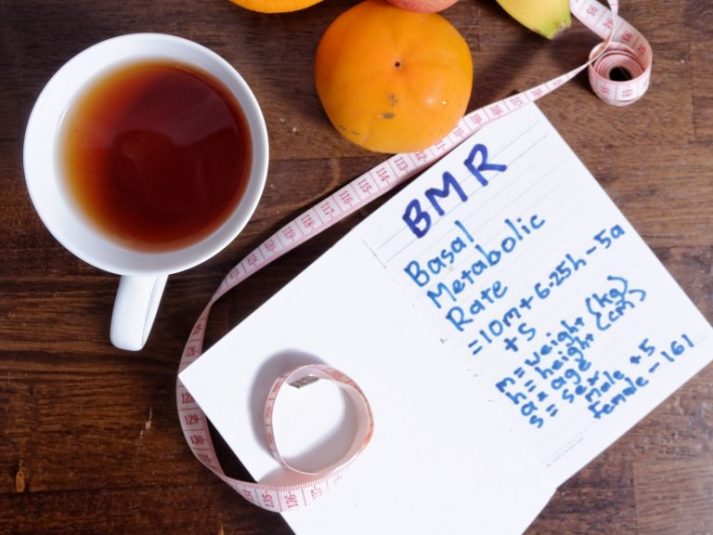
Every day, we burn a certain number of calories just existing, which is called our BMR (basal metabolic rate). We then factor in our daily activity level, and get a number that is called our “total daily energy expenditure.” You can calculate yours below:
(Note: we have used The Mifflin-St Jeor Equation to create this calculator! [8]).
Since we want to gain weight, we want to take our TDEE and add 250 calories to it to get our daily goal. This should result in gaining about half a pound per week.
Now, although eating ANY EXTRA calories from any source will result in weight gain, our goal is to gain the RIGHT kind of weight, in a healthy way.
And thus, we’ll be focusing our efforts on a “healthy muscle building” strategy.
We could easily add more calories each day, and gain weight quicker, however, the slow method gives you the best chances at gaining mostly muscle, with minimal fat. The faster you try to gain weight, the higher the percentage that will likely be fat – so starting off at half a pound per week is a great place to start!
In addition to the number of calories we’ll be adding, we also want to pay attention to the type of foods we’re eating.
As we cover in our “Healthy Eating Guide,” we’re going to build muscle by consuming the three big macros in the correct quantities:
Protein:Â rebuilds muscle after you break it down.
Carbohydrates: provides your muscle with fuel and body with energy.
Fat:Â helps your bodily functions and can also be burned as fuel in the absence of carbs.
Letâs look at each of these individually:
PRIORITY #1: PROTEIN
Protein can come from any number of sources, including:
As we cover in our âHow much Protein do I need?â, claims for the amount of protein required for muscle growth vary wildly from source to source (and athlete to athlete).
Here is our recommendation:
If youâre of healthy weight, active, and wish to build muscle, aim for 1 g per pound of body weight (2.2 g/kg).
If youâre an experienced lifter on a bulk, intakes up to 1.50 g/lb (3.3 g/kg) may help you minimize fat gain.
Let me simplify it for you:
“To build muscle, target at least 1 gram of protein per pound of body weight (2.2 grams per kg).”
If youâre curious, from our healthy eating article, this is what a portion of protein looks like:
Hereâs how much protein is in a serving of food:
4 oz (113 g) of chicken has around 30 g of protein.
Fat is a macronutrient that can help you reach your calorie goals (in the right quantity), as fat can be high in calories. Plus, you can eat lots of it without feeling full. Helpful if you’re trying to put on weight.
Healthy fat can be found in foods like:
Avocado
Almonds
Walnuts
Macadamia nuts
Olive oil
Almond butter
Peanut butter
Science has recently come around on saturated fat too.[10] Once completely vilified, but now considered okay for moderate consumption.
Saturated fats can come from things like:
Whole milk
Full fat dairy
Coconut oil
Grass-fed butter
Fatty cuts of meat
Lard
To help you gauge: a serving size of fat is roughly the size of your thumb!
For reference, this is a single serving of almonds (162 calories):
THIS is a serving of olive oil (119 calories):
As you can see, you can eat an extra 500 calories of âhealthy fatsâ by eating lots of âheart-healthyâ fats like nuts or adding more olive oil to your meals.
PRIORITY #4: VEGETABLES!
Last but not least, you need vegetables in your diet.
As you start to eat more food, your stomach, intestines, and other bodily functions will thank you for consuming more high-fiber vegetables!Â
A serving of veggies is about the size of your fist.
Hereâs a quick, non-complete list of high-fiber veggies that can fill your plate:
Consume 1-1.5g per pound (2.2-3.3g per kg) of body weight in protein every day.
Consume the rest of your calories from foods composed of carbs and fats.
Always eat vegetables so that your body can actually PROCESS all this extra food. I like to aim for half of my plate of vegetables.
If you are not gaining weight, (and you’re hitting your protein goals), add more carbs and/or fats to your meal.
It really does come down to the following:
If you are not gaining weight fast enough, youâre not eating enough. Increase your portions of carbs and fats!
Whenever we work with coaching clients who struggle to build muscle, this is the area we target: adding more carbs and fats to each meal.
8 Strength Training Exercises For Women to Build Muscle
Years from now, you’ll look back and thank âPast Youâ for starting strength training today.
And don’t worry, I’m going to tell you exactly what to do so you can start strength training TODAY!
Here’s why strength training is so important: when you eat a caloric surplus (more calories than your body needs each day), the extra calories have to go somewhere.
If you don’t do any exercise, your body will choose to store the extra calories as fat for later.
However, when you strength train, your muscles are broken down. Then they’ll use the extra calories to rebuild themselves bigger and stronger over the next 48 hours!
“Staci that sounds great, but I’ve never strength trained before, and I don’t know what I’m doing…Halp!” You might be saying into your computer or phone.
Fear not! I’ll help. Strength training doesn’t need to be scary or overly complicated.
Simply put, “strength training” means:
âMovement of any weight against âresistanceâ (including your body weight) â Doing ANY exercise that pushes your muscles outside of their comfort zone, forcing them to rebuild stronger to prepare for the next challenge.
Progressive overload: doing slightly more than last time (lift a heavier weight or do 1 more rep) consistently. Your muscles will have to constantly adapt and rebuild themselves stronger. This is called “progressive overload.”
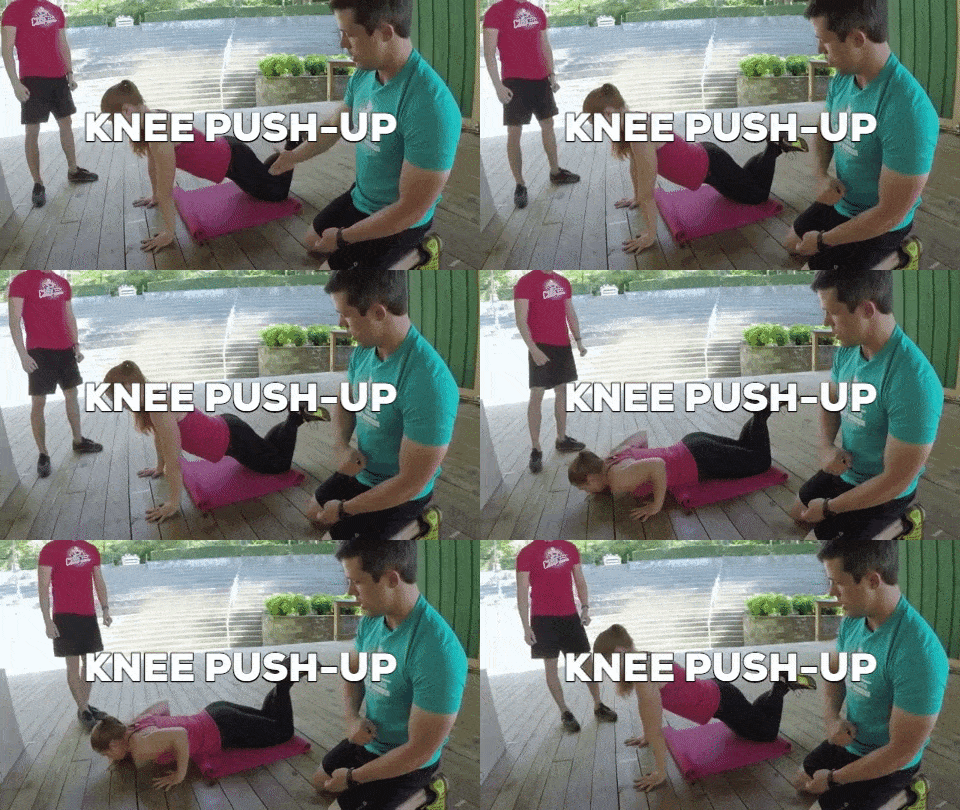
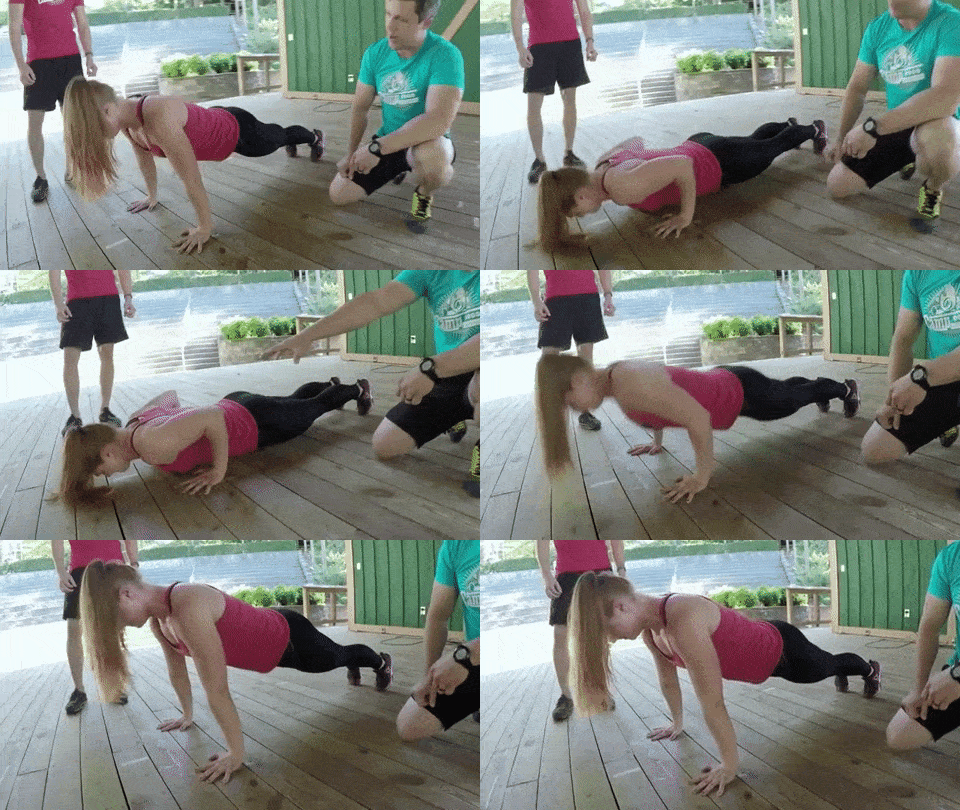
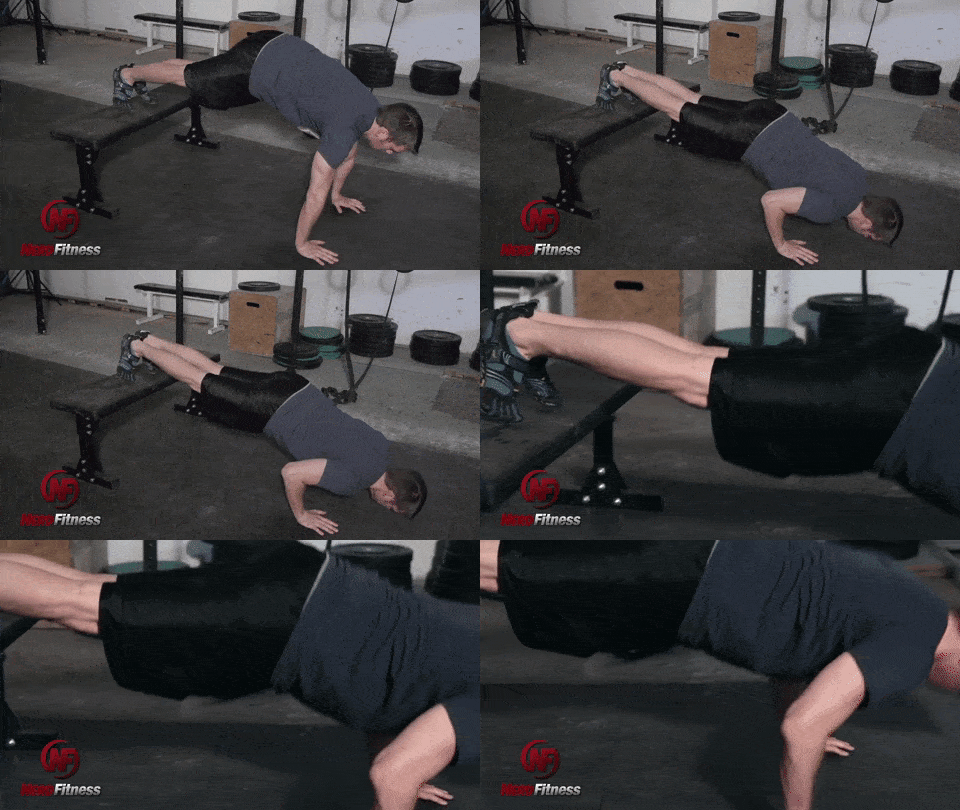
This means if you drop down and do ONE push-up or knee push-up right now…
Here’s what you need to know about strength training:
Strength training is one of the BEST things you can do for yourself.
Strength training will help you put on muscle while eating in a surplus.
While you can’t spot reduce fat, you can focus on building more muscle in specific areas, which can help you attain a specific look you’re going for.
If you don’t like the gym, you don’t need to go, ever. But I hope you do. Because that’s the easiest way to start training with weights.
Regardless of your fitness level, body fat percentage, strength level, or biological sex, you have every right to be in the free weights section in the gym, training with heavy weights, with everybody else. The people in the gym who are very strong with a lot of muscle started somewhere, too!
I used to be a CrossFit instructor, and my favorite thing about CrossFit was that it destigmatized barbell training and heavy lifting for many women.
In order for us to strength train and build muscle, we’re going to approach this intelligently.Â
We’re not going to pick up small dumbbells and do lots of reps.
We’re not going to sit down at various machines and scroll through our phones while doing leg curls.
Instead, we’re going to:
Get very strong with compound movements that recruit LOTS of muscles to work together.
Do our workouts quickly and get out of there. The workout should take no longer than 45-60 minutes.
This is how we efficiently build muscle in the minimum amount of time. What are the exercises that we’re going to target?
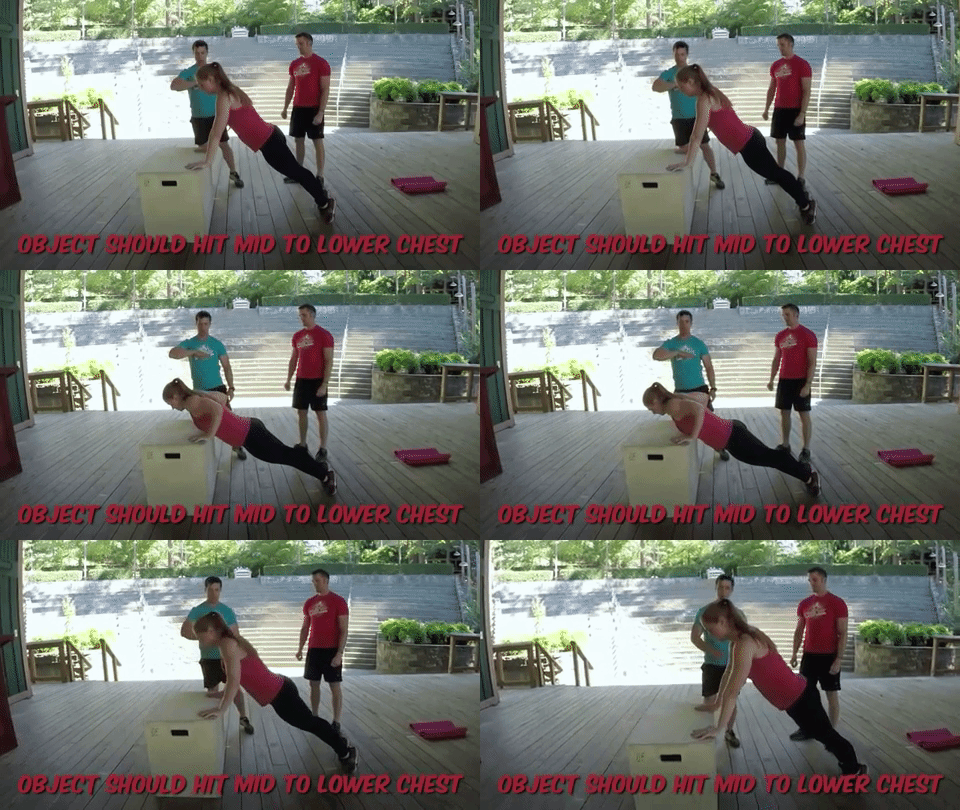
1)Â The Push-Up:Â The best exercise you could ever do for yourself when it comes to using your bodyweight for push muscles (your chest, shoulders, and triceps):
2)Â The Bodyweight Squat:Â This exercise serves a dual purpose: it is the foundation for building strength AND helps build proper mobility. If you are going to ever do barbell squats, you need to work on hitting proper depth with a bodyweight squat first!
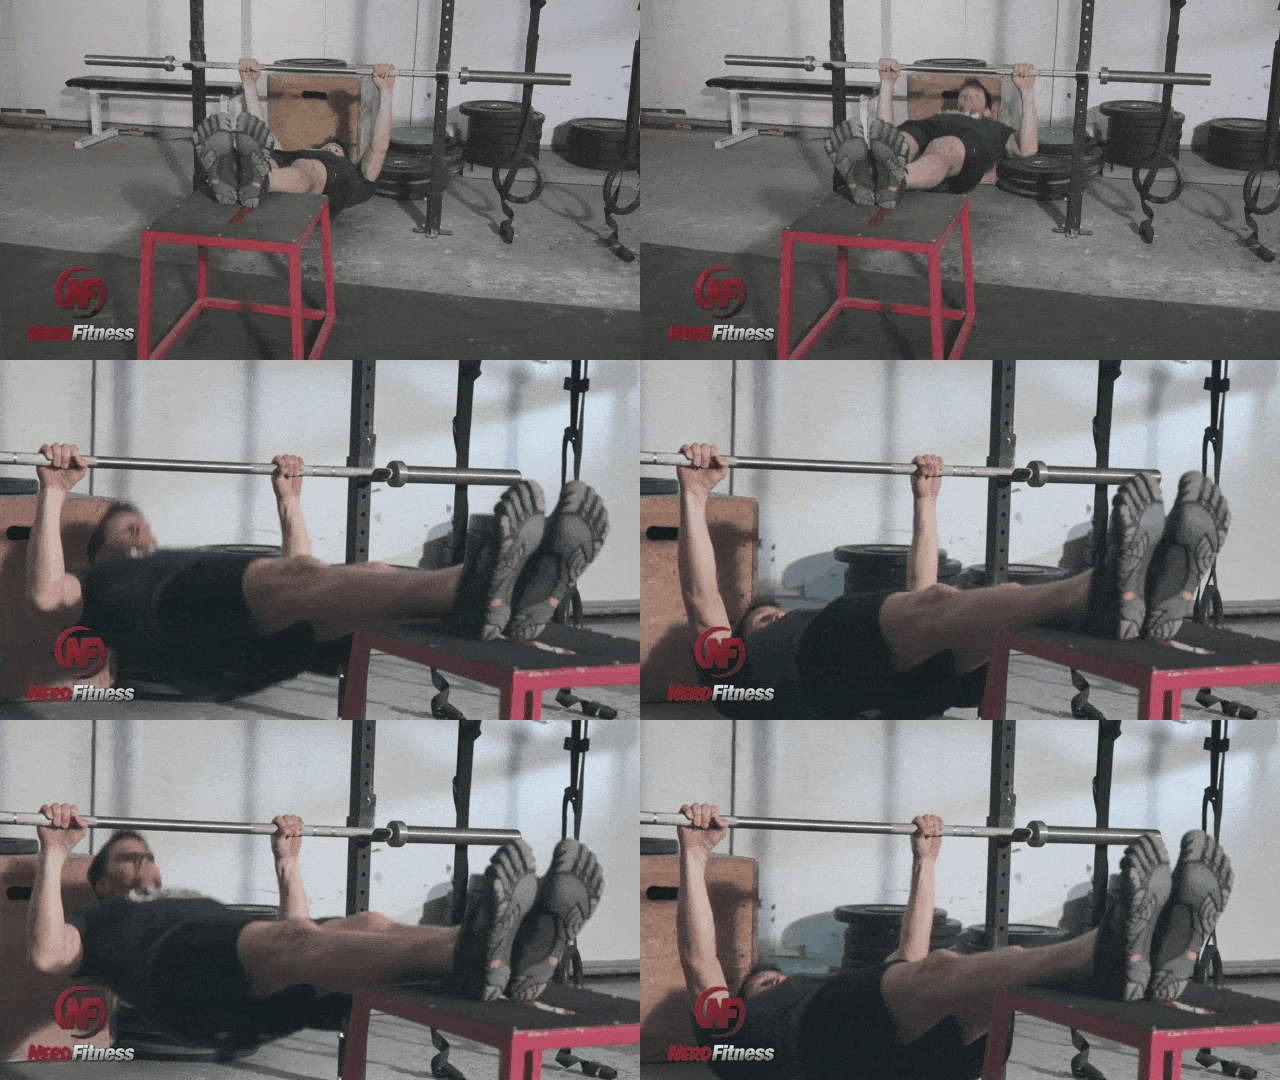
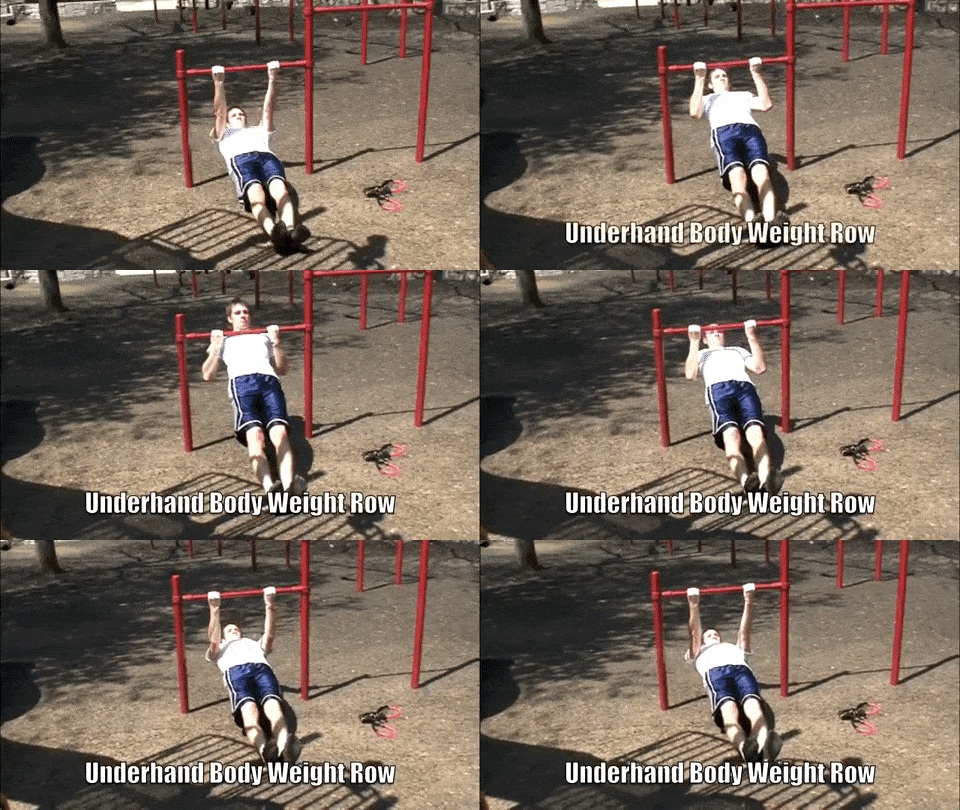
3)Â The Inverted Bodyweight Row:Â Until you can get your first pull-up or chin-up, these exercises are GREAT to start building your pull-muscle strength (your back, biceps, and forearms).
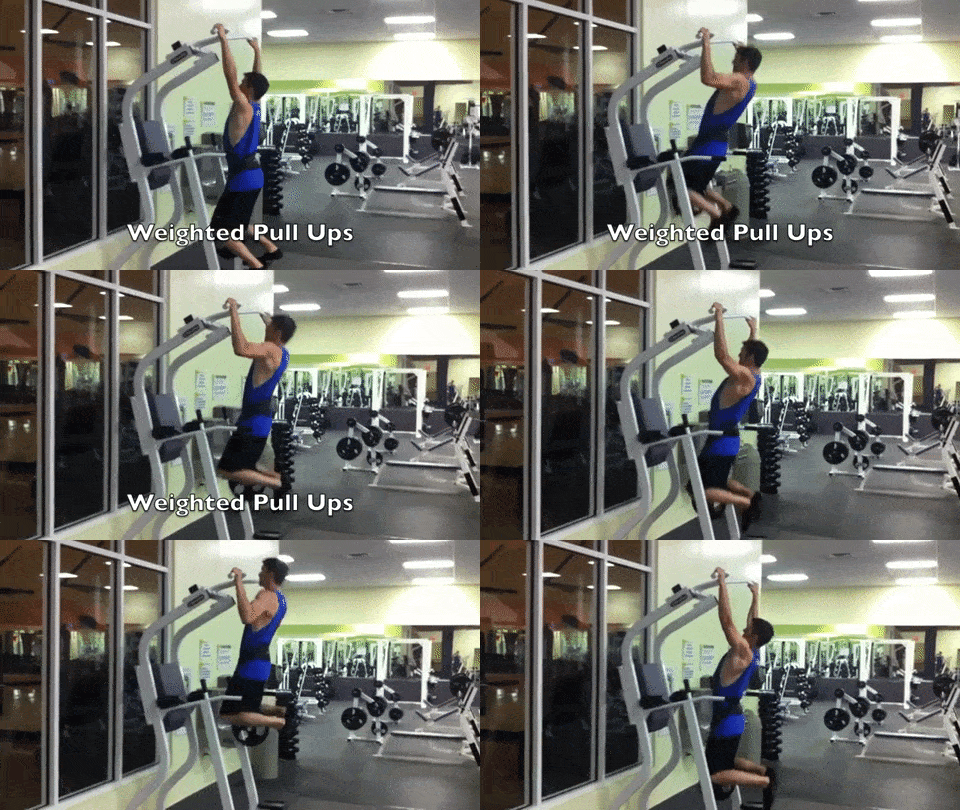
4)Â The Pull-Up and Chin-Up:Â Once you can support your body’s weight above the bar, the world becomes your playground. No strength training routine should be without pull-up or chin-up work! (Click here if you canât do a pull-up or chin-up yet):
And now weâre into the best weight training exercises:
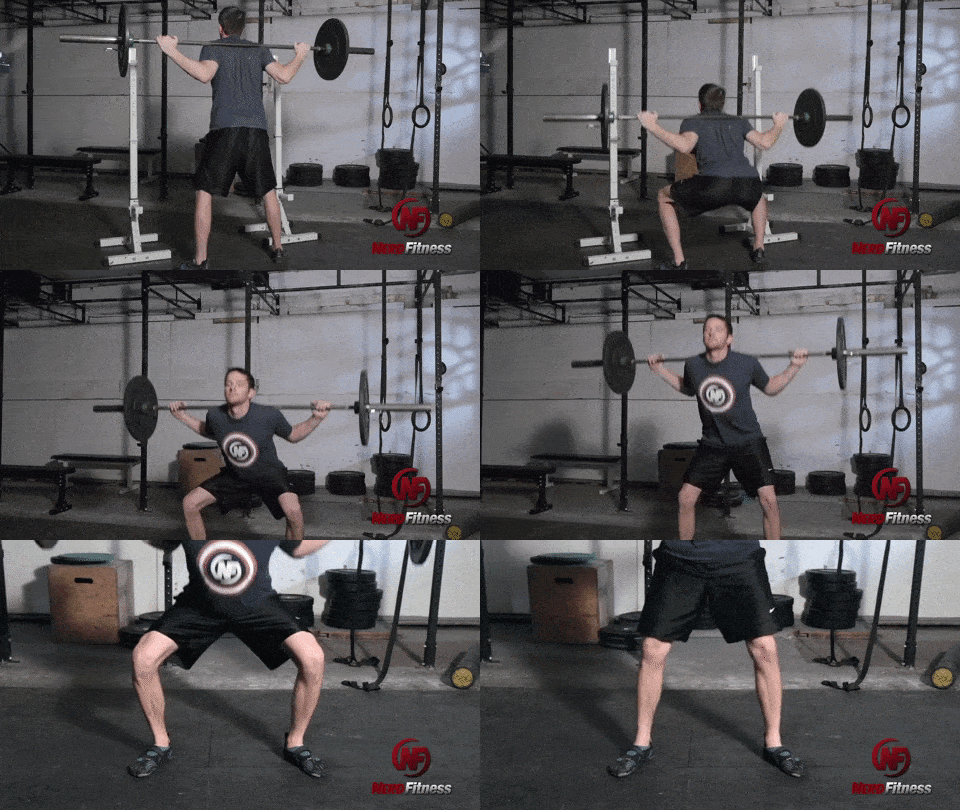
5) The Barbell Squat:Â Probably the best exercise when it comes to building strength and muscle throughout your whole body. It also burns crazy calories and makes life better. This is a MUST:
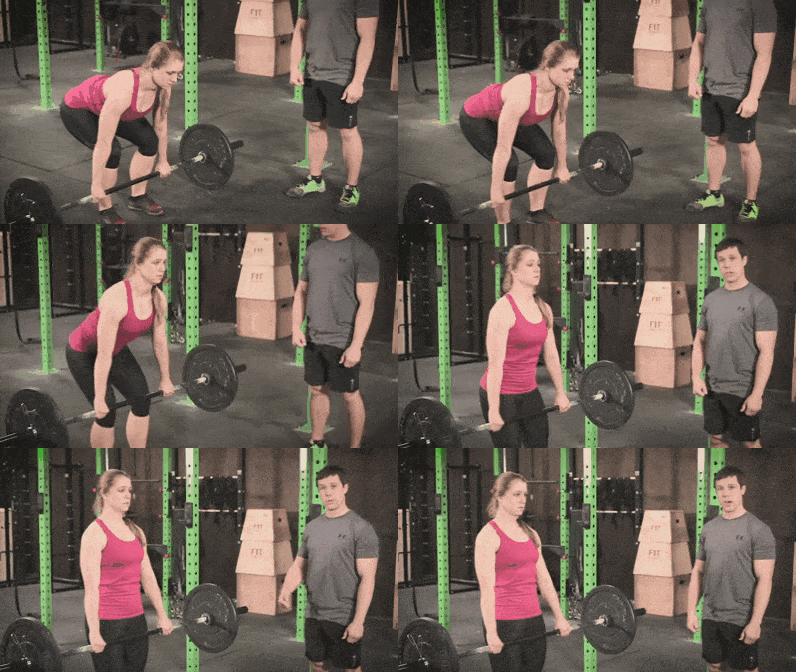
6) The Barbell Deadlift:Â Maybe the best exercise of all time. Actually no, it IS the best exercise of all time. Itâs certainly the most primal: âpick the weight up off the ground. Done.â
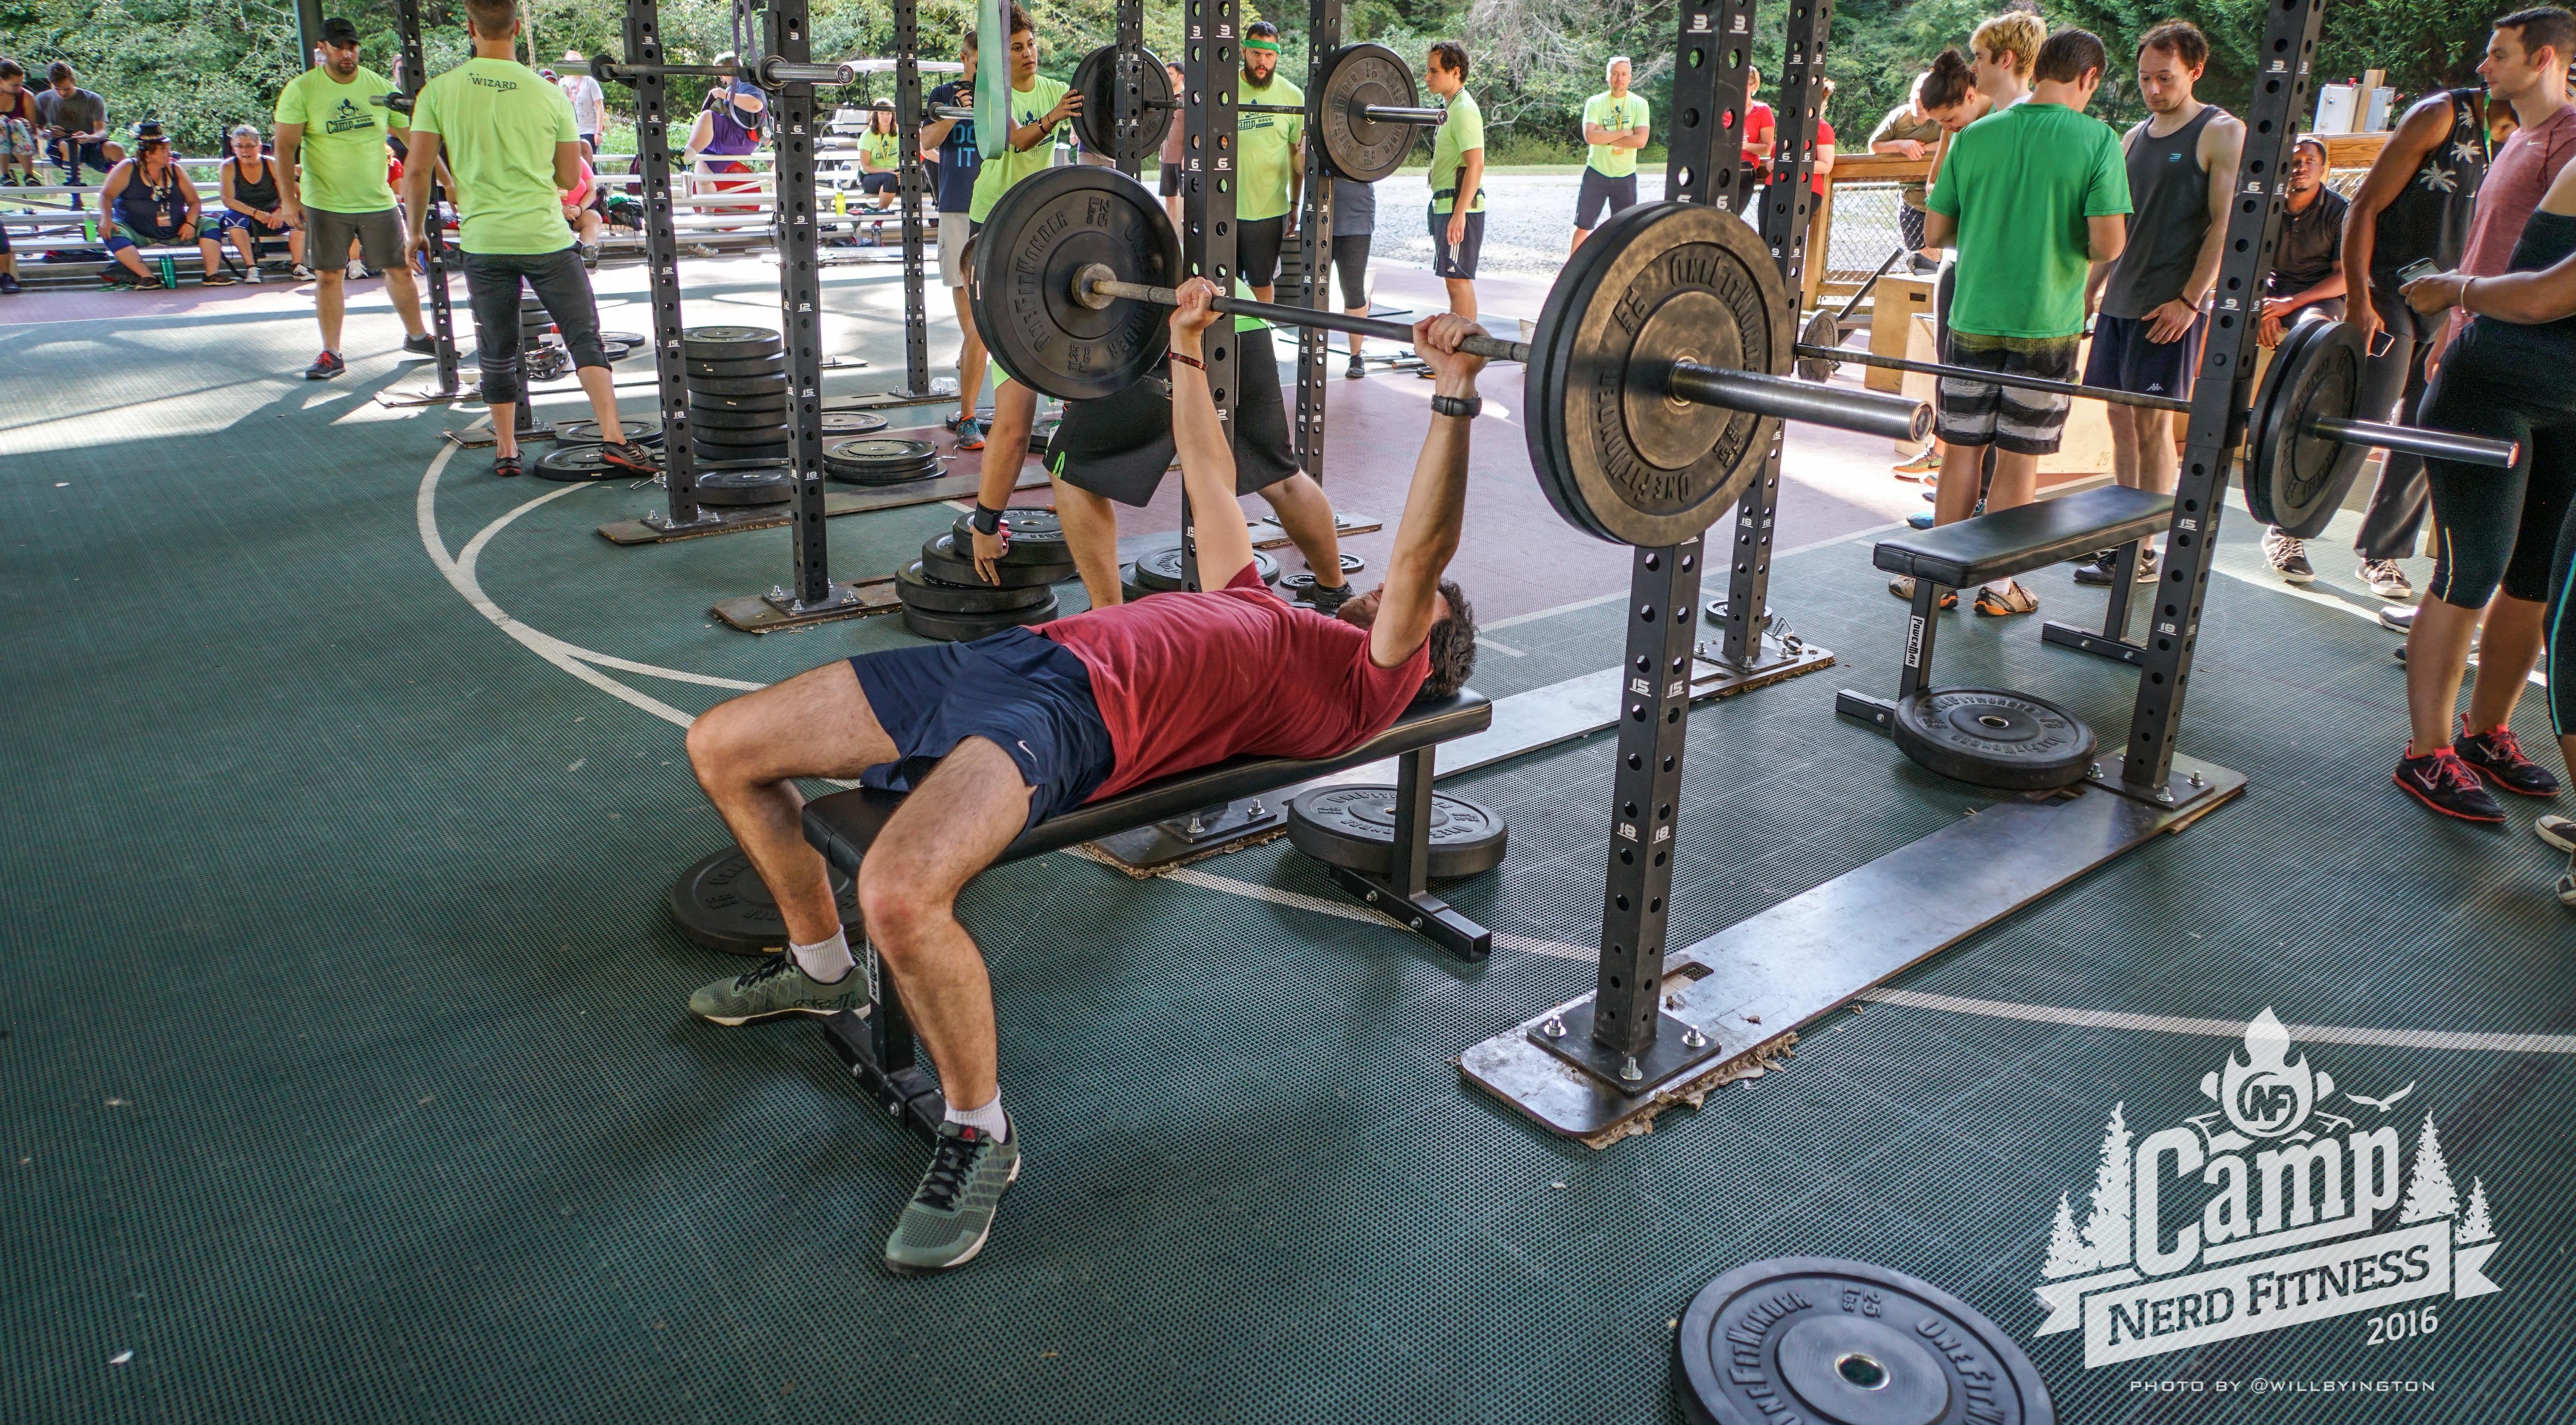
7) The Barbell Bench Press. Lie on a bench, squeeze your shoulder blades to keep your back tight, and then lower a barbell until it almost touches your chest. Pause, and then press it back up towards the sky. Repeat! And get strong.
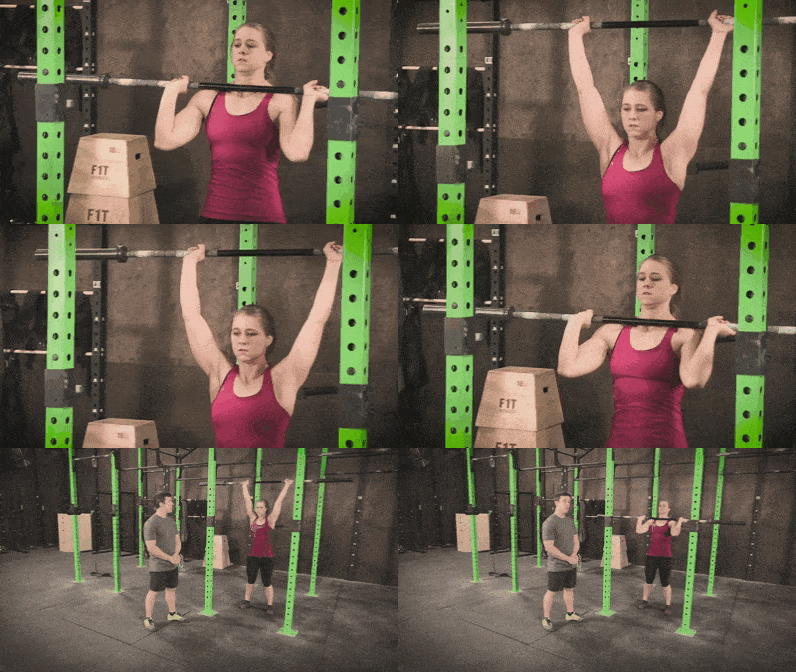
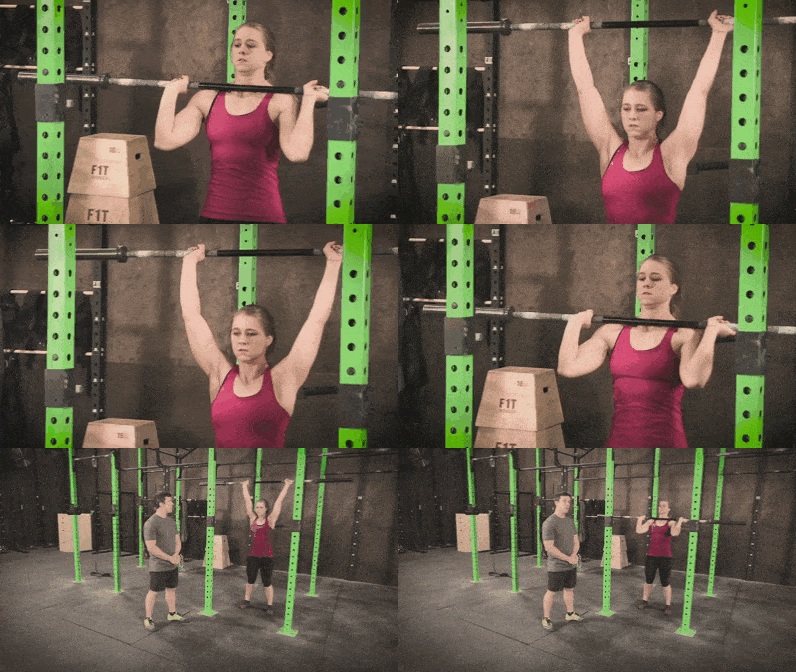
8) Barbell Overhead Press: Stand with your feet about shoulder-width apart and lean back by pushing your hips forward. While keeping your entire body tight, press the bar overhead.
Once the bar passes your forehead, move your body back under the bar by driving your torso forward and back into a standing position. At the top of the lift shrug your shoulders slightly and lock your elbows.
These are some of the best compound exercises you can complete in order to build muscle. Want more muscle? Great! Get stronger at these movements!
One quick note: when I first started lifting, it took a while to build up the strength to be able to bench press or overhead press with the 45-lb bar. If your gym doesn’t have a lighter bar, dumbbells are a great option!
Your mission, should you choose to accept it:
Commit to trying ONE of these movements in the next week. Use 20 seconds of courage, recruit a friend who has lifted or trained before, and try your best.
I have three options for you next:
Select one of the muscle-building routines for women in the next section.
Work with me and our coaching program to follow a custom strength training routine for your goals.
5 Muscle Building Workout Routines For Women
I’m going to walk you through three different levels of strength training, and by the end of today, you’re going to know exactly how to get started.
My advice: do 2-3 strength training routines per week, with 1-2 days off in between. As the saying goes: “muscle isn’t built in the gym, it’s built in the kitchen!”
So your goal should be to do a strength training routine, and then make sure you eat a caloric surplus so that your body has enough calories to rebuild your muscles bigger and stronger!
10 Dumbbell rows (use a milk jug or other weight).
15 Second Plank.
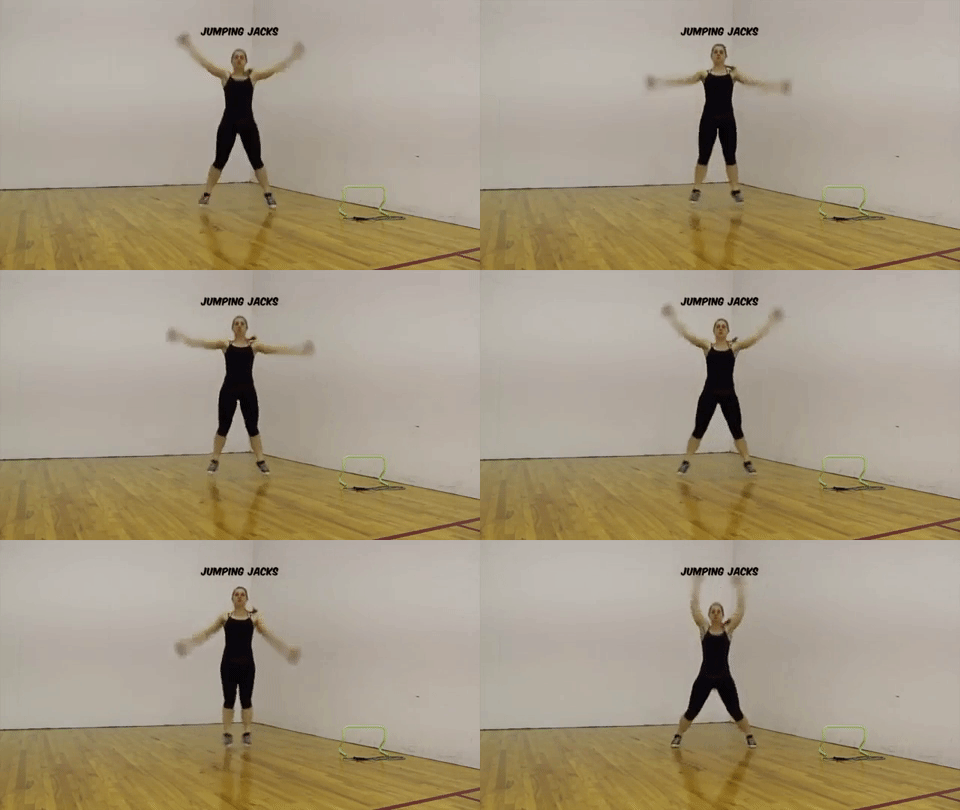
30 Jumping jacks.
We also have a downloadable worksheet of this beginner’s workout that you can print out and hang on your fridge to track your progress! Get it when you sign up below:
Grab Your Beginner Bodyweight Routine Worksheet. No Gym Required!
Complete this workout at home, no equipment required
Avoid the common mistakes everybody makes when doing bodyweight exercises
Learn how to finally get your first pull-up
LEVEL 2: DUMBBELL WORKOUT
If you have dumbbells at home or access to a gym, you can pick our Level 4 workout from our 6-Level Gym Workout Routine.
So your Dumbbell Workout is 3 circuits of the following:
10 goblet squats (holding the dumbbell like a goblet with 2 hands):
If you like this Kettlebell workout and want to follow along on a worksheet, simply print out our Kettlebell Workout and bring it with you:
Grab Your Beginner Kettlebell Routine Worksheet!
Complete this workout at home or gym with 1 kettlebell.
Avoid the common mistakes everybody makes when doing kettlebell exercises.
Build strength, burn fat, level up your life!
LEVEL 3: BARBELL GYM WORKOUT
Here’s a Barbell workout you can follow from our Level 5 Gym Workout Routine.
BARBELL BATALLION WORKOUT A:
3 sets of 10 barbell squats
3 sets of 10 push-ups
3 sets of 10 bodyweight rows:
BARBELL BATALLION WORKOUT B:
3 sets of 5 barbell Romanian deadlifts (video pulled from our courses in Nerd Fitness Prime)
3 sets of 10 bench presses:
3 sets of 5 pull-ups, assisted pull-ups, or negative pull-ups:
PICK A WORKOUT, GET STARTED!
The whole point is to do challenging movements that really make your muscles work, and then try to do ONE more rep, or lift a SLIGHTLY heavier weight next time!Â
Still overwhelmed? Check out our coaching program. We get to learn your story, and then build a program and strategy around your goals that you CAN do.
10 Tips for building muscle as a Woman
I interviewed multiple other coaches on our team and asked for their best advice on how to build muscle as a woman.
Here’s what they said:
Susy (Coach, BS in Psychology, Certificate III & IV in Fitness, 5+ years of experience)
Tip #1: Food is your friend when you are looking to build muscle and get stronger – your body will need fuel, so you may need to eat more on the days that you work out!
Tip #2: Strength and muscle building requires structure to your workouts – you progress through getting better at specific movements, so make sure that you enjoy the style and structure of your workouts so that you can be as consistent as possible.
Tip #3: Your progress will always be fastest if you avoid injury, so correct form and listening to your body is super important. Your muscles will fatigue and feel sore, but joint pain and sharp, stabby pain means something isn’t moving quite right.
Kerry (Coach, NASM-CPT, 6+ years of experience)
Tip #4: Fall in love with the process. Getting stronger is a journey, one that is both rewarding and challenging. So no matter where you are starting from, take the time to celebrate each small step along the way towards a more badass version of yourself!
Christy (Coach, BS in Applied Health/Fitness, National Personal Training Institute Graduate, Precision Nutrition Certification, 6+ years of experience)
Tip #5: To get strong, you gotta lift weights. When lifting weights to get strong, you gotta be okay with testing your boundaries every now and then.
After exercising with your current weight, for the next training session…stop…and try a few reps with the next weight UP to test it out! It might surprise you how much more weight you can lift!
Here are some other tips to help you build muscle.
Tip #6: Boost your testosterone naturally: Consume enough saturated and monounsaturated fats, keep your sugar intake low, and make sure you’re getting enough Vitamin D and Zinc.
These are items linked with boosting your testosterone naturally.[12]
Speaking of testosterone – I know you may think of this as a “male” hormone, but it plays a huge part in women muscle building,[13] fat loss,[14] increase bone mass,[15] and many other health-related issues[16](remember: estrogen is made from testosterone).
Men make about ten to fifteen times what we make naturally,[17] but it doesn’t mean we don’t need it too.
Another way we can help our testosterone levels is to watch our cortisol levels.
Cortisol is a hormone that is promoted by stress and reduces free testosterone levels (in addition to signaling for your body to store fat).[18]
Steve drinks two smoothies a day to reach his protein goals and you can check out our Guide to Protein Shakes for his personal recipe.
On the go with no blender? I like to keep protein powder with me in a small Ziploc bag – that way I can grab a bottle of water, rip off the corner of the Ziploc bag, and use that as a funnel to get the powder into the water bottle. Then, just replace the cap and shake and you’ve got a protein-filled snack!
Tip #9: Get more sleep! When you build muscle, your body is working overtime, burning extra calories. It’s going to need some time to recover. Remember, muscle is built when you rest, not when you actually lift.
Go to bed!
Tip #10: Start today!
Gaining muscle comes down to eating right and strength training. Let’s get you lifting today!
Youâll work with our certified NF instructors who will get to know you better than you know yourself, check your form, and program your workouts and nutrition for you.
2) If you want an exact blueprint for growing strong, check out NF Journey. Our fun habit-building app helps you exercise more frequently, eat healthier, and level up your life (literally).
Try your free trial right here:

3) Join the Rebellion! We need good people like you in our community, the Nerd Fitness Rebellion.
Sign up in the box below to enlist and get our guide, Strength Training 101: Everything You Need to Know. Itâll help you begin your journey on building muscle.
Download our comprehensive guideSTRENGTH TRAINING 101!
Everything you need to know about getting strong.
Workout routines for bodyweight AND weight training.
How to find the right gym and train properly in one.
Lastly, Iâd love to hear from you!
PLEASE leave your questions, eating or strength or otherwise below so we can answer them and become best friends and practice karate kicks in the garage:
How can I help you get bigger and stronger?
What part of this journey are you still struggling the most with?
What are your favorite bulking up foods!?
Share with your friends in the comments so we can all go buy it in bulk at Costco.
-Staci
PS: Make sure you check out the rest of our Strength Building Articles!
“Testosterone in women–the clinical significance” Source; PubMed
Check out this study “Exogenous androgens influence body composition and regional body fat distribution in obese postmenopausal women–a clinical research center study” Source: PubMed
“A concise review of testosterone and bone health” Source: PubMed
Check out this interesting interview with Dr. Stephanie Faubion on testosterone in women. Source: MayoClinic
You can check out this study “Circulating Testosterone as the Hormonal Basis of Sex Differences in Athletic Performance” for more: PubMed.
Check out “Effects of mindfulness meditation on serum cortisol of medical students” for a study on meditation lowering cortisol levels. Source: PubMed.
from Blog â Nerd Fitness https://ift.tt/2NkrXUs
via IFTTT
Iâm now a regular powerlifting competitor and a Senior Coach for the NF coaching program, where I help people like you hit their strength training goals.
I’ve written this guide on Deadlifts because it’s the exercise that will change your life too.
So why is the deadlift so great?
Well, when you deadlift you use every single muscle in your body:
Your arms, forearms, and hands hold onto the barbell and make sure the bar stays in the right position and stays stable throughout the lift.
Your shoulders and traps hold the weight and hold it stable.
Your back and core help keep your entire body tight and stable to help keep your spine secure.
Your posterior chain[1] and legs to act as a lever and lift the weight.
Whenever anyone asks me where I got my shoulders/abs/etc, I answer the same: deadlifts.
Why do a million crunches when I can just do deadlifts instead?
On top of that, the deadlift is a basic human movement. Other than the squat, there might not be another movement that is more “functional.”
From the grocery store, to moving a piece of furniture, to picking your child up off the floor – you are deadlifting.
As you build solid form deadlifting in the gym, your form for picking things up in real life will also improve.
This means you’ll be less likely to injure yourself now and later down the line (not only because you are stronger, but because your body knows how to properly handle the weight).
And this goes further than just picking up objects – how you move while shoveling snow, doing yard work, and doing other basic everyday life tasks will all dramatically improve from deadlifting.
Don’t be that guy/gal with back problems from lifting that random object!
Oh, and by the way, the effectiveness of the deadlift isn’t limited to an age or gender – even grandma thinks theyâre cool.
The deadlift is awesome – perhaps the purest measure of strength: either you can pick the weight off of the ground, or you can’t.
What Is Proper Deadlift Form? How to Deadlift Safely
When doing a deadlift youâll be lifting a dead weight off the ground (hence the name, duh).
The deadlift can actually be taught in one sentence:
âBend your knees and bend over with a flat back to pick up a loaded barbell off the ground.â
Of course, this sentence doesnât do the awesomeness of this exercise justice.
Hereâs how to do a conventional barbell deadlift:
Step up to and under a barbell with your feet angled slightly outward, at hip-width apart.
Bend over and grip the barbell with both hands at shoulder width.
Bend your knees until the bar almost touches your shins.
With a neutral spine, flex your butt and brace your stomach.
Pick the bar up off the ground (It helps to think âpress DOWN into the floor with your feet through your heelsâ).
Continue pressing down with your legs until the barbell passes your knees, then thrust your hips forward until you are standing up.
Reverse your movement until the bar returns to its starting place on the ground.
High five yourself for you doing a deadlift.
(Donât worry Iâll get more in-depth below.)
Oh, whatâs that?
You want even MORE detail on each of those steps!? Sure.
PHASE ONE: The Deadlift Setup.
*NOTE: Always warm up properly, and start with just the bar, even for deadlifts!
Load the bar and secure the plates with collars. If you are just starting out with the movement, begin with 5-10 lb plates, using boxes or blocks to elevate the bar to about where it would be with 45 lb plates attached (if your gym has training plates that are this size, even better!). You may also be able to use your gymâs power rack for this.
Step up to the bar as if you are about to JUMP. Naturally, your feet should end up about hip width (8-12 inches) apart, and your feet slightly angled outwards (5-10 degrees).
Look down – the bar should be over the middle of your feet. If youâre wearing laced shoes, the bar would be approximately over the tied part of your shoelaces.
PHASE TWO: Preparing to lift the bar!
Here are the next steps to take before lifting the bar off the ground (Iâll petition Websters to add the word âdeadliftoffâ to the dictionary):
Without moving the bar, or your hips, bend over and grab the bar. Your legs should still be straight at this point. Your grip width will be slightly outside of your legs, but not so close they touch. For now, a simple double overhand grip (both palms facing behind you) will work. We will discuss options in grip in more detail later!
Now that youâre holding onto the bar (but not moving it), move your hips down. While you do this, your shins will come forward until they touch the bar Stop moving your hips down when your shins touch the bar.
Press your chest out and flex your pecs like youâre King Kong getting ready to bang on your chest for intimidation. As you do this, your back should flatten, and your spine should go into a neutral spine position.
This is the final starting position of the deadlift: everything is tight and in position and youâre ready to pull.
To Recap we DONâT want your back to round or hyperextend.
If youâre just starting out, getting into a neutral spine might feel like youâve gone too far (hyperextended), so donât be afraid to ask a friend for help or to record yourself so you can see what youâre doing.
PHASE THREE: Deadlifting with proper form (THE DEADLIFTOFF!)
If your setup looks and feels good, youâre ready to lift.
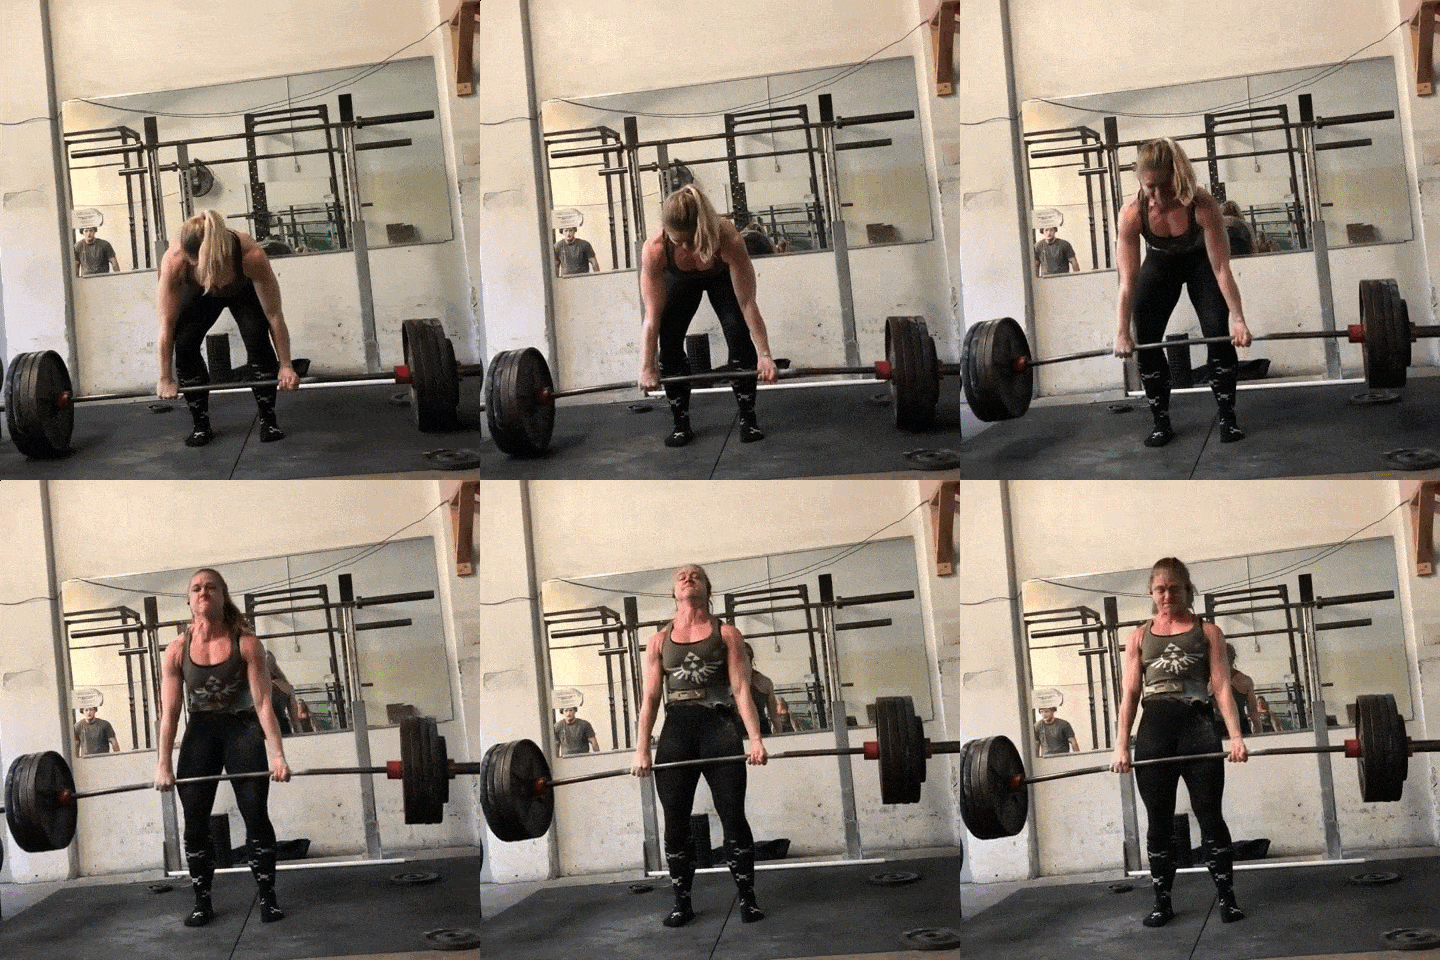
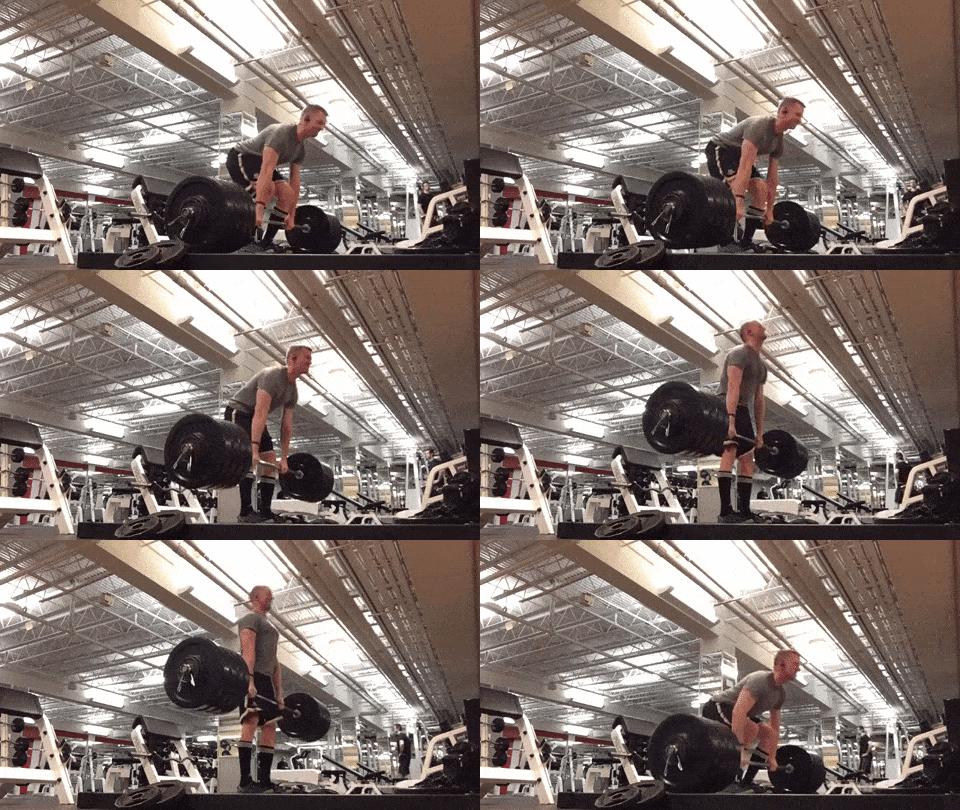
Here is the Conventional Deadlift, as demonstrated by me (Staci) and Jim from the NF Coaching Program:
Here are those steps in written form.
Inhale and fill up space deep in your stomach (like a deep belly breath), and while keeping your entire back, butt, and core tight with your chest puffed out, drive down through your heels and the bar should lift off the ground:
All of your weight should be on your heels and midfoot. You should be able to wiggle your toes the entire time (though that is not a part of deadlifting!). Imagine you are pushing the earth world away from the bar with your heels rather than pulling the bar up.
During the movement, your entire body should move upwards at the same speed. This means that your butt should not rise faster than your chest, or vice versa. You may have heard of the term “stripper deadlift” – this is when your butt rises first before your chest.
Your arms should stay straight the entire time. They are just there to hold onto the bar – they are not bending or pulling at all. Your legs and core are doing all the work!
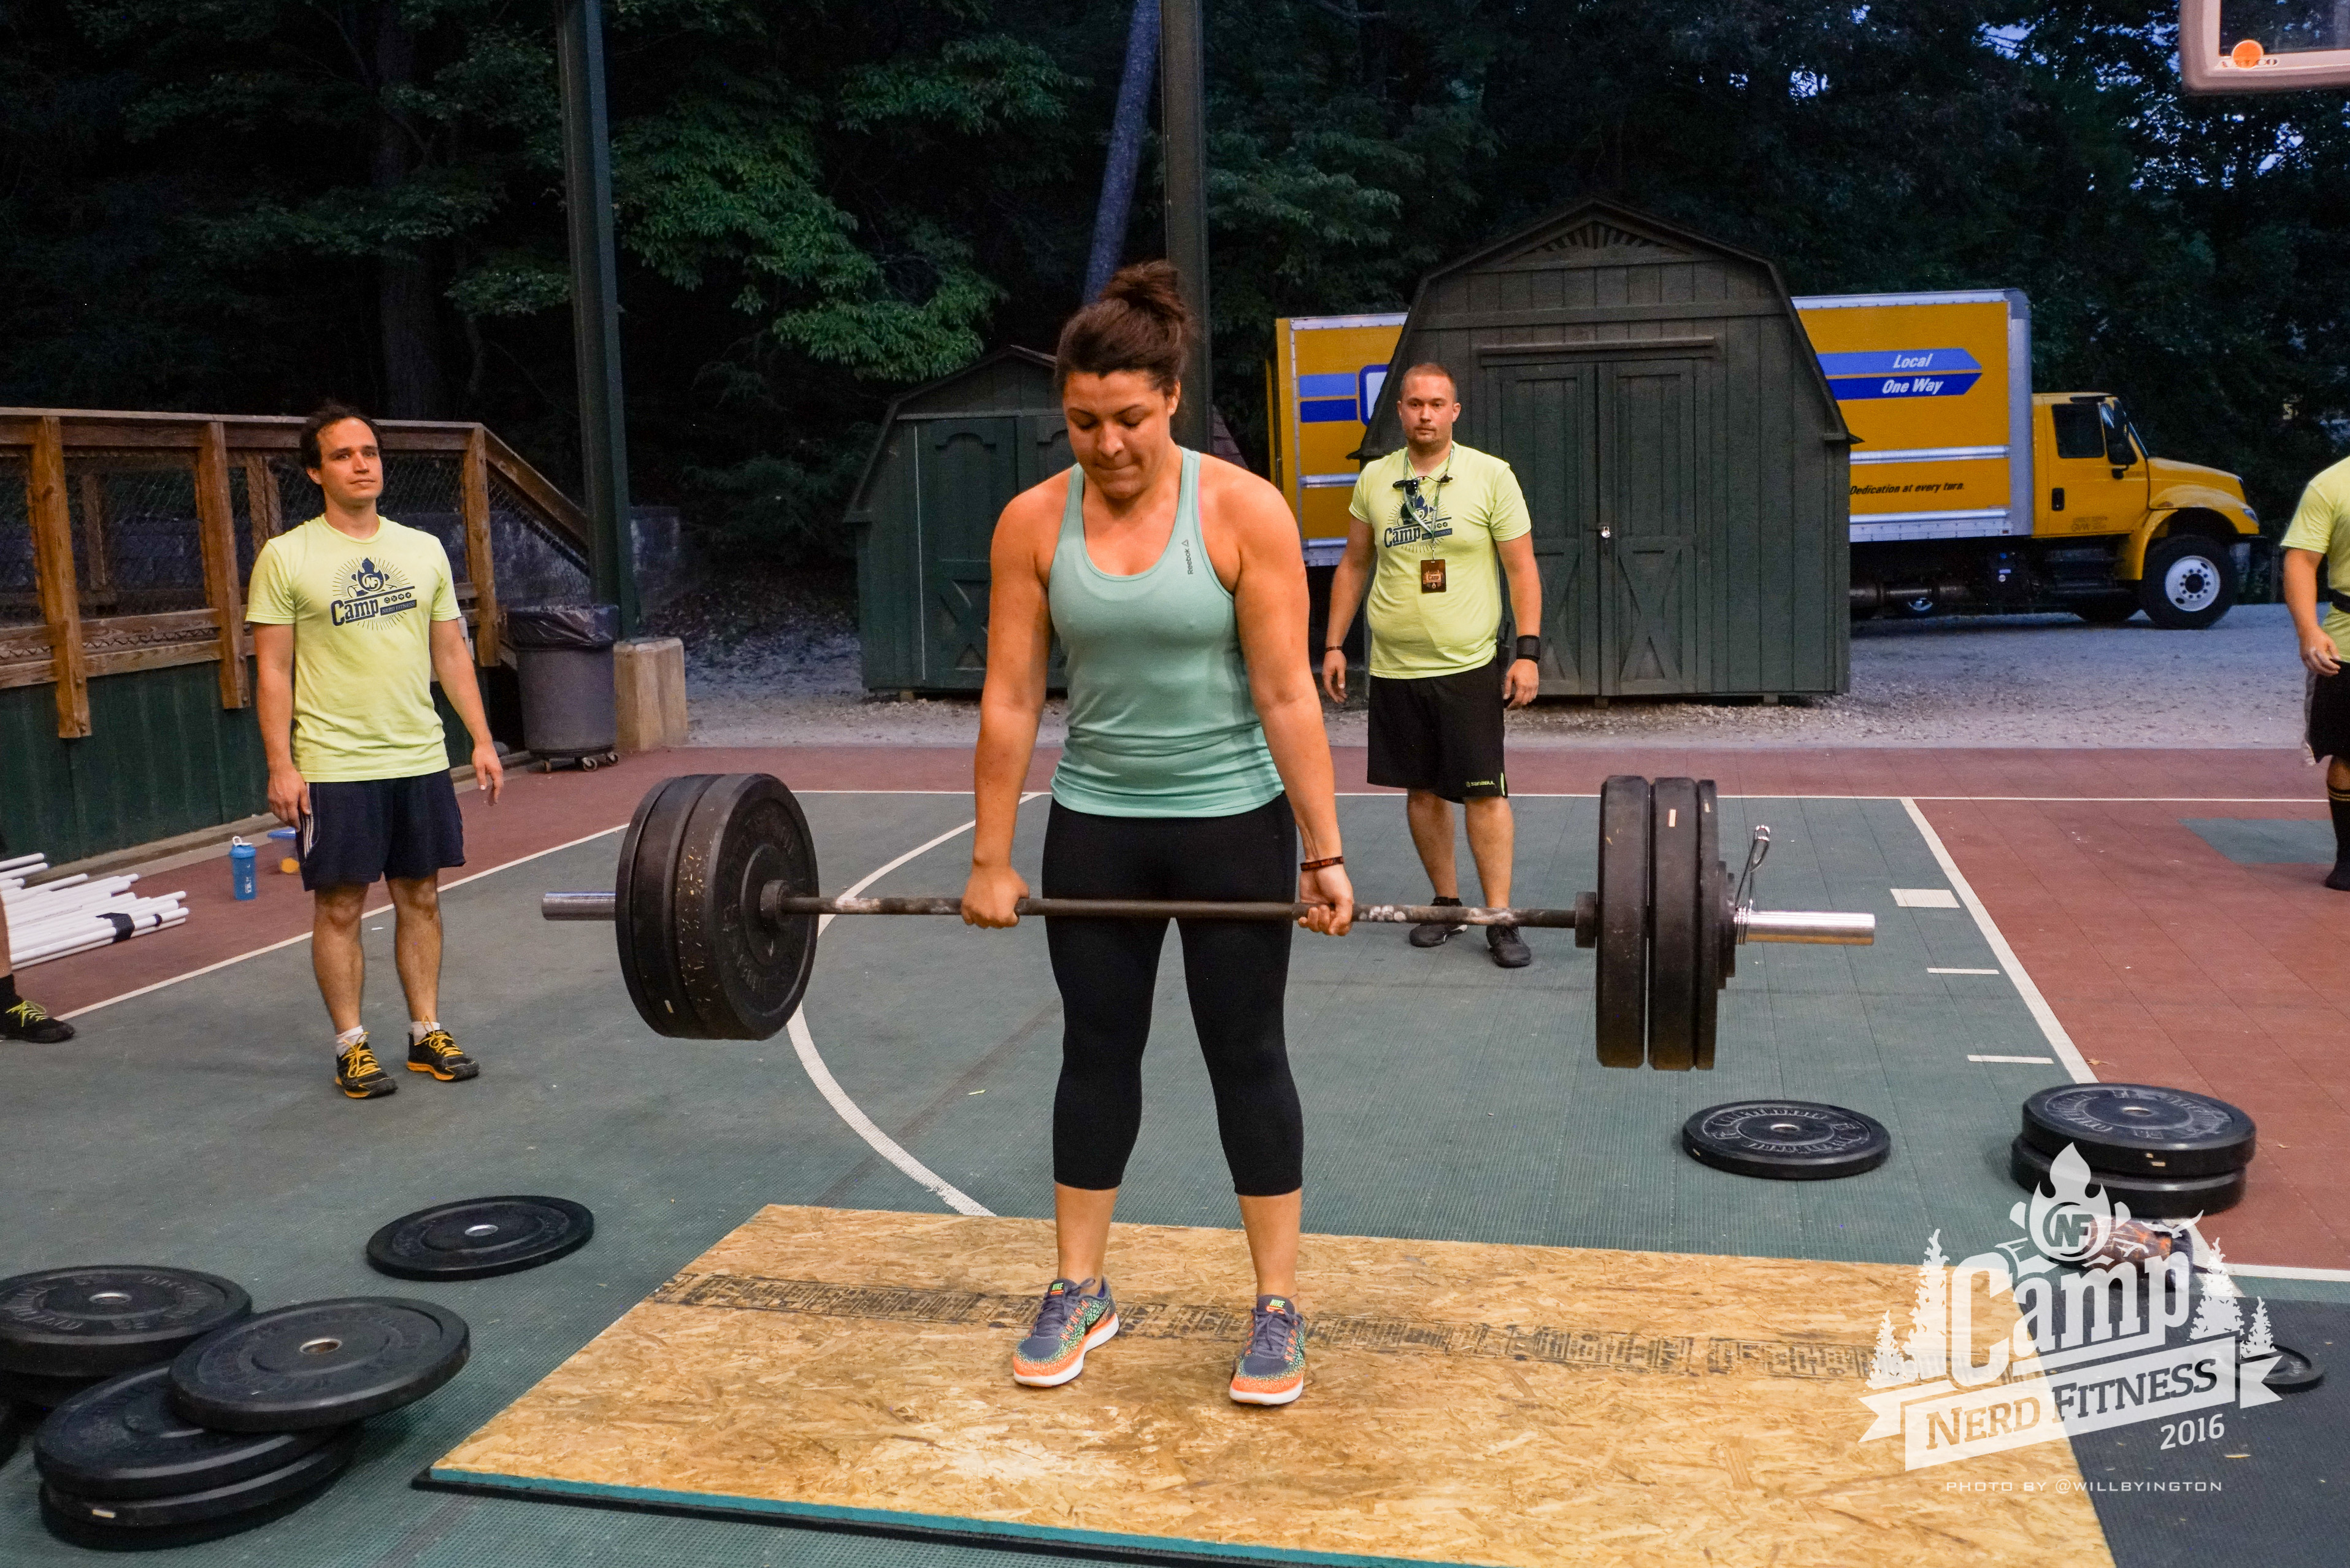
The bar should stay in contact with your body the entire time – you will literally be dragging it up your thighs. This is why you see many powerlifters with chalk or baby powder covering their legs (and why they typically wear socks that cover their shins, to prevent cuts and scrapes). Do not let it come forward. If you were to draw a line that follows the barâs path from the floor to lockout, it should be a straight, vertical line.
As you are pulling, you should be squeezing your glutes like you’re pinching a penny between your…well, you know. Once the bar passes your knees, think of getting your hips under the bar by squeezing your glutes. So while youâre pulling with your arms, youâre pushing through the floor with your feet, pushing your butt under the bar.
At the top of the movement, you should be standing tall and proud with your chest open, like if you were King Kong getting ready to pound his chest.
At the top, do not hyperextend and lean back. You want to keep your spine neutral and everything tight.
I realize thatâs a lot to take in, and thatâs okay! Youâve read this far and Iâm proud of you.
Many people are so afraid of the deadlift and avoid it at all costs because theyâre afraid of splitting themselves in half or getting injured in another way.
Thatâs why we not only created this awesome guide on deadlifts, but also a way to review technique and proper movement so you have the confidence you’re doing it correctly.
If you want an expert to check your deadlift form and help build a workout program specific to your goals, check out our 1-on-1 Online Coaching Program. Our coaching app lets you record and send a video of your movement directly to your coach who will provide specific feedback:
Setting the Bar Down (Should I drop the bar on a Deadlift?)
Okay! You got the weight off the ground and finished the movement. But now what!?
Your body should descend all at the same time, just as it ascended during the deadlift, only in reverse!
Unlock your hips and slowly move your hips backward until the bar lowers past your knees, then bend your knees and slowly lower the bar to set it down (make sure you unlock them at the same time.
Don’t unlock your knees first, as it will cause a lot of awkward movement, and possibly your lower back to round).
I REPEAT: DO NOT DO THIS:
Donât lose tightness until you let go of the bar.
This is extremely important – a large amount of deadlift injuries come from people getting super excited about making a lift, losing tightness, and then putting the bar down wrong.
You want this to be a quick movement – lowering the deadlift slow will take a lot out of you and leave you sore for days.
Should you drop the bar during the deadlift?
The eccentric part of the deadlift (lowering it) is actually riskier than the concentric (picking it up) part of the deadlift.
Many coaches will advocate dropping your deadlift (especially with advanced athletes where they can’t afford to sacrifice performance later in the week).
In our opinion, especially if youâre training in a commercial gym, I would recommend putting the bar down (especially if you want to compete in powerlifting competitions – the lift does not count if you drop it).
So, practice putting the bar down properly. It’s just as important as practicing picking it up.
By the way, we have a massive Strength 101 Guide that you can download free when you join the Rebellion (our free community).Â
Get the guide when you sign up in the box below!
Download our comprehensive guideSTRENGTH TRAINING 101!
Everything you need to know about getting strong.
Workout routines for bodyweight AND weight training.
How to find the right gym and train properly in one.
Proper Deadlift Grip, Straps, and other Equipment
Grip strength is a huge part of the deadlift. If you can’t hold on to the bar, you can’t lift it!
There are two main grips when it comes to the deadlift.
#1) Double overhand grip. Your palms are both facing towards your body. This is the safest grip, and the best grip for beginners to start with.
#2) Mixed Grip: One hand grabs the bar with an overhand grip, and another hand grabs the bar with an underhand grip.
The mixed grip has many disadvantages:
It places uneven stress on your shoulders
It can aggravate problems in the biceps on the side in which your palm is facing outwards
It’s easier for your lift to be uneven as youâre literally gripping the bar it with uneven hands.
So why do a mixed grip?
You can physically lift more. The bar wants to roll out of your hands, so by using a mixed grip you are more likely to not have your grip fail you on a heavy lift.Â
As you start to lift more than your grip can handle, you can consider doing a mixed grip for your heaviest lifts, but be sure to use the double-overhand throughout your warm-up sets. Consider doing grip strength work as well.
#3) Hook grip: This grip is where you put your thumbs under your fingers.
This type of grip is preferable to the mixed grip due to the fact that it doesnât introduce any imbalances. However, it does have one major disadvantage:
It hurts like hell!
From personal experience, you get used to it and your thumbs can manage, but prepare for pain when you learn to do the hook grip!
No matter what grip you use, youâre probably going to want to invest in some chalk! Itâs absolutely optional and initially wonât be incredibly useful.
However, after you start to put some weight on the bar, chalk will be enormously helpful for hanging on to the bar (I use this kind of lifting chalk). I certainly find this to be a better, smarter, and safer option than either straps or gloves.
Speaking of which…
Here are some common questions on deadlift equipment:Â
#1) âShould I use straps while doing deadlifts?â
Ehhh, probably not. Straps can help you lift more than your hands can hold with an overhand grip, but relying on straps could cause your grip strength to be undeveloped down the road.
Short answer: consider using straps strategically when doing high volume deadlifts, but donât rely on regularly them for max lifts: improve your grip strength.
Instead, chalk, stronger grip strength, and a hook grip for max lifts is your friend!
#2) âShould I wear gloves while doing a deadlift, Staci?â
Nope.
Gloves actually create space between your hands and the bar, and it reduces your grip security, increases the diameter of the bar, and makes the bar harder to hold on to.
This means the gloves are doing the exact OPPOSITE of what you think they’re doing.
I don’t recommend using gloves unless you have an injury like a ripped callus.
Speaking of ripped calluses, or if youâre worried about getting rough hands from deadlifting – make sure to take care of your hands and they are less likely to happen!
#3) “Do I need to use a lifting belt?”Â
When starting out, you don’t have to worry about using a belt.
However, as you get to really heavy weights, it may be something to look into.
Belts need to be worn correctly in order to be effective.
Note: While you may be able to lift more using a mixed grip and a belt, they’re definitely not necessary to lift heavy.
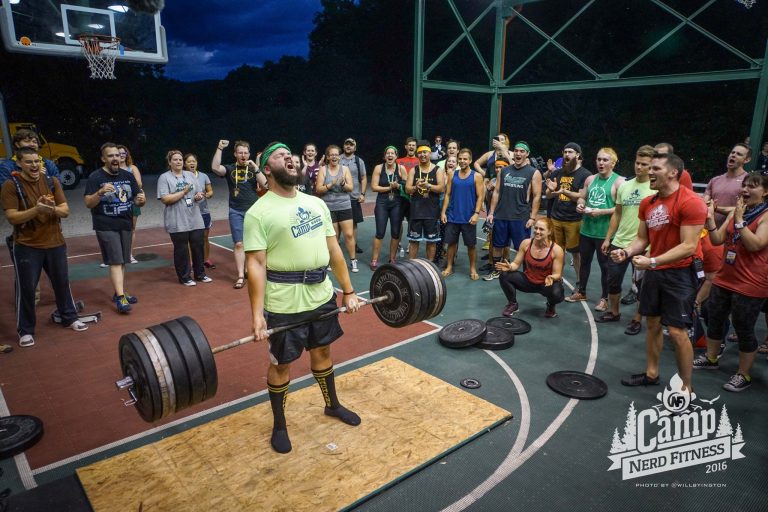
Here’s a video of Anthony Mychal deadlifting 550 lbs at the powerlifting competition at Camp Nerd Fitness – double overhand with no belt:
#4) âWhat kind of shoes should I wear to deadlift?â
GREAT question. I donât care what kind of shoes they are, as long as they are flat.
You really have four options for deadlifting shoes:
FLAT SHOES:Chucks work great. I personally prefer to deadlift in either socks or zero drop minimalist shoes. Do NOT wear clunky athletic shoes with thick heels or shoes with those pockets of air bubbles in the heels.
DEADLIFTING SHOES: Getting a bit fancy here, but if you are competing or just want shoes you can deadlift in, consider deadlifting shoes.
GO BAREFOOT: If you donât want to invest in new shoes, deadlift barefoot. Just donât go walking around the gym in socks – you might get kicked out or have a weight roll across your feet! Â
SLIPPERS: No, not fuzzy Snoopy ones. Look into deadlift slippers â theyâre just fancy socks approved for competition.
Still here, eh? Amazing!Â
We want to be part of a community that helps you reach your goals. Whether you want to deadlift for the first time, or you’re trying to hit the 1,000 club, our Nerdy Coaches want to help.
Let us take care of everything so all you have to worry about is following the instructions and picking up the weight!
7 Common Faults and Mistakes while Deadlifting
DON’T DO THESE THINGS:
#1) Rounded Back – not keeping your spine in neutral the entire time. Letting your lower back round at all is a huge no no. [2]
#2) Looking up (with your neck) – Along with keeping a neutral spine, hyper extending your neck to look up is also something we want to stay away from.
#3) Hyperextending at the end of the movement – The spine should still be in neutral even at the top. Hyper extending at the top is actually not something we actually strive for or need to do.
#4) Treating the deadlift like a squat with the bar in your hands. You are not starting in a squat position and standing up – it is a different movement.
#5) Letting the bar come forward – The bar needs to stay over your midline and be dragged up your body the entire lift – any movement forward of your midline should be avoided.
#6) Butt rises faster than your chest (also known as the “stripper deadlift”) – your chest should lead the movement, and your entire body should move upward at the same pace.
#7) Bending your arms – your arms should stay straight. Don’t bend your elbows to try to get the bar up faster.
NOT SURE YOUR FORM IS RIGHT? I hear you – Personally, I deadlifted with bad form for years and I didnât even realize it.
It wasnât until I enlisted the help of an online coach who checked my form via video and helped me with the right âmental cuesâ to get me to start deadlifting correctly.
If you want somebody to check your form – AND build the workout for you – consider our 1-on-1 online coaching program with form check:
What Are the Different Types of Deadlifts?
So far weâve addressed the conventional/traditional barbell deadlift.
There are MANY different variations of deadlifts, and you can use whichever one floats your boat (if you have a boat to float, that is).
Here are 8 different deadlift variations:
1)Conventional Deadlift – Your hands are just outside your feet, standing at about hip-width apart. Our article has been highlighting this form of deadlift.
2)Sumo Deadlift – Your hands are inside your feet with a wider stance.
3) Hex or Trap Bar Bar Deadlifts – Use a specialty bar made just for deadlifting which changes the biomechanics.
4) Snatch Grip Deadlift – Your hands will use a wide grip like in the Snatch.
5) Romanian Deadlift: Think of this as the top half of a conventional deadlift (imagine youâre a âdrinking birdâ bending over at the waist).
6) Deficit Deadlift: This movement increases the range of motion of your deadlift, since your feet are elevated compared to the bar.
7) Rack Pulls: Conversely, this decreases your range of motion with the deadlift, since the bar is raised higher.
8) Dumbbell Deadlift Variations: For either accessory work, or if you don’t have access to a barbell and weights.
This guide covered primarily the conventional deadlift, because itâs a great variation for beginners and an exercise you can do every week for the rest of your life.
Once you get comfy with it though, move onto others. Need more tips for strength training moves?
Oh and don’t forget to grab our Strength Training 101: Everything You Need to Know when you sign up in the box below:
Download our comprehensive guideSTRENGTH TRAINING 101!
Everything you need to know about getting strong.
Workout routines for bodyweight AND weight training.
How to find the right gym and train properly in one.
Frequently Asked Questions on the Deadlift
#1) “What do I do if I can’t get into the proper starting position?”
While you are getting the mobility to get into the correct starting position, you can put the bar on blocks to raise it up a few inches to help you get in the right position.
Each workout, start with the bar a little lower, until it is just on the floor.
Each week, your goal should be to lift SLIGHTLY more than last week.
Thatâs it. By going SLOWLY, youâre giving all of your muscles, joints, tendons, your grip, and your central nervous system a chance to level up together.
So start small. Lift more each week.
#3) “Should I do ‘touch and go’ or ‘dead stop’ if Iâm doing a set of multiple reps?”
A dead stop means letting the weight settle completely on the ground before doing the next rep, while âtouch and goâ reps means youâre essentially bouncing the weight at the bottom of the movement and going RIGHT into the next rep.
Touch and go reps are thus easier:
The stretch reflex where your body quickly rubber bands in the other direction.
Locomotion: the bar is already in motion, so itâs simply easier to lift something that is already moving than it is to lift something that is completely stopped.
Bounce:Â If you are at a gym that has rubber bumper plates, these plates actually will bounce a little when they hit the floor â helping you lift the weight.
HOWEVER, while “touch and go” reps are easier, they are also more dangerous. It’s easier to mess up your form if you aren’t resetting every rep and easier to get fatigued.
It is also in the eccentric (lowering) part of the “touch and go” deadlifts that most people get hurt. This is one of the most technically demanding, important lifts out there and should be treated with respect.
For that reason, resetting between every rep is preferred for general strength programs. This allows you to reset, get your form right, and get your breathing right on every rep.
Yes, If you are doing a CrossFit WOD, you might be doing touch and go for time. Awesome. You do you, boo.
#4) “Okay, I get it. Deadlifts are great! How often should I deadlift?”
I love your enthusiasm and I would never ask you to curb it, but there are some things we need to take into consideration when adding deadlifts into our program.
Heavy deadlifts are extremely taxing on the central nervous system.
This means your body needs more time to recover. In fact, it’s so taxing that some coaches recommend taking the deadlift out completely for their more advanced, sport specific athletes.
Most good strength programs only deadlift once a week – and it’s lighter volume than with your squats.
Both Starting Strength and StrongLifts only include ONE set of 5 deadlifts. Meanwhile, they program 5 sets of 5 for squats.
In our Coaching Program, we add deadlifts into each person’s workout on a case-by-case basis.
Generally, it’s once per week, and we’d love to help build a program for you that has you deadlifting 400+ pounds in no time!*
*Okay it’ll definitely take longer than “no time,” but it might happen sooner than you think!
Get Out There and Deadlift: Next Steps
I am so excited for you to start deadlifting, because it’s the ultimate physical AND mental exercise.Â
For people looking for the next step, we’ve built 3 options that might float your boat:
You’ll work with our certified NF instructors who will get to know you better than you know yourself, check your form, and program your workouts and nutrition for you.
2) If you want a snazzy app to teach you exactly how to start crushing deadlifts (using things you might have around the house), check out NF Journey. Our fun habit-building app helps you exercise more frequently, eat healthier, and level up your life (literally).
Try your free trial right here:
3) Download our free Strength 101 Guide, which you can get when you sign up in the box below:
Download our comprehensive guideSTRENGTH TRAINING 101!
Everything you need to know about getting strong.
Workout routines for bodyweight AND weight training.
How to find the right gym and train properly in one.
this is a fancy term for your⊔posterior” muscles – your glutes and hamstrings
(Note: there are some powerlifters that purposefully round their upper back to decrease range of motion, but this is a sport specific move, still a fault, and something you should not consider as a beginner.)
This guide will tell you everything you’ve ever wanted to know about CrossFit but were too afraid to ask (Including âIs CrossFit good for losing weight?â).
If you’ve ever questioned why people run around parking lots with sandbags, you’re in the right place.
Many of the coaches in our Online Coaching Program have been CrossFit instructors or gym owners, so this is what we do best: help people start strength training confidently and without injury.
CrossFit can be AMAZING…for the right person, with the right CF coach.
Luckily, this guide is going to help you figure out both of those things!
In this Beginner’s Guide to CrossFit, we’ll cover:
CrossFit is advertised as “the sport of fitness.”Â
With constantly varied, high-intensity functional movements, CrossFit is a training philosophy that coaches people of all shapes and sizes to improve their physical well-being and cardiovascular fitness in a hardcore yet accepting and encouraging environment.
Here’s the definition of CrossFit from the official site:
CrossFit is the principal strength and conditioning program for many police academies and tactical operations teams, military special operations units, champion martial artists, and hundreds of other elite and professional athletes worldwide.
Our program delivers a fitness that is, by design, broad, general, and inclusive. Our specialty is not specializing.
Combat, survival, many sports, and life reward this kind of fitness and, on average, punish the specialist.
CrossFit contends that a person is as fit as they are proficient in each of ten general physical skills: cardiovascular/respiratory endurance, stamina, strength, flexibility, power, speed, agility, balance, coordination, and accuracy.
Or, in nerd speak – CrossFit is a training program that builds strength and conditioning through extremely varied and challenging workouts.
Each day the workout will test a different part of your functional strength or conditioning, not specializing in one particular thing, but rather with the goal of building a body that’s capable of practically anything and everything.
CrossFit is extremely different from a commercial gym…and not just because you won’t find any ellipticals, weight machines, or Zumba.
Not that there’s anything wrong with some of those things. We work with our coaching clients to find the style of exercise that works best for them.
If you want to mix up strength training with other fun exercises…
Can Beginners Do Crossfit? (8 Things to Consider)
According to the CrossFit site:
This program “is designed for universal scalability, making it the perfect application for any committed individual regardless of experience.
Weâve used our same routines for elderly individuals with heart disease and cage fighters one month out from televised bouts. We scale load and intensity; we donât change programs.”
What that means is that every day there is a particular workout prescribed (you’ll often see this written as “Rx’d”) for everybody that comes to CrossFit.Â
Rather than having one workout for older women and another for hardcore athletes – there’s ONE workout each day that is completely scalable based on your skill.
For example, if the workout calls for barbell squats with 135 pounds but you can only do squats with the bar (45 pounds), then that’s where you’ll start.
If you’re injured and can’t do squats at all, a similar movement will be substituted, and if the number of reps is too many for your current ability, that will be reduced.
As you get stronger and more experienced you’ll work your way towards eventually doing the workouts as prescribed.
Now, although CrossFit can be for everybody, it certainly ISN’T for everybody. In this blogger’s humble opinion, CrossFit is perfect for a few types of people:
#1) Beginners to weight training – If you have NEVER weight trained before (or trained only on machines), CrossFit is a great place for you to start (provided you have a great coach, which I’ll cover shortly).
You’ll learn how to do all of the important lifts in a super supportive and nonjudgmental environment. You might even find that…GASP…you love strength training!
#2) People looking for support and community – This is the appeal to CrossFit for me: every CrossFit gym has a really tight-knit community feel to it.
You’re not just a membership payment to them; you’re a person that needs support.
When Nerd Fitness gyms start popping up (don’t think it won’t happen!), I’ll be drawing a lot of inspiration from CF as to how members are so supportive and inclusive of each other.
#3) Fitness fanatics – You know those people that love to work out every day and feel like something is missing if they don’t?
The way CrossFit is structured, you are working out with regular consistency.
The general protocol is 3 days on, 1 day off, but many CrossFitters end up at the gym more frequently. It’s addicting.
#4) Masochists –Â I mean that in the nicest way possible. CrossFit often rewards people for finishing workouts in the least amount of time possible.
This means that you’ll often be in situations where you are using 100% of your effort to finish a workout, exhausting yourself, and forcing yourself to push through the struggle.
#5) Former athletes – CrossFit has built-in teamwork, camaraderie, and competition.
Almost all workouts have a time component to them, where you either have to finish a certain number of repetitions of exercises in a certain amount of time, or the time is fixed and you need to see how many repetitions you can do of an exercise.
You get to compete with people in your class, and go online to see how you did against the world’s elite CrossFit athletes. There is even an international competition for those that become truly dedicated.
There are a few people for whom I don’t think CrossFit would be as beneficial, but this doesn’t mean they won’t enjoy it:
#1) Specialists –Â CrossFit prides itself on not specializing, which means that anybody who is looking to specialize (like a powerlifter) will not get the best results following the standard CrossFit workout schedule.
If you want to be good at a specific activity, that’s where your focus should be.
#2) Sport-specific athletes – Like the specialists, if you are an athlete training for a sport, you’d be better off finding a coach that is trained in getting great performances out of athletes in your specific sport.
Every sport has special movements that require certain types of power in specific muscles.
CrossFit prepares you for everything, but won’t improve your specific sport skills unless you are training for those specific sport skills! Many athletes choose to combine CrossFit with sport-specific workouts (see things like CrossFit Football) in their off-season for conditioning, but that’s up to each sport’s coach.
#3) Solo trainers – Some people, myself included, love to work out alone: my training is my meditative time each day. CrossFit is group training, which means you won’t have that opportunity to get your stuff done on your own.
If you are somebody that likes the IDEA of CrossFit, but you like to train on your own and you still want expert guidance and accountability…
I have a great solution for you!
Our 1-on-1 Coaching Program helps people EXACTLY like you! We create custom workouts and nutritional guidance based on your personality, the equipment you have access to, and your busy life. Let us help you get strong.
How Dangerous is CrossFit?
In short, yes, CrossFit can be dangerous.Â
But that could be said of literally any sport or exercise.
Or driving a car.
Or using a Q-tip.
In the wrong situations, with the wrong coaches, and for a person with the wrong attitude, CrossFit can be dangerous:
1) During a CrossFit workout, you’re often told to complete a number of strength training or endurance exercises as fast as possible, or complete as many repetitions as possible in a certain amount of time.Â
For that reason, it’s REALLY easy to sacrifice form in exchange for finishing the workout quicker. If you don’t have somebody spotting you or telling you to keep your form correct, then you’re in trouble.
When it comes to strength training, improper form (especially at high speeds with heavy weights) is the FASTEST way to get seriously injured.
If a CrossFit gym is run by inexperienced and unproven coaches – which definitely happens – then things like this happen and they happen frequently.
Due to the nature of competition, the motivating atmosphere, and people’s desire to do well, many people in CrossFit often push themselves beyond their personal limitations (which can be a good thing)…but oftentimes they push themselves too far.
I totally get it.
In my first CrossFit experience three years ago, I almost made myself puke because I wanted so badly to finish with a good time.
Last year, I did another CrossFit workout that I hadn’t properly prepared for and cranked out 100 pull-ups quickly…and I ended up walking around with T-rex arms for a WEEK because I physically could not straighten them.
Not kidding.
3) In some extreme cases with a VERY small portion of CrossFitters (or similar types of workout programs), an incredibly serious medical condition called rhabdomyolysis can take place.
When people push themselves too hard, too much, too fast, their muscle fibers break down and are released into the bloodstream, poisoning the kidneys.
At CrossFit, some coaches refer to this as “Uncle Rahbdo,” though it’s not something funny or enjoyable.
You can read all about the condition and issues it can cause here. This typically occurs with ex-athletes who have not exercised for a while and come back trying to prove something, and end up working at a higher intensity than their body can handle.
So, like with any activity, you can have people that like to push themselves too far, too hard, too fast, and too often.
Unfortunately, due to the nature of CrossFit (where this behavior can be encouraged and endorsed by the wrong coach), you can end up in some serious danger if you don’t know when to stop or have a coach that will tell you when to stop.
Personally, I find these issues to be more with individual people than with the CrossFit system as a whole, but it is the nature of CrossFit that attracts these people and encourages them to behave dangerously.
If you like the idea of strength training, but are a bit worried about starting with CrossFit, I hear ya.
We help people like you with our 1-on-1 Online Coaching Program. We create workout programs that are tailored to your experience, and adjust them based on your progress.
We do video form checks, you can text back and forth any questions with your coach, and more.
We also have our massive Strength Training 101 guide so you know exactly how to get started and even provide you with specific workouts to follow! Get it free when you sign up in the box below and Join the Rebellion!
Download our comprehensive guideSTRENGTH TRAINING 101!
Everything you need to know about getting strong.
Workout routines for bodyweight AND weight training.
How to find the right gym and train properly in one.
Whatâs a CrossFit Class Like?
Let’s say you’re interested in joining a CrossFit class, but you don’t know what you’re getting into!
Practically every CrossFit gym around the world will let you come in and try out a class for free, so contact your local gyms and find out what dates and time they’re having newbie sessions.
This is how CrossFit classes are usually structured:
Introduction class – For people who have never tried CrossFit before. Usually, thereâs a quick overview, and then a basic bodyweight movement workout, and then they talk to you about joining. These are usually free.
On Ramp/Elements – If you’re interested in joining the regular CrossFit workout, you’ll most likely be required to go through the On Ramp/Elements course. The purpose of these is to teach you the nine foundational movements of CrossFit and all about proper form. No matter how experienced you are, these are valuable and worth the time and money. Even if you think you have perfect form on your squats, deadlifts and/or overhead presses:
It’s amazing what can be fixed when you have a trained set of eyes watching you do them.
Regular classes:Â This is what you’re probably used to seeing or hearing about. A regular CrossFit class takes anywhere from 45 minutes to an hour. Everybody starts at the same time, there are instructors walking around helping out and keeping track, and everybody is supporting each other and probably swearing a lot.
Most CrossFit gyms will split their classes into three or four sections:
Dynamic warm-up – Not jogging on a treadmill for 5 minutes, but jumps, jumping jacks, jump rope, squats, push-ups, lunges, pull-ups. Functional movements, stretches, and mobility work that compliment the movements you’ll be doing in the workout that day.
Skill/Strength work –Â If it’s a strength day, then you’ll work on a pure strength movement (like squats or deadlifts). If it’s not a strength day, then you’ll work on a skill and try to improve, like one-legged squats or muscle-ups:
WOD –Â the workout of the day. This is where you’ll be told to do a certain number of reps of particular exercises as quickly as possible, or you’ll have a set time limit to do as many of a certain exercise as possible.
Cooldown and stretching –Â Either as a group, or you’re allowed to stretch out on your own. This would also be the time for people who pushed too hard to go puke in a trash can and stretch their stomach muscles.
How to Find a CrossFit Gym
So, let’s say you’re interested in trying out a CrossFit class or maybe joining a CrossFit gym.
Other than picking the one that’s closest to you, why not put a bit more thought into it? This isn’t like picking a commercial gym – the community and coach are so freaking important.
First and foremost, you need a gym with competent, experienced coaches.
You should be able to see through that particular CrossFit gym’s website – not the main CF site – who the coaches are and how long they have been teaching, including their certifications.
Here’s a quick breakdown of what you might see from coaches:
CrossFit Level 1 –an ANSI-accredited certification. This means the person went to a weekend-long course and passed the exam.âš You’re taught the basic movements, how to scale each movement, but not really much more. There are no specifics on how to deal with injuries, anatomy, etc.
CrossFit Level 2– This is the next level up from Level 1, and involves far more in-depth training in coaching.
Certified CrossFit Level 3 Trainer –Â This is for coaches who have passed both the Level 1 & Level 2 certification courses as well as a CrossFit-specific exam.
Certified CrossFit Level 4 Coach –Â Given after an assessment/evaluation of a coach’s abilities, and the highest certification level available.
âšSpecialty Seminars –Â These are one- to two-day courses on specific topics like gymnastics, Olympic lifting, and running.
Other non-CrossFit certifications from personal training organizations, powerlifting programs, kettlebell programs, etc.
There’s big money in CrossFit these days, which is why so many gyms are opening up all over the country. Make sure to do the research on who your coaches are, and if they have actual coaching experience.
The other important thing to check out is PROGRAMMING!Â
CrossFit programs can be truly random, and an inexperienced coach can accidentally program back-to-back workouts that use the same muscle groups in the same way, not giving you enough time to recover.
On every CrossFit gym’s website, thereâs usually a blog where they post the workout of the day.
Look over this for the gym you want to check out and see what they typically do. If they do high-rep cleans three days in a row, they obviously donât program well.
Or if you see every day for a week with heavy shoulder movements, be wary!
Remember, most CrossFit gyms will let you attend one class for free. If you have a few in your area, try out each of them once before making your decision.
Go to each one and make note of the other members:
Are they supportive of each other?
Did they introduce themselves and welcome you?
Were the coaches nice and hands-on with their advice during the workout?
A good community can be absolutely critical for success, so picking the right gym that fits your personality and situation is super important.
If you’re not sure how to find the right gym, or you want nutritional help and form checks as you’re trying to figure this stuff out…
Can I Do CrossFit at Home?
Every day, CrossFit.com puts out the workout of the day (or WOD), which can be done at home, in a commercial gym, or in a CrossFit gym.Â
Every CrossFit gym will put out their own WOD as well, which can be different from the CrossFit.com site – if you happen to find a local CrossFit site that you enjoy but don’t attend full-time, it’s more than okay to follow their workouts.
The best news about this is the workouts are posted free of charge to anybody that is interested in doing them.
CrossFit gyms can be prohibitively expensive, so if you love CrossFit but are looking to save money, you can follow along at home or in your office gym provided you have the right equipment.
Many times, you’ll run into situations where you can’t complete a particular workout because you don’t have the right equipment. Do the best you can with what’s available to you, and keep track of how you made your modification for tracking purposes.
Now, there are a few challenges with following CrossFit at home or by yourself in a gym:
Nobody is checking your form – CrossFit requires many incredibly specific movements; if you start by yourself at home, you’ll never know if you’re doing them incorrectly and could severely hurt yourself as you increase the amount of weight with which you work.
Lack of communal camaraderie – A HUGE part of CrossFit is the supportive community aspect that comes with each gym. I guarantee you’d finish a workout a few seconds (or minutes) faster if you had 50 people screaming your name and cheering you toward the finish line.
You probably don’t have all of the equipment – If you’re working out at home, you probably don’t have a full squat rack, bumper plates, kettlebells, medicine balls, and so on….so you’ll often be creating your own workouts that are modified versions of the online versions. You might also not be able to bounce and throw your weights around like CrossFitters tend to do đ
You will want to buy all of the equipment –Â The more you do it, the more you’ll want to do it properly. This might not cost as much as an actual box, but it will cost you.
Even with all of these negatives, it could save you quite a bit of money each a month by not joining a gym, so I don’t blame you – just be smart about it.
If you’re somebody that does want to train at home or doesn’t have access to a CrossFit gym you can trust, there are two things to consider:
Making sure youâre doing your exercises correctly so you donât develop bad habits.
Personal accountability (somebody to check in on you and cheer you on)
Our coaches work with clients to build workout programs specific to their situation and goals and do form checks on each exercise with their clients via video (to make sure they don’t hurt themselves). Plus, your coach comes with you no matter where you are in the world!
What is a CrossFit Workout I Can Try?
One of my favorite “first time” CrossFit workouts is a benchmark workout named Cindy.
It’s a simple bodyweight circuit (we love workout circuits at NF) and can be done practically anywhere – the only equipment you need is a pull up bar. It’s a favorite for travelling, and shorter versions of it (3 rounds) is often used as a warm up.
Cindy is 20 minute AMRAP (“as many rounds as possible”):
What this means is that you put 20 minutes on the clock and then do as many rounds as possible (AMRAP) of 5 pull-ups, 10 push-ups, and 15 squats before the time runs out. There is no scheduled rest in between rounds – as soon as you finish your 15 squats you start on the pull ups again.
Now, let’s look at each movement and how to scale it down if necessary.
10 push-ups – The standard CrossFit push up is chest to the deck, but if you can’t do that, you can substitute knee push ups or wall push ups.
15 squats – this is a basic air squat, with no weight.
There are also other variations of this workout for beginner athletes. Some examples are:
AMRAP 20min:
3 Pull-ups
6 Push-ups
9 Squats
AMRAP 12min
5 Pull-ups
10 Push-ups
15 Squats
AMRAP 12 min
1 Pull-ups
4 Push-ups
7 Squats
AMRAP 10 min
1 Pull up
4 Push-ups
7 Squats
Sound too easy? Go faster.
While you are getting strength benefits from this workout, the goal of this workout is more metabolic conditioning, so making the movements harder (like switching to divebomber push-ups) isn’t something you would want to do here.
You can find some of the other benchmark workouts here.
And if you want a fun series of workouts you can follow along with at the gym or home, let us create a custom workout solution for you! We’ll even help you start eating better too so you can reach your goals:
Frequently Asked Questions on CrossFit:
#1) “Why is CrossFit so expensive?”
CrossFit has group classes. Think of yoga classes – they are typically $10-20 each. It’s not like a normal gym where there are hundreds of members who come in, use the elliptical for 20 minutes and go home – there is a coach teaching the class.
#2) “Is CrossFit just classes? If I want to workout in addition to my CrossFit classes, would I need a separate gym membership?”
At most CrossFit gyms, yes – it’s just group classes. Some CrossFit gyms have “open gym” hours – but not many are open for use 5am-11pm like your local commercial gym.
#3) “Do I have to eat Paleo Diet if I do CrossFit?”
Absolutely not. Paleo is the diet recommended by CrossFit and a lot of CrossFit gyms have paleo challenges – but you don’t have to (and I’ve never had it pushed on me).
#3) “What is a kipping pull-up? Isn’t that cheating?”Â
A kipping pull-up is a form of pull-up where you swing your body and use the momentum and a hip drive to get your body to the bar.
It’s not cheating because it’s not meant to be the same exercise as a dead-hang pull-up.
Some workouts call for a dead-hang pull-up – and in those you would not be allowed to kip.
#4) “Will CrossFit make me lose weight?”
If you work hard and change your diet. Diet will be 80% of success or failure, but combine a healthy diet with CrossFit and I’d bet anything you start to look better, get stronger, and feel better within 30 days.
However, if you eat like garbage and do CrossFit, your results will vary. It’s why we preach focusing on your nutrition above all else!
#5) “Whatâs with the girls’ names for workouts? Why do people say things like ‘Weâre doing Mary at CrossFit today!’?”
CrossFit has what are called “benchmark workouts” with female names (they also have “Hero WODs” named for fallen military/police/fire personnel).
CrossFit’s reasoning is this: “…anything that leaves you flat on your back and incapacitated only to lure you back for more at a later date certainly deserves naming.â (CF Journal â Issue 13, September 2003)
GREAT community aspect. Unlike a commercial gym, you actually get to know the people at your box. Most gyms will have outings that a LOT of people show up to. There’s always that feeling of teamwork and camaraderie.
Constant coaching and support – In a commercial gym you have no clue if you’re doing an exercise right or not. While it’s not 1:1 training, you have a coach with you during every workout to help out.
If you don’t show up, not only do people notice, but they call you and ask where you’ve been. The only time that happens in a commercial gym is when you miss a session with your overpaid trainer.
Leveling up – Because you get to keep track of how much you’re lifting, and you know how many reps and sets you’re doing, you get to see constant improvement. You also get to advance at your own pace, slowly working your way up towards doing the workouts as prescribed.
Humbling yet encouraging – Yeah, you might end your workout lying on your back, but you have a sense of accomplishment when you finish a workout faster than last time.
Competition –Â It’s amazing how much further you’ll push yourself when surrounded by other people cheering you on and competing with you.
It introduces SO MANY people to weight lifting, especially women who would have never ever attempted to get off the treadmill and strength train. It’s like a gateway workout – you learn what you love and can specialize further from there.
It’s a good outlet for former athletes who like to compete. After playing competitive sports through high school and college, all of a sudden there’s nothing left to compete in – CrossFit gives people that outlet.
You get to find out what you’re made of. CrossFit can be miserable, but it can also teach you how to push through mental barriers, build mental toughness and more.
It builds great physiques (look good naked). While so many women say they want that “toned” look and try to get it with hours of cardio, those bodies are being built every day in CrossFit gyms. Seriously, while their goal is performance rather than aesthetics, take a look at any serious CrossFit female athlete and tell me she doesn’t look incredible!
It builds good muscular endurance and all-around fitness – your body is prepared for pretty much any athletic situation through smart CrossFit programming.
The Negatives of CrossFit:
Not great for specialization –Â You kind of get good at a lot of things, but not great at any one particular thing. If you want to be a great powerlifter or athlete, you’d be better suited finding a sport-specific coach.
Lack of consistency – You rarely do the same workout twice, which makes it incredibly difficult to track your progress. You might go down one week on squat strength and be disappointed, but it’s because you destroyed your legs two days earlier with 150 “wall balls.”
Odd programming – As you’ll read in another critique later in this article, I don’t agree with some of the workouts that are prescribed at some CrossFit gyms. For example, some workouts might call for high reps of snatches; these are an Olympic lift that require perfect form in order to be done successfully. Doing 30 reps of them is a sure-fire way to sacrifice form and dramatically increase the risk for injury.
Price –Â CrossFit boxes can be two or three times the monthly cost of a commercial gym, and this is just for the group classes, not use of the facilities any time you want.
A bad coach can REALLY cause problems –Â You’re doing advanced moves that often take months of learning to do right; with heavy weights, this can lead to horrible injuries. Make sure you have a great coach that doesn’t rush you into anything!
Almost everything is for time or most reps possible, which means form starts to slip in order to finish quicker. This can be fixed with a coach…but I still find it to be an issue.
You start to talk a language nobody understands – talking to a CrossFitter is like talking to somebody in a foreign language. CrossFit people oftentimes forget that nobody outside of CF understands what half the stuff they say means, so they shout out achievements or accomplishments and explain how quickly they did specific exercises…but they don’t realize nobody really cares!
You can get addicted! This can go in either Pro or Con depending on how you look at it, but I know many people that started going to a CrossFit and now all they do or talk about is CrossFit. After a month or two, for better or worse, you might find yourself married to your CrossFit gym and community.
Some CrossFitters drink WAYYY too much “kool-aid.” You’ll run into CrossFit people who think CrossFit is the be-all, end-all training solution, and anybody that doesn’t do CrossFit is a wuss. If you can do 20 pull ups, they can do 22, and do them faster than you, after doing 25 handstand push ups and running 400 meters. I tend to dislike elitists no matter what they are elitist about, and CrossFit is no exception.
Depending on where you fit on that Pro vs Con list, you probably are starting to make your mind up about whether CrossFit is for you.
If you like the IDEA of CrossFit but aren’t sure it’s for you, we help people like you through our 1-on-1 Coaching Program. We create custom workout programs, offer video form checks, and provide nutritional guidance to help you reach your goals safely!
Other Critiques and Articles on CrossFit
If you’re new to CrossFit, you might not know that it is an INCREDIBLY polarizing topic.
If you have 15 minutes to kill, a quick look at this anti-Crossfit timeline (created by a person who truly dislikes CrossFit) will explain why so many people are pissed off about it.
We’ve tracked down a few other articles, some biased, some not, that explain a lot of the background and why CrossFit is the way it is.
I LOVED this critique of CrossFit by 70’s Big, which I found to be incredibly fair and very objective. The fact that the author starts with “Note: Read ALL of this before attacking me” goes to show you how hardcore some CrossFitters can be.
Although long, this article does a GREAT job explaining why CrossFit is the way it is, coming from a guy who has a CrossFit II certification and spent a few months following the main site workouts. This paragraph sums up the appeal of CrossFit:
CrossFit can be fun, especially if youâre a person who hasnât done anything physically challenging since playing sports, or ever.
Athletes enjoy it because it because it provides that difficulty that their training did. Unathletic people like it because it makes them feel athletic.
People who never had good social group experiences like it because, even if they are crazy, CF communities are always positive, supportive, and good-natured.
CF brings people together and makes them compete every day in a society that shies away from competition. The challenge creates a heightened sense of self worth that develops into being an elitist..
…The forum addicts are proud of the fact that they think other populations canât do what they can do. They revel in the fact that they got injured doing CF. They want to push so hard that they vomit.
This only reflects a certain percentage of the CF population, yet the worst part of any population will create the stereotype.
I have a few problems with CrossFit. The conditioning often doesnât apply an optimal stress and itâs superfluous.
It doesnât have any real element of consistent strength training…It has entirely too much frequency at high intensity and almost always results in injury.
It doesnât follow a logical application of stress to induce adaptation…but CrossFit gets people to do something rather than nothing.
It also gets the exercising population to do something better than 45 minutes on the elliptical.
…Itâs a nice gateway into other forms of training and the people are always great.
This T-Nation article also does a solid job of explaining the potential pitfalls of CrossFit and tracks down some big names to give their input:
Alwyn Cosgrove notes that this “all over the place” programming can be dangerous: “A recent CrossFit workout was 30 reps of snatches with 135 pounds.
A snatch is an explosive exercise designed to train power development.
Thirty reps is endurance. You don’t use an explosive exercise to train endurance; there are more effective and safer choices.
Another one was 30 muscle-ups. And if you can’t do muscle-ups, do 120 pull-ups and 120 dips.
It’s just random; it makes no sense.
Two days later the program was five sets of five in the push jerk with max loads. That’s not looking too healthy for the shoulder joint if you just did 120 dips 48 hours ago.”
Mike Boyle adds, “I think high-rep Olympic lifting is dangerous. Be careful with CrossFit.”
Turned off from CrossFit after reading all of that?Â
I hear you – it really comes down to having a GREAT CrossFit gym being the difference maker.
If you’ve had a bad experience, or you just want to know you’re going to start strength training on the right foot and you like our style here at Nerd Fitness…
First, I’m obviously a fan of CrossFit. I do it on a regular basis and have my CrossFit Level 1 Trainer Certificate, but I didn’t start out with CrossFit and it’s not all I do – so don’t think I’m completely biased here đ
I think if you find the right box, CrossFit is an awesome choice for a lot of people.
It’s different every day, so it’s never boring, someone is writing your workouts for you so you don’t have to think about it, and it’s fun.
When I don’t show up, people notice and ask where I was.
It gets you to do things you wouldn’t do on your own. I would never go running or rowing on my own – but if it’s in the WOD, I don’t have a choice.
Also, I’ll go and do things that I would never do before (such as yoga classes, or spending a Saturday afternoon doing hill sprints) because I know it will help me get a better time on a WOD later on.
My biggest issue with CrossFit is that it has no quality control across the boxes – all you need to start an affiliate is to pass the CF-L1 course and pay a $3000 affiliate fee, and once you are affiliated there are no check-ins or anything; you just have to pay the fee every year.
I have now been to 13 CrossFit gyms in my travels and while most of them were great, the quality of a few of them scared me.
I would absolutely love to see CrossFit take some of the money they are making now that it’s becoming more mainstream and invest in a quality control system.
I personally struggle on a regular basis because I’m much more interested in heavy strength training than anything else – and I’m one of those people who really likes seeing very linear graphs and results to my training, and I do want to specialize.
I have a very hard time creating workout plans because with CrossFit, you never know what’s coming next.
I’m lucky enough to have a coach that will work with me and will also let me do my own strength training and work the WODs around that.
Does it work? Well, what’s your goal? If it’s to get in better shape or to lose weight, then yes, it works. However, it’s not some cure-all magic pill – as with any other training program, you will get out of it what you put into it.
So do I think you should try it? Of course, if you want to and aren’t afraid of putting in a little work to get what you want.
And here are my thoughts. I’m just a nerd who happens to love strength training and is the goofball who wrote this article:
I understand the appeal, and I love the community aspect of it…but it’s just not for me.
I like feeling like I just had a great workout, but I don’t enjoy feeling like I want to die at the end of each workout – I know that’s how I’d feel at the end of each CrossFit workout because of my competitiveness.
The biggest reason for me why I’m not a CrossFitter? Well, other than my crazy travel schedule… I LOVE working out alone.
I know at CrossFit I’d be part of a team workout and constantly ripping myself for not being as good as the guy next to me.
From a programming standpoint, I don’t agree with some of the workouts (mostly the high-repetition Olympic lifting), but I understand that there are GREAT CF trainers that create amazing programs.
I love that it gets people started with barbell training and heavy lifting, because nothing makes me happier than watching guys doing proper squats and women doing deadlifts đ
Like with anything related to fitness, a good coach can be the difference between a great CrossFit experience and a dangerous one.
I think everybody should try it (your first trip will be free) and decide if it’s for you. If you decide it isn’t for you – that’s okay!
I’ll admit that CrossFit isn’t for me and I have no intentions of ever joining a CrossFit gym, but I don’t have any problems with others doing it if they enjoy it and they’re safe.
However, when the day comes that I open Nerd Fitness gyms (and it’ll happen), I’m going to be taking a LOT from CrossFit on how to build a great, supportive gym environment and community…something you won’t find at any commercial gym.
My final advice: If you’re interested, give it a shot. If you can afford it, and you enjoy it, keep doing it. If you don’t or can’t afford it, don’t. And don’t feel like less of a person because of it đ I’ll still like you.
If you’re somebody that thinks similarly to Staci and I, and you’re looking for a Yoda to help you get strong without needing to join a specific gym or attend classes at certain times, check out our 1-on-1 Coaching Program!
Any More questions about CrossFit?
Good lord that took a while.
Thanks for taking the time to get through it, as it took Staci and I a few weeks of research, hours of writing, and LOTS of back and forth conversations to put this post together.
I’ll throw one final mention in there for our Nerd Fitness Coaching Program, where we pair NF Coaches with busy people like you:
We create your workout programs and adjust the intensity based on your progress.
We provide video form checks to make sure you’re doing each movement correctly.
We help you get your nutrition in order to line up with your goals.
If you have read this far, I commend you.
You just read 6,500 words about CrossFit which means you’re probably serious about taking your physical fitness into your own hands.
Now, you just need to act.
Let’s go! Go do a workout RIGHT NOW, CrossFit gym or no CrossFit gym.
If you don’t know where to start, start here. You can do it right in your living room.
That may seem like a lot of topics to cover. DONâT PANIC!
Because gaining muscle and strength really comes down to three things.
If you’re looking to start building muscle, getting bigger, and becoming stronger, these are the things you need to do:
Lift heavy things
Eat a diet based on your goals
Get enough rest
I realize doing those three things is much easier said than done â I struggled with progress for a decade and know exactly what youâre going through if youâre feeling unsure.
You probably don’t have years to make the mistakes that I did, and you just want to start getting results today. In addition to the free resources below, we also offer 1-on-1 Online Coaching, where you’ll get personalized instruction for your body type and goals, and professional accountability from a Coach on Team Nerd Fitness!
But enough of that, let’s get into the nitty-gritty of how to get started with strength training!
How do you build muscle and Strength? Lift Heavy Things
If you are going to build muscle, you’re going to need to lift heavy things.
This means you’ll most likely need access to a gym with a great free-weight section.
Bodyweight exercises can be fantastic for weight loss and keeping the muscle you already have, but if you’re serious about weight training you’ll need a gym with a squat rack, bench, barbells, and a spot to do pull-ups, chin-ups, and dips to be most efficient.
Because we’re looking to create functional strength and size, we’ll be doing lots of full-body routines with compound exercises that train multiple muscle groups at once.
They’re more efficient, they create solid growth and stimulation, and they will keep you safe.
Why is that?
Well, when you spend all of your time doing stupid isolation exercises on weight machines (ugh), you’re only working those specific muscles and not working any of your stabilizer muscles (because the machine is doing all of the stabilization work).
On the other hand, when you do compound exercises like barbell squats, you work pretty much EVERY muscle in your body, setting yourself up to be strong and injury-free.
If youâre going to do a full-body routine each workout (which is what I would recommend for ANY beginner), each routine can have one leg exercise, push exercise, pull exercise, and a core exercise:
That’s IT. Don’t worry about adding in any ridiculous machine shoulder shrugs, iso-chest flys, preacher bicep curls, calf-raises, whatever.
Learn these few exercises, get really good at them, and your entire body will get stronger and bigger. Focus each week on adding more weight to each exercise.
For example, from one week to the next you could do:
Week 1 Barbell Squat: 3 sets of 5 at 150 lbs.
Week 2 Barbell Squat: 3 sets of 5 at 155 lbs.
If you do that, youâve gotten stronger. Then, repeat next week. Eat right, and youâll get bigger too.
what’s a sample routine for building muscle?
Using the principles I’ve laid out in my “how to build a workout routine” article, here’s a three-day routine I’ve created for myself recently:
Each day has a leg exercise, push exercise, pull exercise, and some core work.
While it’s possible to build out the perfect routine on your own, many of our Rebels end up spending hours and hours building something custom – only to realize it isn’t what they need (or isn’t effective) weeks and months later for their goals.
For people who want to avoid that altogether, we built the solution – our uber-popular 1-on-1 Nerd Fitness coaching program pairs you with your own Nerd Fitness Coach who will get to know you, your goals, and your lifestyle, and handcraft a workout plan that’s specific to not only your body, but also to your schedule and life. Click on the image below to schedule a call with our team to see if we’re a good fit for each other!
If youâre just interested in getting stronger, you can do: 3-5 sets of 5 reps, with a focus on lifting heavier and heavier each week.
If youâre looking to add more size along with strength, mix up your rep ranges. Sets of 5 reps will build compact explosive strength, while sets of 6-12 reps will build more size but less concentrated strength.
If you get bored, want to change things up, or youâre looking to bust through a plateau, you can do the following:
This week, I might do 3 sets of 5 reps for each exercise (other than the core exercises), adding enough weight to each exercise so that itâs incredibly taxing.
Next week, Iâll do four sets for each exercise, adding weight each time and doing less reps. For example, Iâll do an overhead press in the following sequence:
100 pounds: 12 reps
105 pounds: 10 reps
110 pounds: 8 reps
115 pounds: 6 reps
The good news is that no matter which path you take (pure strength, size, or a mix of both), as long as you are adding weight each week – and eating enough – you WILL be getting stronger.
ANY path will work, provided you are progressively overloading your muscles with an increased challenge!
So if you do 5 sets of 5 squats at 140 pounds this week, aim for 5 sets of 5 of 145 pounds next week. Or 3 sets of 10 at 100 pounds, then next week try for 3 sets of 10 at 105 pounds.
Get stronger, which is 20% of the puzzle. The other 80% is nutrition (which I cover later)!
Any other Muscle Training and weight-lifting tips?
#1) Warm-up before exercising – don’t walk into a gym, slap 45-pound plates on the bar, and then start your routine.
Get your heart rate up and muscles warm first by doing a dynamic warm-up of jumping jacks, lunges, bodyweight squats, hip raises, push-ups, leg swings, jumps, etc.
After that, always start with doing a set or two of lifting JUST THE BAR. Only then should you start adding weight for some warm-up sets before moving into your real sets.
However, if you do a barbell squat incorrectly with 405 pounds on your shoulders, you could do some serious damage. If you’re just starting out, check your ego at the door: start with a VERY light weight and make sure you are doing the exercise properly.
There is NO SHAME in starting with just the bar. You can always add more weight next week if this week is too easy.
#3) Stimulate, don’t annihilate – I try to always have one more rep left when I finish a set.
Some trainers will preach working your muscles to annihilation, but I think that’s just asking for an injury, poor form, and beyond-sore muscles.
Your muscles get built while resting, not in the gym, so don’t worry about destroying them completely each day you step in the gym – it’s not worth it.
#4) Change up the time between sets – if you’re doing 3 sets of 5 reps of a really heavy weight, it’s okay to wait 3-5 minutes between sets – you’re focusing on pure strength here.
If you’re doing sets in the 8-12 range, try to keep the time between sets around a minute or so. This will affect your muscles in different ways.
Just be consistent between sets and when doing the same workout between weeks to track your progress.
#5) Don’t overdo it – More does not mean better in weightlifting. You don’t need to spend two hours in the gym, you don’t need to do 15 different kinds of chest exercises.
My routines last no longer than 45 minutes, I only do three or four sets (after warm up sets) for each exercise, and it’s enough to stimulate muscle growth.
Three routines a week is plenty too – you shouldn’t lift every day, as you need to give your muscles time to regrow bigger – remember muscles are made in the kitchen!
Less is often more – just make your routines really intense and exhausting.
#6) Write down everything – Keep a training journal, and write down exactly how many sets and reps you did for every exercise.
That way, you can compare how you did this time with how you did last time. You’ll know how much more you need to lift this week to make sure you’re stronger than last week.
#7) Follow a routine, have a plan. The best thing you can do is have a plan to follow and stick with it! We provide a free bodyweight routine, and a comprehensive gym training routine to get you started with strength training in our free guide, Strength Training 101: Everything You Need to Know. Grab your guide when you sign up in the box below:
Download our comprehensive guideSTRENGTH TRAINING 101!
Everything you need to know about getting strong.
Workout routines for bodyweight AND weight training.
How to find the right gym and train properly in one.
Proper diet to gain muscle (and which Supplements)
If you’ve been lifting weights for a while “but can’t seem to gain weight,” then you are not eating enough – it’s that simple.
I thought I was one of those people who just could never gain weight…and then I learned it was all diet, started eating 4,000 calories a day, and I put on 18 pounds in 30 days.
Yeah, I wanted to throw up from always eating along with three Muscle Milk shakes a day, but it worked.
Looking back I would have done things differently (so many calories and so much sugar/carbs), but after 6 years of exercising without putting on any weight, it was great to see so much progress in such a short period of time.
4,000 calories sounds freaking insane, right? I know.
It makes eating a full-time job.
You’ll always either cooking, eating, or cleaning up after yourself.
But if you really want to get bigger and you’re struggling to do so, then all of your effort is going to have to go into eating more, eating healthier, and eating ALL THE TIME.
Here are a few different techniques for weight gain:
PATH #1: Eat a lot of whatever – this was my first plan years ago: it’s cheapest, the fastest, but probably the least healthy.
Just make sure you get 200+ grams of protein a day and 3,500+ calories in any way that you can: pasta, rice, pizza, milk, hamburgers, chicken, protein shakes, muscle milk shakes, whatever. This is how I went from 162-180 pounds in 30 days. I’m not proud of how I ate, but it produced results and I remained healthy and strong.
PATH #2: Eat a lot of “healthy”stuff – I did this once and put on about 10 pounds in 30 days. Lots of:
Almond butter sandwiches on whole-grain wheat bread
Beef
Eggs
Fruits
Veggies
Milk
Still not optimal, but it works and is better for your insides than the previous method. Still relatively cheap, as tubs of oats, brown rice, and bread are inexpensive and can add on a lot of calories quickly.
PATH #3: Eat Paleo – I’ve tried this strategy too, and despite my best efforts to GAIN weight I managed to lose five pounds (all of which was fat).
It’s certainly possible to gain weight on the paleo diet (try adding in three big-ass Primal Shakes per day), but it is tricky and very expensive to get 4,000 calories of paleo-approved food daily. LOTS of nuts, eggs, sweet potatoes, shots of olive oil, and yams along with tons of chicken, grass-fed beef, fruit, and veggies.
PATH #4: GOMAD (Gallon of Milk a Day) –Â Obviously this method will only work if you’re not lactose intolerant.
Oh, and it has to be whole milk. You’ll definitely put on some fat, but you’ll build muscle and get really strong quickly – and then you’ll adjust the diet to thin out.
I’ve attempted this diet occasionally, as whole milk is certainly a fast path to tons of carbs, fat, protein and calories. Be prepared for your stomach and body to constantly feel bloated. Note: you can adjust the amount of milk you consume daily based on how your body responds.
“Which Supplements Should I Take to Build Muscle Quickly?”Â
As we lay out in our Nerd Fitness Supplement Guide, most supplements are a waste of money and completely unnecessary for building muscle.
However, there are two supplements that CAN BE helpful in building muscle quickly:
Protein Shakes:Â If you are struggling to hit your protein and calorie intake goals for the day, adding in a high-calorie protein shake can be a game-changer.
Creatine Supplements: Creatine helps your muscles retain water and can improve your performance, allowing you to push harder, for longer, in the gym.
That’s going to depend on your situation – your age, how much you weigh now, how much you want to weigh, and how fast your metabolism is. For some, just 2,500 calories and strength training will be enough to build muscle.
For others, you might need to eat 4,000+ calories in order to put on weight. The only way to find out is to track your normal calorie intake for a few days, and then start adding on 500 extra calories per day for a week or two and see if you notice any changes.
Want a rough idea of how many calories you should be eating?
Bottom line: If you don’t see any change, then you need to eat more.
Yes, it will feel excessive.
Yes, you will feel full all the time.
Yes, it’s a pain in the ass and expensive.
But if you really want to be bigger, then you are going to need to really dedicate yourself in the kitchen.
Unless you’re a genetic mutant, it’s incredibly tough to build muscle and strength without overloading your system with calories and nutrients.
Just keep eating.
Won’t all of this eating make me fat? I don’t want to get bulky.
I get this question all the time in emails, usually from guys who are 6 feet tall and 130 pounds.
Don’t worry, if you can’t gain weight now, putting on extra weight is going to be great for you.
Yes, you will put on SOME fat along with the muscle you’re building if you’re running a calorie surplus.
This is why picking the right amount of calories per day is important:
If you can build muscle at 3,000 calories, but you’re eating 4,000 calories, you’ll put on a pound or two of fat per week along with your muscle.
However, if you need to eat 4,000 calories to build muscle and you’re only eating 3,000, you won’t see any changes.
Everybody is different, so you need to experiment and find out what works best for you.
Once you get to your desired weight (actually, aim for about 10-15 pounds heavier than your goal weight), you can scale back the calories, add in some extra sprints to the end of your workout, and keep lifting heavy – the muscle will remain, the fat will disappear, and you’ll be left with the body you want.
I’m not skinny, I need to LOSE weight – what’s different for me?
You can actually build muscle and lose body fat at the same time.
Now, this only works if you have plenty of fat stores to pull from. Once you start to lean out a little, youâll likely have to increase your calories to start putting on more muscle.
Just remember, you can build muscle while losing weight if you:
Sustain a caloric deficit
Lift heavy
Prioritize protein
Rest
Letâs talk about that last one for a bit.
Rest days for building muscle and strength
If you’re skinny and trying to bulk up and build muscle, avoid cardio like the plague (also avoid the plague).
Why? Take a look at the best marathon runners in the world, and compare their physique to somebody like Usain Bolt, the best sprinter in the world – tons of muscle, power, and a body to envy.
There’s nothing wrong with EITHER body – we’re all awesome and are special and blah blah blah.
But you’re reading an article about how to build muscle fast, right? So focus all of your effort on building muscle!
You want all the calories youâre consuming to go towards âbuilding muscle,â and not âfuel my run.â
I will admit that I’m biased against chronic cardio, but mostly because it bores me!
You can be far more effective when you focused on getting stronger and only do ‘cardio’ on things you enjoy – after all, your success will largely depend on your nutrition, NOT your cardio!
Personally, I spend three days a week in the gym, with each workout clocking in at 45 minutes.
I go for long walks on my off days along with a day of sprints to stay active, but I know that my muscles get built while I’m resting, not when I’m working out.
I really focus in on my workouts to make them as exhausting as possible, and then I give my body ample time to recover (while eating enough calories to produce a surplus).
If you’re lifting heavy, and eating enough, make sure you’re also getting enough sleep! 5-6 hours a night isn’t going to cut it – you need to get at least 8-9 hours of sleep per night for optimal muscle-building. Take naps too if you have the opportunity.
If you’re a big guy/girl trying to slim down, a little extra cardio might speed up your fat loss but if youâre not eating correctly, it might result in losing some of the muscle you already have.
Don’t worry about going for 10 mile runs on your off days – do 20-30 minutes of intervals or go run hill sprints in your park. The weight will come off more slowly, but you’ll only be losing fat, not fat AND muscle.
Once you hit your goal weight and the target amount of muscle mass, I’d recommend adding back in some cardio for your overall conditioning, but keep it varied (sprints and intervals). The focus is to keep building explosive muscle and not long, slow, boring muscle.
If you love going for long runs and aren’t going to give that up, I’m not gonna stop you. Just know that the long hours of cardio will severely inhibit your progress on building strength and size.
Get Started Building Muscle Today
This is a basic overview to get ya started. It really boils down to a few major things:
Lift heavy
Eat lots of good food
Rest
Simple to understand, tough to implement.
Trust me, I know – I’ve been battling this for the past decade.
If you made it this far, and you want more specific instruction, here’s how Nerd Fitness can help!
Youâll work with our certified NF instructors who will get to know you better than you know yourself, check your form, and program your workouts and nutrition for you.
2) If you want a snazzy app to teach you exactly how build muscle and strong, check out NF Journey. Our fun habit-building app helps you exercise more frequently, eat healthier, and level up your life (literally).
Try your free trial right here:
3) Join the Rebellion! We need good people like you in our community, the Nerd Fitness Rebellion.Â
I’ll send you two free resources that will help you reach your goals: our massive Strength Training 101 guide and a Bulk Up Cheat Sheet and Shopping List.
Download our comprehensive guideSTRENGTH TRAINING 101!
Everything you need to know about getting strong.
Workout routines for bodyweight AND weight training.
How to find the right gym and train properly in one.
So did I miss anything:
Any unanswered muscle building questions?
Do you have any tips or tricks I’m missing?
Any success stories from our community to share?
Post your questions in the comments and I’ll go ahead and answer them.
Let’s hear your strength and muscle stories!
-Steve
PS: Be sure to check out the rest of our Strength Training 101 series:
The âcircuitâ in circuit training comes from the fact that you do a sequence of exercises back to back to back, and then you repeat the sequence.
And then again.
You cycle through the planned sequence of exercises, or circuit, multiple times.
Thatâs circuit training.
Generally, you hit each major muscle group during one full circuit. You may do a lower body for one exercise. Then the upper body the next.
Youâll find all sorts of different circuit training sequences. Here are some things most will have in common:
Several different exercises. A normal circuit will have five to ten different movements per circuit. Youâll often hear these referred to as âstations.â Overhead press station, squat station, etc.
Little to no rest in between.The goal of circuit training is to keep your heart rate up. Ideally, if youâre physically able, you go from one exercise to another without stopping. Maybe you rest after the whole circuit. Maybe.
Rinse and repeat.Generally, youâll run through your circuit a few times. Three rounds are common.
Make sense?
The point here is to work different parts of your body with different exercises, and then while those parts are recovering, youâre working on your other movements! This helps build cardiovascular health, while also improving muscular endurance and strength.
More importantly, for somebody with limited time, doing a strength training circuit is more effective at building strength and burning fat than an equivalent amount of cardio.
In other words, if you are trying to lose weight, you should be doing circuit training.
Our Beginner Bodyweight Circuit would be a great place to begin, and you can download a worksheet to help you get started right here:
Grab Your Beginner Bodyweight Routine Worksheet. No Gym Required!
Complete this workout at home, no equipment required
Avoid the common mistakes everybody makes when doing bodyweight exercises
Learn how to finally get your first pull-up
Why Should I do circuit training?
Generally, youâll hear exercise divided into strength training or aerobic exercise (cardio).
Whatâs the difference, you wonder?
Strength training. Strength training is also referred to as anaerobic exercise, which would be a short burst of energy for movement. Think of a push-up or pull-up. These exercises help build and tone muscle.
Aerobic Exercise.âAerobicâ means âneeds oxygen.â Your heart rate increases to get oxygen where your body needs it, thus the word âcardio.â Running, biking, or jumping jacks would be examples of aerobic exercise.
The thing about a circuit is, you actually do both categories. Presses and lunges fall into strength training. Jumping jacks are cardio.
And since you arenât stopping much in between stations, youâll need more oxygen, and voila. Even more cardio.
With circuit training, you build muscle and burn fat WHILE building stamina.
As Michael Scott would say, âthatâs a win, win, win.â
Thereâs some debate on what kind of exercise is better for weight loss: aerobic or anaerobic.
My thoughts?
If you’re limited on time and only can pick one, I would pick strength training: when you strength train, you break your muscles down, and your body needs to work extra hard over the next 24-48 hours to rebuild those muscles (with increased calories burned).
We work with our 1-on-1 Coaching Clients to create programs that combine both strength and cardio in a fun way – it really comes down to a program that you actually WANT to do.
Before and after your circuit training: Warm up and stretch
No matter which circuit you pick, I want you to start with one important thing:
Warm-up!
I cover why you should always warm up in an article found right here. It doesnât have to be much though, give it about five minutes to get your muscles active and your heart rate up.
This will help you do exercises properly and help prevent injury. You can run in place, do air punches and kicks, or some jumping jacks.
Here is NF Senior Coach Staci (you might know her incredible story) showing you many beginner options you can use to warm up as well:
Did I just tell you to prepare for circuit training, with a circuit?!
If you’re curious, here’s my personal (advanced) warm-up:
Jump rope: 2-3 minutesÂ
Jumping jacks:Â 25 reps
Bodyweight squats: 20 reps
Lunges: 5 reps each leg.
Hip extensions: 10 reps each side
Hip rotations: 5 each leg
Forward leg swings: 10 each leg
Side leg swings: 10 each leg
Push-ups: 10-20 reps
Spider-man steps: 10 reps
Our goal isnât to tire you out. Instead, we want to warm you up.
Thatâs step one.
Completing your chosen circuit training routine would be step two.
Below, you’ll find 15 workouts you can follow along with! And if you like our style of workouts, you might like our new app, Nerd Fitness Journey!
Our fun habit-building app helps you exercise more frequently, eat healthier, and level up your life (literally).
Right now, you can try it for free for a full week (no credit card required). Jump in below:
Dumbbell rows (using a gallon milk jug or another weight): 10 each arm.
Plank: 15 seconds
Jumping jacks: 30 reps
Run through this circuit three times. If you donât have milk in the house for the rows, find something of roughly the same weight with a good handle.
If you want to download this Beginner Bodyweight Workoutas a worksheet, you can do so when you sign up in the box below:
Grab Your Beginner Bodyweight Routine Worksheet. No Gym Required!
Complete this workout at home, no equipment required
Avoid the common mistakes everybody makes when doing bodyweight exercises
Once youâve done the above three times, go ahead and put your kettlebell away for your final step: stretches.
If you want a kettlebell worksheet for this workout, grab one by signing up in the box below:
Grab Your Beginner Kettlebell Routine Worksheet!
Complete this workout at home or gym with 1 kettlebell.
Avoid the common mistakes everybody makes when doing kettlebell exercises.
Build strength, burn fat, level up your life!
We also have a fun new adventure in our app that will allow you to train with your kettlebell right alongside Hack Morris (this will make sense more sense when start).
Jump in right now for your free trial:
Beginner Gym Circuit Training
If you have access to a gym, you have a lot of circuit options.
If itâs your first time stepping foot in a fitness facility, check out our Beginnerâs Guide to the Gym. The gym can be a scary place, but weâll give you a strategy to get comfy.
Weâll also walk you through each movement for both Days A and B below. I would recommend picking one of our 5 Beginner Gym Workouts, going through the leveled progressions, and working your way up to the circuits below:
Alternate your circuits on different days. Rest in between. âDay Aâ could be Monday. Rest Tuesday. Wednesday could be âDay B.â
We LOVE helping people get started in the gym, as we’re huge fans of barbell training and helping beginners build confidence with weight training! If that sounds like you…
And you can download our full Strength 101 guide too, which has this routine along with other circuits to help you start building strength today:
Download our comprehensive guideSTRENGTH TRAINING 101!
Everything you need to know about getting strong.
Workout routines for bodyweight AND weight training.
How to find the right gym and train properly in one.
The Hotel Workout Circuit: For Travelers that Train
Sometimes, you just plain find yourself stuck in a hotel room. Maybe you can find the hotel gym, but I bet it’s terrible! It probably has 2 machines, a broken treadmill, and no free weights.Â
Ugh.
Instead, how about a workout circuit you can do in the room itself! Utilize the furniture to its full potential.
Gimli âShall I get you a box?â jumps:Â 7 box jumps â REALLY explode
Helmâs Deep-Squats: 9 bodyweight squats â get your ass to the ground
Tower of Orthanc Holds: 1 minute (Kick up against a wall and hold a handstand for as long as you can until 1 minute is complete, in as few as sets as possible. Check out our Guide to Handstands.)
âArmy of Deadâlifts: 9 lightweight reps, barbell or dumbbell
Samwise Gamgee Carries: 1 minute (Demonstrated here by AKLulu carrying me at a NF meetup) A heavy sandbag over the shoulder works too. No sandbag? Just carry two dumbbells around the gym for a minute.
If you can get through a superset three times, consider yourself an honorary Ranger. Nothing found in Mordor can faze you.
Barbell Deadlift / Dumbbell RDL / Banded Good Morning / Regular Good Morning: 10 reps
Medicine Ball Slam / Quick Downwards Bodyweight Squat: 10 reps
Push-up to Renegade row (push-up, row left, push-up, row right, repeat): 5 Rows per side
Transverse Lunge and Chop: 5 reps each side
How many times do you do this circuit? AMRAP, or, As Many Rounds As Possible. I suggest setting a 12-minute timer and getting to work. Be careful though, because only Wolverine can heal automatically.
Youâll need actual rest.
Boom!
There are your nerdy circuits. Feel free to rock the soundtrack of the referenced movies during your workout. If you own a cape, now’s the time.
Complete List of Circuit Training Exercises
You can do any of the workouts in this article and get a great workout, but if you want to build your own workout, you can totally do that too!
Here is a list of exercises you can use to create your workout.
Simply pick a few, and do one after the other in as many circuits as you want!
Do 3 circuits with 10 reps of each exercise, one after the other!
Have fun and keep things interesting. And if you don’t want to build your own workout, that’s cool too! We have 15 free workouts in this article, and we can also do all the heavy lifting for you.
Well, not literally DO the heavy lifting, but you know what I mean. We create custom workout solutions for busy people just like you in our 1-on-1 Coaching Program. Let us create a workout and help you make better food choices.
It’s like having a Yoda in your pocket (again, not literally).
How to Stretch After Circuit Training
Once you finish your workout, the final step (three) would be stretching and cool down. No matter what circuit you go through, stretch after a workout. It can help a lot with muscle recovery.
Scope this video for an awesome stretching sequence to follow:
You could also do some yoga poses. For stretching, find what feels good and take your time. Let your heart rate come down while you stretch.
You could even do some foam rolling too if youâre a glutton for punishment!
YOUR MISSION: Complete one of the above circuit training workouts! If you donât know which one to pick, start with the Beginner Bodyweight Circuit. Itâll get you used to the idea of hustling from one exercise to the next.
And you can do it in your living room!
If you’re looking for more hands-on instruction and customized guidance, check out our 1-on-1 Coaching program. Youâll work with our certified NF instructors who get to know you better than you know yourself, and then build a workout program that is specific to your exact goals.
Simply put, we tell you exactly what to do every day, and how to eat. And then, we check in with you regularly to make sure youâre doing it!
If you got this far in the article, I really want you to try one of these workouts. Right NOW. I always mention the most important step in a fitness journey is starting it. Today, start circuit training.
Once completed, Iâd love for you to share your story with the community in the comments:
Howâd it go?
Did you get through three full circuits?
Which routine did you pick?
Find a circuit you’re comfortable with, and do it.
The tutorials ahead are from our premium course Nerd Fitness: Handstands, which you gain access to under a Nerd Fitness Prime membership. I would encourage you to check out if you like what you see here.
Alright, brace yourself to get flipped-turned upside down.
Are Handstands Good for You? (3 Reasons Why Handstands Rule)
At Nerd Fitness we LOVE handstands like Eleven loves waffles.
Here are 3 reasons why handstands rule:
#1) Like other bodyweight training, thereâs no excuse. If you have room to stand up, you have room to practice handstands.
#2) It recruits DOZENS of muscles in your body.
From arm strength to wrist mobility to core strength to shoulder mobility and muscular endurance, handstands do it all.
When you are trying to balance, it makes your body work as one complete unit.
#3) It scares you – yes, thatâs a positive. We grow outside our comfort zone and for many people, just the thought of a handstand is enough to make their palms sweaty, knees weak, arms are heavy, vomiâŠ
…nevermind.
The point is that the handstand is just as much of a mental challenge as it is a physical one.
How scared do you think this guy gets on a regular basis?
Thatâs Coach Jim!
Master of the NF Fitness Universe, and our lead trainer for our Handstands Course and Nerd Fitness Coaching. Youâll be seeing a lot of him in todayâs article because Jim can do handstands in his sleep.[1]
The Secret to Performing a Handstand
Sure, we need to build strength to support ourselves upside-down, but even that hurdle is overblown.
A proper handstand actually starts to feel easy.Â
That’s because once you’re balanced and aligned, it becomes uber efficient. Just as you donât exert yourself much if you stand straight with good posture, a good efficient handstand is the same way⊠it will soon start to feel effortless.
Actually, the biggest hurdle to overcome – especially at the beginning – is the mental fear.
The voice/feeling in the back of your head that says âyou could get hurt doing this!â SCARY!
And I wonât sugar-coat things, you CAN hurt yourself working on these skills⊠but itâs no different than if you walked into the gym first day, slapped 315 lbs on the bench press, and gave it a go.
Or went out and tried to run 13 miles without training.
The exercise itself isnât dangerous, unless you attempt TOO much, too quickly.
If you wouldnât load up a bar to deadlift 500 lbs on your first day in the gym, why do so many people just kick and fling themselves up into a handstand, failing repeatedly, hoping one day theyâll âgetâ it?
There’s a smarter way!
How do we overcome this fear and keep ourselves safe? Just like learning any other fitness skill: slow, easy, successful steps!
These small victories accumulate over time to bring us to our goals safely while having a lot of fun.
Are you ready to learn?
Donât worry, weâve got you covered. Read on for ways to safely progress to handstand mastery!
Handstand Progression Warm-Up Routine
For any handstand exercise, there is going to be a significant amount of stress on the hands and wrists. So, itâs important you stretch and warm things up.
Here is a video from our NF Handstands course going over some of our favorite wrist stretches to prepare to get upside-down. Go through each stretch about 10 times.
Letâs spotlight a few of these Handstand Warm-Up exercises:
Forward and Back Wrist Stretch:
Lifted Palms Wrist Stretch:
Reverse Palm Stretch:
Backhand Palm Stretch:
Upside Down Wrist Stretch:
The trick with wrist stretches is to move in as many different ways as feels comfortable. Feel free to make the warm-up your own!
The shoulders are another stressed area in the handstand. There are several ways we can prepare them for work
A few rounds of jumping jacks:
Or arm circles
That will get the blood moving and the area ready.
From here, weâll begin our journey leveling up your Handstand Progression.
Weâll start by having you work with some balance drills and some positional drills.
Nothing too crazy, and in fact some of these might seem TOO EASY. Thatâs fine! Thatâs what we want, remember?
Weâre using small victories to motivate us. Landing on your head is not a great way to motivate anyone.
Want someone to build you a custom made progression plan for doing your handstand? Our 1-on-1 Online Coaching Program will do just that, plus your coach can review your movements through our app so youâll know your training correctly and safely.
Level 1 Handstand Progression: Quadruped Rocking
You may be thinking that feeling the balance of a handstand is going to be brutally difficult.
Not so!
We can start quite easily on our hands and knees in the quadruped position.
From here, we will simply rock forwards and backwards on our hands.
Seem familiar?
If you did the wrist mobility we described above, itâs the same motion!
As you are rocking back and forth, feel where the weight rests in your hands.
When you rock back, it sits more in the heel of your hands.Â
When you rock forward, youâll feel it in your knuckles and fingertips.
Where do we want it in the handstand?
Right around the knuckles.
This is a balanced spot – similar to the balance you find when standing. You donât sit all your weight on your heels, and you donât lean all your weight forward, gripping your toes hard into the ground, do you?
Find and feel that balance when you rock.
When should you move on to Level 2 Handstand Progression?Â
Now would work!
Level 2 Handstand Progression: Hollow Body
The hollow body is one of the best ways to engage the midsection and stabilize the body. It will help to give your handstand a good shape.
Do you need to master the hollow body to master the handstand?
Not necessarily, as there are plenty of handstands out there that are a bit banana-shaped.
But the hollow body will help you create a more efficient position.
#1) Start by laying down a yoga or exercise mat on the ground and laying on the ground face up.
#2) Think about pressing your lower back down into the ground and engaging your midsection like youâre coughing. You should still be able to breath!
#3) Once the midsection is set, tuck your knees to your chest and hold your shins like youâre getting ready for a wicked cannonball.
#4) Holding the shins will help you maintain that lower back and midsection position.
Still feeling good?Â
Then try rocking!
Rock your body forward and back slightly from the upper back to the lower back, like a rocking chair.Â
Head and feet stay off the ground.Â
If you are stable then you should move as one unit.
If you need more of a challenge, reach your arms by your ears, keep the knees tucked, and rock some more.
Without the hands holding the shins, the midsection really has to keep engaged in order to give you a smooth rock.
With any of these positions, work to rock for a full 15 seconds under control.Â
Once you can do so with arms extended, progress up to Level 3.
Level 3 Handstand Progression: Crow Pose
To enter Crow Pose, move forward from the Quadruped Rock position so that your knees are on the outside of your arms. You can even bend the elbows a little and rest your legs on them.
Rock forward in the same manner as before, putting a little more weight on the hands and a little less weight on the feet.
Important: this isnât Assassinâs Creed⊠We are not making a leap of faith here!
Donât jump!!!Â
We are simply looking for less and less weight on the feet.
Take things slow and easy â rising up on the toes when you can. When you are ready to pick the feet up and hold yourself off the ground on just your hands, it should come naturally.
Be sure to grab into the ground hard to hold and control yourself, and feel free to put down a pile of pillows or mats in front of you if you should fall!
Once youâre able to get both feet off the ground comfortably and safely, itâs time for Level 4 Handstand Progression.
If you find yourself stuck at the crow position or any other level, we are here to help!Â
Our coaches can review your progression and form to help you advance onto the next level!
Level 4 Handstand Progression: Wall Walk
In this level, weâll get started working toward something that actually looks like a handstand!
All weâre trying to do with this exercise is support our bodyweight on our straightened arms (just like the front plank or push-up).
So, the first level of this exercise is to simply get yourself up into the top of a push-up and hold. If thatâs too hard, put your hands up on an elevated surface and/or rest on your knees and hands instead.
Once this is mastered, level up by simply lifting your hips in the air into a down dog position!
From here, itâll be a matter of getting your feet onto a higher and higher surface. Note: putting your feet up something even a few inches off the floor counts – small steps!
You can use something as simple as bumper plates:
As you progress, add more bumper plates (or whatever youâre using) so your feet are higher and higher.
Once you are supporting yourself with your feet on a high box, try walking your feet up the wall. (Think of it like a really tall box!)
Be careful at this step: Be sure you have enough energy to walk back down safely and second, that you donât walk too close to the wall and risk flipping onto your back!
With each of these variations, weâre looking to build up to a solid 15 seconds under control before moving forward.
Once you’re at the point of lying vertically against the wall, youâre on your way to leveling up to a full handstand!Â
But first, we need to talk about how to bail safely.
Level 5 Handstand Progression: How to Bail out of a Handstand
As you start to get better with Wall Walks, and you practice getting closer and closer to completely vertical while upside down, there’s going to be instances where you start to “tip over.”
In order to safely return your feet to the ground, you’re going to want to do what we call a pirouette:
How to bail out of a handstand:
Get into a wall handstand.
Shift your weight to one arm (the planted arm), allowing the other arm to move.
Drive one leg into the wall (the one thatâs on the same side as the planted arm), and lean the opposite leg forward.
Gravity pulls you around, and lets you lower your feet to the floor safely.
This is one of the most important skills you can learn as you develop your handstand practice, as it will allow you to safely exit any handstand without any risk of injury as you develop your balance!
Once you feel comfortable bailing out of a handstand, my dear rebel, it is time for Level 6!
Level 6 Handstand Progression: How to Do a Handstand
We are now ready for you to try a handstand!
Itâs going to come down to you slowly but surely leaving the safety of the wall.
First, just try to take one leg off the wall during your wall walk:
When youâre comfortable taking one leg off, trying switching them!
The objective is now is to switch your legs in a slow, smooth manner â one lifts off the wall while the other simultaneously moves back to the wall.Â
Once you get comfortable with this, itâs time to take both legs off the wall!
BOOM! Your first handstand!
Are you doing it right?
A good way to tell would be to record your handstand practice and review it against the videos here to check your form.
Want to have an expert review your form? Check out our 1-on-1 Online Coaching Program! Our spiffy mobile app lets you send a video of your handstand directly to your coach, who will provide feedback so you can perfect your technique.
Theyâll also build a workout program thatâs custom to your situation, which will have you doing handstands like Luke Skywalker in no time!
4 Tips and Tricks for Doing Handstands
Nothing beats patience and hard work, but there are a few tips and tricks we can provide that will allow you the best chance for success.
#1) Make sure you go through a proper warm-up: Weâve given you several options for the wrists and shoulders. Not only will a warm-up help prevent injury, but it will get the muscles and joints properly prepared to get the most out of your training.
#2) Prioritize Your Handstand: You can work the skill on its own time, and it wonât interfere or be interfered by anything else, but what if youâre doing other exercises during your workout?
When do you handstand, when you’re training in a swamp?
The best time to work the balancing drills (like your wall walk) is at the beginning of your workout, after youâve warmed up.
These skills require concentration and a fresh focus to really benefit and progress with them.
Trying to balance after youâve exhausted yourself with a tough cardio session is an exercise in futility (pun intended).
The best time to work the positional drills (like your quadruped rock) would be sometime during your strength session, and before your cardio.
These drills are not as dependent on completely fresh muscles, but we still donât want to try and hold ourselves upside-down after a grueling workout.
#3) Don’t do too much, too soon.
Weâve mentioned this a million times because itâs so important. Taking on too much too soon is a way to develop bad habits and possibly injure yourself.
Take your time! Enjoy and really master each step!
#4) Take it Easy: In the same vein, we want to look for success.
What do I usually see when people practice handstands: Someone kicking up 100 times and kinda getting a handstand once or twice. How much sense does that make?
While we might not be batting 1,000 with all our attempts, but we should be looking to successfully complete around 8 out of 10 attempts. If weâre not? Then we might have taken on too much, too soon!
Letâs wrap up this guide and give you some next steps for your handstand practice.
The 5-Minute Rule: Practice Handstands Every Day and Be Amazed at What Happens
Commit to 5 minutes a day. Thatâs it. But do it every day.
Iâll see a lot of people go all-in for a single handstand session, and then not touch the skill for a week or more.
Dan Gable once said, âIf itâs important, do it every day.â
Now, this is a simplification, but with handstands, this is ESPECIALLY important.
When you first start out, your arms and shoulder may only be able to do 5 minutes before they are DONE.
Doing them for a short time each day is the best strategy to improve strength, endurance, and balance.
Want help progressing with handstands from here?Iâve got 3 great options for you!
#1) If you want step-by-step guidance on how to complete handstands, get stronger, and even eat better, check out our killer 1-on-1 coaching program:
#2) Exercising at home and need a plan to follow? Have questions you need answered? Join Nerd Fitness Prime!
Nerd Fitness Prime contains at-home exercise routines, live-streamed workouts with NF Coaches, a supportive online community, and group challenges. Plus, you’ll gain access to all our online courses, including Nerd Fitness: Handstands, which will help you become a master at flipping upside down!
#3) Join The Rebellion! We have a free email newsletter that we send out twice per week, full of tips and tricks to help you get strong, get healthy, and have fun doing so.Â
Iâll also send you tons of free guides that you can use to start leveling up your life too:
Get your Nerd Fitness Starter Kit
The 15 mistakes you donât want to make.
Full guide to the most effective diet and why it works.
Complete and track your first workout today, no gym required.
Alright, your turn:
Have you ever tried to kick up into a handstand?
Whatâs the one thing holding you back?
What questions can I answer?
-Steve
PS: One day Iâll be able to type articles like this while doing a handstand.Â
One of the best exercises for you, whether you’re trying to build muscle or lose weight (or both) HAS to be the squat.
However, it’s also an exercise I see nearly EVERYBODY do incorrectly.
We do video form checks with every Online Coaching Client to make sure they’re squatting correctly, and we use a LOT of the same cues and instruction we cover in this guide!Â
So have no fear…
After reading this big ass squat guide (pun intended, I suppose?) – part of our Strength 101 series – you can start performing this compound exercise safely and effectively.
Click any link below or scroll down to read the whole guide:
Squats are one of the most foundational functional movements in our lives. Letâs talk about the benefits and why you should be squatting all the time.
#1) Weâre designed to squat: Weâve been squatting since we were babies, but as we get older and sit in unnatural positions all day, our squat form goes from perfect to terrible.
Crap.
In many countries, people often sit in a full squat for hours at a time.Â
From an evolutionary standpoint – it makes sense that we are genetically designed to, and can be really good at – squatting.
Before modern-day furniture and technology, you didnât stop sitting in a full squat once you got older like we do today…you continued squatting your entire life.
#2) Squats are a compound movement that recruits most of our muscles – this means itâs a movement that uses multiple muscle groups and joints (your hip and knee joints) to complete.
A simple bodyweight squat – which Iâm demonstrating above –Â uses almost every muscle in the core and lower body.
If you add a dumbbell or barbell into the equation, I would even argue that they use every single major muscle group to complete.
In addition to every muscle in your “legs,” you need your:
Hips
Back
Core
Shoulders
Arms.
Nothing is left out with this monster movement.
Because of the utilization of a large amount of muscle groups, squats cause your body to increase our anabolic hormone production, helping us lose fat and build muscle.[1]
#3) Squats will help strengthen your bones and your muscles (and your knees!), and can also increase flexibility.
Increasing the strength in your knees and hips (and entire body) reduces your chance of injury while doing both athletic movements and everyday life things (such as shoveling the driveway or standing up and sitting down).
And by learning to squat deeply, safely, youâre improving your range of motion and helping make you antifragile and protecting yourself against future injury.
Bazinga!
If your goals are to:
Build muscle and get stronger, squats will get you there faster.
Lose weight and get âtoned,â squats will get you there faster.
Look better naked, squats will get you there faster.
Get healthier and happier, squats will get you there faster.
Feel like an absolute badass in the gym, squats will get you there faster.
In short, squats are amazing.
(See what I did there?)
My name is Staci Ardison, Iâm a Senior Coach at Nerd Fitness, and my life has been absolutely transformed by barbell training, which is why Iâm so excited to share this guide with you.Â
I am so excited to teach you how to squat today, as Iâve taught tons of coaching clients how to get started too.Â
Let’s start off by taking a look at the bodyweight squat – the first move you should master before you add weight.
How to Do a Bodyweight Squat With Proper Form
The setup for the squat exercise is incredibly simple.
Stand with your feet slightly wider than your hips.
Your toes should be pointed slightly outward – about 5 to 20 degrees outward (the wider your stance, the more you’ll want to rotate your feet outward).
Look straight ahead and pick a spot on the wall in front of you.
Look at this spot the entire time you squat, not looking down at the floor or up at the ceiling.
I go over the setup and the full movement in this video:
1) Put your arms straight out in front of you, parallel to the ground. Keep your chest up and proud, and your spine in a neutral position.
2) Your weight is on your feet â it should be on the heels and the balls of your feet, as if they were pasted to the ground. You should be able to wiggle your toes the entire movement (though thatâs not a part of squatting!).
3) Keep your entire body tight the entire time, your core flexed like youâre bracing to be punched in the gut!
4) Breathe deeply into your stomach, break at your hip and push your butt back. Keep sending your hips backwards as your knees begin to bend.
Itâs important to start with your hips back, and not by bending your knees.
5) As you squat down, focus on keeping your knees in line with your feet.
Many new lifters need to focus on pushing their knees out so they track with their feet.
When your knees start to come inside the toes, push them out (but not wider than your feet).[2]
Make sure your knees aren’t moving inward toward each other through the movement – this is very common.Â
6) Squat down until your hip joint is lower than your knees (what we call âparallelâ in the squat game). Note: if you THINK you might not be squatting deep enough, you probably arenât!
Once at the bottom, itâs time to stand back up from your squat:
7) Keeping everything tight, breathe out and drive through your heels (keep the balls of your feet on the ground as well).
8) Drive your knees outward (away from each other) the same way you did on the way down, and squeeze your butt at the top to make sure youâre using your glutes.
Here is a video from us nerds at Team Nerd Fitness (with instructions from Jim, lead trainer at our 1-on-1 Online Coaching Program) that will teach you good form on a bodyweight squat, including all the mistakes NOT to make:
Once you can do multiple sets of 15+ deep bodyweight squats with proper form, itâs time to move onto barbell squats!
If you are confident in doing bodyweight squats and want to work up to a barbell squat, follow our Gym Workout Level 4 Program, which includes dumbbell goblet squats, a good stepping stone to barbell squats:
The majority of the population has some sort of mobility issue (including myself!) that they are working on fixing.
We have LOTS of 1-on-1 coaching clients who are new to squatting, and it often comes down to ankle flexibility and hip mobility.
If you spend all day, every day, sitting in a desk chair, this might be you.
If you want us to help you fix your squat depth and start getting stronger, thatâs what weâre here for!Â
How to Set Up Properly For The Barbell Back Squat
#1) Find your squat rack! Itâll look something like this, with an unattached barbell:
A. Squat Stand:
B. Power Cage/Squat Rack:
C. Half Rack (Least favorite*):
*I don’t like Half-racks without adjustable safety bars – if you want to squat deep the barbell might hit the immovable bars! Not cool. Aim for the A or B options if you have the choice!
Note: a squat rack is NOT the same thing as a Smith Machine, where the barbell is attached to the machine, and slides up and down two bars:
You do NOT want a Smith Machine.
You need a completely unattached barbell in order to do a barbell squat properly and safely. Donât squat in a Smith Machine.
#2) Set the height of the bar to be about the same height as your collarbone.
Not sure how to set the height of the bar? I got you:
If your options are either too high or too low, itâs always best to set the pins slightly lower than you need them.Â
You donât want to have to get up on your toes to rack/unrack the bar, especially as the weight gets heavier.
#3) Decide if you are going to do a high bar squat, or a low bar squat. Either is fine, but there IS a difference:
The âLow Bar Back Squatâ is the most common form done by beginners, general lifters, and powerlifters.
Itâs also the form taught in Starting Strength, one of the best books for beginners on the market.
So weâll be focusing on that version for the rest of this section:
#4) Always squat with just the bar to start â as we discuss in âHow much weight should I be lifting,â even if youâre planning on squatting 500 lbs, always start with just the bar!
How to Do a Proper Barbell Back Squat, Step By Step
1) Facing the bar, step under it, and put your hands around it on either side of you.Â
For this type of squat in our example, we are going to want a thumbless grip, so that our wrists are properly aligned with our forearms.
The width of your grip will be dependent on flexibility, but generally, a narrower (hands closer to your shoulers) grip will help create a meaty shelf for you to place the bar on the muscles in your upper back.
If you lack the flexibility for the narrower grip (which is super common), start out wider, then slowly bring it in as you get more flexible.
See the difference here between a âhigh bar, wrapped gripâ (Left) and âlow bar, thumbless gripâ (right):
And now time to DO A BARBELL BACK SQUAT!
Definitely watch the video above and listen to the instructions, and then read this description when you need to restart:
With the weight on your shoulders, step back from the supports.
Your feet should be slightly wider than hip-width apart.
 Your toes should be slightly pointing outward.
Flex your stomach, squeeze your glutes, inhale deeply into your stomach.
Move your butt back, squat down slowly.
Continue to drop until the tops of your legs are parallel or lower (the crease of your hip is below your waist).
Explode back up to the starting position.
After your set is complete, walk carefully forward to return the weight to the rack, and lower it down safely onto the supports.
High five yourself, you just did a barbell squat!
Not sure if you squatted deep enough?
Record yourself! 95% of the people I see doing squats in a gym donât go deep enough!
Nervous about squatting correctly? Yes, I am a mind reader, and yes we can help you!
If you want an expert to check your squat form check out our 1-on-1 Coaching program. Our coaching app lets you record and send a video of your movement directly to your coach, who will provide specific feedback and build a custom program just for you.
Interested? Click below to jump on a free call with our team to see how our online coaching program will get you the results youâre after:
How To Bail Out of a Squat Safely
If you are going to squat, you have to know how to âfailâ at squatting safely! After all, thereâs nothing scarier than being stuck in the bottom of a squat movement and not knowing how to get out of there!
A squat is very different from a barbell deadlift in that aspect: if you fail on a deadlift, you just donât pick up the weight.
If you fail on a squat, youâre trapped under a bar…with potentially a lot of weight on it.Â
This can lead to SERIOUS injury. So please, learn how to bail out of a squat safely before you start attempting to do heavy barbell squats.Â
This will help give you the confidence to push yourself and get stronger!
7Â Common Mistakes When Doing Squats
The squat is a basic movement, but those new to lifting often fall victim to a handful of common mistakes.
Let’s take a look at some of the big problems and how to fix it!
#1) Coming up on your toes with your knees forward during your squat
Itâs important to keep your heels on the ground the entire time youâre squatting.
You should be driving down through your heels, and in order to do that, they need to be on the ground!
While some of your weight will be on the balls of your feet, you never want all of your weight to be on the balls of your feet or your toes.
You should be able to lift your toes up off the ground and wiggle them at any point and it shouldnât change anything about your squat.
#2) Not going deep enough on your squats
Your squat should hit at least parallel (middle image above) – where your hip joint goes below the knee.
Depending on what youâre training for, you can go lower, but in order to maximize the muscles worked in the squat, it needs to be done to at least parallel or lower (you can see lower in the upper right image).
If you squat above parallel (a partial squat) you’re leaving the hamstrings out of the movement. This puts more pressure on the knee – the force put on your knee is actually reduced as you drop below parallel.
Unfortunately, there’s a lot of misunderstanding about squats and knee issues.
The deeper the squat, the more glutes that are activated as well. Deeper is typically harder, both strength and flexibility wise.
However, depending on your goals, squatting to parallel may make more sense.
If youâre struggling hitting depth there could be many causes – you could have poor ankle mobility, tight hip flexors and/or hamstrings, weak glutes, or poor pelvic alignment (among many other things).
This is something we work closely with our coaching clients on, and often prescribe ankle and hip mobility drills to help clients reach proper depth on squats!
#3) Knee PositioningÂ
When you squat, you want your knees to track along with your toes.
This means if you are looking down at your knees and feet, your knees should be aligned at the same angle as your feet throughout the movement.
Everyone’s exact positioning is going to be slightly different, but they should not be on the outside or the inside of the foot.
#4) Back PositioningÂ
Your chest should be up and your shoulders should be back, like youâre King Kong about to pound your chest proudly.
Your body should stay in this position the entire time.
You don’t want your shoulders to round forward, but you also don’t want to hyperextend your back either.
Keeping your spine in a neutral position will help your spine safe and build a strong foundation throughout the heavy squat movement.
#5) Head PositioningÂ
Many coaches will tell their lifters to look up, as that is the direction in which you want to be moving, but this is actually the last thing you want to do.
Take a second quick and look at the ceiling (I’ll wait! đ ).
Now, see that position your neck vertebrae are in? That is a very unsafe position for your spine to be in, especially when more weight starts getting included in the equation.
You also don’t want to be looking directly at the floor.
Look straight out in front of you the entire time, with your head in a “neutral” position. Your chin should be in a position where you could hold a tennis ball between your chest and your chin.
#6) Attempting to keep your shins vertical.
Unless there is a current underlying knee issue that would cause additional pain – the shin can and should go past vertical in the squat. This will often allow a deeper squat which will build more strength and stability in the knee.
A forward lean in the shins is also present when we engage in any number of daily activities such as walking up steps or standing up from a chair. Squat as deep as you are able, but do not focus on holding a vertical shin.”
#7) Too much weight on the heels/on the outside or inside of feet during your squat
When trying to fix coming up on your toes, or your knee positioning, it is common for people to focus so much on keeping their weight on their heels that they forget to keep the balls of their feet on the ground!
Some of your weight will still be on the ball of your foot – if you are truly only having weight on your heels, itâs pretty hard to balance.
To the same effect, if the inside of your foot or the outside of your foot comes up off the floor, this is also not a good thing!Â
How do you know if youâre making these mistakes? Simple!
Record yourself doing squats.
I do.
And so does anybody else who is serious about improving their squats.Â
Often we look VERY different than we think we look when doing an exercise, so having a video of the movement is often the only way we can improve.
If you canât self-diagnose your squat challenges, let us help!
Squat Variations for Beginners (Box Squat):
In this section, weâre going to go over some squat variations to help you improve your form and build confidence before hitting the free weights section of the gym.
If you’re struggling to do a squat correctly, don’t fret!
Iâm going to teach you aboutâŠ
BOX SQUATS!
Squatting to a box will help teach you to sit back and keep your weight on your entire foot, instead of squatting with your knees forward and up on your toes.
Squatting back to a box is also great for people who have bad knees and can’t do bodyweight squats anymore.
You can do box squats with a barbell as well, but for this explanation, weâre just going to keep it simple with bodyweight box squats.
In order to do this, find a box or a chair that is the right height so when you sit on it, you are at parallel with your squat.
Your options include things like step stools, milk crates, or the smallest box at the gym (there’s usually a set of plyo boxes, and the shortest is around 10″.)
The lower the box, the more it will help you develop stronger hips and low back – the box at exactly parallel will help you more with quad strength.
Set up exactly as if you were going to do a regular bodyweight squat, only standing about a foot in front of the box.
1) Breathe in deeply, brace your core, move butt back, and keep your knees in line tracking in the same direction as your toes and squat back until you sit completely on the box.
Don’t plop back on the box, make it slow and deliberate while keeping your entire body tight.
2) Now, don’t move! Think about your positioning:
Are your back and core still super tight?
Is your weight on your heels and your mid foot?
Is your head in a neutral position?
Great, now stand up by driving your hips upward, don’t let your weight shift forward and onto your toes (drive through your heels!), shoulders and chest up, knees out keeping them lined up with your toes.
For your first few, feel free to sit on the box while you evaluate your positioning, but as you get better at them, sit back and then quickly stand up again.
You know you’re doing a good squat when you can stand back up from the bottom of a squat position without having to lean forward and use momentum to get up.
You can squat, touch your butt to the box, and then stand back up without having to shift your weight around!
KEEP THAT BUTT BACK!
How to Perform a Front Squat
If you’re up for a similar-but-different squat, try…
The barbell front squat!
A front squat moves the weight from behind you to in front of you, which requires different muscles and mobility in different places.
I personally alternate front squats and back squats on my leg days.
I know all of this can be overwhelming, so the important thing is that you START! I realize I sound like a broken record at this point, but I really want you to begin strength training today.
We created our free guide, Strength Training 101: Everything You Need to Know, just for that purpose. I’d love to send it to you, because I know it’ll help you overcome any fears and confusion and have you getting stronger TODAY
Get it when you sign up in this box below – I’m excited to hear what you think of it!
Download our comprehensive guideSTRENGTH TRAINING 101!
Everything you need to know about getting strong.
Workout routines for bodyweight AND weight training.
How to find the right gym and train properly in one.
How to Start Squatting Like A Pro
Squats are awesome.
How awesome? Look at that woman above owning her squat before owning her putt!
Once you’ve mastered the Back Squat, give Front Squats a try!
And if you want to learn more about squats, or youâre looking to build more confidence before you get started, we have a few options for you:
Youâll work with our certified NF instructors who will get to know you better than you know yourself, check your form, and program your workouts and nutrition for you.
2) If you want a snazzy app to teach you exactly how to start crushing squats, check out NF Journey. Our fun habit-building app helps you exercise more frequently, eat healthier, and level up your life (literally).
Try your free trial right here:
3) Download our free Strength 101 Guide, which you can get when you sign up in the box below:
Download our comprehensive guideSTRENGTH TRAINING 101!
Everything you need to know about getting strong.
Workout routines for bodyweight AND weight training.
How to find the right gym and train properly in one.
And Iâd love to hear from you! PLEASE leave your questions, squat or fitness or otherwise below so we can answer them and become best friends:
What struggles do you have when trying to squat?
What questions do you have?
If you havenât squatted before, what else do you need us to tell you to give you the confidence to start squatting TODAY!?
-Staci
PS: Be sure to check out the rest of the Strength Training 101 series:
A new year brings us new opportunities to align our health and goals. While weâre taking a new approach to goals in 2021, it doesnât mean we canât see big changes.
In this episode, Robin reveals the biggest mistakes people make when setting goals that lead to burnout. She also analyzes red flags that may be why you arenât seeing results or reaping the benefits from your health journey that you should be. If you’re tired of feeling burnt out and starting and stopping new fitness programs, this episode may help you find a solution!Â
Show highlights: what you can look forward to in this episode!
Setting intentional rhythms and routines for 2021
The mistake that leads to burnout and metabolic issuesÂ
Why only believing in high-intensity cardio is a mistakeÂ
Robin analyzes red flags in a workout routineÂ
The ripple effect that happens when you donât listen to your bodyÂ
Why itâs important to choose a sustainable programÂ
Giving up alcohol for the first month of the year is a growing health trend and something weâve seen many of our Online Coaching Clients partake in. Today, weâll share with you the same tips and tricks we provide them when abstaining from alcohol.
Pour yourself a tall one (of water) and letâs do this.
What Is Dry January?
Dry January, simply put, is the tradition of abstaining from alcohol for the month of January. You might also hear it called âDrynuary.â
While itâs gotten a lot of buzz (pun intended) in recent years, it actually dates back to 1942. The Finnish government launched a campaign called âRaitis tammikuuâ or âSober Januaryâ as a post-war effort to drink less.
Undoubtedly though, itâs been practiced by people in other places and times before that – as a way to focus and reset after the holiday season.
January doesnât have a monopoly on sobriety though.Â
Youâll also come across:
Dry Feb, which started as a fundraiser in Canada to support those affected by cancer.
Sober September, to mark the end of summer festivities.
No matter what you call it, itâs all more or less the same goal: donât drink for the month.Â
What Happens When You Do Dry January? (Why Take a Month off Drinking?)
Here at Nerd Fitness, weâre really, really big fans of your âBIG Whyâ – the reason you start anything.Â
Digging into your BIG Why can be incredibly helpful for you when you start any sort of health or fitness habit, and especially when you come up against challenges along the way (which WILL happen).
âThose who have a âwhyâ can bear with almost any âhow.ââ
-Victor Frankl
So before you dive further into Dry January, ask yourself âWhy do you want to do it?â
Then dig deeper into that. Try to go three levels down!Â
For example:
âI want to do Dry January so that I drink less.â
DeeperâŠ
âI want to drink less because alcohol is really affecting my ability to get up early and workout.â
DeeperâŠâŠ
âSince I havenât been able to work out regularly, I move terribly, and have a hard time keeping up with my kids. Drinking less will help me be there for them.â
Now weâre getting somewhere.
Make. It. Personal.Â
You may tell your friends and family about Dry January, but at the heart of it all, itâs your journey.
Naturally, the more you can personalize your BIG Why, the more it will uplift you during difficult times this month (and beyond).
What Are the Benefits of Dry January?
Here are some of the positives of abstaining from alcohol for a month:
The negative effects of alcohol on sleep have been well documented.[1]
However, with even just one night of heavy drinking, it doesnât take a pile of scientific papers to let you know your sleep is affected.
Good sleep is one of those âdomino habitsâ that affects so many other things in our day.
A good night of sleep can help you get up and workout in the morning (or just start the day sooner and get more done!).Â
Youâll likely be better focused at any tasks you have. There have even been studies correlating lower amounts of sleep to obesity.[2]
#2) Improved Mood
No doubt, better (and longer) sleep will improve your frame of mind. Not only that, but there is some evidence to suggest that reducing alcohol consumption might improve your mood in general.[3]
#3) Money Saved
Booze is expensive! Especially if youâre going out for it!Â
Many peopleâs New Yearâs resolutions include seeking financial improvement. An easy target to reduce spending could be to cut out alcohol.
Sure, wine and some other beverages might have some antioxidants here and there.[4] But other than that, itâs more or less just alcohol, water, and calories.
Thatâs why youâll often hear booze referred to as âempty calories.â Cutting back on alcohol will reduce your âcalories in,â essential for weight loss.Â
Not only will you cut the calories from the booze itself, but thereâs another insidious effect alcohol can have on our weight loss efforts: the choices we make after a few drinks.
After a few cocktails, we may find our cravings increasing and our willpower decreasing. Avoiding this situation, by avoiding alcohol, can help support healthy habits.
At this point, we should note that not everyone will benefit from taking a month off drinking.
Who Shouldnât Do Dry January? (The Risks of Cold Turkey)
Weâve just spent some time going over the benefits of a Dry January – and there are a lot!Â
But we also need to give the very real warning that this is NOT for everyone.Â
Weâll go over a few possible scenarios, but if there is ANY apprehension to starting Dry January for any reason, then please consult your doctor first.
#1) Alcohol Dependency
If you currently have a strong alcohol dependency, then going cold turkey can be potentially life-threatening. There are numerous withdrawal symptoms such as rapid heartbeat, increase in potential for seizures, and even hallucinations.[5]
Again – and it bears repeating – if you believe you have any sort of dependency, please talk to your doctor before making dramatic changes in your alcohol consumption.
 #2) Predisposition to Seizures
As mentioned above, alcohol withdrawal can cause an increase in potential for seizures (due to an increase in your central nervous activity).Â
If you are already knowingly prone to seizures for any reason, then a rapid swing in your drinking habits may exacerbate the situation.
 #3) Depression and Anxiety Issues
If you have been diagnosed, or suspect depression or anxiety issues, then sudden removal of alcohol as a possible coping mechanism may have detrimental effects.Â
We recommend, as always, to reach out for professional support in these cases!Â
In addition, if you feel like you want to start Dry January to absolve yourself of dietary âsinsâ from December, (âI canât believe I ate and drank so muchâ), weâd also recommend that you revisit your BIG Why for starting.
We want this experiment to be beneficial to your health, not something that triggers a big swing in the opposite direction.
How to Start Dry January
âAlright Jim, Iâve gotten this far and Iâm ready to start! I just stop drinking…right?â
Sure, sure – thatâs the core of Dry January. But there are a few things to consider, to really personalize it and get even more out of it.
#1) Dry or Semi-Dry?
While the more popularly discussed variation of Dry January involves cutting out alcohol completely, perhaps you just use the month to do an alcoholic audit. You might just decide to reduce your consumption a bit.Â
This may end up looking like one or more of the following:
Eliminating weekday drinks only.
Having drinks only on special occasions.
Reducing the amount of drinks you have in one sitting.
The point is that this âDryâ January may look different to everyone, and thatâs ok. As far as we know, thereâs no âDry Januaryâ police that are going to bust in your doors for any dietary infractions.
This was a much better reference than The Untouchables.
#2) Are You Stuck in âAll or Nothingâ Thinking?
On a similar note, Dry January presents the challenge of having absolutely NO alcohol for the entire month. So maybe you start the month off with the best of intentions – no alcohol for me! – and then something happens and you have a drink.
Then itâs time to give up the rest of the month and return to old habits!
Also, whenever I get a flat – I make sure to slash the other three tires!
Jokes aside, if you start with one plan and things donât quite go how you expected – thatâs fine.Â
Get right back to it. You are still making changes and focusing attention on improving your health.
And again, no Dry January police.
#3) What Are Your Triggers?
With any behavior youâre looking to change, it helps to identify what triggers that behavior in the first place.
Charles Duhigg, in his New York Times bestselling book The Power of Habit, talks about cues that lead to routines, that lead to rewards (note: the rewards may not always be healthy)
If youâre able to identify triggers, you have a better chance of avoiding or adjusting them to support your new behaviors.Â
In regards to alcohol, look for triggers related to:
Time: Are you always drinking during a certain time of day, or day of the week?
Location: How about always drinking in a certain place?
Preceding Event:Is there something that always seems to happen beforehand, that then leads to having a drink?
Emotional State:How do you usually feel before having a drink? Or even just having a craving to drink?
Other People: Are you interacting with certain individuals before drinking?
Asking yourself these questions will help get to the root cause of your drinking habits.Â
The other thing to consider here is âfriction.â
James Clear, author of Atomic Habits, talks about habit change and the importance of âfrictionâ – or how easy or hard you make an action.Â
Specifically, we should look for ways to change our environment to increase or decrease friction. If you change your environment to reduce friction, you wonât have as many decisions to make to take the action you want. Then things start becoming automatic.Â
For example, letâs say you want to âwork out more.â Reduction friction might include putting your gym bag where youâll always run into it, or setting a phone alarm to train.
Around here, we call these strategies âHacking Your Batcave,â because of course thatâs what weâd call it.
On the flipside, increasing friction for a habit we want to reduce (e.g., drinking) would mean we want to make that habit invisible.Â
If a food is in your possession or located in your residence, either you, someone you love, or someone you marginally tolerate will eventually eat it.Â
That means if you donât want to drink it, donât keep it at home!Â
#2) Avoiding areas where you can buy alcohol.Â
If you have a beer and wine aisle at your regular supermarket, consider if you can shop without going near it.
You could also opt for grocery delivery, so you donât even have to set foot inside a store with a beer/wine aisle.
Change your routes – if you walk or drive by a bar or liquor store regularly, look for new ways to go. Out of sight goes a long way for out of mind.Â
Strategically increasing and decreasing friction will go a long way towards reducing the habit of drinking.Â
If you want more tips and tricks for habit change, Iâve got two great resources for you:
Tools to Help You With Dry January (Additional Resources)
Letâs chat about some additional resources that may help as you begin your month-long journey.
#1) Community and Apps
Some find community and social accountability really helpful during Dry January. Others just like to see a visual streak of their success.
Nerd Fitness Prime provides social support through Facebook and Discord to hundreds of other Rebels. Weâve already used that community to tackle other challenges like running 5Ks:Â
And rocking chin-ups!
For seeing a visual streak of progression, we have our NF Journey App (which is part of your NF Prime membership).Â
Weâre actually rolling out a 31-day habit challenge this January (boy, what excellent timing!). So jump on in and let it help your Dry January too!Â
You can try a 7-day free trial of NF Journey right here:
#2) Non-Alcoholic Drinks
When reducing or eliminating alcohol in your routine, it can sometimes help to have a substitute that gives you a similar experience as alcohol, without the depressive effects. These options have come a LONG way from the days of watery, tasteless non-alcoholic beers.
For NA beers, Iâve personally tried the following:
For NA spirits, there are a couple good options here too:
Ritual Zero Proof:the âwhiskeyâ wonât fool anyone, but having a glass of it still satisfied a lot of the âritualâ of sitting down for a drink.
Seedlip: itâs less of a stand-in, like Ritual Zero Proof, and more of their own distinct tastes. The Garden 108 was my favorite and a decent gin substitute.
They even make some non-alcoholic wine now, although admittedly I havenât tried any yet:
As previously mentioned, if you do suspect you have an alcohol dependency issue – please talk to your doctor, your therapist, and/or social resources like Alcoholics Anonymous.
What to Do in February (Next Steps)
As you go through Dry January, it can be easy to focus on the end date.Â
You just need to hold out a little longer, then you can get âback to normal!â
Instead, Iâd recommend using the month of âno alcoholâ to think about what February 1st will look like.Â
This should be about introspection, not just avoidance. Use it as a time to look into your relationship with alcohol.
Ask yourself:
What adjustments have you made during January that feel sustainable?
What adjustments donât feel sustainable?
What had you been using alcohol for in the past? (Boredom? Coping? Anxiety?)
Studies have shown that Dry January can become a foundation for continued and long-lasting changes to your health.[6]
However, for you to really see the benefits, you need to do the extra work here.[7]
Well, we hope to have provided enough information about Dry January that you can make the best decisions for yourself.
There is no shame if youâre not ready for this challenge (just as thereâs no shame if your friend doesnât participate while you do).
Whatever youâre going to embark on, we are here to support!Â
If you want to continue your journey with Nerd Fitness, you can check out:
#1) Our Online Coaching Program: we work hand in hand with our clients for all sorts of nutritional changes, including drinking less.Â
You can schedule a free call with our team so we can get to know you and see if our coaching program is right for you. Just click on the image below for more details:
#2) If you like the idea of doing challenges with a group of others, check out NF Journey. Our fun habit-building app helps you exercise more frequently, eat healthier, and level up your life (literally).
Try your free trial right here:
#3) Join the Rebellion! We need good people like you in our community, the Nerd Fitness Rebellion. Youâll meet all sorts of individuals who are trying to better themselves, by drinking less, eating more vegetables, or lacing up to go for a run.Â
Sign up in the box below to enlist and get our Diet Cheat Sheet, which will show you where certain alcoholic drinks fall on the âhealthy or less-healthyâ spectrum.Â
Download our free weight loss guide
THE NERD FITNESS DIET: 10 Levels to Change Your Life
Follow our 10-level nutrition system at your own pace
What you need to know about weight loss and healthy eating
3 Simple rules we follow every day to stay on target
Letâs go!
-Jim
PS: Make sure you check out A Nerdâs Guide to Drinkingfor more thoughts on how to drink while still being a healthy individual.
Psychologies has an interesting article exploring this. This interview from NPR also talks about an improved mood from drinking less.
Read, âContribution of Red Wine Consumption to Human Health Protection.â Source, PubMed.
Read, âAlcohol Dependence, Withdrawal, and Relapse.â Source, PubMed.
Read, âVoluntary temporary abstinence from alcohol during “Dry January” and subsequent alcohol use.â Source, PubMed. Also, read, âTemporary abstinence during Dry January: predictors of success; impact on well-being and self-efficacy.â Source, PubMed.
Read, âDrink refusal self-efficacy and implicit drinking identity: an evaluation of moderators of the relationship between self-awareness and drinking behavior.â Source, PubMed.
from Blog â Nerd Fitness https://ift.tt/3siPc2e
via IFTTT