A quick note: we have compiled ALL of our strength training content into a comprehensive guide that will remove all the confusion and answer all the questions you have about weight training! Grab our guide, Strength Training 101: Everything You Need to Know, when you sign up in the box below!
Download our comprehensive guideSTRENGTH TRAINING 101!
Everything you need to know about getting strong.
Workout routines for bodyweight AND weight training.
How to find the right gym and train properly in one.
What Is the Dip Exercise? What Muscles Does the Dip Train?
The dip is a compound, bodyweight exercise.
You grab two parallel bars, hoist yourself up, and then lower your entire body by bending your elbows.
When you hear “compound exercise,” it’s referring to multi-joint movements that work several muscles or muscle groups at the same time.
The dip exercise trains your:
Chest
Shoulders
Tricep
Back
Abs
You may be thinking, “abs?”
Yep! You need to stabilize your body as you raise and lower yourself.
Which is one of the reasons bodyweight dips are so great!
Some would even argue that dips are the best chest exercise out there, even better than the bench press.
There’s some logic to it.
When you think about it, the bench itself offers a lot of support during the bench press. So do your legs.
With the dip exercise, your upper body is supporting your entire body. Thus a fuller workout.
Instead of isolating your chest for 5 exercises, your shoulders for 5 exercises, and triceps for 5 exercises, just do dips!
How to Do a Proper Dip Exercise
First of all, make sure you can do a dip.
Don’t hop up there and then lower yourself unless you’re fairly confident you can get through at least one of these things. We can’t have you tearing any muscles or falling on somebody, because that would suck.
Grab the parallel bars (or rings), and hoist yourself up. At this point look straight ahead, and contract your stomach muscles (just like when you do squats and deadlifts). If you’re keeping your abs tight for all of these exercises, you’ll never have to do a crunch again and you’ll still have washboard abs.
Bend your knees if you like (so your feet are behind you), for stability purposes, but keep your head up and look straight ahead.
Keeping your elbows at your side, lower yourself until your triceps are parallel to the floor. A lot of folks will recommend you go past parallel, but I think this puts too much strain on your shoulders at a weird angle and can cause injury/discomfort. I only go down to parallel and haven’t had any issues, so I’d recommend the same.
Once you hit parallel, explode back up until JUST before you’re able to lock your elbows. By not locking your elbows, you keep the tension in your muscles and don’t jack up your joints. w00t.
Now do another one. And then another!
Those are dips.
Keep your elbows as tight as possible, engage your abs, and hold your body in balance as you go up and down.
Are you doing it right?
Check your form by recording a video of yourself and matching it against the videos and gifs here. If it looks close then you’re doing great!
Want to have an expert review your form? Our coaches can do just that in our spiffy app!
What If I Can’t Perform a Dip? (Progression Plan)
If you don’t quite have the strength to do a full bodyweight dip, follow our progression plan below.
You’ll be doing the complete dip movement before you know it!
Level 1 Dip Progression: Knee Push-Ups
If you’re just starting to develop your push muscles, our first stop will be knee push-ups. We’ll build your strength up so you can start doing…
Push-ups will help you develop chest muscles for doing proper dips. Only after you can do 20 proper push-ups should you consider trying to do a dip.
Level 3 Dip Progression: Assisted Dips
It’s now time to do some dips! With a little bit of assistance…
We’ll use a resistance band to help support your weight while you grow stronger. You can progress with weaker and weaker resistance bands until you feel comfortable trying a proper bodyweight dip.
Here’s why: an assisted dip machine stabilizes your body during the movement, which means your own muscles don’t need to do any of that stabilization work! We’d rather you stick with resistance bands than mess with this contraption, as it still makes your muscles work together throughout the movement.
Sure, if you don’t have bands and can ONLY do dips with the machine pictured above, it’s not the end of the world! Just make sure you are also doing other movements as well that DO recruit those stabilizer muscles (push-ups, presses, and so on).
ALSO, if you find yourself getting stuck on “assisted dips,” you’re not alone. Lots of folks find it difficult to move beyond the support of the band.
We work hand-in-hand with people like you to master bodyweight training in our Online Coaching Program. If you don’t know how to add dips into your workouts, or you just want somebody to give you the exact workout to follow every day, we got you!
Tips and Tricks for Performing the Dip Exercise
Here are some extra tips on getting better at dips:
#1) Get your setup correct at the start.
When people experience pain with their dips, it’s probably one of two things:
When your arms go too far back, they can close off the shoulder and start to cause pain.
If you allow your shoulders to round forward during the movement, it can again close off the area and create discomfort.
Coach Jim shows you how to avoid these two issues in the video “How to Do Pain-Free Dips,” which you can check out right here:
#2) Don’t swing – this goes for practically every exercise. If you start swinging your body as you go up and down, you take the emphasis off the muscles you’re actually trying to work.
Save swinging for the playground:
#3) Don’t flare out your elbows if you can avoid it – the more “out” your elbows are, the more emphasis on your chest. Elbows tight = emphasis on shoulders and triceps.
Nicholas Elorreaga does a good job showing the difference here:
#4) Don’t do half reps – again, this could be another universal rule. Challenge your muscles by bringing your tricepsparallel to the ground, then make sure you extend arms to almost “elbows locked” at the top:
#5) Don’t go too fast – you want to be slow and in control during your dip. When you go too quickly, proper form is often sacrificed. Make sure you train safely by going slowly…this isn’t a race!
If you’re training at your home gym, you can absolutely do bodyweight dips.
Here are two variations to try:
#1) Bodyweight Dips Between Two Chairs or Bar Stools:
This is all going to be about the chairs or barstools you can find.
The important thing here is the stability of your furniture – don’t pick anything that’s wobbly. However, if you have a couple tall and sturdy chairs or bar stools, you can set them up on either side of you to perform your bodyweight dips.
If they’re too high for you and you can’t quite get your feet on the ground for assisted dips, no problem. Just stand on a few books or a short stool to help you gain support.
#2) Bodyweight Dips Off a Countertop:
Another great option is to perform dips on the corner of two sturdy countertops. As long as you can place your hands to the side so they can face forward, and you have plenty of room to maneuver between them, then you’re solid.
One thing you should be careful with is bench dips, which could be done off of a couch:
The trouble with this comes from your arms being behind you.
As we covered in the “How to Do Pain-Free Dips” video above, this position is a common problem area for causing pain in bodyweight dips. If it hurts when trying the bench dip, stick to the other two home variations above.
When Should You Do Dips in Your Workout? (Getting Started)
Now that you know how to do dips, let’s discuss when to do them.
Unless you’ve been strength training for years and know what you’re doing, we recommend that you pick a full-body routine that you can do 2-3 times a week.
Do your full-body workout and then go play some Nintendo.
Need some help getting started?
I have three great options to help you with your dip and strength training journey:
#1) If you want step-by-step guidance, a custom strength training program that levels up as you get stronger, and a coach to keep you accountable, check out our killer 1-on-1 coaching program:
2) If you want an exact blueprint for crushing dips, check out NF Journey. Our fun habit-building app helps you exercise more frequently, eat healthier, and level up your life (literally).
Try your free trial right here:
3) Join the Rebellion! We need good people like you in our community, the Nerd Fitness Rebellion.
Sign up in the box below to enlist and get our guide, Strength Training 101: Everything You Need to Know. It’ll help you start incorporating dips into your training:
Download our comprehensive guideSTRENGTH TRAINING 101!
Everything you need to know about getting strong.
Workout routines for bodyweight AND weight training.
How to find the right gym and train properly in one.
That should get you going on mastering the bodyweight dip.
Alright, now I want to hear from you:
Do you head to the gym to crush dips?
Are you currently progressing through assisted dips?
Any tips or tricks we missed?
Let us know in the comments!
For the Rebellion,
-Steve
PS: Want to learn more? Read the rest of our Strength Training 101 series:
I’m now a regular powerlifting competitor and a Senior Coach for the NF coaching program, where I help people like you hit their strength training goals.
I’ve written this guide on Deadlifts because it’s the exercise that will change your life too.
So why is the deadlift so great?
Well, when you deadlift you use every single muscle in your body:
Your arms, forearms, and hands hold onto the barbell and make sure the bar stays in the right position and stays stable throughout the lift.
Your shoulders and traps hold the weight and hold it stable.
Your back and core help keep your entire body tight and stable to help keep your spine secure.
Your posterior chain[1] and legs to act as a lever and lift the weight.
Whenever anyone asks me where I got my shoulders/abs/etc, I answer the same: deadlifts.
Why do a million crunches when I can just do deadlifts instead?
On top of that, the deadlift is a basic human movement. Other than the squat, there might not be another movement that is more “functional.”
From the grocery store, to moving a piece of furniture, to picking your child up off the floor – you are deadlifting.
As you build solid form deadlifting in the gym, your form for picking things up in real life will also improve.
This means you’ll be less likely to injure yourself now and later down the line (not only because you are stronger, but because your body knows how to properly handle the weight).
And this goes further than just picking up objects – how you move while shoveling snow, doing yard work, and doing other basic everyday life tasks will all dramatically improve from deadlifting.
Don’t be that guy/gal with back problems from lifting that random object!
Oh, and by the way, the effectiveness of the deadlift isn’t limited to an age or gender – even grandma thinks they’re cool.
The deadlift is awesome – perhaps the purest measure of strength: either you can pick the weight off of the ground, or you can’t.
What Is Proper Deadlift Form? How to Deadlift Safely
When doing a deadlift you’ll be lifting a dead weight off the ground (hence the name, duh).
The deadlift can actually be taught in one sentence:
“Bend your knees and bend over with a flat back to pick up a loaded barbell off the ground.”
Of course, this sentence doesn’t do the awesomeness of this exercise justice.
Here’s how to do a conventional barbell deadlift:
Step up to and under a barbell with your feet angled slightly outward, at hip-width apart.
Bend over and grip the barbell with both hands at shoulder width.
Bend your knees until the bar almost touches your shins.
With a neutral spine, flex your butt and brace your stomach.
Pick the bar up off the ground (It helps to think “press DOWN into the floor with your feet through your heels”).
Continue pressing down with your legs until the barbell passes your knees, then thrust your hips forward until you are standing up.
Reverse your movement until the bar returns to its starting place on the ground.
High five yourself for you doing a deadlift.
(Don’t worry I’ll get more in-depth below.)
Oh, what’s that?
You want even MORE detail on each of those steps!? Sure.
PHASE ONE: The Deadlift Setup.
*NOTE: Always warm up properly, and start with just the bar, even for deadlifts!
Load the bar and secure the plates with collars. If you are just starting out with the movement, begin with 5-10 lb plates, using boxes or blocks to elevate the bar to about where it would be with 45 lb plates attached (if your gym has training plates that are this size, even better!). You may also be able to use your gym’s power rack for this.
Step up to the bar as if you are about to JUMP. Naturally, your feet should end up about hip width (8-12 inches) apart, and your feet slightly angled outwards (5-10 degrees).
Look down – the bar should be over the middle of your feet. If you’re wearing laced shoes, the bar would be approximately over the tied part of your shoelaces.
PHASE TWO: Preparing to lift the bar!
Here are the next steps to take before lifting the bar off the ground (I’ll petition Websters to add the word “deadliftoff” to the dictionary):
Without moving the bar, or your hips, bend over and grab the bar. Your legs should still be straight at this point. Your grip width will be slightly outside of your legs, but not so close they touch. For now, a simple double overhand grip (both palms facing behind you) will work. We will discuss options in grip in more detail later!
Now that you’re holding onto the bar (but not moving it), move your hips down. While you do this, your shins will come forward until they touch the bar Stop moving your hips down when your shins touch the bar.
Press your chest out and flex your pecs like you’re King Kong getting ready to bang on your chest for intimidation. As you do this, your back should flatten, and your spine should go into a neutral spine position.
This is the final starting position of the deadlift: everything is tight and in position and you’re ready to pull.
To Recap we DON’T want your back to round or hyperextend.
If you’re just starting out, getting into a neutral spine might feel like you’ve gone too far (hyperextended), so don’t be afraid to ask a friend for help or to record yourself so you can see what you’re doing.
PHASE THREE: Deadlifting with proper form (THE DEADLIFTOFF!)
If your setup looks and feels good, you’re ready to lift.
Here is the Conventional Deadlift, as demonstrated by me (Staci) and Jim from the NF Coaching Program:
Here are those steps in written form.
Inhale and fill up space deep in your stomach (like a deep belly breath), and while keeping your entire back, butt, and core tight with your chest puffed out, drive down through your heels and the bar should lift off the ground:
All of your weight should be on your heels and midfoot. You should be able to wiggle your toes the entire time (though that is not a part of deadlifting!). Imagine you are pushing the earth world away from the bar with your heels rather than pulling the bar up.
During the movement, your entire body should move upwards at the same speed. This means that your butt should not rise faster than your chest, or vice versa. You may have heard of the term “stripper deadlift” – this is when your butt rises first before your chest.
Your arms should stay straight the entire time. They are just there to hold onto the bar – they are not bending or pulling at all. Your legs and core are doing all the work!
The bar should stay in contact with your body the entire time – you will literally be dragging it up your thighs. This is why you see many powerlifters with chalk or baby powder covering their legs (and why they typically wear socks that cover their shins, to prevent cuts and scrapes). Do not let it come forward. If you were to draw a line that follows the bar’s path from the floor to lockout, it should be a straight, vertical line.
As you are pulling, you should be squeezing your glutes like you’re pinching a penny between your…well, you know. Once the bar passes your knees, think of getting your hips under the bar by squeezing your glutes. So while you’re pulling with your arms, you’re pushing through the floor with your feet, pushing your butt under the bar.
At the top of the movement, you should be standing tall and proud with your chest open, like if you were King Kong getting ready to pound his chest.
At the top, do not hyperextend and lean back. You want to keep your spine neutral and everything tight.
I realize that’s a lot to take in, and that’s okay! You’ve read this far and I’m proud of you.
Many people are so afraid of the deadlift and avoid it at all costs because they’re afraid of splitting themselves in half or getting injured in another way.
That’s why we not only created this awesome guide on deadlifts, but also a way to review technique and proper movement so you have the confidence you’re doing it correctly.
If you want an expert to check your deadlift form and help build a workout program specific to your goals, check out our 1-on-1 Online Coaching Program. Our coaching app lets you record and send a video of your movement directly to your coach who will provide specific feedback:
Setting the Bar Down (Should I drop the bar on a Deadlift?)
Okay! You got the weight off the ground and finished the movement. But now what!?
Your body should descend all at the same time, just as it ascended during the deadlift, only in reverse!
Unlock your hips and slowly move your hips backward until the bar lowers past your knees, then bend your knees and slowly lower the bar to set it down (make sure you unlock them at the same time.
Don’t unlock your knees first, as it will cause a lot of awkward movement, and possibly your lower back to round).
I REPEAT: DO NOT DO THIS:
Don’t lose tightness until you let go of the bar.
This is extremely important – a large amount of deadlift injuries come from people getting super excited about making a lift, losing tightness, and then putting the bar down wrong.
You want this to be a quick movement – lowering the deadlift slow will take a lot out of you and leave you sore for days.
Should you drop the bar during the deadlift?
The eccentric part of the deadlift (lowering it) is actually riskier than the concentric (picking it up) part of the deadlift.
Many coaches will advocate dropping your deadlift (especially with advanced athletes where they can’t afford to sacrifice performance later in the week).
In our opinion, especially if you’re training in a commercial gym, I would recommend putting the bar down (especially if you want to compete in powerlifting competitions – the lift does not count if you drop it).
So, practice putting the bar down properly. It’s just as important as practicing picking it up.
By the way, we have a massive Strength 101 Guide that you can download free when you join the Rebellion (our free community).
Get the guide when you sign up in the box below!
Download our comprehensive guideSTRENGTH TRAINING 101!
Everything you need to know about getting strong.
Workout routines for bodyweight AND weight training.
How to find the right gym and train properly in one.
Proper Deadlift Grip, Straps, and other Equipment
Grip strength is a huge part of the deadlift. If you can’t hold on to the bar, you can’t lift it!
There are two main grips when it comes to the deadlift.
#1) Double overhand grip. Your palms are both facing towards your body. This is the safest grip, and the best grip for beginners to start with.
#2) Mixed Grip: One hand grabs the bar with an overhand grip, and another hand grabs the bar with an underhand grip.
The mixed grip has many disadvantages:
It places uneven stress on your shoulders
It can aggravate problems in the biceps on the side in which your palm is facing outwards
It’s easier for your lift to be uneven as you’re literally gripping the bar it with uneven hands.
So why do a mixed grip?
You can physically lift more.The bar wants to roll out of your hands, so by using a mixed grip you are more likely to not have your grip fail you on a heavy lift.
As you start to lift more than your grip can handle, you can consider doing a mixed grip for your heaviest lifts, but be sure to use the double-overhand throughout your warm-up sets. Consider doing grip strength work as well.
#3) Hook grip: This grip is where you put your thumbs under your fingers.
This type of grip is preferable to the mixed grip due to the fact that it doesn’t introduce any imbalances. However, it does have one major disadvantage:
It hurts like hell!
From personal experience, you get used to it and your thumbs can manage, but prepare for pain when you learn to do the hook grip!
No matter what grip you use, you’re probably going to want to invest in some chalk! It’s absolutely optional and initially won’t be incredibly useful.
However, after you start to put some weight on the bar, chalk will be enormously helpful for hanging on to the bar (I use this kind of lifting chalk). I certainly find this to be a better, smarter, and safer option than either straps or gloves.
Speaking of which…
Here are some common questions on deadlift equipment:
#1) “Should I use straps while doing deadlifts?”
Ehhh, probably not. Straps can help you lift more than your hands can hold with an overhand grip, but relying on straps could cause your grip strength to be undeveloped down the road.
Short answer: consider using straps strategically when doing high volume deadlifts, but don’t rely on regularly them for max lifts: improve your grip strength.
Instead, chalk, stronger grip strength, and a hook grip for max lifts is your friend!
#2) “Should I wear gloves while doing a deadlift, Staci?”
Nope.
Gloves actually create space between your hands and the bar, and it reduces your grip security, increases the diameter of the bar, and makes the bar harder to hold on to.
This means the gloves are doing the exact OPPOSITE of what you think they’re doing.
I don’t recommend using gloves unless you have an injury like a ripped callus.
Speaking of ripped calluses, or if you’re worried about getting rough hands from deadlifting – make sure to take care of your hands and they are less likely to happen!
#3) “Do I need to use a lifting belt?”
When starting out, you don’t have to worry about using a belt.
However, as you get to really heavy weights, it may be something to look into.
Belts need to be worn correctly in order to be effective.
Note: While you may be able to lift more using a mixed grip and a belt, they’re definitely not necessary to lift heavy.
Here’s a video of Anthony Mychal deadlifting 550 lbs at the powerlifting competition at Camp Nerd Fitness – double overhand with no belt:
#4) “What kind of shoes should I wear to deadlift?”
GREAT question. I don’t care what kind of shoes they are, as long as they are flat.
You really have four options for deadlifting shoes:
FLAT SHOES:Chucks work great. I personally prefer to deadlift in either socks or zero drop minimalist shoes. Do NOT wear clunky athletic shoes with thick heels or shoes with those pockets of air bubbles in the heels.
DEADLIFTING SHOES: Getting a bit fancy here, but if you are competing or just want shoes you can deadlift in, consider deadlifting shoes.
GO BAREFOOT: If you don’t want to invest in new shoes, deadlift barefoot. Just don’t go walking around the gym in socks – you might get kicked out or have a weight roll across your feet!
SLIPPERS: No, not fuzzy Snoopy ones. Look into deadlift slippers – they’re just fancy socks approved for competition.
Still here, eh? Amazing!
We want to be part of a community that helps you reach your goals. Whether you want to deadlift for the first time, or you’re trying to hit the 1,000 club, our Nerdy Coaches want to help.
Let us take care of everything so all you have to worry about is following the instructions and picking up the weight!
7 Common Faults and Mistakes while Deadlifting
DON’T DO THESE THINGS:
#1) Rounded Back – not keeping your spine in neutral the entire time. Letting your lower back round at all is a huge no no. [2]
#2) Looking up (with your neck) – Along with keeping a neutral spine, hyper extending your neck to look up is also something we want to stay away from.
#3) Hyperextending at the end of the movement – The spine should still be in neutral even at the top. Hyper extending at the top is actually not something we actually strive for or need to do.
#4) Treating the deadlift like a squat with the bar in your hands. You are not starting in a squat position and standing up – it is a different movement.
#5) Letting the bar come forward – The bar needs to stay over your midline and be dragged up your body the entire lift – any movement forward of your midline should be avoided.
#6) Butt rises faster than your chest (also known as the “stripper deadlift”) – your chest should lead the movement, and your entire body should move upward at the same pace.
#7) Bending your arms – your arms should stay straight. Don’t bend your elbows to try to get the bar up faster.
NOT SURE YOUR FORM IS RIGHT? I hear you – Personally, I deadlifted with bad form for years and I didn’t even realize it.
It wasn’t until I enlisted the help of an online coach who checked my form via video and helped me with the right “mental cues” to get me to start deadlifting correctly.
If you want somebody to check your form – AND build the workout for you – consider our 1-on-1 online coaching program with form check:
What Are the Different Types of Deadlifts?
So far we’ve addressed the conventional/traditional barbell deadlift.
There are MANY different variations of deadlifts, and you can use whichever one floats your boat (if you have a boat to float, that is).
Here are 8 different deadlift variations:
1)Conventional Deadlift – Your hands are just outside your feet, standing at about hip-width apart. Our article has been highlighting this form of deadlift.
2)Sumo Deadlift – Your hands are inside your feet with a wider stance.
3) Hex or Trap Bar Bar Deadlifts – Use a specialty bar made just for deadlifting which changes the biomechanics.
4) Snatch Grip Deadlift – Your hands will use a wide grip like in the Snatch.
5) Romanian Deadlift: Think of this as the top half of a conventional deadlift (imagine you’re a “drinking bird” bending over at the waist).
6) Deficit Deadlift: This movement increases the range of motion of your deadlift, since your feet are elevated compared to the bar.
7) Rack Pulls: Conversely, this decreases your range of motion with the deadlift, since the bar is raised higher.
8) Dumbbell Deadlift Variations: For either accessory work, or if you don’t have access to a barbell and weights.
This guide covered primarily the conventional deadlift, because it’s a great variation for beginners and an exercise you can do every week for the rest of your life.
Once you get comfy with it though, move onto others. Need more tips for strength training moves?
Oh and don’t forget to grab our Strength Training 101: Everything You Need to Know when you sign up in the box below:
Download our comprehensive guideSTRENGTH TRAINING 101!
Everything you need to know about getting strong.
Workout routines for bodyweight AND weight training.
How to find the right gym and train properly in one.
Frequently Asked Questions on the Deadlift
#1) “What do I do if I can’t get into the proper starting position?”
While you are getting the mobility to get into the correct starting position, you can put the bar on blocks to raise it up a few inches to help you get in the right position.
Each workout, start with the bar a little lower, until it is just on the floor.
Each week, your goal should be to lift SLIGHTLY more than last week.
That’s it. By going SLOWLY, you’re giving all of your muscles, joints, tendons, your grip, and your central nervous system a chance to level up together.
So start small. Lift more each week.
#3) “Should I do ‘touch and go’ or ‘dead stop’ if I’m doing a set of multiple reps?”
A dead stop means letting the weight settle completely on the ground before doing the next rep, while “touch and go” reps means you’re essentially bouncing the weight at the bottom of the movement and going RIGHT into the next rep.
Touch and go reps are thus easier:
The stretch reflex where your body quickly rubber bands in the other direction.
Locomotion: the bar is already in motion, so it’s simply easier to lift something that is already moving than it is to lift something that is completely stopped.
Bounce: If you are at a gym that has rubber bumper plates, these plates actually will bounce a little when they hit the floor – helping you lift the weight.
HOWEVER, while “touch and go” reps are easier, they are also more dangerous. It’s easier to mess up your form if you aren’t resetting every rep and easier to get fatigued.
It is also in the eccentric (lowering) part of the “touch and go” deadlifts that most people get hurt. This is one of the most technically demanding, important lifts out there and should be treated with respect.
For that reason, resetting between every rep is preferred for general strength programs. This allows you to reset, get your form right, and get your breathing right on every rep.
Yes, If you are doing a CrossFit WOD, you might be doing touch and go for time. Awesome. You do you, boo.
#4) “Okay, I get it. Deadlifts are great! How often should I deadlift?”
I love your enthusiasm and I would never ask you to curb it, but there are some things we need to take into consideration when adding deadlifts into our program.
Heavy deadlifts are extremely taxing on the central nervous system.
This means your body needs more time to recover. In fact, it’s so taxing that some coaches recommend taking the deadlift out completely for their more advanced, sport specific athletes.
Most good strength programs only deadlift once a week – and it’s lighter volume than with your squats.
Both Starting Strength and StrongLifts only include ONE set of 5 deadlifts. Meanwhile, they program 5 sets of 5 for squats.
In our Coaching Program, we add deadlifts into each person’s workout on a case-by-case basis.
Generally, it’s once per week, and we’d love to help build a program for you that has you deadlifting 400+ pounds in no time!*
*Okay it’ll definitely take longer than “no time,” but it might happen sooner than you think!
Get Out There and Deadlift: Next Steps
I am so excited for you to start deadlifting, because it’s the ultimate physical AND mental exercise.
For people looking for the next step, we’ve built 3 options that might float your boat:
You’ll work with our certified NF instructors who will get to know you better than you know yourself, check your form, and program your workouts and nutrition for you.
2) If you want a snazzy app to teach you exactly how to start crushing deadlifts (using things you might have around the house), check out NF Journey. Our fun habit-building app helps you exercise more frequently, eat healthier, and level up your life (literally).
Try your free trial right here:
3) Download our free Strength 101 Guide, which you can get when you sign up in the box below:
Download our comprehensive guideSTRENGTH TRAINING 101!
Everything you need to know about getting strong.
Workout routines for bodyweight AND weight training.
How to find the right gym and train properly in one.
this is a fancy term for your…”posterior” muscles – your glutes and hamstrings
(Note: there are some powerlifters that purposefully round their upper back to decrease range of motion, but this is a sport specific move, still a fault, and something you should not consider as a beginner.)
Before we jump in, if you’re looking for a way to train anywhere (like with push-ups), you may be interested in the new app we built!
Nerd Fitness Journey will guide you through a workout routine that can be done anywhere, all while creating your very own superhero!
You can give it a free test drive right here:
How to Set up for a Proper Push-up (Staging)
When it comes to push-ups, your form is crucial. Each push-up needs to be done with proper form so that your total reps measured from workout to workout are on equal footing.
If you did 20 push-ups two days ago, and then today you did 25 push-ups by only going down halfway, sticking your ass up in the air, etc., it’s absolutely impossible to tell if you got any stronger.
Here’s how to get into proper push-up position:
1) On the ground, set your hands at a distance that is slightly wider than shoulder-width apart.
Draw a straight line from your chest/nipple down to the floor – it should be directly over your thumbnail.
Depending on your strength and experience, your hands should be angled in a way that feels comfortable to you. For me, my hands are set up so that my middle finger points straight up and away from me.
2) To alleviate wrist pain (if you have poor wrist flexibility) do your push-ups holding onto push-up handles (so your wrists aren’t as compromised), or a bar:
If you’re hardcore, you can do them on your knuckles (as long as you’re on a semi-soft surface like grass or carpet or broken glass. Wait, scratch that last one).
3) Your feet should be set up in a way that feels right and comfortable and in balance. For some, that might be shoulder-width apart.
For others, it might be with your feet touching. Generally speaking, the wider apart your feet, the more stable you’ll be for your push-ups.
4) Think of your body as one giant straight line – from the top of your head down through your heels. Your butt shouldn’t be sticking way up in the air or sagging. You’re essentially holding a plank throughout the entire movement.
5) If you have a problem getting the proper form with your body, try this: clench your butt, and then tighten your abs as if you’re bracing to get punched.
Your core will be engaged, and your body should be in that straight line. If you’ve been doing push-ups incorrectly, this might be a big change for you.
Record a video of yourself to make sure you’re doing it correctly.
6) Your head should be looking slightly ahead of you, not straight down.
I read somewhere that said “if you’re doing them right, your chin should be the first part of your head to touch the floor, not your nose.”
Looking up helps you keep your body in line, but feel free to look down if that helps you concentrate more.
7) At the top of your push-up, your arms should be straight and supporting your weight. You’re now ready to do a push-up.
8) I want to draw special attention to that first step with hand position: nearly EVERYBODY does push-ups with their arms out far too wide and their shoulders flared. This is bad news bears.
If I was looking down at you from above, your arms and body should form an ARROW, not a T.
WARNING: If you have been doing push-ups with your arms flared, doing them with proper form will be significantly more difficult!
How to Do a Proper Push-Up (Correct Push-Up Form with Video).
In the 5-minute “Perfect Push-Up” video above, featuring yours truly and two of our coaches, we take you through EACH of the steps of a push-up, including some variations!
Here’s how to complete one perfect repetition of a proper push up:
With your arms straight, butt clenched, and abs braced, steadily lower yourself until your elbows are at a 90-degree angle or less. Depending on your level of experience, age, and flexibility, 90 degrees might be the lowest you’re able to go. Personally, I like to go down until my chest (not my face), hits the floor. That way, I know I’m going the same distance each and every time.
Try not to let your elbows go flying way out with each repetition. Keep them relatively close to your body, and keep note of when they start to fly out when you get tired.
Once your chest (or nose/chin) touches the floor (or your arms go down to a 90-degree angle), pause slightly and then explode back up until you’re back in the same position.
Do as many as you can until you start to feel your form slip (even slightly); you are done for that set.
Here’s why you should focus on form over quantity:
10 good push-ups and 5 crappy ones are tough to quantify against eleven good push-ups.
If you can only do 10 of something, write down your results and aim for 11 next time.
Perfect form allows you to keep track of your improvements week over week.
Want to know where push-ups should fall into your workout routine? I have three options!
1) Try Nerd Fitness Journey!
Nerd Fitness Journey will guide you through a bodyweight workout routine that can be done anywhere (yep, even there). You can try it for free right here:
Grab Your Beginner Bodyweight Routine Worksheet. No Gym Required!
Complete this workout at home, no equipment required
Avoid the common mistakes everybody makes when doing bodyweight exercises
Learn how to finally get your first pull-up
3) Make your own workout with push-ups by following our“Build Your Own Workout” guide! It’ll walk you through everything you need to build an exercise program for your goals in 10 steps.
How Do You Train to Do Push-Ups? (Where to Start If You Can’t Do a Push-Up.)
Don’t worry if you can’t do a push-up yet. As we lay out in the video above, we have a plan that will help you get there.
You need to start with an easier push movement, and work up to progressively more difficult types of moves that will eventually result in you doing true push-ups.
We’ll progress from Level 1 Push-ups to Level 4 Push-ups:
Wall Push-Ups: Level 1
Elevated Push-Ups: Level 2
Knee Push-ups: Level 3
Regular Push-ups: Level 4
LEVEL 1: HOW TO DO WALL PUSH-UPS
Stand in front of a wall. Clench your butt, brace your abs, and set your hands on the wall at slightly wider than shoulder-width apart.
Walk backwards with your feet until your arms are fully extended and supporting your weight (generally one decent sized step back with both feet will suffice). Keeping the rest of your body in a straight line, steadily lower yourself towards the wall until your nose almost touches the wall, and then explode back up to the starting position.
HOW TO TRAIN WALL PUSH-UPS:
Do 4 sets of wall push-ups with a 2-minute rest between sets, every other day. Keep track of how many repetitions you can do WITH PROPER FORM for each set in a notebook for easy comparison to previous workouts. Once you can do 4 sets of 20 repetitions of wall push-ups, you can progress to knee push-ups.
LEVEL TWO: HOW TO DO ELEVATED PUSH-UPS
As we demonstrate in this video above from Nerd Fitness Prime, elevated push-ups are just what they sound like – your hands are on an elevated surface, whether it’s something as tall as a kitchen table or as low as a few blocks that are inches off the ground. This will depend on your level of strength and experience.
If you’ve just progressed from wall push-ups, pick something that is at a level that’s right for you – I generally find the back of a park bench or the side of a picnic table to be a perfect height for doing incline push-ups. Like so:
HOW TO TRAIN ELEVATED PUSH-UPS:
Do 4 sets of elevated push-ups with a 2-minute rest between sets, every other day. Again, keep track of all of your stats for how many proper form repetitions you can do in each set. Once you can do 4 sets of 20 repetitions, it’s time to either move to regular push-ups, knee push-ups, or a lower height for your hands to be supported.
Once you can do 4 sets of 20 repetitions, it’s time to either move to regular push-ups, knee push-ups, or a lower height for your hands to be supported.
To work on progression, try to doing your elevated push-ups on the stairs in your house. As you get stronger, you can move your hands to lower and lower steps until your hands are on the ground.
LEVEL THREE: HOW TO DO KNEE PUSH-UPS
Once you’re comfortable doing wall or elevated push-ups, proceed to knee push-ups. Your shoulder and hand placement will look just like a regular push-up (an “arrow”, not a “T”), but you’ll stabilize yourself on your knees instead of your feet. As demonstrated here:
HOW TO TRAIN KNEE PUSH-UPS
Once you can do 4 sets of 20 repetitions on your knees, you can start thinking about doing regular push-ups.
To recap, if you can’t do a regular push-up, move from:
Wall Push-Ups: Level 1
Elevated Push-Ups: Level 2
Knee Push-Ups: Level 3
Regular Push-ups: Level 4
How do I know the above progression will work? Well, it’s the exact plan we use to help people crush push-ups in Nerd Fitness Journey!
You can see how we scale our bodyweight workouts right here:
What Are Other Types of Push-Ups? (Push-Up Variations)
Basic push-ups can get boring…
Fortunately, there are dozens upon dozens of variations to make things more difficult for you.
Once you’re cranking out perfect form push-ups like it’s your job,[1] try some of these advanced variations on for size.
Click on each for a video demonstration (these are some of the push-up variations pulled from NF Prime):
#1) One-legged Push-ups: introducing some variety and balance by removing one of your legs for less stabilization:
#2) Side-to-Side Push-Ups –Get into the classic push-up position and move your hands farther apart. Now, lower yourself down towards one arm only – you should feel like you’re supporting a lot of your weight.
To complete the rep, slide horizontally over to the other arm, and push-up. The farther apart your hands, the higher percentage of your bodyweight will be supported by that side of your chest/shoulder and arm (thus getting harder)!
#3) Decline Push-Ups – these work your shoulders and triceps more so than normal push-ups.
#4) Diamond Push-Ups – keep your arms tight at your side, rotate your hands outward, and keep your elbows tight as you lower your body. Works your triceps like crazy.
#5) Dive-Bomber Push-Ups – funky, difficult, but oh so fun. I’d explain it, but just watch the video
#6) Plyometric Push-Ups – these are brutal and will wear you out just after a few repetitions. Just don’t hurt yourself and smash your face during a failed attempt (not that I’ve ever done that. Shut up my face always looks like this)!
#7) Handstand Push-Ups – This goes without saying, but you should be able to do a proper handstand before attempting these!
Kick up against a wall, and without flailing your elbows way out to the side (which can wreak havoc on your shoulders and elbow joints), slowly lower yourself down until your head touches the ground softly.
Then raise yourself back up.
Rotate some of these advanced push-ups into your workout routine and you’ll be well on your way to a great strength training practice.
If you want more strength building tips, we also have a comprehensive guide, Strength Training 101: Everything You Need to Know, when you sign up for the Rebellion (that’s our community) below:
Download our comprehensive guideSTRENGTH TRAINING 101!
Everything you need to know about getting strong.
Workout routines for bodyweight AND weight training.
How to find the right gym and train properly in one.
How to get better at push-ups
So you’ve learned how to do a push-up, you can do a few of them, but you want to get better!
Here are some tips to help you along the way:
Get healthy! As you lose weight (which is 80% nutrition!), you will have to move less weight around than before, which will make your push-ups easier to manage. Have you had trouble losing weight in the past? Check out our article “Why Can’t I Lose Weight?” to find out why.
Don’t cheat on the last few push-ups – when you’re tired, it’s easy to skip out on good form for your last few reps. As soon as you do one bad form push-up, you’re done. Finish up your four sets, write down your numbers, and try to beat those numbers next time.
When starting out don’t do push-ups two days in a row. You need to give your muscles time to rebuild and recover – take off at least 48 hours in between your push-up adventure. However, when push-ups became a warm-up exercise for you – you can do them every day if you want. If you’re advanced, you can consider a PLP program.
Get enough protein into your system after finishing up your workout – protein helps rebuild the muscles you just broke down doing push-ups, and it helps them rebuild those same muscles stronger than before. You can read our ultimate guide on protein for some tips on how to up your protein intake.
If you can do 4 sets of 20-25 perfect form push-ups no sweat, then it’s time to start looking into push-up variations to keep things interesting.
Build up your core with planks – this will help keep your core strong so that it’s not the weakest link in your proper form push-ups.
These 6 tips will be a great addition to your strength training plan. Keep at it and before you know it you’ll be doing one-arm push-ups like Batman.
What’s that? You don’t have a strength-building plan!!! Well then…
What’s Your Strength Building Plan?
It makes me sad when we get emails from people who struggle and try and work hard to get healthier, and to be better at push-ups, and just can’t seem to make any progress.
If that’s you, you’re not alone!
1) Consider working with an online coach (or in-person trainer).
Helping people learn push-ups and other bodyweight exercises is why we built our1-on-1 Online Coaching Program:We build programs for busy people to cut through the noise and just get results
2) Exercising at home and need a plan to follow? Check out Nerd Fitness Journey!
Our fun habit-building app helps you exercise more frequently, eat healthier, and level up your life (literally).
Try your free trial right here:
3) Join our community! We have hundreds of thousands of people, and I send out two free emails every week to help them level up their lives. Join our free community today, and I’ll send you a dozen free ebooks, including TONS of workout plans you can do anytime, anywhere.
Join the community by signing up in the box below:
Grab Your Beginner Bodyweight Routine Worksheet. No Gym Required!
Complete this workout at home, no equipment required
Avoid the common mistakes everybody makes when doing bodyweight exercises
Learn how to finally get your first pull-up
YOUR MISSION, SHOULD YOU CHOOSE TO ACCEPT IT:go home, set up a camera, and check your form on your push-ups.
I hope you’ll find that your form is as good as you expected, but it’s okay if it’s not, it’ll give you something to work on.
Go do some push-ups, and work on getting better with them every day.
You’ll be moving from Level 1 to Level 4 push-ups and beyond!
-Steve
PS: Not to brag, but I typed this entire article while doing 1-handed push-ups.
PPS: Okay no I didn’t. But it would have been cool if I did, right?
Rowing classes are everywhere. It’s easy to find professional and Olympic athletes hyping up the machine’s ability to provide a full-body workout.
All well and good…but how do you actually use the thing?
Well my friend, you’ve come to the right place to find out.
Many clients in our Online Coaching Program tell us they want to start rowing, but they don’t know how. Today, we’ll explain how we get them going with row machine workouts.
She also knows a thing or two about using a rowing machine, since she’s gotten several CrossFit certs (they love the rowing machine at CrossFit).
If you’re going to learn about using a rowing machine, she’s not a bad person to talk to.
But first, let’s back up here a bit…
What Are the Benefits of Using a Rowing Machine?
The rowing machine was originally invented for water rowers to train offseason.
You might hear the indoor rowing machine called an ergometer, or “erg” or “ergo.” They get this name since rowing machines often measure the energy produced from the workout in units of ergs.
They’ve grown in popularity, because of the many benefits offered by this one stationary machine.
For example, the rowing machine offers:
A Full-Body Workout. If we use proper rowing technique, we’ll hit every major muscle group in our body. Upper, lower, core, we’ll work it all. This is one of the main reasons they’ve become so popular.
Low-Impact. While a workout from a rowing machine can get intense, it’s considered to be little to no impact. That’s why it’s sometimes recommended to patients with osteoarthritis.[1]
Versatility. We can do a lot with an ergometer. We can train for duration and/or intensity. We even do a HIIT workout. Or we can combine it with bodyweight movements in a circuit. Plus, since some of them fold up, they’re perfect for those who need to train in small spaces.
Alright, let’s now go over some terminology so you know what’s what with the ergometer.
Rowing Machine 101: Terms to Know
When it comes to the rowing machine, there’s some vocabulary that would be worth discussing quickly.
First, let’s chat about the rower itself:
#1) Foot Plate – no matter the rower, there will be a place for you to strap your feet in.
You’ll want to set your feet so that the strap goes over the ball of your foot. This will allow you to have the most powerful stroke.
You should be able to lift your heel in this position.
#2) Handle – also called “the bar.” This replicates the handles of an oar.
Your hands should be approximately shoulder-width apart.
#3) Rail – the central beam of the rower, which allows the seat to roll forward and back.
#4) Display Monitor – while these will differ from model to model, the rower will normally have a screen to show some basic info:
Strokes per minute (Stroke Rate)
Split Time (more on this momentarily)
Duration of workout
Etc.
For the Concept2 model – the rower Coach Staci demonstrates above – you can hit any button and select “Just Row.”
This will be the easiest way to get going.
#5) The Damper – The lever on the side of the flywheel housing (or fan cage) that controls airflow.
The difference in Damper settings:
The higher the setting, the more air is allowed to flow. This requires more work to spin the flywheel.
The lower the setting, the less air is allowed to flow. This requires less work to spin the flywheel.
Think of this sort of like bicycle gears – it affects how the rowing feels but does not necessarily reflect the resistance:
A setting of one will feel fast and easier to pull, but you’ll need to move quickly to generate power.
That said, cranking the damper up to ten doesn’t mean a better workout either. It just means a tougher pull – like trying to move a rowboat.
We recommended you aim for a Damper setting between 3 and 5 (which is also where most competitive rowers have it).
Note: some indoor rowers use a water tank to create resistance, so any similar Damper setting controls the amount of water moving through the system. You can still use the same recommendations for damper numbers.
More on that here:
Next, let’s talk about some terminology for the sport of rowing itself.
Rowing has been around for centuries and a lot of the vocabulary has carried over to the indoor sport.
Rowing Terms to Know:
#1) Split
Split time refers to the time it takes to row 500 meters, also known as the “split per 500.” This will likely be shown prominently on your Display Monitor.
If the number goes down, it means you’re going faster! Woot.
#2) Strokes Per Minute (SPM)
This is also called Stroke Rating and it’s exactly what it sounds like: the number of strokes you take per minute.
A higher SPM doesn’t necessarily mean you’re going faster – you can also go faster by putting more power into each stroke.
#3) Paddle (or Rest)
Normally in the sport of rowing, you never stop completely. You just row or “paddle” a little bit easier.
However, if you need to stop completely in your workout, don’t stress it. It’s fine to even get off the rower from time to time…it’s not actually a boat.
You do you.
Next, we need to discuss the four parts of the rowing stroke, but we’ll jump to a new section for that.
The Four Parts of the Rowing Stroke
The rowing stroke is broken out into four parts:
The Catch
The Drive
The Finish
The Recovery
It’ll look like this:
Let’s cover each.
#1) The Catch
This is the start of the stroke:
Our knees are bent and our shins are roughly vertical.
Our body leans forward slightly to about a 1 o’clock position and our arms are straight.
Like so:
This puts us in the ideal position to generate power.
#2) The Drive
As the name would suggest, this is where we’ll be driving and generating power for the stroke.
The order in which we generate power is key:
It should go legs first
Then lean back with the body
Then pull with the arms
It’ll look like this:
They should blend smoothly right into each other, so a good reminder is:
Legs
Body
Arms
A great drill to practice the Drive:
Start with JUST the legs:
THEN the legs and a slight backward lean with the body:
FINALLY, the legs, body, and arm pull together:
This can be done with or without the rowing handle.
Common mistakes with the Drive:
A) Pulling hard with the arms first. We’ll see the elbows bend early. This greatly decreases the amount of power we can put into the stroke.
We want to keep the arms straight and wait until the handle passes the knees BEFORE we first bend the arms.
B) Letting the body pull forward while we’re driving with the legs.
Instead, we want to keep a strong and stable midsection so that we can go smoothly from the leg drive to the body lean.
#3) The Finish
This will be our position after the Drive:
Our legs are extended and our body is leaning back slightly.
The handle is about at our solar plexus.
Our shoulders are down and our wrists are straight.
It’ll look like this:
A great drill to practice the Finish: just work on the arm motion.
Keep the legs extended and lean back slightly. Then pull with just the arms.
Common mistakes with the Finish:
A) Shrug the shoulders up by the ears.
This is often accompanied by bent wrists and chicken wing arms.
Instead, we want the shoulders down and the elbows closer to the sides, with enough space between the arms and body for a grapefruit to fit.
B) Pulling the handle too high – to the neck or face.
We want the handle down at the solar plexus, not up orbiting in the solar system!
C) Leaning back too far – we’re not trying to perform the one-person luge here!
We only need to lean back slightly, at about an 11 o’clock position.
#4) The Recovery
This is how we return back to the starting position.
Just as we had a proper order for the Drive – legs, body, arms – we’ll have a proper order for the recovery by reversing it – arms, body, legs.
Straighten the arms, then lean the body forward slightly, and finally bend the legs to head back to the Catch.
Common mistakes with the Recovery: Bending the legs too early when recovering from the stroke. You’ll know you’re doing this when you have to lift the handle up and over the knees.
Instead, wait for the handle to PASS the knees before fully bending the legs.
There you have it, the four parts of the rowing stroke.
You’ll get better at this as you go, I promise.
Rowing is like golf: the relentless pursuit of the perfect stroke.
One way to check your form would be to record yourself doing a rowing stroke.
If it looks close to the gifs and videos found in this guide, you’re doing great!
Oh, and if you want an expert to review your form, you can do so in our snazzy Coaching app.
You can learn more here:
When to Add the Rowing Machine to Your Workout
A rowing machine can fit into our workout in all sorts of ways.
If you want to give the rowing machine a whirl, including it as part of your warm-up wouldn’t be a bad idea. Since it’s a full-body exercise, it’s a great way to prep our body for the workout ahead.
To warm up with the rower, aim for about 5-10 minutes at a steady pace.
Once you get the hang of the rower, you can look to incorporate it with some of these ideas:
#1) Interval Training
Interval training or HIIT is all about flipping between intensity.
Going hard one moment, then resting another.
So after your warm-up, you could row intensely for two minutes, rest or “paddle” for a minute or two, then back to intensity.
A fun way to do this is to build up the duration and then pull it back with a “Meter Pyramid.”
To Row a Meter Pyramid:
One minute of intensity, followed by one minute of paddle.
Two minutes of intensity, followed by two minutes of paddle.
Three minutes of intensity, followed by three minutes of paddle.
Four minutes of intensity, followed by four minutes of paddle.
Three minutes of intensity, followed by three minutes of paddle.
Two minutes of intensity, followed by two minutes of paddle.
One minute of intensity, followed by one minute of paddle.
If you start this off with a 5-minute warm-up, it’ll take about 37 minutes.
We could aim for 3-4 circuits here, but even 1-2 is a great start.
#3) Steady State
This is exactly what it sounds like: rowing at a constant pace.
After a warm-up, find a pace that you can stay with. Then stay with it.
A good frame of mind here would be about 50% of your effort, but don’t overthink this.
Put on a good podcast or your favorite playlist, find a Stroke Rate you can maintain for 10-30 minutes, and get rowing.
You can pretend you’re in a competition if it helps!
Also, mix and match! The important thing is that you’re doing some type of workout. Don’t fret if it doesn’t fit into the exact format you find here or on other websites.
Should a Beginner Use a Rowing Machine? (Next Steps)
There you have it, my friend.
You now have everything you need to get started rowing.
Don’t overstress if you’re not doing anything 100% right as you start.
Like anything, you’ll get better at it as you go.
Plus, it’s not like you’ll be ejected into the water from an indoor rower.
But, if down the road you do want to take it outside, there are all sorts of leagues and clubs you can join.
It could be a great way to get out and make friends!
Granted, you’ll need SOME type of body of water around you, but if you live next to a lake or large river, there’s likely a team out there that would love to meet you.
Practice indoors for a bit, then take 20 seconds of courage to put yourself out there.
What’s 20 seconds of courage?
We explain it all to you in this video:
Oh, and if you want to continue having Nerd Fitness propel your journey, here are three ways we can help:
#1) Our Online Coaching Program: a coaching program for busy people to help them make better food choices, stay accountable, and get healthier, permanently.
If ever you come across a snazzy piece of equipment and what to learn how to use it, your very own coach can help you!
Plus, they can guide your nutrition and help you level up all areas of your life.
You can schedule a free call with our team so we can get to know you and see if our coaching program is right for you. Just click on the image below for more details:
#2) If you want an exact roadmap for building a full-body workout, check out NF Journey. Our fun habit-building app tells you exactly what days to exercise, what days to rest, and helps you track it all so you know if it’s working for you.
Interested?
Try your free trial right here:
#3) Join the Rebellion! We need good people like you in our community, the Nerd Fitness Rebellion.
Sign up in the box below to enlist and get our Rebel Starter Kit, which includes all of our “work out at home” guides, our Strength Training 101 eBook, and much more!
Get your Nerd Fitness Starter Kit
The 15 mistakes you don’t want to make.
Full guide to the most effective diet and why it works.
Complete and track your first workout today, no gym required.
Today, we’re answering both of them (and much more).
Walking is a great form of exercise and something we often recommend to folks starting our coaching program. Some have had great success walking, including Megan, who has a daily practice to maintain her weight loss journey.
How Many Calories Does Walking Burn? (Calorie Calculator)
In true Nerd Fitness fashion, we scienced the crap out of this, and even created a handy calculator for you – simply put your stats in the calculator here:
A few things to remember about the above equation:
There’s a difference between gross calories (total calories) expended and net calories (additional calories) expended! Your body burns most of its calories every day JUST by existing.
Gross calories: calories burned while walking PLUS the calories burned just existing
Net calories: ADDITIONAL calories you burned thanks to exercise.
Also, our calculation is an ESTIMATE. You’re a unique snowflake, and no box or formula can capture your awesomeness/uniqueness. This equation below is JUST a starting point!
Also, if you don’t feel like playing with our calculator (boo), here’s something you should know:
On average, a mile burns about 100 calories when walking.
ANY exercise pales in comparison to a much more important part of the weight loss equation: nutrition.
If you’ve come this far, and you want to learn more about why walking is so amazing, continue reading.
And you’re damn right, I’ll show you exactly how to walk to Mordor too.
What Are The Benefits of Walking?
We are designed to walk. It’s in our DNA, and it’s a huge part of our emergence as the dominant species on this planet (along with opposable thumbs, big brains, and Nintendo).
Let’s get the basic stuff out of the way:
Every day, it’s recommended by the CDC that we walk around five miles, or 10,000 steps.[1]
Hence the reason why your Fitbit – which I’ll get to shortly – has that 10k step goal as its default number.
Unfortunately, we Americans tend to average HALF that: 2.5 miles or 5,000 steps. And I’d imagine that people who work outdoors or have more physically active jobs drag that average wayyyy up.
Which leaves us desk jockeys, who don’t walk nearly enough.
We use our feet to get us from the front door, to our car, to our desk, to our car, to our front door, to our couch… where we put them up while watching four hours of TV before going to bed.
Not walking enough can be a big factor in the creep-up of weight gain over the years.
You might have questions like:
Can I walk more to lose weight?
Is walking REALLY good for me?
Do I need to do more intense exercise?
Long story short: You should walk more and it can help you lose weight and behealthier.
Short story long, here’s why walking is important:
#1) Walking burns calories without exhausting you.If you walk the recommended mileage each day (5 miles instead of just 2.5), it can lead to a tremendous amount of weight loss over time.You’ll burn an extra 100 calories walking just ONE more mile each day than normal: When that’s multiplied out, it’s an extra 700 calories burned per week, which results in approximately a pound of fat lost every five weeks, or 10 pounds in a year. You can scale up your distances to get your desired results!
#2) Walking doesn’t add to training stress. If you are strength training regularly, adding in more weight training or running can lead to burnout, breakdowns, and injuries. If you are trying to look like a super-hero, extra cardio sessions (or long distance cardio sessions) might kill your gains. But you can just walk. You can walk great distances, provided you’ve built up your body’s physical ability, and not get tired or sore – walking (especially outside while soaking in some sunlight) can make you feel better, not worse.
#3) Walking is low impact. Unlike running, which can wreak havoc on people’s joints if they run improperly or are severely overweight, walking doesn’t have those impact issues. If you go for a walk and your feet or joints hurt, you’re doing it wrong – read the next section!
#4) Walking can burn fat. Because walking is low impact and low intensity, your body doesn’t need to pull much glycogen and glucose stores to fuel itself, which happens when you strength train or push yourself into “aerobic training” with higher intensity cardio. Proponents of intermittent fasting suggest walking in a fasted state in the morning before eating anything in order to help burn extra fat. It’s a little controversial, so this will have to be something you attempt and measure for yourself.
#5) Walking relieves stress. Seriously! Put on your favorite playlist, and go for a pleasant walk around your neighborhood or through the woods as the sun is going down. It’s a recipe to forget the worries of your day.
Bonus points if you can get someone to follow you with a boombox:
#6) Walking improves mental health (especially in older hobbits). Walking can improve mental health, increase brain size, improve memory, and is correlated with improved, longer lifespans.[2]
How Walking Can Change Your Life
If you are severely overweight and can’t run or strength train, walk on.
If you are building muscle and bulking up, walk on.
If you are trying to lose weight, walk on.
If you struggle with following a routine, or have failed in the past with weight loss, walk on.
Why? I’m a HUGE fan of small habit change and tiny victories – walking is the PERFECT habit builder. If you’re brand new and starting out, go for a walk TODAY and begin your journey to Mordor.
This afternoon, go for a five-minute walk. Tomorrow morning before work, before breakfast, as SOON as you wake up, put on your shoes, and go outside for a five-minute walk. No snoozing, no lying in bed, no checking email or Twitter. Put on your headphones, pick your favorite song, go outside, and start walking.
Here’s why:
Walking for just five minutes a day is the start of a new habit.Every morning for a few weeks, you’ll have to force yourself to walk. Initially, it will take effort and willpower to walk instead of snoozing. However, with each passing day of success, you’ll need to use less effort and willpower to get out the door. After all, it’s only five minutes, right? Once it’s something you do automatically without thinking, you can add on to it by increasing your walk time.
Walking briskly outdoors in the fresh morning air can be a great caffeine-free wake up call! If you make walking the FIRST thing you do in the morning, especially if you’re doing it before anybody else is awake, there will be zero distractions and no reason to say “sorry, I didn’t have time.” Of course, we like caffeine too (in moderation).
Walking will give you a chance to gather your thoughts and clear your head before the day begins. We’re constantly distracted at home: TV, iPads, smartphones, etc. Walking is so primal – no gadgets, just walking. Many people cite walking as the impetus for their creative or intelligent breakthroughs.
Walking and successfully building a habit will give you a habit blueprint to follow for anything else you’d like to accomplish: “Hey, I was able to make walking a habit, what else can I tackle in the same way?” Slow and steady wins. One foot in front of the other, my friend.
How to Walk Properly
“Uhhh, Steve, I know how to walk. I do it every day!”
Welp, if you’re starting from only walking from your car to the office, we need to make sure you’re walking the right way for when you push that mileage up.
Let’s start with your feet, provided you’re not gonna glue hair to your feet and go barefoot to become a hobbit.
I recommend walking in shoes that have a wide toe box and minimal drop (height at the heel vs height at the toes), as we discuss in our monster post on healthy feet and footwear:
You might not be used to walking with minimal cushioning under your heels, so walk slowly and land softly. Walking on softer surfaces to start isn’t a bad idea either.
We were designed before the invention of big clunky shoes… thus, we should be able to walk without big clunky shoes.[3] If you are interested in going barefoot as a runner, get started by walking short distances first. Your feet will toughen up (though they probably won’t grow hair quite like Frodo and Sam), your joints and muscles around your feet and ankles will strengthen, and your knees will deal with less stress.
When going for a lazy stroll, focus on landing softly, which is much easier when you don’t have thick soled shoes to cushion your stride: land softly with your heel barely touching before rolling onto the middle (ball) of your foot, and then push off. You might need to take shorter strides than you’re used to if you were a big heel striker with a long stride.
If you’re aiming to walk quickly and up the intensity, shorten your stride and aim to land in the middle of your foot while pumping your arms. This is more easily done when walking uphill (which is also a great way to burn extra calories).
Is Walking Enough for Weight Loss?
Can walking help you lose weight?
You’re darn right it can!
The above photos are from Don, one of our coaching clients. Don credits his daily walking practice with helping him lose 85 pounds!
He’s not our only example here:
Megan, who I mentioned earlier, is another client who walks daily to maintain her weight loss.
Case closed?
Of course not!
Both Don and Megan also made adjustments to their nutrition to reach their amazing results.
One of the Rules of the Nerd Fitness Rebellion is that we know “you can’t outrun your fork.” No amount of exercise can counter a bad diet, as your nutrition will be responsible for 90% (not an exaggeration) of your success or failure.
Here’s an example:
Let’s say you go for a 5-mile walk, which takes you 90+ minutes.
If you then consume a 20 oz Gatorade and a small bag of Fritos (a typical snack for many here in America), you will have already undone all of the calories burned while walking.
Depending on your nutrition and love/hatred for exercise, this is either great news or bad news!
The BAD news: you can’t eat very badly in mass quantities and then expect to lose weight with a bit of exercise every week, even if it’s strenuous.
The GOOD news: Even if you dislike exercise, you can avoid exercise and still lose weight! Instead, put ALL of your focus instead on fixing your nutrition, and then go for a walk every once in awhile.
Oh, and if you want to see if a Nerd Fitness Coach can build you a program to lose weight while doing movements you enjoy (like walking), click on the button below:
The Best Practices for Walking (Tips and Tricks)
#1) Focus on posture! Head up! Shoulders back! Walk with a confident stroll – practice this one in the morning if you’re not used to walking like this. It’s also a great way to appear instantly more confident; we nerds and hobbits need all the confidence we can get! Look around at your surroundings with your head up, arms swinging in rhythm.
You can also do some well placed neck swings and jacket removals:
#2) Walk uphill to burn more fat. If you are walking on a treadmill, set it to an incline to increase the intensity and thus increase the amount of fat burned. Just don’t be that person who sets the incline way up, then holds onto both sides and leans their body back to be perpendicular with the incline. Keep good posture, lean forward into the incline, shorten your stride, and pump your legs.
#3) Hiking is a great way to practice walking, enjoy the scenery, and play Lord of the Rings in the woods with plastic swords and capes. Not that you should do that (you totally should). Here’s a beginner’s guide to hiking!
#4) When walking downhill, especially while barefoot (or wearing minimalist shoes), keep that stride short and be careful on how you are walking. Make sure your knee is bent when you land and absorb the impact rather than jamming the impact through your heel, knee, leg, hips, and lower back.
#5) Consider going for fasted walks in the morning. When you wake up first thing in the morning, your body has burned through most of the carb-fueled energy stores during the night. Which means when you go for a walk first thing in the morning, your body is more likely to have to pull from the only fuel source available to it: fat! This is the entire philosophy behind things like Intermittent Fasting or really low-carb diets like the Ketogenic diet.
#6) Get yourself a sturdy walking stick, if only so you can use it to battle imaginary ogres, goblins, cavetrolls, etc. It can also make you feel far more adventurous than if you’re just walking, and help you get up hills and land softly when going back down.
#7)Try Temptation Bundling. Load up an audiobook or your favorite podcast, and tell yourself that you can ONLY listen to the book or podcast while walking.
Is a Fitbit Helpful for Walking? (Which Fitness Tracker Is Best for Me?)
If you’re somebody who has been interested – or is getting interested – in walking, you’re probably familiar with step-tracking devices:
Personally, I’m a huge fan of fitness wearables, but not for the reasons you’d think.
For starters, you’re wearing a constant reminder that you are prioritizing movement, which can only be positive. You can even trigger it to remind you to get up and move every hour.
It can also allow you to see how many steps you normally take, and thus allow you to prioritize moving MORE.
Although Fitbit has a history of being sued for the inaccurate heart-monitor portion of its devices, I’m less concerned about heart rates and 100% accuracy of step distance, and instead think in terms of personal improvement.
Just like with tracking your bodyfat percentage or your weight, “that which gets measured gets improved,” and that carries over to your total steps. The fact that you’re tracking it means you’re going to be more aware of it, which means you’re going to be more likely to be able to improve it.
And that’s why, in a weird way, I’m not very concerned about the total accuracy of these devices. Even if your scale is off by 5 pounds, or your body fat caliper is inaccurate by 1%, as long as you use the same device and measure in the same way under the same conditions, you can track trends and paint the picture of your health and whether or not it’s improving!
And that’s what these fitness trackers should be used for: a reminder and a trend tracker!
What you SHOULDN’T do: take your fitness tracker as gospel, and use that to calculate down to the calorie and macro how much food exactly you can consume.
What you SHOULD do: track your trend over time, and see if you can improve your average. Use the technology to aid your fitness quest. Use the community portion of the band to compare your stats against friends and get some positive friendly peer pressure to get you off your ass.
Okay, if nerdy fitness technology isn’t nerdy enough for you, let’s go full-nerd.
How to Actually Walk to Mordor
Did you know it’s 1779 miles between Hobbiton to Mount Doom? [4]. We can actually determine how far Sam and Frodo walked, and then set out on the journey ourselves! It’s one thing to go for a stroll around your neighborhood. It’s another to know that, “If I take one more step, it’ll be the farthest away from home I’ve ever been.”
So let’s take a look at how far we need to walk first:
458 miles: Go from Hobbiton to Rivendell.
462 miles: Set out with the Fellowship from Rivendell, through Moria, to Lothlorien.
389 miles: From Lothlorien, down the Anduin, to Rauros Falls.
470 miles: Follow Frodo and Sam on the quest from Rauros to Mt. Doom.
535 miles: From Minas Tirith to Isengard
693 miles: From Isengard to Rivendell.
397 miles: From Rivendell to Bag End.
467 miles: (bonus!) Follow Frodo to the Grey Havens and return home with Sam.
Following this path, you need to walk a total of 1779 miles to get from Hobbiton to Mt. Doom. Then it’s time to destroy the ring and get carried to Minas Tirith by the Great Eagles.
Then you’ll walk 1625 miles back to Bag End (and an additional 467 miles if you’re interested in doing a round trip to the Grey Havens).
Obviously, you don’t need to move at the same speed as the hobbits (18 miles on the first day is no joke! Damn, those hobbits covered some ground!), but it’s still fun to track your walks and your total miles to see where you’d be on your journey.
However, like Frodo and Sam, it starts with the first step.
I’ve created a Google Doc that you can copy for yourself to track your distances to follow Frodo and Sam on your journey to destroy the One Ring.
Here’s how to do it:
Open the document, and then click on “file,” “save a copy,” and then you can edit your own copy of the document.
Track your distances with a pedometer, Fitbit, your iPhone or Android phone.
Input your distances and work towards completing each section of the journey over months. As you input your distances, it will automatically let you know when you reach each destination so you can get you started on the next one. 5 miles a day on average will have you destroying the Ring within one year.
Oh, and if you’re curious, according to my rough gorilla math, Frodo burned at least an additional 61,0000+ calories (100,000+ gross calories) by walking “there and back again” – you’re welcome[5].
What’s that?
You want some help getting out the door?
You got it – but only cause you asked nicely.
Here are three ways to level up alongside Nerd Fitness.
#1) Our Online Coaching Program: a coaching program for busy people to help them make better food choices, stay accountable, and get healthier, permanently.
You can schedule a free call with our team so we can get to know you and see if our coaching program is right for you. Just click on the image below for more details:
#2) If you want an exact roadmap on how to get in shape, check out NF Journey. Our fun habit-building app helps you exercise more frequently, eat healthier, and level up your life (literally).
We even have fun missions that will help you walk more, all while you earn XP! Righteous.
Try your free trial right here:
#3) Join the Rebellion! We need good people like you in our community, the Nerd Fitness Rebellion.
Sign up in the box below to enlist and get our Rebel Starter Kit, which includes all of our “work out at home” guides, the Nerd Fitness Diet Cheat Sheet, and much more!
Get your Nerd Fitness Starter Kit
The 15 mistakes you don’t want to make.
Full guide to the most effective diet and why it works.
Complete and track your first workout today, no gym required.
Alright, your turn:
What questions do you have about walking?
How have you incorporated it into your daily routine?
You’re probably wondering about the math on this one. I followed this thread down a rabbit hole and estimated a hobbit at 3.5 feet tall would weigh 60 pounds. I then put that into the calculator to determine calories walked. Again – this is just an estimation, and probably could be even more accurate if we had the topography of middle earth to determine elevation climbed too! Feel free to get me more accurate numbers in the comments and I’ll update this!
Fasten your seatbelt, because today we’re going to highlight a truly amazing nerd in the Rebellion.
Meet Megan, a member of Nerd Fitness Coaching who is currently celebrating losing over 200 pounds!
(That’s not a typo.)
Megan’s journey is so amazing that the Today Show recently spotlighted her!
My favorite part of Megan’s story?
She decided to stop letting the scale define her!
Megan actually went and smashed her scale in one of those rage rooms:
Epic.
Instead of stressing about the scale, Megan now focuses her goals on athletic performance, like doing chin-ups and running 5Ks.
How cool is that!?!
So without further ado, let’s dig into Megan’s jaw-dropping transformation.
The 6 Keys to Megan’s Success
#1) Megan Found Her “Big Why”
When you ask Megan why she began her most recent weight loss attempt, she responds quickly with “my children.”
“Being a parent at 350 pounds, there’s so much that I couldn’t do:
Climbing stairs.
Going for a walk.
Taking a trip to the amusement park.
I knew I wanted to make changes so I could be a part of their life. When I have days where motivation is tricky, I think of them.”
Takeaway: Here in the Rebellion, we often recommended the first step of any fitness journey be “determine your Big Why.”
We should ask ourselves, why am I doing this?
Knowing the answer will help when our journey gets difficult (and inevitable it will).
On these challenging days, we can remind ourselves:
I’m doing this to lower my blood pressure.
I’m doing this so I can hike with my friends.
I’m doing this so I can spend time with my children.
Once we have our Big Why, it’s important to write it down. Then we should try and place it somewhere we’ll see often, like a desk or bathroom mirror.
The “Why am I doing this?” reminder can be helpful for the journey ahead.
#2) Megan Started Making “Small Changes”
This wasn’t Megan’s first attempt to get in shape (“I had tried for YEARS!”).
So after many frustrating starts, she decided to switch things up.
“I had made the typical New Year’s resolution to lose weight, but this time I knew I had to approach it differently because nothing had worked in the past.
So I said, I don’t care how long it’s going to take, I’m going to go slow. I’ll make one small change at a time and not burn myself out.
When thinking about what to prioritize, I had read that losing weight is 80% about nutrition, so I made that 100% of my focus.
I didn’t try to add exercise right away. I knew that every time I tried to do too many changes at once, it was too much to sustain long-term.
But one small change (like switching from orange juice to water in the morning, or eating pasta as a meal to eating pasta as a side dish) led to others. Once I started to see results, I was addicted!
Adding small changes over time created a snowball effect. The steady momentum had been missing every other time I attempted to lose weight.”
Takeaway: We always advise Rebels who want to get in shape to start small.
Time and time again, we’ve found this is the pace that prevents burnout.
Plus, once we start to see these small changes produce results, we’ll want to make more!
This is how we gain momentum for the long haul.
#3) Megan Asked for Help
Megan started her weight loss journey all by herself (which is crazy impressive). But after a while, she knew she needed help to keep progressing.
“All the changes I had made over time had led to some very restrictive ways of eating. Eventually, I realized I had eliminated whole food groups from my diet (I was even nervous about eating bananas).
I had been dieting for what felt like forever (15 months), and I was burnt out. I was unsure what to do next to transition from a weight loss journey to a maintenance journey.
This coupled with everything I read about losing weight very quickly, and the statistics around re-gain, made me realize that it was time to get help. Over a year of dieting left me smaller yes, but also weaker and feeling trapped in a way of eating that no longer felt sustainable to my current life.
That’s when I decided to hire a coach.”
Takeaway: It’s truly insane that Megan was able to lose over 100 pounds, only using information she found on the internet.
But it’s also amazing that Megan understood that she had exhausted her solo journey – that it was time to ask for help.
This is okay!
Our fitness journeys will change.
Sometimes, it takes an expert to explain what we should do next. Occasionally, only an outside pair of eyes can see the path forward.
#4) Megan Decided to Get Strong
“My coach helped me switch away from a scale-focused mentality. Instead of thinking of body size, I started to think about what my body can do.
My coach asked, what do I want to accomplish?
So we started planning goals around:
Running a 5K (which I did with the Rebellion with the Nerd Fitness 5K!)
Completing my first Chin-up (which I also did as part of a NF Group Challenge!)
Deadlifting my entire weight
All of these things I never dreamed of when I was 350lbs…I just wanted to walk up a flight of stairs without being out of breath.”
Takeaway: I’m so happy that Megan transitioned from “wanting to be small to wanting to be strong.”
This really is the secret to long-term weight loss success. Every single client we’ve had who successfully lost significant weight (and kept it off) started some type of strength training.
Yep, resistance training can actually help us stay lean!
How should we go about it?
Any way we can!
Sure, we could go to the gym and start playing with barbells.
Just remember, when in doubt, attempt to grow strong.
#5) Megan Kept Moving (Even After Her Surgery)
After losing so much weight, Megan decided to remove some excess skin with surgery.
The problem: this would mean Megan would have to stop her weight training while she recovered.
However, her doctor said she could walk instead, explaining she could stroll “as far as you can.”
“Challenge accepted,” Megan told herself.
“My friend Karen comes over and we go for walks together. It’s such a release being out in nature, plus I’m still challenging myself with nearby hills. We hold each other accountable, even on days that neither of us feels so great.
Over time, I’ve gone up to 10, 15 miles a day.”
Takeaway: Things will happen and our training will have to adapt:
Maybe we’ll have to deal with an injury and pause heavy lifting.
Maybe our gym will shut down.
Or maybe we’ll have to deal with surgeries.
When these cases arise, we should still attempt to move, whatever way our body allows.
That’s how we continue to maintain momentum.
#6) Megan Joined a Community
“When I joined NF Coaching, I knew I was getting a coach. But I didn’t know I was getting a community.”
The energy around the Group Challenges is simply contagious and it’s gotten me out of my comfort zone to try things that I may not otherwise have attempted.
The support of the community, knowing there’s an amazing group of people going through similar things as I am, has really helped on the days I’m struggling.
Takeaway: Well that just warms my heart.
Small Changes Can Lead to Incredible Feats
I asked Megan what advice she would give to somebody who had a lot of weight to lose.
She replied:
Wise and beautiful words.
I’m so proud of everything Megan has accomplished and honored that she trusted Nerd Fitness Coaching to propel her journey.
As she explained to me, “I can say with absolute certainty that I wouldn’t be in the place I am without the coaching program. I have learned so much about what my body is capable of and how to continue to challenge it through this process.”
If you think you’re in a place where NF Coaching can help you too, we’d be thrilled to talk together.
You can schedule a call to see if we’re right for each other right here:
Not interested?
No problem.
If you decide not to try coaching, I’ll still be here offering free guides and corny jokes to help you level up your life.
Remember, Megan lost over 100 pounds all from material she pulled online!
While a coach can be super helpful when you have a lot of weight to lose, don’t let the absence of one prevent you from taking your first step.
You just have to start small, like Megan did.
-Steve
PS: Megan’s “Big Why” started with her children and they’ve leveled up right alongside her!
Megan told me:
“For me, the biggest change has been a mental one.
Transitioning from wanting to be small to wanting to be strong. And it has been such a joy to see my children pick up these habits and want to be strong with me.
Sometimes when we’re on a walk together and I’m feeling tired, my 8-year-old daughter will say ‘you can do this mom, we are strong women’ and I just smile because yes, yes we are.”
OMG, that’s cool AF!
What an amazing family:
PPS: If you want to follow along with Megan’s adventures, make sure you check out her Instagram!
So you want to learn about the best core exercises?
Well my friend, you’ve arrived at the right place!
We help men, women, and intergalactic bounty hunters grow strong as part of our 1-on-1 Online Coaching Program, and we always put an emphasis on core muscles when we build client workouts.
Here’s what we’ll cover to answer the question, “What are the best core exercises?”
You use your core muscles for just about everything:
Getting out of bed in the morning? Not without a sturdy core.
Pushing a grocery store cart across the parking lot? Your core will make that happen.
Fighting off ninjas who just discovered your secret identity? Karate kicks require a strong core.
You get the gist.
So what exactly do we mean when we say “core”?
Contrary to popular belief, your core isn’t just your abs.
Some of the muscles found in your core include:
Erector spinae: this is the muscle around your spine and helps you stand up straight.
Rector abdominis: better known as your “abs.”
Obliques: these are found on the sides of your torso and help you twist (and shout).
Gluteal muscles: also known as your “glutes” or “butt” or “bum” or “ass” or – okay, you get the point – which connects your legs to your core.
You might also hear your core referred to as your “trunk.” Same thing.
The core muscles really are the foundation of the human body. And much like building a house, when it comes to fitness, you need to start with a strong foundation.
This is why we focus on building a strong core with each of our coaching clients.
What Are the Best Core Exercises for Beginners? How Can I Strengthen My Core at Home?
If you’re just starting your fitness journey, we won’t make you jump into the deep end quite yet.
Here are the Best Core Exercises for Beginners:
#1) Plank
Your entire core is engaged in a plank, as you stabilize yourself in a straight line (don’t sink)!
If you can’t quite support yourself into a full plank, have no fear, you can start with…
#2) Knee Plank
Just like a regular plank, but you have your knees for support. Start with these until you can do the real thing.
#3) Hip Bridge
The hip bridge will activate the glutes and the rest of your core as you bring your body up.
#4) The Hollow Body Hold
The hollow body is one of the best ways to engage the midsection and stabilize the body. We utilize the hollow body exercise as part of our strategy for getting your first handstand.
Once you get comfortable holding the position, try…
#5) The Hollow Body Rocking
These 5 exercises will go a long way towards developing serious core strength.
“Steve, these moves are easy peezy. What are some advanced core exercises?”
I thought you’d never ask.
The 5 Best Core Exercises
Now the real fun starts.
Here are The 5 Best Core Exercises:
#1) Squats
Squats? Yes, squats.
Squats train just about every muscle in your core (and lower body). Your core is engaged as you stabilize yourself up and down. If you don’t currently train with squats, start with a simple assisted bodyweight squat:
We’re big fans of the deadlift around these parts. Not only is it a core exercise, but it’s really an EVERYTHING exercise (lower body, core, and upper body).
Yes, pull-ups are an upper-body exercise. But you’ll engage your core as you hoist yourself up. The more you keep your body in control (don’t flail about as you go up and down), the more you’ll train your core.
Depending on your age, weight, sex, and genetic makeup, your body will lose fat in a certain order, from certain parts of your body, that you can’t control.
Here are some things to consider:
Everybody has abdominal muscles. Yep, even you! They might be tiny, or weak, but everybody has 6-pack abs. They might just be hidden under a layer of fat. No judgment, just reality.
Fat does NOT turn into muscle – they are two different things. Like oil and water, fat sits on top of muscle. You could have ridiculously strong abs ready to pop out, but if they are buried under a lot of fat, no amount of exercise will give you a flat stomach or make those abs pop, because it doesn’t address the fat on top of your muscles.
A flat stomach only appears when you have a low enough bodyfat percentage.The reason there are 1,000,000,000 ab workouts on YouTube is that people know there’s BIG money in the ab-industry for people desperate to get a flat stomach! And ab exercises are much easier to market as exciting than “eat better, get strong, move more, for a long long time.”
So if you want a flat stomach or six-pack abs, we need to create a plan for sustainable weight loss.
I know, WAY EASIER SAID THAN DONE.
Have no fear, I have a couple of resources for you:
How to Lose Weight Without Dieting (The 5 Rules of Weight Loss): you’ve probably been on a diet before. You might even be on a diet right now. We discuss why they generally don’t work (temporary changes create temporary results) and provide a less conventional but more permanent solution (tiny changes for the win).
That will help you build a practice to grow strong.
Don’t get startled by my comment that you should train “two to three times a week.” If you can only do a full-body workout once a week, that’s WAY BETTER than none a week.
Once you get the practice going, we can always work to increase the frequency later.
The most important thing you can do today is start:
Want a little help getting going? The perfect next step on what you should do now?
No problemo!
Here are 3 options on how to continue with Nerd Fitness:
Option #1) If you want step-by-step guidance on how to lose weight, eat better, and get stronger, check out our killer 1-on-1 coaching program:
Option #2) If you want an exact roadmap for getting fit, check out NF Journey. Our fun habit-building app helps you exercise more frequently, eat healthier, and level up your life (literally).
Plus, we have Missions specifically designed to help you achieve a strong core.
Try your free trial right here:
Option #3) Join the Rebellion! We need good people like you in our community, the Nerd Fitness Rebellion.
Sign-up below and receive our free guide Strength Training 101: Everything You Need to Know. It includes step-by-step instructions for the Best Core Exercises covered in today’s guide.
Download our comprehensive guideSTRENGTH TRAINING 101!
Everything you need to know about getting strong.
Workout routines for bodyweight AND weight training.
How to find the right gym and train properly in one.
Alright, enough from me. Your turn:
Do you agree with my list of the best core exercises?
Do you think I’m missing any?
Am I completely off base on my position on sit-ups?
Let me know in the comments!
-Steve
PS: Many of the exercises covered today came from our post “The 42 Best Bodyweight Exercises.” Give it a read if you’d like to start training without a gym!
If one thing’s true about parenting it’s this: it’s bloody tiring.
Any parent will tell you that as soon as Player 2 or 3 enters the game, the sleep level difficulty instantly shifts from ‘tutorial’ to ‘expert’.
But have no fear, we’ll set you up with some tips to help you regain a little energy.
Many folks in our Online Coaching Program are parents (as well as the coaches themselves!) so we have all sorts of advice on how to stay energized with kids around.
If you and your partner really feel burnt out (or you’re a single parent and you’re struggling), I have one big message for you:
Ask for help.
Let go of the feeling that asking for help is some epic inconvenience or that you’ll no longer be this self-sufficient superhero. Even Batman needs Robin. Asking partners, family, or friends to take your little one out for a walk or just keep an eye on them while you have a moment’s rest can be the difference between getting through a week with energy and struggling to the end of a week feeling exhausted.
If you’re lucky enough to have a partner or someone who can help out, try taking turns settling or feeding overnight, and work with what best fits your sleep type.
Couples, talk to each other! So many parents I’ve worked with have been struggling for so long because they simply haven’t spoken with their partners about their needs.
Feel like you’re a night person and you’re always exhausted when you feed the baby in the morning? A short conversation could really make a huge impact: “I think I’d be better off putting the baby to bed and feeding at night if you can do the morning feed and let me sleep until 7. What do you think?”
Figure out what you both want, try a few things out, and come to an agreement on what works best for both of you.
My wife and I found a way to take advantage of my ‘night owl’ tendencies by expressing the milk beforehand (and storing it safely). I stayed up late like normal, allowing my wife to go to bed early, and I covered the 2 am feed.
Even if you don’t have kids, this is a great strategy for couples or roommates to divide responsibilities.
What responsibilities and chores can you divide to work to your advantage, allowing you to rest when you need it?
Do less, be better
At the end of the day, you can’t do it all. Most days I go about doing everything I can, pretending I’m a Superman…
…but in the end, we’re all just Clark Kent. If we’re feeling like we’ve been exposed to Kryptonite, we won’t be able to effectively look after our little ones or get the things done that need doing.
Sometimes our expectations of ourselves are simply too high; we make a list of things to do that is unrealistic. As parents especially, but also for anyone who feels like they “just never have time”, making hard choices and prioritizing what’s important can help take the pressure off while improving your overall output.
We all like to think that we can play with the kids, get them dressed, go to work, cook an amazing dinner, clean the house, get the ironing done, put the kids to sleep, go to the gym, and play ‘just 15 minutes’ of our favorite video game in between everything else going on in our lives. But as parents and busy people of all varieties, we need to accept that our lives are different now, and we need to let go of certain things that might not be as important anymore.
Try picking a few things out of your week to stop doing so you can focus on what’s really important to you. It may feel weird at first, but you’ll be able to focus on the big wins and accept that you’re not going to be able to fit EVERYTHING from your old schedule into your new life.
Move More
“But I’m already so tired, and you expect me to move more?!”
I know it’s a really tough ask. But it’s been shown that physical activity can actually increase your energy levels, make you feel better, and even increase the quality of the little sleep that you do get.
As parents, we’re usually short on time, so the easiest way to get moving more is to sneak light exercise into everyday activities. This could be a walk with your child to somewhere nearby that you would usually drive to, rolling around on the floor with them, or some roughhousing.
For non-parents and parents alike, try to complete some smaller “move more” quests like taking the stairs instead of the elevator, walking the long way, or dancing in your house when you’re just hanging out or cooking a meal.
Movement really matters. Think of this like a small investment in your day – you pay in a little movement upfront, but you’ll start to notice that these tweaks will pay dividends in your energy and mood. It’s amazing how these small movements add up to not only help you get through the day, but in turn help you sleep better and set you up for success the next day. It’s a cycle of awesome!
“Wait, so a fitness site is telling me to eat better and move more? Interesting.”
Yes, I know you’ve heard it all before, but this isn’t just cliche advice. It’s crucially important, research-backed advice. Eating healthy and moving more isn’t just a physical fitness thing, it’s about keeping your brain working at full capacity and your energy levels up.
Once you become a parent, there will be changes in your lifestyle, daily routine, social values, and spending power. This makes the temptation of unhealthy snacks and cheap fast-food that much more appealing: it’s cheap, it’s easy, and it tastes great it’s designed to manipulate your taste buds and hit the perfect bliss point.
But as we all know by now, this is a recipe for a downward spiral of energy, mood, and health. Eating the right amount of calories and the right types of food is the foundation for feeling great every day.
Regular healthy snacks can be important as a parent, especially if you’re throwing off your body’s clock by being awake at all hours of the night. A small hit of fat or protein to the system will really help you work up the motivation to take the baby for a walk, wash those bottles, or spend some time on the floor with your little one. Don’t be afraid to keep a jar of almond butter nearby!
The sooner you actually think about your sleep and establish a bedtime routine, the better. Your baby will be more relaxed if they know what’s coming next. It’s been shown that with a routine, your kids will be more likely to go to bed easily, fall asleep quicker, and even improve their wakeful state afterward as well!
But establishing a sleep routine is great for parents (and other adults) too, as it gives you time to wind down, and makes your day a little more predictable. Studies show understanding sleep routines may help in making choices that will lead to better quality sleep. Once you start to fall into a good routine, you’ll be able to know when you can get things done around your little Rebel’s slumber, and maybe even get some extra shuteye yourself.
So, if you don’t have a sleep routine, it’s time to implement one starting now. I suggest working it around when your child naturally sleeps best. Don’t swim upstream if you don’t have to.
A good way of going about this is to track your child’s sleep pattern for at least a week so you can really recognize any patterns. I’ve even compiled the official ‘Nerd Fitness Child Sleep Diary’ (or the Tired Parent Syndrome (TPS) Report) for you to print out and keep records in. Just open the document and go to file –> “Make a copy.”
Start establishing a routine by giving your child a bath, bedtime story, feed, and a lullaby…maybe using an ocarina!
Stick to the same time and order each night and your child will be more settled as time goes on.
Once you’ve figured out and established your routine, try to rest around the time your child is resting. I know not everybody has this luxury, but if possible, try to lay down, relax, meditate or even have a power nap during their day sleeps.
Level Up Your Sleep Game
When you become a parent, chances are you’ll be sleeping like a baby for a few years, even if you don’t get a lot of shut-eye. (Whoever coined that phrase obviously never had kids.) You’ll likely be waking up really grumpy every few hours and taking a long time to settle back down.
Let’s be realistic here: you’re more than likely not going to get as much sleep as you need, and you’re going to feel tired more often than not. Recognizing this, knowing your limitations, and knowing how to optimize your energy levels is the key to staying on top of your game.
Here are a few bonus tips to ensure you’re getting the best rest you can:
Follow good sleep hygiene rules – limit media use in the bedroom and have time to wind down. If you don’t get much sleep time anymore, you should make sure the little shuteye you get is good quality.
Limit your consumption of caffeine and alcohol for the hours leading up to bedtime – they can lead to poor sleep. If you do drink caffeine (most parents need to), use it wisely. See Taylor’s article for ways to go about this.
Do some stress-busting things like yoga and meditation as often as you can. As mentioned, your child will pick up on and react to your mood, so being calm is always a good thing.
If you feel the lack of sleep is really taking its toll on yourself or your child, seek professional advice as soon as you can. (My wife and I saw a specialized child sleep psychologist with our second child as he was constantly waking throughout the night, which made a world of difference.)
Your priorities change once you have children. You want what’s best for them and to be the best parent you can be. This means you must be rested, calm and healthy. An investment in you is an investment in them. Looking after yourself is paramount in caring for your child; they deserve nothing less.
So get started. Tonight, have a roll around on the floor with your child. The ironing can wait and the Reddit frontpage will still be full of reposts later on. Start figuring out your routine with our official Tired Parent Syndrome Report (yeah, if you can get those TPS reports done as soon as possible, that would be great). Talk to your partner about your schedules, or set up a time for a loved one to come lend a hand this week so you can get in a power nap or exercise.
To parent best, rest.
If you want some more help, Nerd Fitness is here for you.
We have three options on how to continue with us. Pick the option that best aligns with your goals:
Option #1) If you want a professional coach in your pocket, who can do video form checks, provide feedback, and adjust your workouts based on the equipment you have available, check out our 1-on-1 Online Coaching Program!
As I said earlier, many of our clients are parents, and they find a customized plan for their hectic lives to be a total gamechanger.
Option #2) If you want a daily prompt for getting in shape, check out NF Journey. Our fun habit-building app helps you exercise more frequently, eat healthier, and level up your life (literally).
Try your free trial right here:
Option #3) Become part of the Rebellion! We need good people like you in our community, the Nerd Fitness Rebellion.
Sign up in the box below to enlist and get our Rebel Starter Kit, which includes all of our “work out from home” guides.
Get your Nerd Fitness Starter Kit
The 15 mistakes you don’t want to make.
Full guide to the most effective diet and why it works.
Complete and track your first workout today, no gym required.
Now, it’s your turn.
I love hearing from other Rebel parents, I’m always willing to try new ideas:
There’s one question we get asked more than any other: “Is diet soda bad for me?”
People want to know if Diet Coke will make them fat and make them sick, or if it’s all just a bunch of hoopla about nothing.
We help our clients navigate challenges with soda (diet or not) in our 1-on-1 Online Coaching Program, and we’re gonna tell you everything you need about diet soda below.
It would be super evil if it did, what with the whole “diet” thing and all.
Diet sodas utilize “high-intensity sweeteners” which is a fancy term for very-low-calorie (or zero-calorie) sugar substitutes:
Acesulfame Potassium
Advantame
Aspartame
Monk Fruit Extract
Neotame
Saccharin
Sucralose
Stevia
The FDA has approved these eight high-intensity sweeteners for human consumption.[2] You’ll find them in all sorts of food products, not just diet drinks.
Because high-intensity sweeteners are many times sweeter than table sugar, you can make a drink taste “sweet” without including any sugar at all.
Most important, without the sugar, you’re skipping out on all the calories that come with it.
Weight loss depends on consuming fewer calories than you burn, so drinking Diet Coke compared to regular Coke can help tip the equation in favor of “weight loss.”
12 oz Diet Coke total calorie count: 0
12 oz Coca-Cola total calorie count: 150
If you’re trying to lose weight, but love fizzy carbonated and caffeinated beverages, the soda with fewer calories seems like a no-brainer.
“Steve, hold the phone here! Are you saying Diet Coke is okay to drink? I thought the sweeteners and chemicals in it were sketchy!?!”
The concern of drinking diet soda generally rests on three points:
Drinking diet soda will make you crave real sugar.
Your body processes high-intensity sweeteners just like actual sugar.
Artificial sweeteners (like aspartame) can make you sick or cause cancer.
We’ll hit each of these points with its own section below.
Before we continue, I need to make a strong caveat: most studies on diet soda treat all high-intensity sweeteners as one.[3] This is concerning considering there are eight approved high-intensity sweeteners in use.
Does your body process all eight the same?
Some early studies on various sweeteners do show our bodies process them differently.[4]
More studies are being done on individual high-intensity sweeteners as we speak, so expect new information on the subject to unfold.
For now…
Will Drinking Diet Soda Make Me Crave Actual Sugar?
If you eat a bunch of sugary and sweet food regularly, your body can start to crave more of it.[5]
In other words, consistently eating sugary foods in the afternoon can result in an urge for sweets after lunch.
These cravings can make it difficult to turn down the bowl of M&M’s as you pass Debra’s desk (She’s even got the peanut kind!).
The question becomes, do the high-intensity sweeteners found in diet soda make us crave sugary foods?
The research on this isn’t clear:
Studies done on rats have shown a positive correlation between high-intensity sweeteners and sugar cravings.[6]
A 2019 meta-analysis found two studies where aspartame was added directly to the diets of humans. The result? Those who consumed the high-intensity sweeteners found their sugar craving to be LOWER.[7]
There might be something to the thought that drinking a Diet Coke can help satisfy the sugar craving.
Anecdotally, many of our coaching clients claim that grabbing a diet soda helps them from drinking the regular sugar-filled version. This can be really important, because “cravings” are one of the top issues facing most of our clients.
Which is why we work closely to identify possible food addictions in our 1-on-1 Online Coaching Program, so we can start to work through them together. Our strategy is to take it slow, to make small changes to alter these cravings. Over time, this is the best way to see real progress.
If you’d like to learn how we can help battle sugar cravings, click below:
Does My Body Process Artificial Sweeteners Just like Sugar?
Another concern of drinking diet soda rests on the idea that your body processes high-intensity sweeteners as it would normal sugar.
The argument states that these sweeteners are so sweet that they fool your body into thinking it’s consuming actual sugar.
After drinking diet soda, your body responds as it would after consuming normal table sugar: by dumping out insulin. This slows down the fat-burning process.
That’s the gist of it, more or less.
Is it true?
Do high-intensity sweeteners trick our bodies into releasing hormones (insulin)?
Again, the studies on this are mixed:
The high-intensity sweeteners sucralose and saccharin were both shown to provide a small insulin response in men.[8]
Aspartame does not appear to elicit the same hormone response.[9]
Verdict?
This isn’t a HUGE deal. Of all the things to worry about with regards to weight loss or getting healthy, this doesn’t hold the top spot on the list.
While hormones do play a role in weight loss, the main determining factor will always be an energy balance (calories in vs. calories out).
Since most diet sodas have next to zero calories, I’d say the insulin response of high-intensity sweeteners isn’t that important for your weight loss journey.
Can Drinking Diet Soda Cause Cancer? (Is Aspartame or Saccharin Dangerous?)
The other concern people have about diet soda is that it will cause cancer and kill them and everyone they know.
A little hyperbolic perhaps, but…
Should we be worried about the ingredients of diet soda causing us harm?
Some history is in order:
In the 70s a high-intensity sweetener(saccharin) was shown to give rats cancer.[10] People flipped out and actually banned saccharin in America, although it’s since been reintroduced.
Why the reintroduction?
Because no cancer link has ever been shown for the human consumption of saccharin. And folks have looked.[11] A lot.[12]
Not everything that is cancerous to rats is harmful to people, and vice versa.
Plus, you would have to drink 800 cans of diet soda to get to the levels of saccharin given to the rats in the study.
Even an all-night binge of Call of Duty would only put a small fraction of a dent in that.
How about aspartame or any of these other high-intensity sweeteners…
Are they sketchy?
Earlier I stated the FDA, the United States’ regulation agency, approved eight high-intensity sweeteners.
They aren’t the only agency that has done so. Australia, the EU, Japan, and Canada have all reviewed and approved these sweeteners.[13] They did so after a thorough investigation.
So it’s safe to say that high-intensity sweeteners are okay to be used in a reasonable amount.
This brings up the question…
How Many Diet Sodas Can I Have in a Day?
While the sweeteners in diet soda have been approved safe for human consumption, there is a limit to this approval.[14]But I won’t make you pore over charts and do the math…I’ll do that for you.
What’s the number of 12-ounce diet sodas deemed safe in a day?
18.
Which is A LOT of diet soda.
However, it should be noted that diet soda is not the only place high-intensity sweeteners are found.
Many other food products utilize these sweeteners to cut back on sugar and calories. So keep an eye on protein bars, yogurts, baked goods, etc, for hidden high-intensity sweeteners.
There’s about half the caffeine in Diet Coke versus a regular cup of coffee, which is still a decent amount.
If you have trouble sleeping at night, consider how late in the day you’re having your last can of soda. Perhaps install a 2pm “caffeine cutoff” if you find yourself tossing and turning at night.
Another problem with diet soda: most of them contain exactly zero nutrients. It’s water, some kind of sweetener (sugar or not), flavoring, coloring, and carbonation.
Drinks like coffee and tea actually have some antioxidants present, so you might be getting some benefits with these caffeinated drinks.[16]
If you find yourself drinking lots of diet soda, consider mixing in some coffee or tea as a partial replacement.
Sparkling water might help with the switch too, if you love those fizzy bubbles.
At this point, we should note that stopping diet soda consumption might be easier said than done.
Can You Be Addicted to Diet Soda?
Anecdotally, it does appear that drinking diet soda can be “habit forming” for some people.
CNN explored the issue and found numerous people who consumed more than a six-pack daily, “easy.”[17]
“Addiction” is a word that gets thrown around too much these days, so I’ll stop short of making a medical classification on these folks. Plus, I searched the scientific literature and couldn’t find any studies on diet soda addiction.
However, if you stockpile Diet Coke like it’ll be currency in the post-zombie world, you’re not alone.
This “addiction” makes sense considering the beverage was designed to hijack your brain’s reward system.
The Coca-Cola Company hires folks to find the perfect combination of:
Carbonation. The bubbles actually burn your tongue a little, which provides a pleasurable experience. Kind of like a good hot sauce.
Sweeteners. Sure, it isn’t sugar, but your brain likes them just the same.
Caffeine. The jolt from caffeine will provide you a boost and raise your dopamine levels. The brain likes this.
Flavor. After drinking Diet Coke for some time, your brain will start to associate the flavors with carbonation, sweeteners, and caffeine. Which will make you start craving the flavor of Diet Coke. This is probably part of the reason people become brand loyal to particular diet beverages.
How do you know if you have an addiction? If you find yourself approaching our 18 can a day safety limit, that’s definitely a sign.
Another would be if you find diet soda interfering with your life (not sleeping after drinking Diet Coke all evening).
You don’t have to go cold turkey on this one:
If you normally drink six cans of diet soda a day, try five.
After a month or so of this, try four.
This is the exact strategy we follow with our 1-on-1 Online Coaching clients, and it’s the most likely to succeed.
Small changes over time are the ticket to permanent success.
Is Diet Coke Worse for You Than Regular Coke?
Before you use this article as justification to start drinking a six-pack of Diet Coke a day, let’s talk about some other possible concerns.
We’ve talked about all the mechanisms in diet soda that can make it unhealthy (high-intensity sweeteners, caffeine, etc). My conclusion is that these factors are likely overblown.
However, we should acknowledge that drinking diet soda can often be linked to health issues:
Despite diet sodas containing low to zero calories, drinking them is correlated with obesity.[18] Is this just because people who are overweight are more likely to consume a “diet” drink? We don’t know.
Diet soda consumption has been associated with kidney disease.[19] Is this because of the high phosphorus content of diet soda, or because people who drink soda likely have a poorer diet than those who don’t? This has still yet to be answered.
Soda, even the diet version, isn’t great for your teeth.[20] Diet sodas are acidic, leading to the erosion of tooth enamel. Although to be fair, this study found the acids in orange juice more corrosive than Diet Coke.[21]
There’s an important point here: drinking regular soda is also linked to kidney disease, teeth erosion, and obesity. Even more so those last two points (because of all the sugar and calories).[22]
So the concerns of drinking diet soda would also be found in drinking regular soda…even more so.
Drinking Diet Coke may be the lesser of two evils here.
Is Drinking Diet Soda Bad for Weight Loss? (Next Steps)
If you’re starting your weight loss journey and wondering where diet soda fits into the picture, I want you to know I’m proud of you.
You’re starting to ask questions and you’re looking for answers. This is a great first step.
If you’re trying to lose weight and currently drinking regular soda, the switch to diet would be a good move.
You’re gonna consume fewer calories that way, critical for weight loss.
This is why one of our top recommendations to our coaching clients is to cut back on sugary drinks.
However, if you currently drink diet soda and are trying to lose weight, there might be some better targets to shoot for:
These are far more important than an occasional Diet Coke here and there.
If you find yourself firing on all cylinders (you eat well, you strength train, you get lots of sleep), then maybe consider replacing diet soda with tea, coffee, or carbonated water. There are enough unanswered questions on consuming diet soda to warrant the switch.
The most important thing you can do now? Commit to a change:
Pick something you can track. Something with a clear “yes or no” that you can reflect on at the end of the day.
This will help you start your weight loss journey.
Want some help getting going? A little nudge out the door?
Okay, but only because you’ve been nice this whole time:
#1) Our 1-on-1 Online Coaching Program: a coaching program for busy people to help them make better food choices, stay accountable, and get healthier, permanently.
You can schedule a free call with our team so we can get to know you and see if our coaching program is right for you. Just click on the image below for more details:
#2) If you want an exact blueprint leveling up your nutrition, check out Nerd Fitness Journey! Our fun habit-building app helps you exercise more frequently, eat healthier, and level up your life (literally).
It’ll also provide a step-by-step plan from moving away from regular sodar, perhaps to a diet version or even tea.
Try your free trial right here:
#3) Join The Rebellion! We have a free email newsletter that we send out twice per week, full of tips and tricks to help you get healthy, get strong, and have fun doing so.
I’ll also send you tons of free guides that you can use to start leveling up your life too:
Download our free weight loss guide
THE NERD FITNESS DIET: 10 Levels to Change Your Life
Follow our 10-level nutrition system at your own pace
What you need to know about weight loss and healthy eating
3 Simple rules we follow every day to stay on target
Alright, I think that just about does it for me.
Now, your turn!
What are your experiences with diet soda?
Did you use them as a tool to help you lose weight?
Or did you struggle with weight loss until finally dropping diet soda out of your daily consumption as well?
Share your story in the comments!
-Steve
PS –
Check out the rest of our sustainable weight loss content:
Such as this meta-analysis: “Association between intake of non-sugar sweeteners and health outcomes.” Source, PubMed.
Read, “A randomized controlled trial contrasting the effects of 4 low-calorie sweeteners and sucrose on body weight in adults with overweight or obesity.” Source, PubMed.
Read, “Behavioral sensitization of the reinforcing value of food: What food and drugs have in common.” Source, PubMed.
Read, “Gain weight by “going diet?” Artificial sweeteners and the neurobiology of sugar cravings.” Source, PubMed.
Read, “Association between intake of non-sugar sweeteners and health outcomes: systematic review and meta-analyses of randomised and non-randomised controlled trials and observational studies.” Source, PubMed.
Read “The Cephalic Phase Insulin Response to Nutritive and Low-Calorie Sweeteners in Solid and Beverage Form.” Source, PubMed.
Read “The role of taste in cephalic phase of insulin secretion.” Source, PubMed.
Read, “Carcinogenicity of saccharin.” Source, PubMed.
Read, “Diet Soda Consumption and Risk of Incident End Stage Renal Disease.” Source, PubMed.
Read, “Effect of a Common Diet and Regular Beverage on Enamel Erosion in Various Temperatures: An In-Vitro Study.” Source, PubMed. Coca-Cola themselves also state that their diet drinks will erode your teeth.
Read, “Influence of Various Acidic Beverages on Tooth Erosion.” Source, PubMed.
There are a lot of excellent reasons to take up riding bikes:
It’s a great and healthy way to move from point A to point B.
It’s free – no gas to put in, no parking spaces to pay for.
It’s low impact on your body. There are no jarring-impact moments like with running.
It’s a great place to start with exercise. Sit on bike. Pedal. Done.
It’s fun!
Cycling has a magical ability to be whatever the rider wants it to be.
Fun, challenging, scary, romantic, social, silly… you name it and there’s a type of cycling for it. You can even change what type you are doing to suit your mood on any given day, which is why most avid cyclists end up with several different bikes.
Some Rebels in the NF Coaching Program have even used cycling as a tool to help them get in shape, as demonstrated by Kyle here:
The world can use more cyclists, so I’m stoked you’re interested in getting started.
The 6 Different Types of Cyclists
Let’s spend a few minutes thinking about what type of rider you’d like to be.
The below list is not mutually exclusive, mind you. You can flip back and forth, contradict yourself, or mix and match them to suit your own needs.
#1) Mountain Biker
No one loves the outdoors as much as these guys do. If you’d rather ditch the pavement for a trail, mountain biking may be for you.
#2) Roadie
As the name would suggest, these riders are going to be found pedaling down your street. They often wear bright colors to make them easily seen by commuters. If you go this route, you can pretend like you have a sweet superhero costume to wear!
You can take this idea too far.
#3) Track
Track cycling is a racing sport where riders zoom around a velodrome. If you’re a beginner, this is probably too advanced for you, but something to think about as you gain more cycling experience.
#4) Triathlete
A triathlon is a multisport race where participants run, swim, and bike their way to the finish line. They’re not a bad event to train for since you have to condition yourself for a few different sports.
There are many triathlon events designed for beginners, some of which you can check out right here.
#5) BMXer
Generally when people do lots of tricks on their bike, it’s a BMX bike.
BMX is an abbreviation for bicycle motocross or bike motocross. BMX bikes were originally modeled after dirtbikes (minus the engine).
They’re popular with kids, but also good for adults who are looking to perform a stunt or two.
#6) Casual Rider
This is, in my opinion, the easiest way to get started. Just do whatever you want to on a bike and enjoy yourself in the process.
Sounds simple, right? It is!
How to Buy a Bike
Truth be told, the best bike for you to buy is whatever one you like the best.
I think it’s wise to get a bike shop’s help in buying a bike that fits you. Even though you can adjust your bicycle to fit (more on this next section), it could still be potentially too large or small. Here’s how to find a bike shop in your area.
If you are going to select a bike on your own, you’ll want to consider its height:
If the bike has a horizontal tube, you should have about one to two-inch clearance from your crotch to the top tube, when standing over the bike.
If the bike has a sloping top tube, you’ll want at least two-inch clearance.
Now, bikes do cost money. Expect to spend a few hundred bucks minimum at your bike shop. You don’t have to spend thousands, but you’ll have more fun on a decent bike than a heavy, crappy one from a department store.
If you must buy as cheaply as possible, in my opinion, most people are best served with a steel-framed 80’s road bike. They’re cheap, nearly indestructible, and easy to find on Craigslist.
Don’t be afraid to make counter offers and haggle a bit.
You can also search the bike on Bicycle Blue Book to make sure you’re getting a fair deal.
If you do buy a used road bike, steer away from 27” wheels, since 26” have become standard and will be easier to replace.
Lots of people get mountain bikes for their first bike, and I think it’s a mistake unless you plan on riding through dirt. They are heavy and slow because they’re meant for trail riding on mountains.
There’s also a cheaper bike option called bikesdirect.com. They sell off-brand frames with name-brand components, and seem to have good customer service.
Remember: get the bike you like. If you like it you’ll ride it. Keep that in mind as you’re reading the flame wars and conflicting advice. After all, it’s just bikes. It ain’t rocket surgery.
How to Setup Your Bicycle
While a professional at a bike shop can be a lifesaver when it comes to proper setup, you can totally do it yourself too.
#1) Saddle Height
A “good enough” way to determine proper seat height is the heel-to-pedal method. It might help to have someone hold your bike while doing this.
Take a seat, then have one pedal go completely down in the six o’clock position. Your knee should be completely straight here when making contact to this low pedal.
If your knee is bent, you need to increase the saddle height. If you lose contact with the pedal, lower your seat.
#2) Saddle Angle
For the most part, you’re going to want your seat angled so it’s parallel to the ground. Try this first, then you can adjust it slightly if you find different positions more comfortable.
#3) Handlebar Reach
While handlebar reach can be a bit more personal, in general you don’t want to strain yourself to control the bike.
When seated, you should easily be able to reach the brakes and shifters. Your elbows should have a slight bend, not locked. Adjust your seat first, get that dialed in, then adjust the bars themselves for your ideal setting.
What Gear to Purchase for Biking
After initially purchasing a bike, there are a few other things you should consider.
#1) Helmet – In my opinion, it is imperative to own and wear a helmet when cycling. I don’t think it should be a law that everyone has to, but I think everyone should of his own volition anyway.
What kind of helmet should you buy? Giro, Bell, and Specialized all make good helmets. Try a few on and get a bike shop’s help with how it should fit.
#2) U-Lock – One of the most awesome things about riding bikes to get places is that you don’t have to park a car. You can just ride right up to the place, lock your bike, and go inside. You will need a lock if you’d like your bike to be there when you come out, though. Read up on locking strategy here.
#3) Blinky Lights – Get yourself a good set of blinky lights for your bike.
Outside has the unmitigated gaul of getting dark without our consent. It’s wise to have lights in these cases, so that you can be as visible as possible on the roadway.
#4) Clippy Shoes – If you’re going to ride often, eventually it’s wise to switch to clipless pedals and shoes. If you’re worried that they’ll make you fall over, rest assured. You will definitely fall over in them at least once. It’s called a zero-mile-per-hour fall, and it’s a rite of passage. It’s also completely worth it.
#5) Lycra – If you’re doing any amount of riding at all, I recommend getting yourself a pair of bibs. Cycling shorts are nice too (they both have a chamois) but bib shorts are the ultimate in comfort.
Everything except the tube fits nicely into a little canvas bag that can slip into a center jersey pocket, which eliminates the need for a seat bag, which has a tendency to fall apart after a few hundred miles.
Don’t buy an expensive bike tool to carry on your rides. Any repair you can’t do with the above kit is a ride ender. Take a cab with the $20 instead and spend your tool budget on nice tools to keep at home if you want to wrench on your bike.
Also don’t buy a frame pump or mini pump – they don’t work well at all. Get a floor pump for home and carry CO2 with you.
How to Ride a Bike
Turn pedals.
Don’t hit anything or fall off.
Kidding.
Here’s exactly how to ride a bike:
Let’s explain some more tips for smooth bike riding:
#1) Use your rear brake to check your speed and your front one only if you really want to stop. If you grab a handful of front brake on a modern bike it might become a catapult.
#2) Remember when I said clippy shoes were worth it? It’s because they allow you to apply power throughout the whole revolution of the pedal, and to use your whole leg and butt to apply said power. They’re awesome.
#3) Keep in mind also that it’s more efficient to spin than to mash. This means that you’ll be able to deliver more power for longer if you ride in a smaller, easier gear at a higher cadence (RPM) than in a bigger, harder gear at a slower cadence. The ideal cadence is said to be 90rpm or so, which is the exact tempo of Cake’s song The Distance.
One foot should make a revolution for each beat of the song, or in other words, your foot is a quarter note. Your other foot will be offset, of course, so as a pair your feet will play eighth notes. And you didn’t even know you were a musician!
#4) Your body should be pretty much still when you’re riding. Your knees should be in line between your hip and ankle, not out as if you’re trying to climb a pole:
How to Improve Your Bike Riding Skills
Cycling is beautiful and amazing, but the best cycling is also social.
Having some friends who are into it will help keep you into it. Mind you, it is ten buh-jillion times easier to meet people who already like things you want to do than to convert people you already like into doing something new.
So, go do your local group ride. There’s guaranteed to be a beginner one near you that runs out of a bike shop. Ask at the bike shop once you feel comfortable returning.
There’s a tendency for new riders to want to express their liberation from the metal cage of the automobile through a certain free-spirited attitude toward traffic laws.
Please don’t do this.
Whatever we do while riding in traffic will be remembered by every driver who sees us and counted either for or against cycling as a whole in that driver’s mind.
Many new riders adopted a Me-Vs-Cars attitude, and it’s always a mistake.
Figure out what the laws regarding cyclists on the road are in your area and follow them always! Google “bicycling laws + [ your state ]”
You’ll also have a much easier time in traffic when you ride like traffic.
It’s Time to Hit the Road (Next Steps)
Above all, remember that cycling is a fun, social activity.
Wave to other riders. Say hello to them when you pass them. They’re nice folks! Well, except “serious” roadies, of course, but only other roadies listen to them!
Okay, that’s about it for this guide.
Find a bike, wear a helmet, and get ready to roll:
If you want to continue your journey with Nerd Fitness, there are three great options for you.
Option #1) If you want a professional coach in your pocket, who can do video form checks, provide feedback, and adjust your workouts based on the equipment you have available, check out our Online Coaching Program!
Some of our clients are avid cyclists and their coaches design workouts around their biking schedule:
Option #2) If you’re looking for fun way to stay active, check out NF Journey. Our fun habit-building app helps you move more frequently, eat healthier, and level up your life (literally).
We assign fun missions daily to get you to exercise in a way that doesn’t feel like exercise…because it’ll feel like a side quest instead.
Try your free trial (no credit card needed) right here:
Option #3) Become part of the Rebellion! We need good people like you in our community, the Nerd Fitness Rebellion.
Sign up in the box below to enlist and get our Rebel Starter Kit, which includes all of our “work out from home” guides.
Get your Nerd Fitness Starter Kit
The 15 mistakes you don’t want to make.
Full guide to the most effective diet and why it works.
Complete and track your first workout today, no gym required.
Have fun out there, and ride safe, cycling friend!
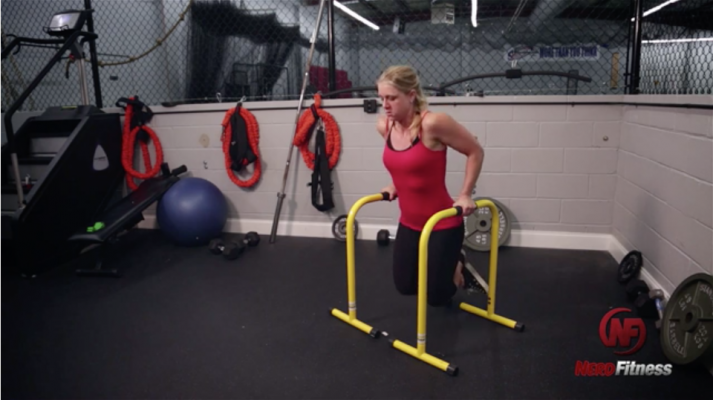



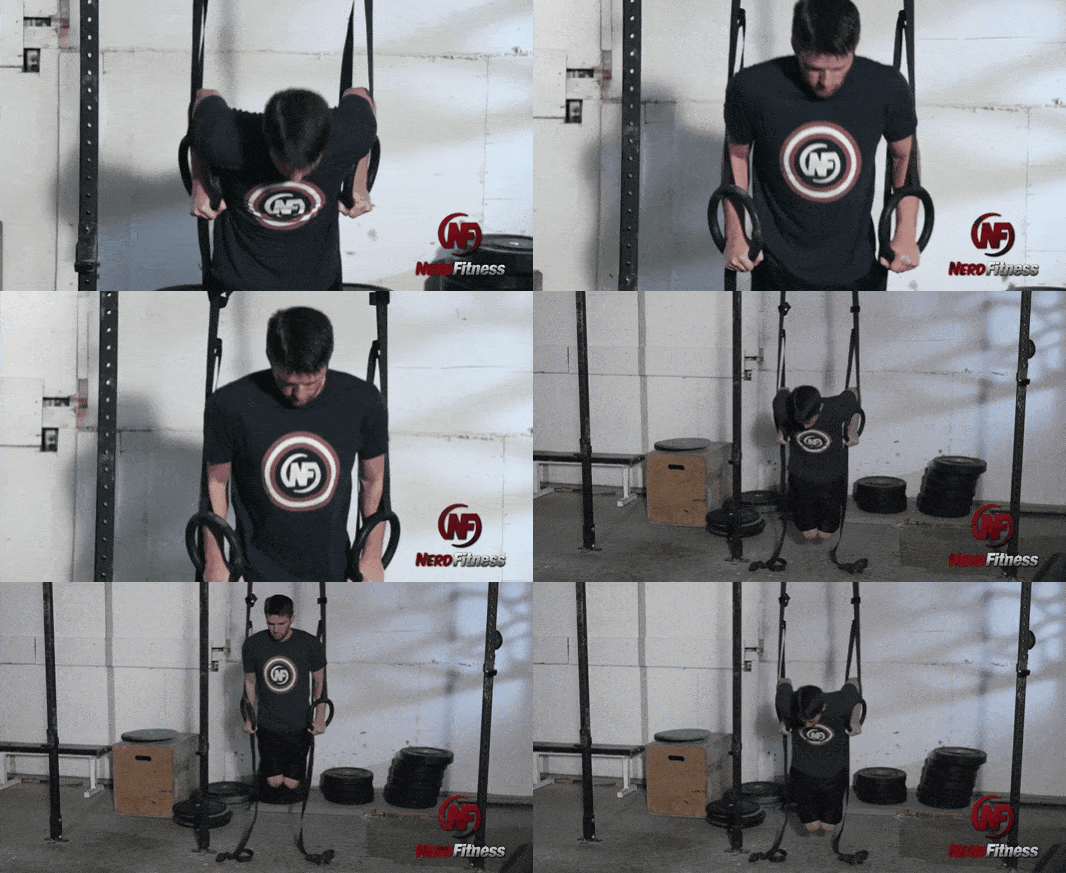

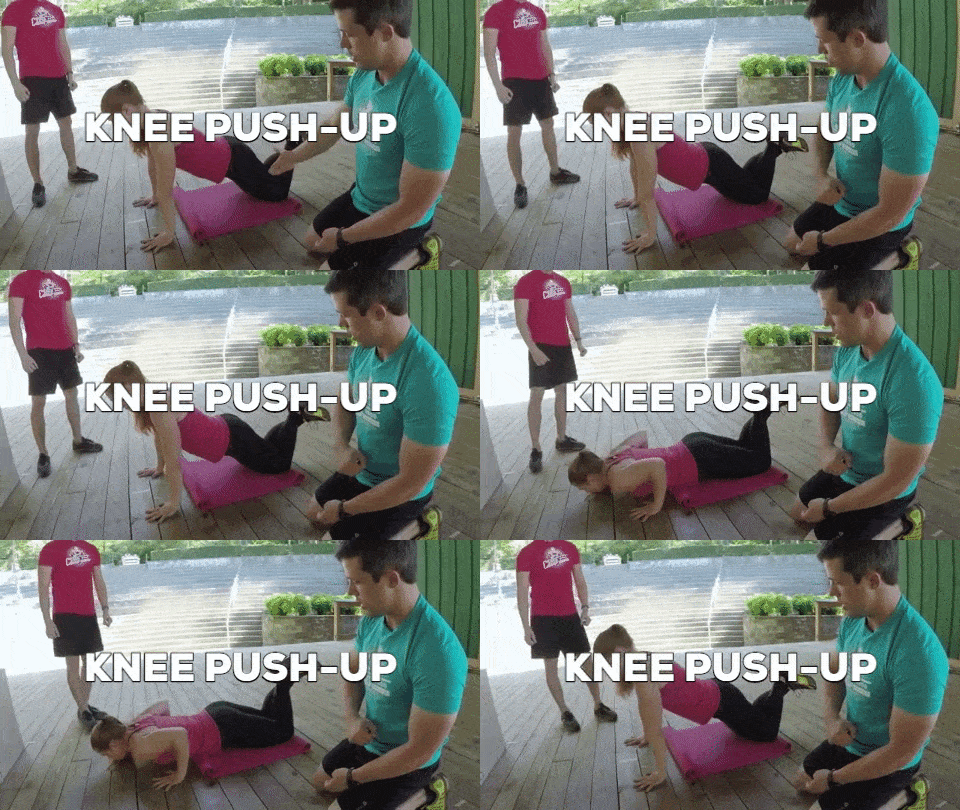
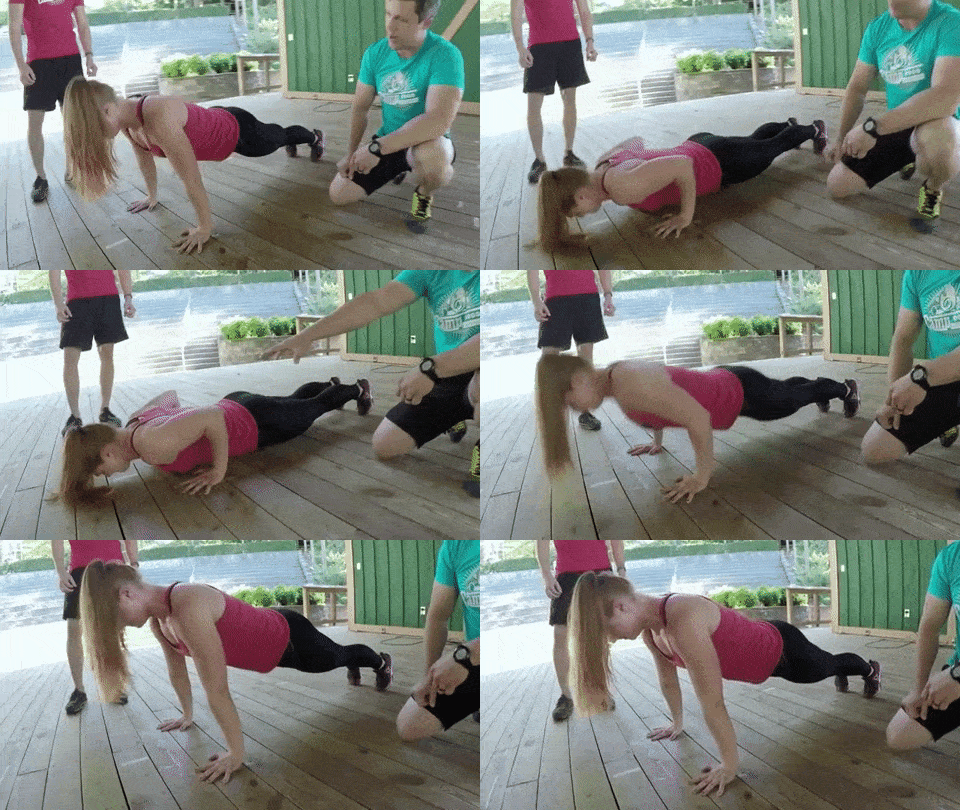
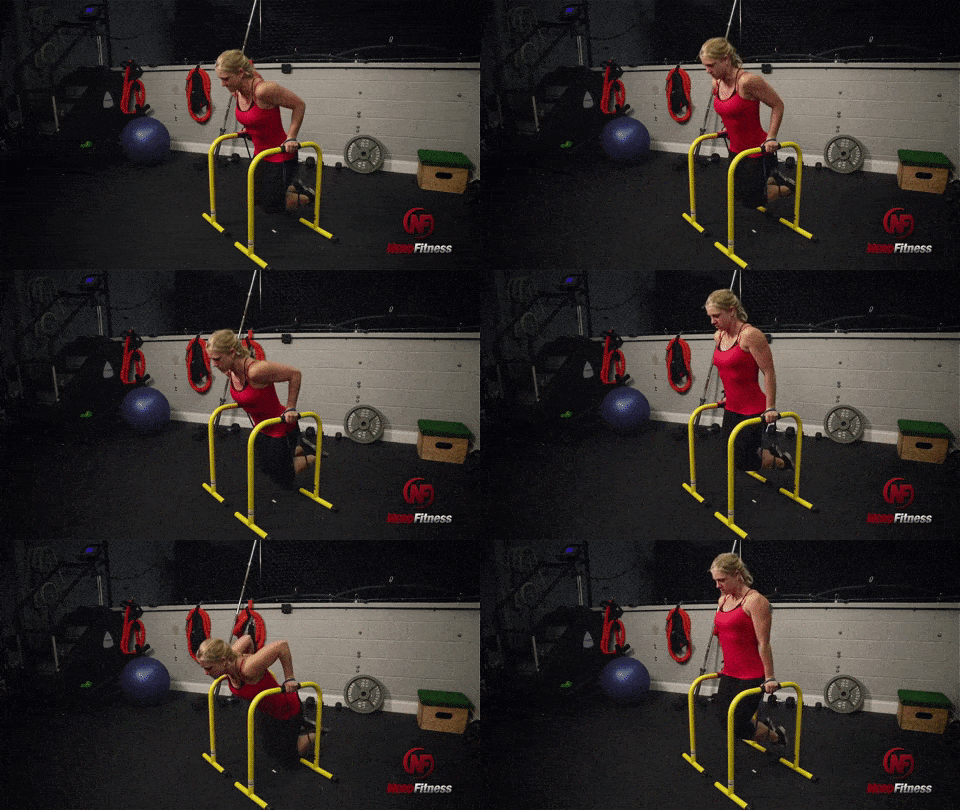
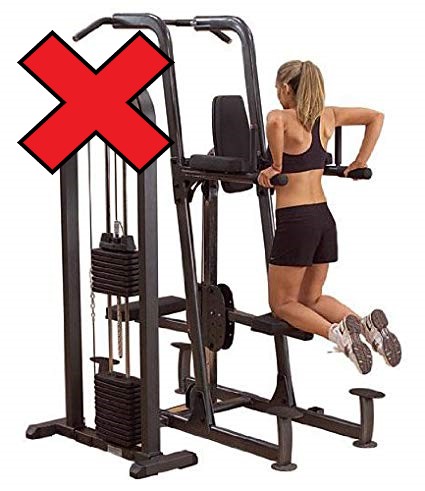
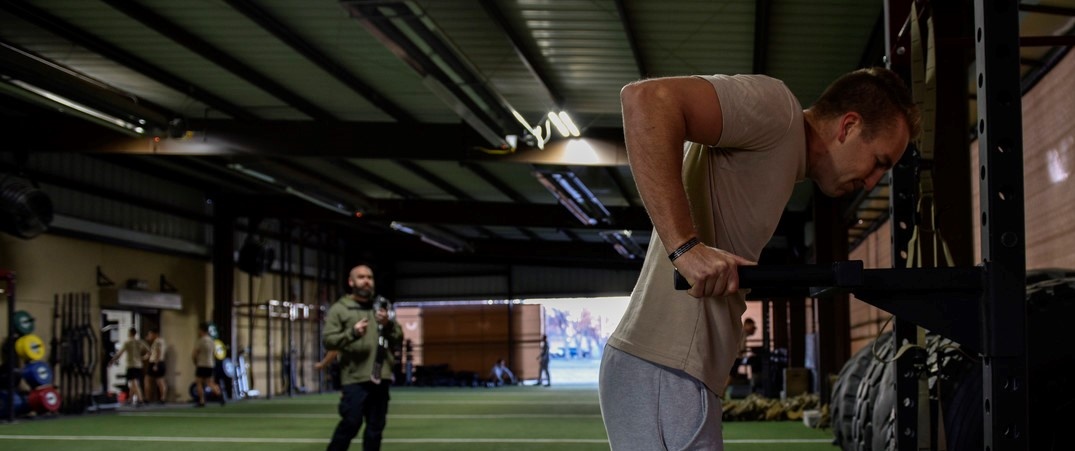


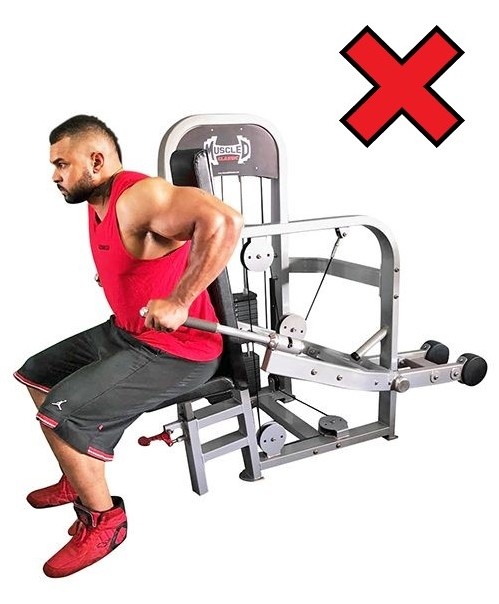
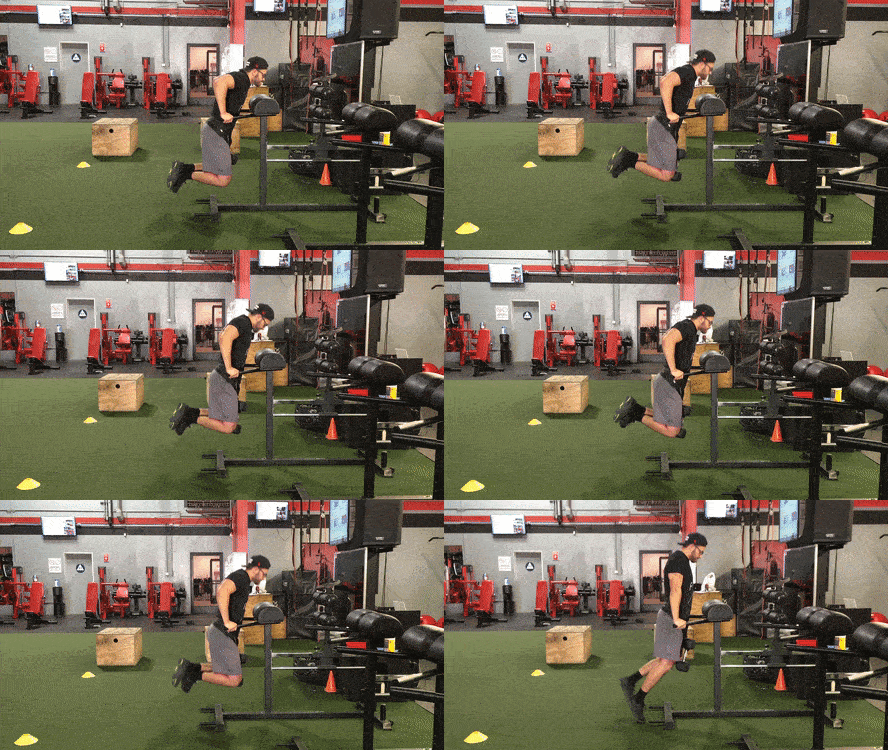
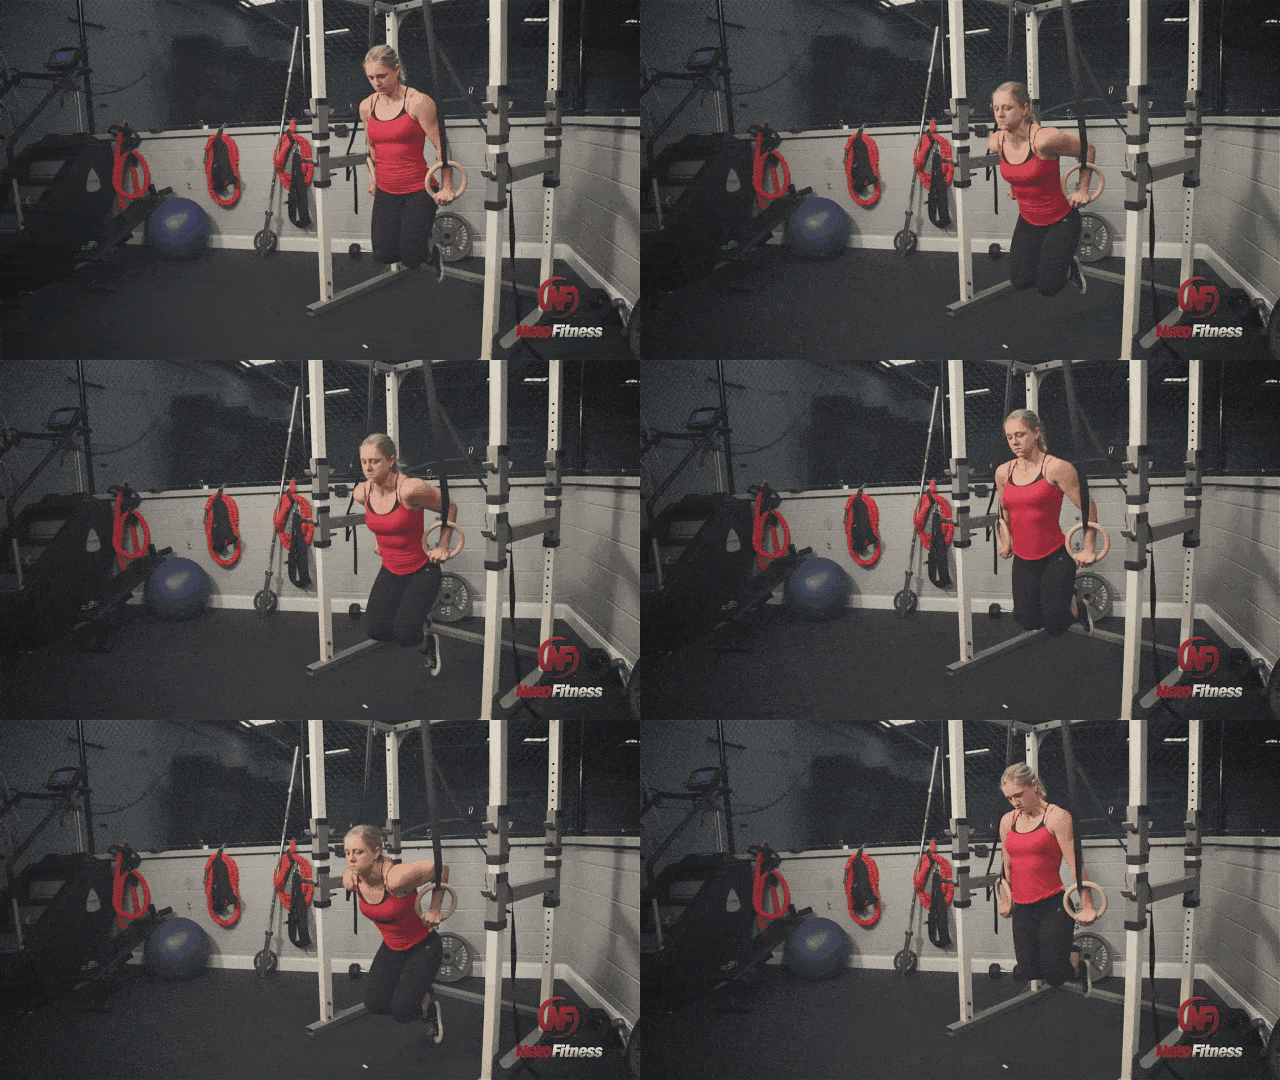
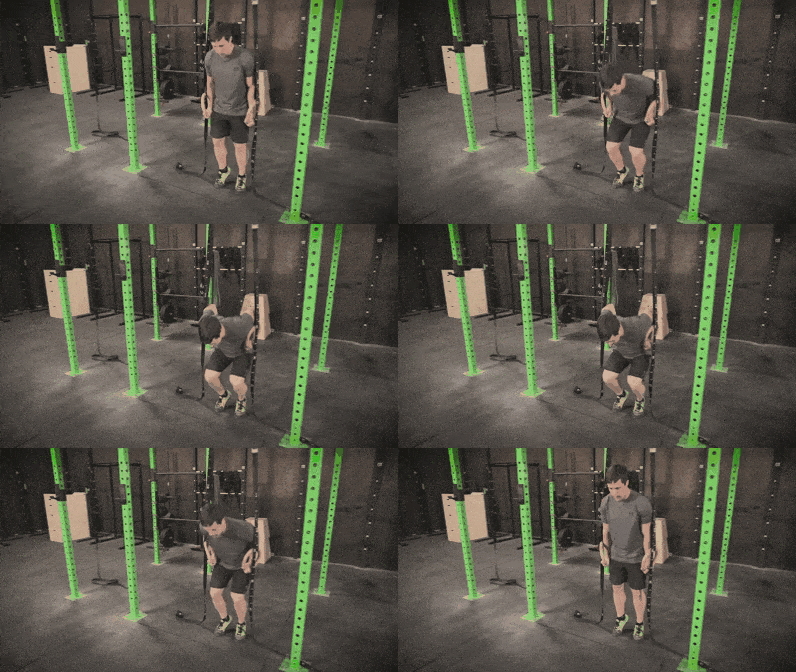

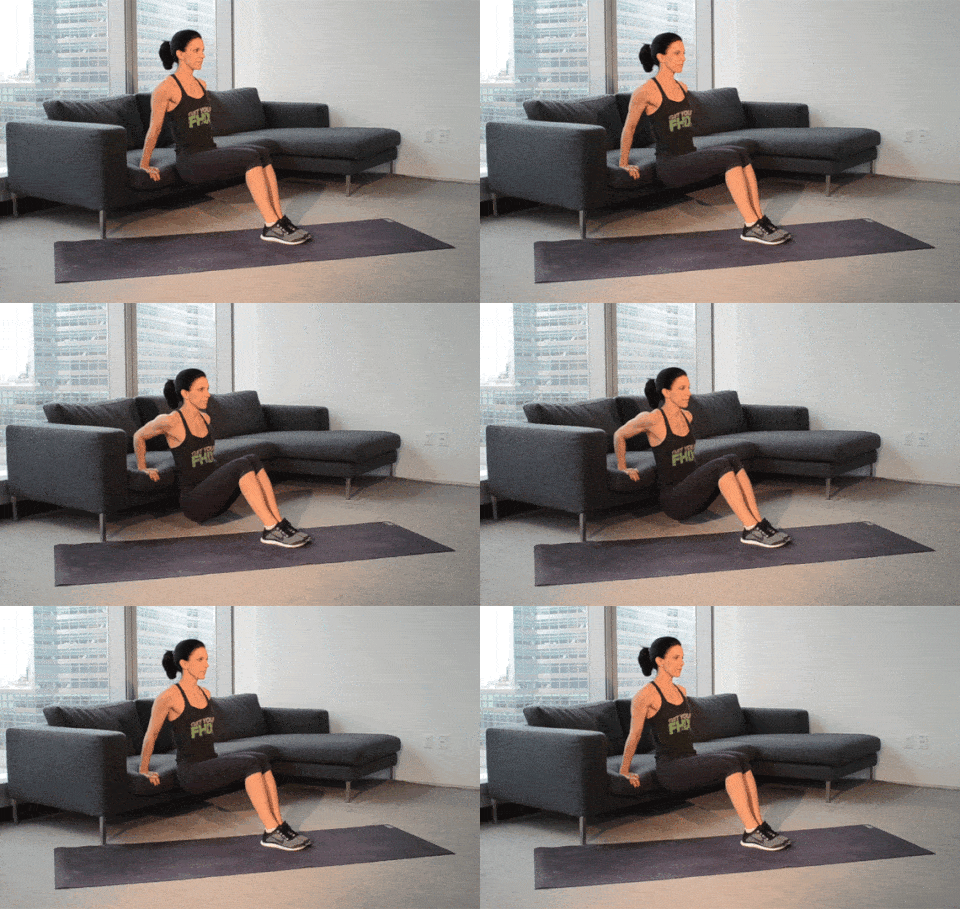



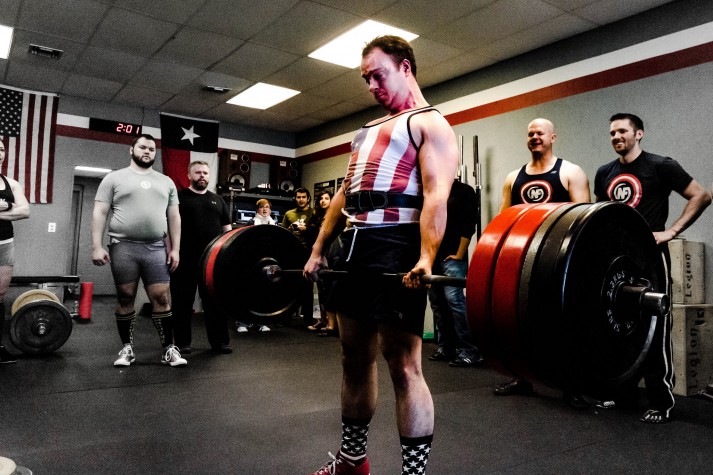
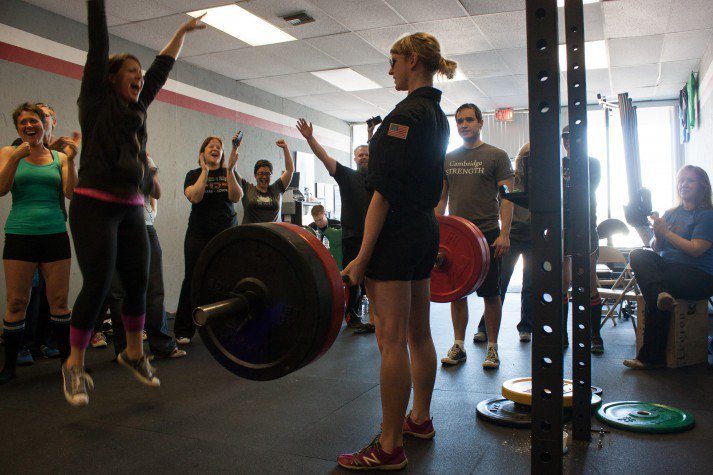
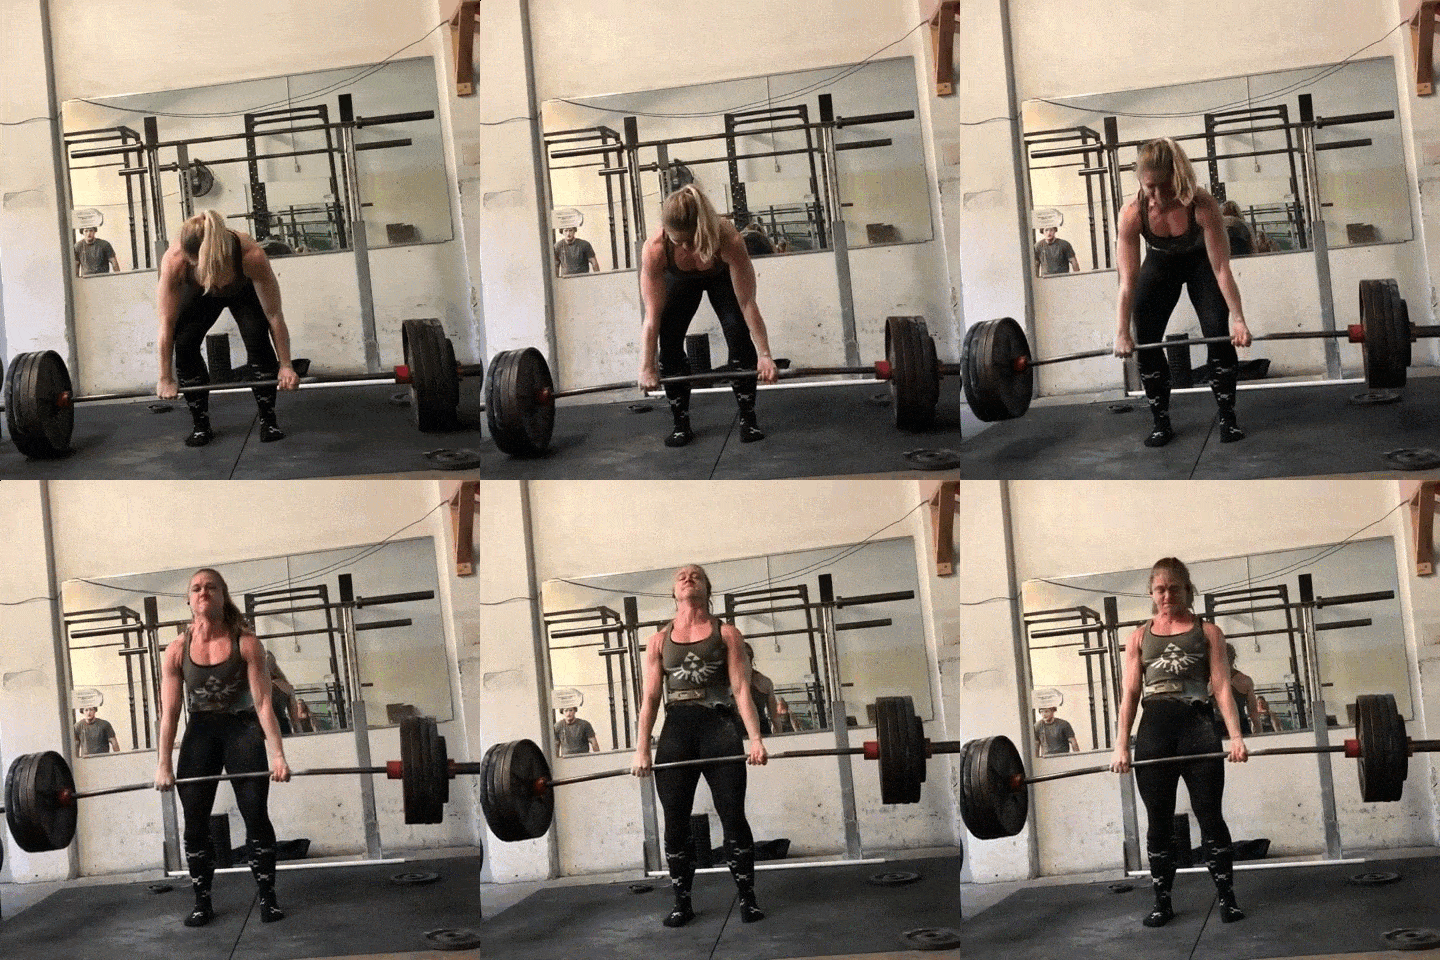
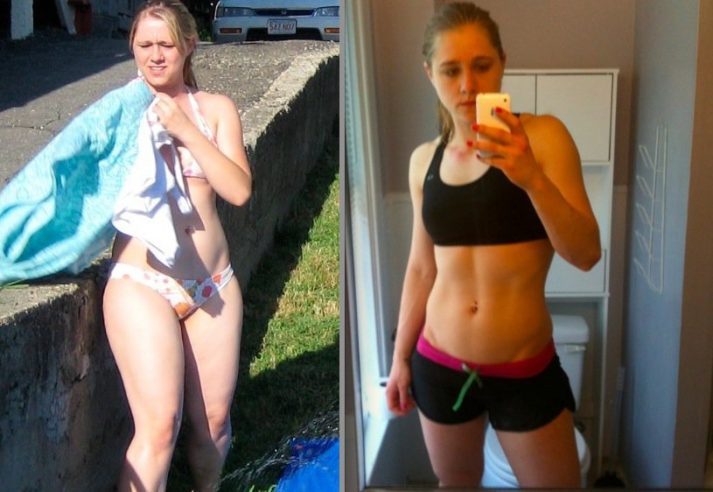
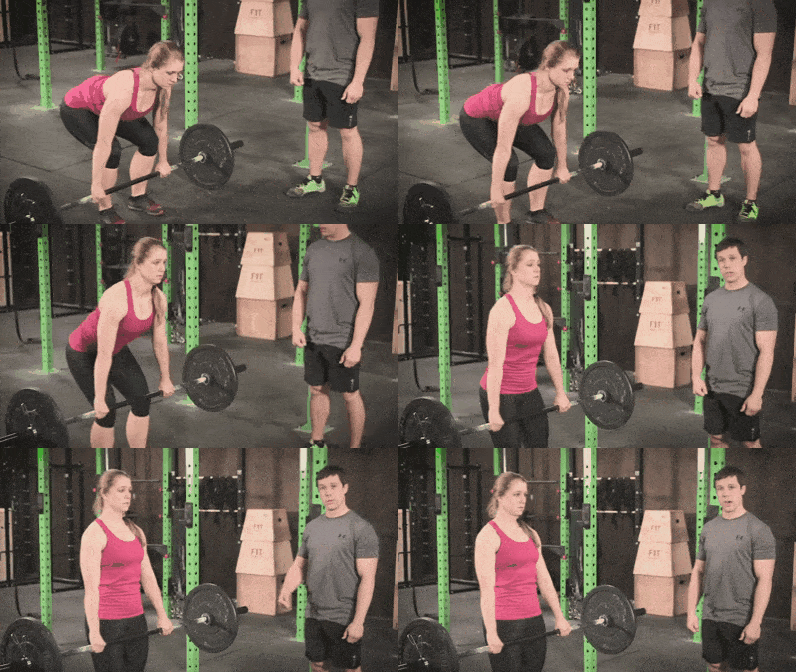
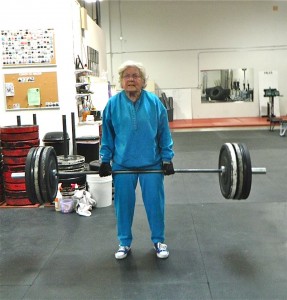
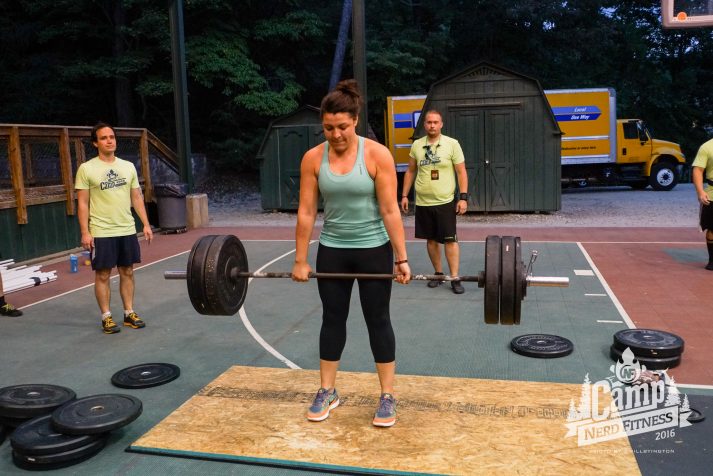
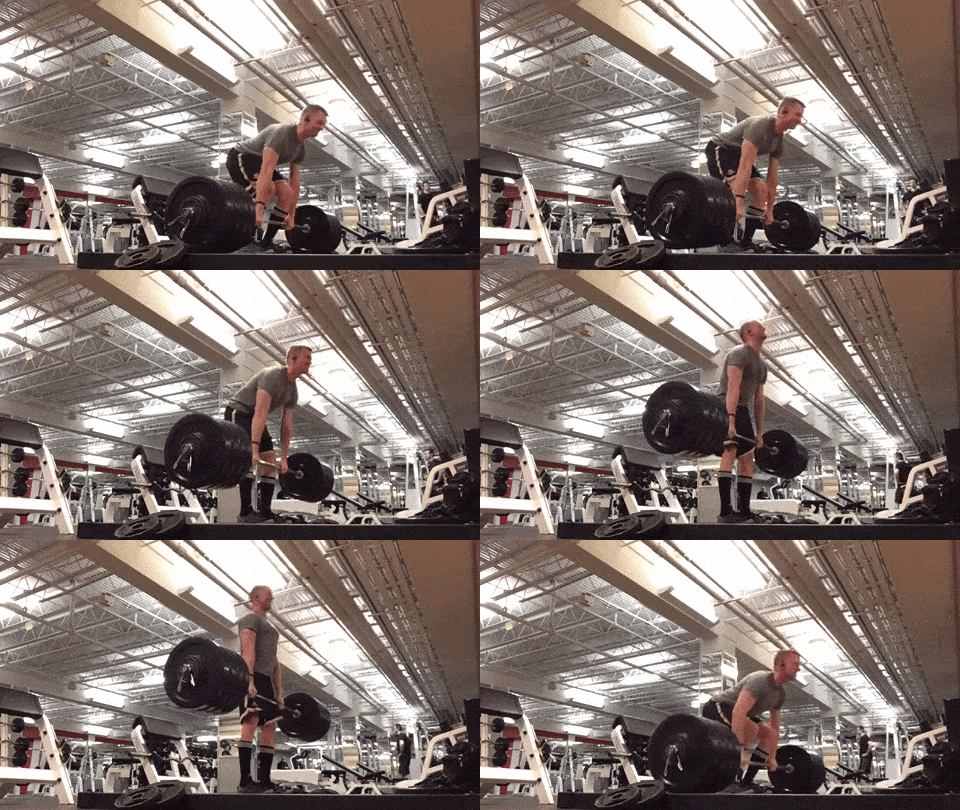
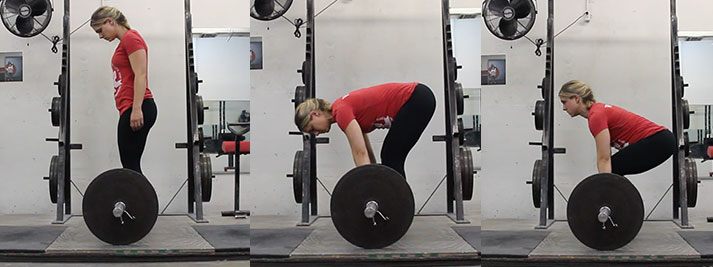
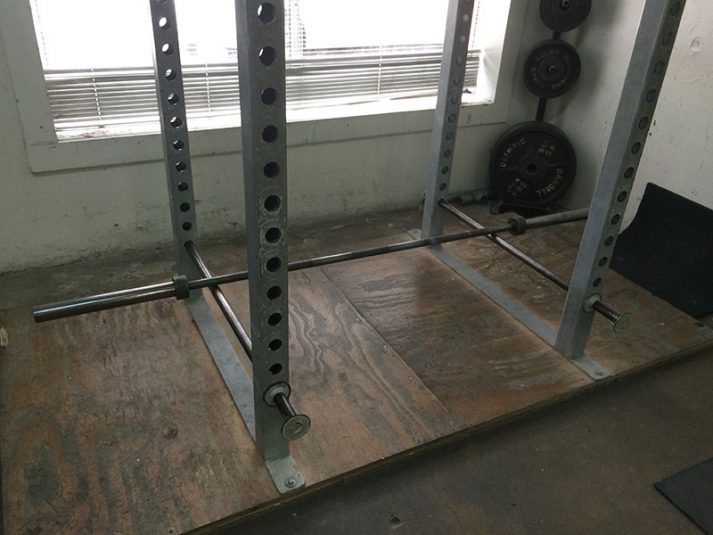
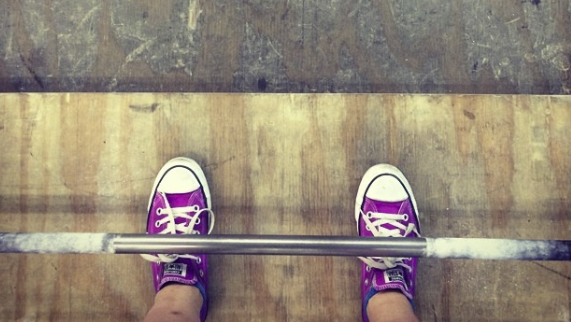
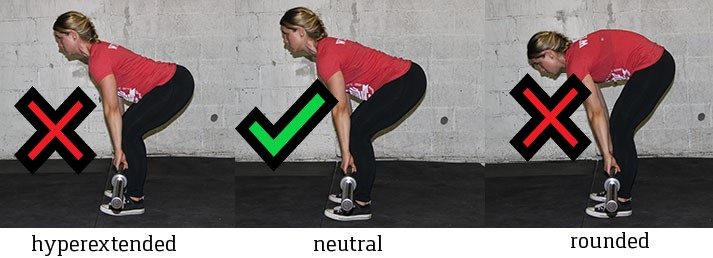
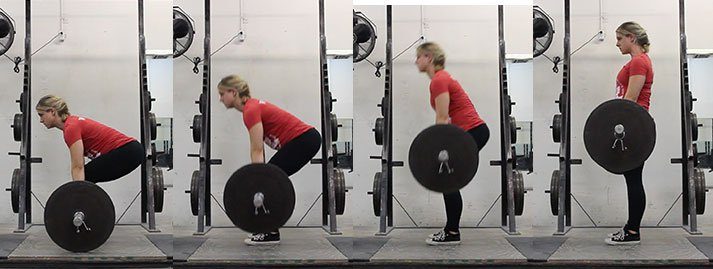

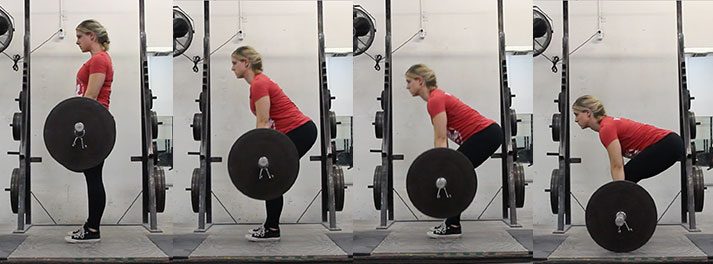
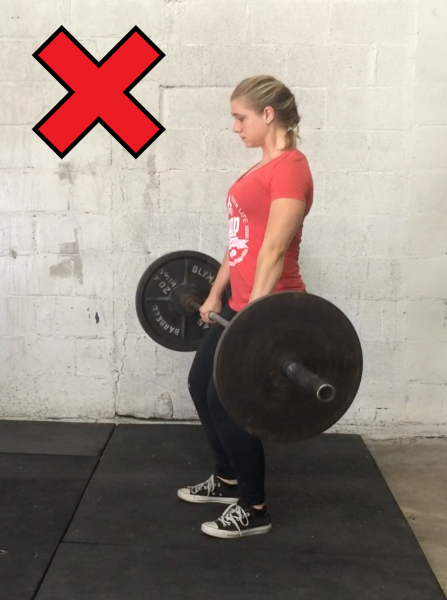
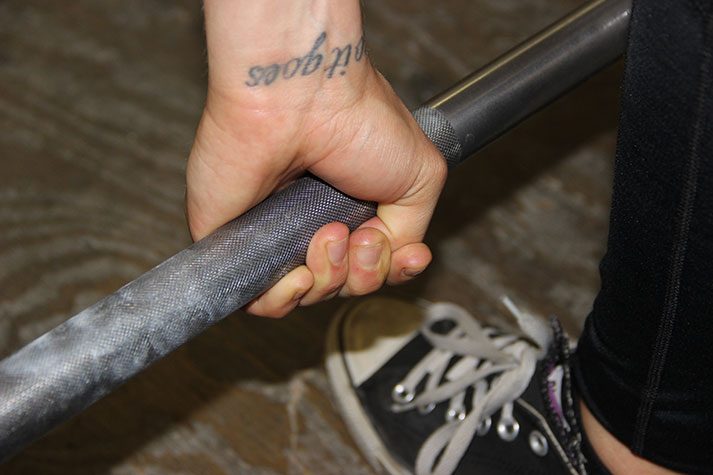
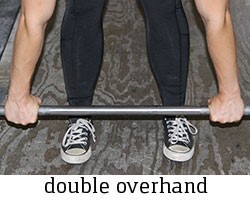
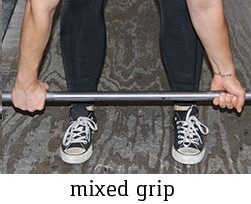
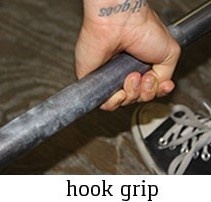
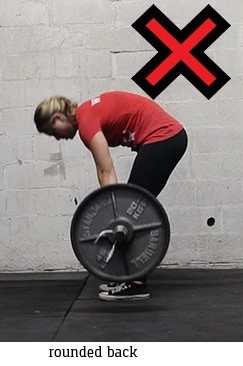
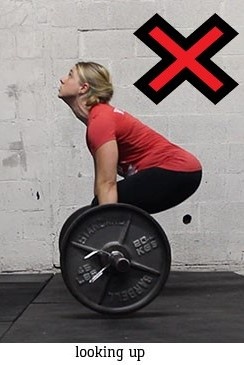
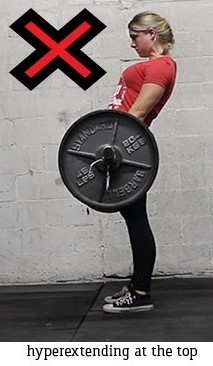
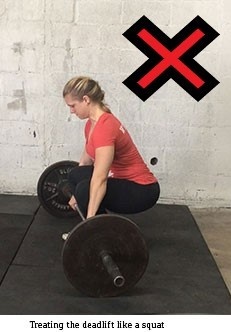
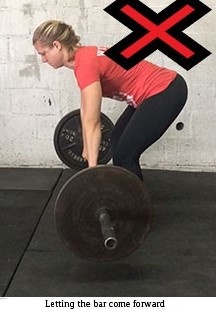
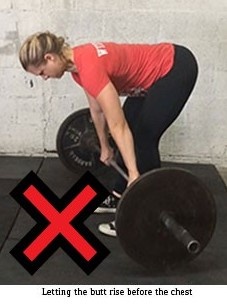
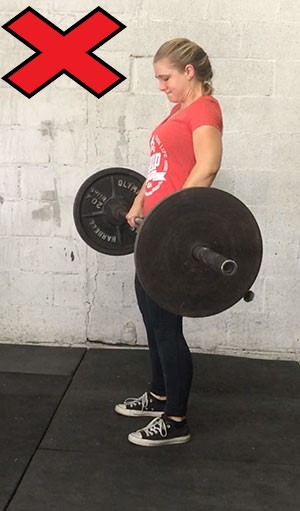
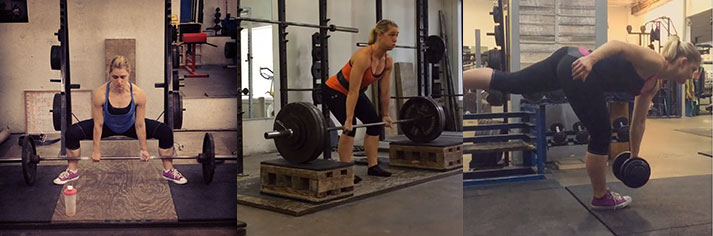
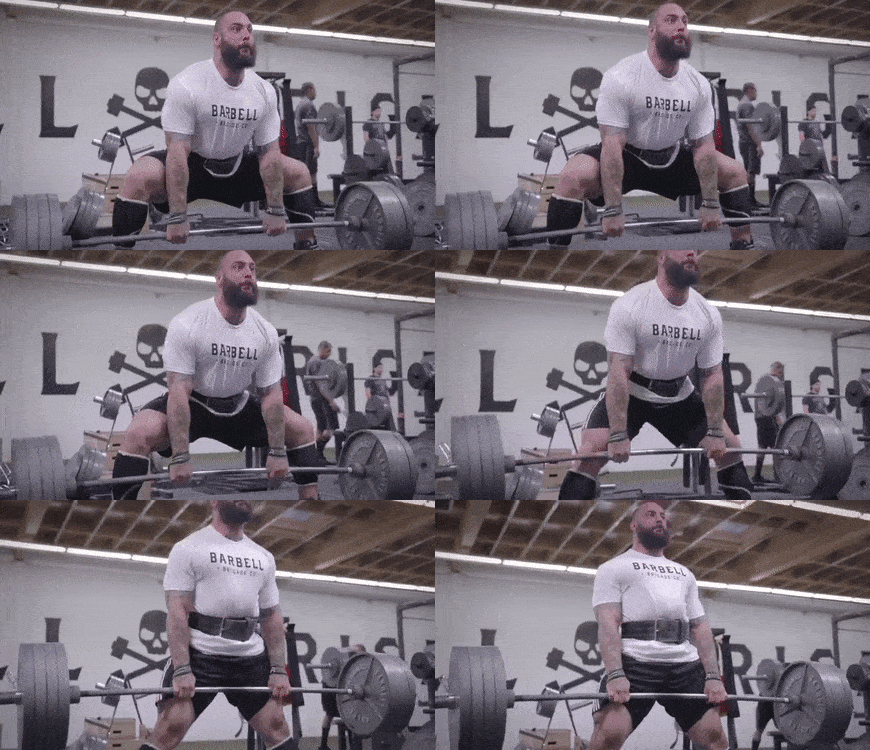

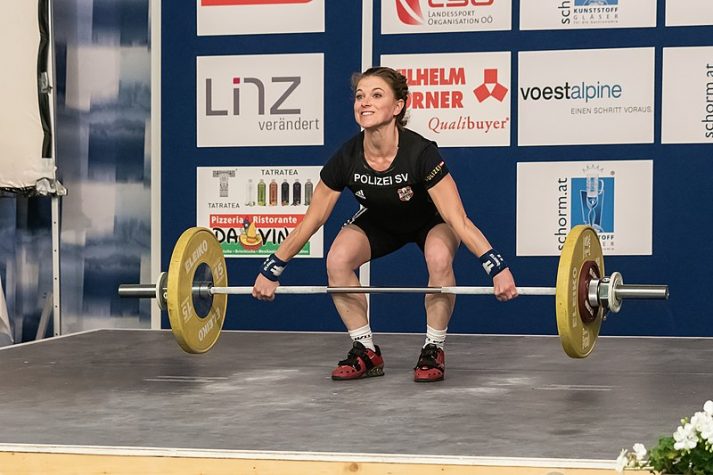
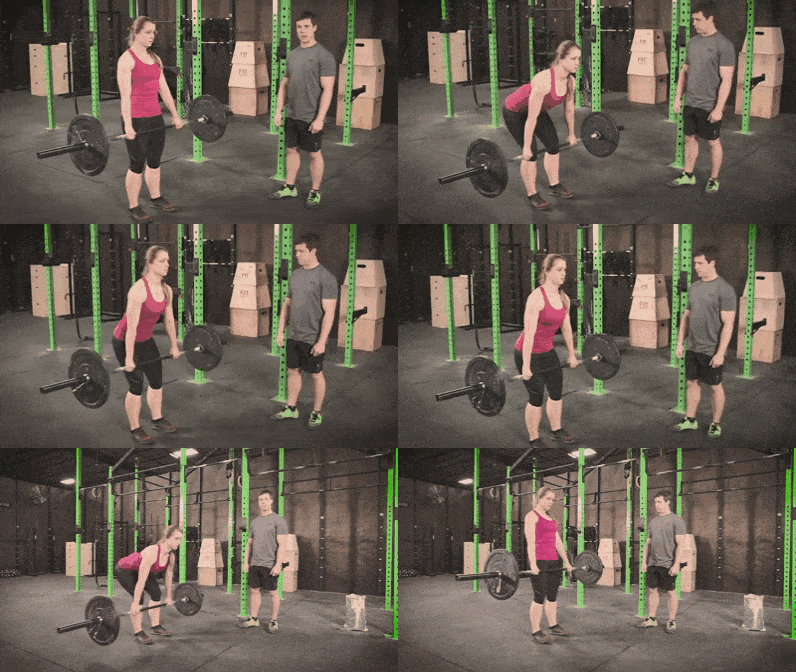
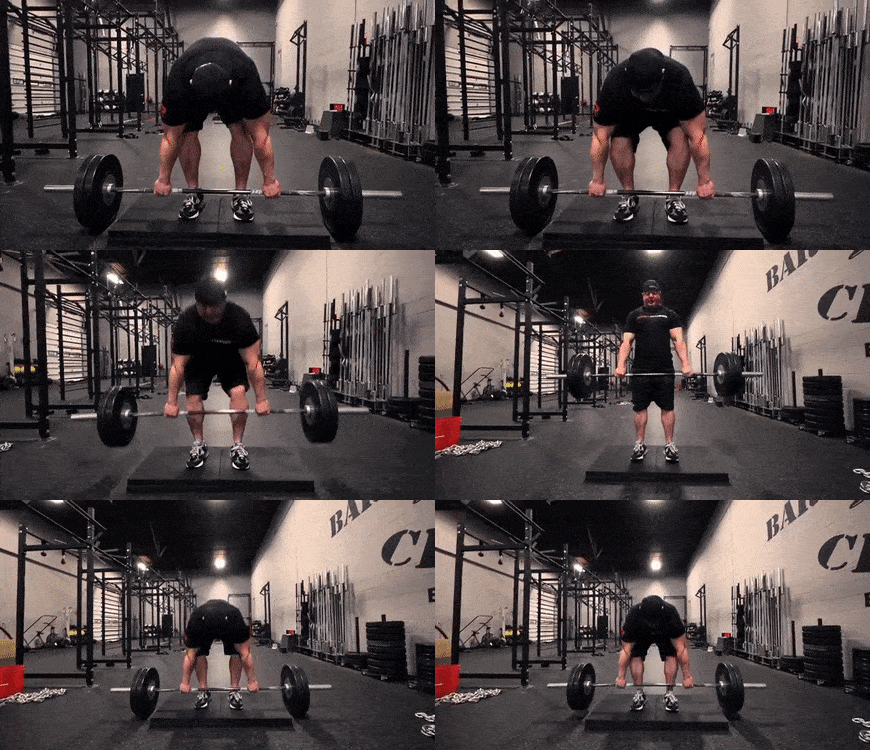
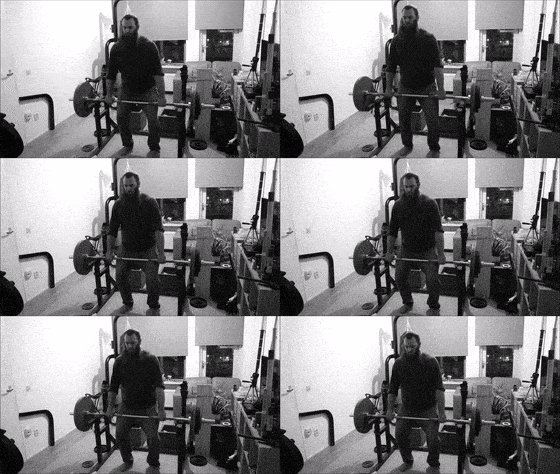
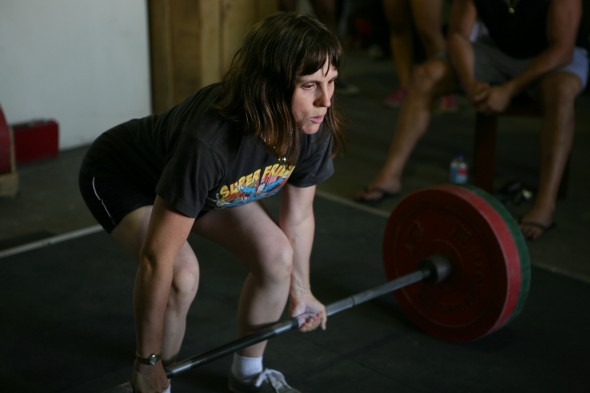
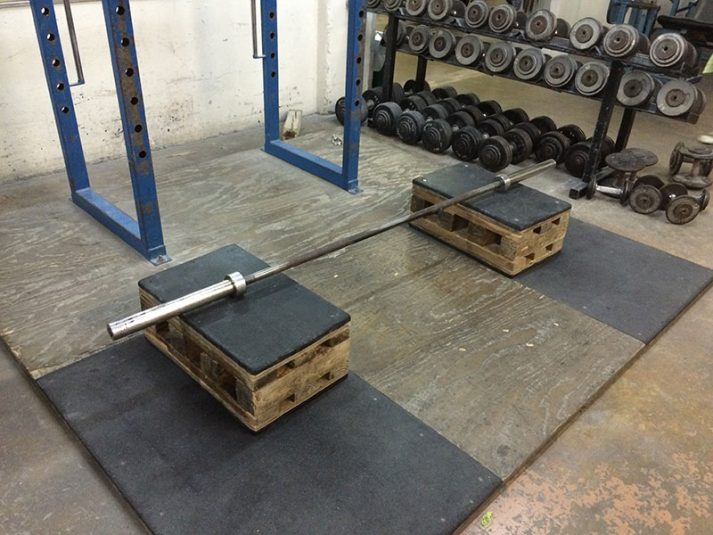
 I am so excited for you to start deadlifting, because it’s the ultimate physical AND mental exercise.
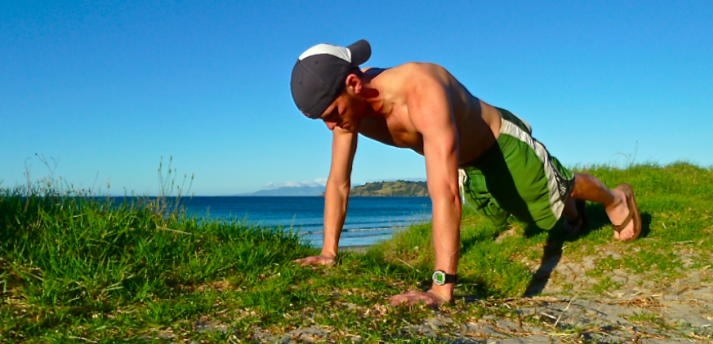
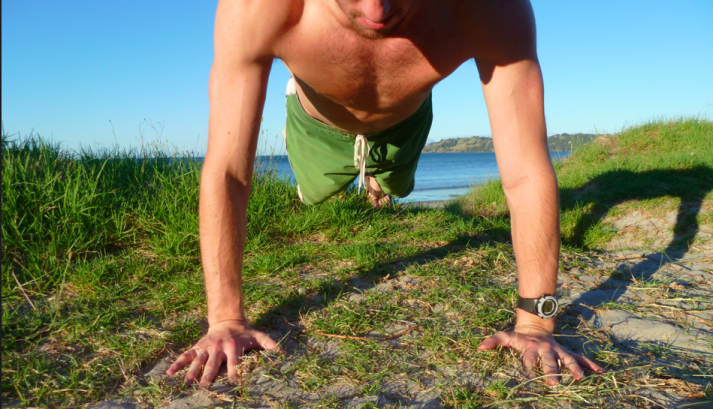

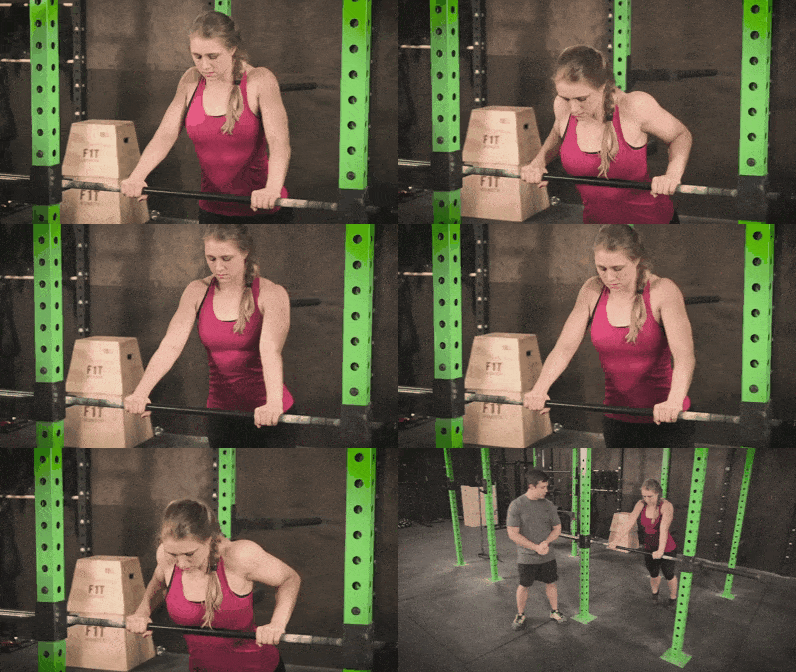
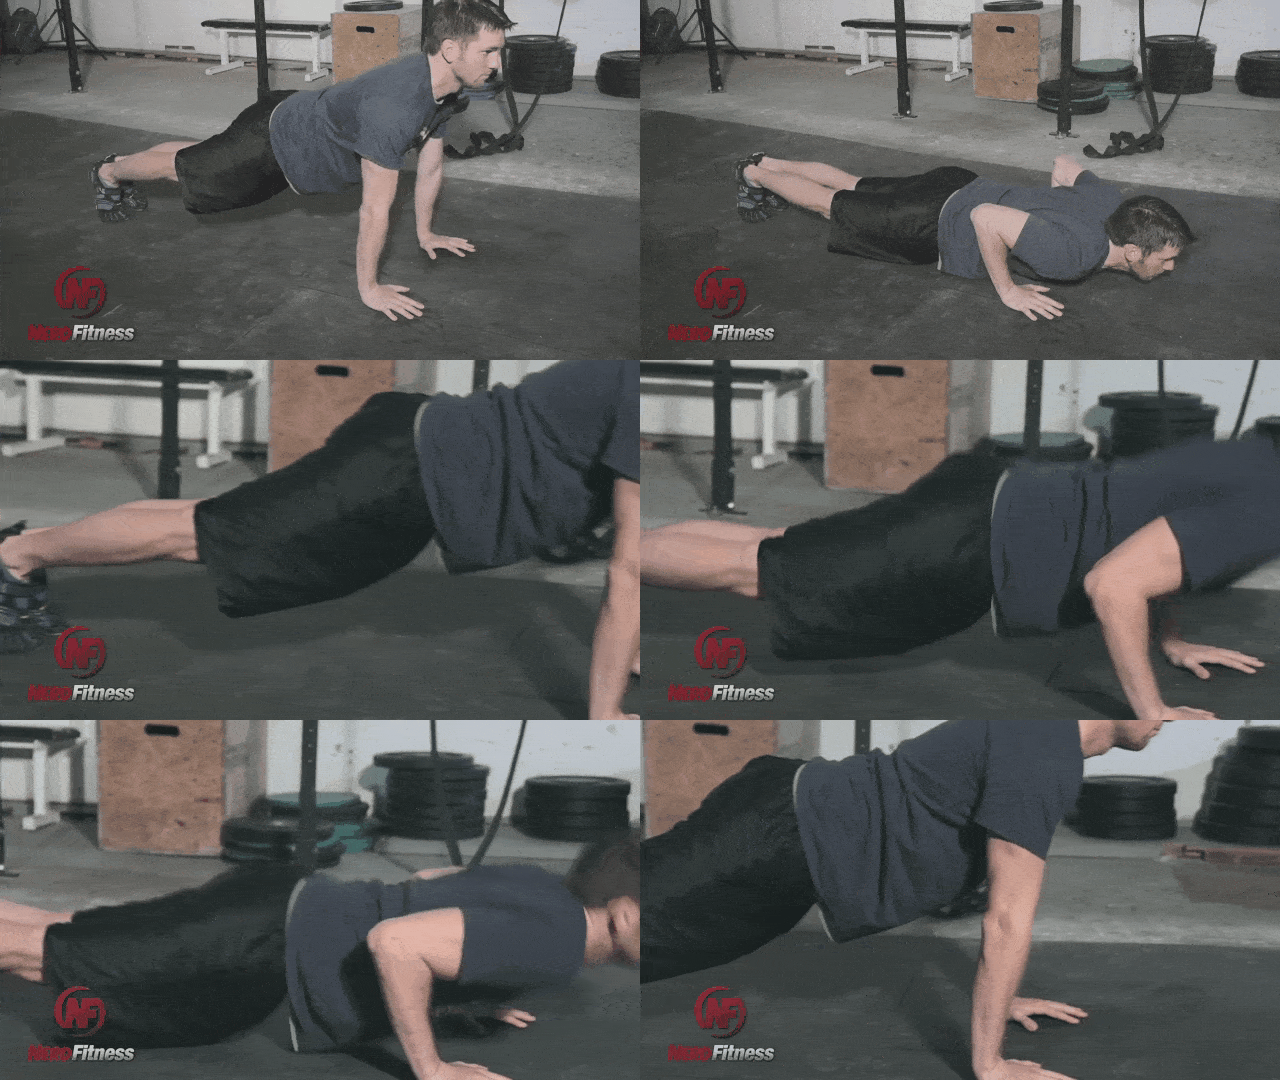
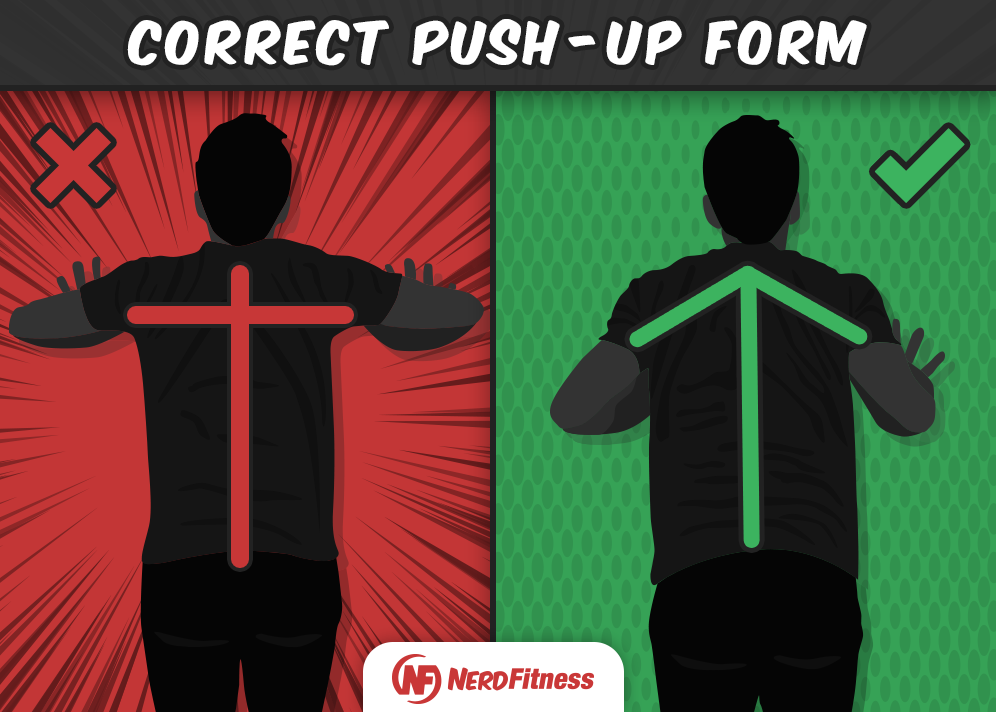
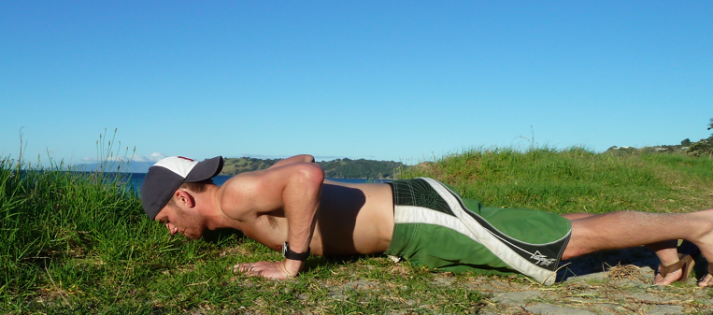
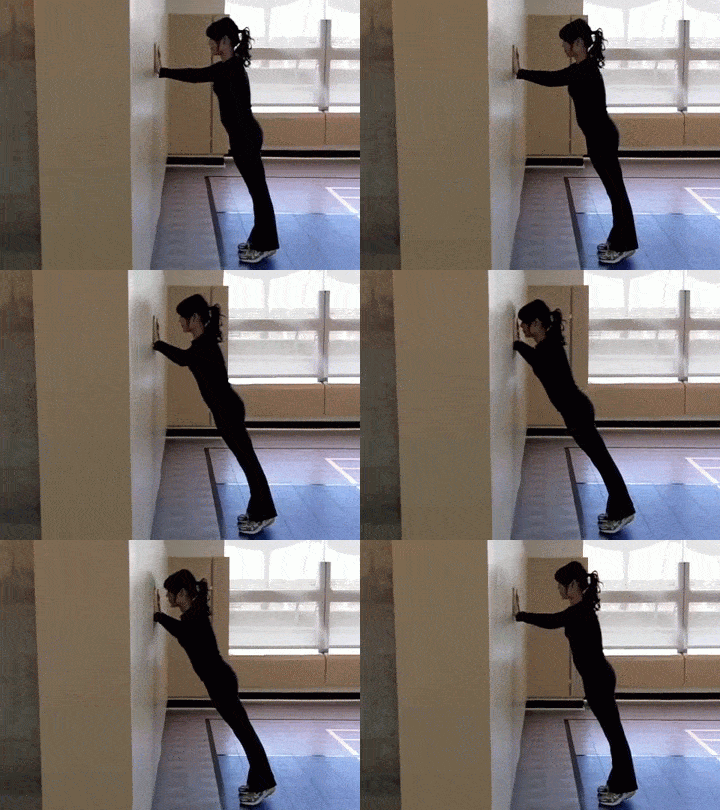


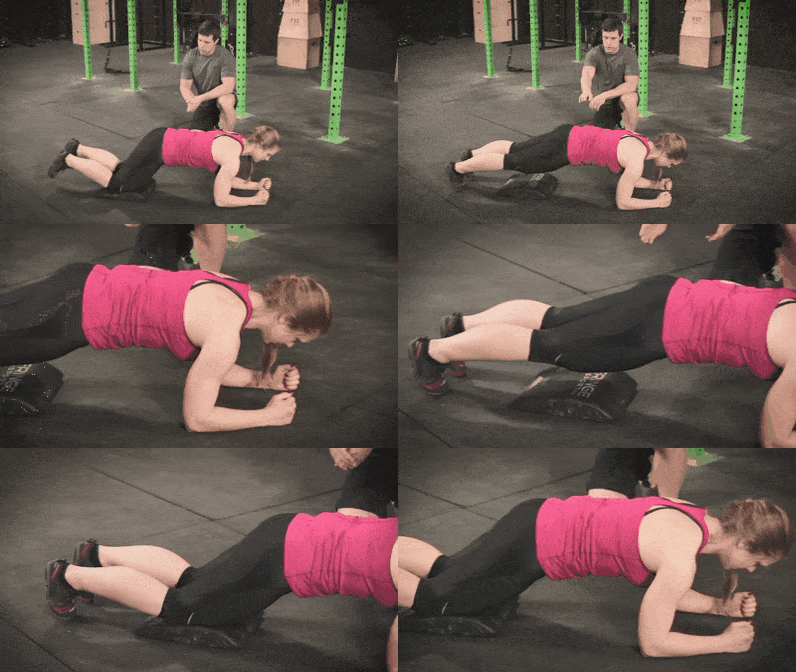


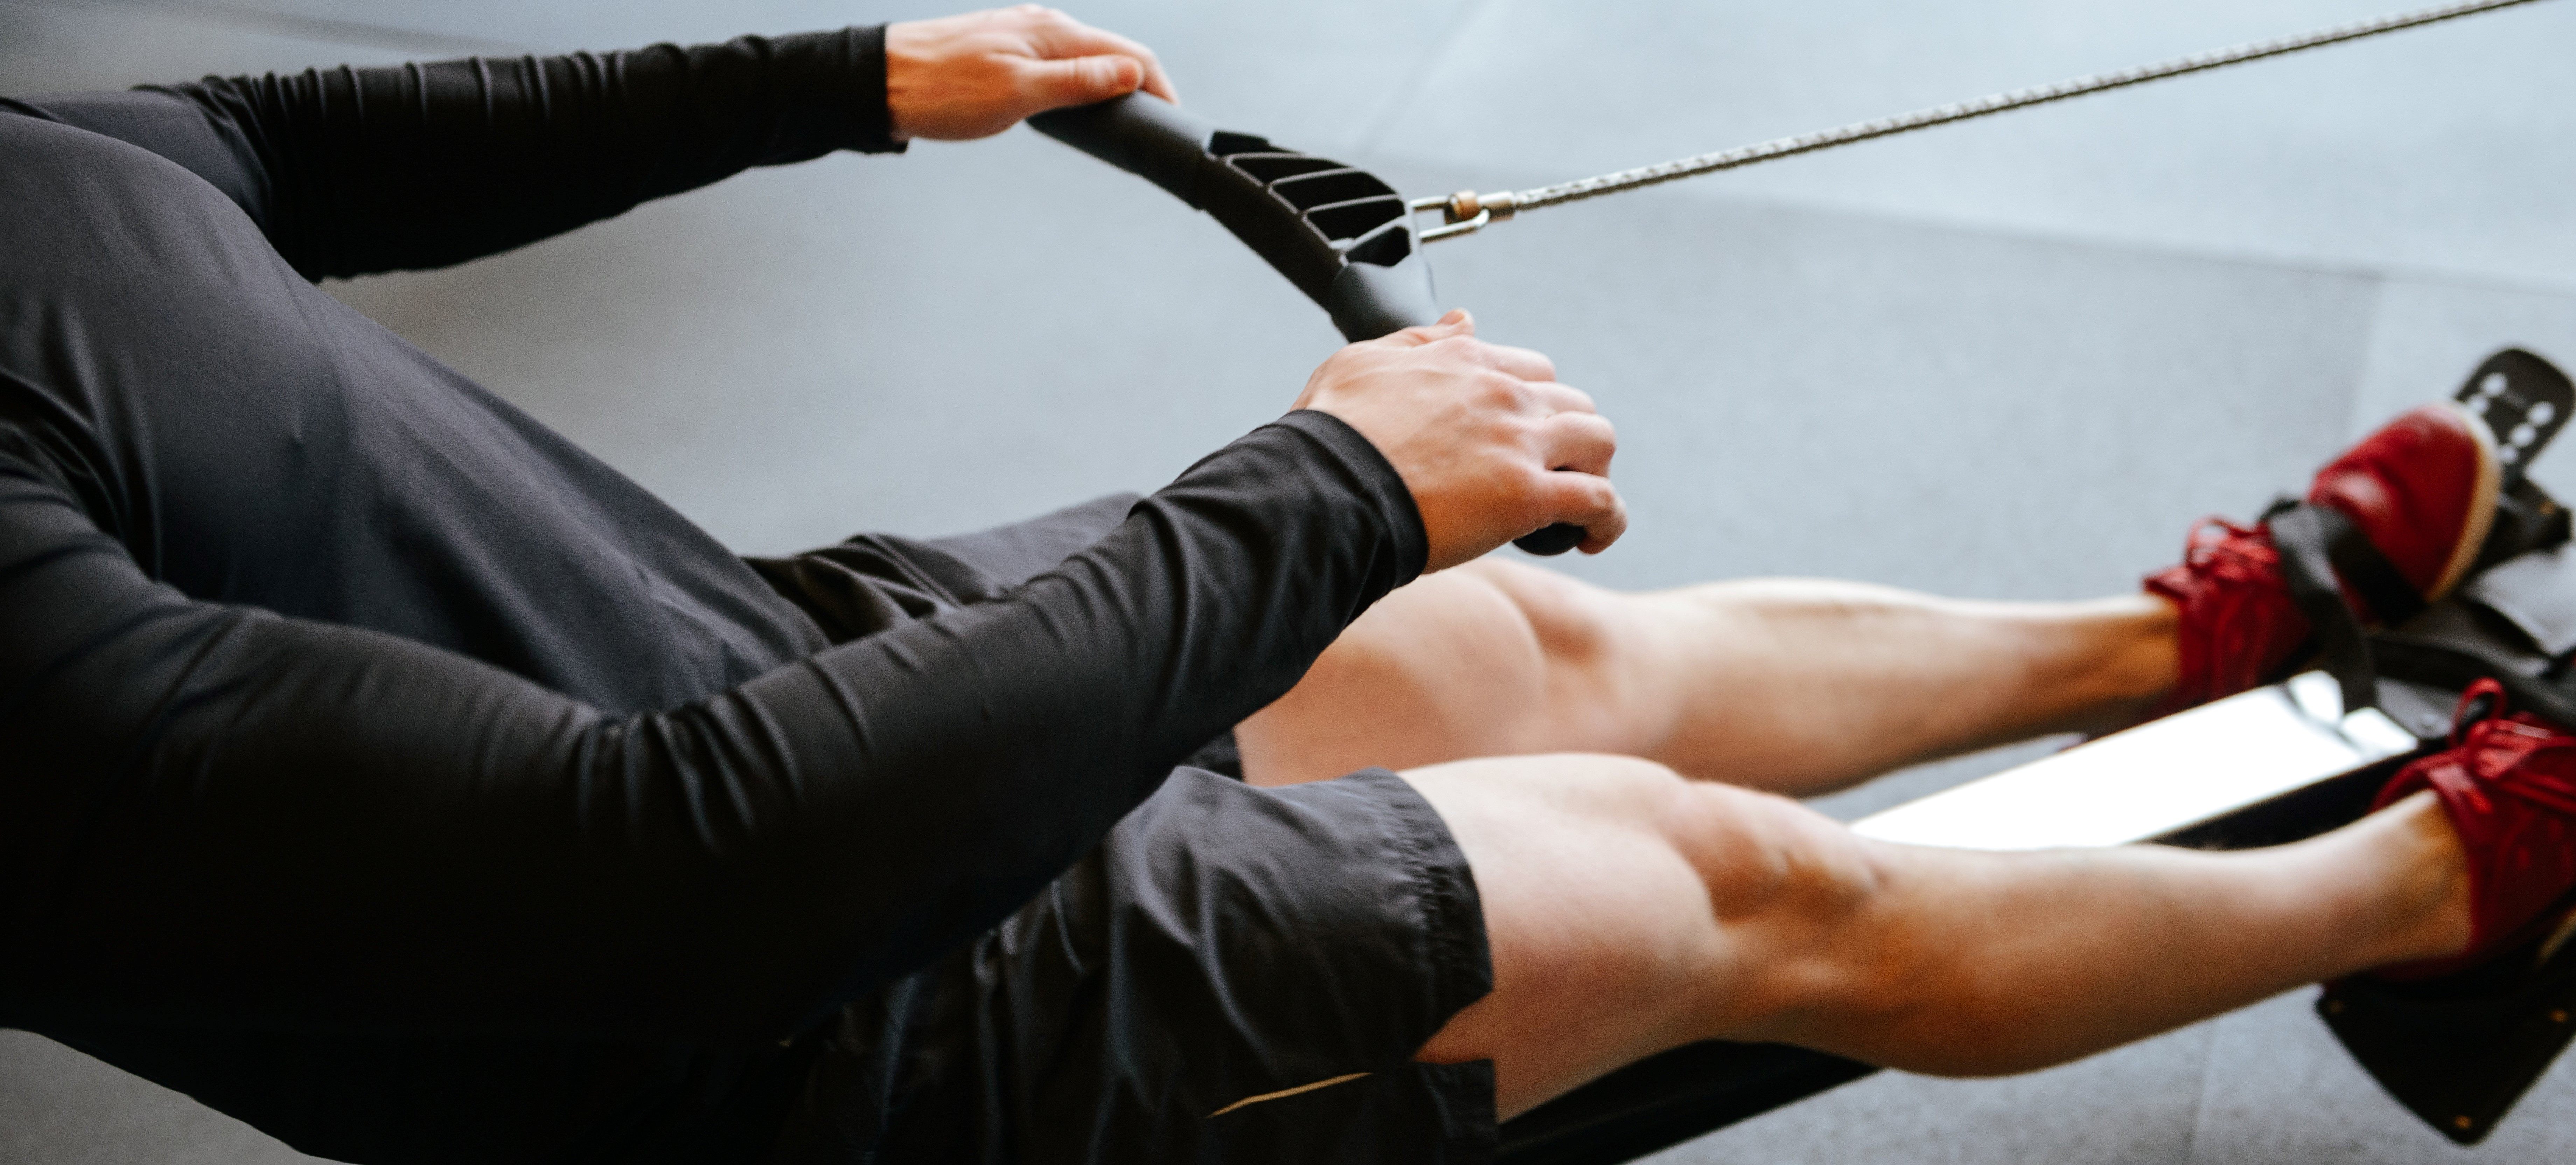

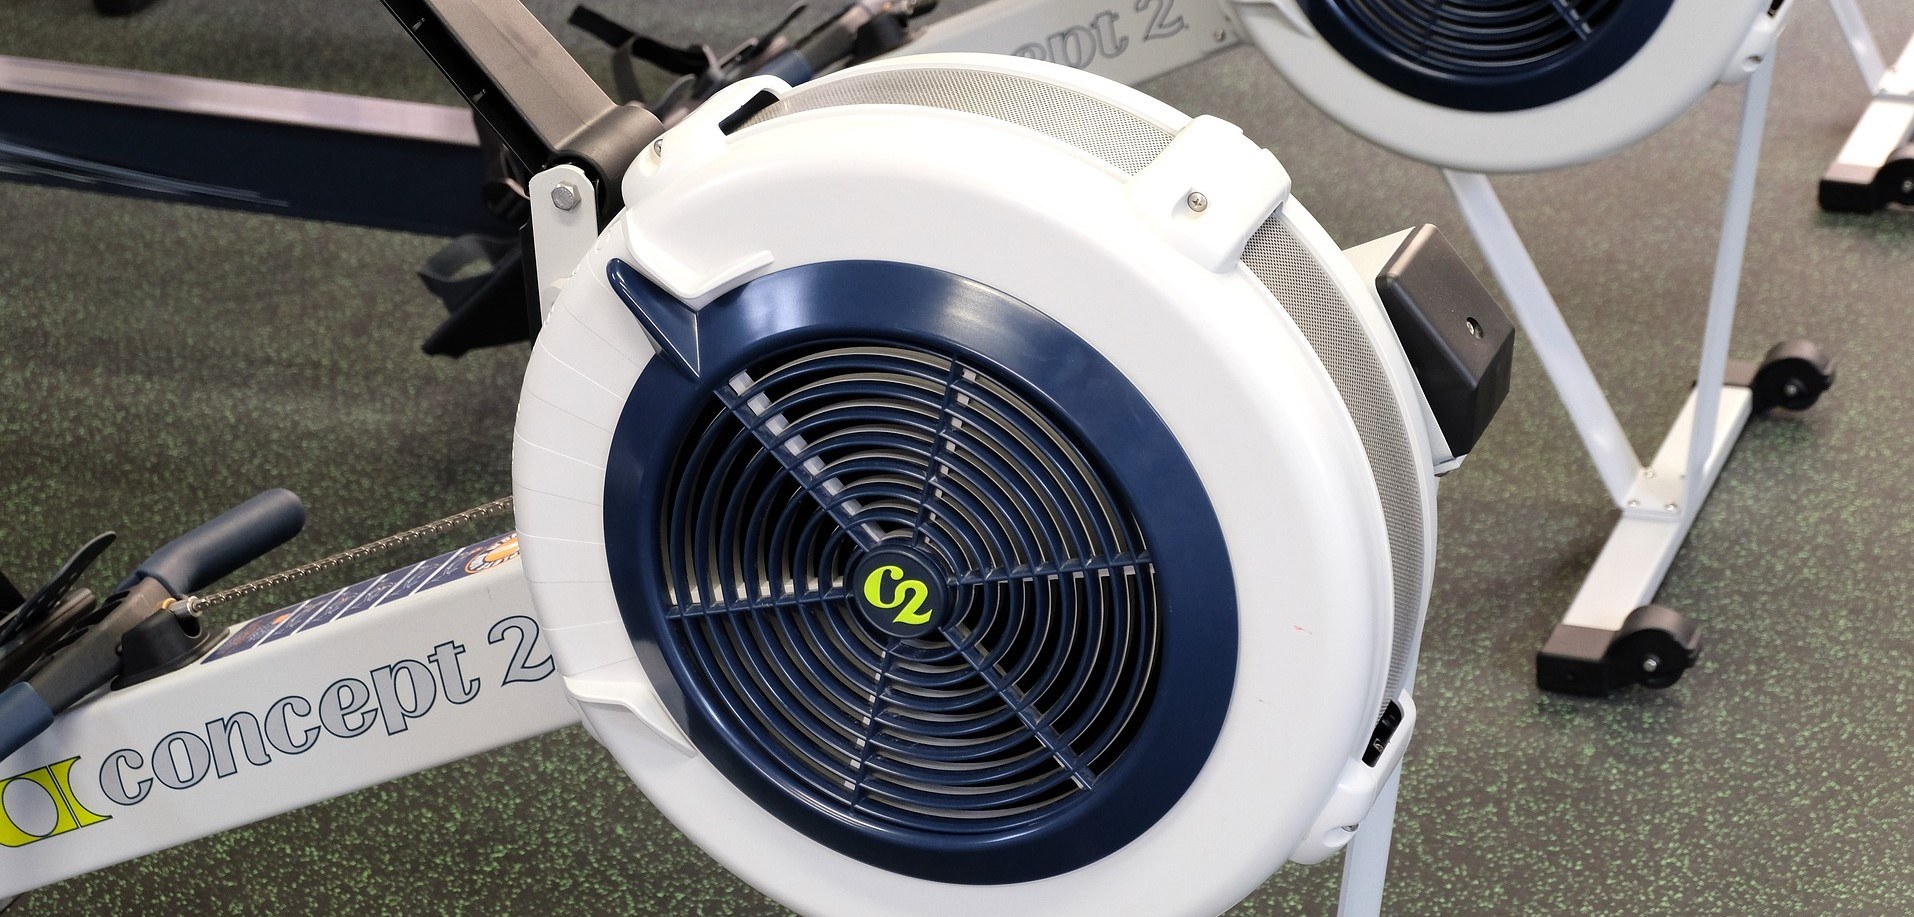
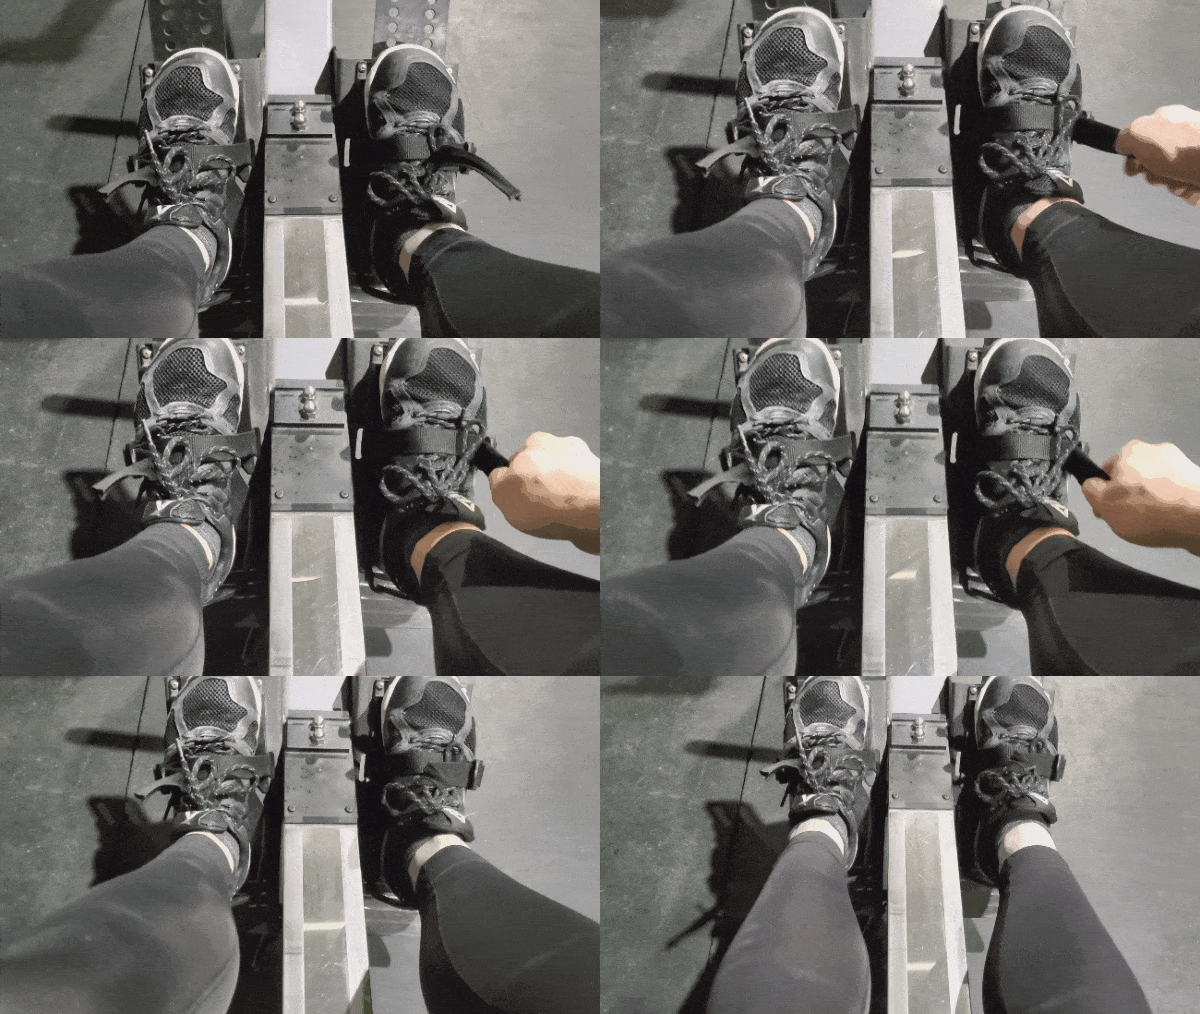

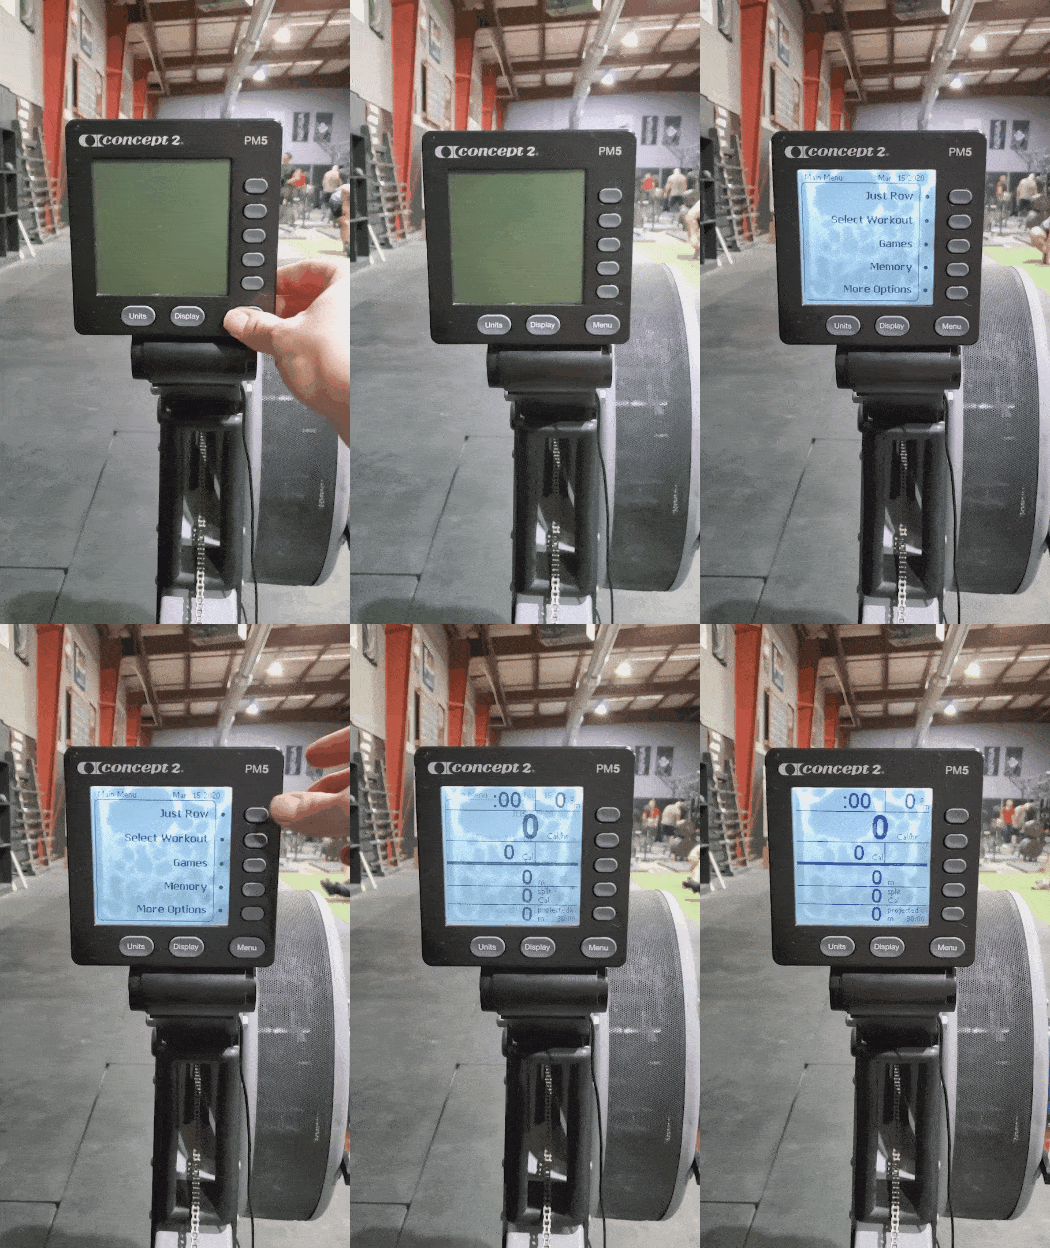
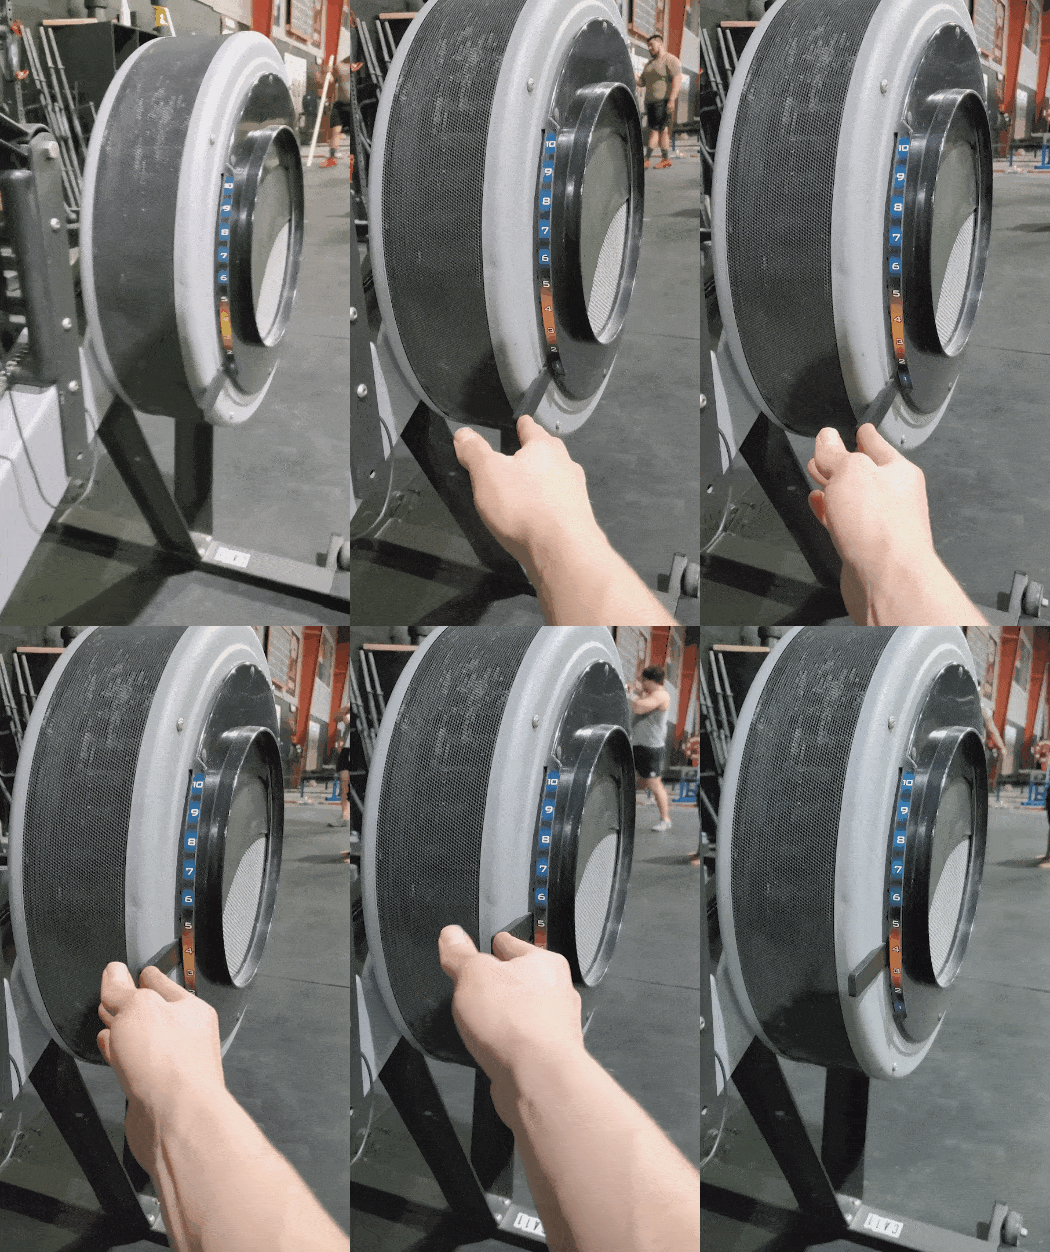

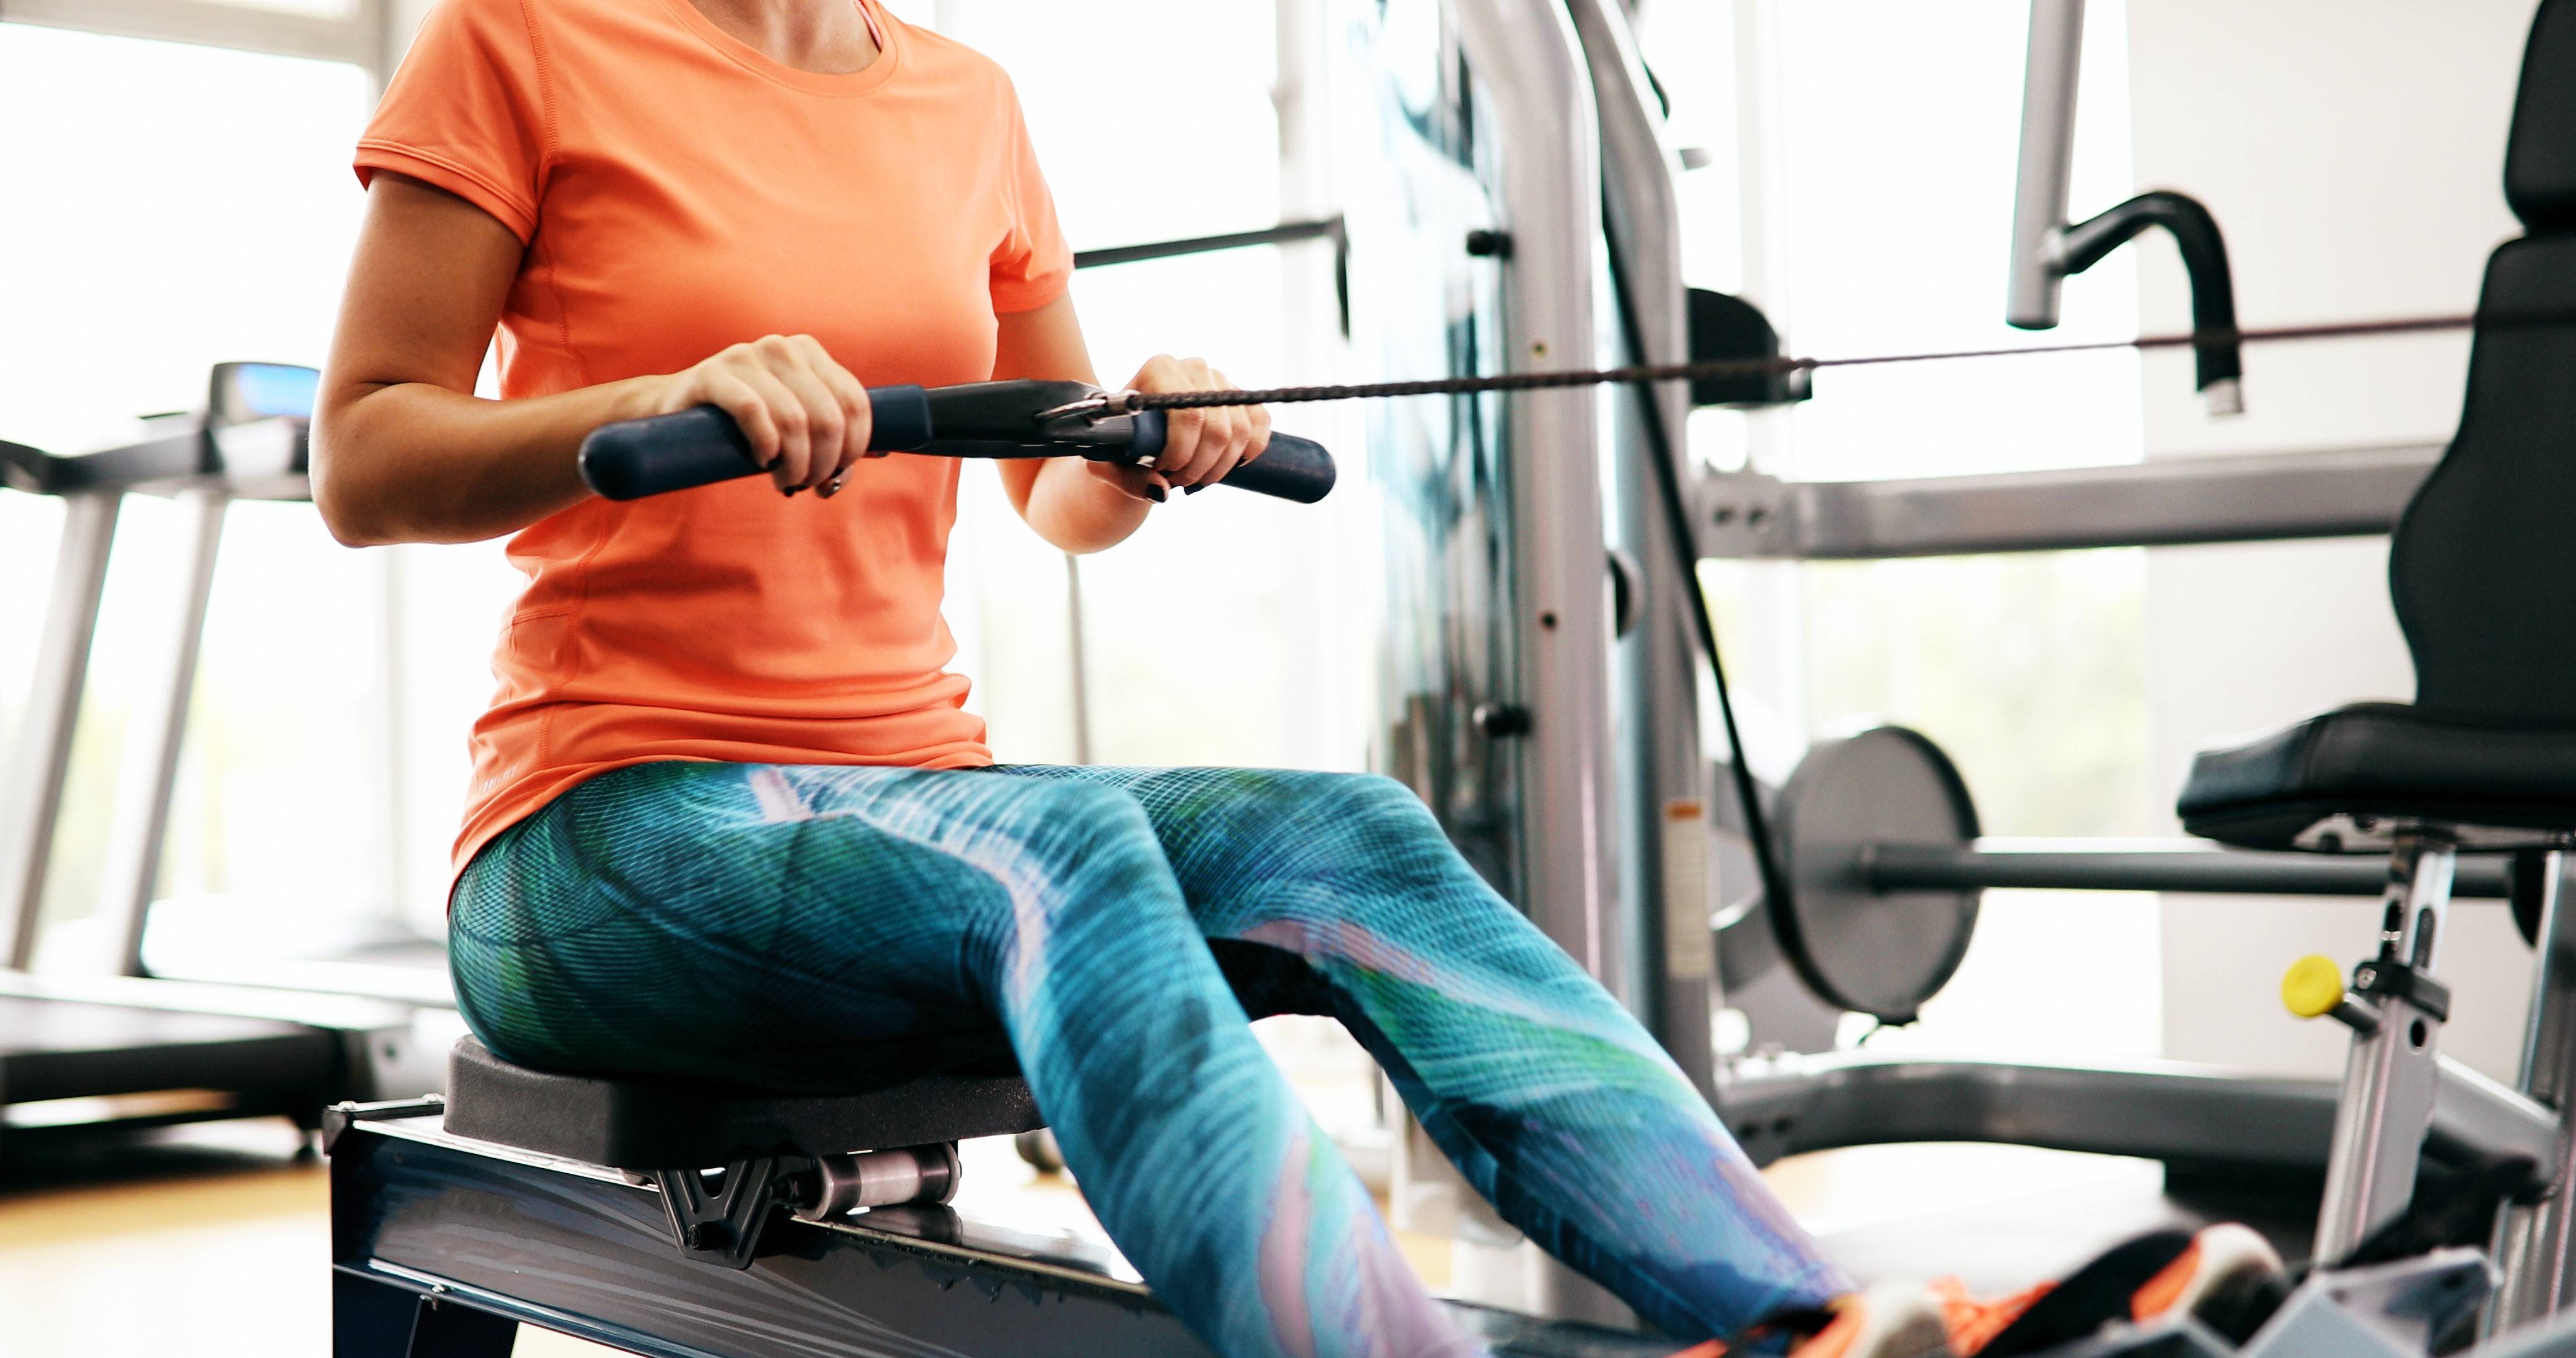
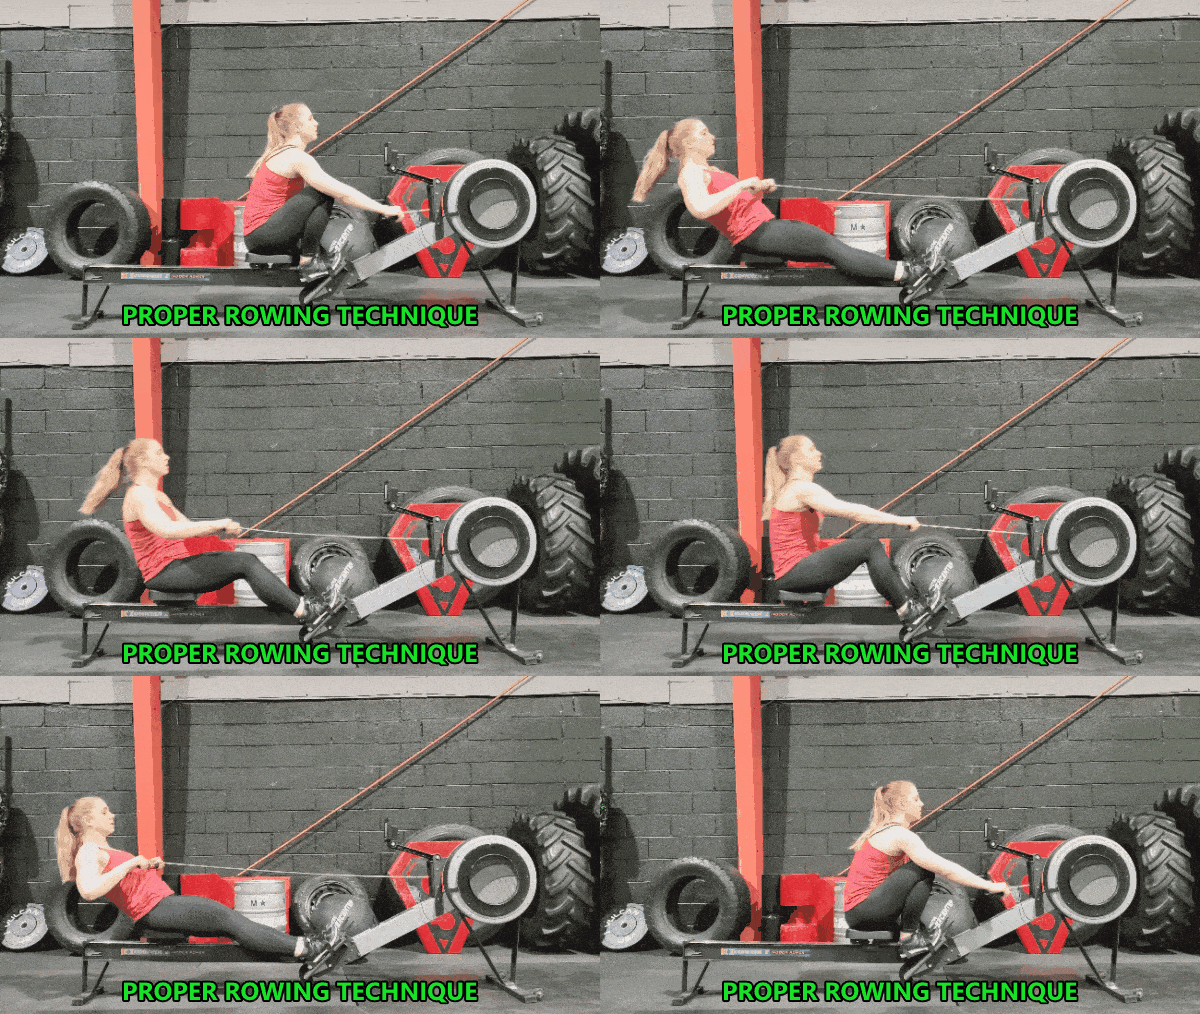
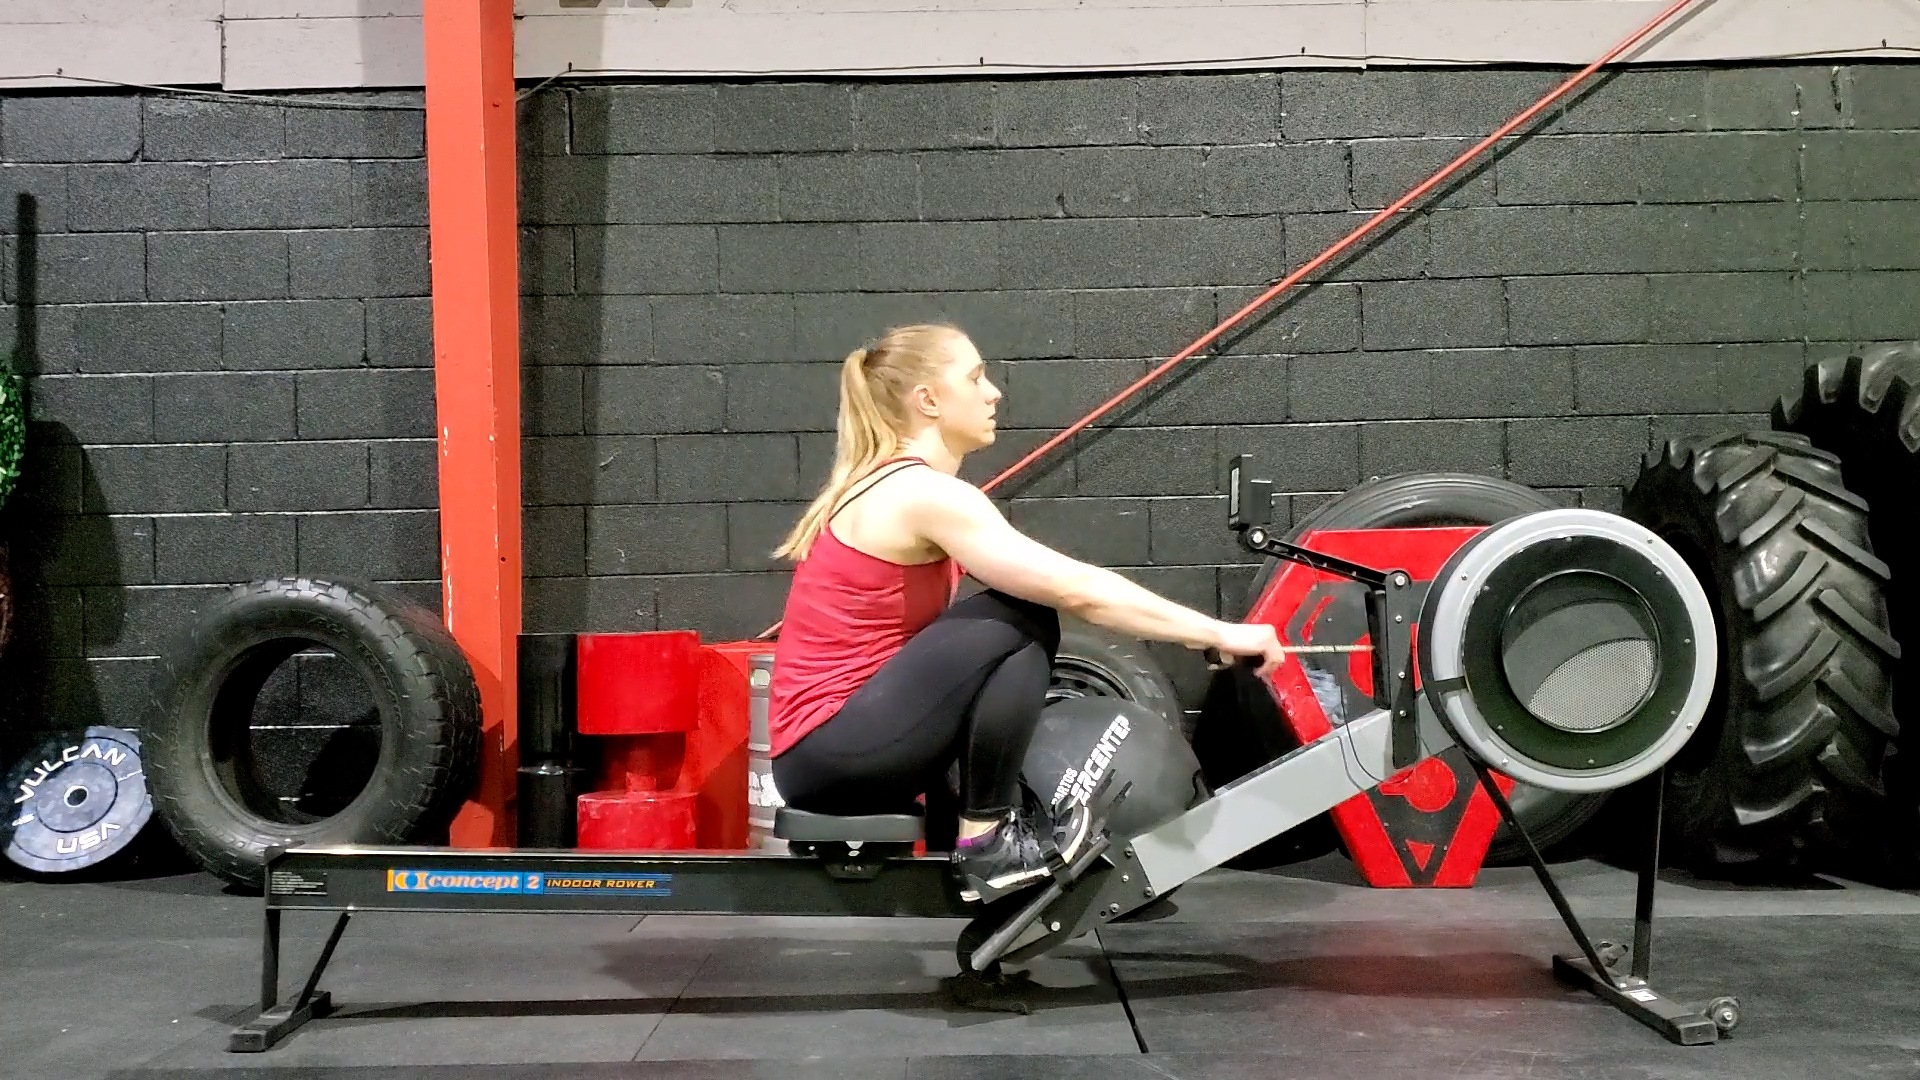
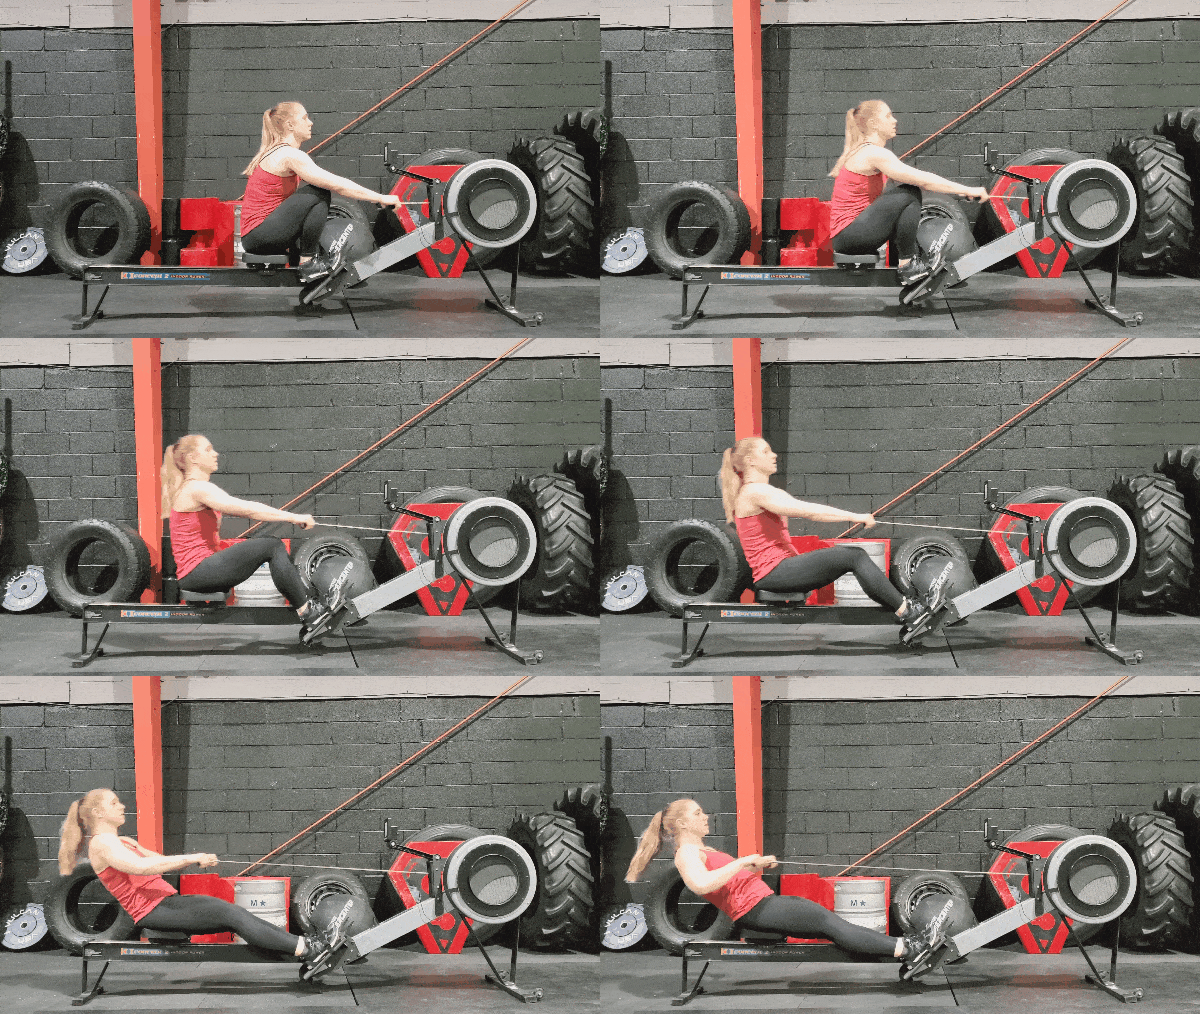
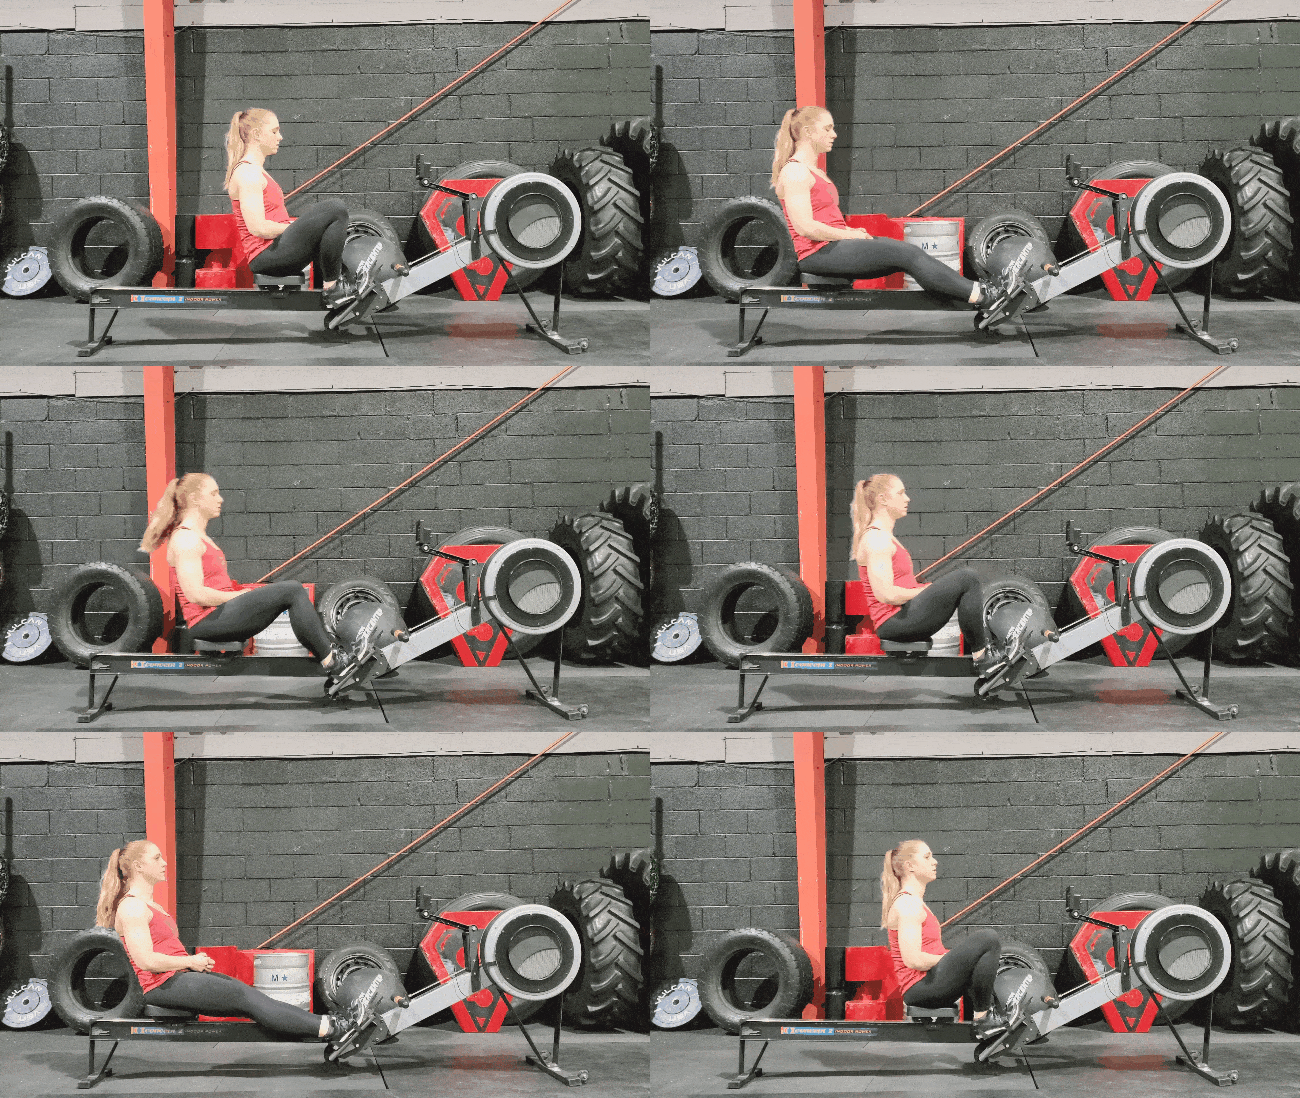
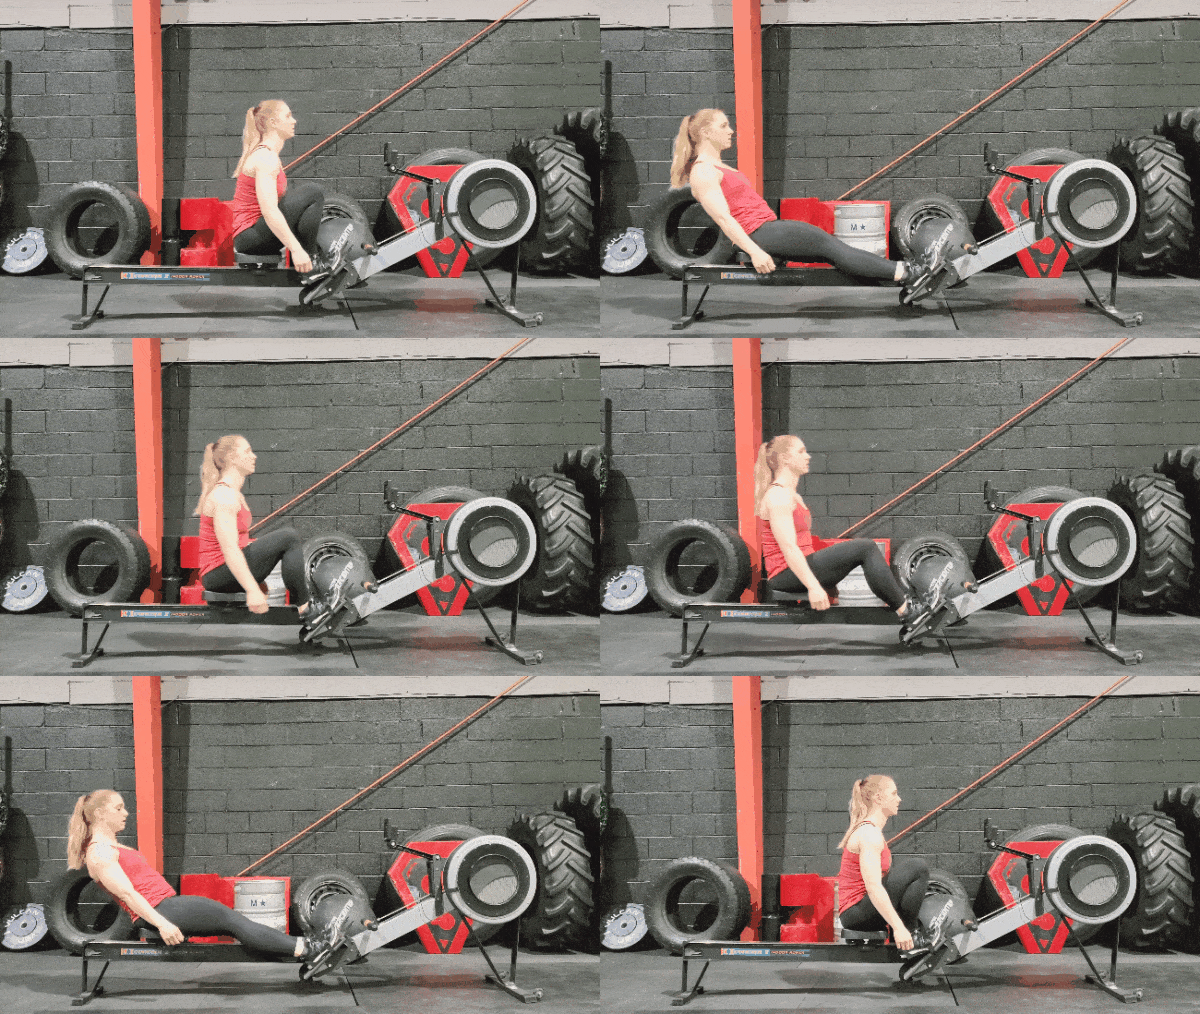
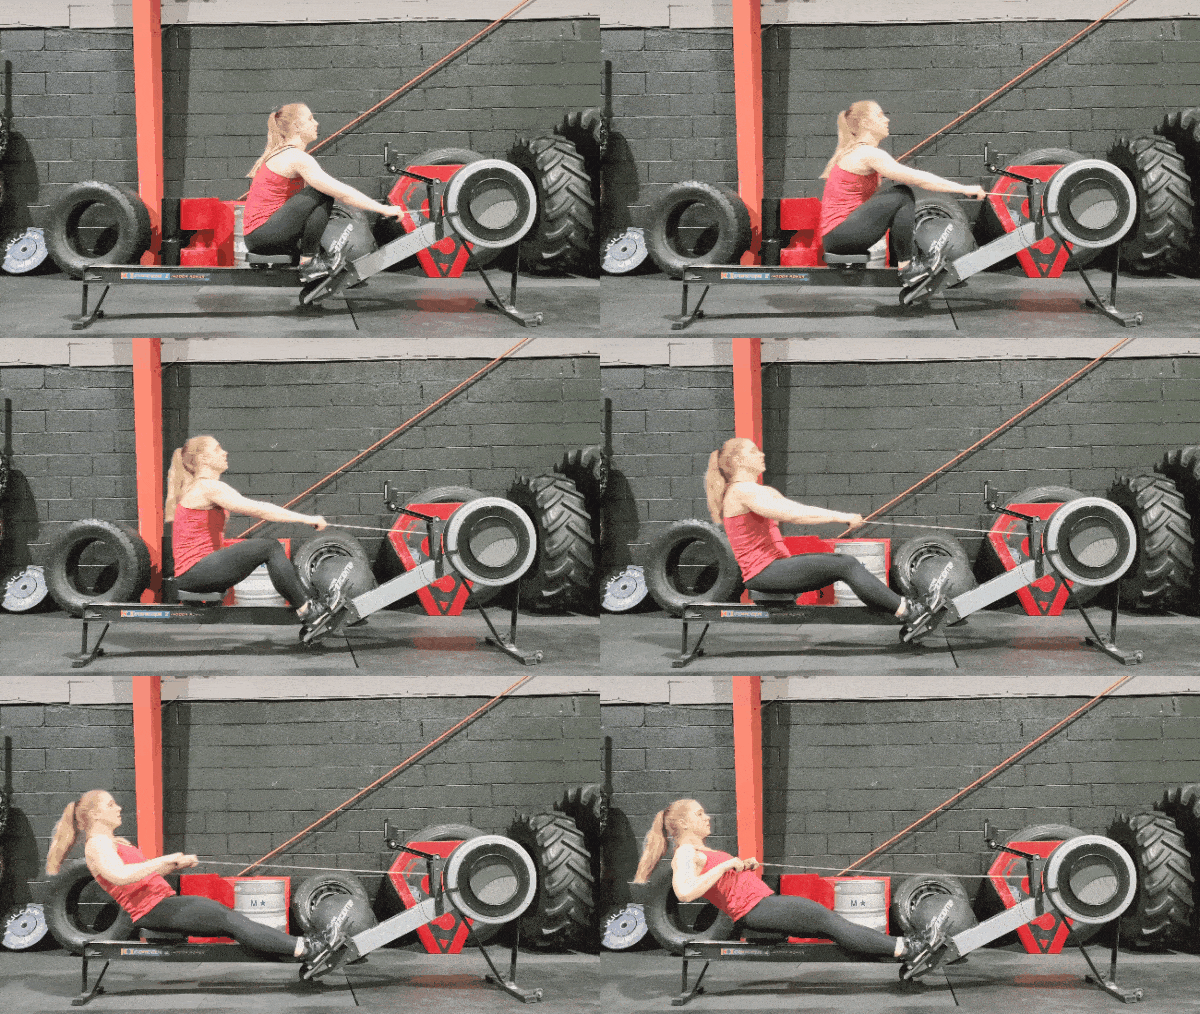
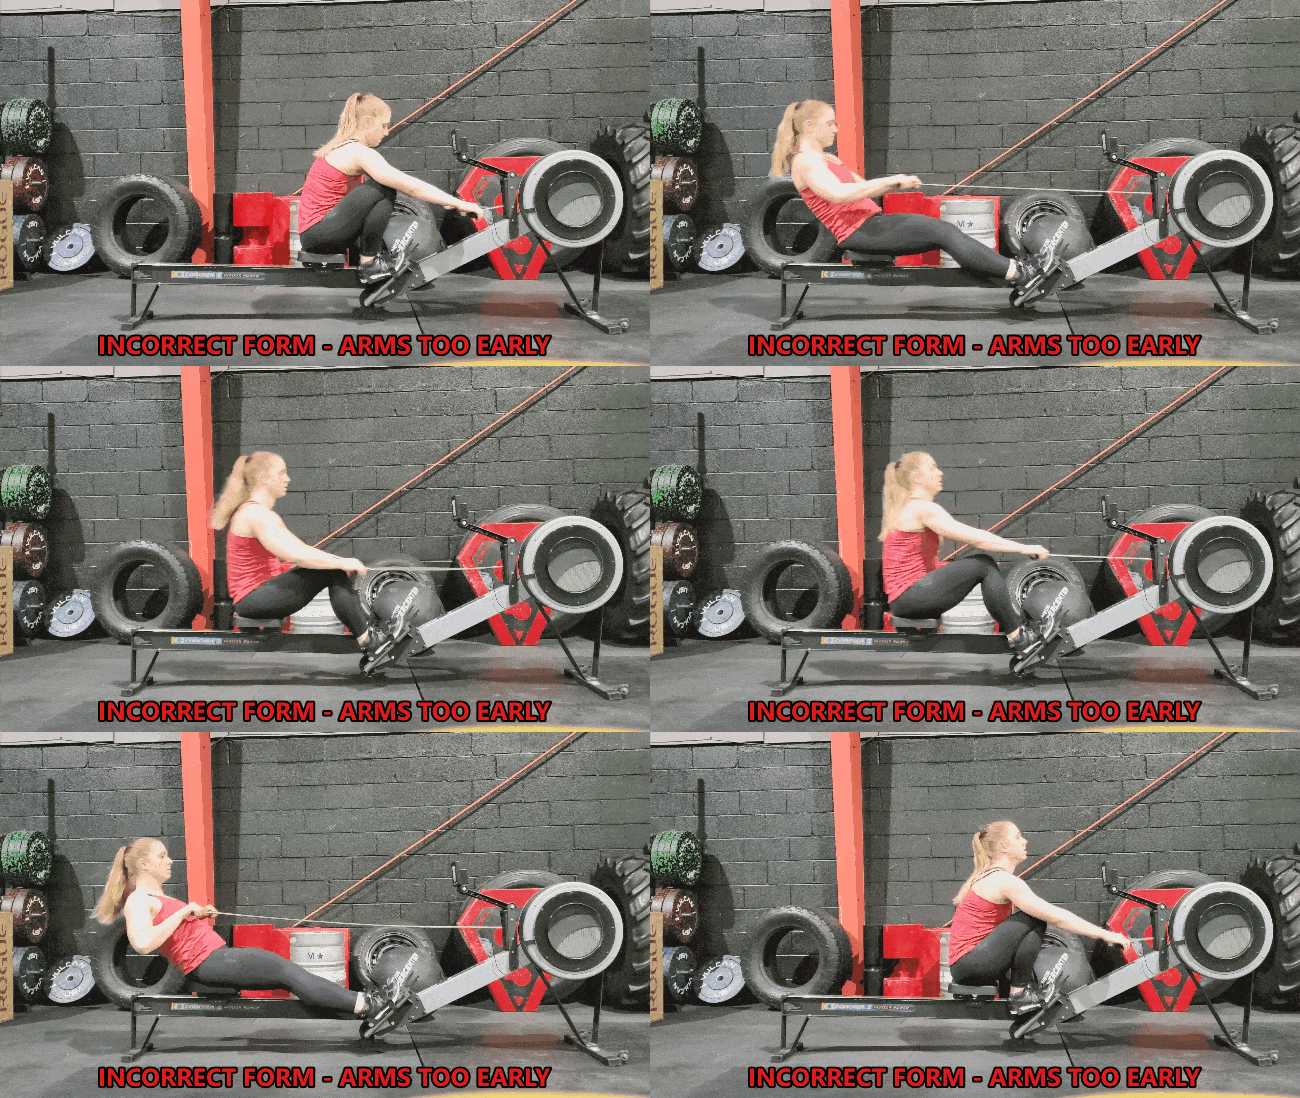


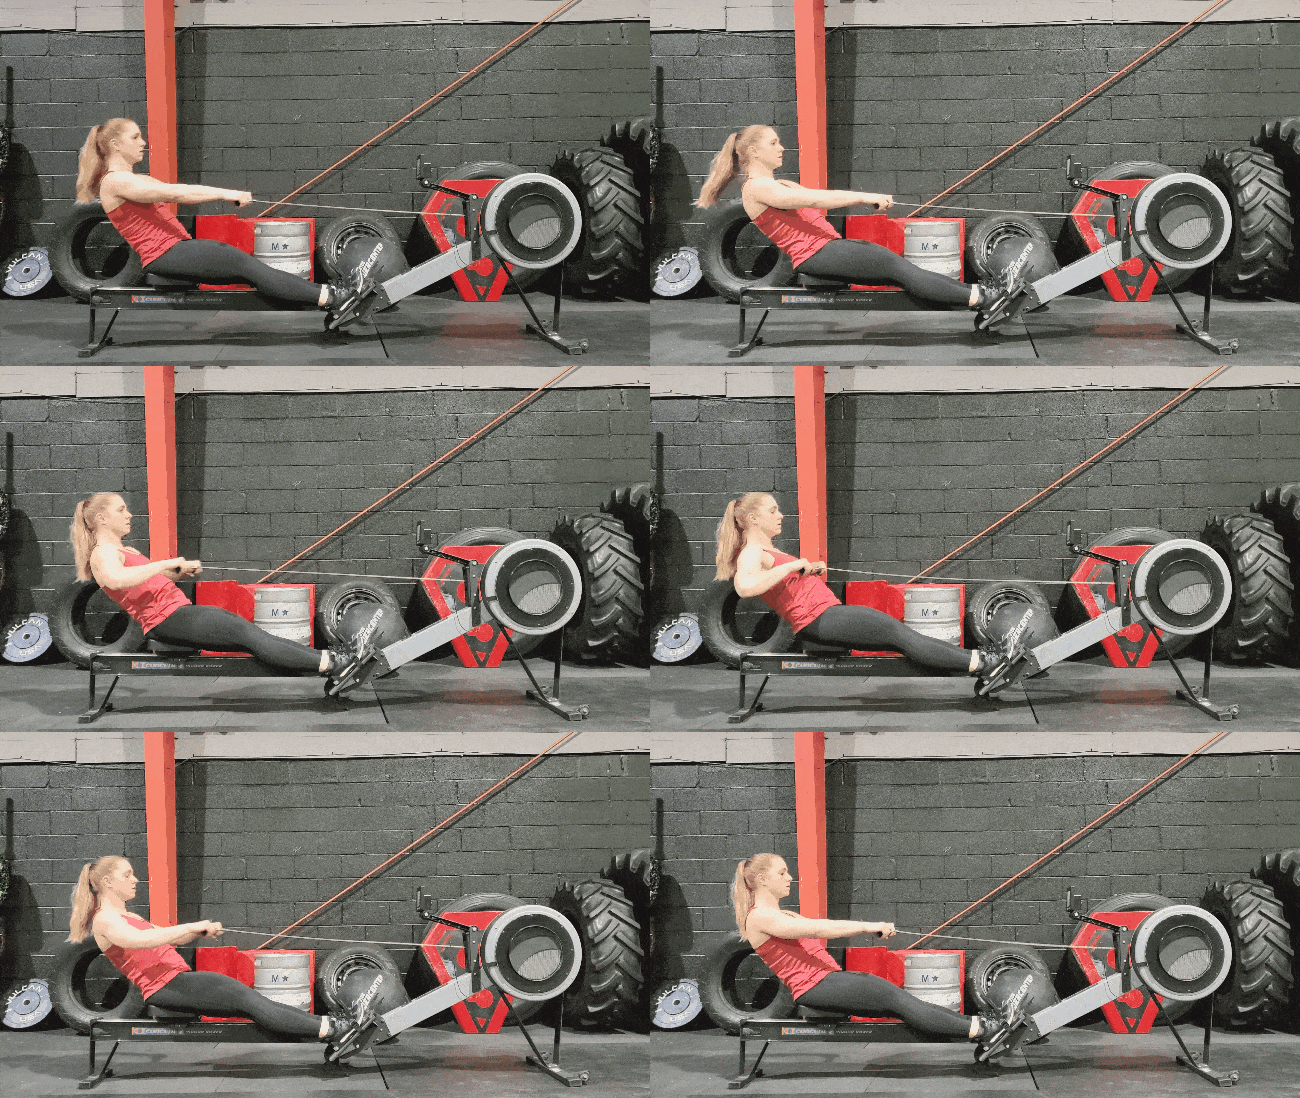
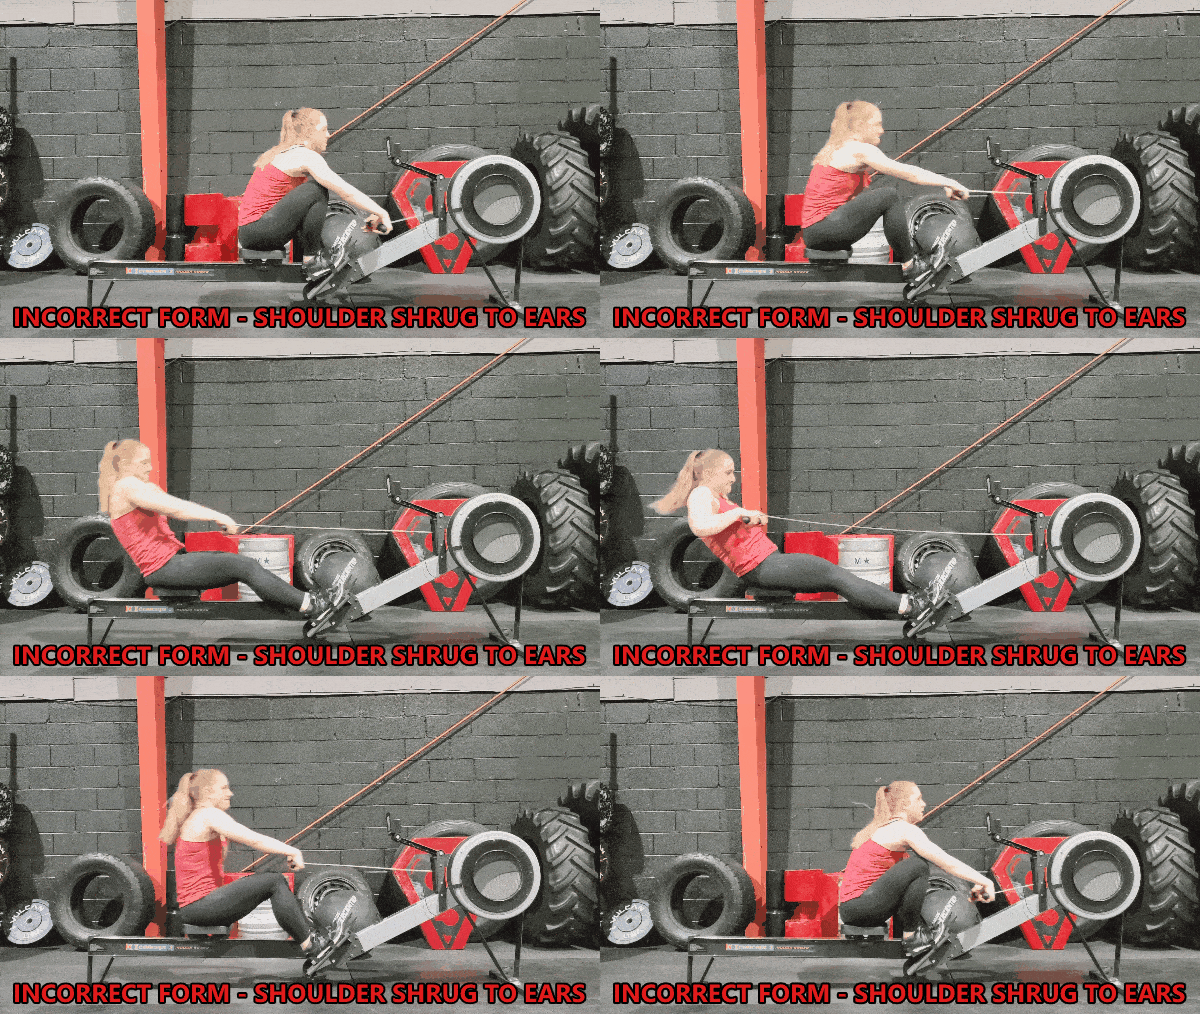
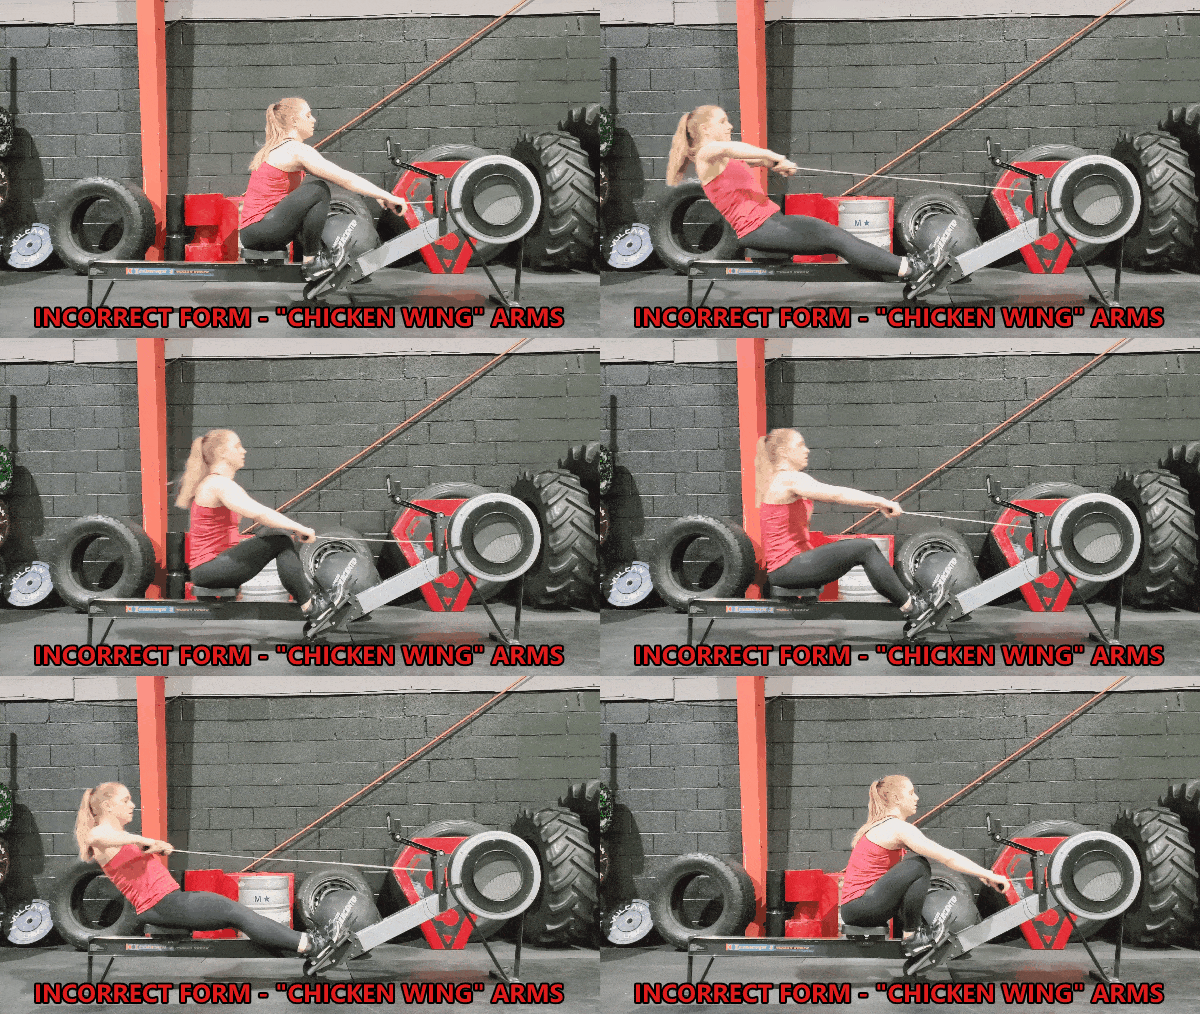

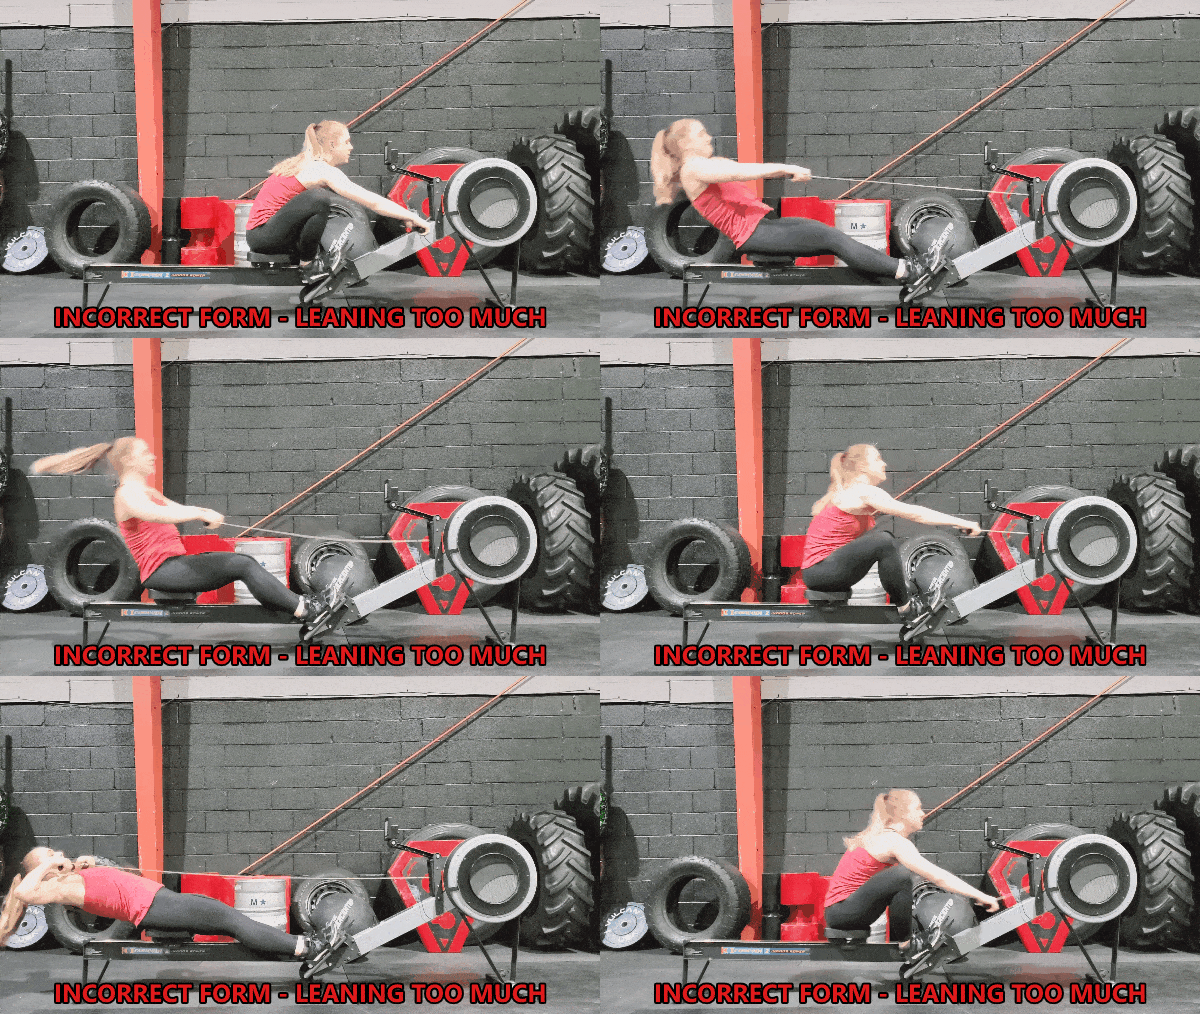
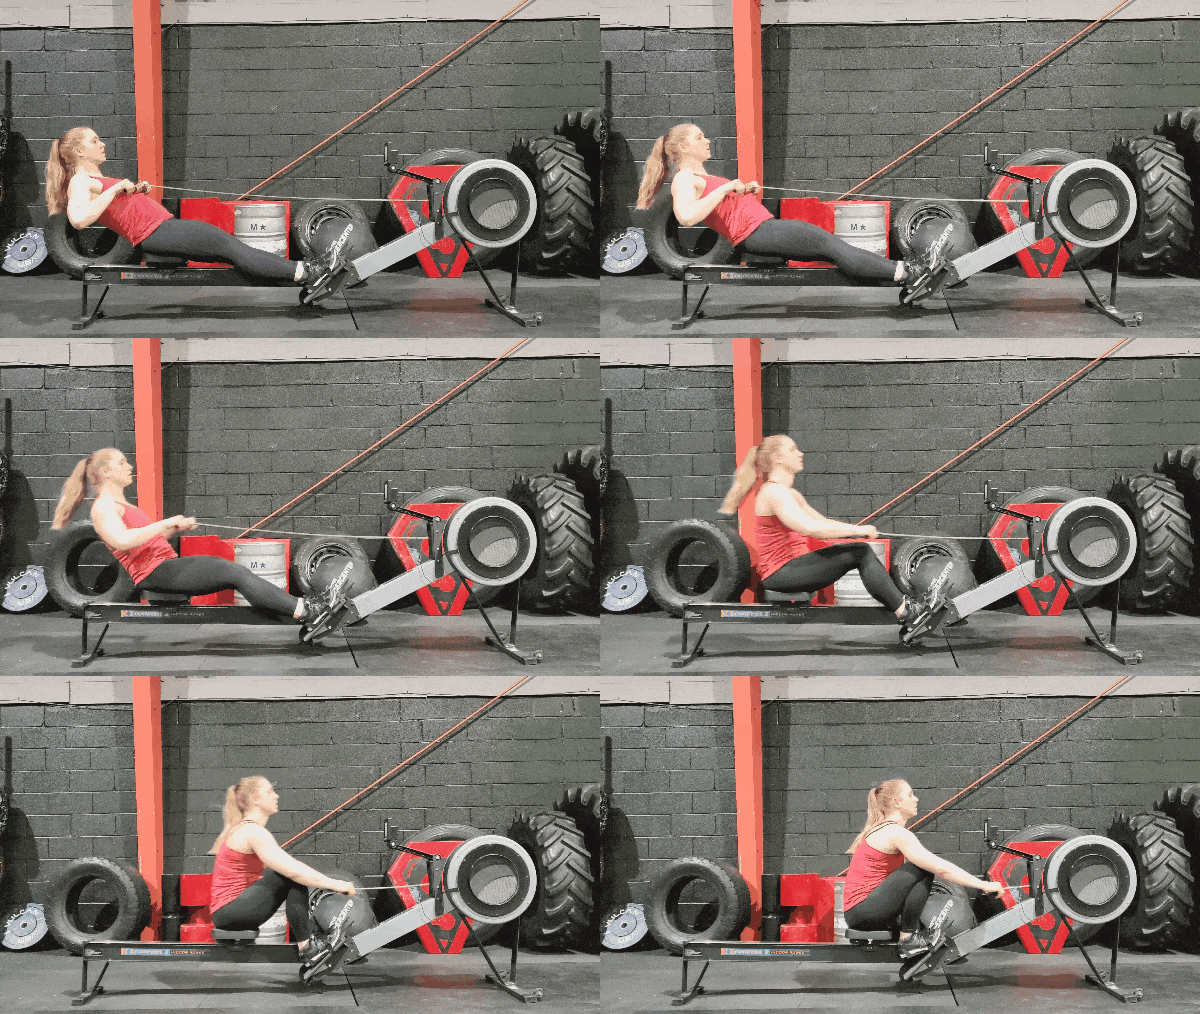
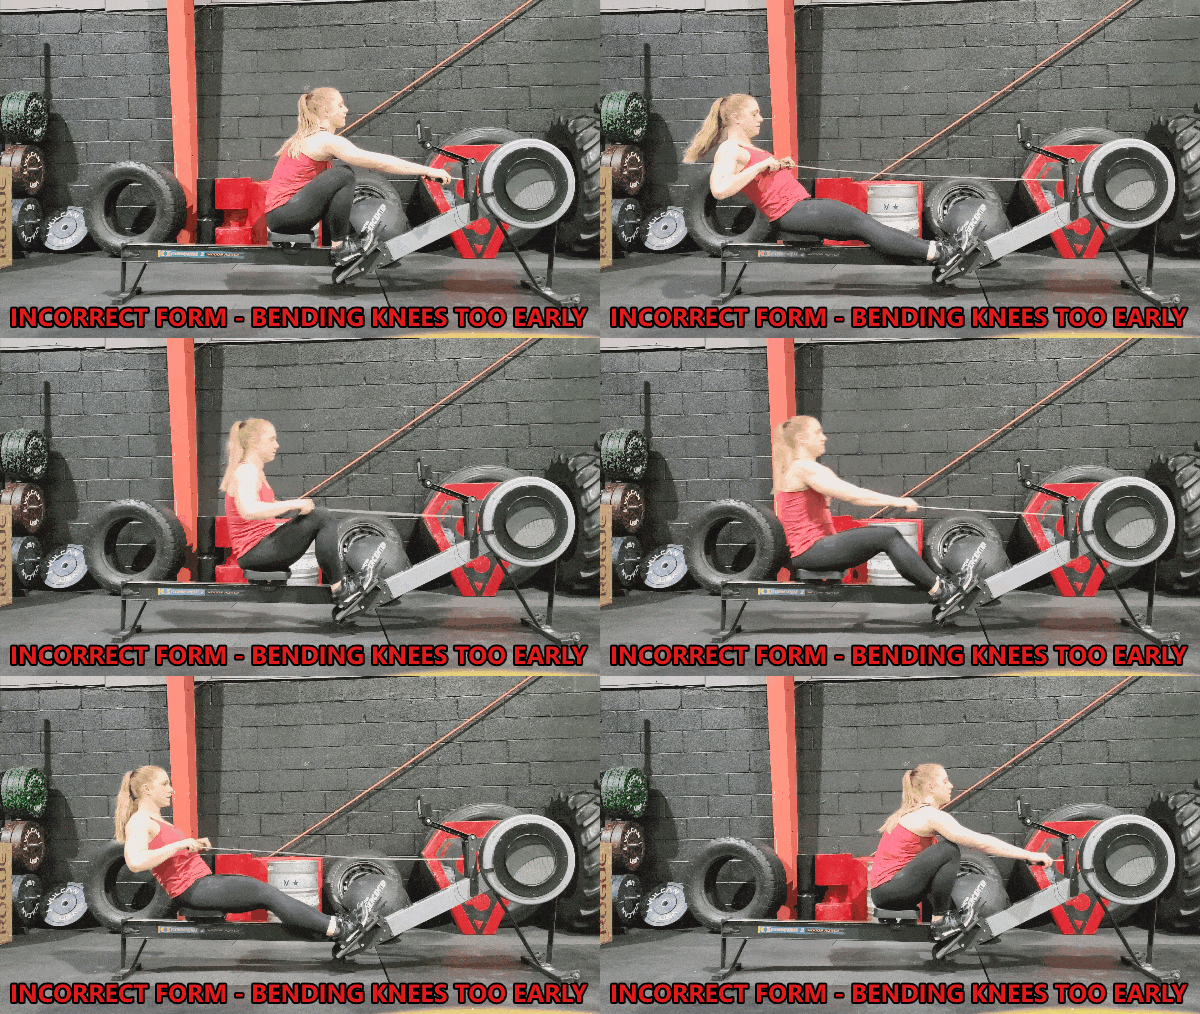

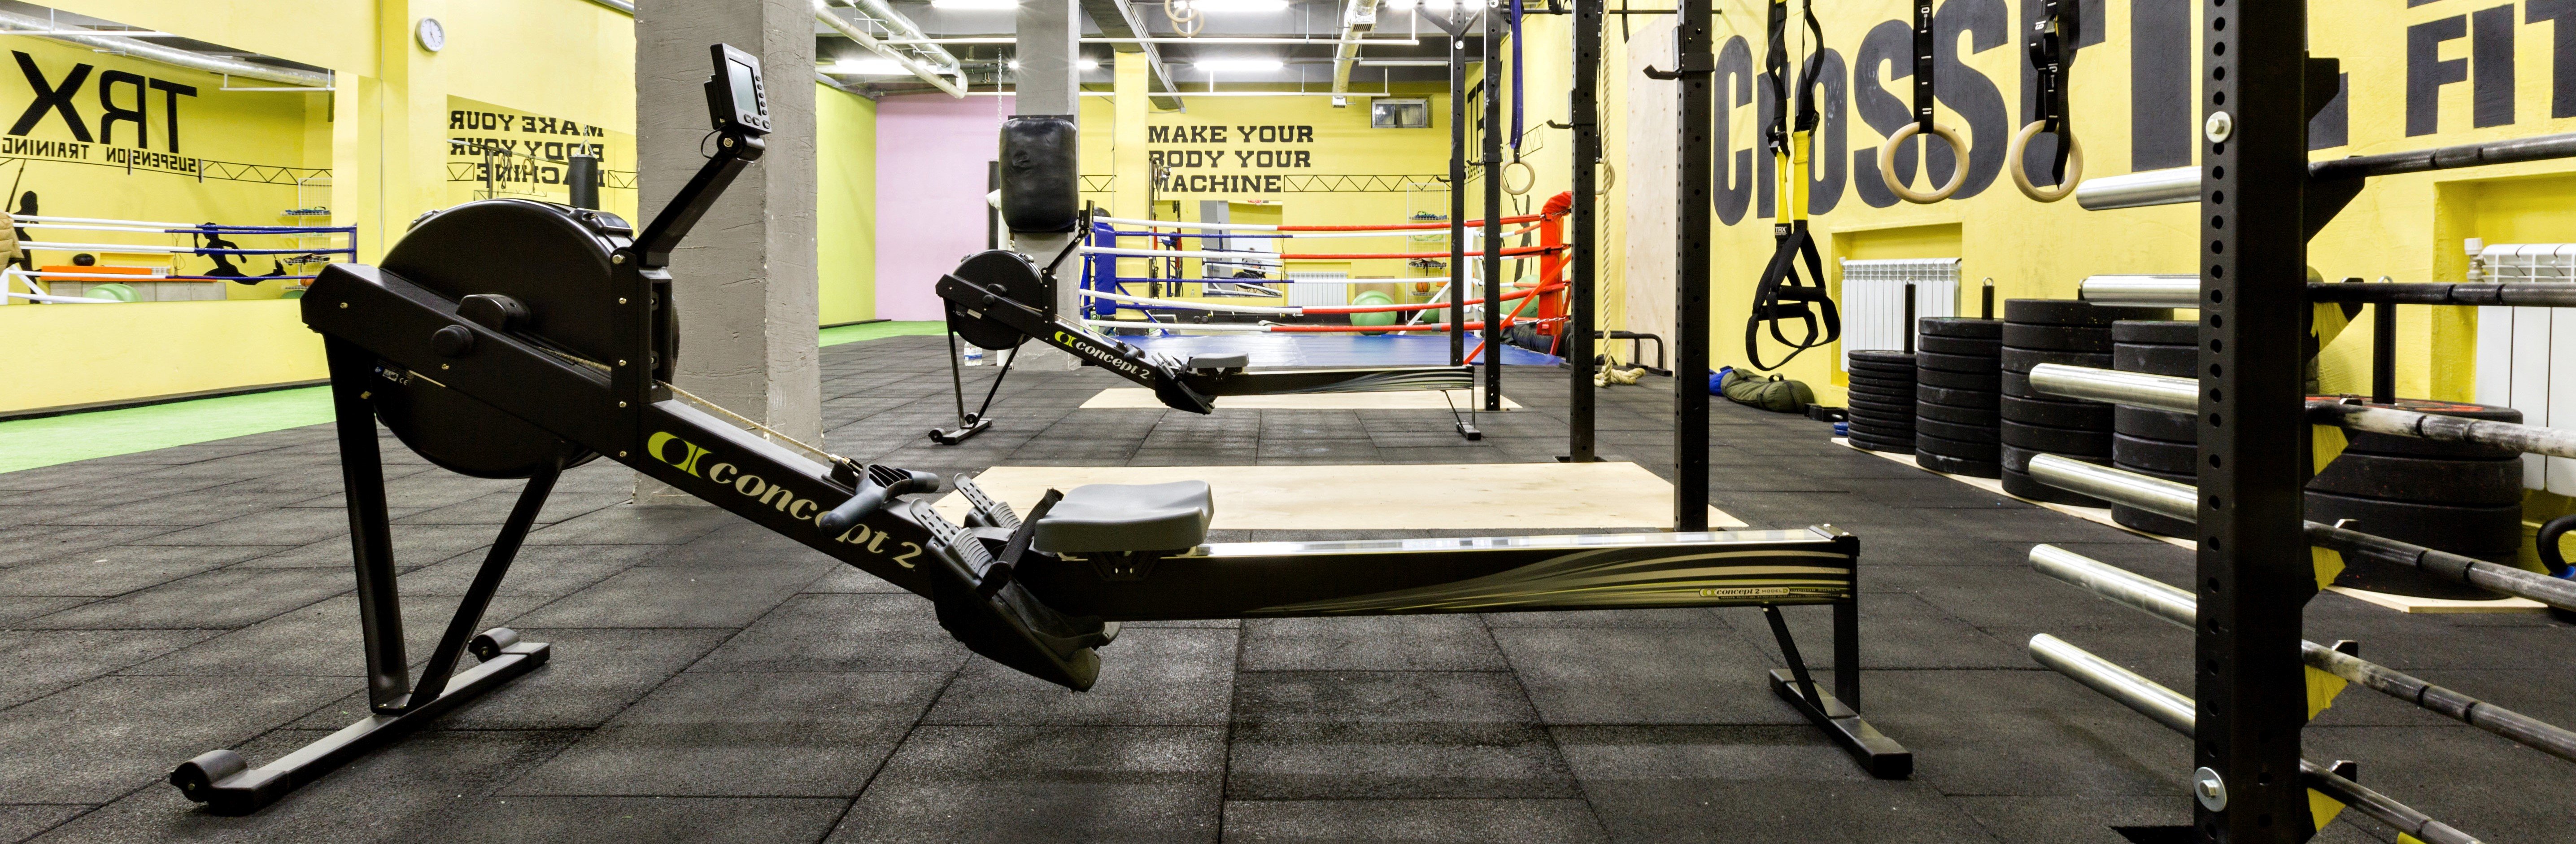




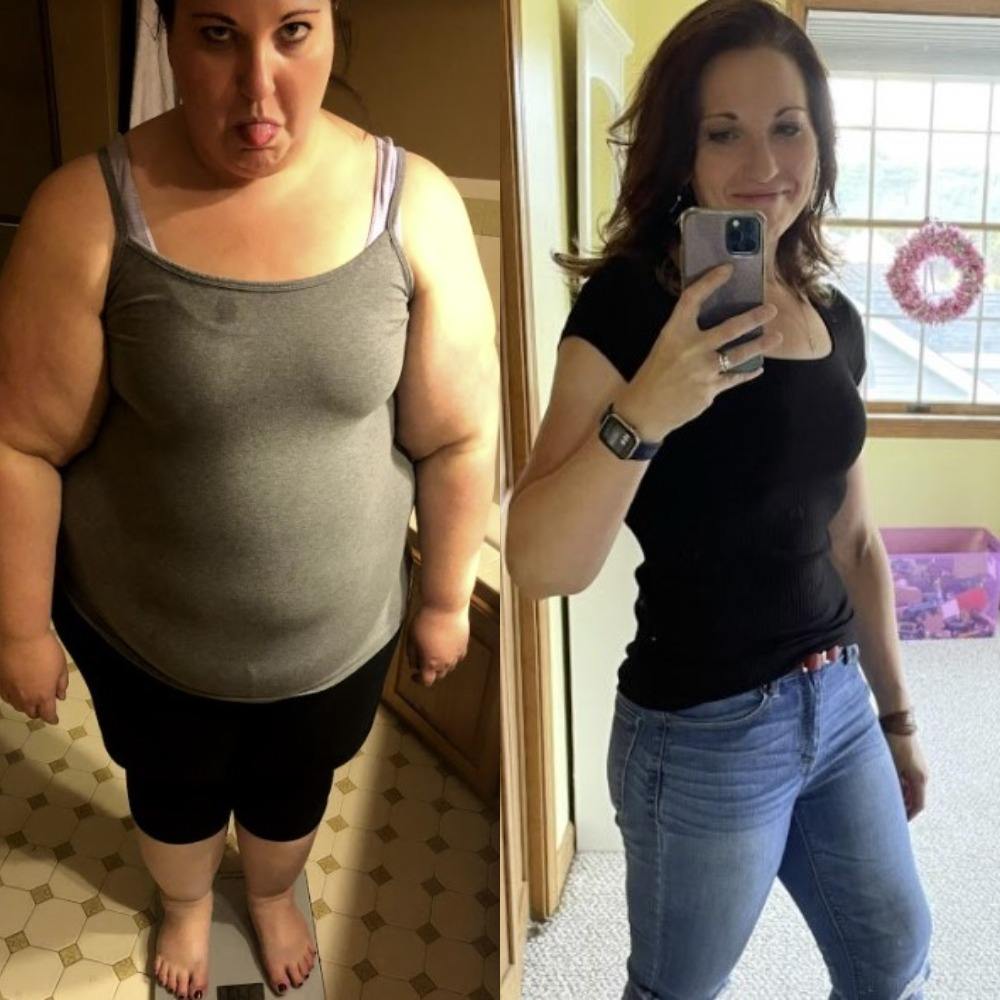
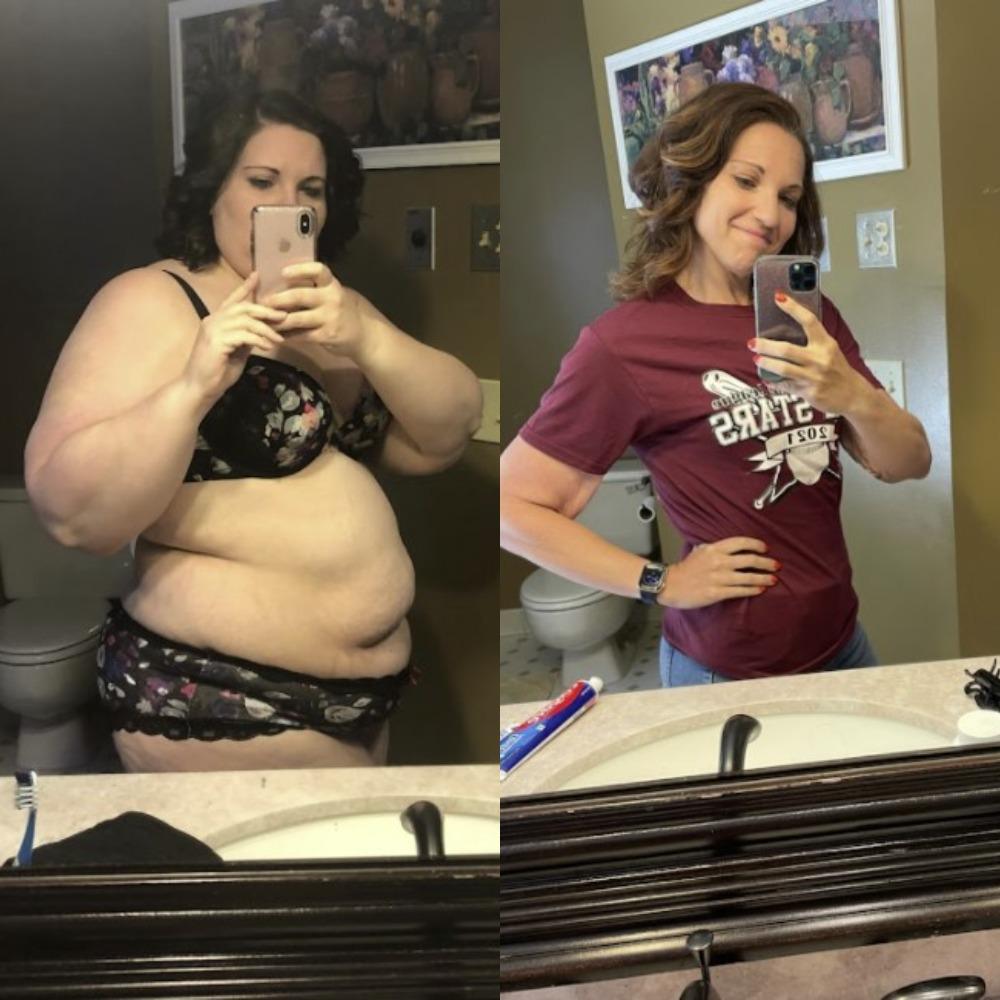





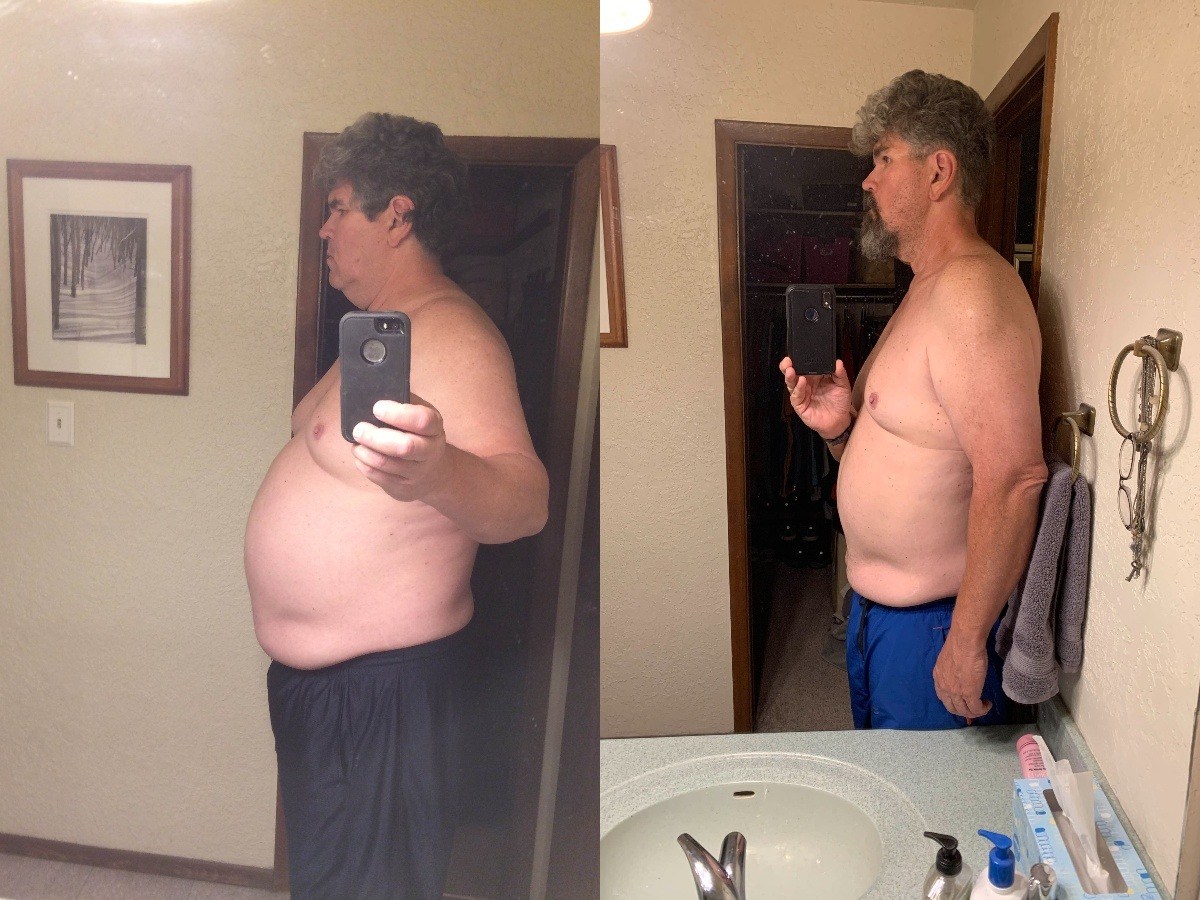
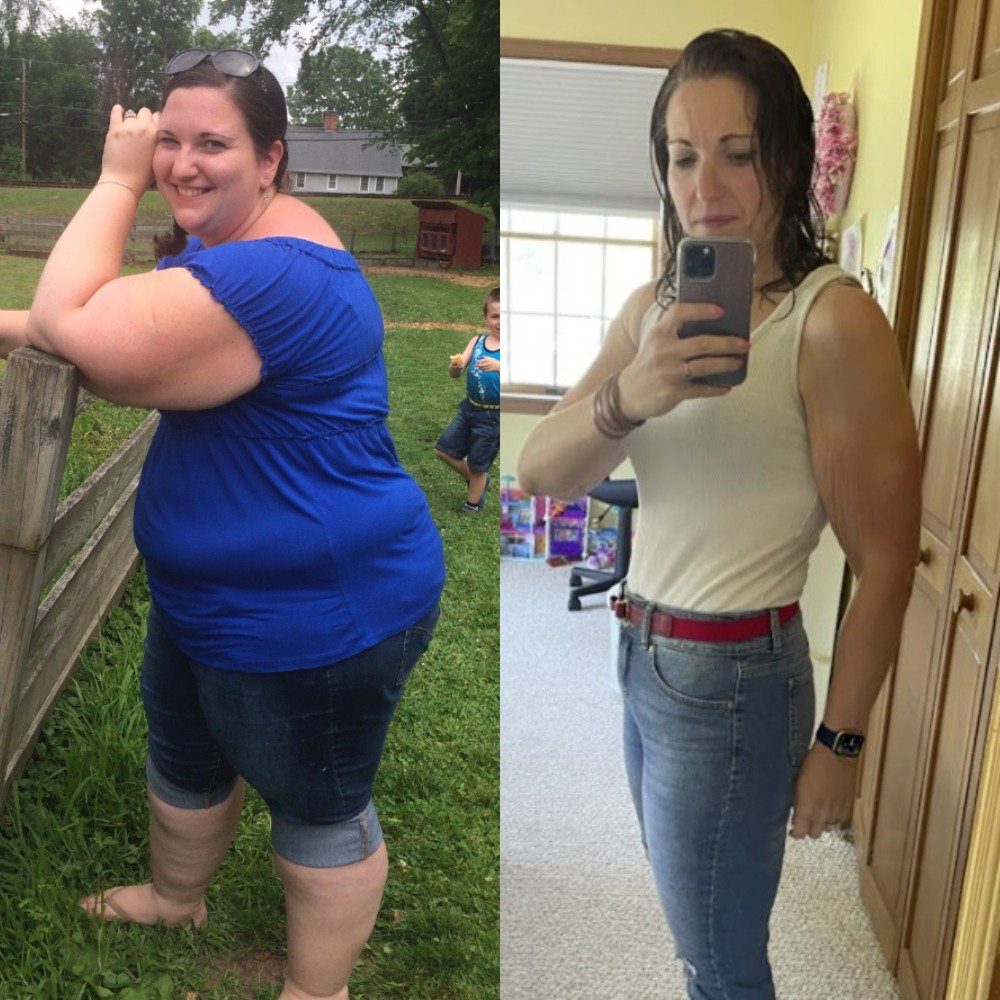


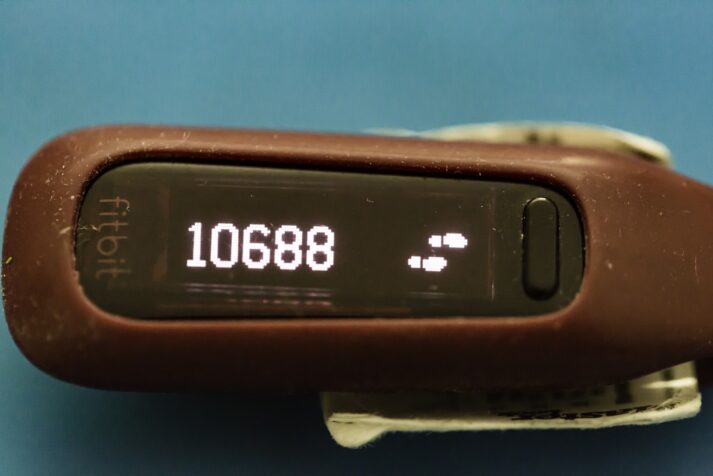



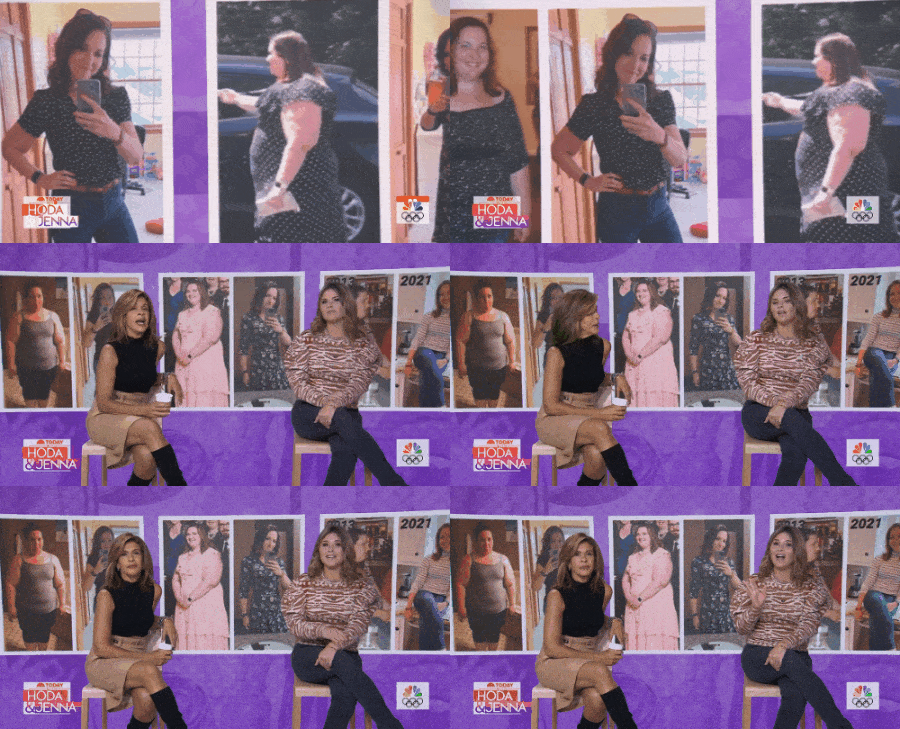


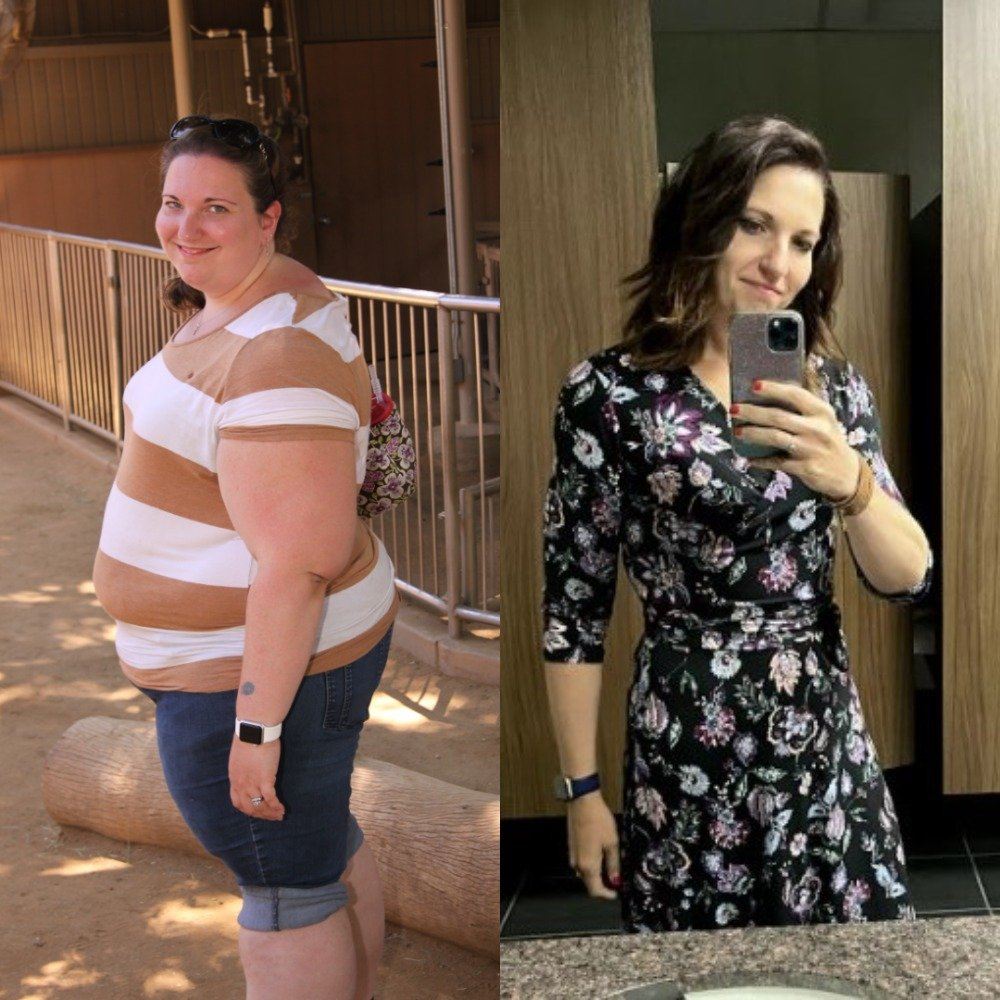
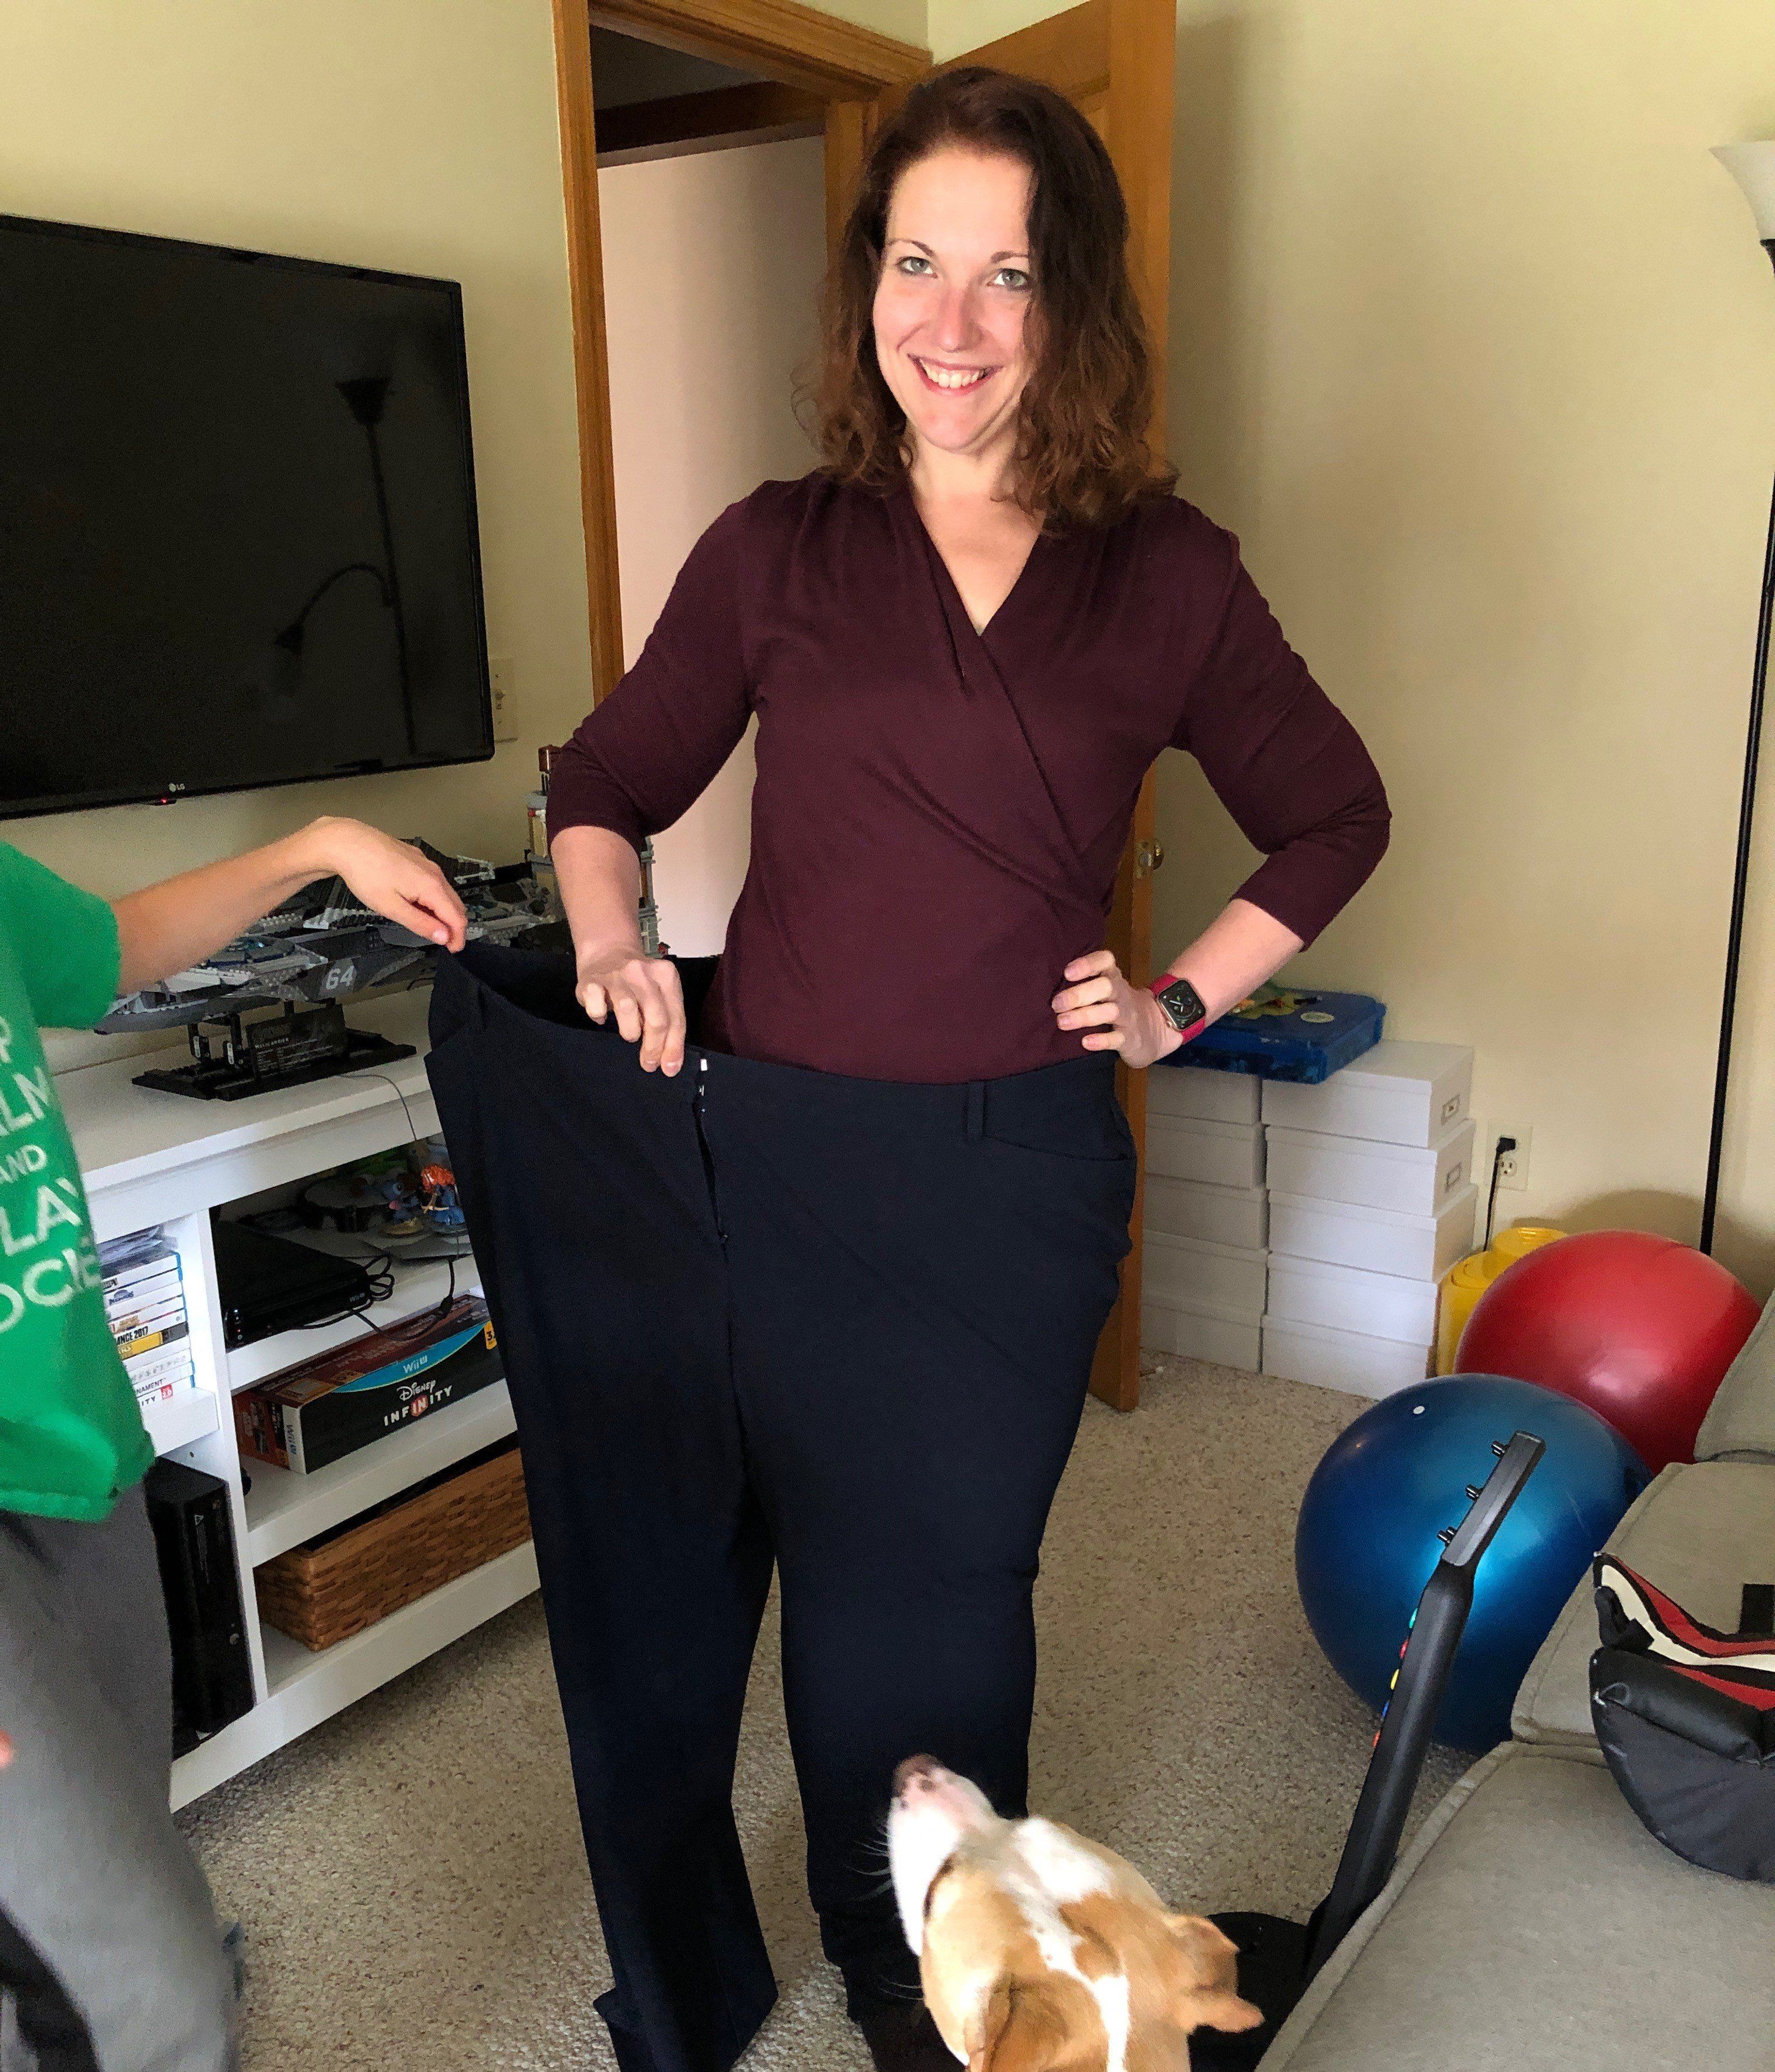

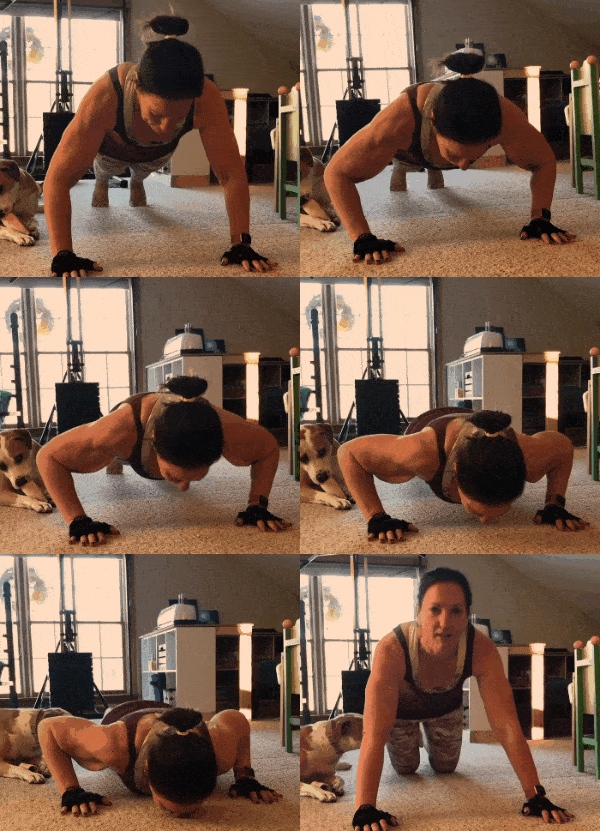
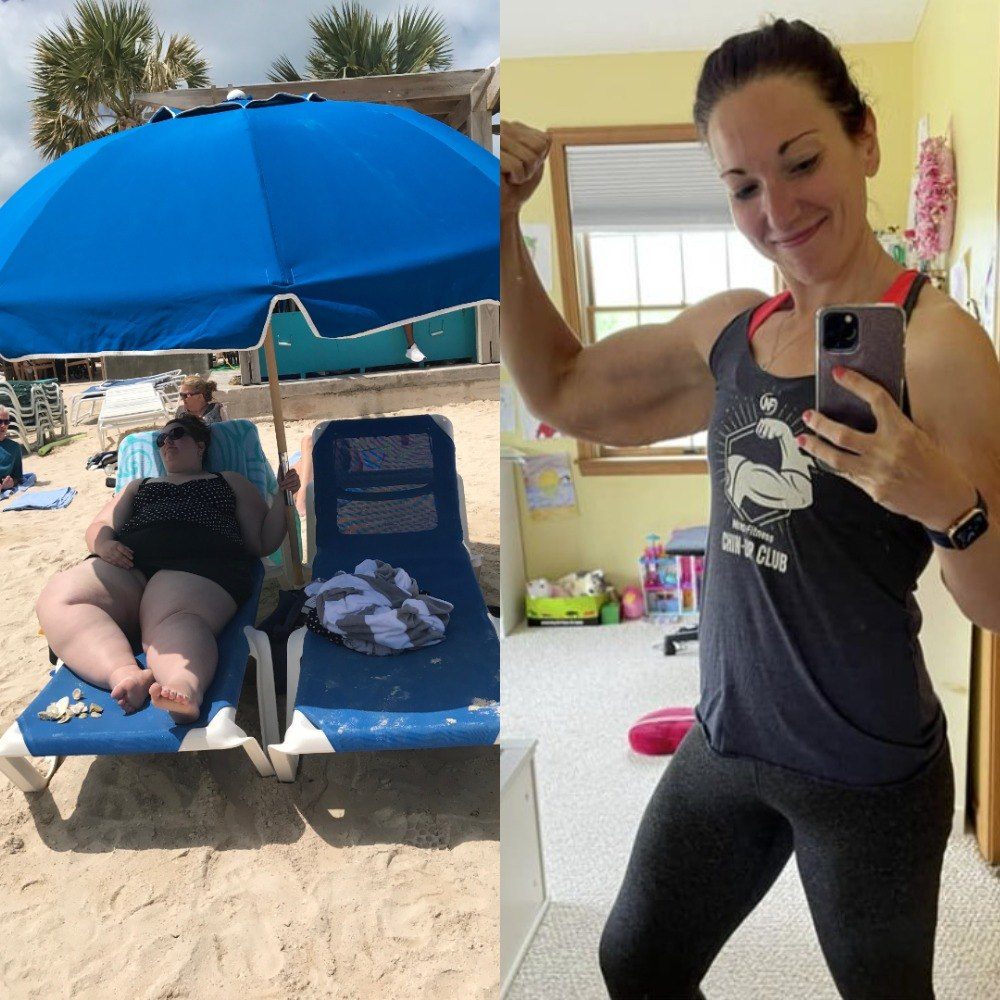




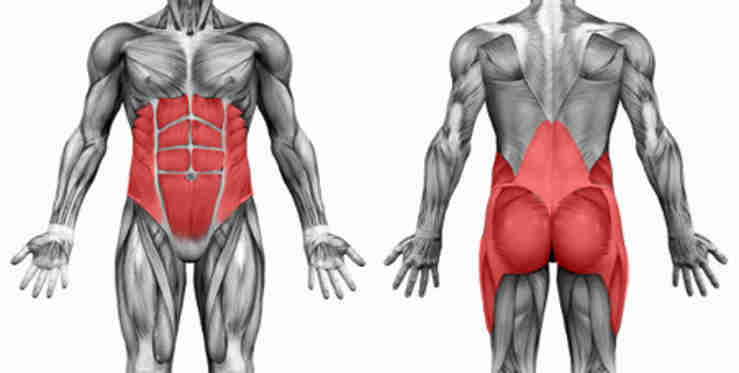

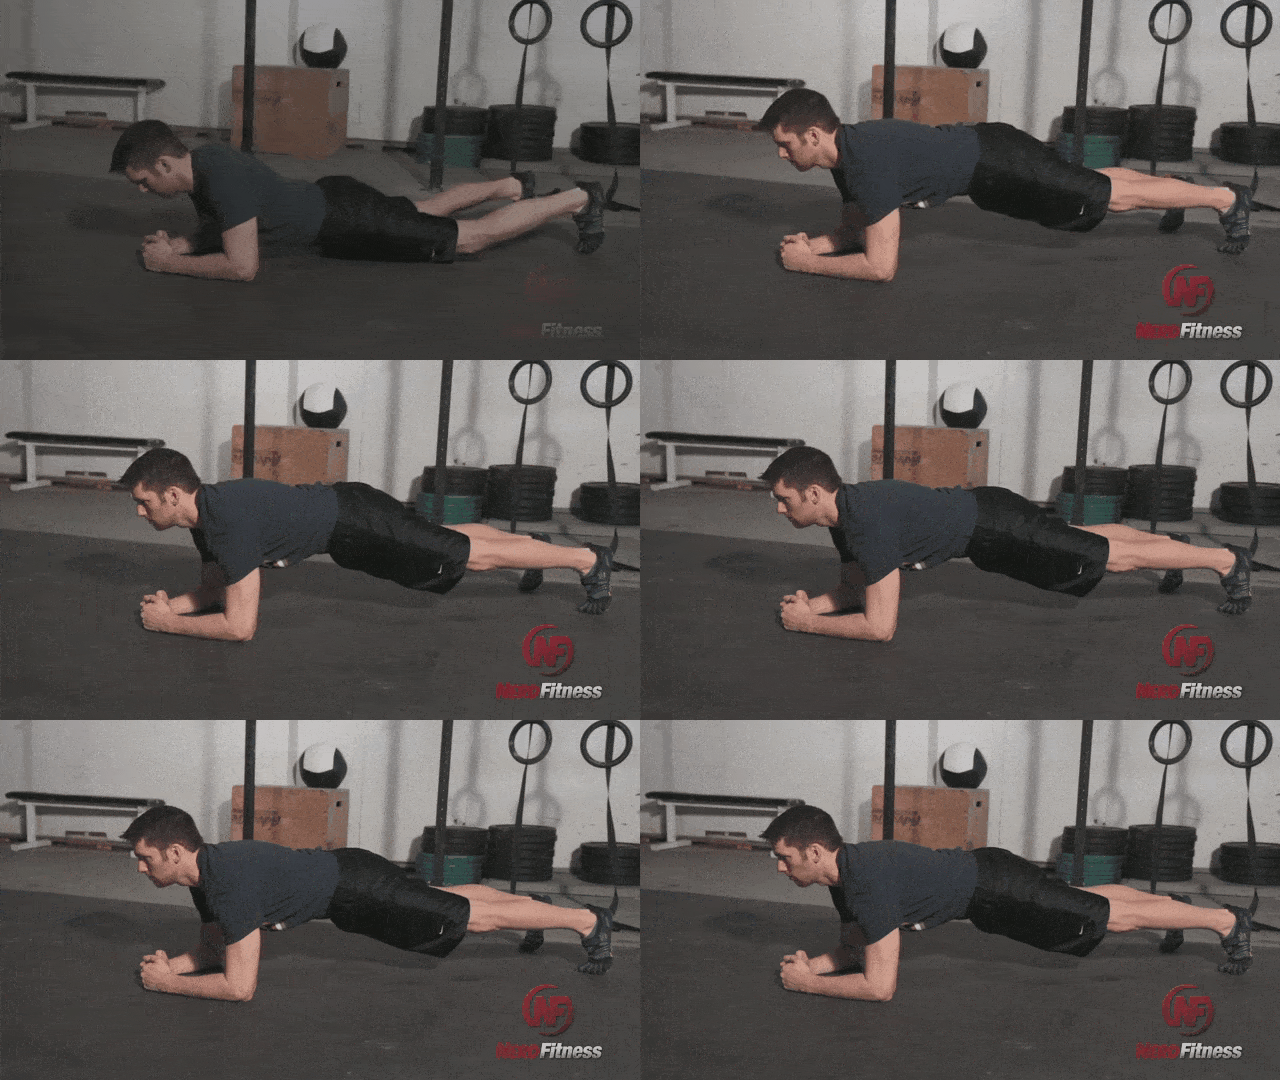
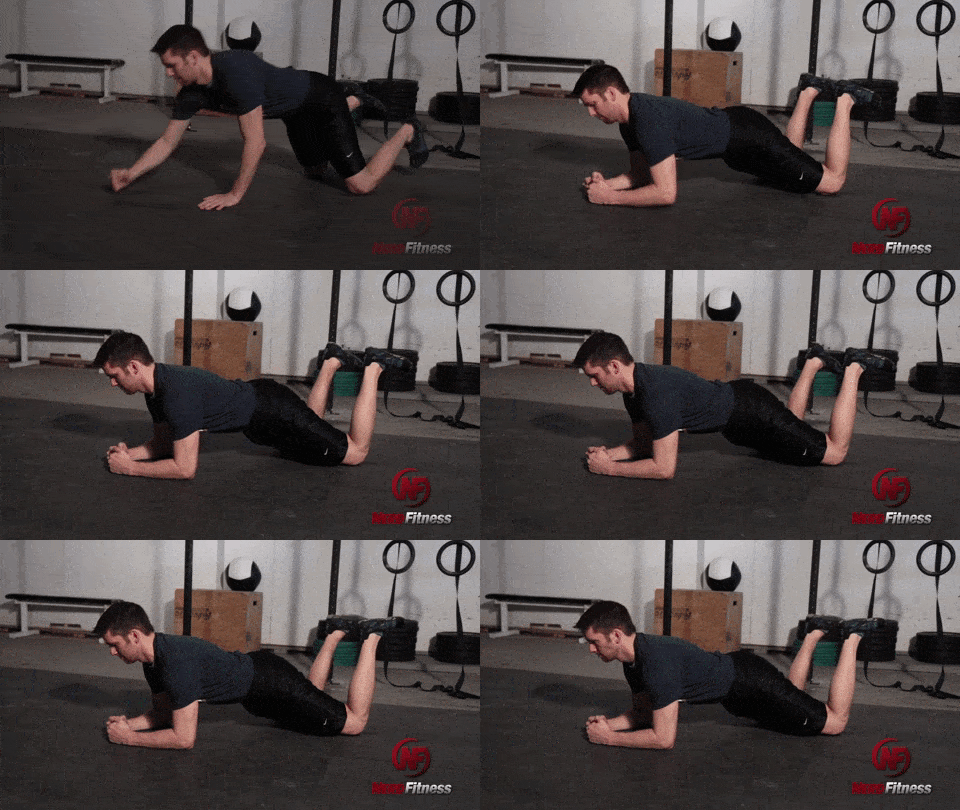
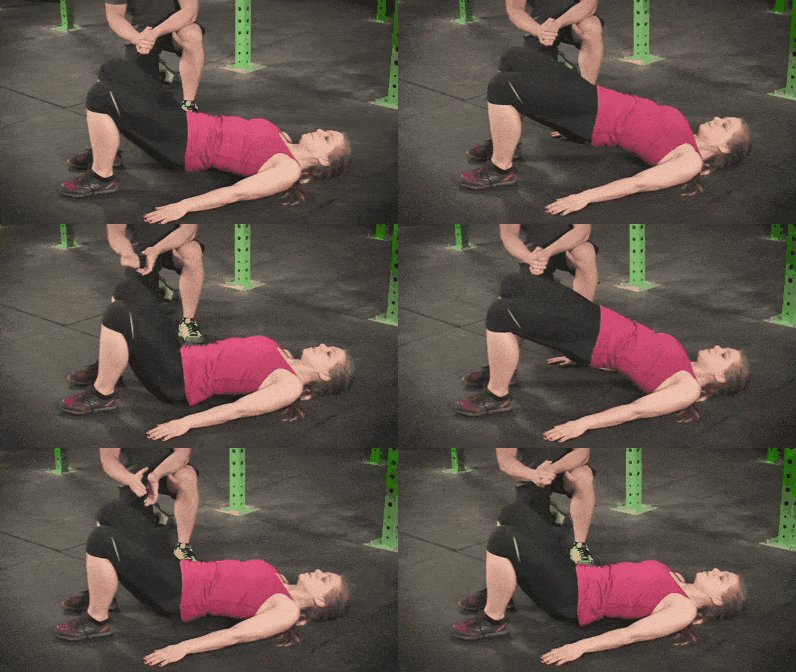
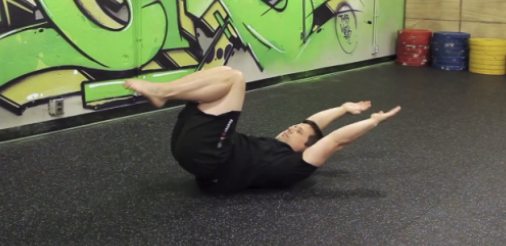
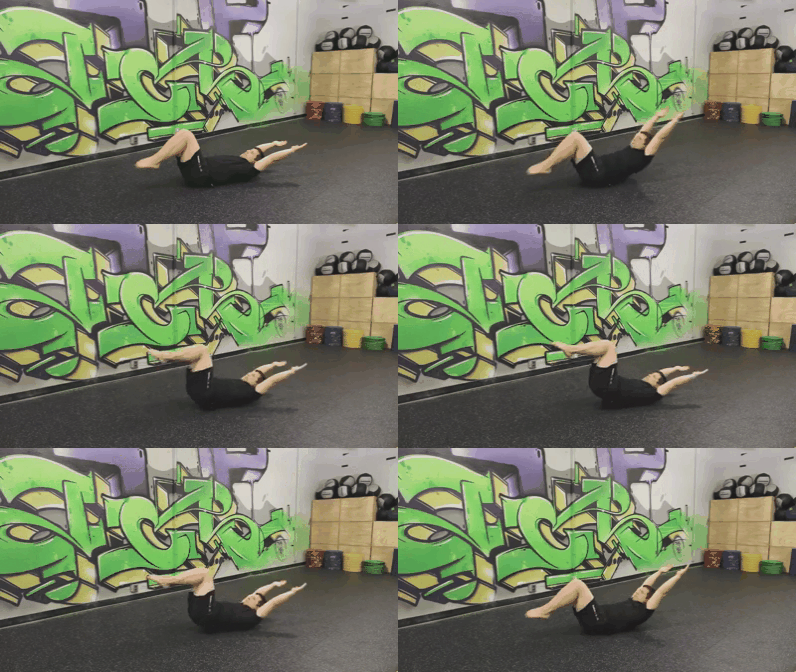
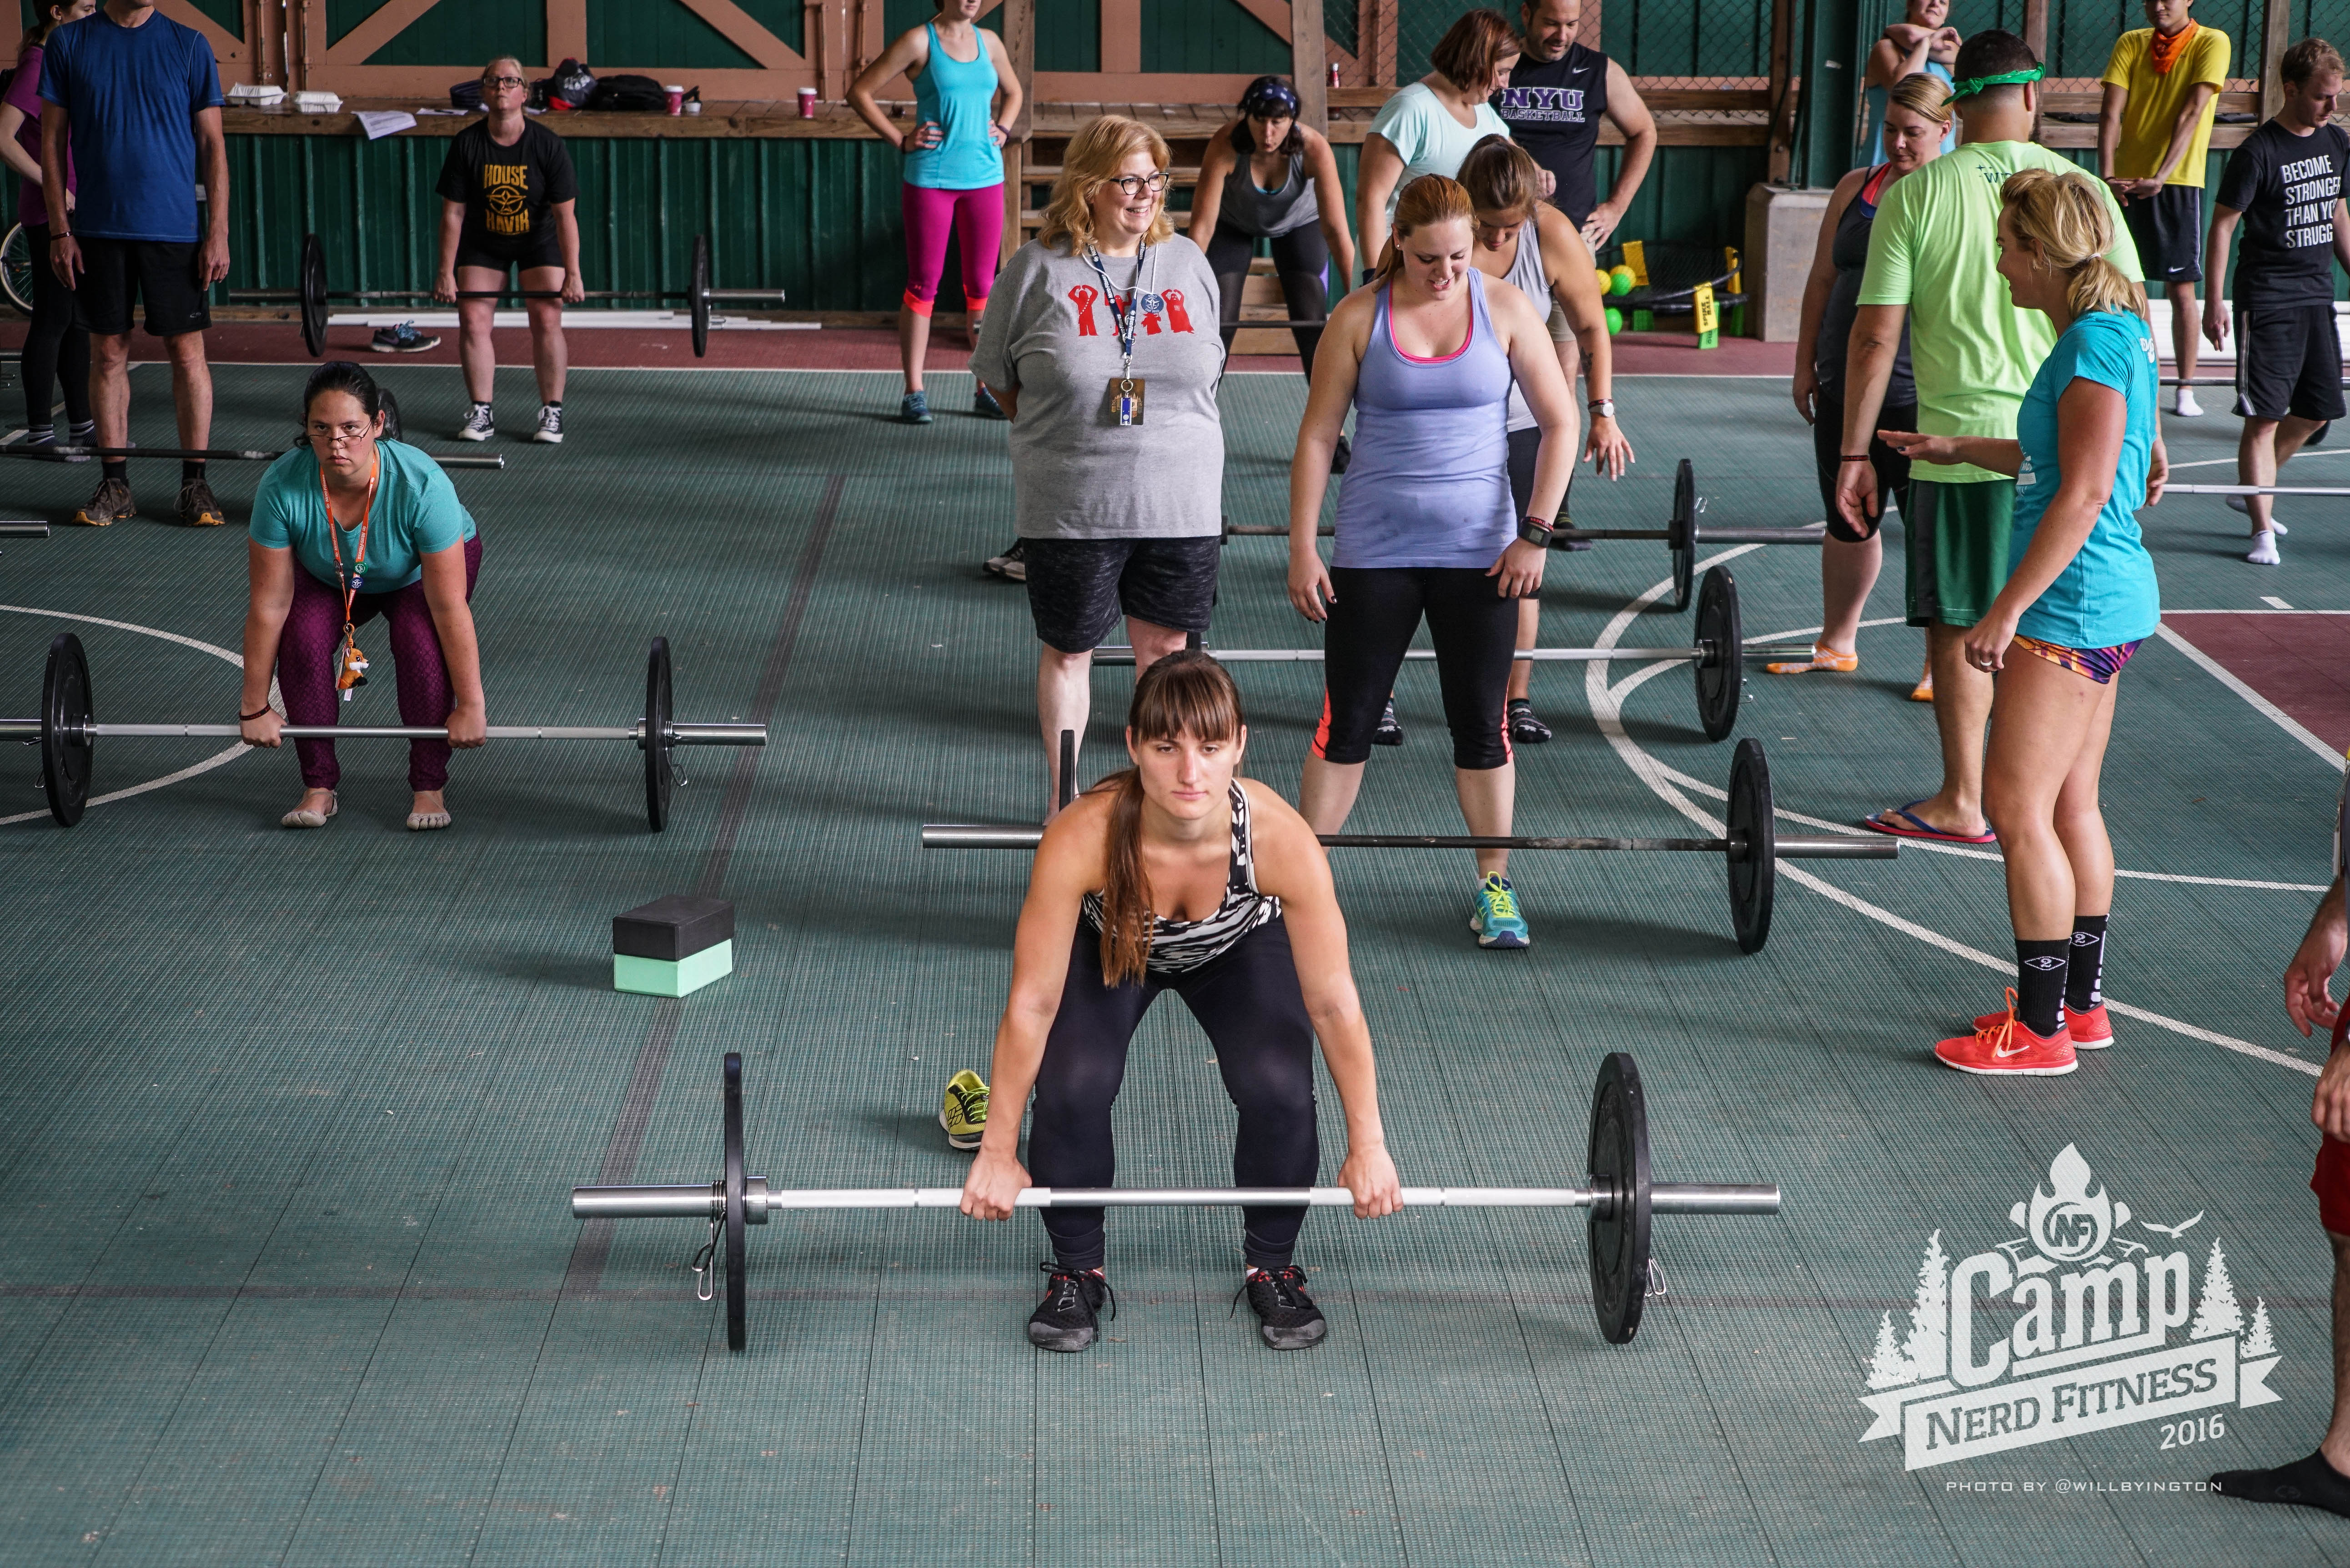
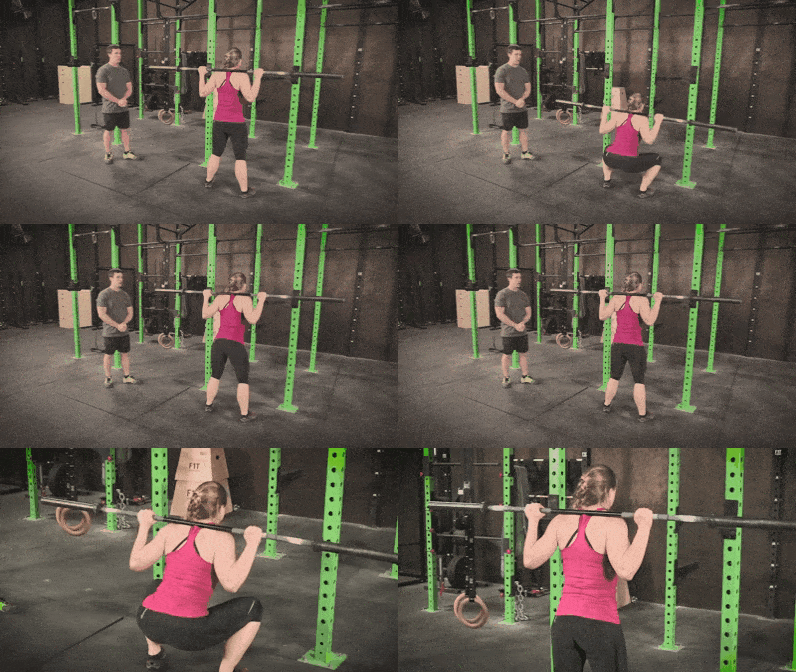
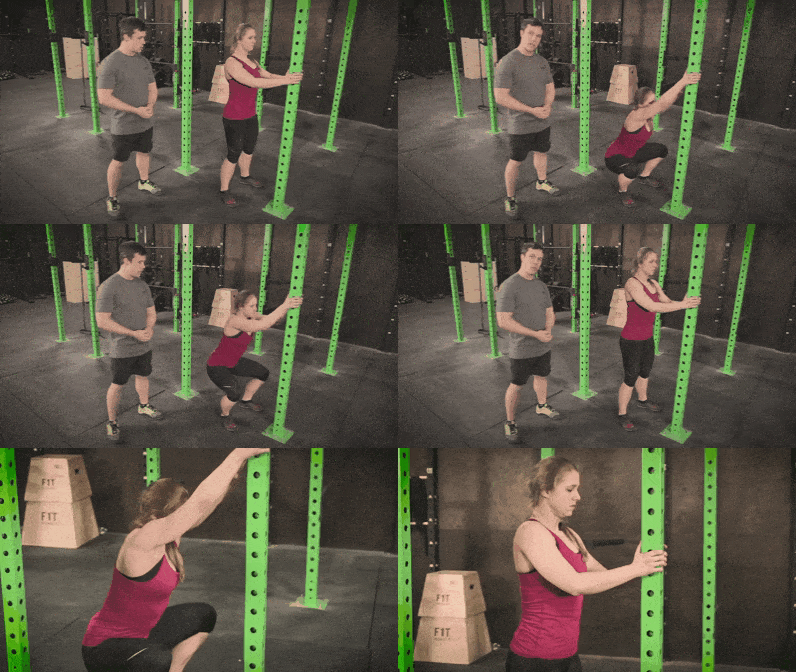
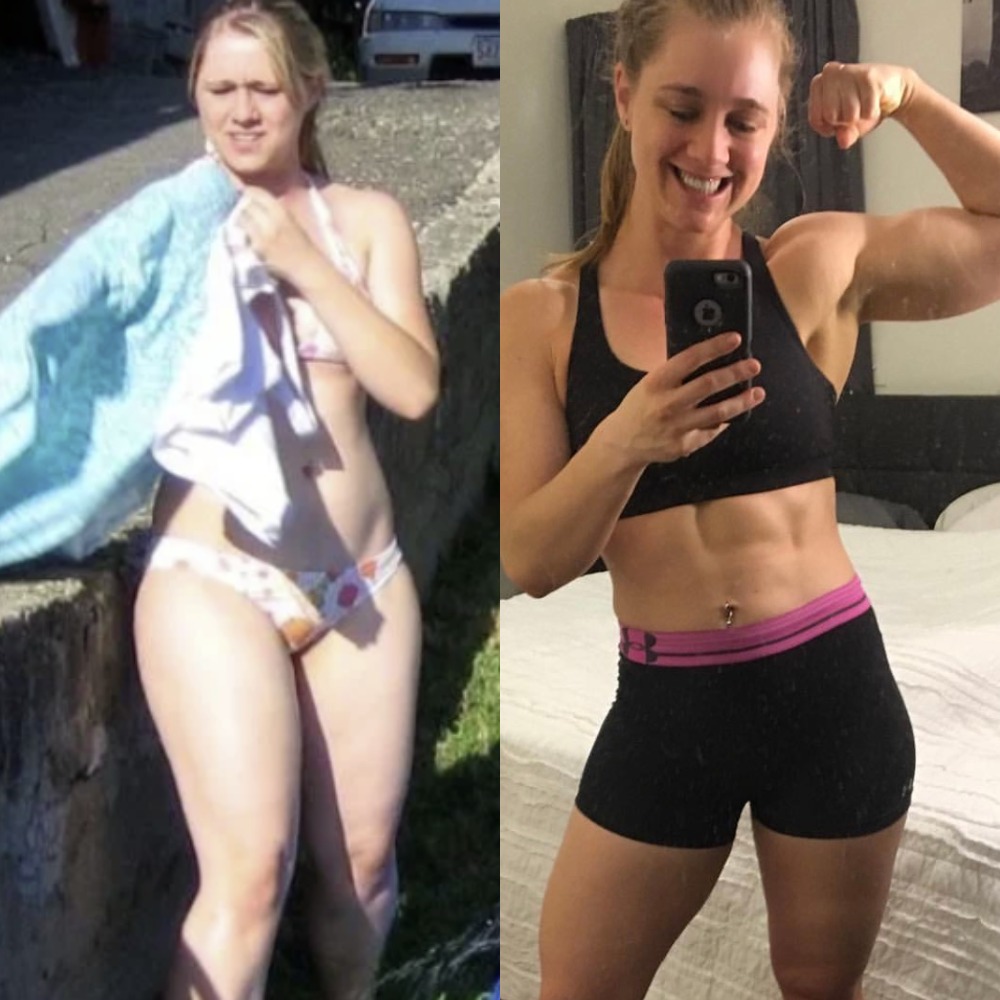
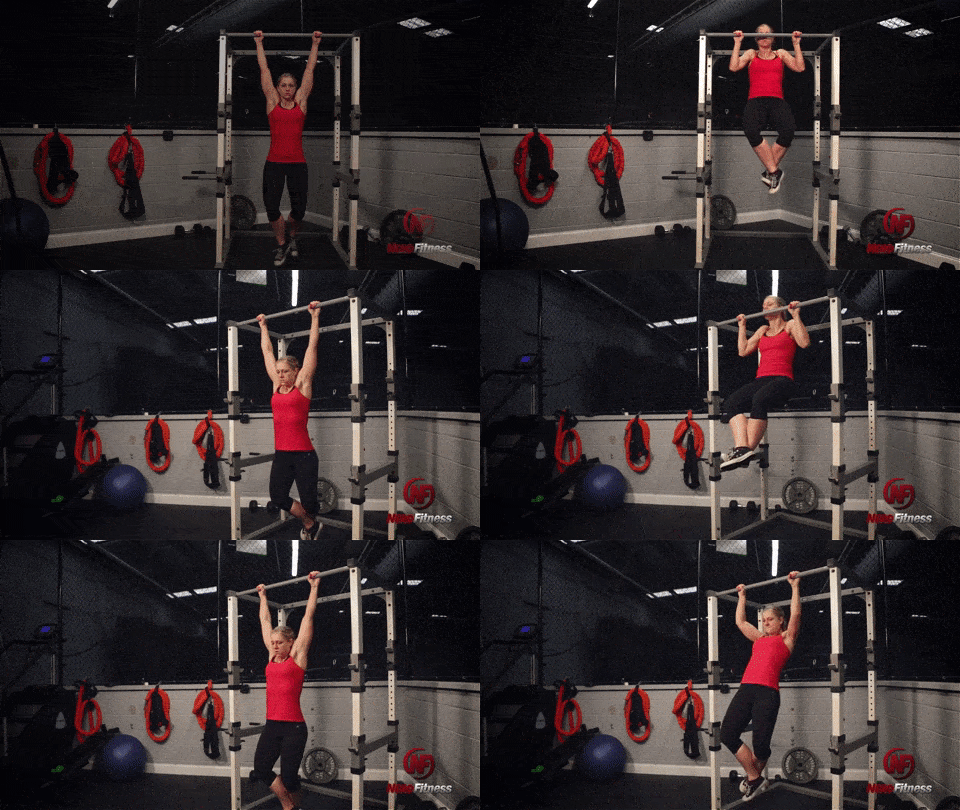
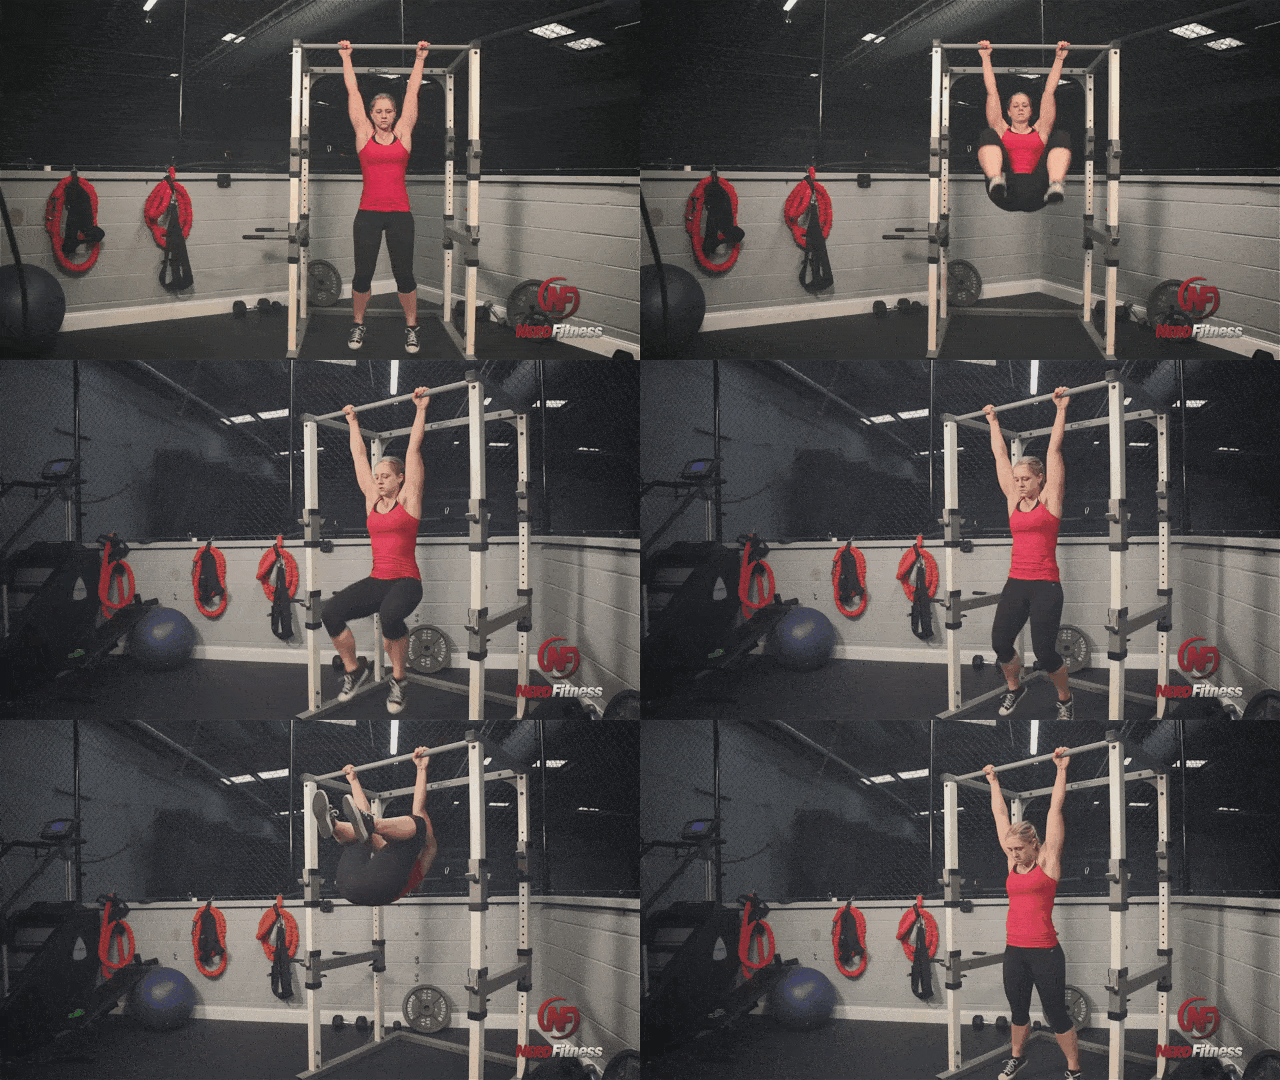
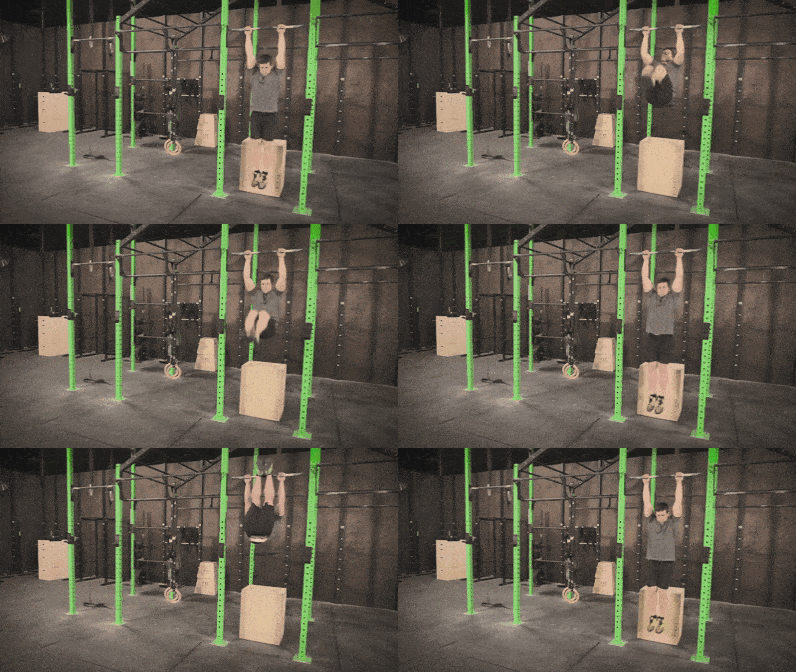
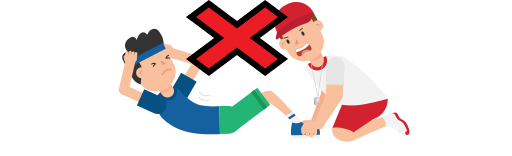
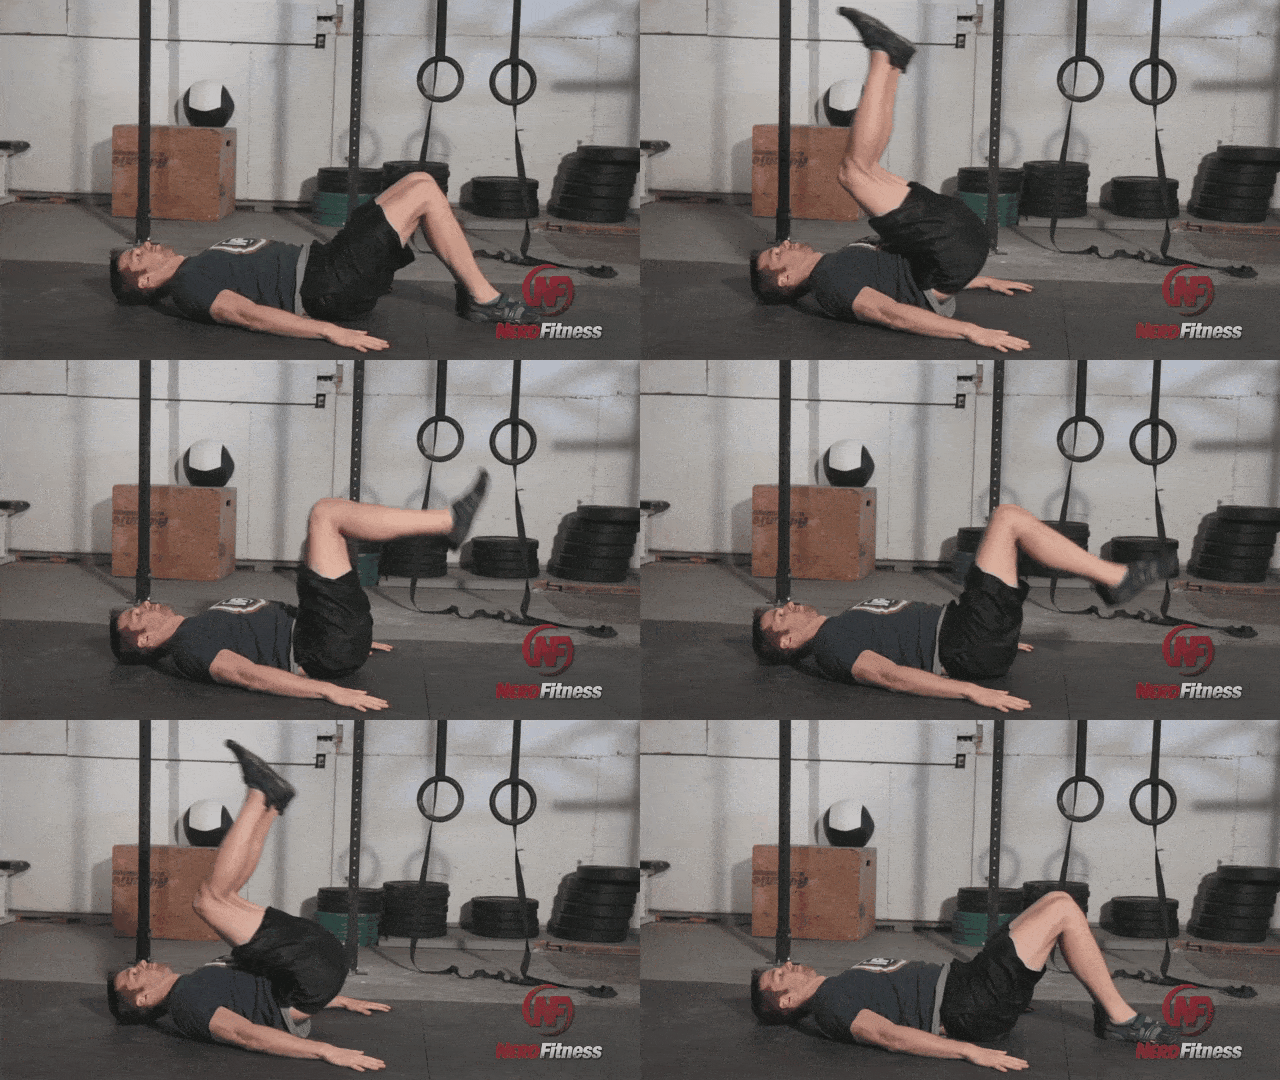

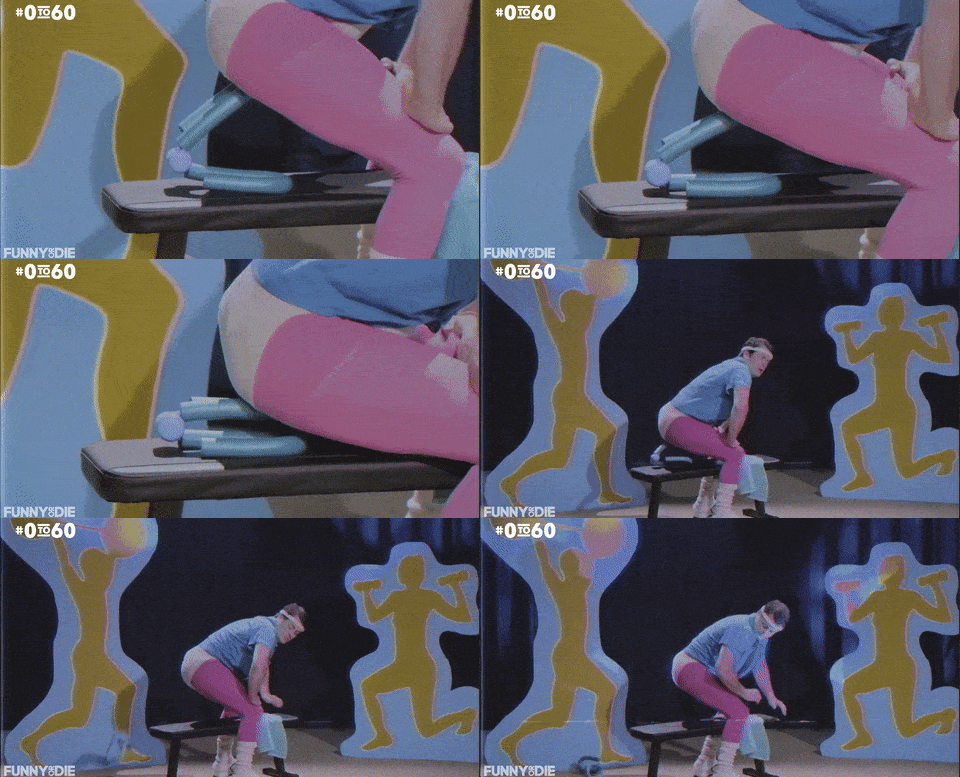





















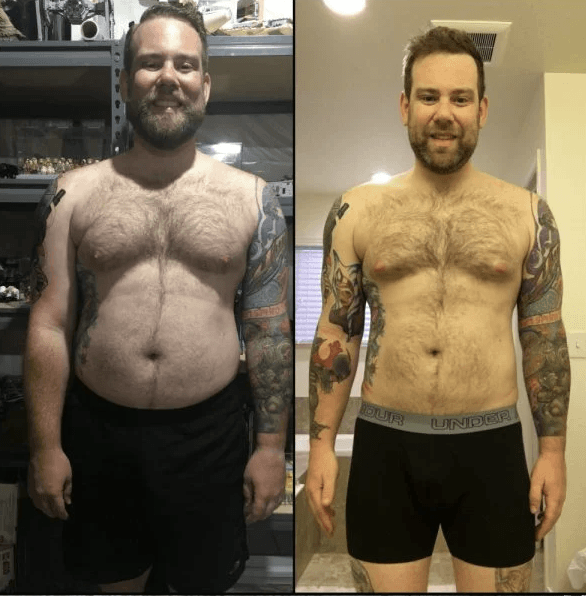










Anecdotally, it does appear that drinking diet soda can be “habit forming” for some people.
CNN explored the issue and found numerous people who consumed more than a six-pack daily, “easy.”[17]
“Addiction” is a word that gets thrown around too much these days, so I’ll stop short of making a medical classification on these folks. Plus, I searched the scientific literature and couldn’t find any studies on diet soda addiction.
However, if you stockpile Diet Coke like it’ll be currency in the post-zombie world, you’re not alone.
This “addiction” makes sense considering the beverage was designed to hijack your brain’s reward system.