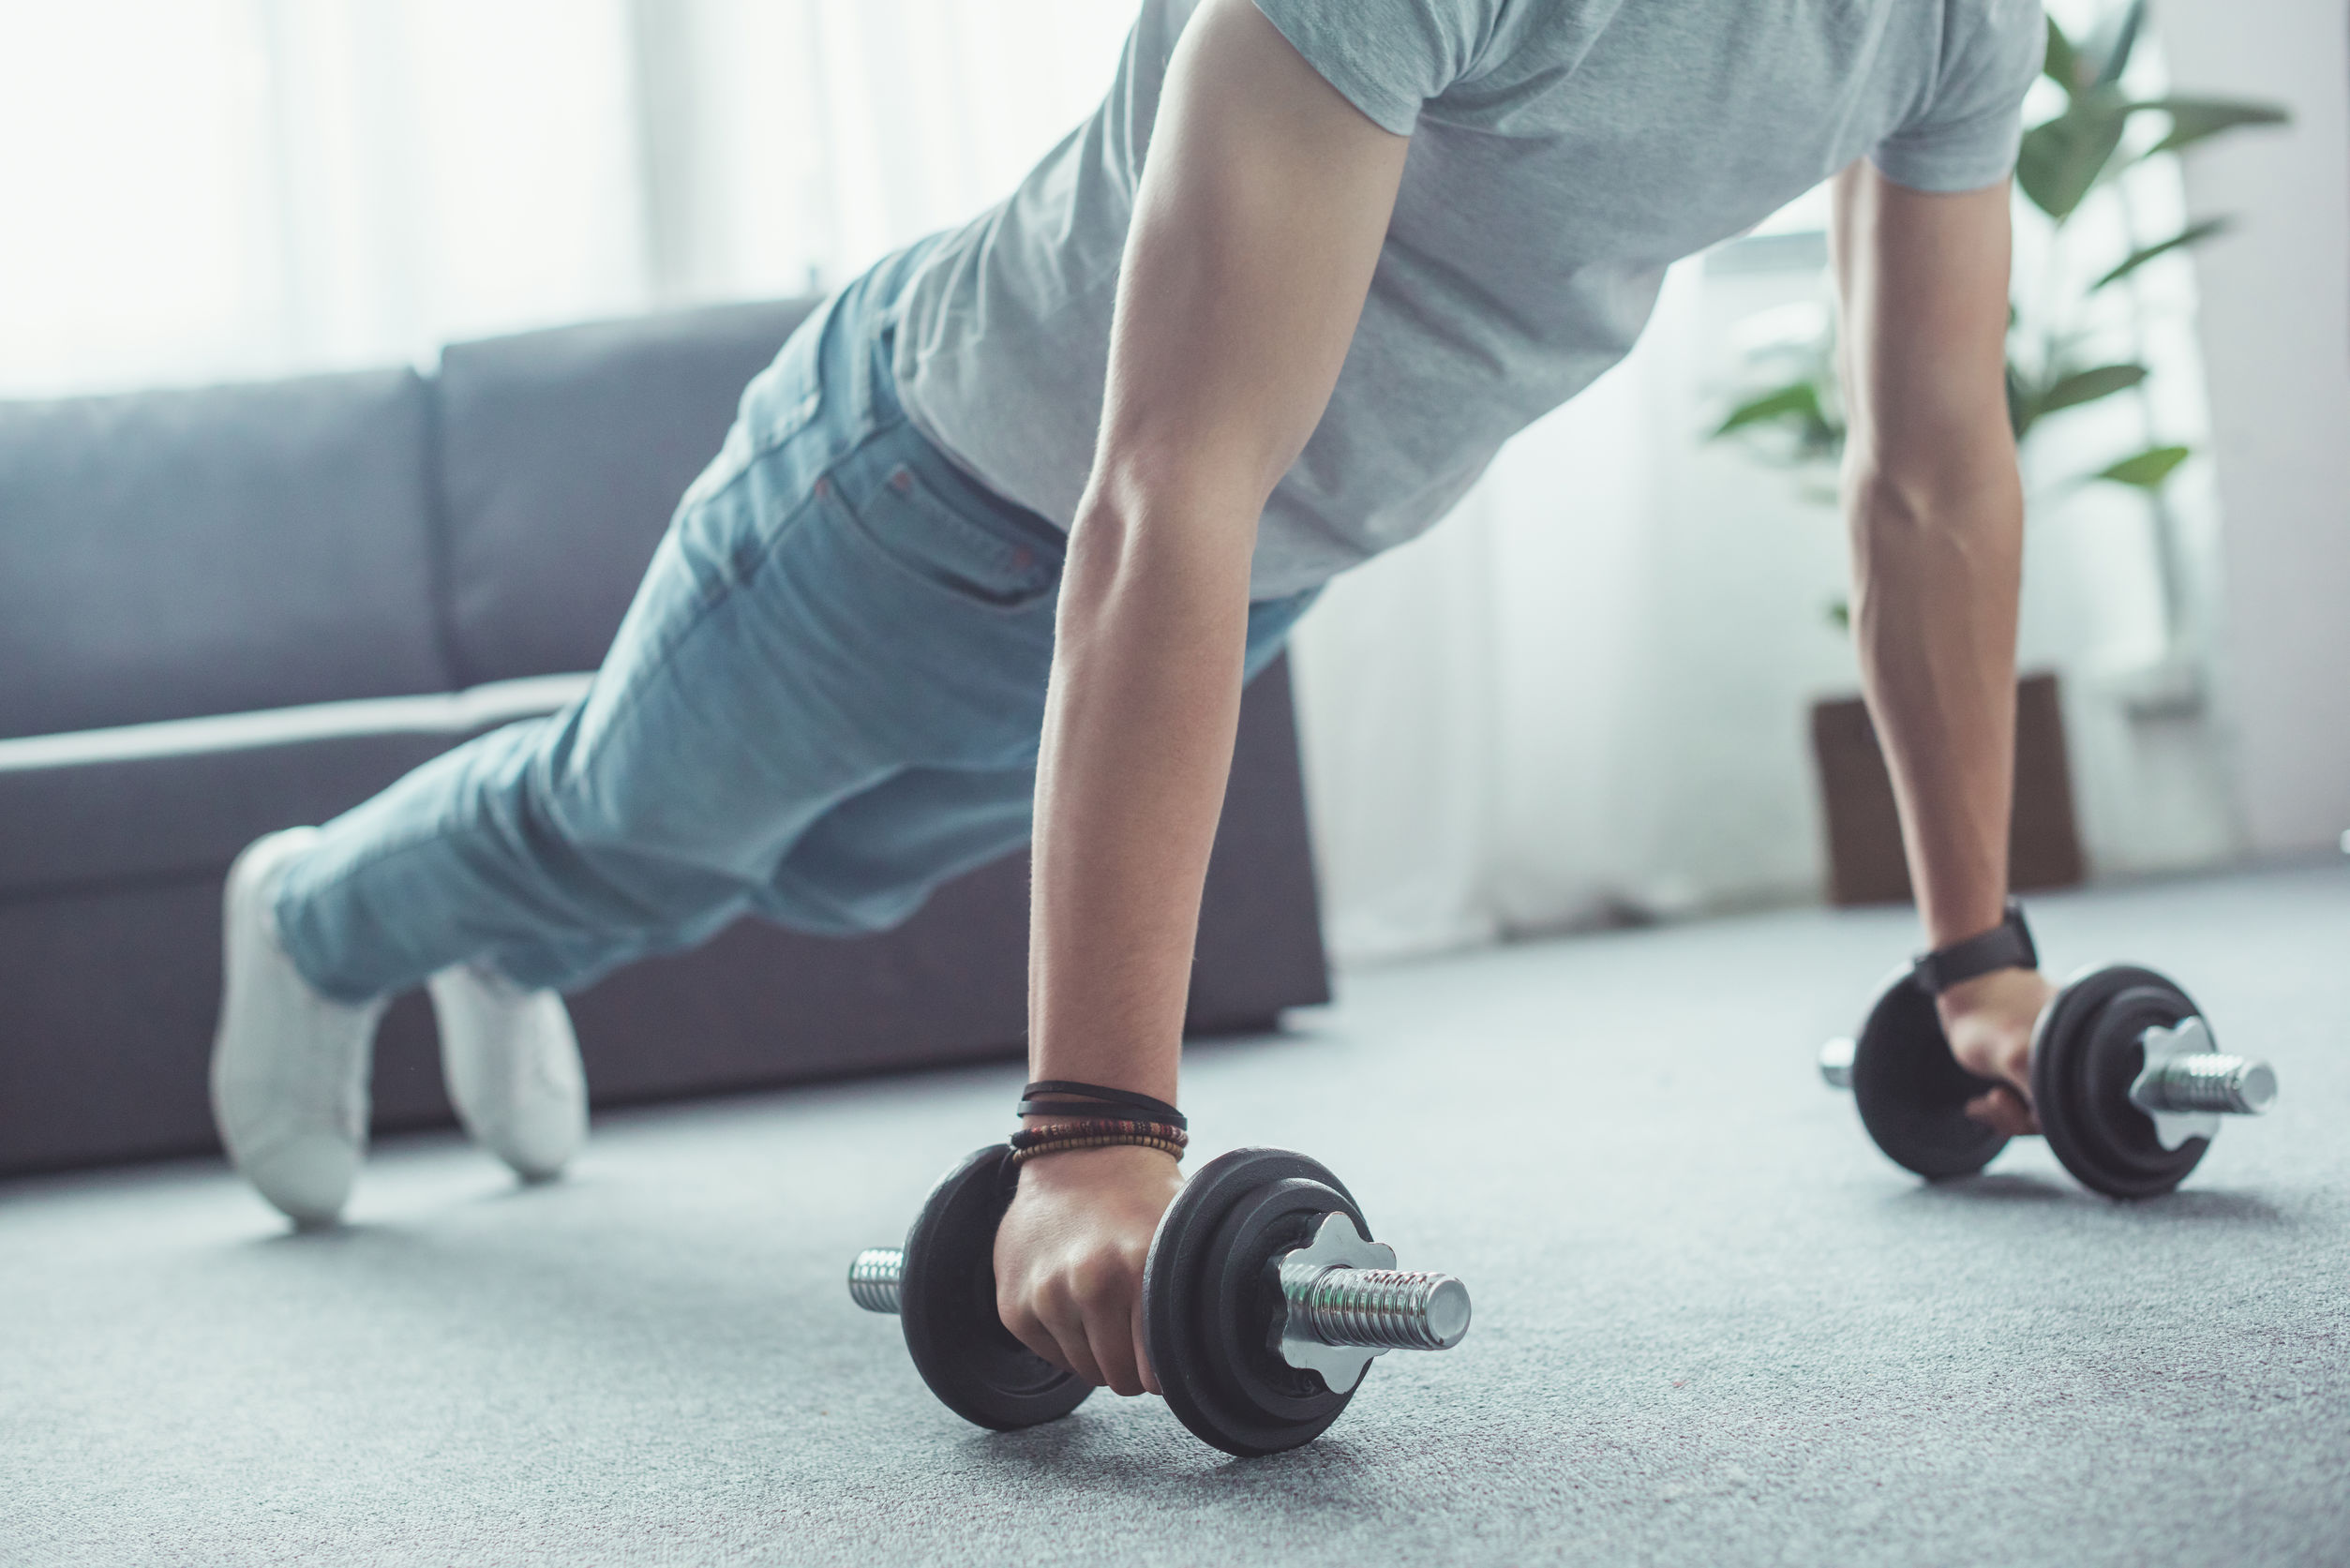
Hello, hormones! Nice to meet you! This month, we’re talking about hormonal health.
Hormones often get overlooked, yet they are at the heart of our lives and wellness. They are fundamental to how we feel each day and how our bodies function. And we need to normalize talking about hormones and learn about our hormonal health before we find ourselves out of balance.
In this insightful episode, Robin brings the conversation about hormones into light. She talks about getting to the root cause of our physical problems and dives into the key things she focused on over the last year, while overcoming hormonal imbalance. She shares actionable steps you can take to care for yourself and support healthy hormones. Stay tuned to learn what you can do to support hormonal health and maintain hormone balance!
Show highlights: what you can look forward to in this episode!
Hormones are the basis for just about every function in the body and affect almost every bodily process.
We don’t always go to the root cause of the issue when looking to solve physical problems like acne, thinning hair, weight gain, or energy loss. We often go for a quick fix.
Robin talks about the physical symptoms she was experiencing and what finally led her to search for the root cause and make a change.
Robin’s healing process was gradual, but very effective. She shares a list of the key things she has focused on over the past year.
We all need opportunities to reset. Robin had to become aware of when she was becoming overstimulated and learn to relax her body and calm her mind.
Pilates has been helpful for Robin over the last year. It kept her moving without any added stress.
We need to embrace where we are now, listen to our bodies, and allow time to heal when necessary.
It’s been a few years (circa 2017) since I’ve been logging consistent long weekend rides but the 100km ride from London to Windsor seemed like a good idea especially with RideLondon Essex on the horizon. In reality, completing 100km was…
Are you trying to learn a new exercise, lose weight, or build muscle, but find doing it on the road a challenge? Let us help you – click below to learn more.
5 Travel Workouts You Can Do Anywhere
Without access to your favorite gym, it can seem like you are doomed to remain sedentary until you get back home.
Have no fear! These 5 workouts you can do anywhere and at anytime!
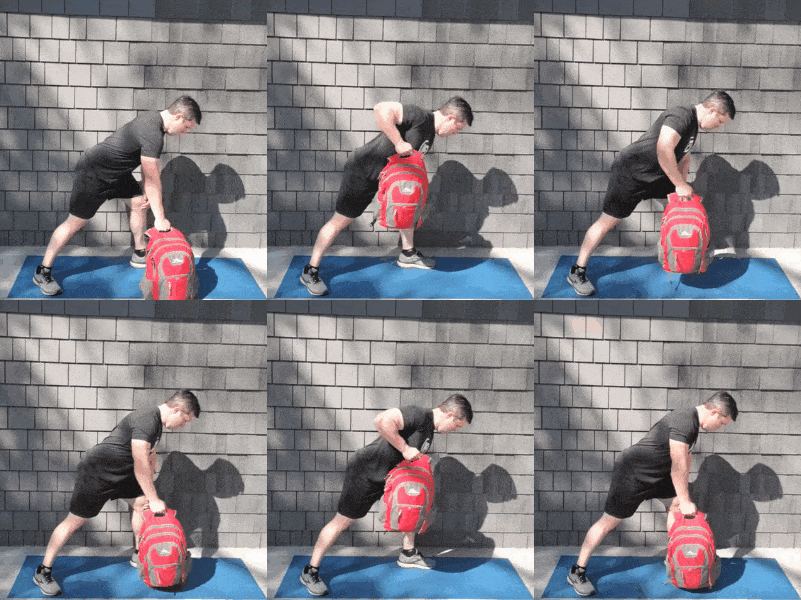
Dumbbell rows (using your luggage/laptop bag as a weight): 10 reps each arm.
Plank: 15 seconds.
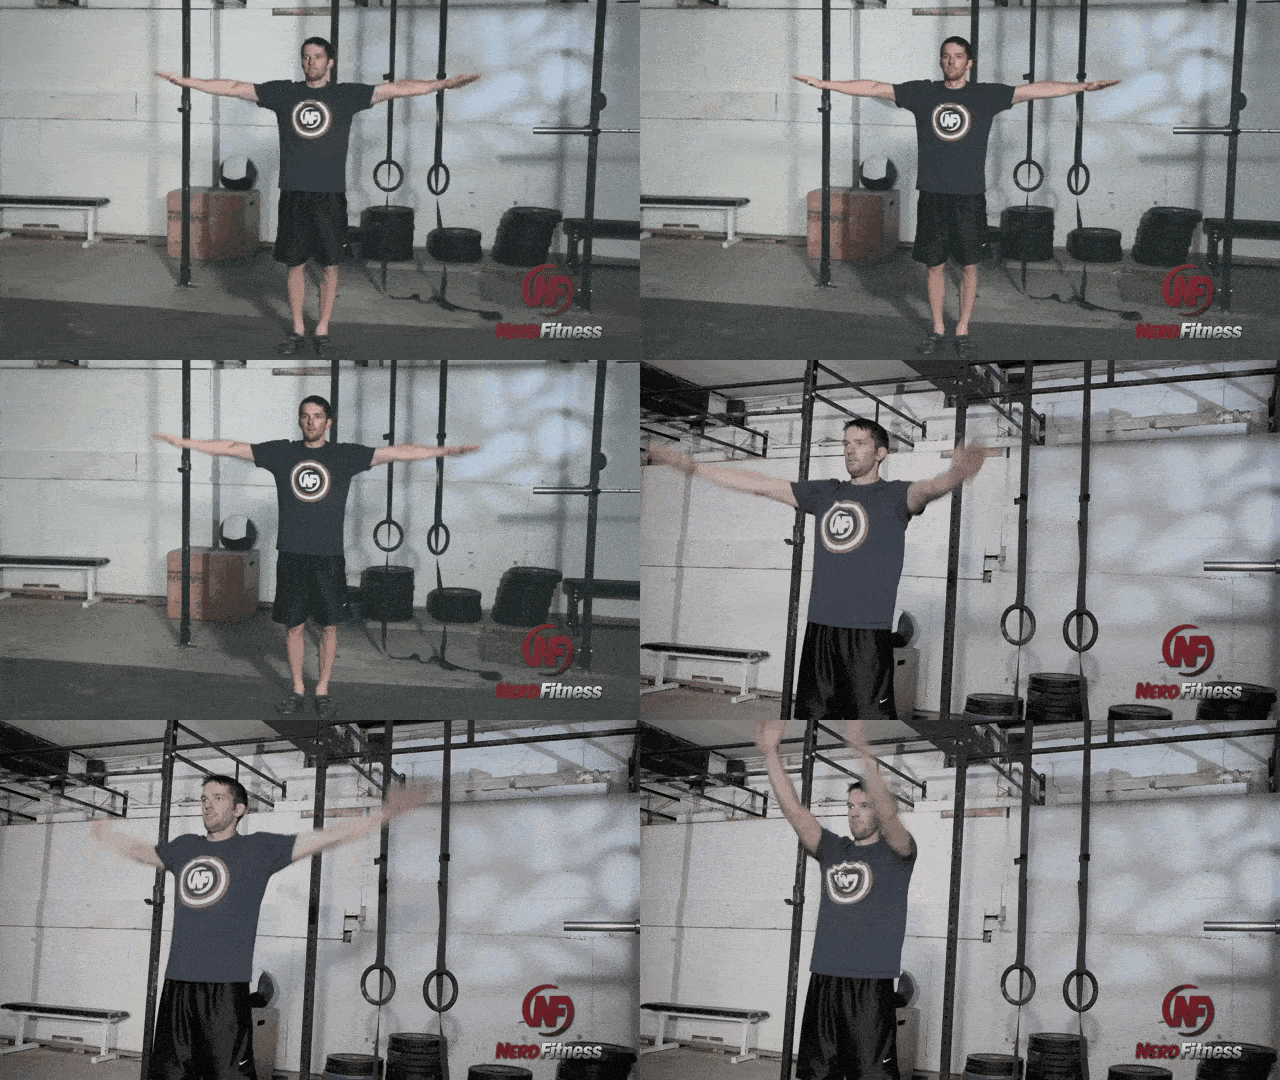
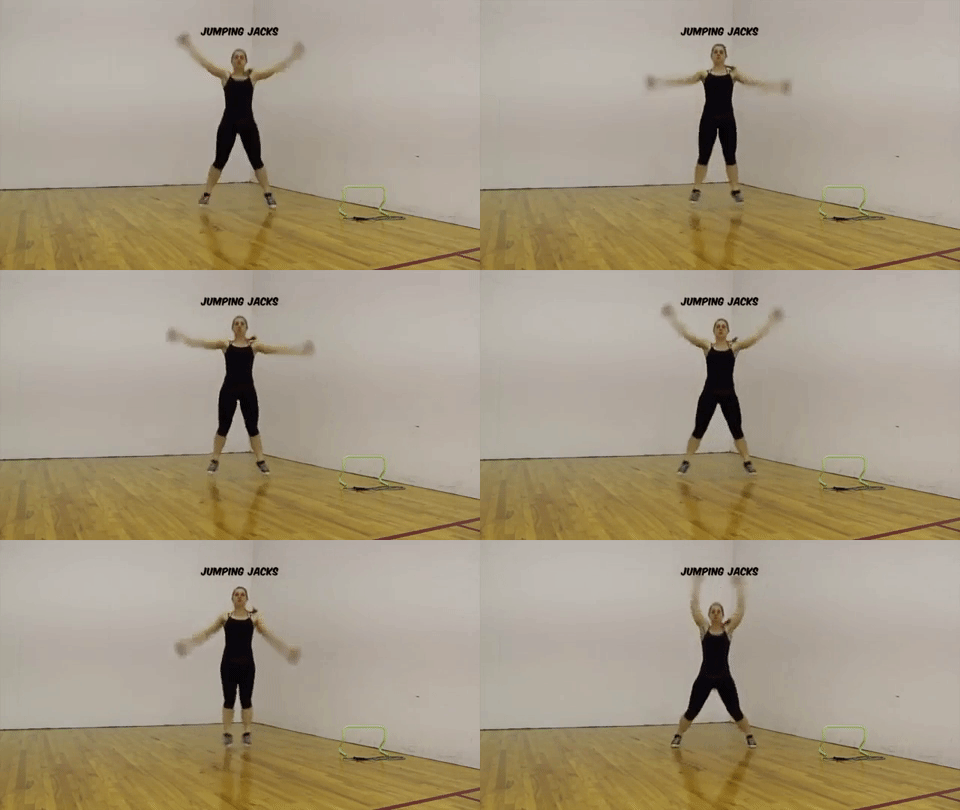
Jumping jacks: 30 reps
Run through this circuit three times. If you don’t have milk in the hotel room for the rows, find something of roughly the same weight with a good handle. Your luggage might work perfectly.
#2) Prepare for bad meals. I love me a good steak dinner with a side of mac and cheese and sweet potato fries and dessert and a few beers. When I’m on vacation or celebrating, that sounds like heaven to me.
However, I know if I always eat like that, I’m going to pack on lots of weight.
So I plan ahead for a big meal, that way I can enjoy it guilt-free and not see the scale budge. I eat protein and veggies for lunch, strategically undereating so that I can overeat for dinner – and not gain weight in the long run.
#3) Never eat 2 bad meals in a row. We have a big “never two in a row” rule at Nerd Fitness, as I explain here:
Believe it or not, even sticking with your goals 50% of the time carries with it the tremendous potential for improvement. So, if you eat a so-so lunch, follow it up with a nutritious dinner. Eat too much pizza for dinner? Cool! Make your breakfast part of your plan.
This is NOT “100% or nothing.” Every decision counts, every meal counts, so any decision where you are SLIIIIIGHTLY better than you would have been otherwise is a win in my book.
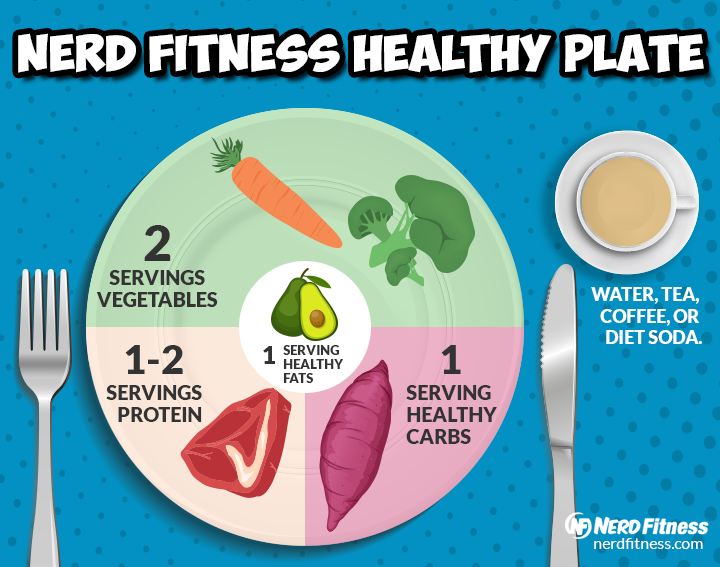
If you’re interested in the Nerd Fitness philosophy on proper diet, make sure you read our article “How to Start Eating Healthy,” which will teach you how to build a plate like this:
Here are some other strategies for healthy eating on the road:
#1) Ask your hotel for a mini-fridge
Fill the fridge with your own nutritious snacks – just make sure they don’t charge you for taking out the other foods! Fruit, sliced veggies, and some deli meat will provide you with some sustenance until you can order a proper meal.
I’ve eaten almonds forgotten in a backpack, months later, and lived to tell the tale.
Lots of dry food like nuts and jerky won’t spoil anytime soon, so store some in your travel bag. Munching some beef jerky is a much better idea than the pizza in the airport terminal. Here are some good almonds to purchase, and here’s some recommended beef jerky for you to try out.
#4) Focus on protein and fiber
When choosing meals or snacks, make sure the foods you pick are full of protein and fiber.[1] This will help keep you full, so you’re not tempted to eat the donuts waiting for you at your work conference.
What are protein and fiber-rich foods? Hard-boiled eggs will store well, and can be bought at many convenience stores. That’s a good protein source. Deli meat, jerky, and nuts will also do the trick for your protein requirements.
Fiber-rich foods? Fruits and vegetables for the win. Always bring an apple with you.
#5) All is not lost if you order fast food
There’s a common belief amongst our coaching clients, that the moment you step foot in a fast food store, you lost. You made a terrible decision by even walking in. Might as well order whatever, because you already failed.
This is 100% NOT true. What you order while out will make all the difference. For example, I eat a chicken bowl from Chipotle almost every day. To the point that it’s weird.[2]
Why? Because it’s more nutritious than anything I’m going to make at lunchtime, given my schedule.
Remember, what you order is more important than where you order from.
Let’s dive into that last point a little more.
What Are Some Healthy Fast Food Options?
Let’s outline an entire day’s worth of eating, provided by a drive-thru window (we cover this in our fast food article).
Most of these can also be found at your average airport terminal.
#1) BREAKFAST:
Location: Starbucks
Sous Vide Egg Bites, Bacon & Gruyere: A great protein source. Go ahead and order some black coffee with it too.
Calories: 310
Protein: 19g
Net Carbs: 9g
Fat: 22g
Location: Dunkin’ Donuts
Sausage Egg and Cheese Bagel (no bagel): Sausage and egg are a breakfast staple. Plus, cheese!
Calories: 370
Protein: 16g
Net Carbs: 3g
Fat: 33g
#2) LUNCH:
Location: McDonald’s
Bacon Ranch Grilled Chicken Salad (Use the Balsamic Vinaigrette): It’s mostly greens, grilled chicken and a little bacon. No customization required. Your salad comes in under 400 calories.
Calories: 320
Protein: 42g
Net Carbs: 6g
Fat: 14g
Location: Subway
Oven Roasted Chicken: Grab it with lettuce, spinach, tomatoes, onion, green peppers, cucumbers, and olives, with oil and vinegar as dressing. Also, feel free to add bacon and guacamole to increase your calories. Your nutrition info will look like this if ordered as above:
Calories: 490
Protein: 24g
Net Carbs: 11g
Fat: 35.5g
#3) DINNER:
Location: Boston Market
Three-Piece Dark: Lot’s of protein, decent fat, and no carbs.
Calories: 300
Protein: 37g
Net Carbs: 1g
Fat: 16g
Green Beans: Keep it simple.
Calories: 90cals
Protein: 1g
Net Carbs: 4g
Fat: 5g
Fresh Steamed Vegetables: Following our “simple” strategy.
Calories: 60
Protein: 2g
Net Carbs: 4g
Fat: 3.5g
Location: Chipotle
Salad Bowl (with Carnitas): order it with Fajita Vegetables, Fresh Tomato Salsa, Sour Cream, Cheese, and YES for Guacamole.
Calories: 710
Protein: 34g
Net Carbs: 12
Fat: 51g
The above should help give you some ideas on what to order when you’re depending on fast food.
So your room comes with a free complimentary breakfast.
Might as well take advantage of it!
Go ahead and load up on these:
Eggs. We mentioned earlier to prioritize protein with your meals. Just about every hotel continental breakfast will have some eggs. The quality might be so-so, however. If they have some hot sauce around, this can make just about any scramble tolerable.
Sausage. Continuing with our protein theme, if there is sausage at the buffet, grab some. Granted, it’ll often have some sugar in the form of maple syrup included. But we’re going with the best we can here.
Bacon. We love bacon around these parts so much, we wrote an entire post on it. The fat in bacon will help keep you full until you’re next meal. Plus, if the eggs are crappy (the eggs will probably be crappy), you can mix in some bacon to bring up the tasty factor.
Fruit. It can’t all be about meat. Go ahead and grab some fruit for your plate. Apples are relatively high in fiber, which is why they’re my go-to. Bananas also have decent fiber, as well as vitamin C, vitamin B6, and potassium. Are there berries available? Grab some for their antioxidant potential (we talk all about berries and antioxidants in this article).
Toast. I know, I know, we might be attracting the Carb Police on us for this one. But you can do a lot worse at a breakfast buffet than a little whole-wheat toast. If you put some eggs and bacon on it, you have yourself a pretty decent breakfast sandwich with some fiber to help keep you full.
Alright, prioritize the above on your plate. Plus, minimize:
Juice. If I could give you one single piece of diet advice, it would be this: try not to drink your calories. There’s a lot of arguments on diets, but this advice is widely accepted. An orange has plenty of vitamins in it, plus a lot of fiber to help balance out the sugar. OJ? Zero fiber, and it’s mostly just high-calorie sugar water at this point! Skip the juice and eat the whole fruit.
Pancakes/Waffles. Don’t eat these, unless you are good at portion control! The high-calorie batter itself will have sugar in it, plus it’s designed to have more sugar (maple syrup) poured on top. Stick to toast.
Cereal. This breakfast food is often packed full of carbs, calories, and sugar. For example, the third ingredient for Cheerios is “sugar.” And that’s Cheerios. Don’t even get me started on Fruit Loops or Frosted Flakes. Again, stick to toast.
The above advice should get you started on loading up properly at a breakfast buffet.
How To Make Staying Fit A Priority on the Road
If you are trying to get healthy but need to travel frequently, I want you to make exercise your constant.
I don’t know if you were a Lost fan, but my favorite episode, “The Constant,” involved a character named Desmond who had to find the one “constant” in his life in order to stay sane.
Something Desmond could focus on as his mind traveled through time.
During all this chaos: exercise became my constant.
I knew that without a doubt, no matter where I was or what I was doing, every other day I would find a way to work out – no excuses. I might have had to add in an extra day between workouts maybe a handful of times.
What I’m trying to say is this: if you are serious about prioritizing your health, even while traveling, then start treating exercise like YOUR constant.
Make it a reliable, consistent thing in your schedule, no matter where you are in the world.
No matter what.
Sound difficult? Start by asking yourself the following:
“If I HAD to still get my workouts in, even if I am traveling or on vacation, how would I do it?”
Most answers will be something like this:
“If I had to work out, it would mean that I need to wake up SUPER early tomorrow morning to hit the gym before the conference starts.”
“If I had to get my run in, it would mean I could only go for a 20 minute run instead of my normal 60-minute run.”
“If I had to get my workout in, that would mean I need to actually PAY for a day pass at a real gym, because I know hotel gyms are crappy.”
This is the most important question you can ask yourself before your trip: “How do I make this work for me?”
Then, structure your environment and schedule to make it happen:
Again, ask yourself – what if you HAD to work out, no matter what. How would you get it done? What would you need to change?
And then do whatever you can to make it your constant.
How to Overcome Jet Lag (and other tips)
We need to address a few final points: sleep, jet lag, and hydration.
All of these are going to impact your ability to follow the advice above.
#1) SLEEP
When I’m sleep-deprived, I often don’t have the energy to exercise…when the reality is that exercise is often the thing that will give me energy (foreshadowing).
Also, if you’re lacking shuteye, you’ll get hungrier.[3] When you’re sleep-deprived, your brain sends signals for more energy, which means more calories. This is troublesome if you’re trying to hold out until you can order a nutritious chicken salad.
Two good tools to help with this are earplugs and an eye mask. Some hotels have a way of being bright and noisy.
#2) HOW TO DEAL WITH JET LAG
Sleeping might be tough if you’re dealing with “jet lag.”
Jet lag is the phenomenon of traveling from one time zone to another, but still being stuck in the former time.
For example, you fly from New York to London.
It was night when you left New York. It is now morning in London. You may or may not have slept on the plane.
What time is it?
Your body can have some serious trouble getting back on track, because our circadian rhythms (our biological clock) are thrown off by the geographic change.
Studies have shown that a good sweat can help change your circadian rhythm, which might help you adjust to the local time.[4]
If you’re able to, work out as soon as you get settled to help combat jet lag. I’ve personally found this to be super helpful in adjusting to the local time.
#3) STAY PROPERLY HYDRATED
Air travel dehydrates you.[5] The cabin’s air is environmentally controlled, with lower moisture than you find here on the ground.
Humidity on the good old fashioned Earth: 30-60%
Moisture in an average airplane: 10-20%
Yeah…that 10-20% is less than the Sahara desert.
That’s pretty dry…
On top of that, the pressurization of the cabin itself causes you to expel H2O.
Something something, physics. Something something, less water.
The low humidity and pressurized environment create a perfect scenario for you to lose lots of water.
And if you’re dehydrated, it can make you tired, which can go back to that whole hunger and calories thing.
Above All Else, Preserve Momentum While Traveling!
Whatever you’re currently working on improving in your life, you can continue working on that while traveling.
You only fall off the wagon if you resign yourself to the fact that it’s impossible to stay fit while traveling!
Why not have the opposite mindset, and ask “How do I make this work for me?”
Millions of people manage to stay healthy despite a hectic travel schedule, and I want the same for you.
Here are some final tips to help you while traveling:
Travel day? Pack some healthy snacks with you in your bag – apples and almonds are my go-to.
Going out to dinner with co-workers? Find the restaurant online, scour the menu, and “pre-order your dinner” in your mind so you know what to order when you get there. Order the “meat + veggie + potato” option on the menu, and ask for double veggies instead. Aim for something like steak tips, or grilled chicken, salmon, etc.
Traveling with your family? Let them know that you’re making a concerted effort to eat better and that you’d like their support.
Going out with friends? Let’s say you’re going out with buddies, and you have no choice but to eat fried food and drink tons of beer (I hate when that happens). Compensate by being extra diligent on the days before and after – no drive-thru meals, no late-night vending machine stops, no bad snacks while at the convention.
Pick your battles. Plan ahead. Make eating a priority.
If you want any help as you head out on the road, I got you boo.
Here’s how Nerd Fitness can help you get in shape while you travel:
#1) Our 1-on-1 Online Coaching Program: a coaching program for busy people to help them make better food choices, stay accountable, and get healthier, permanently.
Lots of our clients travel full-time, and their coach is one of the few constants they have every day.
You can schedule a free call with our team so we can get to know you and see if our coaching program is right for you. Just click on the image below for more details:
#2) If you want a roadmap for getting in shape on the road, check out NF Journey. Our fun habit-building app will help you exercise and eat better, all while you build your very own superhero…no matter where on Earth you are!
Interested?
Try your free trial right here:
#3) Join The Rebellion! We have a free email newsletter that we send out twice per week, full of tips and tricks to help you get healthy, get strong, and have fun doing so.
I’ll also send you tons of free guides that you can use to start leveling up your life too:
Download our free weight loss guide
THE NERD FITNESS DIET: 10 Levels to Change Your Life
Follow our 10-level nutrition system at your own pace
What you need to know about weight loss and healthy eating
3 Simple rules we follow every day to stay on target
Alright, that’s about it for this guide. Now, your turn:
Do you travel for work?
Do you upcoming vacation this summer?
What struggles do you have while on the road? What kind of questions do you have about staying in shape and traveling?
Leave a question in the comments and I’ll help in any way that I can.
Way back in 2021, I decided to sign up for my first Triathlon, which was the 25th anniversary Windsor Triathlon. Now, this won’t be a big deal for most people but for me, it was a game-changer. I had to learn to…
Over the past year or more, sleeping with a weighted blanket has become a solid part of my bedtime routine for a good nights sleep. I’m not even sure where I came across the idea of getting a weighted blanket…
Over the past year or more, sleeping with a weighted blanket has become a solid part of my bedtime routine for a good nights sleep. I’m not even sure where I came across the idea of getting a weighted blanket…
I have some exciting news to share and I want you to be the first to know! Check out this quick video below for the exciting announcement + exclusive details!
I’m so excited to announce that three expert Pilates instructors are officially joining us at The Balanced Life!
I’m not going anywhere – I love teaching and creating workouts for you. You’ll continue to see new workouts and more from me, along with more new workouts from Sheri, Becca, and Kaita inside The Balanced Life Sisterhood!
This means members of The Balanced Life Sisterhood will now get access to even MORE workouts, including a variety of lengths, styles, and focuses – all with our signature approach of grace over guilt, clear instruction, and encouragement to focus on progress, not perfection.
Get to know your newest Pilates instructors
Sheri’s love for the way Pilates makes her feel inspired her to become a certified Pilates instructor nearly ten years ago. Her calm voice and intentional approach to movement will lead you to uncover your strength, connect to your core, and learn to trust yourself, both on and off the mat.
As a Birth Doula she also specializes in prenatal & postpartum Pilates. She has a passion to educate and empower women to feel good in their bodies and celebrate the seasons of change in their lives.
Sheri lives in San Diego and loves spending her weekends exploring with her family.
Becca’s journey to take better care of her body moved her to become a certified Pilates instructor more than ten years ago. Her realistic approach to Pilates helps you gain more confidence and mindfulness in your everyday life.
She specializes in making Pilates accessible to everyone. Becca believes Pilates is for ANYbody and because it didn’t always come naturally to her, she has the words and tools to help others discover its joy.
Becca and her family live just north of Santa Barbara in Los Olivos, CA.
Kaita began her career in dance, which eventually led her to the world of Pilates and becoming a certified instructor almost 15 years ago. She was interested in how Pilates emphasized alignment and helped women feel good without trying to be perfect.
She specializes in an “embodied approach,” using the body as a tool for healing. Kaita will help you become more curious and playful with your Pilates practice to relieve tension, ease pain, and cultivate a deeper mind-body connection.
After living in Santa Barbara for years, Kaita and her family now call Austin, TX home.
We can’t wait for all that’s ahead! If you’re not yet a member, we’d love to have you join us! Click here to learn more about The Sisterhood and we’ll see you on your mat soon!
xo,
PS – I also had these three women on the podcast recently where we talked about all things Pilates, including their inspiring journeys and more! Click here to listen and get to know Sheri, Becca, and Kaita even more!
So it’s time to exercise, but you’re confined to a small space?
No problem!
In our Online Coaching Program, where I’m a senior coach, we help folks work out in whatever nook and cranny they may have available. Today, we’ll share these tips with you too.
And no, we won’t make you shrink like Ant-Man to do your workout.
“Baby, air and light and time and space have nothing to do with it and don’t create anything except maybe a longer life to find new excuses for.”
– Charles Bukowski
“Space, the final frontier”
– James Tiberius Kirk
When it comes to working out in a small space, the first obstacle you have to overcome is your mindset:
You may find yourself thinking, “I can’twork out in this space.”
We want to flip this to “I getto be more creative in this space.”
This may seem like a minor change of perspective, but oftentimes the most important part of overcoming a challenge is adjusting our mindset. I see this over and over again with our coaching clients.
Step 1 for our Small Space Workout is becoming okay with whatever room we may have to exercise.
Step 2 is determining WHERE our actual Small Space Workout will take place.
That might lead you to a question:
How much space do you need to exercise and work out?
Answer: not much.
I grew up working out in a room not much bigger than a closet:
Which now acts as a storeroom.
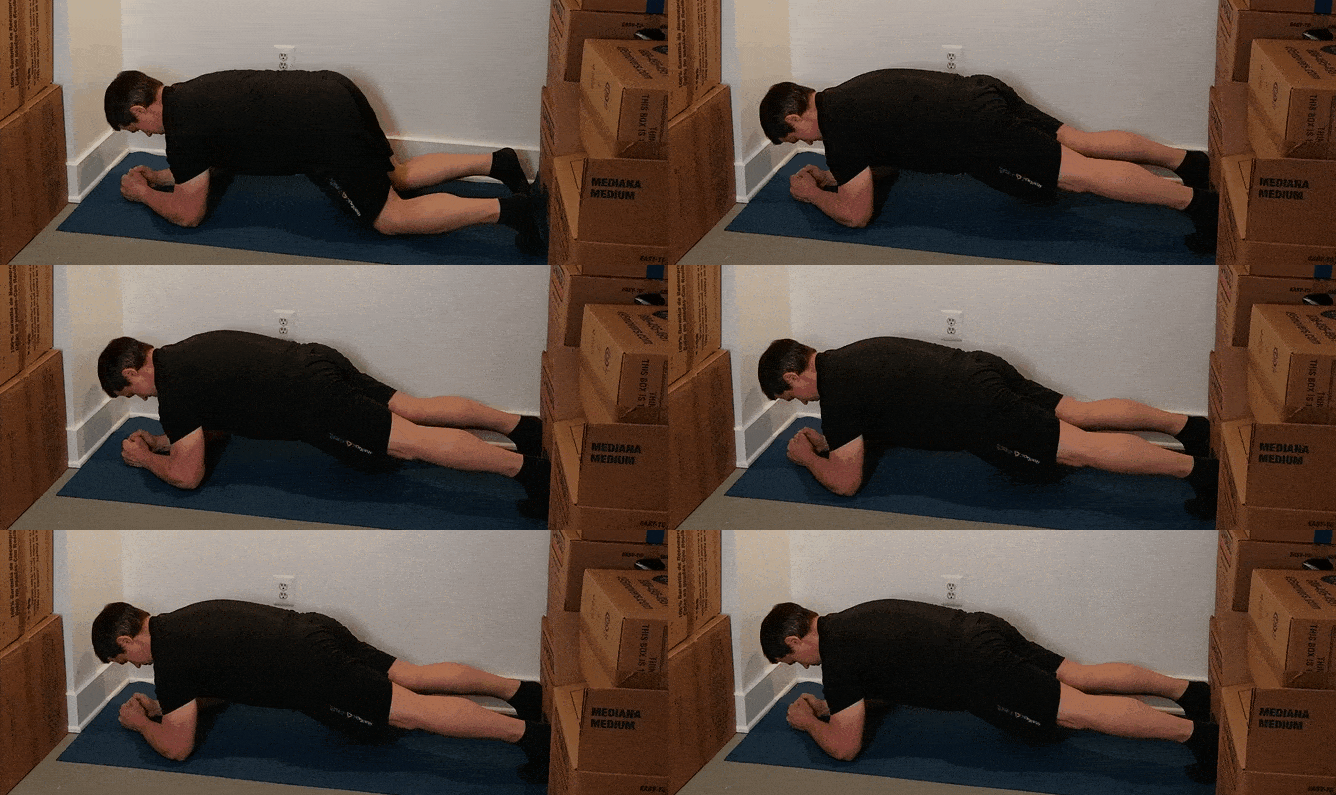
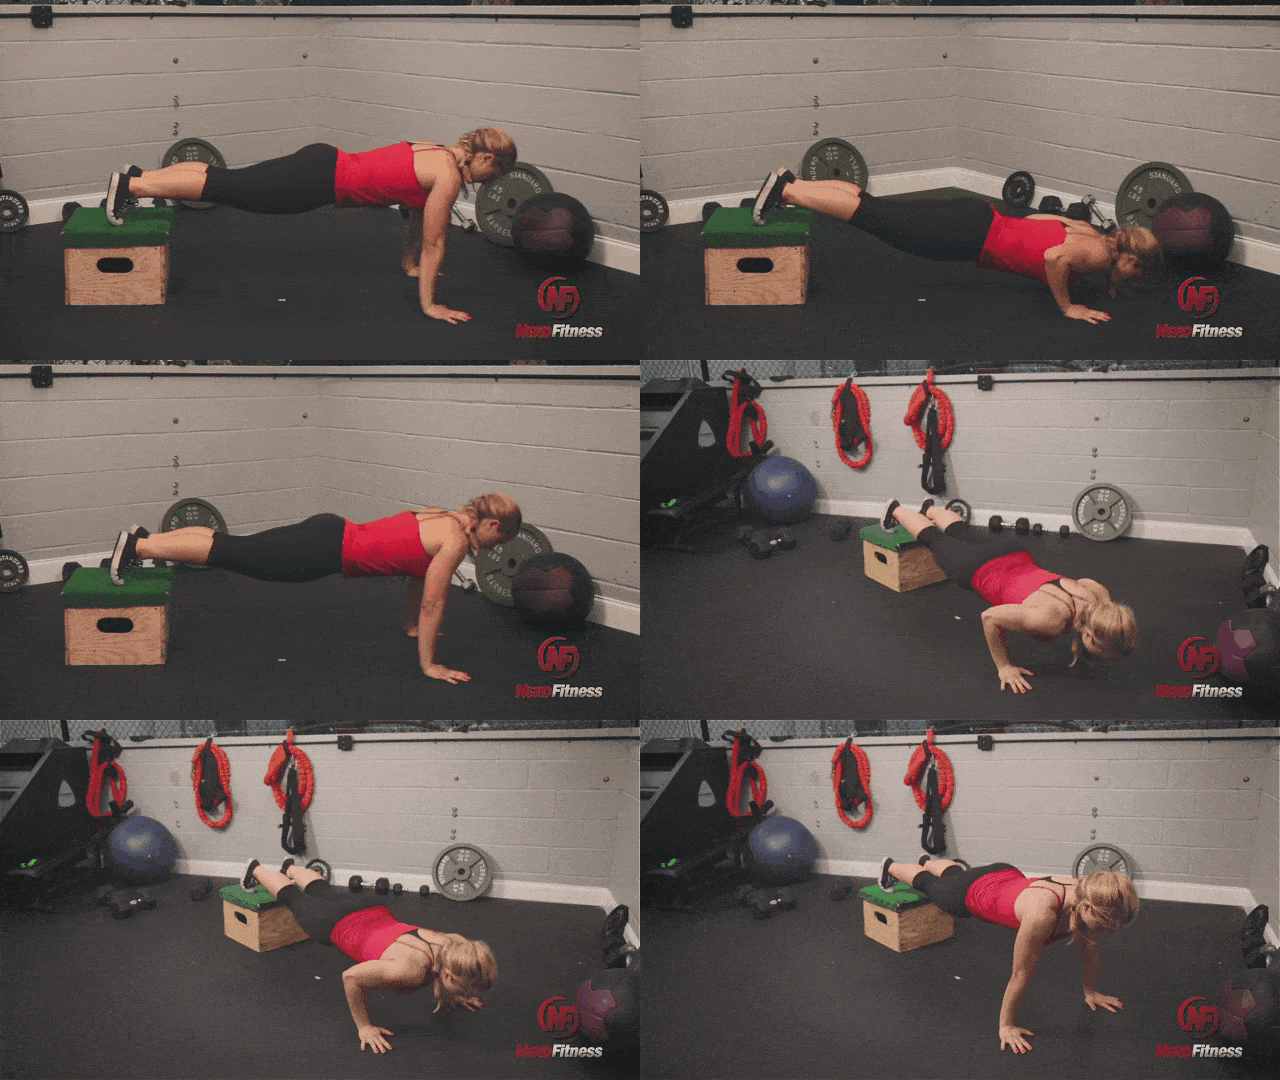
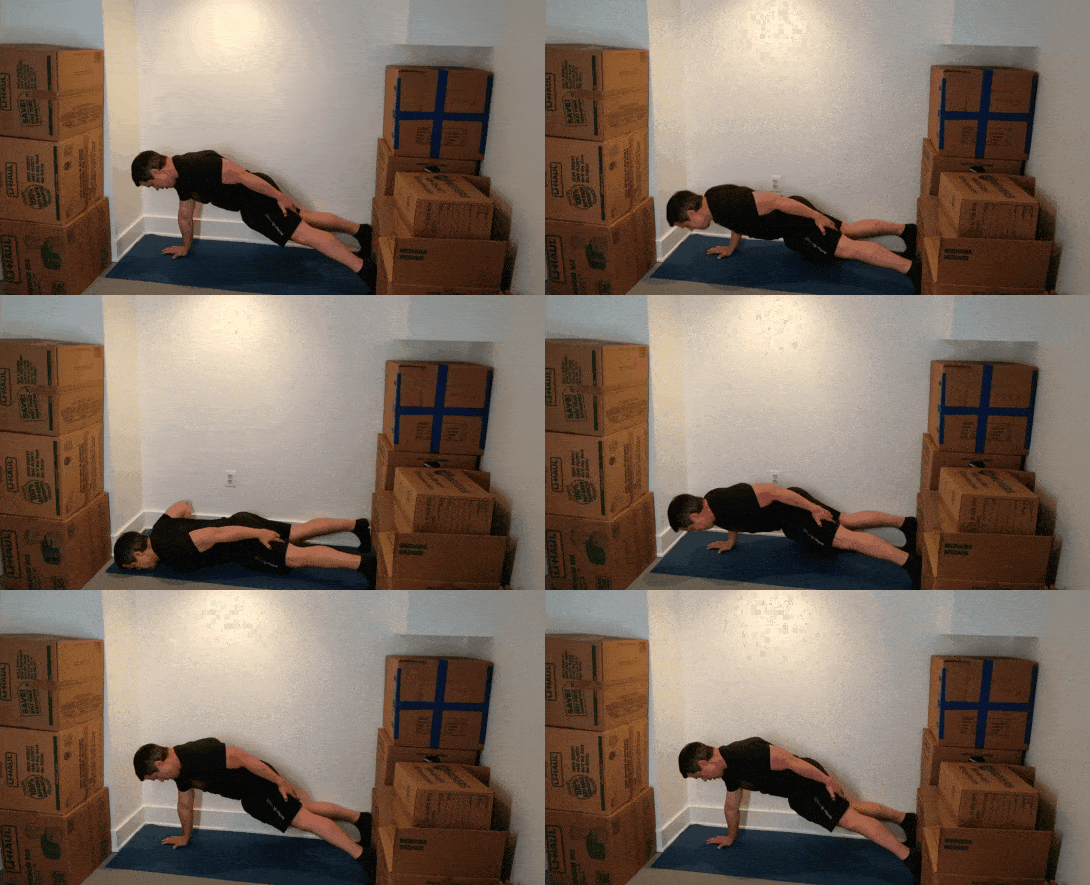
If you have enough room to do a plank, you’re good:
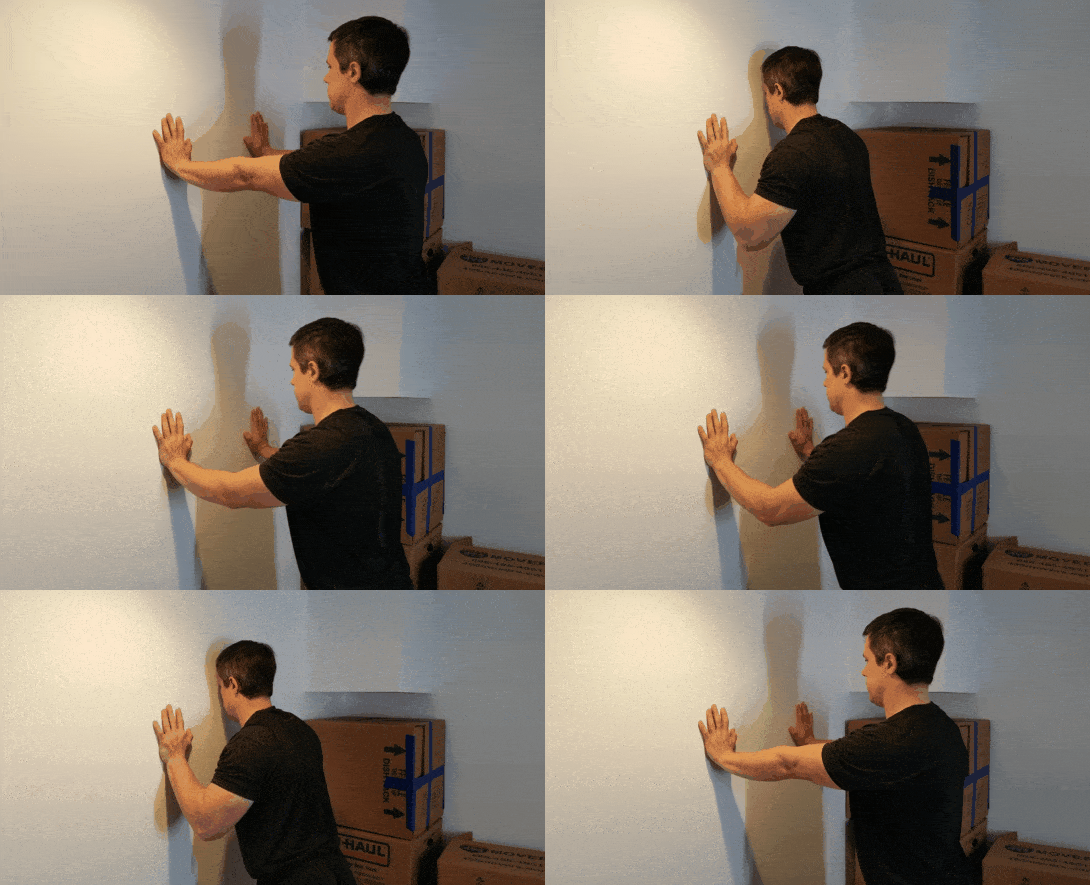
However, even if you can’t spread out for a plank, that’s okay. We can always use the small space itself for “equipment,” like with wall push-ups:
Speaking of, I can already anticipate your next question:
What’s the minimum equipment needed for a work out?
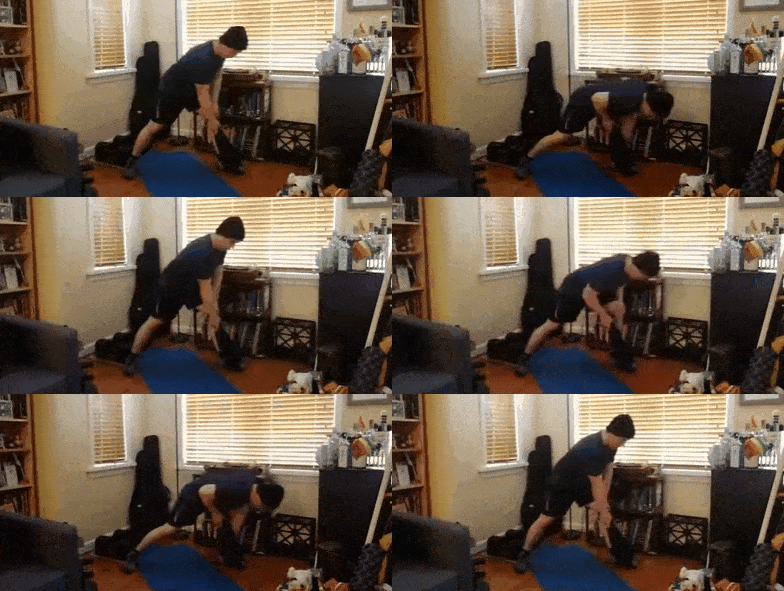
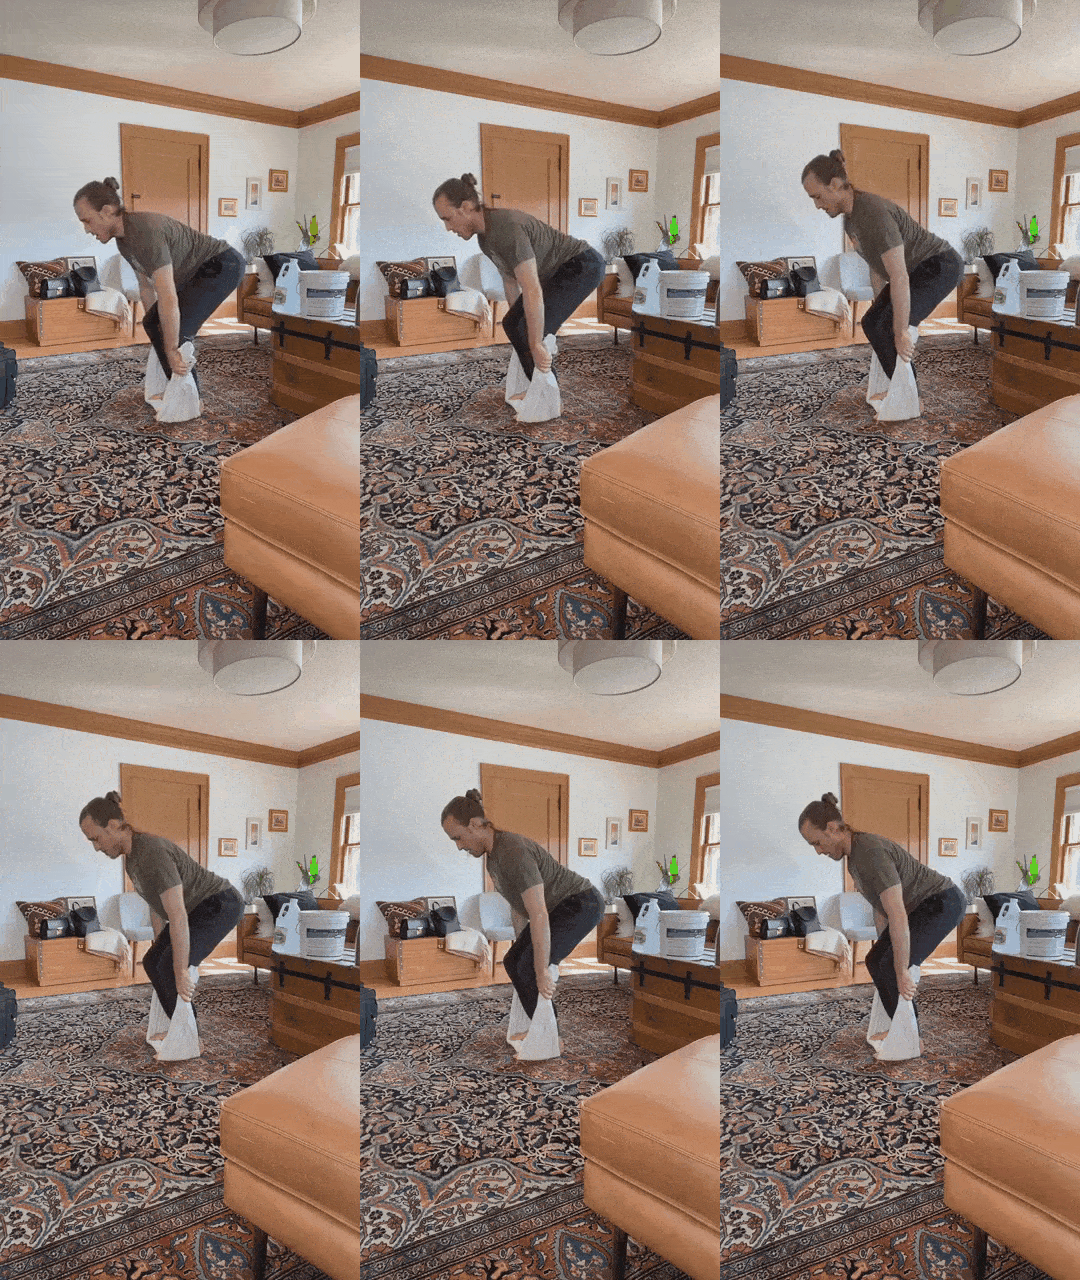
The trick is to get your setup right, by pushing your hips back and chest out. Then you perform the same upward motion as you would in a normal deadlift.
I walk you through how to do a towel deadlift right here:
I apologize if you rip your towel in half doing this because you’re so strong (but like, worth it).
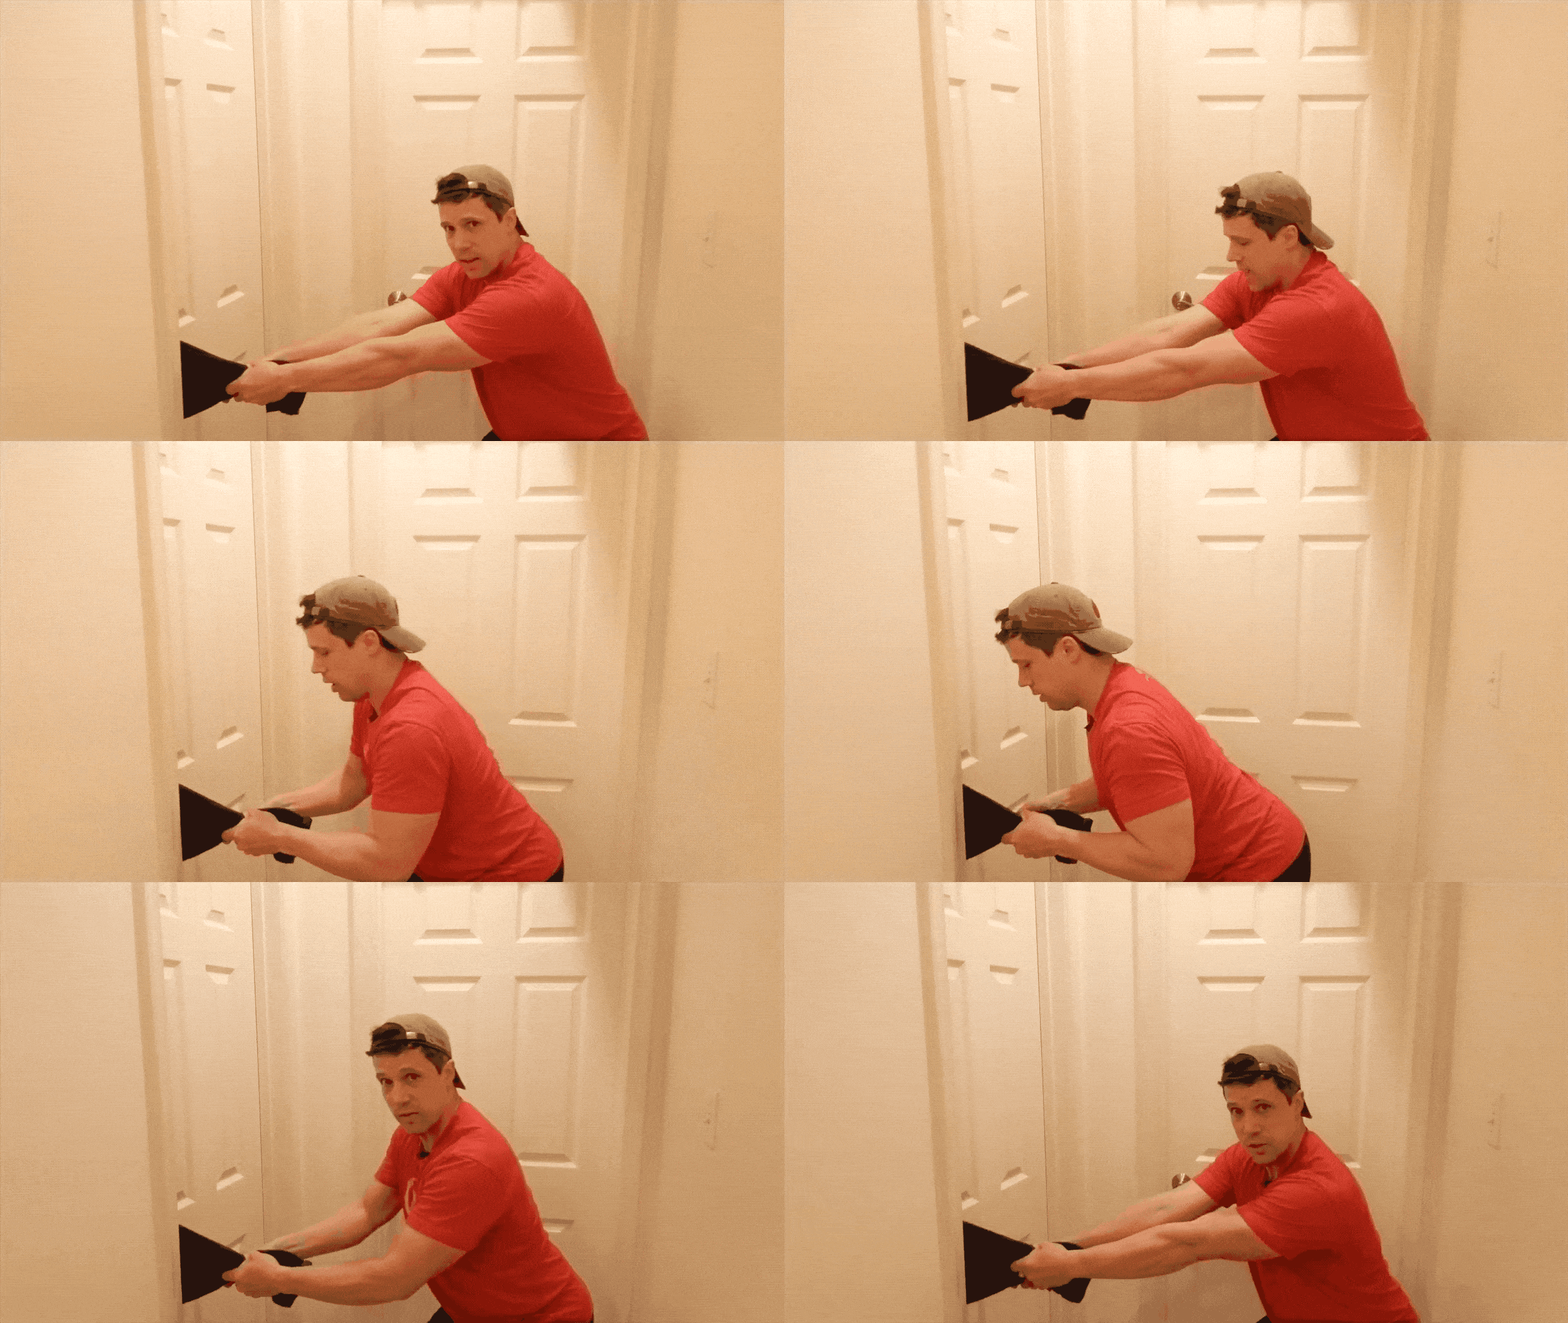
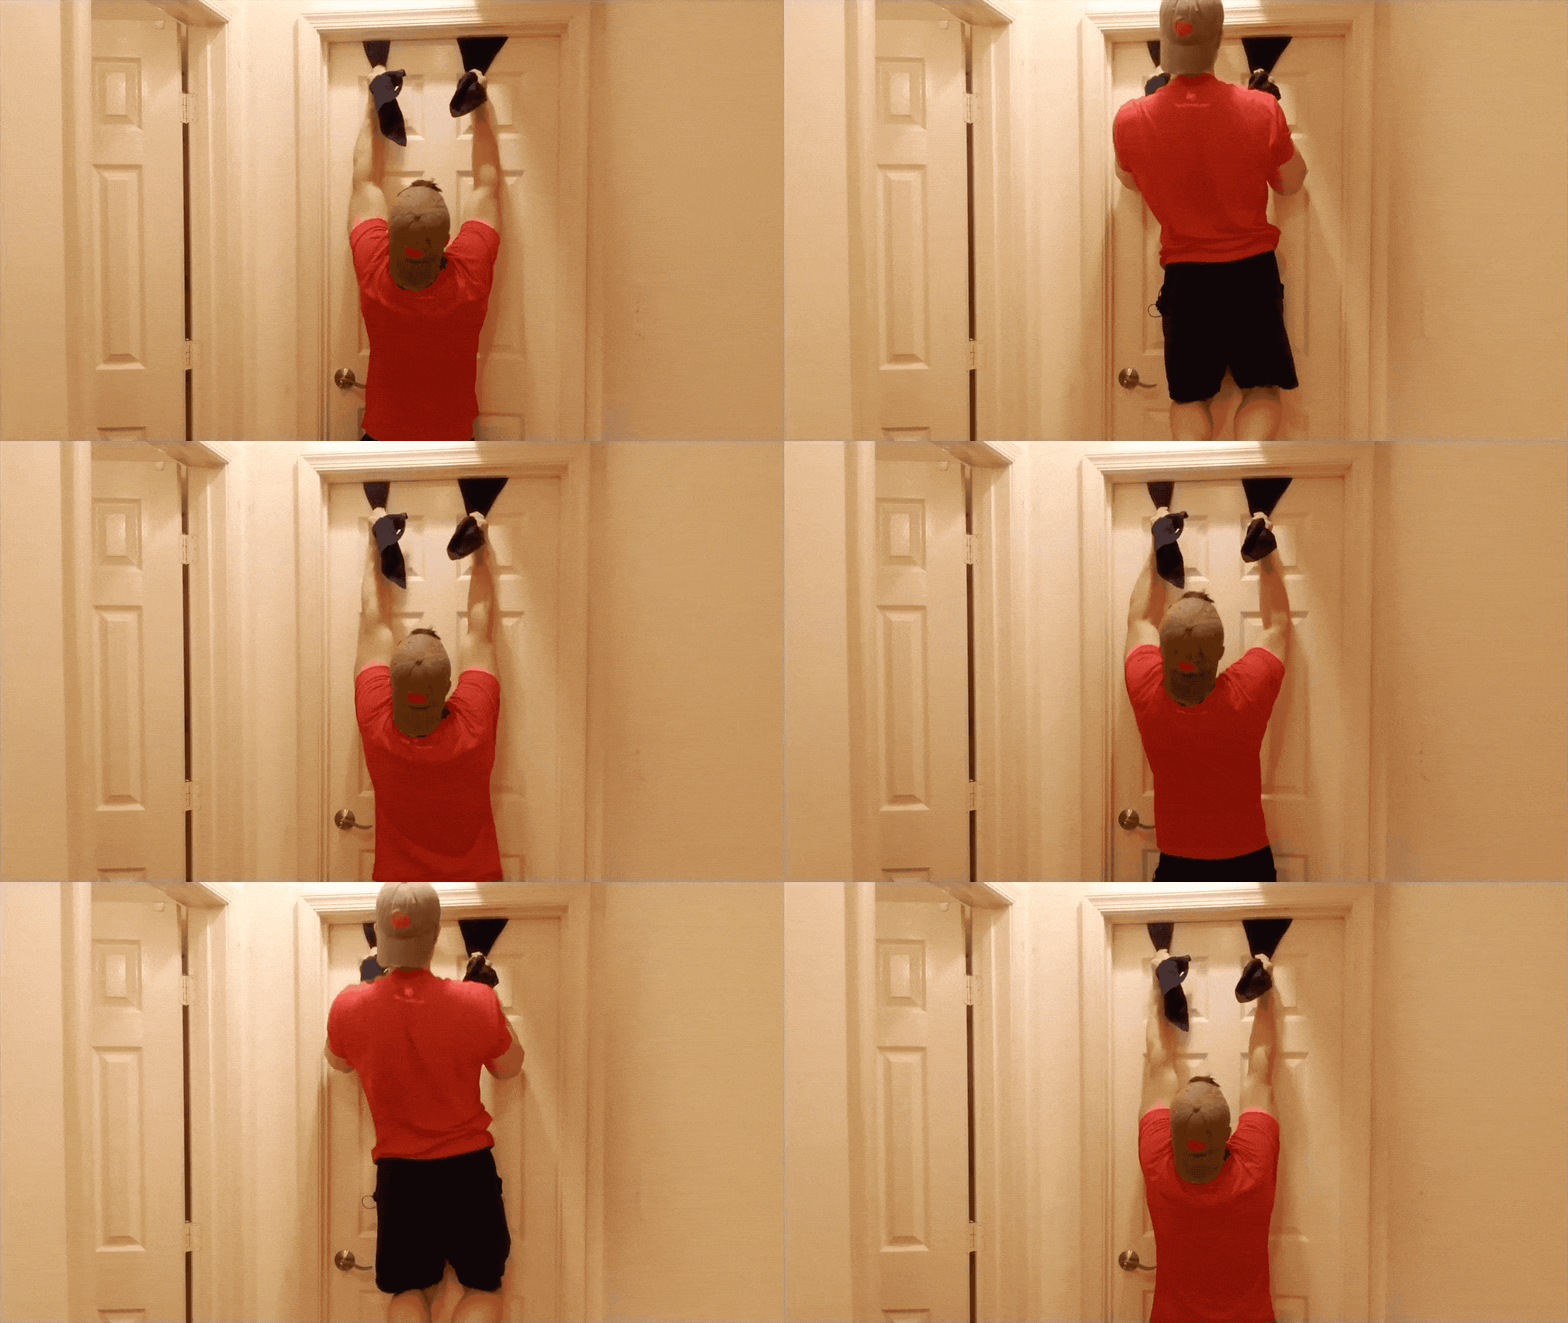
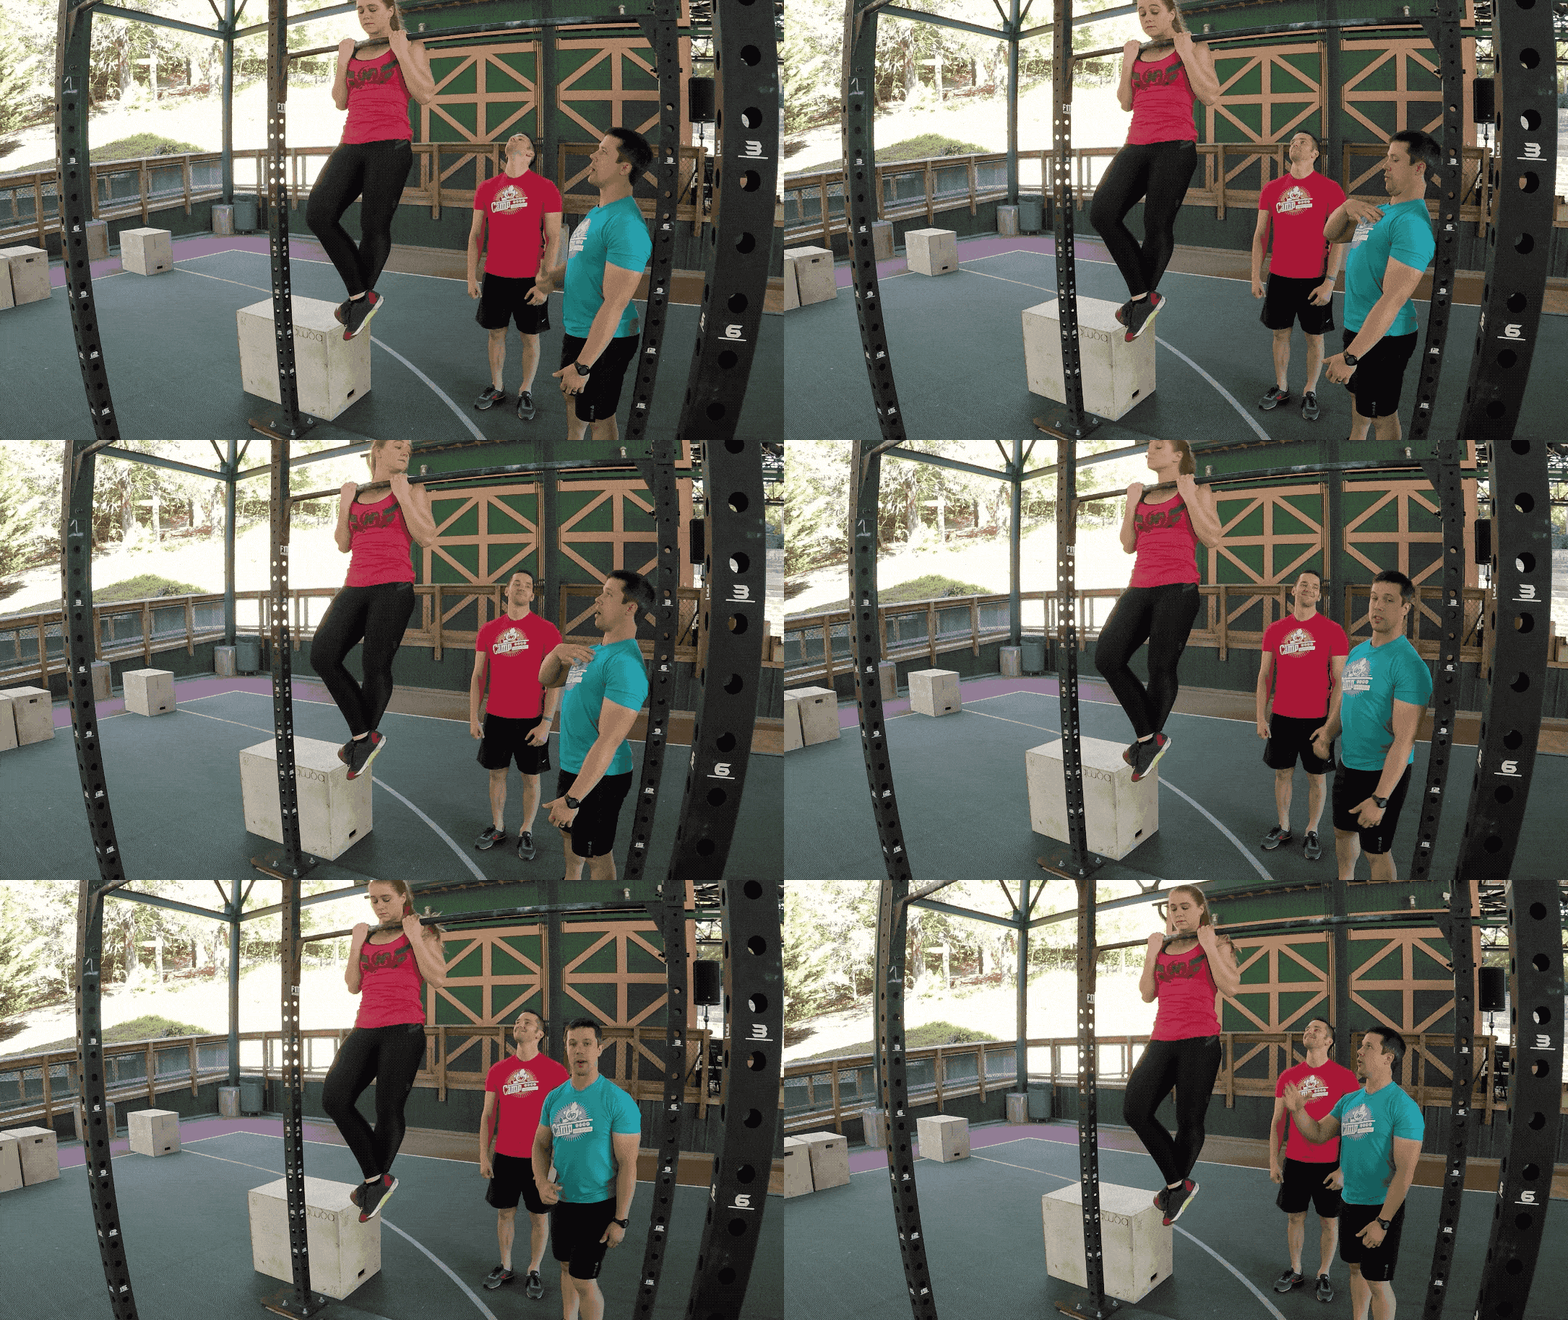
The other cool thing you can do with towels? Chin-ups!
It’s designed to be done in a small space, like a hallway, or an escape pod.
At this level, if you were going to buy some equipment for a small home gym, my number one recommendation would be to purchase some resistance or exercise bands:
They don’t take up much space and can offer you a lot of versatility for Small Space Workouts.
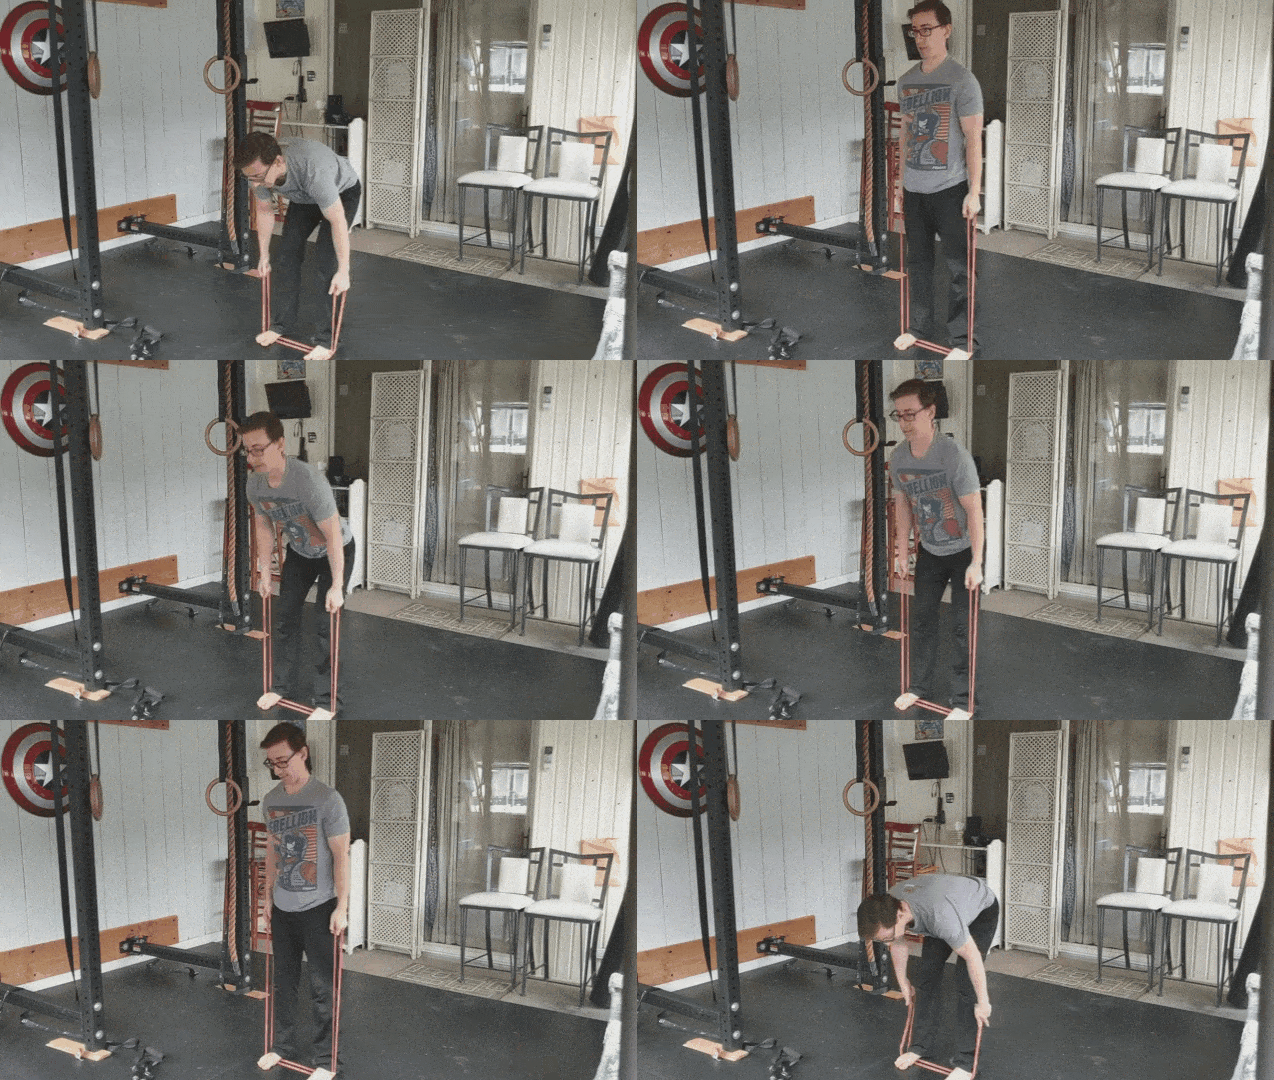
For example, you can do deadlifts using a resistance band:
Or presses:
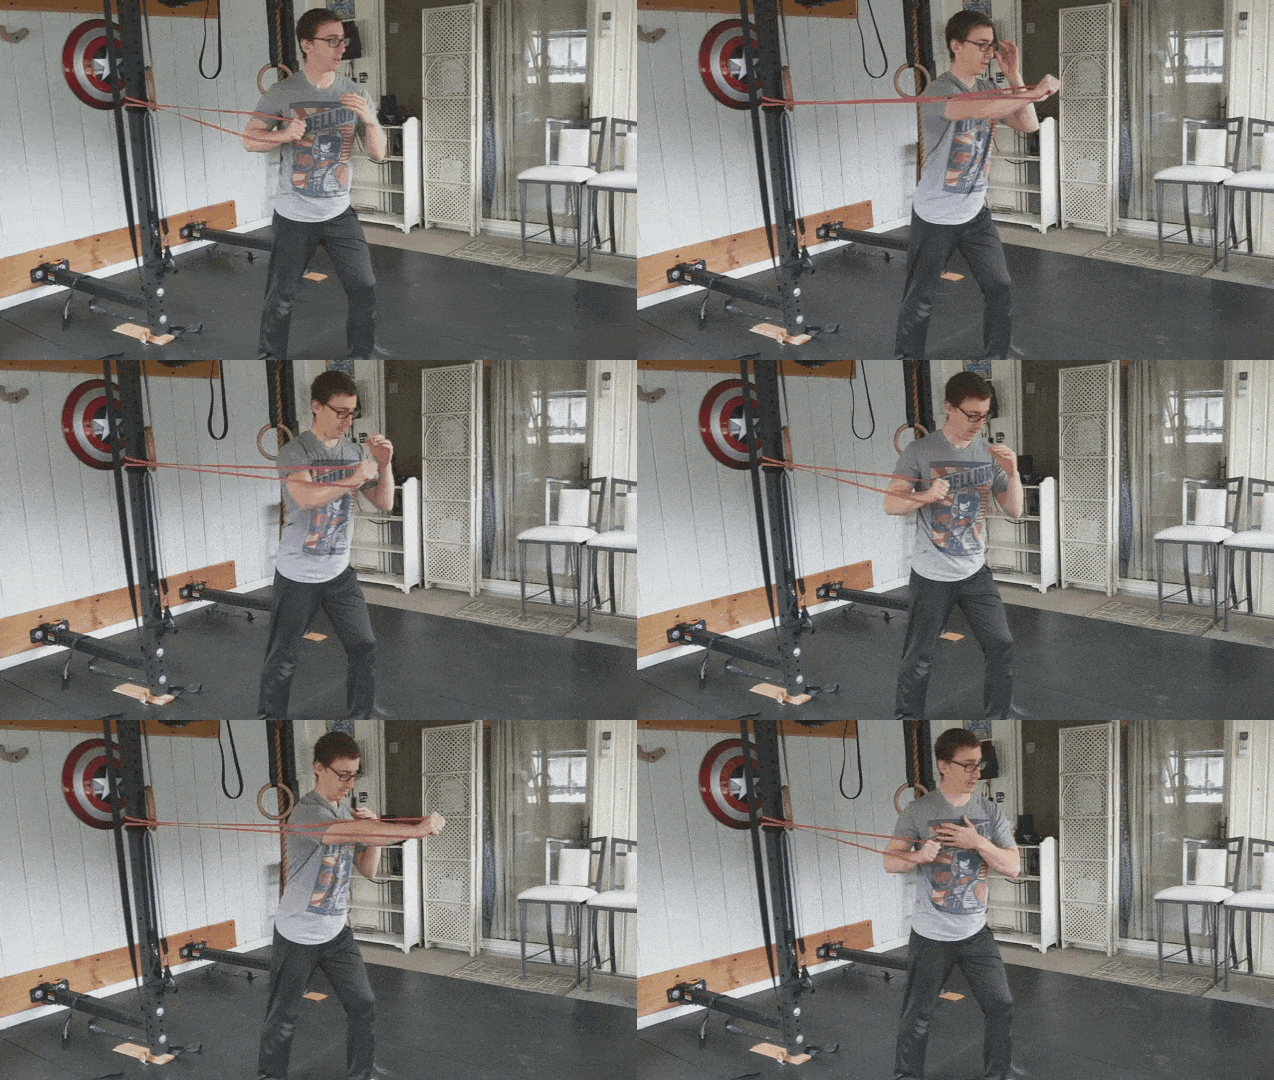
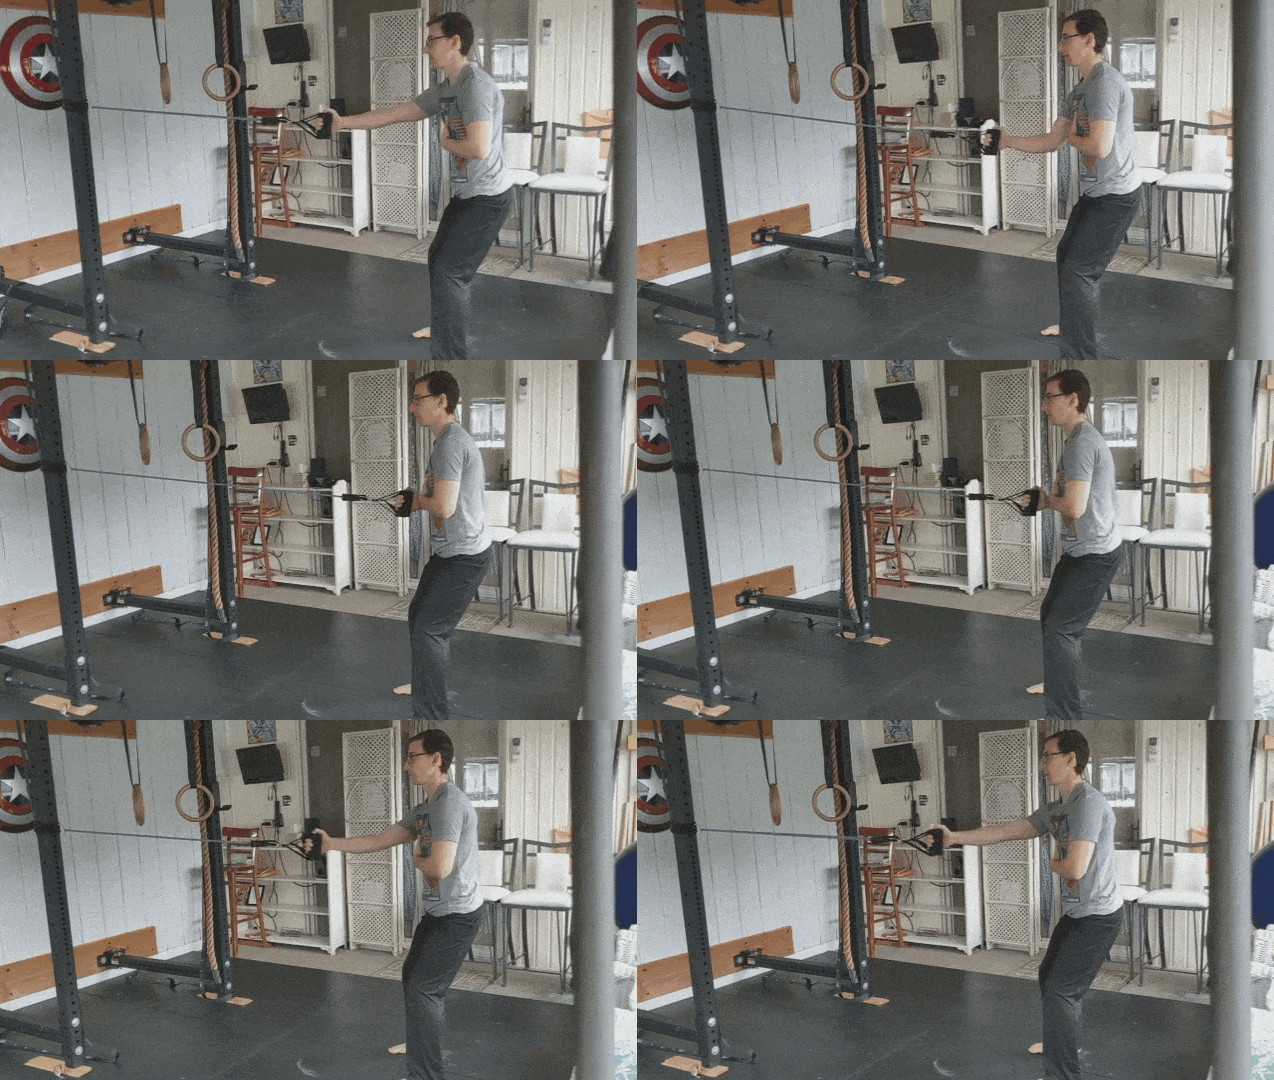
Or rows:
Boom!
There are your lower-body, push, and pull exercises we talked about earlier. Plus, we’re barely scratching the surface of all the exercises you can do with a sturdy exercise band.
We’d all love a tremendous amount of space to work out.
However, we work with whatever we have, whenever we can, wherever we are.
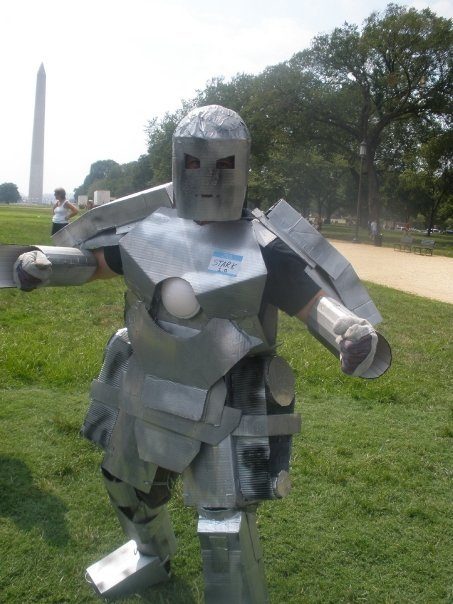
So remember, if Tony Stark can build a robot in a cave with a pile of scraps, then we can scrape together a workout with next to nothing as well.
Or build our own suits out of cardboard.
Which I’ve done.
Just remember, you got this.
If you want any help in working out in a small space, we got your back.
Here’s how to continue your training with Nerd Fitness:
Next Step #1) Our Online Coaching Program: if you want someone to design you a workout (like me!) for any small space, we got you!
You can schedule a free call with our team so we can get to know you and see if our coaching program is right for you. Just click on the image below for more details:
Next Step Number #2) If you want a daily prompt for doing workouts in any space, check out NF Journey. Our fun habit-building app helps you exercise more frequently, eat healthier, and level up your life (literally).
Try your free trial right here:
Next Step Number #3) Join the Rebellion! We need good people like you in our community, the Nerd Fitness Rebellion. You’ll meet individuals who train at the gym, in their cramped basement, or in outer space (that last one may or may not be true, but we do HAVE Rebels working out on boats in the middle of the ocean and even Antarctica!).
Sign up in the box below to enlist and get our Rebel Starter Kit, which includes all of our “work out at home” guides, the Nerd Fitness Diet Cheat Sheet, and much more!
Get your Nerd Fitness Starter Kit
The 15 mistakes you don’t want to make.
Full guide to the most effective diet and why it works.
Complete and track your first workout today, no gym required.
Alright, I want to hear from you:
Do you train in a small space?
What’s your “no space” workout look like?
Any tips or tricks for training in a phonebooth we should know of?
Let me know in the comments!
-Jim
PS: If you want any more help training at home with little to no equipment, check out:
Coach Matt, from our Online Coaching program, guides you through learning how to jump rope in the video above.
Matt breaks down jumping rope into three parts:
The Jump
The Arm Swing
Timing
First up…
#1) The Jump
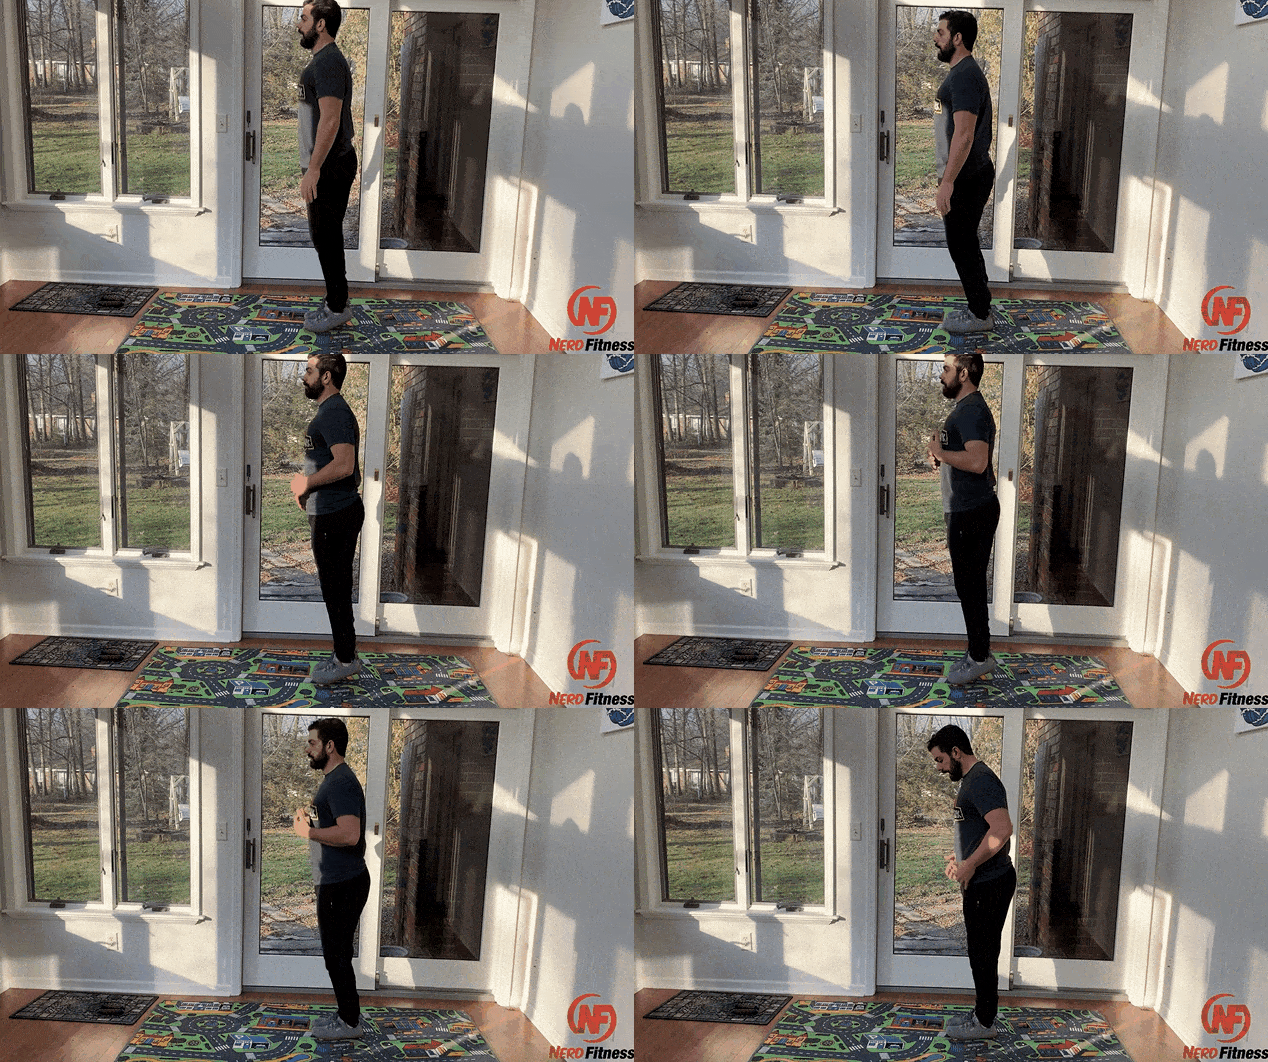
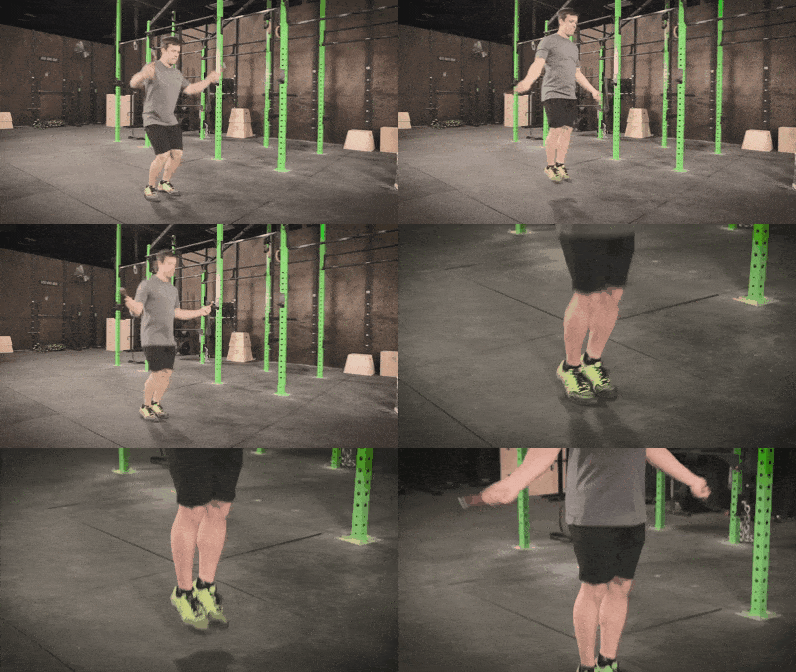
First, let’s just practice jumping.
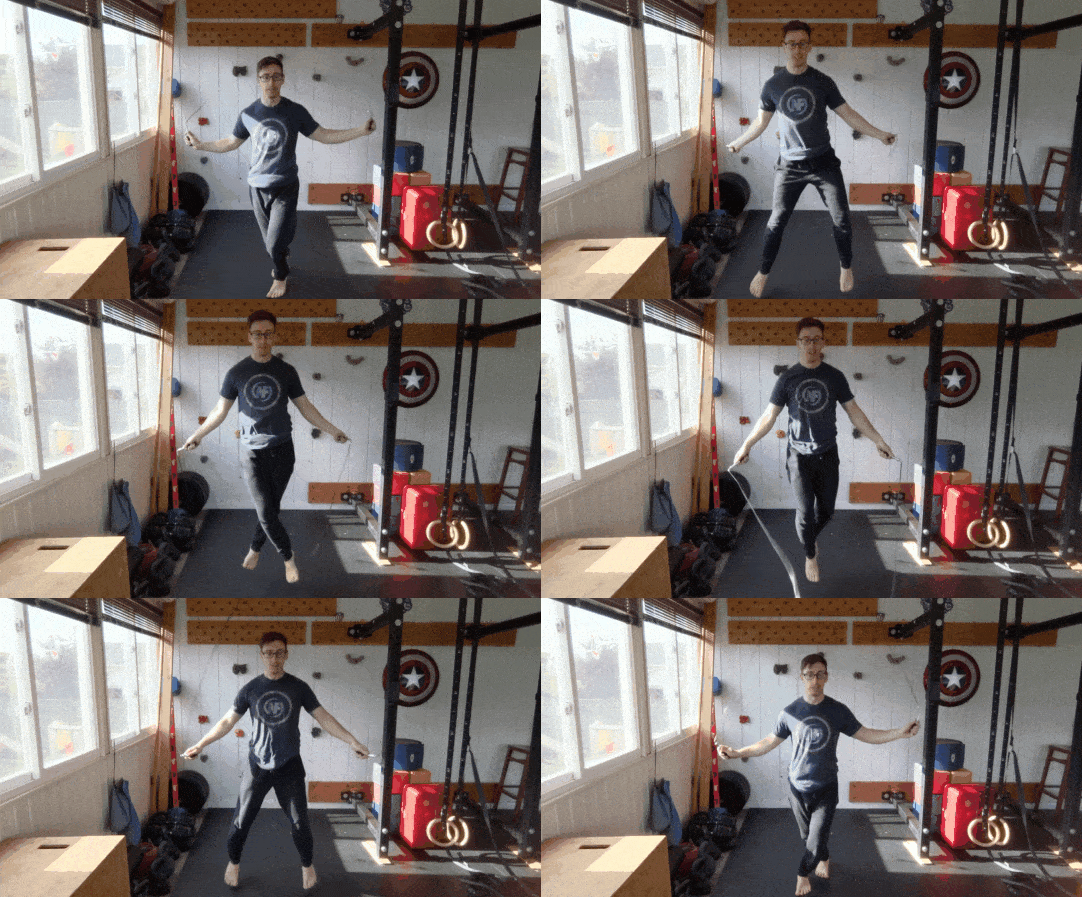
Stand tall, feet about hip-width apart.
Then, practice jumping up and down in one spot.
Most of your power will come from your ankle and toes. It’s really more of a “hop” than jump.
If you have trouble with this, Coach Matt recommends drawing some type of “X” or mark on the ground so you stay in one place.
Another tip from Coach Matt: keep a little tension throughout your body. If you’re too loose, you might flail around a bit and get off your mark.
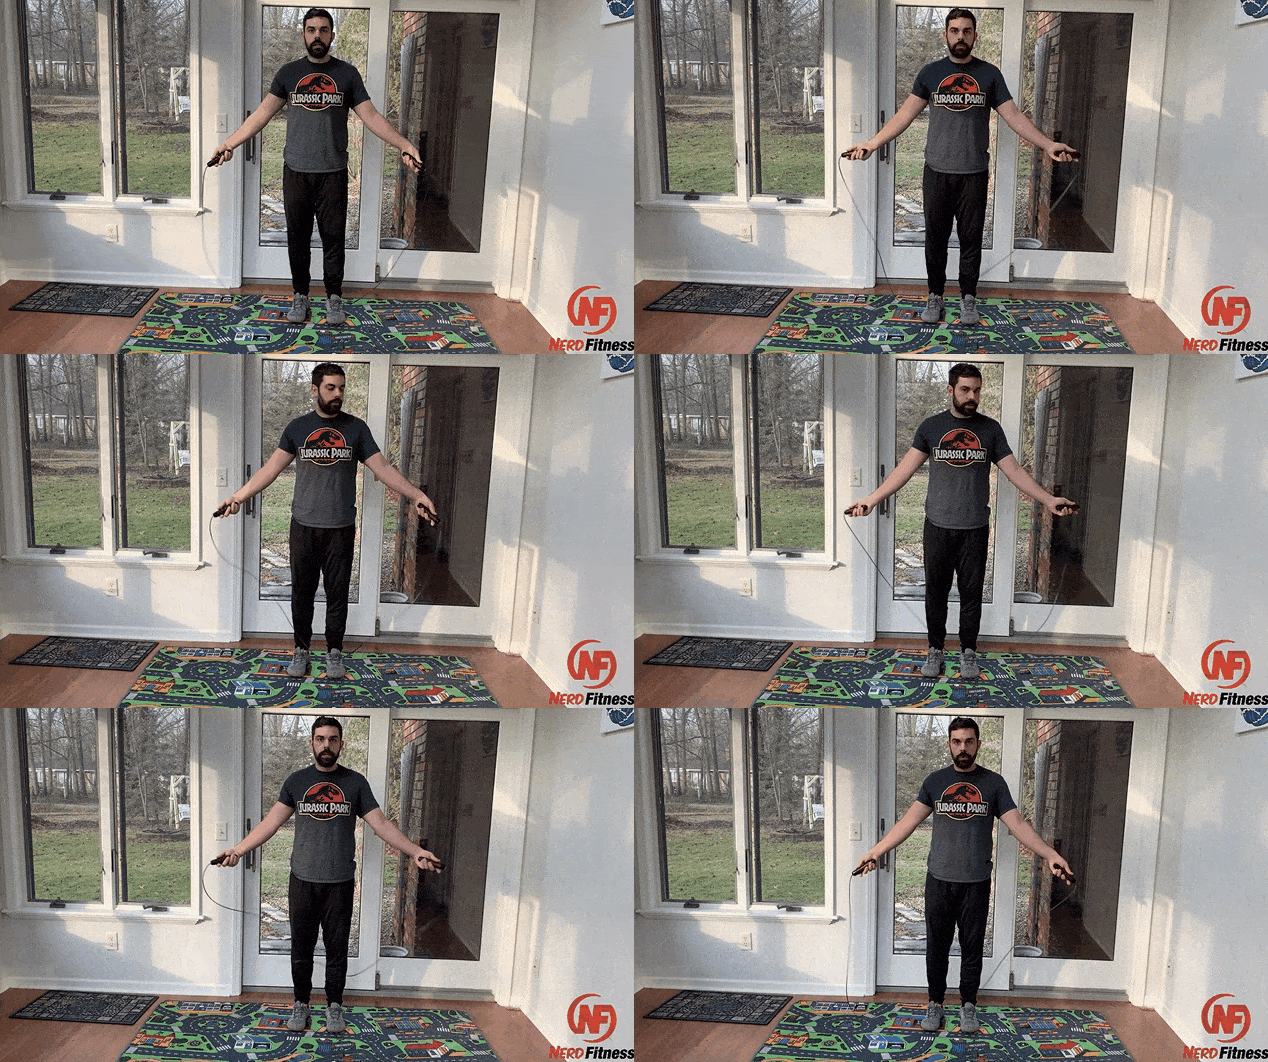
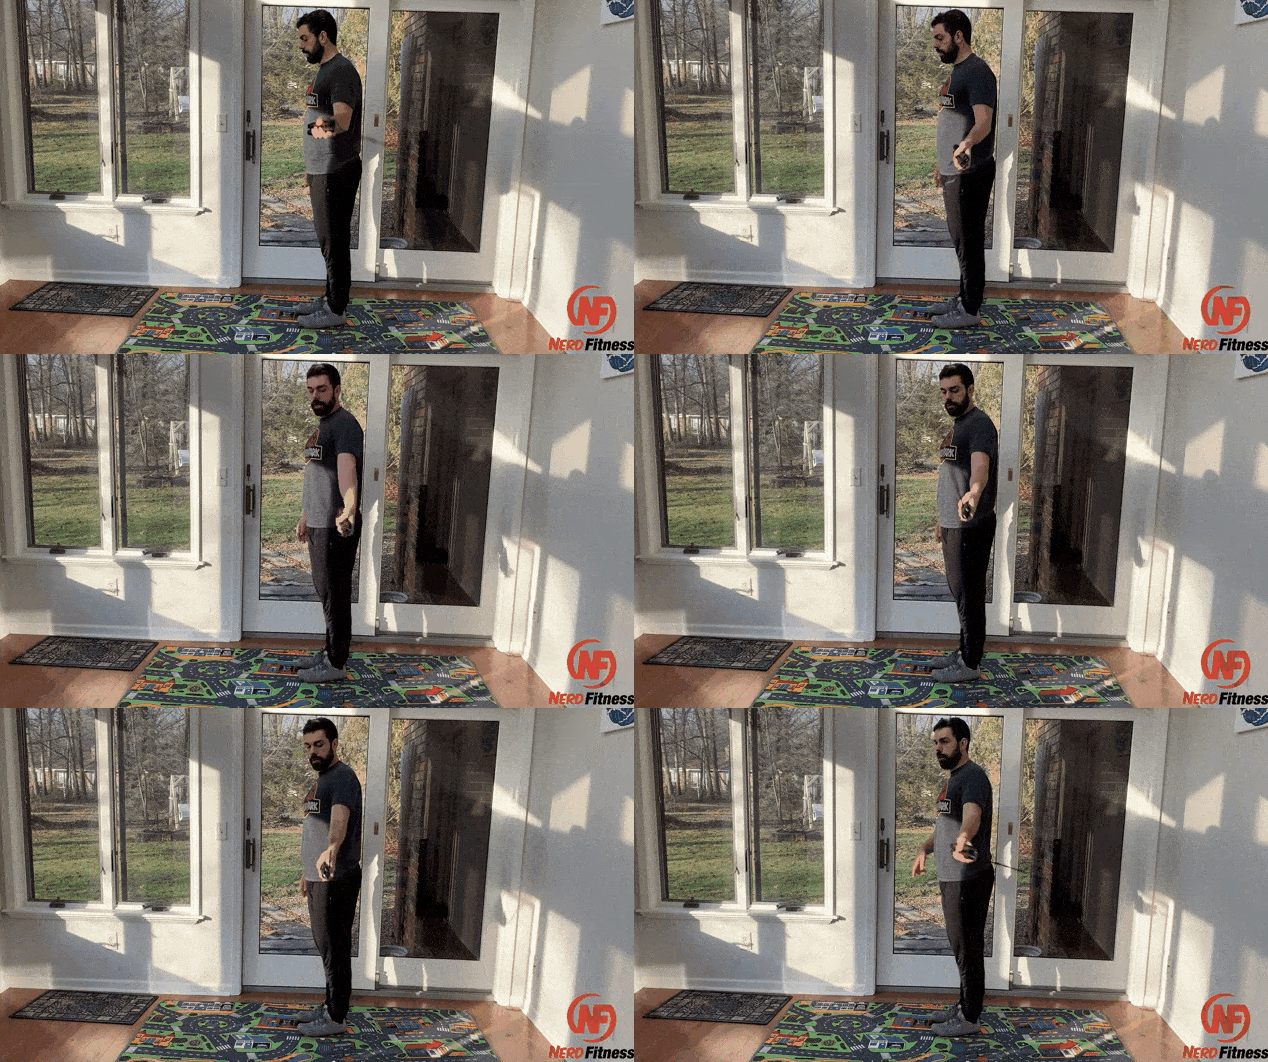
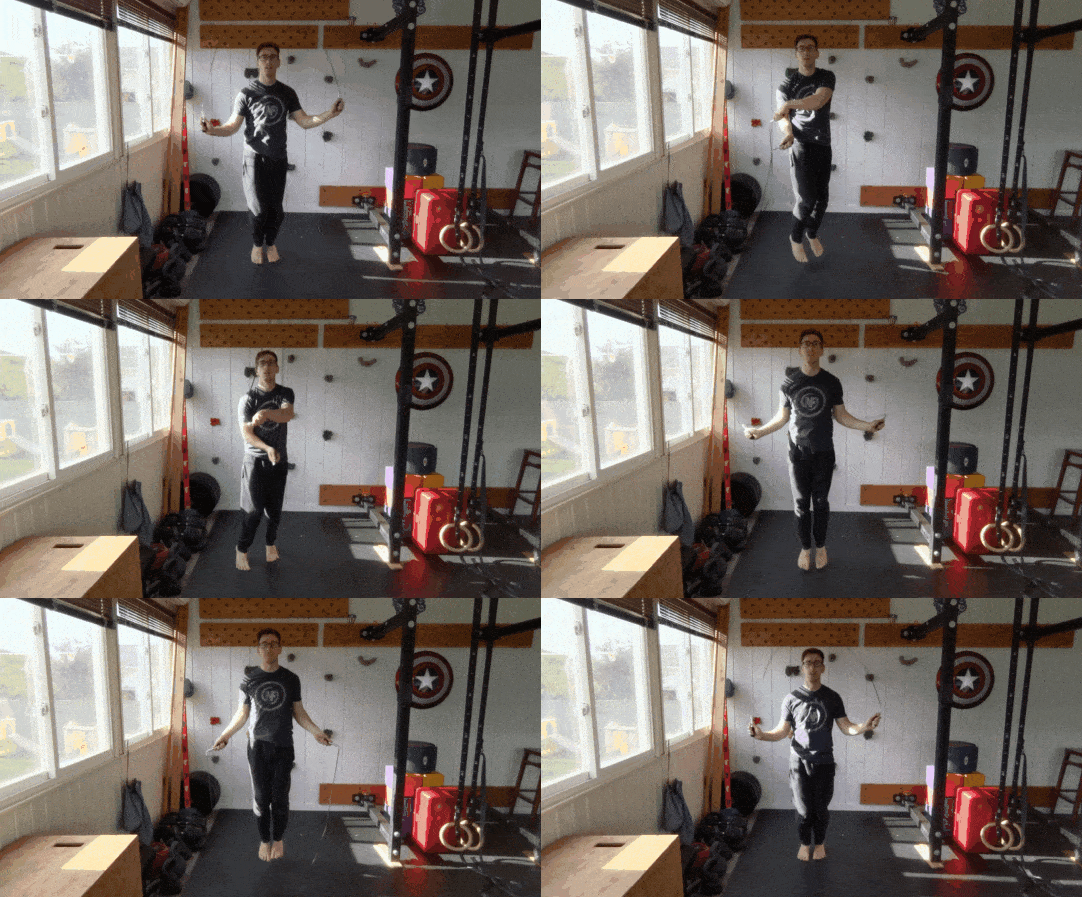
#2) The Arm Swing
Your arms will remain mostly stable when powering the rope. We want to keep the movement narrow, mostly coming from your wrists.
The name of the game with jumping rope is “in control.” Swinging from the wrists will help you maintain control of the rope.
Resist trying to rotate with a lot of elbow movement (try to keep them stable instead).
For the position of your arms, you want your hands out roughly at the height of your hips. Your arms will go downward at about a 45-degree angle.
To start, you might even just try getting the rhythm down with one hand:
Don’t even worry about jumping at first.
Once you’re comfortable swinging from both hands, it’s time to think about putting it all together.
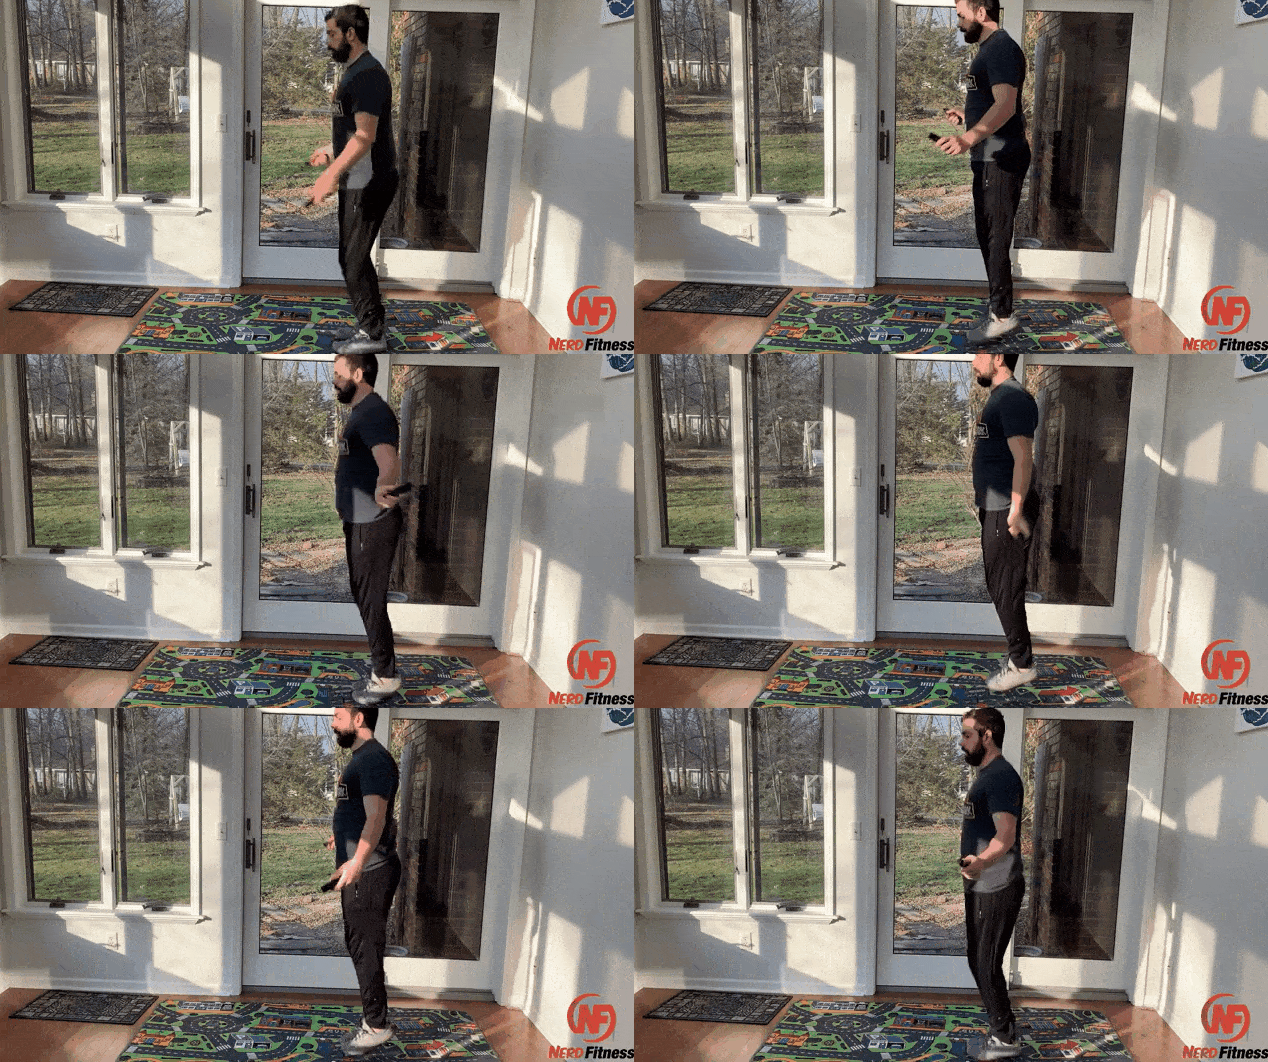
#3) Timing
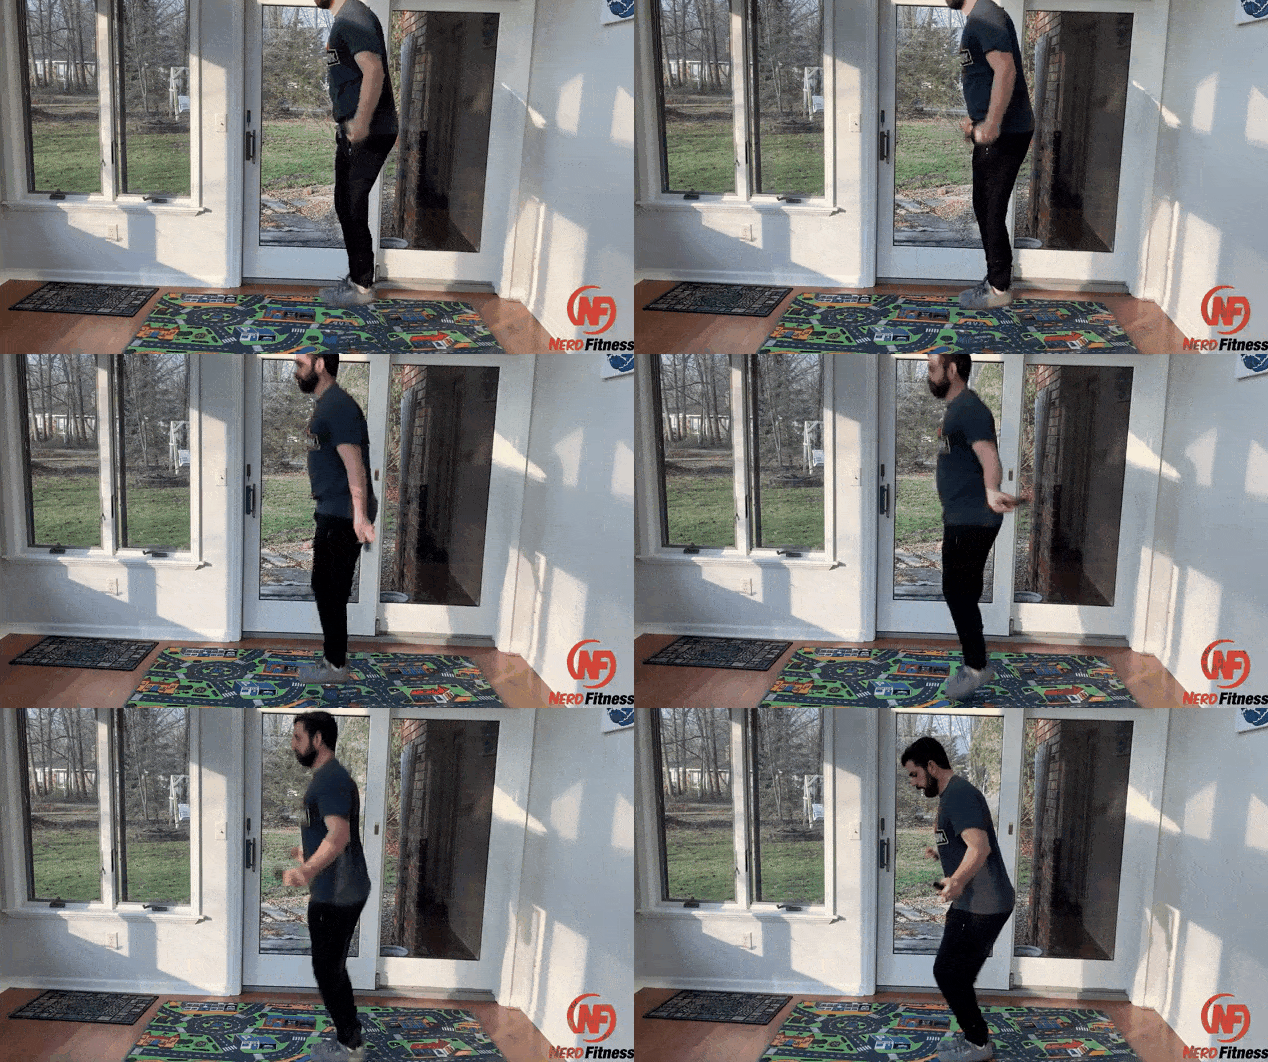
When you first get going, go slow with the arms, and do two hops per one rope revolution.
It looks like this:
When starting with this position, you might find your elbows flailing out a bit since they’re moving slow. So you’ll have less wrist control.
That’s okay.
Once you get comfortable with the rhythm, try one hope per rope revolution to tighten it all up. You may find it easier to keep your arms and elbows stable moving faster.
Here’s a great point from Coach Matt: as a beginner, the rope itself will be your coach.
If you hit your shins or toes with the rope, something went wrong. Maybe you hopped too high or your elbows went a little off.
No problem. Just accept that the rope is providing you with immediate feedback, and try again.
Getting the rhythm and timing down with a jump rope can be tricky, so hang in there and be patient.
Once you get the feel of it, it’s time to do some workouts.
The Nerd Fitness Jump Rope Workout (With Video Tutorial)
Coach Matt walks you through 5 different levels of difficulty for your jump rope workout.
If this is too much, feel free to increase your rest period. Meaning you can rest for 45 seconds, no problem.
For the next level, we’ll do the same moves, but we’ll increase your single under duration
Jump Rope Workout Level 2:
Single Unders: 45 Seconds
Rest: 15 Seconds
Single Unders: 45 Seconds
Rest: 15 Seconds
Single Unders: 45 Seconds
Rest: 15 Seconds
Single Unders: 45 Seconds
Rest: 15 Seconds
Single Unders: 45 Seconds
Rest: 15 Seconds
Total time: 5 minutes
On Level 3, it’s time to mix in double unders.
During our jump interval, you can do every other, so one single under followed by one single double under (1 jump, 2 rotations of the rope).
If this is too tricky, do a double under for every four normal jumps.
Just try to keep it consistent, as this will help your rhythm.
The mission with Level 3 is to get comfortable performing double unders.
Jump Rope Workout Level 3:
Single/Double Under Mix: 30 Seconds
Rest: 30 Seconds
Single/Double Under Mix: 30 Seconds
Rest: 30 Seconds
Single/Double Under Mix: 30 Seconds
Rest: 30 Seconds
Single/Double Under Mix: 30 Seconds
Rest: 30 Seconds
Single/Double Under Mix: 30 Seconds
Rest: 30 Seconds
Total time: 5 minutes
Now that you’re at Level 4, it’s all double unders, all the time.
We’re going to focus on building power, so we’ll do intervals for 15 seconds, then rest for 45.
Jump Rope Workout Level 4:
Double Unders: 15 Seconds
Rest: 45 Seconds
Double Unders: 15 Seconds
Rest: 45 Seconds
Double Unders: 15 Seconds
Rest: 45 Seconds
Double Unders: 15 Seconds
Rest: 45 Seconds
Double Unders: 15 Seconds
Rest: 45 Seconds
Total time: 5 minutes
With our last workout today, we’re bumping up the duration of double unders to 30 seconds, then resting for the same time.
This might be challenging.
Jump Rope Workout Level 5:
Double Unders: 30 Seconds
Rest: 30 Seconds
Double Unders: 30 Seconds
Rest: 30 Seconds
Double Unders: 30 Seconds
Rest: 30 Seconds
Double Unders: 30 Seconds
Rest: 30 Seconds
Double Unders: 30 Seconds
Rest: 30 Seconds
Total time: 5 minutes
If single and double jumps get boring, have no fear.
We’ll cover additional exercises you can do to level up your jump rope game now.
Feel free to mix and match any of the moves below into your workout.
After a while, your rest period might be normal hops, while your interval period can be one of these sweet moves.
The 13 Best Jump Rope Exercises
Now that you have the basics down on how to jump rope, let’s cover some moves so you can expand your workouts.
#1) The Single Under
This is the most basic jump rope exercise. One hop per rope revolution, both feet together.
Get this down before you move on from here.
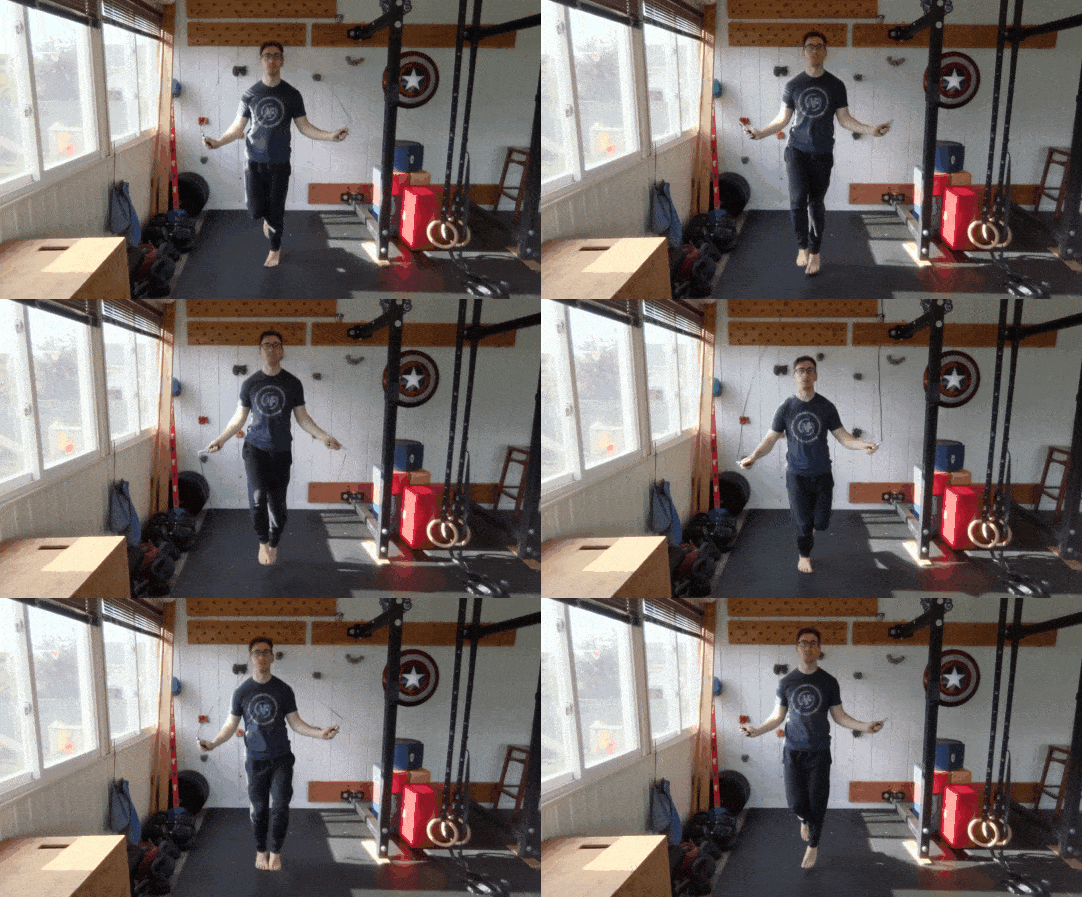
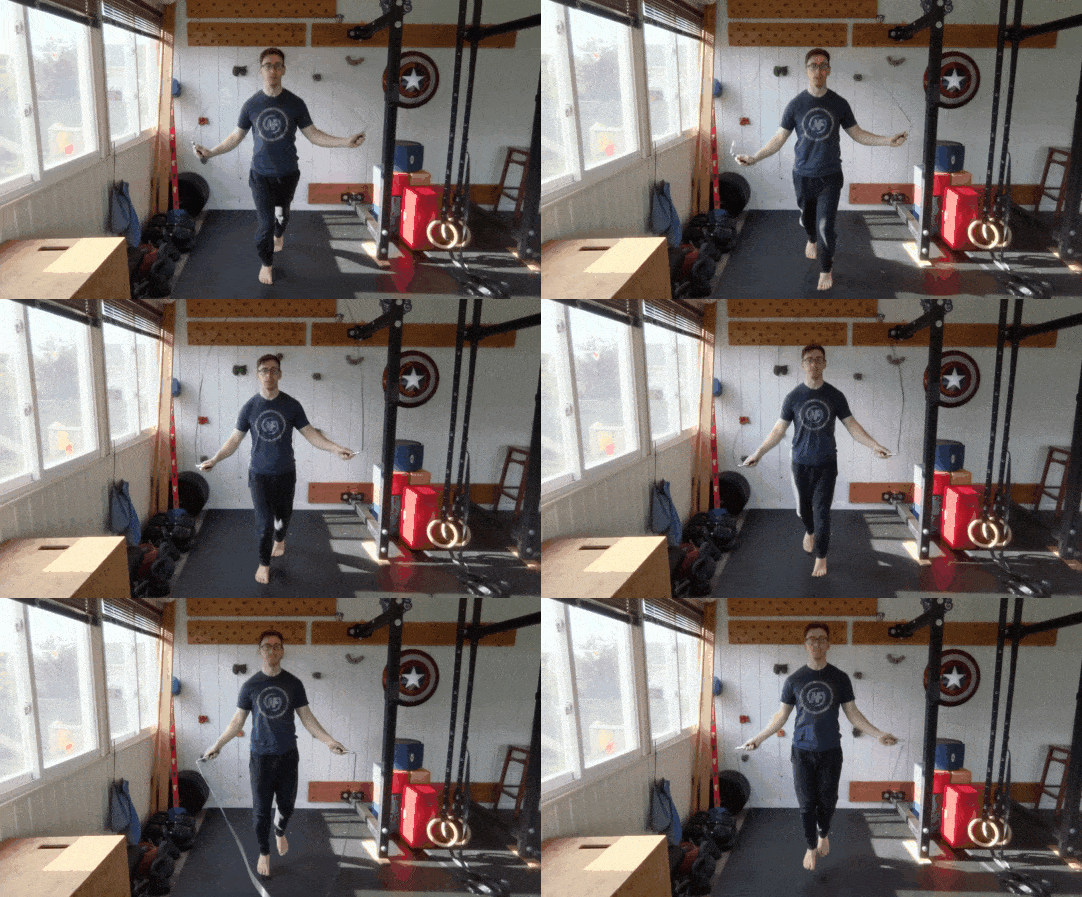
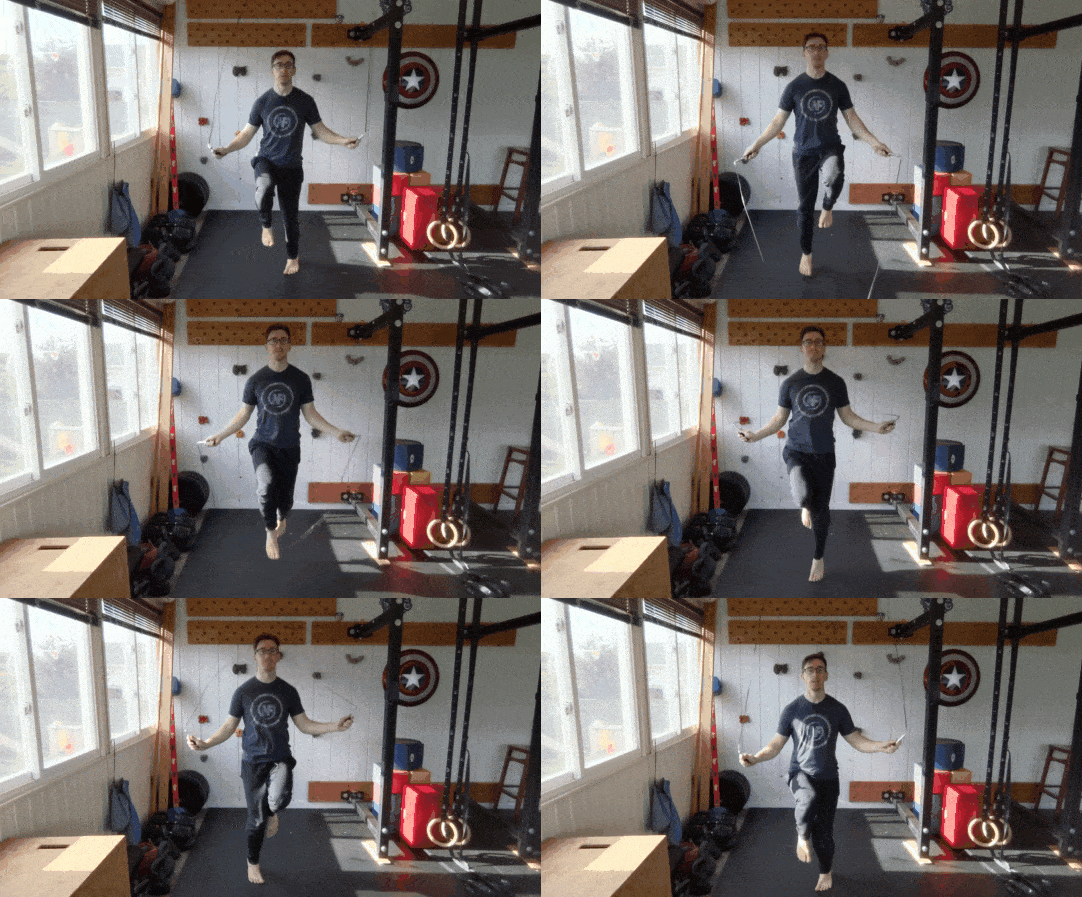
#2) Double Single Foot Jumps
Once you get the single under down, try hopping on one foot.
To really test your balance, jump twice from the same foot.
An example beat would go left foot, left foot, right foot, right foot, with one rope revolution between.
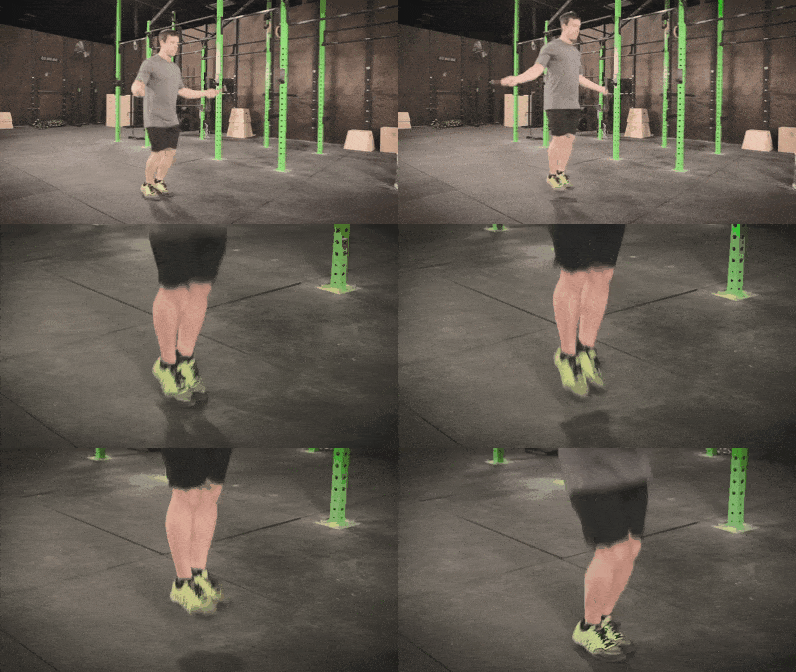
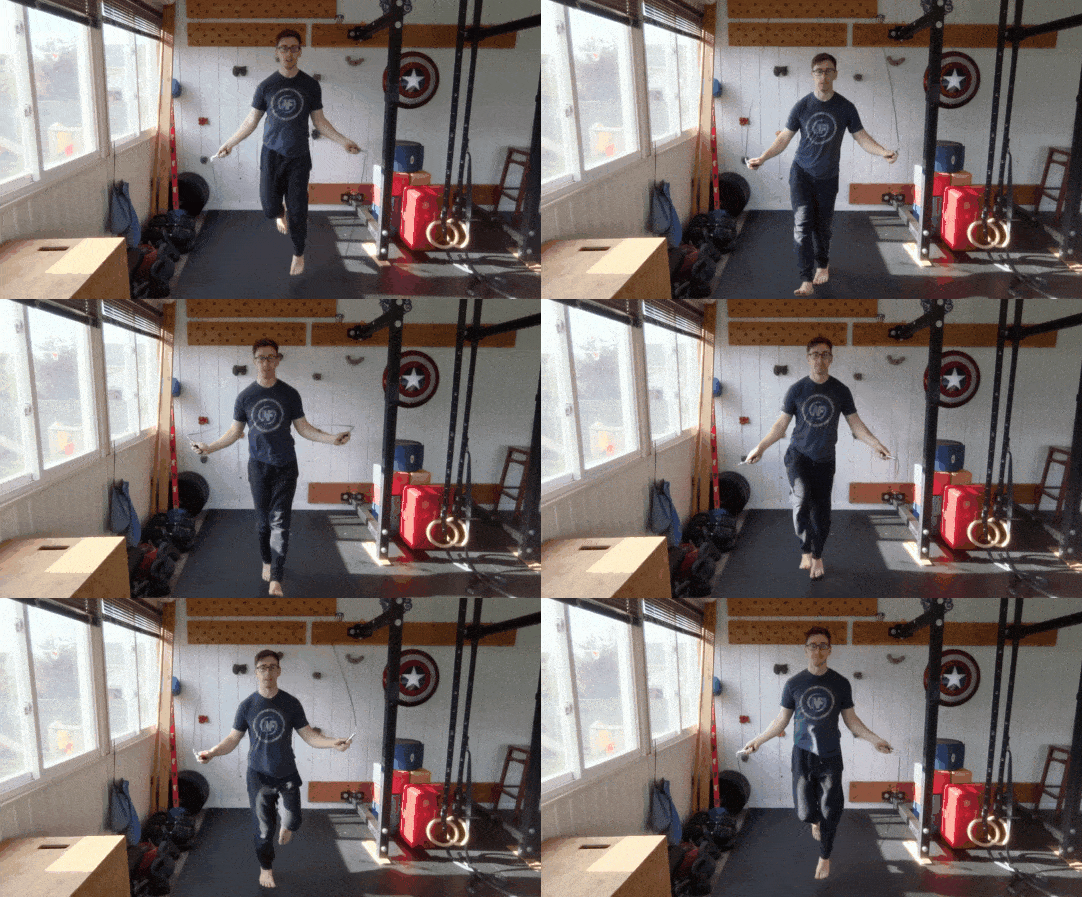
#3) Kick Out Jumps
Here, you’ll alternate taking one foot forward every jump.
So while your left is down, your right foot will be kicking out.
You’ll hop and switch feet between rope revolutions. This is trickier than it looks.
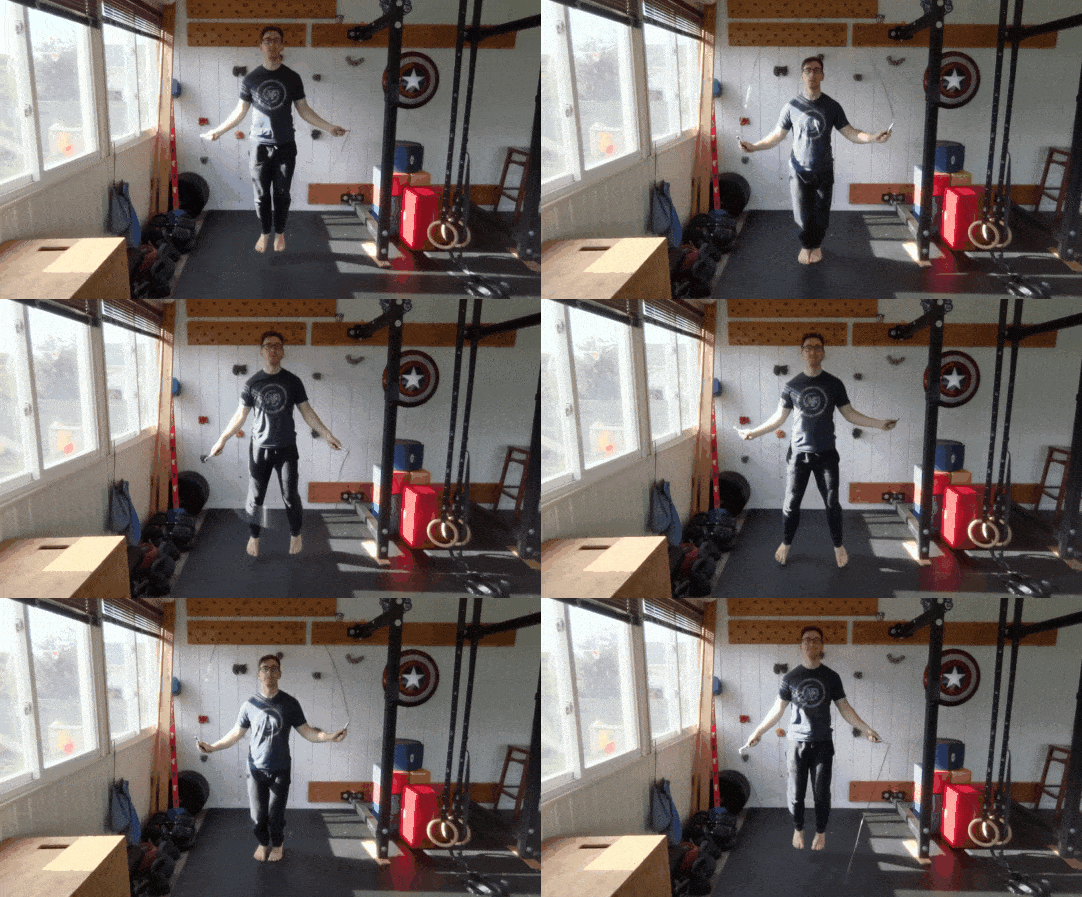
#4) Jump Rope Jacks
Your feet will act as they would in a normal jumping jack, jumping wide apart every other hop.
Your arms will stay as they would during a normal single under, so it’s more of a “half jack.”
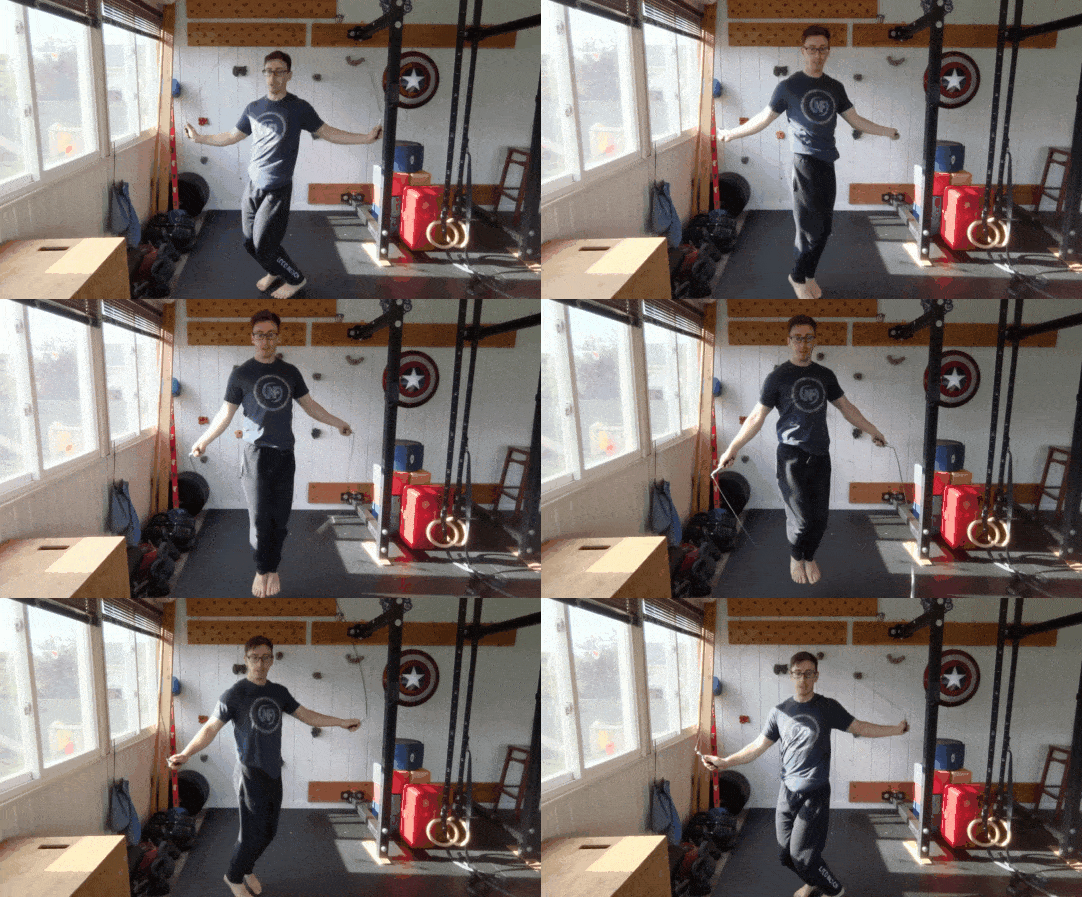
#5) Twist Jumps
This jump rope exercise is all about rotating your torso.
Your feet will jump together, but will be rotating about 180 degrees from left to right, twisting from your hip.
Your shoulders will stay firm, which will keep the rope in place.
#6) Skiers
The feet will land together for your skiers, but one leg will be in front and the other will be behind.
You’ll alternate leg positions between jumps, in a scissor-like motion.
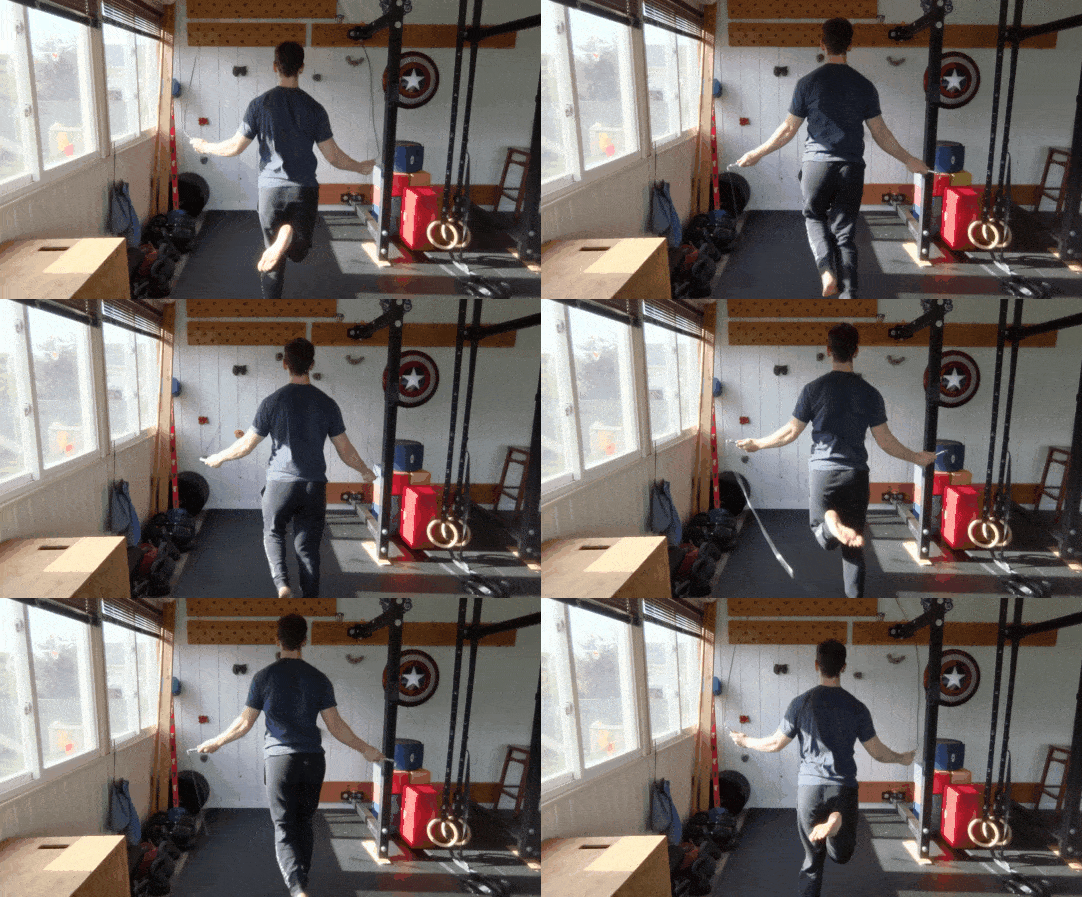
#7) High Knees
Alternate jumping from one leg to the other with your hops. The trick here is to bring your knees up high as you do so.
#8) Butt Kicks
These are much like your high knees, but in reverse, as you’re trying to bring your foot back to the point where it meets your glute (butt).
A good counter exercise for your high knees.
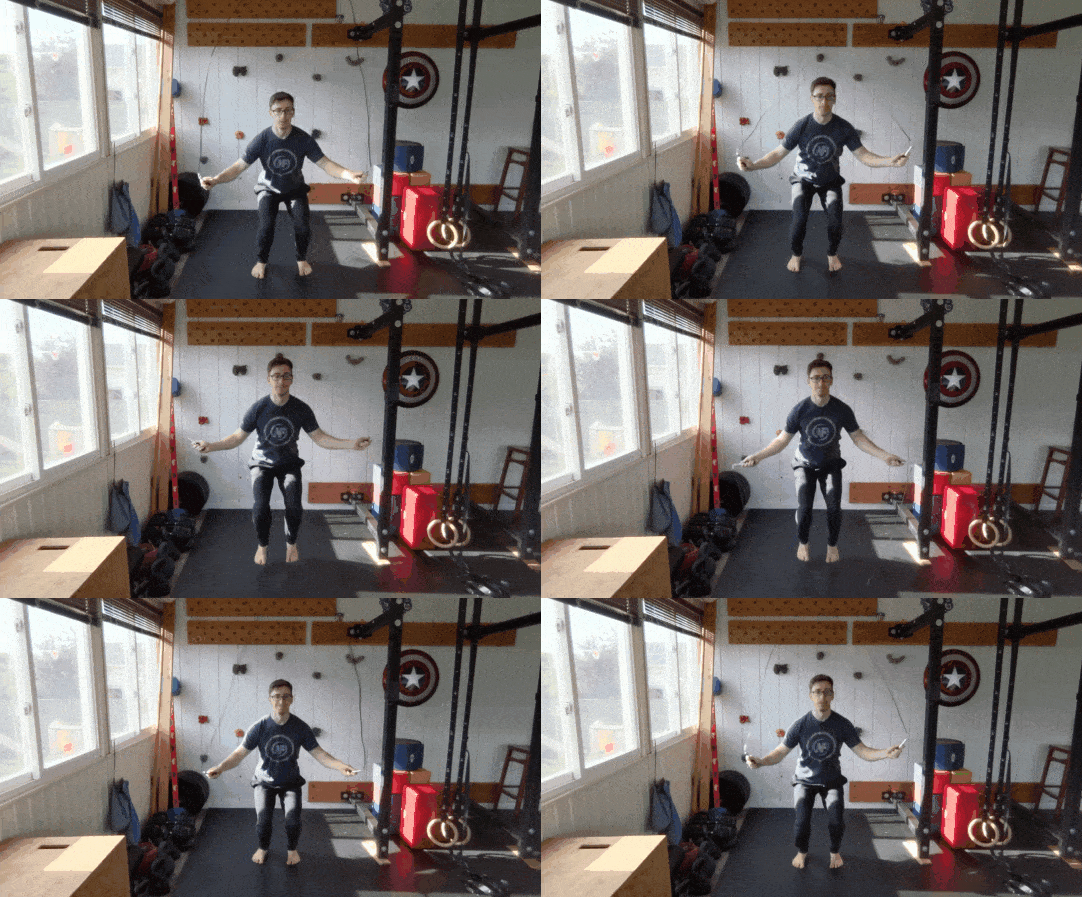
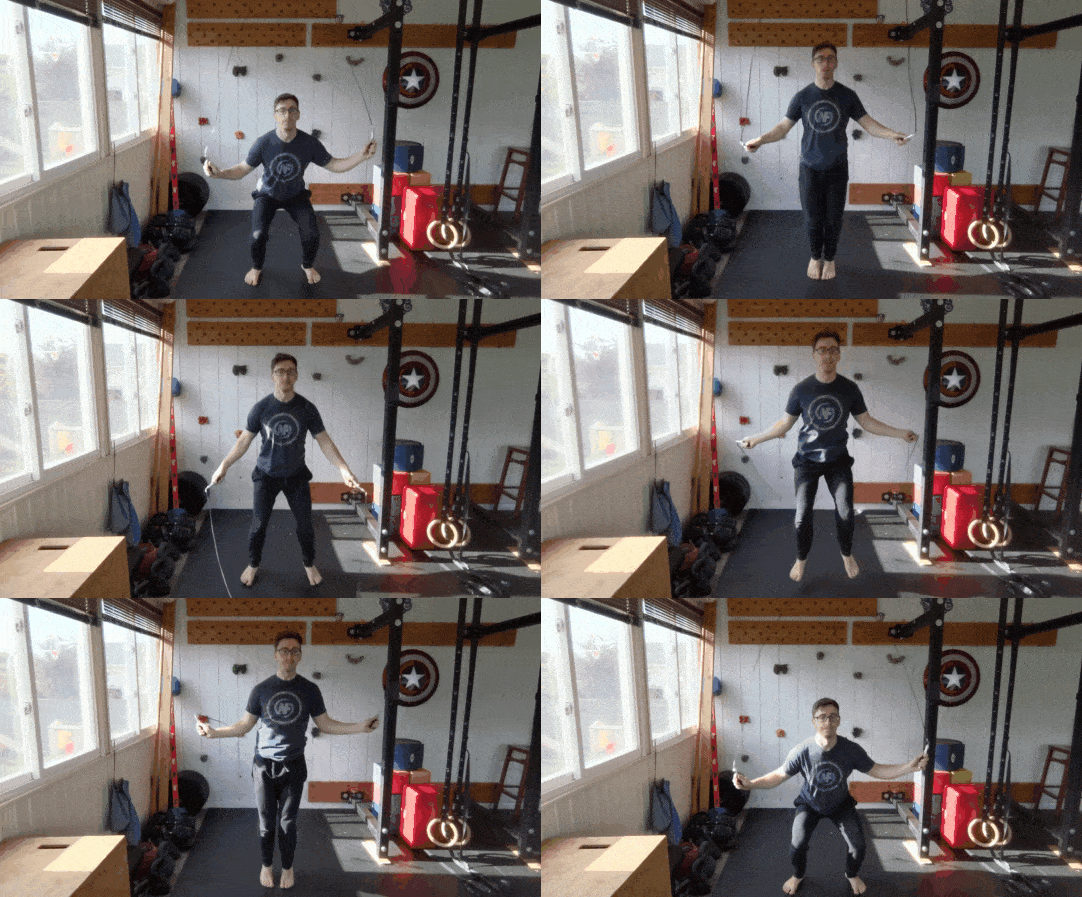
#9) Squat Jumps
If you want to really challenge your lower body, hold a squat position while doing your hops.
Your entire lower body will be engaged for this exercise.
#10) Squat Jacks
Just like the name would suggest, here we are combining our squat jumps with jumping jacks.
To do it, perform jump rope jacks, but land in a squat position when your legs are kicked out wide.
This will get challenging quickly.
#11) Criss Cross Jacks
These are like jumping jacks, but instead of bringing your feet together, you cross one foot in front of the other.
Your feet will go wide, then left in front of right, then wide, then right in front of left, then wide.
After some practice, you’ll get the coordination down.
#12) Jump Rope Figure 8
We’re gonna have fun with this one.
This exercise has you doing four normal hops, followed by four twist jumps.
Here’s the fun part: when you rotate, bring your arms together and have the rope do a revolution on the side you’re twisting away from. Alternate to the other side, combining your twist, hop, and whip.
Don’t feel bad if this takes some practice. This is starting to get into the “jump rope tricks” territory.
#13) The Double Under
This is one of the more advanced jump rope moves, as you need to swing the rope under you twice per hop.
Here’s a video on how to perform double unders:
If you get the double under down consistently, you’re no longer a jump rope noob.
Want a workout that will have you doing some of these jump rope moves? If so, check out our new app!
NF Journey will match a workout for you based on your experience level, and will also show you exactly how to use your jump rope.
No guesswork needed, just grab your rope and follow along with the app.
You can sign-up for a free trial right here:
How Do I Choose a Jump Rope? (Type and Length)
There are a couple of things to consider when choosing a jump rope: type and length.
Let’s discuss both.
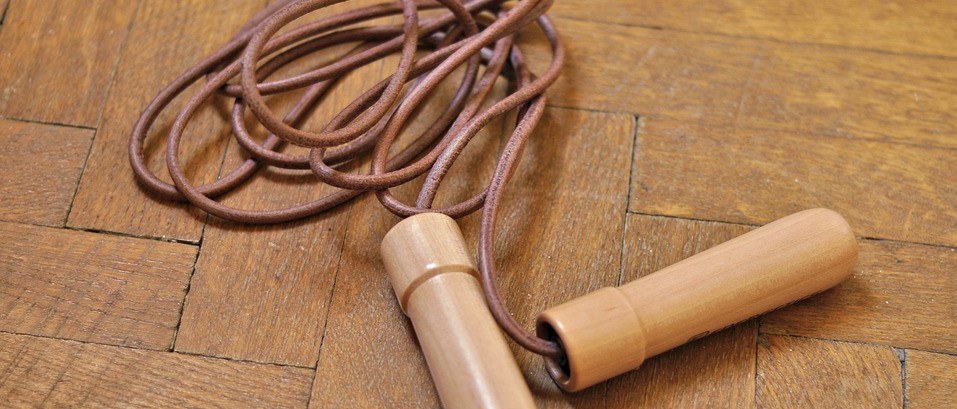
There are generally three types of jump ropes you’ll run into.
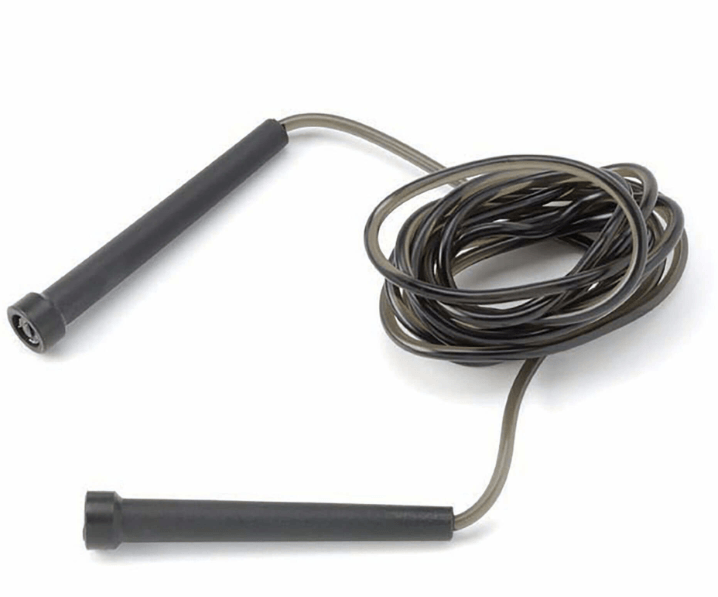
#1) Speed Ropes
This is the most common type of jump rope you’ll come across. It’s also what Coach Matt uses in his videos above.
Speed ropes are lightweight, which will help when doing certain moves like the double under.
Coach Matt’s speed rope has a plastic covering, but occasionally you’ll find these with just the wire. This makes them even lighter. The danger here is that if you hit yourself…it’s with a bare wire…
Ouch.
WOD Nation has a decent coated speed jump rope that you can find.
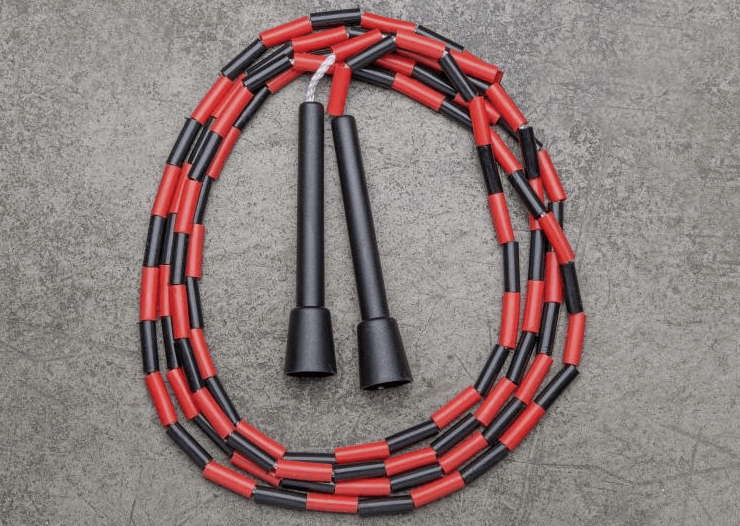
#2) Beaded Ropes
This rope is probably what you used as a kid on the playground.
Beaded jump ropes don’t tangle as easily as speed ropes and weigh a bit more.
They are also clunkier and will make double unders tougher, but the little bit of extra weight might make them easier for a beginner to handle.
Rogue Fitness has some pretty cool ones to check out.
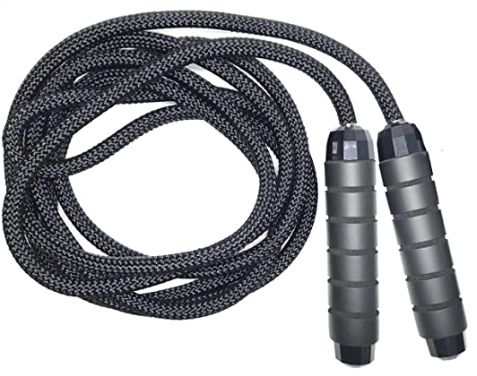
#3) Weighted Ropes
For more advanced jumpers, we have weighted ropes.
These can range from a one-pound rope to a six-pound rope.
Why the additional weight?
With extra weight added, your upper body gets a more intense workout.
If you’re a beginner, it’s probably best to skip these for now (hehe), but something to consider as you level up your jump rope skills.
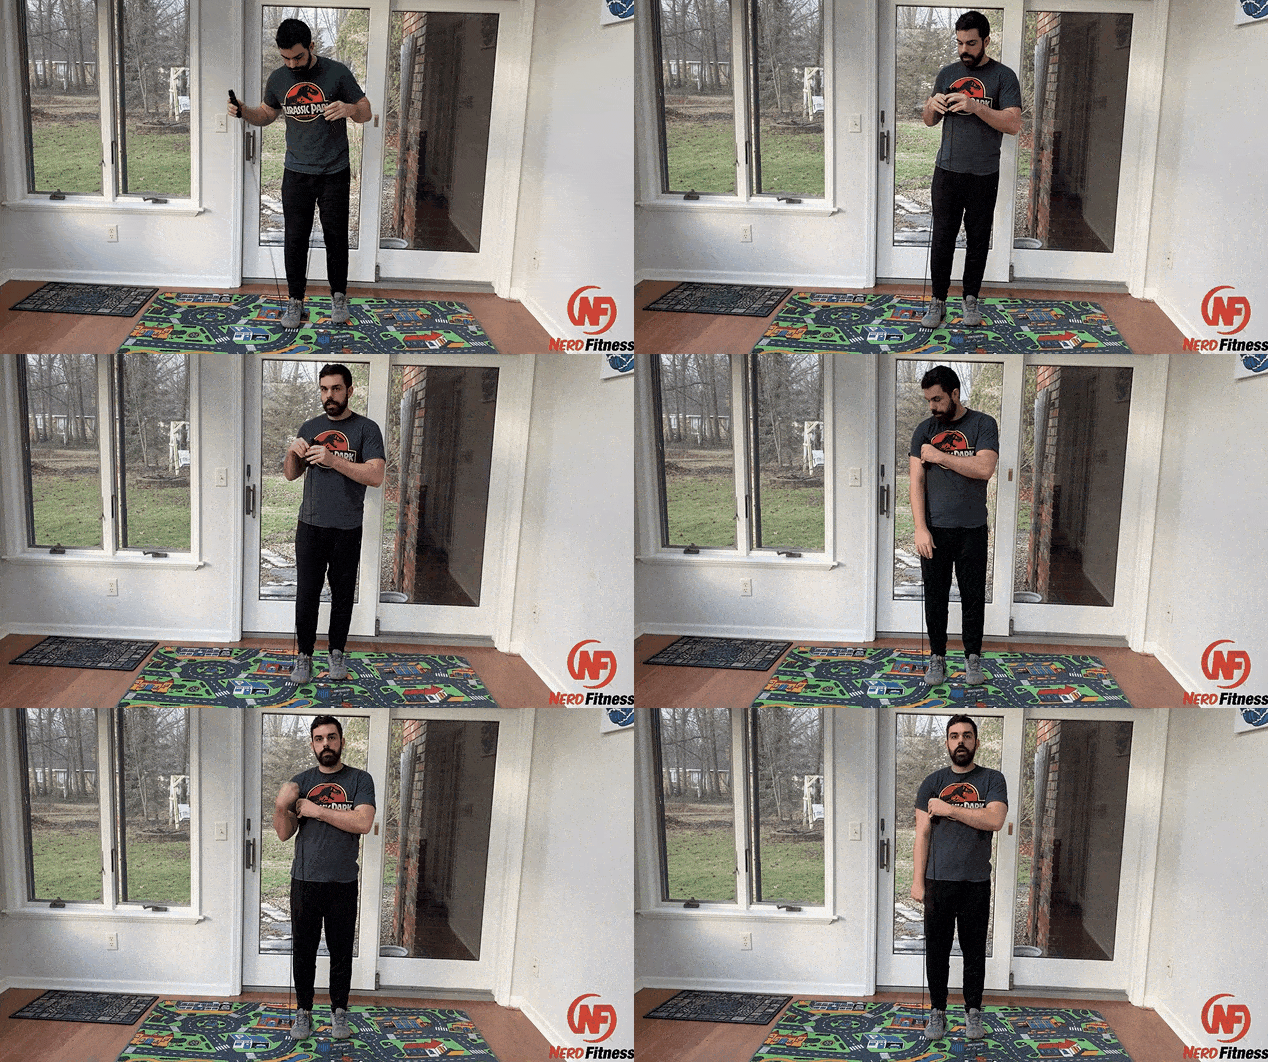
The next question we want to answer: how long should my jump rope be?
The good news here: most jump ropes you purchase will be adjustable.
When properly adjusted, step on your jump rope with one foot, and both handles should reach right around your armpit:
If it’s a little higher or lower than that, you may be okay, but you’ll likely need good jump rope technique to skip correctly.
How to Jump Rope (Without a Rope)
In the video above, Coach Jim walks you through 3 alternatives to jumping rope.
Just in case you want to get your heart rate up and you don’t have a rope around, or if you’re just getting started and haven’t quite got your rhythm dialed in.
Here are three alternatives for jumping rope:
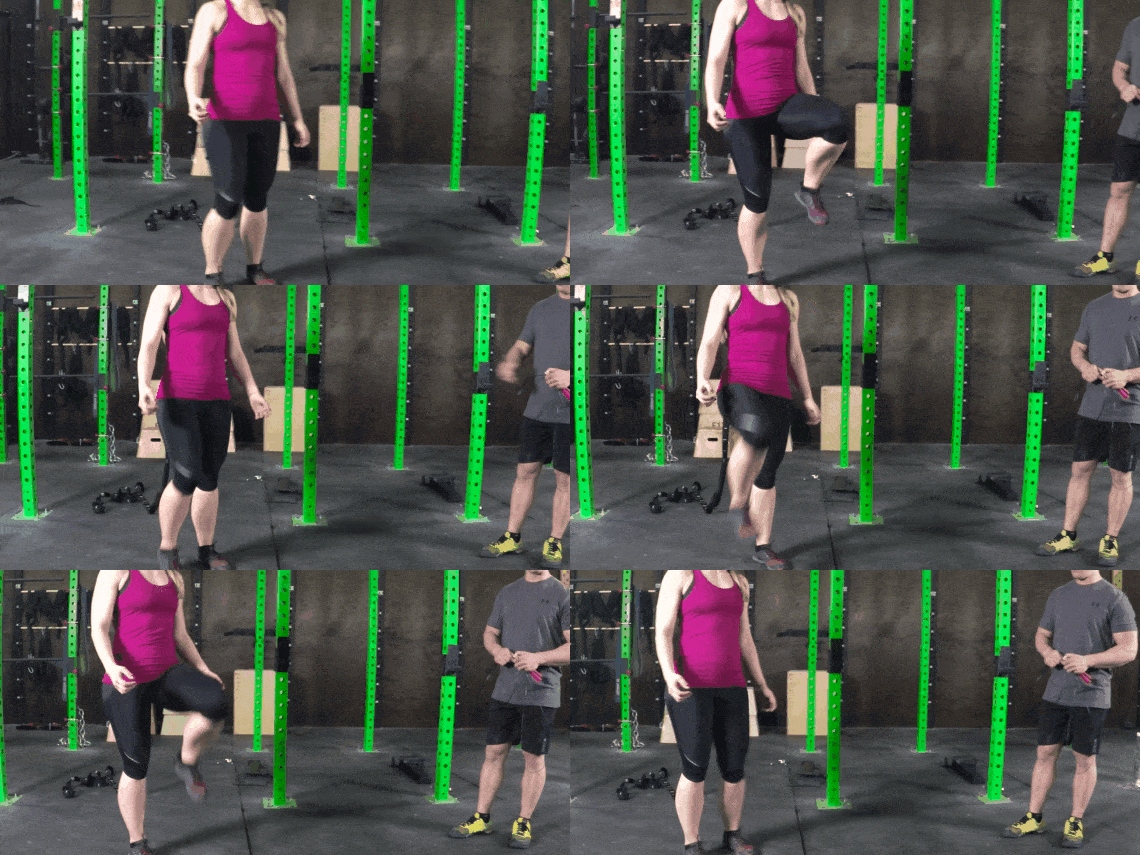
Jump Rope Alternative #1: Marching in Place
This is as easy as it sounds, simply march in place. The higher you bring your knees, the more challenging this will become.
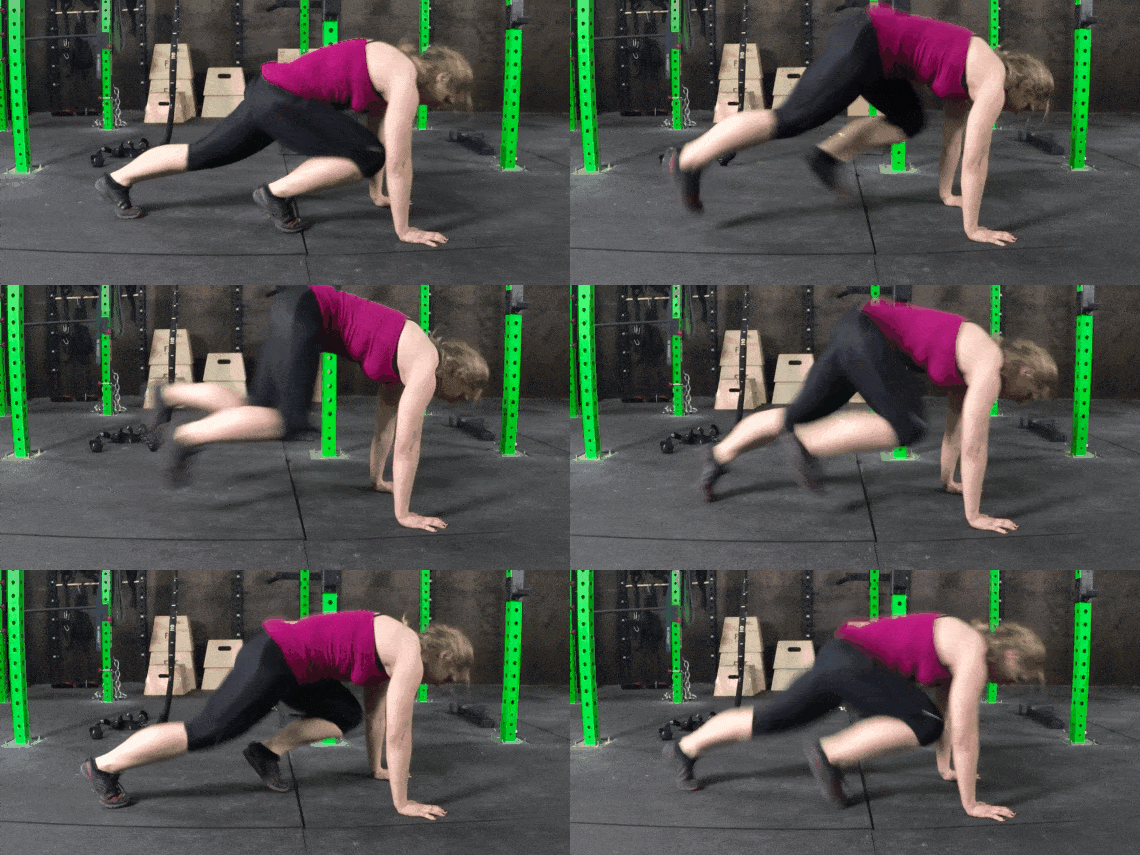
Jump Rope Alternative #2: Mountain Climbers
To do a mountain climber:
Place your hands and knees on the floor.
Place your right foot near your right hand, but extend your left leg behind you.
In one motion, switch your legs, keeping your arms in the same position.
Continue to switch your legs, attempting to keep your arms and back in a staple position.
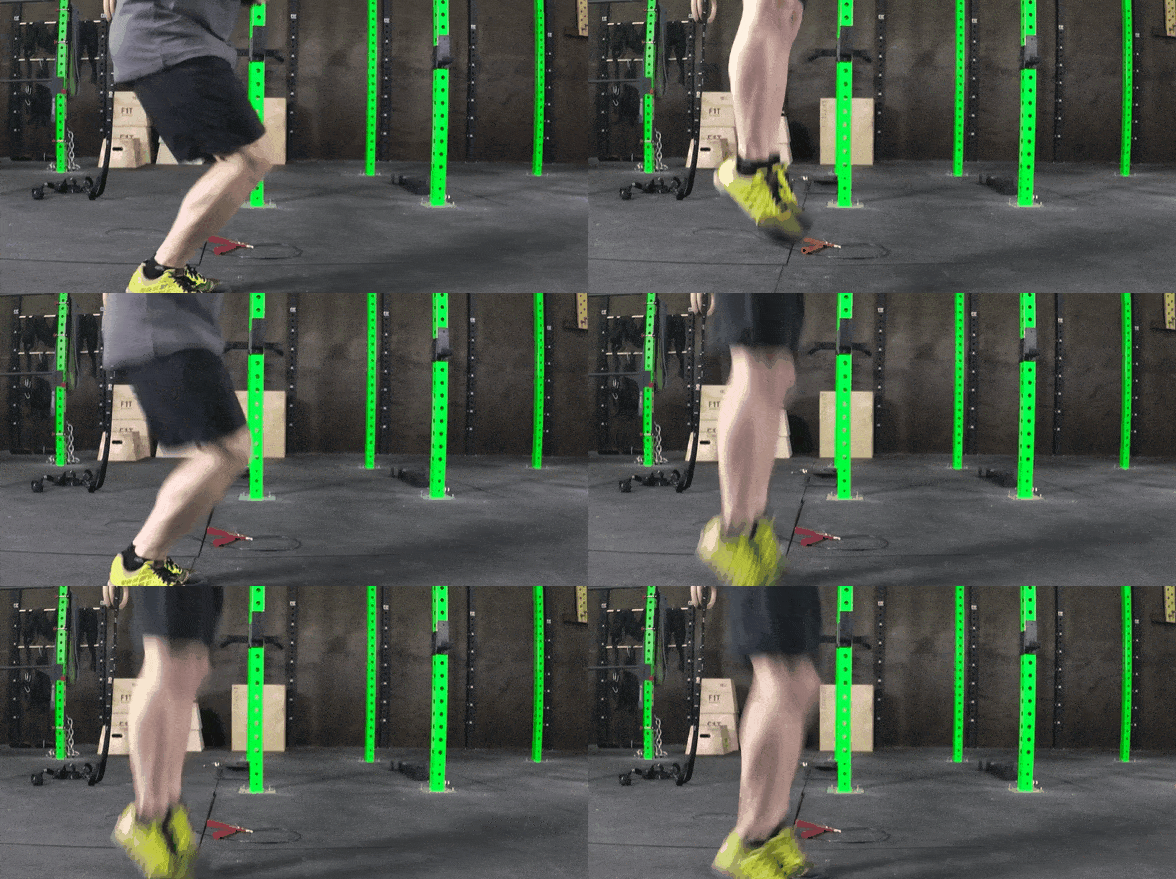
Jump Rope Alternative #3: Hop in Place
And last but not least, you can simply hop in place for a jump rope alternative.
Where Should I Jump Rope?
The cool thing about a jump rope is that you can pretty much use it anywhere, as long as you have room to maneuver.
That doesn’t really mean you SHOULD jump wherever, as not all surfaces are created equal for jumping.
In the videos and gifs above, you’ll notice that both Nerd Fitness Coaches use mats for their jump rope practice.
This is a good idea.
Jumping on a mat will put less stress on your joints, lowering your chance of injury.
If you do jump on a harder surface like concrete or asphalt, it’s okay, just focus on less intense moves like single unders. You might want to save the fancy moves and double unders for when you have a more forgiving surface under you.
The other thing to consider is your footwear.
Something with good shock absorption will help as your feet make contact with the ground.
You don’t necessarily need a running shoe, since you’ll be coming up and down from your toes. But you probably don’t want to jump barefoot either, because that rope hitting unprotected toes won’t be fun.
If you fix your diet AND begin to incorporate a jump rope workout a few times per week, you’ll find yourself building muscle, losing fat, and getting stronger!
That’s because a jump rope will you train your:
Calves
Rear Deltoids
Abdominals
Quads
Hamstrings
As long as you do it correctly:
My point is jumping rope needs to be part of a larger picture for weight loss.
If your goal is weight loss, you have to eat less than you burn each day. This can be through eating less and burning more (from the resistance band workout above)
Processed foods and junk food make it really tough to lose weight: They have lots of calories and carbs, low nutritional value, don’t fill you up, and cause you to overeat.
Liquid calories are sabotaging your efforts. Soda, juice, sports drinks: they’re all pretty much high-calorie sugar water with minimal nutritional value. Get your caffeine from black coffee or tea, fizzy-drink fix from sparkling water.
Eat more protein! Protein helps rebuild muscle and can help you stay under your calorie limit because it’s satiating and filling. Here’s exactly how much protein you should be eating every day.
Those tips should get you started, but if you want more specific instruction and guidance, check out the NF Coaching Program– Your Coach will build a routine tailored to your individual needs and what equipment you have available:
How to Build a Jump Rope Workout (Next Steps)
The only question left to answer with this guide is “When should you do your jump rope workouts?”
You have a bunch of different options for that, with a few considerations.
Here are 3 ways to incorporate workouts into your training:
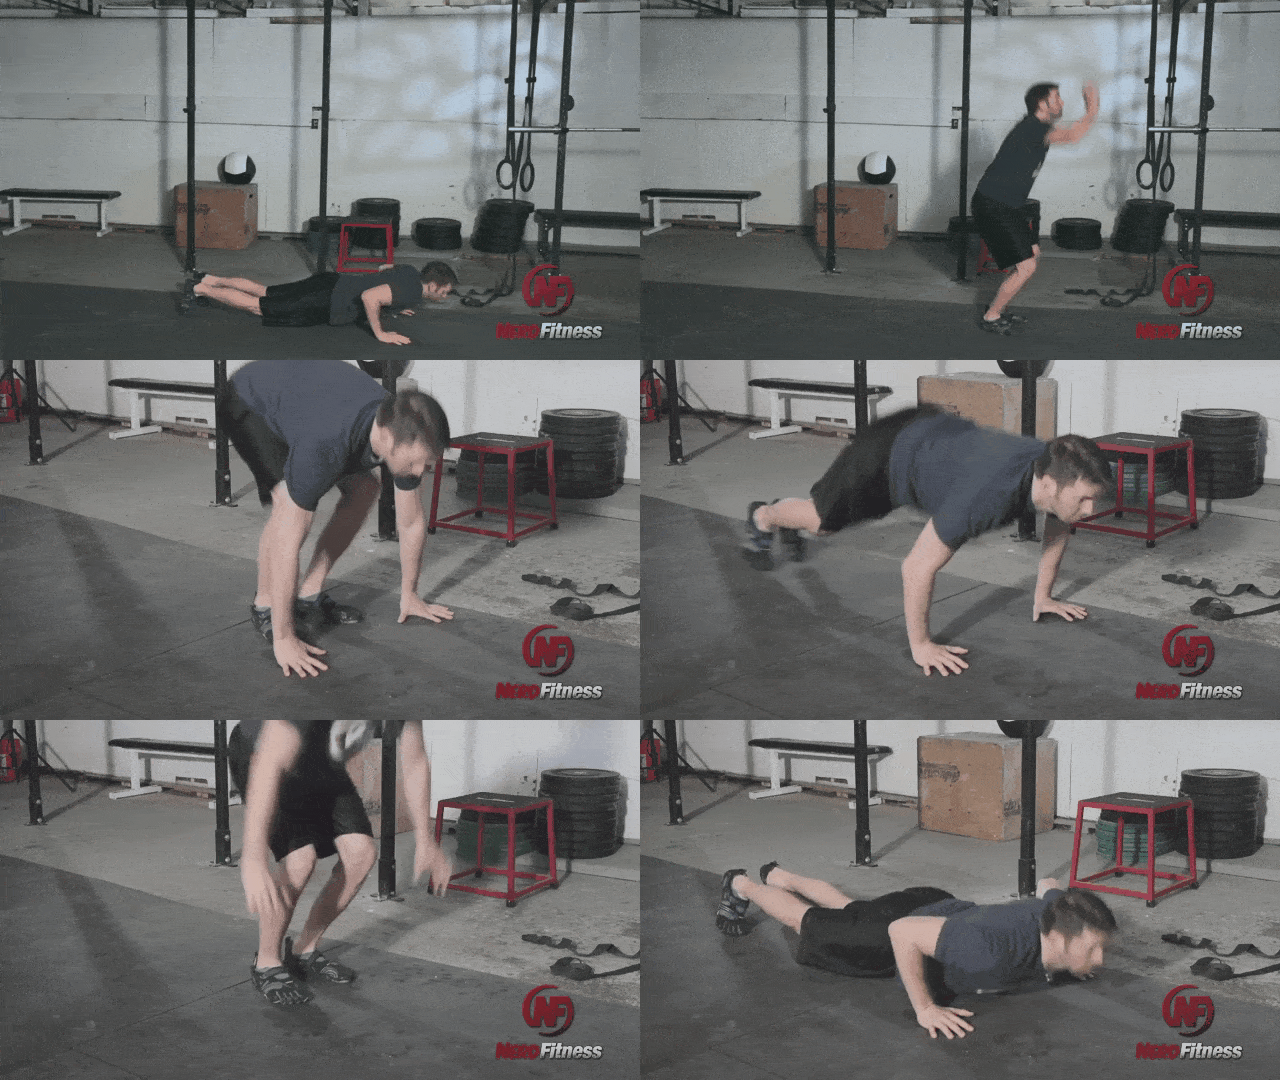
Maybe you alternate burpees with your jump rope intervals.
Lots of HIIT workouts include jump rope sessions, so you have tons of ways to bring your jump rope into your training.
Once you get your technique nailed down, the world will become your jump rope playground:
If you need any help pulling this all together, Nerd Fitness is here for you.
We have three great options for continuing your journey with us.
Option #1) If you want a professional coach in your pocket, who can do video form checks, provide feedback, and adjust your workouts based on the equipment you have available, check out our 1-on-1 Online Coaching Program!
For example, let’s say you find yourself stuck indoors during a pandemic, and you want somebody to custom-build you a workout program based on the furniture and equipment you have (like a jump rope). That’s where an online coach is a game-changer!
Personally, I’ve been working with the same online coach since 2015 and it’s changed my life. You can learn more by clicking on the box below:
#2) If you need a trigger to “get up and jump” check out NF Journey. Our fun habit-building app helps you exercise more frequently, eat healthier, and level up your life (literally). Plus, we’ll send you on an adventure that teaches you how to jump rope!
Try your free trial right here:
Option #3) Become part of the Rebellion! We need good people like you in our community, the Nerd Fitness Rebellion.
Sign up in the box below to enlist and get our Rebel Starter Kit, which includes all of our “work out from home” guides.
Get your Nerd Fitness Starter Kit
The 15 mistakes you don’t want to make.
Full guide to the most effective diet and why it works.
Complete and track your first workout today, no gym required.
Alright, I want to hear from you and your experience with jumping rope!
Do you train with jump ropes?
Any exercises or tricks we’re missing?
Are you one of those people who hasn’t touched a jump rope since grade school?
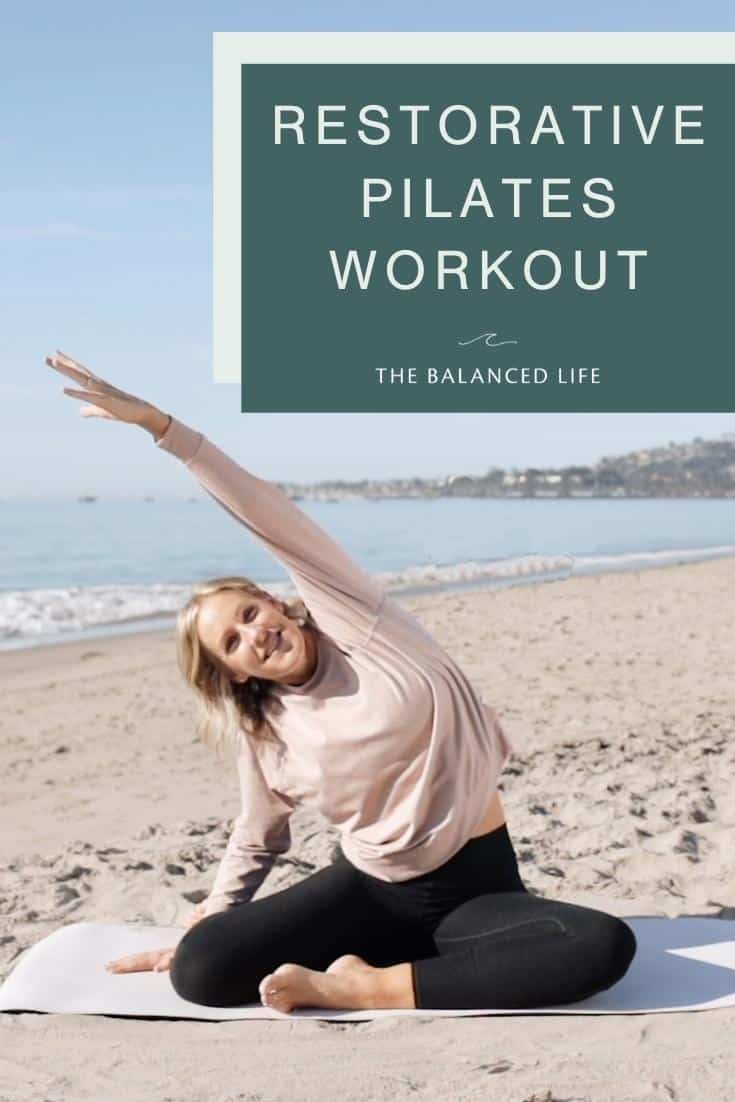
This quick and gentle, restorative Pilates routine is perfect for any time you are recovering from sickness, not feeling a hundred percent and don’t really want to push yourself, but you know a little movement will help you to feel better. You’re going to flow through a couple of classic Pilates exercises. breathe, stretch, and at the end, you’ll feel refreshed and ready to take on the rest of your day.
Come back to this workout anytime you’re looking to feel a little better and could use some good stretching + a boost of energy!