While I love the occasional glass of wine or cocktail, I want to head into this winter with a few good winter mocktails I can enjoy by the fire on a chilly night or with friends during a holiday party! Interestingly, we’re seeing that more of our community is craving mocktail options as well—and this is happening outside of our community too.
Recent data found that fewer than 4 in 10 Americans consider themselves regular drinkers. Plus, seasonal trends like Sober October or Dry January encourage a more balanced relationship with alcohol intake.
Just because we might want to consume less alcohol (or none at all) doesn’t mean we can’t get a taste of the season. As a bonus, we can also give our bodies good-for-you nutrients that help us feel great too!
That’s why I asked Micah Siva, our resident recipe developer and registered dietician, to create a few winter mocktails for us. If you’re craving a zero-alcohol beverage this winter, you don’t want to miss these!
First: What Are the Benefits of Drinking Less Alcohol?
If you do consume alcohol (I see you, date night margarita) there are many clear benefits to moderating your overall intake for both physical and mental wellness. Habitually excessive alcohol consumption (4-5+ drinks in one sitting) could shorten a person’s life by an average of 26 years. That’s because too much alcohol in your bloodstream will take a gradual, but serious, toll on the liver, heart, colon, esophagus, and other organs.
Over time, this can increase your risk of chronic illnesses such as cancer, hypertension, stroke, fibrosis, fatty liver disease, hepatitis, cardiovascular problems, and even mental health conditions or cognitive decline.
I personally find that my sleep is greatly impacted by alcohol (even just one drink!), so I often choose to skip the drinks altogether. Doing so helps me get a better night’s sleep and also makes it easier to wake up the next day feeling refreshed and energized.
To avoid these potential health issues, or experience the benefits of not partaking (hello better sleep!), moderation is the key—and many people are starting to choose this route lately. In fact, 34 percent of Americans resolved to cut back on their alcohol intake in 2023 and more than 50 percent are interested in trying alcohol-free beer, wine, or spirits.
Cue one of my favorite zero-proof drinks: a good mocktail. This delicious alternative allows you to sip the flavorful, refreshing drinks you love without those long-term health effects.
What I love about the winter mocktails I’m sharing here is that they’re festive for the holiday season and also support your health and well-being. With ingredients like pomegranate, apple cider, ginger, lemon, and honey, they may be just what your body needs to get you through the holiday and cold season!
Pomm Spritz
Pomegranate is a classic flavor this time of year. As this jewel-toned fruit reaches its peak of freshness in September through November, it becomes the perfect addition to meals— and of course, beverages. In addition to its ruby color and sweet-tart flavor, pomegranate also contains immune-boosting antioxidants to protect your cells from environmental toxins and repair DNA damage. In this recipe, the pomegranate juice melds with bitter tonic, lime, and mint, for a batch of truly satisfying winter mocktails.
Ingredients:
2 oz. pomegranate juice ½ oz. lime juice 6 oz. tonic water 1 tbsp. pomegranate seeds 1 sprig mint leaves Ice cubes (to taste)
Instructions:
Pour the lime juice and pomegranate juice in a glass with a small handful of ice cubes. Stir the mixture to thoroughly combine. Top with the tonic water, then garnish with a fresh sprig of mint and pomegranate seeds. Enjoy this beverage while it’s cold.
Apple Tini
Few things are more warming in the winter than a hot mug of apple cider. Turn this classic into an effervescent, martini-style mocktail, infused with warming spices. As a bonus, apples are a nutritional powerhouse. Thanks to a robust combination of fiber and antioxidants, it can lower cholesterol, stabilize blood pressure, ease inflammation, and improve digestion.
For the freshest (and nutrient-dense) version of this drink, try to use unpasteurized apple juice. I find this at my local health food store or farmer’s market, but when it’s not convenient, I just use whatever I have available!
Ingredients:
¼ cup apple cider
½ oz. ginger juice
2 oz. sparkling water
1 pinch cinnamon
Ice cubes (to taste)
Thin apple slices (to garnish)
Instructions:
Pour the apple cider, ginger juice, and cinnamon in an empty jar or cocktail shaker with a tight lid. Fill the remaining space with ice cubes and shake vigorously for 10–15 seconds. Transfer the mixture into a coupe or martini glass, then top with sparkling water, and garnish with a few thin apple slices. Enjoy this beverage while it’s cold.
Rooibos Totty
If you’re like me, nothing sounds cozier than a cool winter evening on the couch with a cup of hot tea. This rooibos totty hits all those snug, thermal notes, and it’s full of beneficial nutrients. Rooibos is a fermented African red tea varietal that, when brewed at a high temperature and steeped for several minutes, releases quercetin, aspalathin, and other bioactive antioxidants.
Plus, it’s naturally caffeine-free, which makes for a soothing sober nightcap.
Ingredients:
1 rooibos tea bag
1 tbsp. lemon juice
2 tbsp. honey
1 cinnamon stick
1 slice ginger
1 cup boiling water
Instructions:
Bring a cup of water to a rolling boil on the stovetop. Place the rooibos tea bag in your favorite mug, then pour in the lemon juice and honey. Top with the cinnamon stick and slice of fresh ginger, then cover all these ingredients with hot water. Allow to steep for 3 to 5 minutes, and remove the tea bag. Enjoy this beverage while it’s steamy.
Winter Mocktails for a Balanced and Healthy Season
Whether you want to limit your alcohol intake or abstain altogether, these irresistible winter mocktails are the alternatives that your body is craving. Plus, they taste good too! Whip up a batch for yourself on a cool winter evening or to impress your guests at a holiday party!
I’ve been working out at home (and delivering classes from home) consistently for nearly 4 years now. Over that time, I think I’ve pretty much figured out the best 7 day workout plan, for all levels, and how to schedule…
For as long as I can remember, I’ve been on a mission to find the best vegan protein powders. Now I don’t follow a vegan diet, but I am lactose intolerant so I try to avoid whey / dairy based…
Wholistic fit living is a different way of thinking about health, wellness, and fitness. Ultimately, it gives us a chance to zoom out.
When you hear the word, “health,” usually exercise or diet comes to mind, right? Of course, these things are important for us to feel our best, but long-term wellness is about so much more than that. Real, sustainable health needs a wholistic, or whole body, approach, especially as we work to embrace joyful aging and feeling great in every season of life.
This is where the 8 Dimensions of Wellness, developed by Dr. Margaret (Peggy) Swarbrick, come into the picture. While there are many ways to think about wholistic health, I love that this framework makes it easy to connect with and see how each area of our lives impacts us.
Each of these pillars dives beneath the surface to examine:
How you move through the world
What you think and feel
Who you interact with
How you allocate your time or resources
Which values, habits, or beliefs you practice
When creating your roadmap to mind-body health, so you can feel your best in every season, all of these factors play a role—so let’s look at how.
The Physical Dimension
The health industry often focuses on this dimension; the strength, resilience, and function of your body—and it’s important. However, where the fitness industry often gets it wrong is the focus on pushing your body at all costs and doing more than your body can handle. This mentality can lead to injury and a start-and-stop way of working out—which means you aren’t reaping the benefits of physical fitness because you’re not being consistent (or are continually hurting yourself).
The physical dimension best serves your health when you meet your body where it’s at and choose movement that not only feels good but uses proper form so you avoid injury and pain.
Put It Into Practice: While there are many ways to choose the right movement for your body, strength training is one of the best formats for building long-term muscle. Instead of going to the gym and figuring it out yourself, start a 14-day free trial of Lindywell and get instant access to our Weight Training Series. This will allow you to build strength with weights while being very intentional with your movements, leading to better results and less pain and injury.
The Intellectual Dimension
This dimension refers to pursuits and behaviors that sharpen your brain and reduce the risk of cognitive decline. It’s about immersing yourself in new skills or information, maintaining a sense of curiosity, and seeking out intellectual enrichment. This may not sound important to your health, but data shows that those who identify as “lifelong learners” report more:
Self-efficacy
Intrinsic motivation
Alertness, retention
Flexible thinking
Positive mood state
They’re also less susceptible to chronic stress, depression, or other mental health issues. All of this is key to your mental health and wellness, which in turn, of course, affects every single area of your life.
Put It Into Practice: Challenge yourself to develop a new hobby, whether it’s learning how to speak a new language, crocheting a scarf, or planting a garden. I love learning about interior design to create a life-giving and comfortable home that impacts all areas of my life—from enjoying the learning experience itself to implementing new things in my home.
The Emotional Dimension
This dimension refers to the awareness of your emotions, modulating them in a constructive way, and respecting the emotions of others. Research shows that the ability to determine how you feel, and then use healthy coping or problem-solving skills to deal with that emotion, referred to as emotional regulation, can boost quality of life and alleviate clinical symptoms.
Those who regulate their emotions also tend to prioritize other beneficial habits such as nutrition, fitness, sleep hygiene, and stress or anxiety management.
Put It Into Practice: One way to improve your emotional awareness is breathwork. An intentional breathwork practice will teach you to be mindful of emotions while accepting them without judgment. It can also help you tap into your self-compassion, release feelings that do not serve you, and return to a state of calm rather than staying in a stress state.
This is an area of wholistic fit living that is rarely ever connected to health in our modern wellness culture—but is so incredibly important. Loneliness and isolation can actually worsen health outcomes whereas, a sense of connection with community and friends will improve them. A thriving social circle (even if it only includes a few people!) can:
Reduce inflammation in the body
Increase metabolic function
Relieve depression or anxiety
Lower the risk of cardiovascular issues, pulmonary disease, or high blood pressure
You can learn more about how friendships impact your health through the work of Dr. Andrea Bonior, one of the most well-known researchers in this space. Her book The Friendship Fix shares fascinating data and stories that illuminate the importance of this dimension of health.
You can also dig deeper into connection in my new book Well to the Core, where I share about the power of community and its impact on our health. I also share some simple but actionable strategies for creating deeper connections within your world.
Put It Into Practice: Creating social connections and cultivating the ones you already have takes intentional practice as an adult. Start by planning a date night if you have a partner—even if you can’t leave the house (hi parents, I see you!).
To connect with current friends, invite them to do something, like take a pottery class or get coffee. If you’re looking to build your social circle, consider ways that you can meet people who align with your values, like joining a book club, taking an art class, or finding another meet-up in the community.
The Spiritual Dimension
This dimension refers to having a deep sense of meaning in your life, with or without a religious faith tradition. For me personally, this includes spending time in prayer, reading scripture or even meditating on scripture throughout the week. For you, that might mean taking a walk in nature or connecting with the higher power you believe in.
Regardless of what you believe, spiritual well-being makes it easier to feel gratitude, access inner peace, and maintain a hopeful outlook in hard circumstances, all of which come in handy during those difficult seasons that we all go through.
When it comes to wholistic fit living, this is also important in ways you might not have realized. Data shows a direct correlation between spirituality and self-actualization, personal growth, resilience, psychological wellness, prosocial behaviors, satisfaction, and even immune strength.
Put It Into Practice: Having a regular gratitude practice is so important in helping me tap into my spirituality and sense of meaning in life. An easy way to do this is with a gratitude journal (even a note app on your phone). Use this time to reflect on what you’re thankful for each day.
The things you write down can be simple (I am grateful for my warm cup of coffee each morning), or even existential (I am grateful for the opportunity to be alive right now). No matter how you approach it, gratitude is spiritually nourishing and supportive of your health, whether you’re religious or not.
The Vocational/Occupational Dimension
This dimension refers to applying unique skills, talents, and passions toward work that enriches your life and the impact that has on your health. Regardless of how you apply those talents and passions—from building a career to taking care of your family or traveling the world—doing what you love decreases stress, boosts your mood, and expands your social circle.
Put It Into Practice: Do you enjoy what you spend your days doing? If the answer is no, consider what shifts you need to make to discover more fulfillment in your life. There is always an opportunity for change in some way, whether big or small, but you have to see it and choose it first.
The Financial Dimension
This dimension refers to the responsible management of financial resources. This, in turn, empowers you to establish realistic plans and live within your means, which leads to a greater sense of calm and comfort. While this may seem disconnected from wholistic fit living, financial security is actually one of the main determinants in both long-term mental and physical health outcomes.
Actions like monitoring cash flow, eliminating debt, or saving for important milestones can create the financial freedom to enjoy life, instead of fretting about how you’ll afford basic necessities. We can also see this importance through Maslow’s Hierarchy of Needs. The second layer of the triangle is safety, which is impacted by stable and sufficient income, and is one of the most important.
Put It Into Practice: This dimension of health doesn’t mean you need to have a lot of money. It means you have to understand how to manage it so that you can feel supported in having what you need to live happily and comfortably.
One of the ways I’ve pursued growth in this area of my life is by working with my friend Natalie, who also happens to be a financial advisor. Together, she helps me understand my personal values and how to better align my finances with those values. Listen to my interview with Natalie on the Balanced Life.
The Environmental Dimension
Where you live, who you interact with, and what you encounter influence your overall health and longevity. This is especially true when you consider the power of nature on health. Data has found that spending at least 120 minutes in nature (or urban green spaces) each week can increase your level of happiness while reducing the risk of obesity, cardiovascular issues, diabetes, mental illness, cognitive function, and asthma hospitalization.
Put It Into Practice: Set aside time each day to spend time outside, whether you take a walk or just sit on your porch or in a nearby park. My daily walks have become necessary for my mental health. At first, it was hard to prioritize the time but now I look forward to them—and even end up walking much longer than I intended because it feels so good to not only move my body but to be outside in the sunshine and fresh air.
Wholistic Fit Living Is Your Roadmap to Wellness
Wholistic fit living has little to do with your fitness level (though physical fitness is important), and more to do with zooming out. When you broaden your lens via the 8 Dimensions of Wellness, you can see that so much of your life has an impact on how you feel physically and mentally, both in the moment and long term. At Lindywell, we value long-term, sustainable, whole-bod health above all else and encourage you to do the same.
If you want to get started with wholistic fit living in your life, check out my book, Well to the Core, where we cover real-life examples, experiences, and ideas for bringing these dimensions into your everyday life.
With today’s Advanced Bodyweight Routine, you can burn fat, build muscle, and get a great workout in! All with no gym membership required!
It’s the kind of workout we build through our online coaching program. If you’re in a hurry, sign up for our free weekly newsletter and we’ll send you PDFs of our “Work Out at Home” guides!
If you’re ready, click the sections below to get right into the action:
Don’t forget to warm up. You can run in place, jump rope, do a few push-ups, pedal on a stationary bike, jog up and down your stairs, etc. Since we are doing advanced movements here, the warm-up becomes even more critical.
If you are following this bodyweight workout plan because you’re trying to get in great shape without needing a gym, download our free guide: Strength Training 101: Everything You Need to Know. It’ll provide an exact plan to follow for growing strong.
Download our comprehensive guideSTRENGTH TRAINING 101!
Everything you need to know about getting strong.
Workout routines for bodyweight AND weight training.
How to find the right gym and train properly in one.
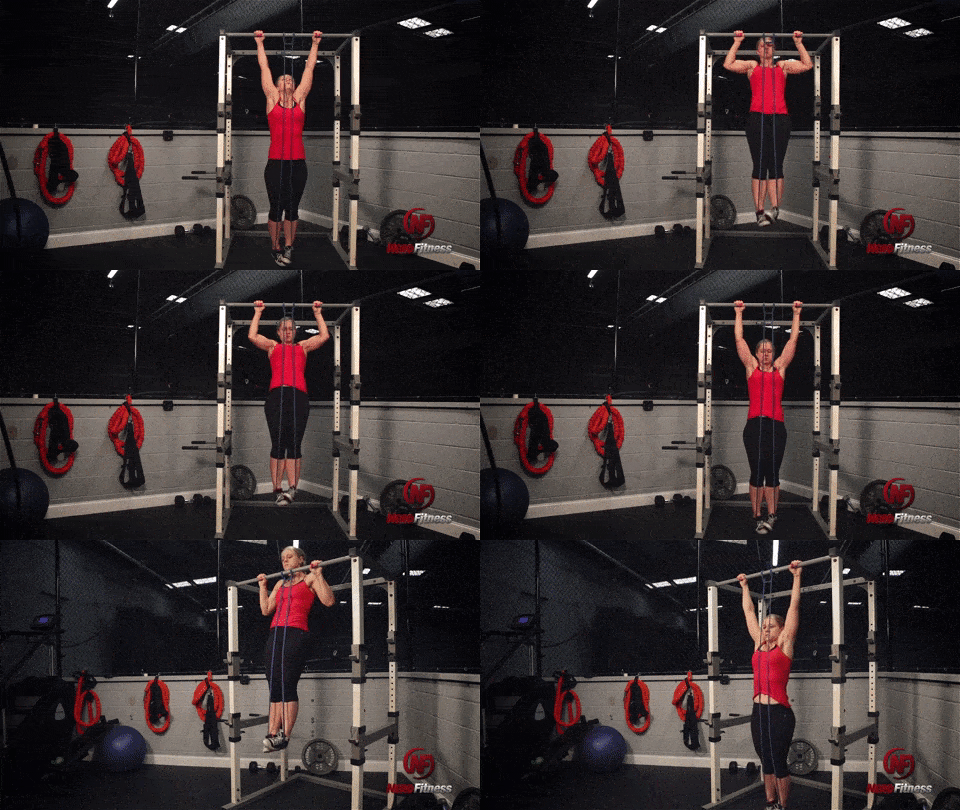
You can get different types of exercise bands with different levels of strength, or a variety pack for easy progression.
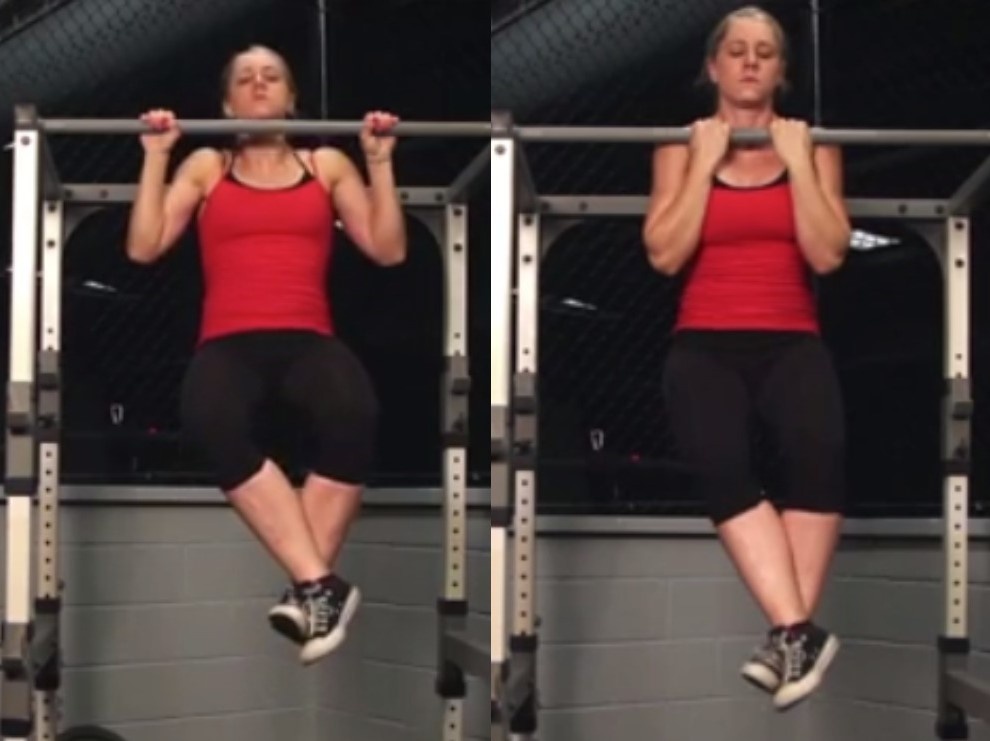
Put your foot in the exercise band and pull yourself up.
Here’s a video on How to Tie the Resistance Band for Your Pull-up:
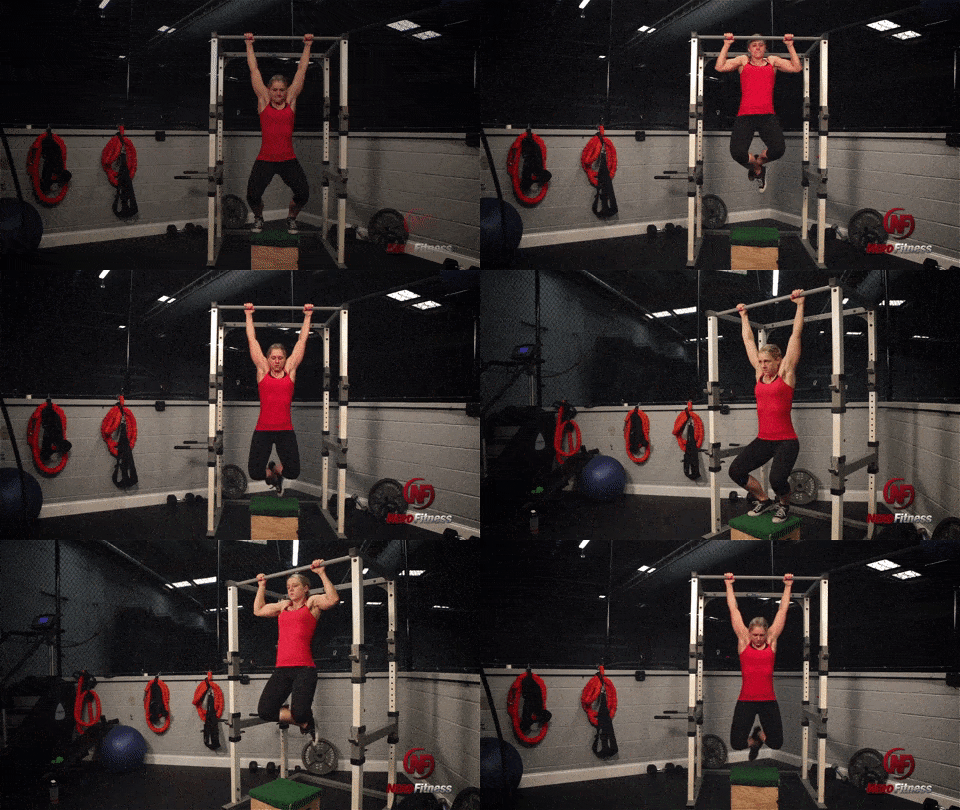
7) NEGATIVE PULL-UPS
If you don’t have a resistance band, you can do negative pull-ups instead. Jump and hold yourself above the bar, and then slowly, under control, lower yourself to the ‘starting position’ of a pull-up. Then repeat!
This is a great way to build up enough strength to eventually get your first pull-up.
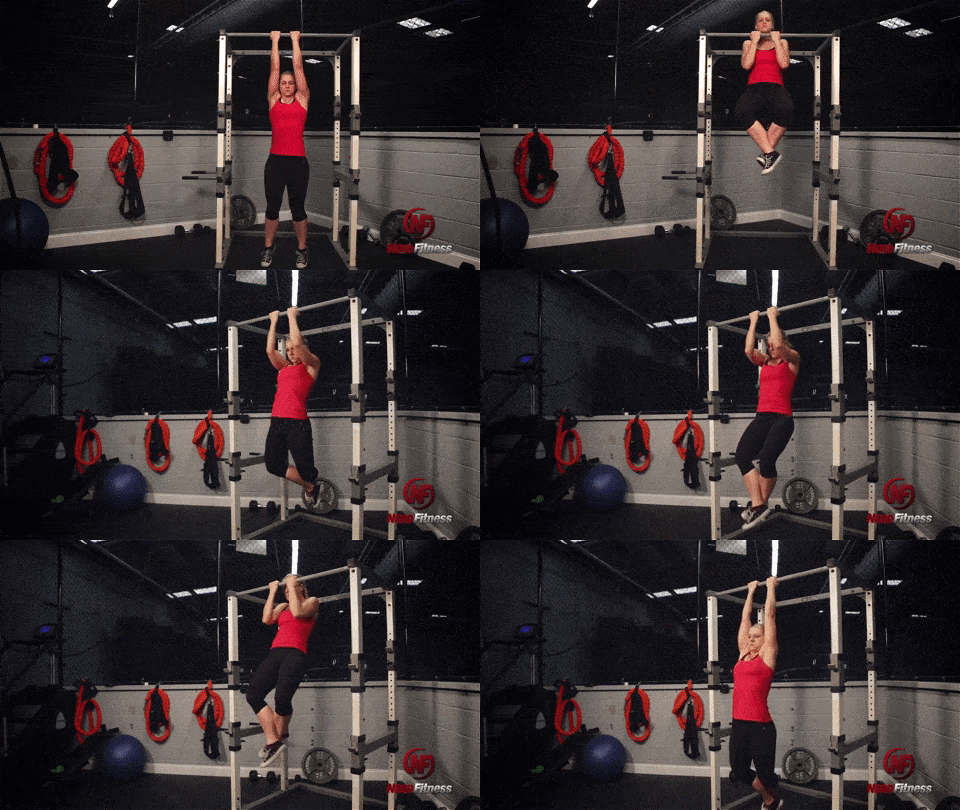
Much like a pull-up, but with your palms facing toward you.
Here’s a video going over the proper pull-up and chin-up form:
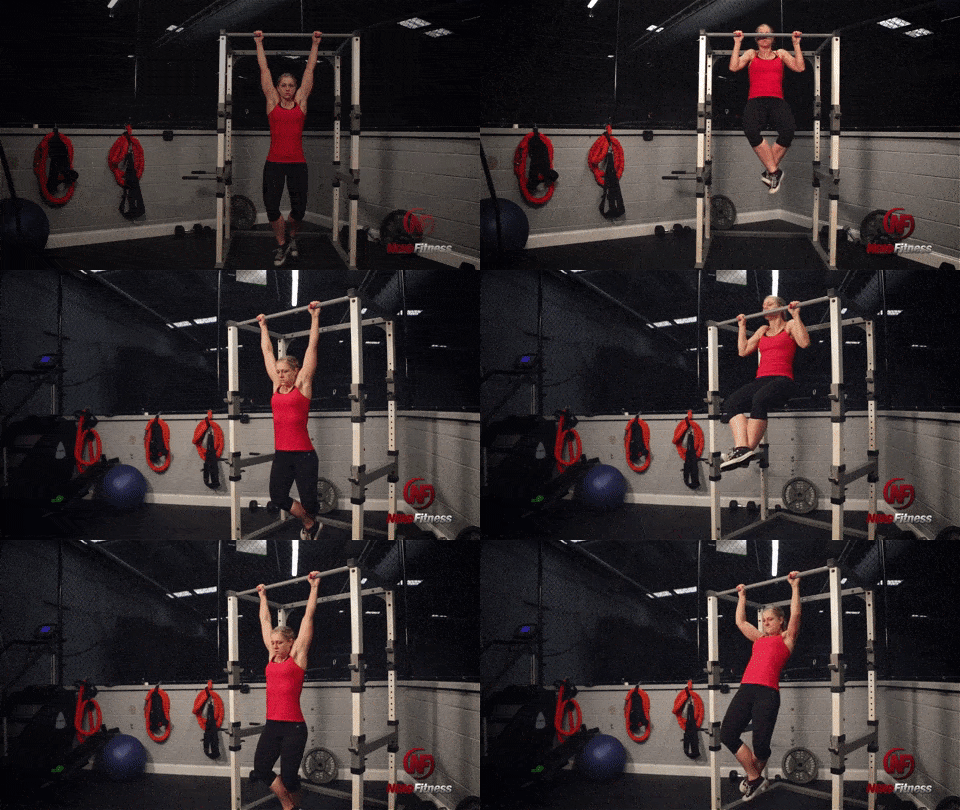
If you can’t do pull-ups or chin-ups, you have another option…
10) INVERTED BODYWEIGHT ROW (OVERHAND)
An inverted bodyweight row can be a great “pull” exercise if you can’t do a pull-up yet, or if you don’t have a proper pull-up bar nearby. Because a good sturdy table can be used for inverted rows:
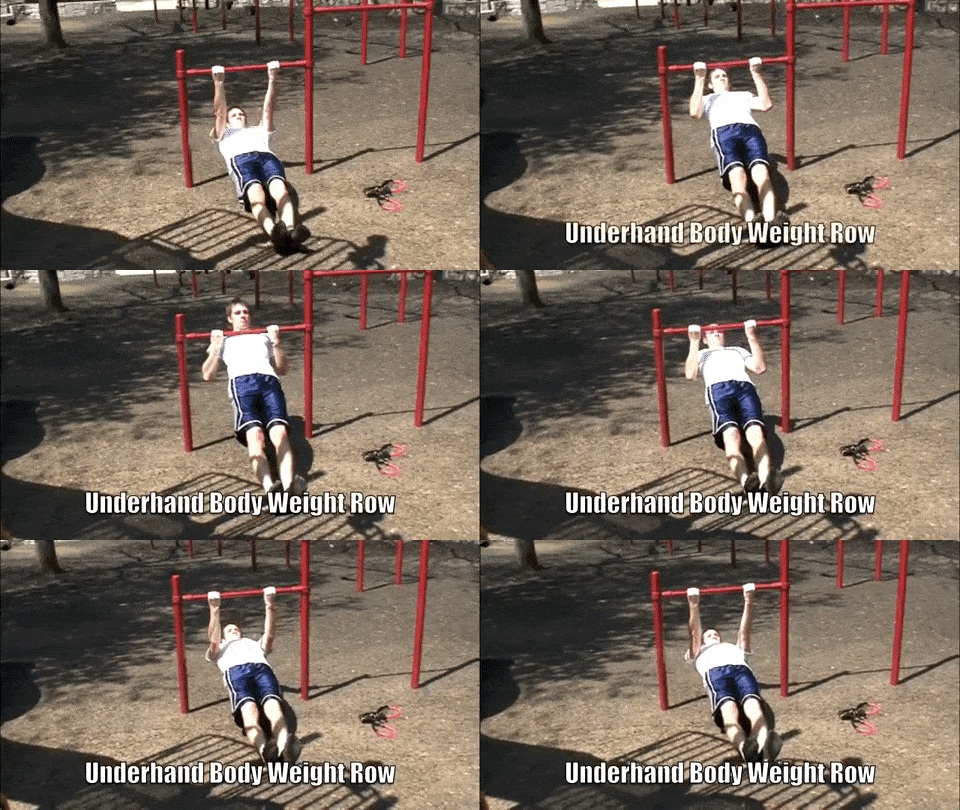
11) INVERTED BODYWEIGHT ROW (UNDERHAND)
12) ASSISTED BODYWEIGHT DIPS
With a resistance band, you can start performing assisted dips. A great exercise while you build up strength for normal dips.
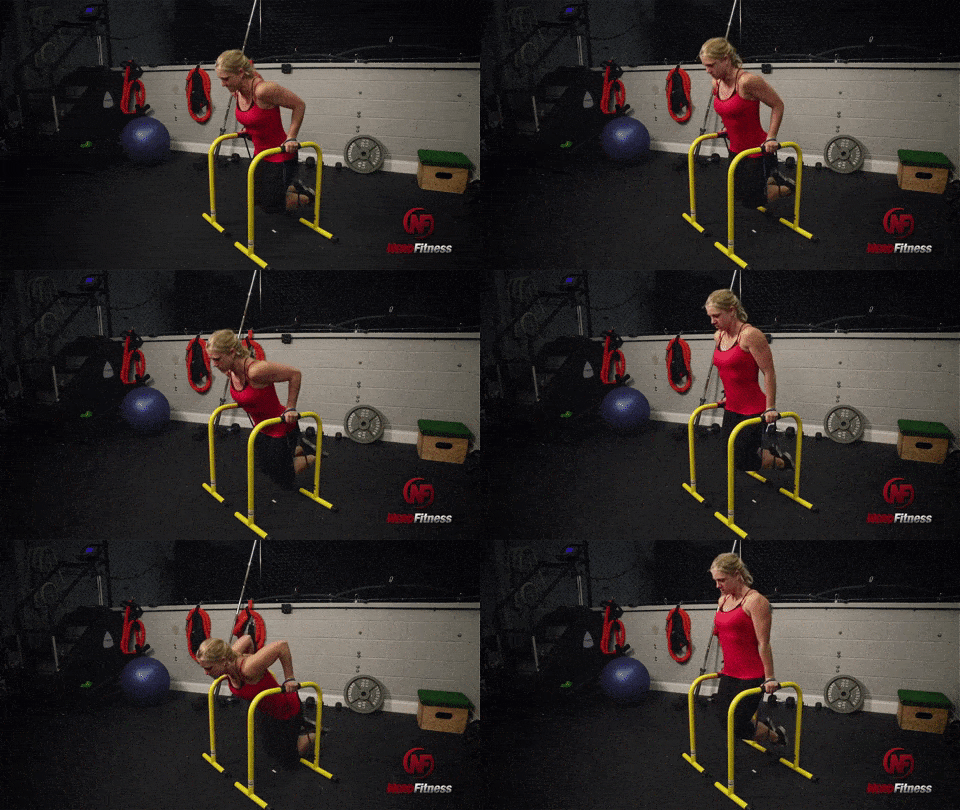
13) BODYWEIGHT DIPS
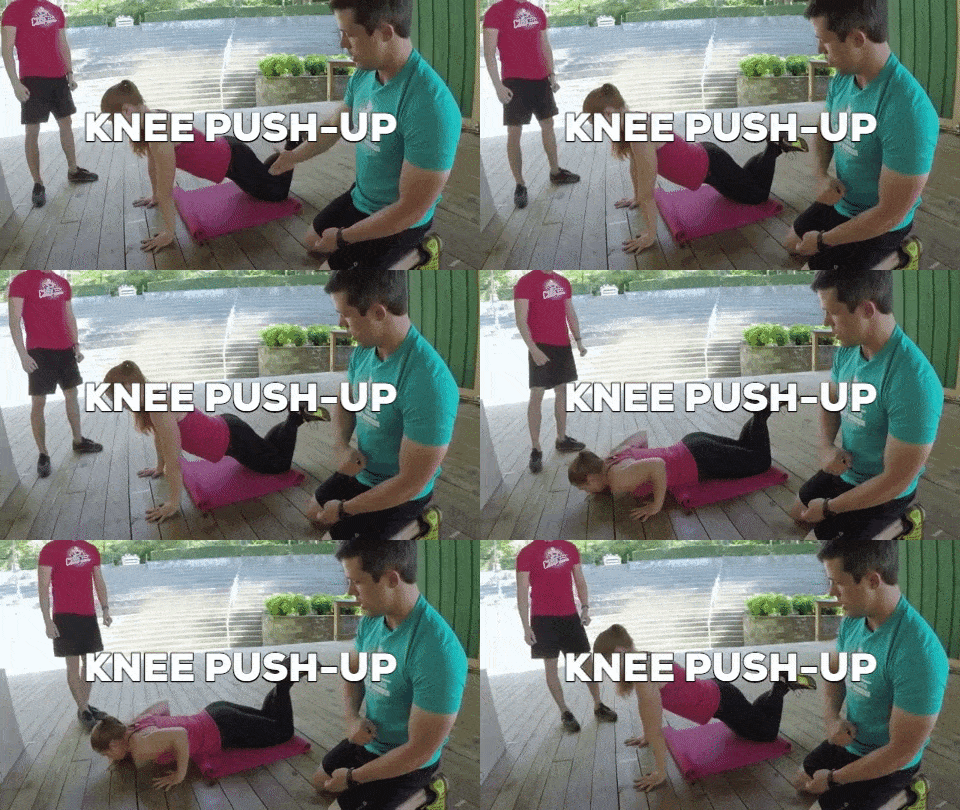
14) KNEE PUSH-UP
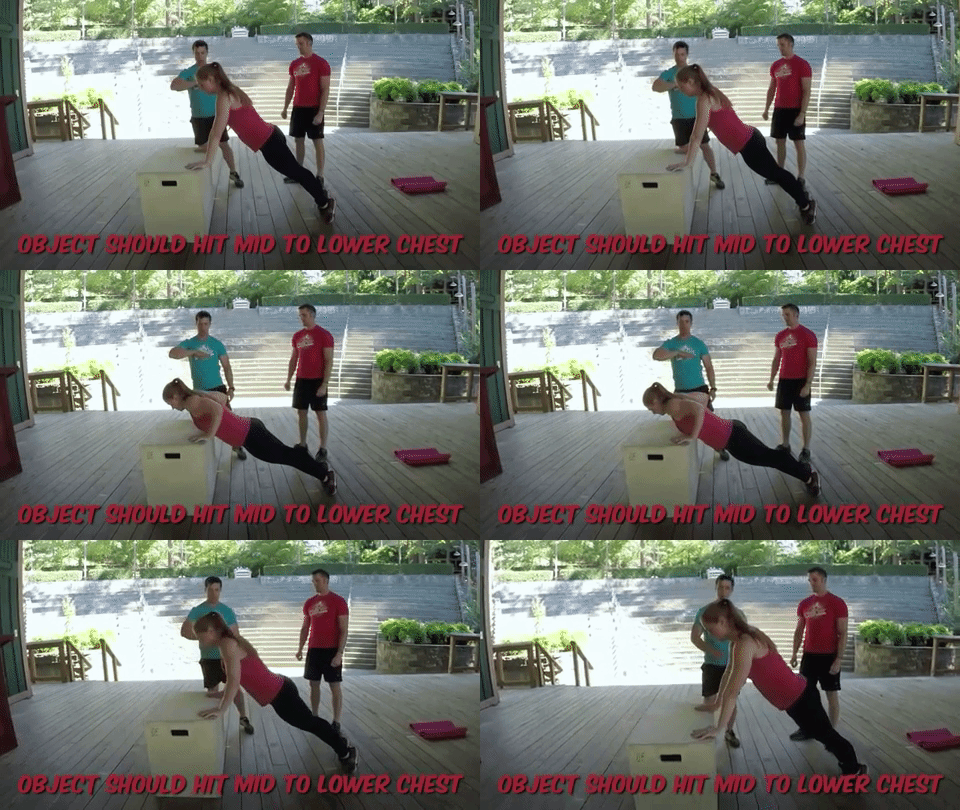
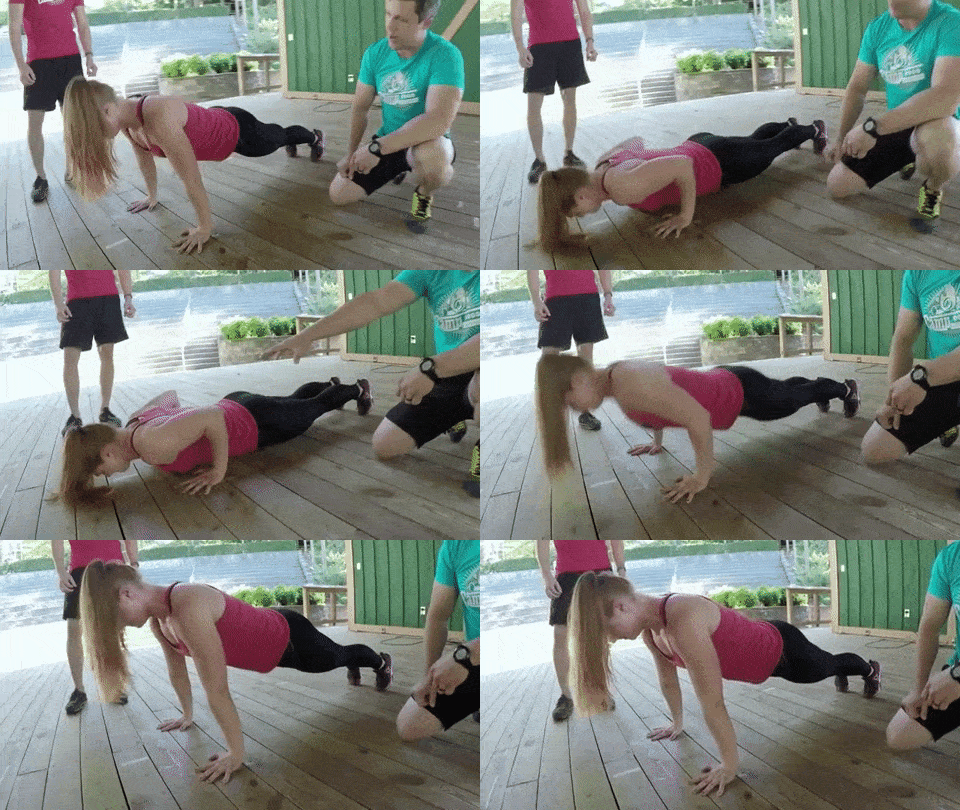
15) ELEVATED PUSH-UP
16) REGULAR PUSH-UP
We have a whole article on how to do a proper push-up, but we also cover it extensively in this 5-minute video:
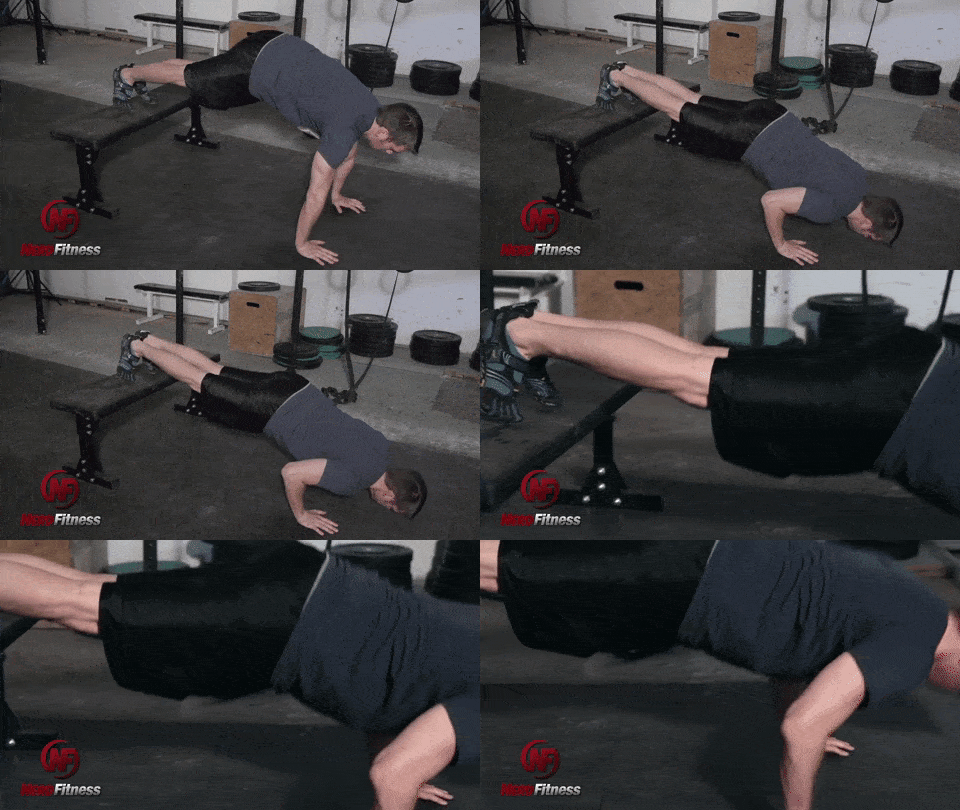
17) DECLINE PUSH-UPS
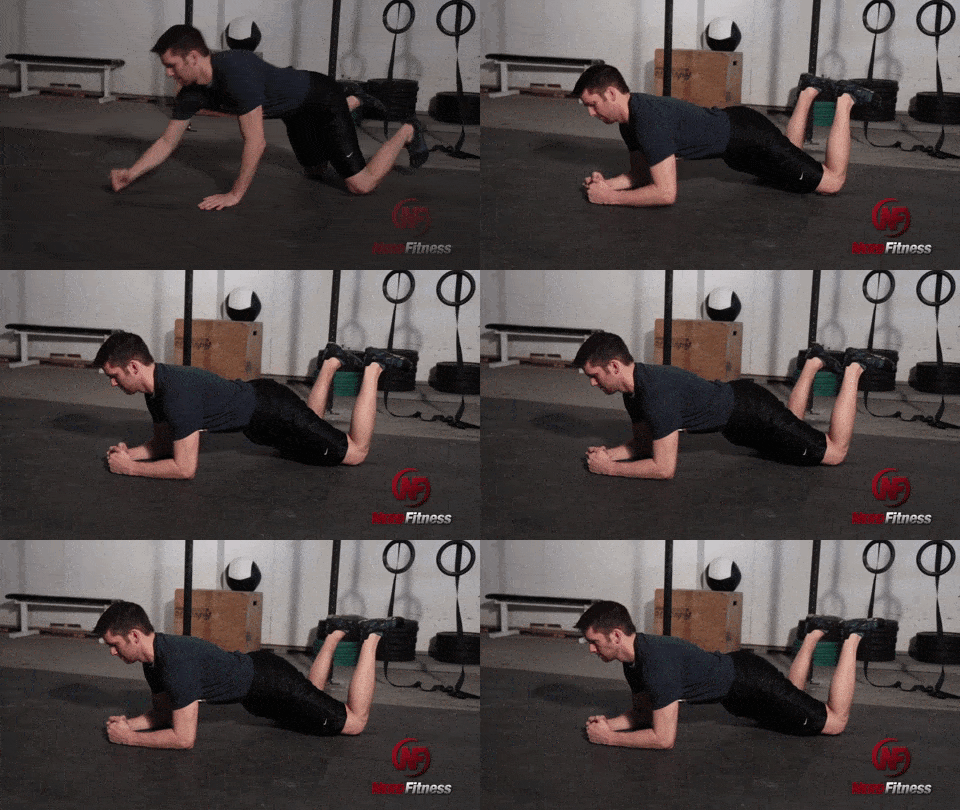
18) KNEE PLANK
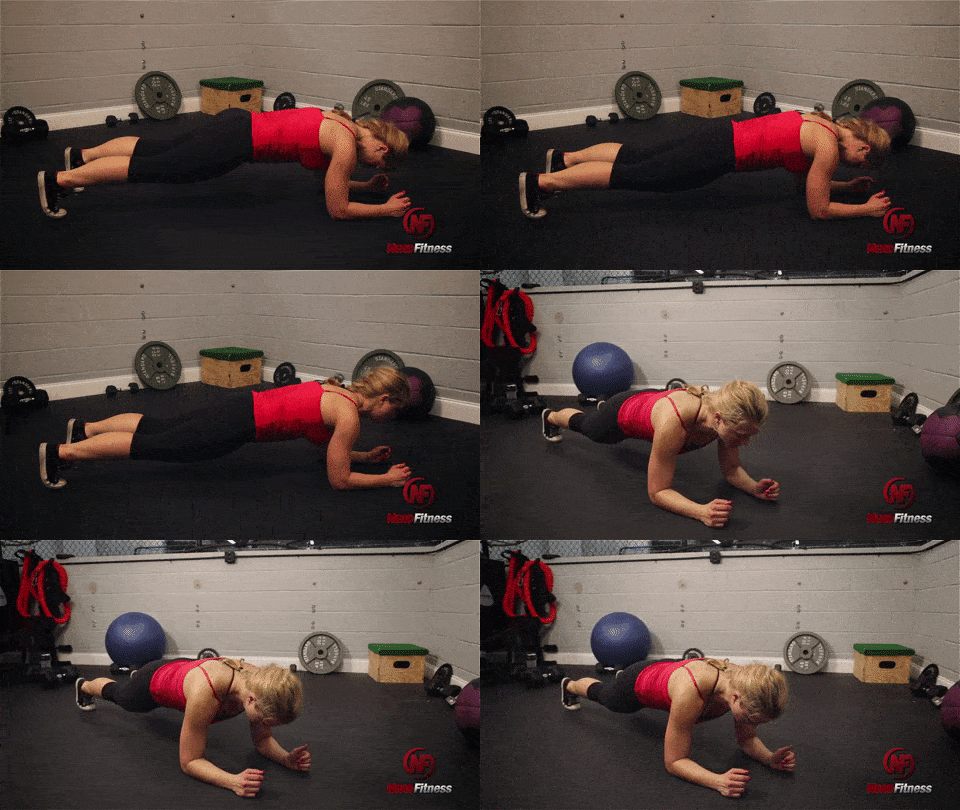
19) PLANK
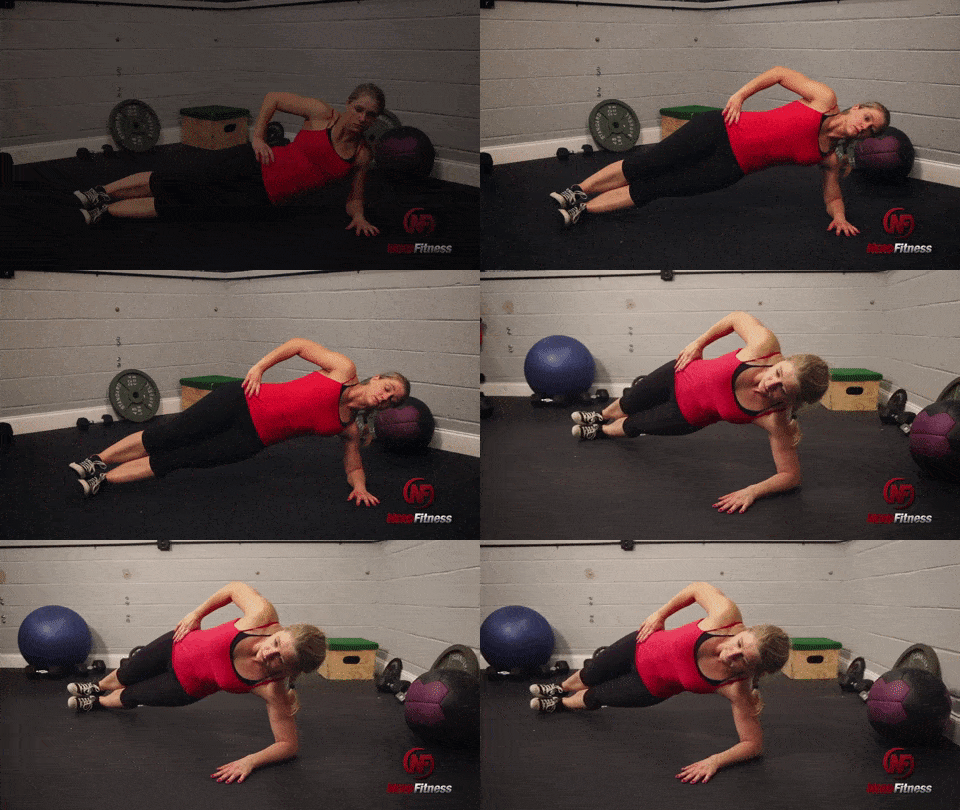
20) SIDE PLANK
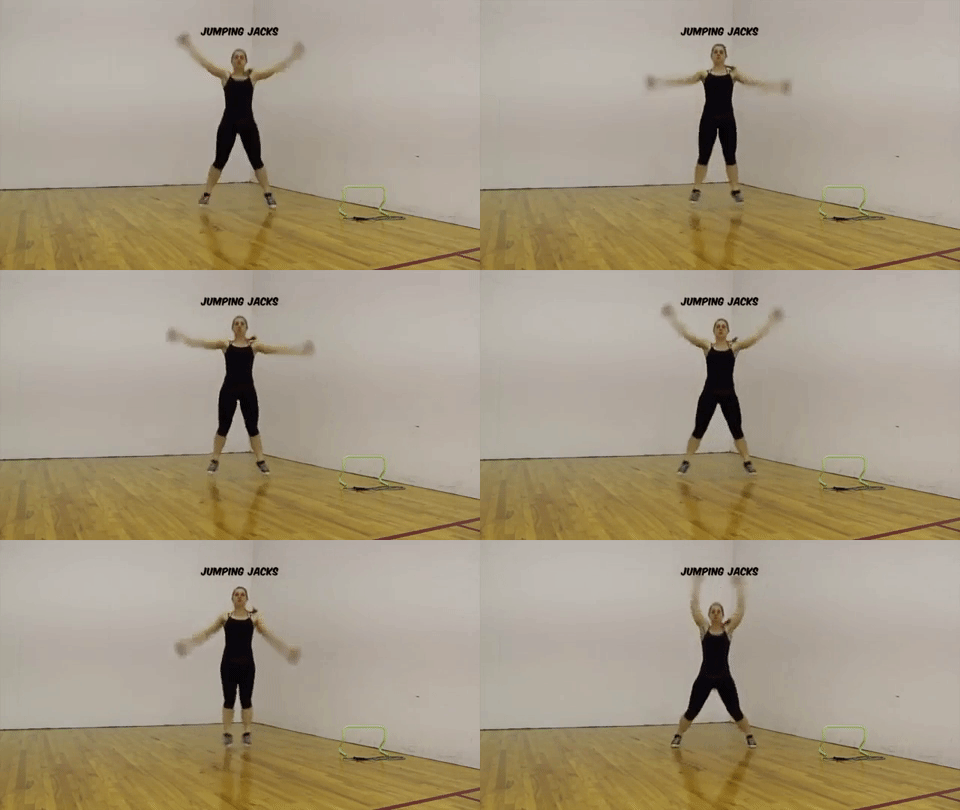
21) JUMPING JACKS
If you are looking for even MORE bodyweight exercises you can use in your workouts, make sure to check out our mega-resource:
Full guide to the most effective diet and why it works.
Complete and track your first workout today, no gym required.
How to Scale Your Bodyweight Routine
As I said earlier, this whole routine is scalable based on your ability. For example, here is a sample routine for somebody who has conquered the Beginner Bodyweight Workout but can’t do the full routine above:
“HOW OFTEN SHOULD I DO THE ADVANCED BODYWEIGHT WORKOUT?”
Do this routine 2-3 times a week, but never on consecutive days. It’s a message we really strike home in our guide, “How Often Should I Work Out?”
You don’t build muscle when you’re exercising, you build muscle when you’re resting, so try not to do a strength training routine (of the same muscle groups) two days in a row.
If you’re still uneasy about this advanced workout, start with our Beginner Bodyweight Workout instead. You can download a worksheet to get started when you sign up for our free weekly newsletter:
Grab Your Beginner Bodyweight Routine Worksheet. No Gym Required!
Complete this workout at home, no equipment required
Avoid the common mistakes everybody makes when doing bodyweight exercises
Learn how to finally get your first pull-up
After the Advanced Bodyweight Workout: Next Steps!
This should help you get started with a really powerful bodyweight training routine. But we hear frequently that people want MORE instruction, MORE guidance, and MORE workouts.
If that’s you, we have MULTIPLE options to take the next step. Pick the option below that best aligns with your goals and timeline:
1) If you want step-by-step guidance, a custom bodyweight training program that levels up as you get stronger, and a coach to keep you accountable, check out our killer 1-on-1 coaching program:
2) If you want a daily prompt for doing workouts at home, check out NF Journey. Our fun habit-building app helps you exercise more frequently, eat healthier, and level up your life (literally).
Try your free trial right here:
3) Enlist in the Rebellion! We need good people like you in our community, the Nerd Fitness Rebellion.
Sign up in the box below to enlist and get our guide, Strength Training 101: Everything You Need to Know. It’ll help you start incorporating these advanced bodyweight moves into your training.
Download our comprehensive guideSTRENGTH TRAINING 101!
Everything you need to know about getting strong.
Workout routines for bodyweight AND weight training.
How to find the right gym and train properly in one.
4) Level Up Your Workout! If you’re looking for more workout routines to follow, I got you covered:
How to Do Your First Handstand: now we’re talking! Learn the different progressions that will eventually have you getting your first freestanding handstand!
6 Levels of Gym Workouts: never wonder what to do in the gym again! Follow these 6 levels of workouts to go from Newbie to Gym Hero!
I’d love to hear how this workout was for you.
Leave a comment below with your results or any questions you have on advanced bodyweight training and how else we can help.
For the Rebellion!
-Steve
PS: Where do you go after you’ve crushed the Advanced Bodyweight Workout? Well, have you ever heard of the PLP Progression? There’s really no limit on how challenging that can get.
Do you find your grip a limiting factor in the gym (I see you chin-ups and deadlifts)?
Or in everyday life (looking at you, pickle jars)?
If so, don’t worry! We’ve got a handle on this (pun 100% intended).
As the lead trainer of our 1-on-1 Online Coaching Program, I’m going to outline a number of helpful, handy (sigh) stretches and exercises to help eliminate pain and build you some powerful, useful hands and a strong grip.
Now, it goes without saying that the hands and forearms are anatomically complicated areas.
I am also not your mother, or your doctor. If anything in the article below causes pain, or your pain is not alleviated by these stretches – call in the pros!
See a physical therapist or sports massage practitioner.
Why Grip Strength And WRist Mobility Is So Important: Basic Holds.
We use our hands for EVERYTHING.
Whether it’s everyday tasks like carrying groceries, opening jars, and lifting suitcases, or gym-related activities like chin-ups, rows, and deadlifts.
Of course, you probably also type at your computer for hours – with resulting aches and pains at the end of the workday.
Guess what?
Stretching out the hands and building up a strong grip can help in all of those areas.
A strong grip has even been correlated to lower mortality rates – and you can also imagine the usefulness of a stronger grip for aging individuals if they happen to slip.
Our point is that it’s always better to have a stronger grip!
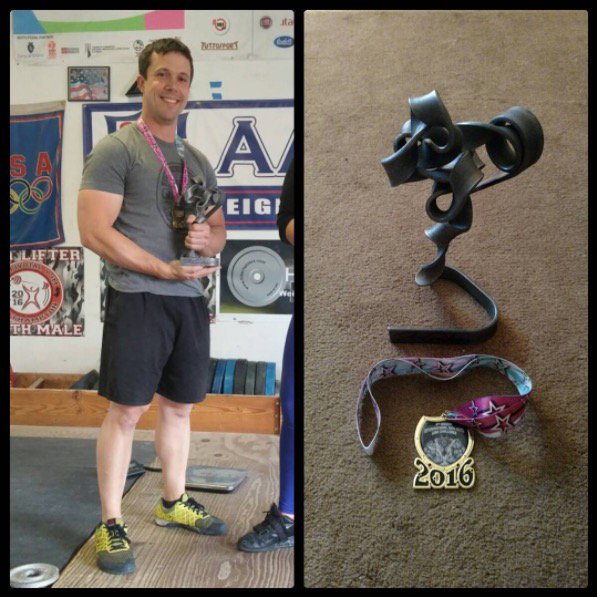
This is a favorite area of expertise for me. I’ve worked my grip for years and years, and have even won some grip competitions:
In fact, I’m currently typing this one-handed while squeezing coal into diamonds with my other hand.
Not really, but I promise my grip strength is above average.
SO WHERE TO START?
The hands are complex, and training them can seem just as complicated.
We’ll simplify matters a bit and you can categorize the grip exercises into the following general types:
#1) CRUSH
This is what you probably think of when you think of a “strong grip”. This is the whole hand closing in around something. A strong handshake. None of that dead-fish handshake stuff!
#2) PINCH
Think of making an alligator mouth with your hands, and chomping down. In this grip, there tends to be a lot more work/stress on the thumb. This is important to work, as the thumb is a vital part of a strong grip!
#3) SUPPORT
This is similar to crush, but rather than the ability to close, this type of grip tests the ability to hold.
#4) EXTENSION
Every action has an opposite reaction, right? This type of grip work is all about strengthening the opposing muscles. We were built to grab and hold onto things, so these muscles will not be as strong.
Wrist movement and wrist stability are the focus here. In order to be able to transfer energy from the body through the hands (for opening those pickle jars) we need to make sure every link in the chain is strong.
PUTTING IT ALL TOGETHER
When putting together a grip routine of your own, it’s a good idea to cycle through these different types of grips over the course of the week, in order to work different muscles and different angles.
If you have to pick just a few, I’d put my money on stretches, crushing, and extension to get your hands strong and keep them healthy!
Before we go further, I want to mention that if you’re improving your grip as part of a strength training practice, you’ve come to the right place!
We have a free guide Strength Training 101: Everything You Need to Know, that will walk you through every aspect of building muscle and growing stronger.
Want in?
Grab it for free when you join the Rebellion (that’s us!) below:
Download our comprehensive guideSTRENGTH TRAINING 101!
Everything you need to know about getting strong.
Workout routines for bodyweight AND weight training.
How to find the right gym and train properly in one.
How to Improve Your Grip Strength and Mobility Quickly.
Here are the best exercises you can do to strengthen your grip quickly:
Dumbbell head grab: Put a dumbbell on its end and pick it up by the head. Could anything replicate a pickle jar more? Be careful with this exercise if the dumbbell is too big, as the thumb can easily be strained if it’s stretched too far. Hold for time (~30 seconds) or go for heavier weight.
Farmer’s walks: Grab a pair of heavy dumbbells (heavy for you) and walk around! Don’t have space to walk? Just stand there! 30 seconds minimum!
Plate curls: A wrist strengthener that works the biceps too! Anything past 25 lbs becomes insanely hard. ~10 repetitions. Watch the face!!
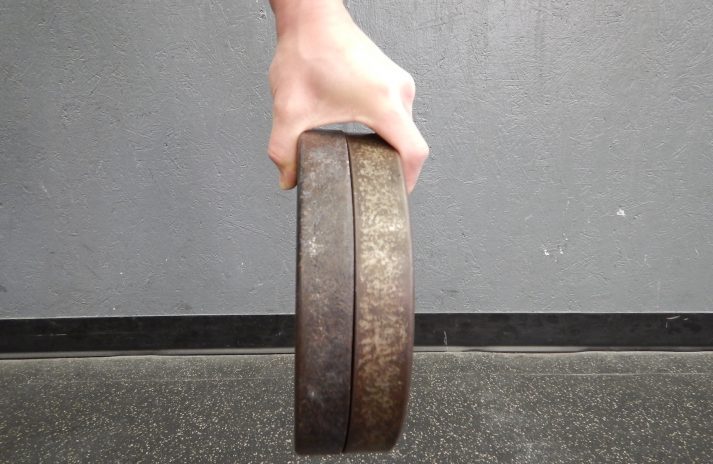
Plate pinches: If you’ve got a pair of smooth metal plates, you can sandwich them together with the smooth side out. You can also use thick bumper plates. Pick them up with one or two hands and hold for time (~30 seconds) or go for heavier weight. World class grip athletes can pick up a pair of 45 lb plates with one hand!
Barbell finger rolls: How to work the crushing grip without grippers. You can use an empty bar or load up some weight. Get the bar to your fingertips, then squeeze and crush! ~10 repetitions.
Towel chin-ups: Regular chin-ups too easy? Throw a pair of gym towels over the bar and challenge that grip. A great exercise to prepare for rope climbing!
Next, let’s talk about some stretches and exercises to perform at the gym.
#1) STRETCHES AT THE GYM
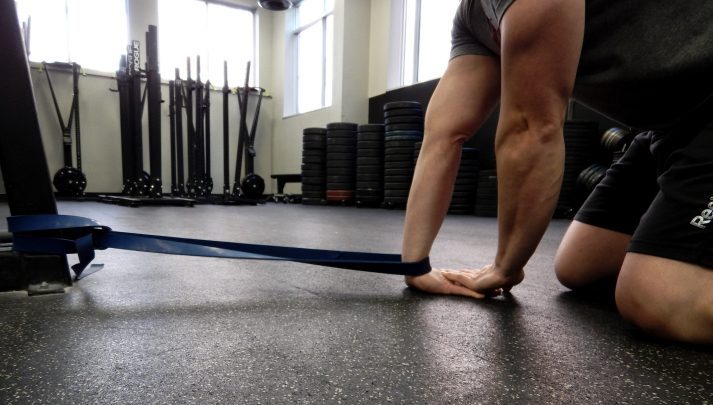
The only addition I have to your stretching routine that can be done at the gym is banded wrist stretches. The addition of the band can help open up your wrist joint a bit more. The band should be pulling in the opposite direction of the stretch (fingers face one way, band pulls the other way).
10-15 repetitions.
#2) EXERCISES AT THE GYM
While we recommend picking up some grippers as specialized grip equipment, there are TONS of options to work the grip at the gym with existing equipment! This is certainly not an exhaustive list, but should give you plenty of ideas.
The one warning I give for any of these exercises is WATCH YOUR TOES. The grip can give out fast and unexpectedly, so we don’t want to crush any little piggies!
This list is certainly not exhaustive, but it’ll get you started!
Other Easy-Grip Exercises to Integrate:
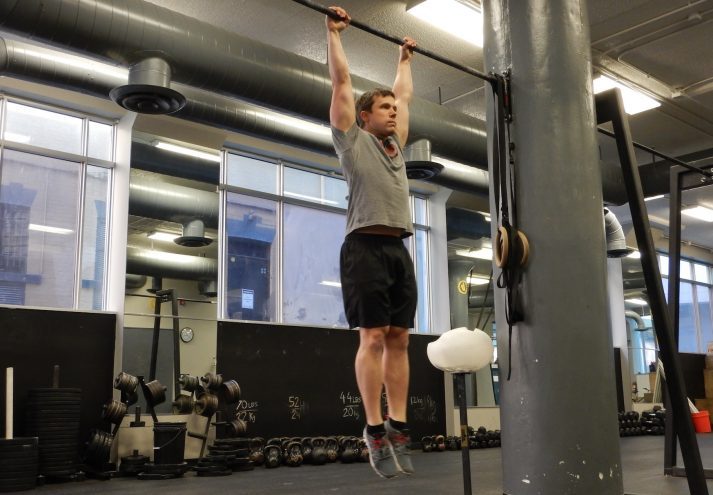
Bar hang: Simply hanging from the bar or gymnastic rings will build up your grip strength! If you can’t hang freely, put your feet on the ground for an assist. Couldn’t be simpler! Work up to one minute or more!
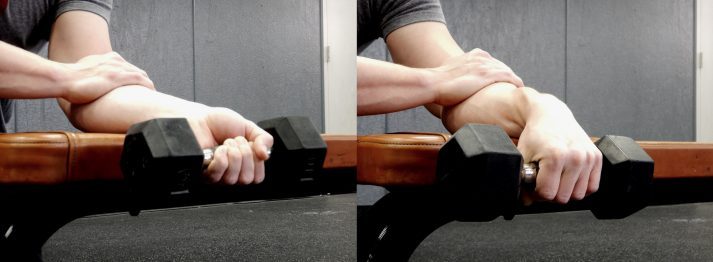
Wrist curls/Reverse wrist curls: What many may think of when they think of “grip strength” exercises. Not bad for some wrist strength. ~10 repetitions. Pictured – Left: Wrist curls, Right: Reverse wrist curls.
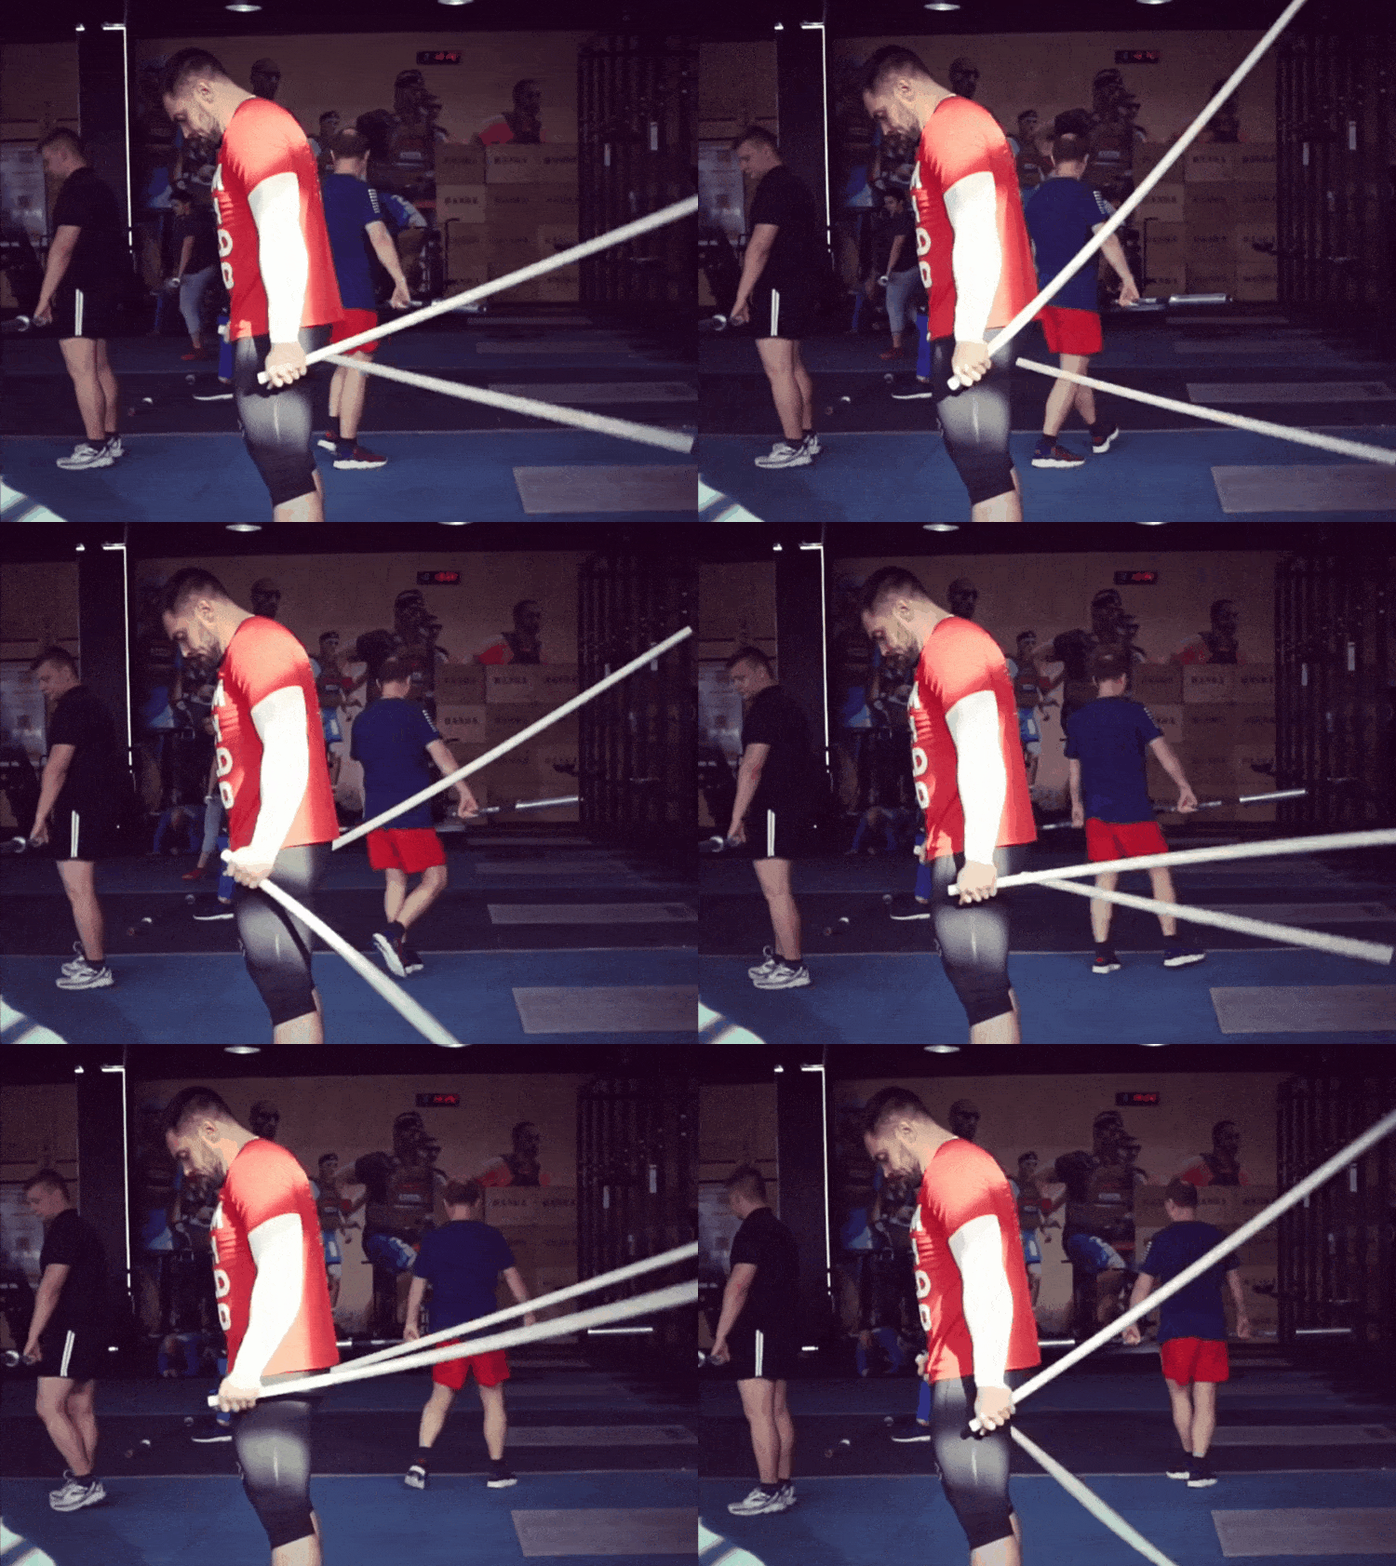
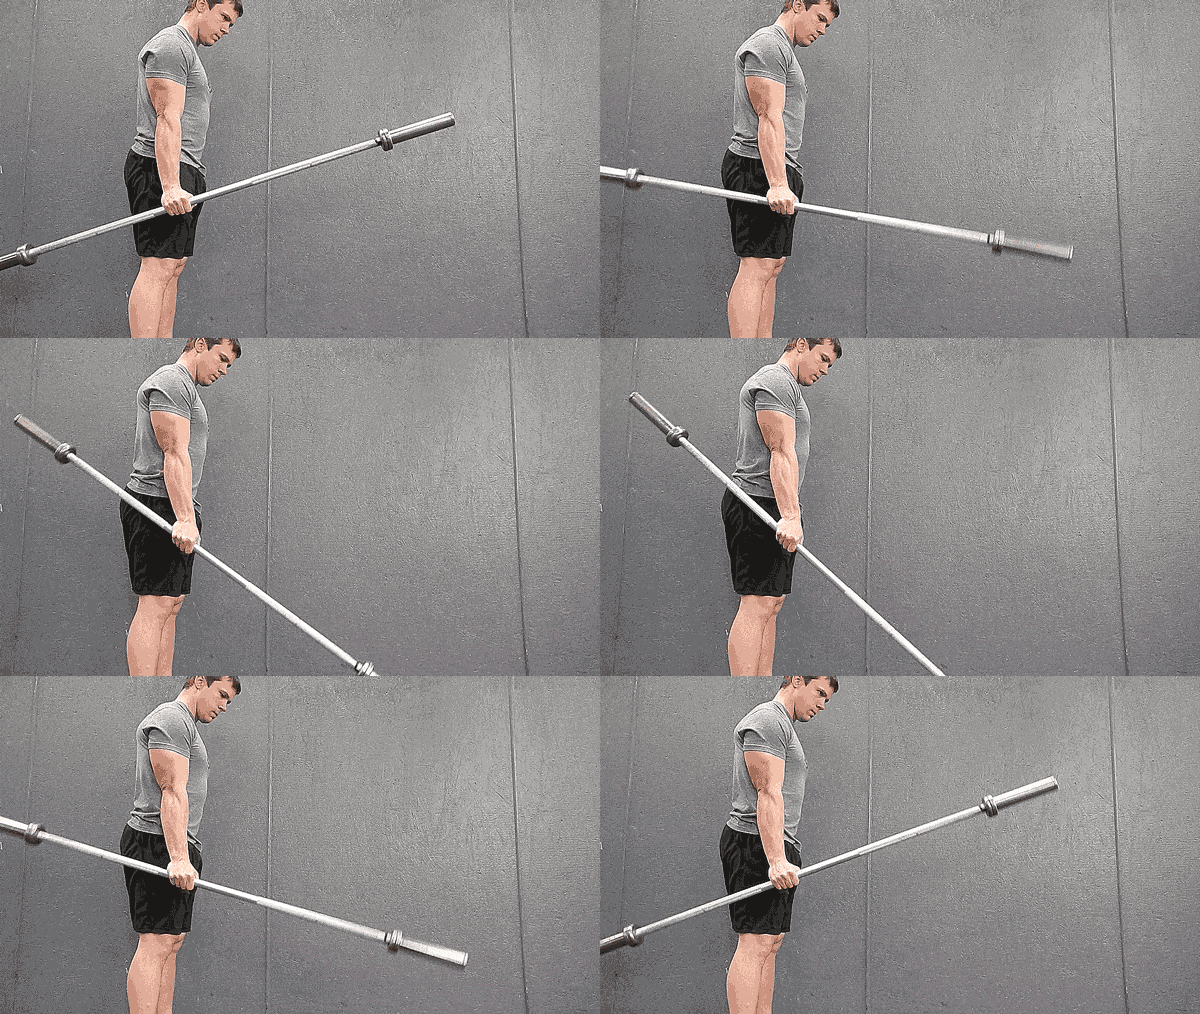
Barbell levering: We’re getting into crazy town with this one. An unbelievable wrist exercise that is not for the beginner. Grab the bar with one hand, off-center, and lift it to parallel. You can lift to the front and the back. I would also recommend using a 15 lb/5 kg bar, or one of those lighter “bodypump” bars for this. The leverage is crazy! This can also be done at a faster pace with PVC pipe.
Things can get really crazy when you start combining exercises…Plate pinch farmer’s walks with bumper plates, anyone?
…and speaking of NF Coaching, if you’re worried that your grip strength is holding back your training, we can help!
Our certified coaches can do an assessment, design a program to increase your grip and overall strength, and provide support and accountability. It’s kind of like having a coach in your pocket (not literally – via an app).
Plus, our coaching app lets you record and send a video of your movement directly to your coach, so you can take comfort knowing you’re training correctly:
How To Improve Grip Strength and Mobility At The Office.
Alright, you’re ready to jump into grip strength training!
I’ve outlined a number of stretches and exercises for you to do, no matter where you are and what equipment you have. Skim over and see what you can add to your daily mix or gym training!
#1) STRETCHES AT YOUR DESK
You might be reading this while sitting at your computer right now.
We put a LOT of stress on our hands and wrists over the course of a day, so take the time to take care of these hard workers!
Below is a quick and dirty stretch routine, just three moves. This is good for a warm-up or just for overall hand health. We spend a lot of the day at our computer with our elbows bent and our hands in a pronated position (palms turned down), therefore stretches with our elbows extended and hands supinated (palms turned up) is a good idea.
The stretches from the video:
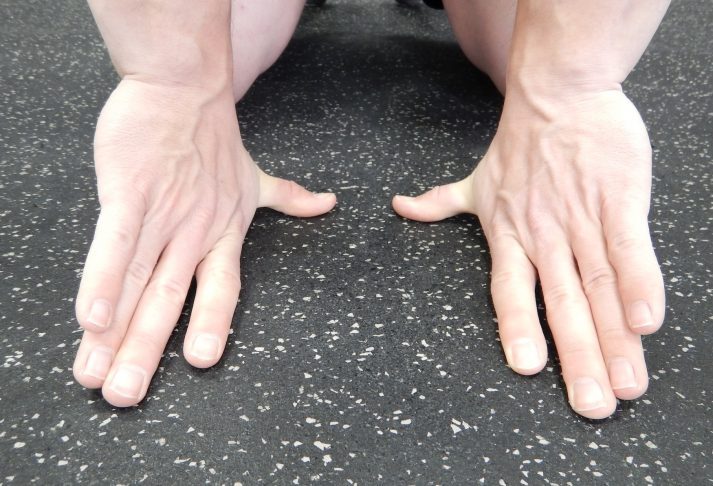
Fingers back, palms on desk: You can stretch straight backwards, or rock gently left to right. 10-15 repetitions.
Finger back, palms lifted off desk: You can lift the palms and get a bit more stretch through the fingers and first knuckle. Again, stretch straight backwards, or rock gently left to right. 10-15 repetitions.
Fists together, back of hands on desk: Make two fists, with the thumbs on the outside of your fingers. Bend your elbows and put the knuckles together like two cogs in a machine. Bend your elbows and put the back of your hands fully on the desk. Keep your fists together (this will be tough) and fists tightly closed (this will also be tough) as you bend and flex your elbows. 10-15 repetitions.
Give it a shot, I bet your hands feel noticeably different (and better) afterward.
If you have additional time, the first two stretches can also be done with your fingers forward!
You can also stretch the thumbs out on the desk. Moving into and out of the stretch shown below. You may be surprised how good this feels if you’ve never done it before. Again, 10-15 repetitions.
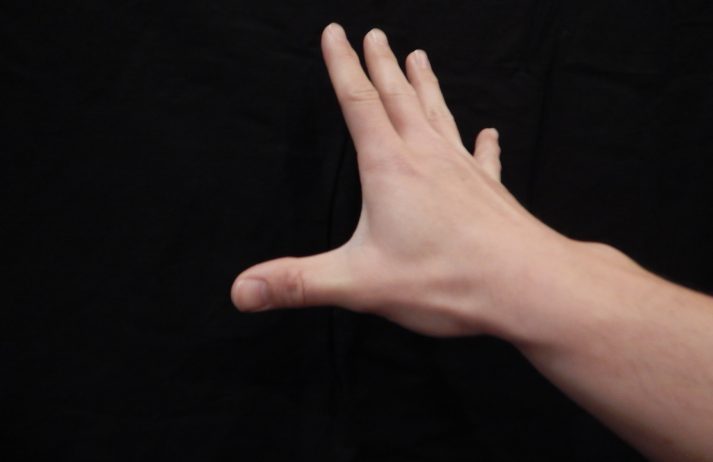
A final stretch, if you have the time between updating Excel and checking Facebook for the 100th time (I kid, I kid), is stretching your wrists in the direction of your thumb.
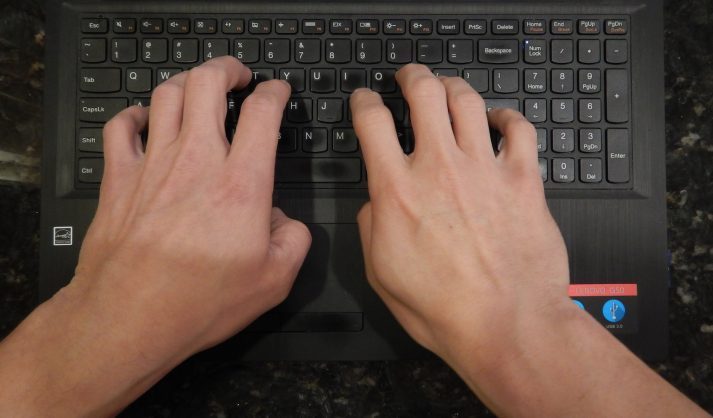
If you think about how your hands are often oriented on your keyboard, you’ll see that they are often bent toward your pinky.
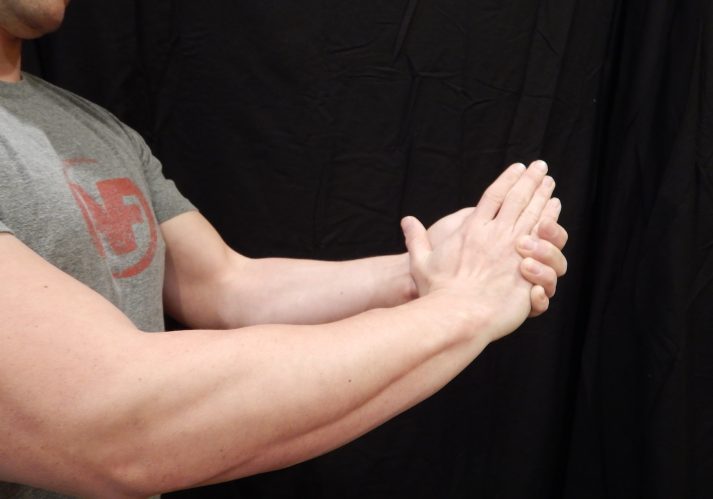
So let’s stretch them in the opposite way! Make like you’re about to karate chop someone with one hand. With the other hand, grab the chopping hand and pull it sideways in the direction of your thumb.
Going gently into and out of this stretch for 10-15 repetitions. It may not feel as intense as the previous stretches, but it will still help.
This is certainly not an exhaustive list of hand and wrist stretches, but it should give you plenty to work with!
#2) EXERCISES AT YOUR DESK
Do you know there’s already an excellent piece of grip-strengthening equipment present in many offices? What is that?
The rubber band!
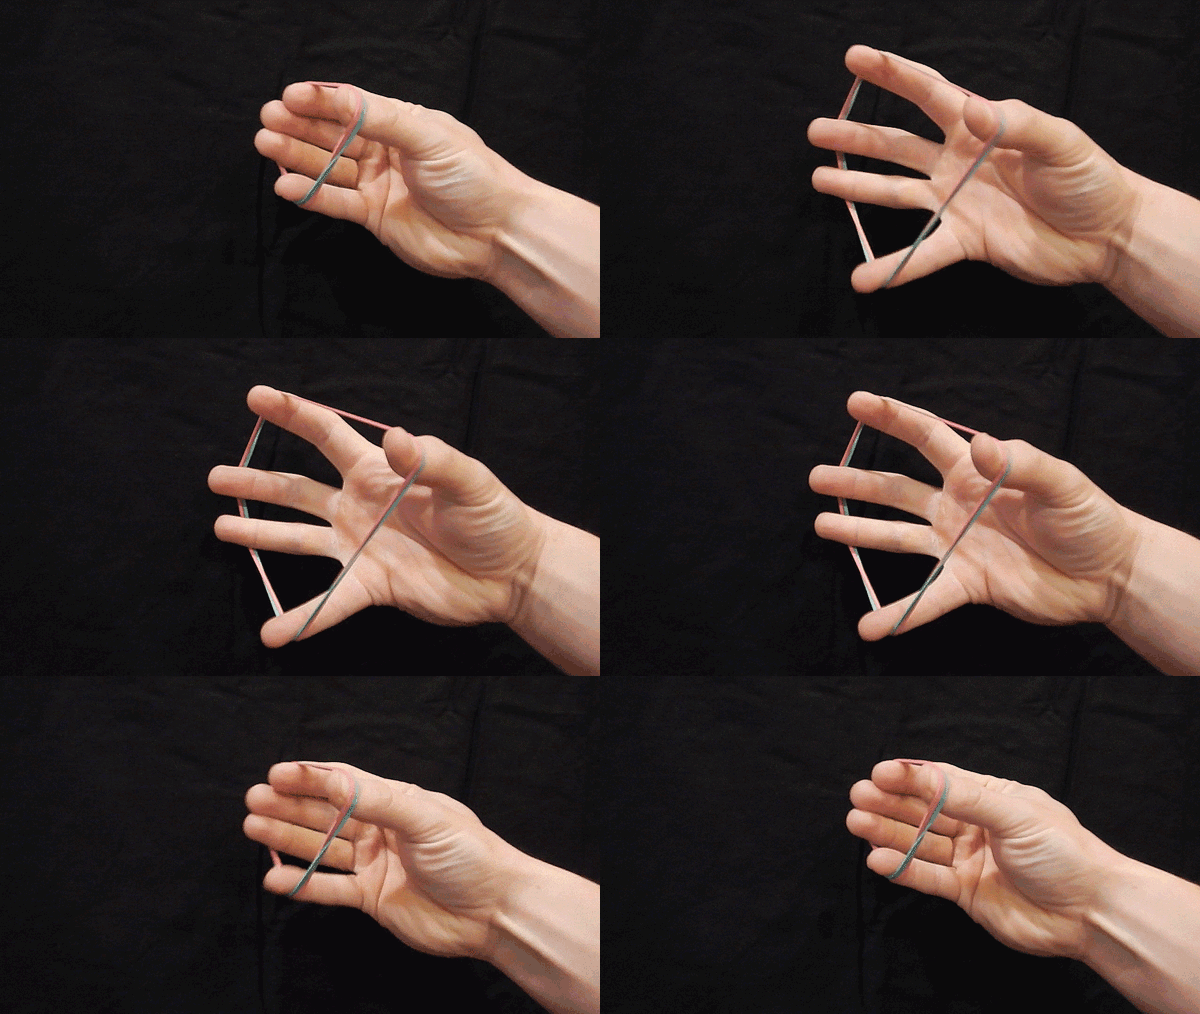
Snag one off that rubber band ball in your desk and do these simple rubber band extensions:
If one band gets too easy, put two or more on! This is a super easy exercise to do while you’re on a phone call or that conference call (that you’re not paying attention to anyway) that gets the blood moving through the hands and helps balance out your vice-grip-like hands.
Another grip exercise that can easily be done at your desk is closing grippers. Now, this does require an investment (~$20/gripper), but you’ll find that these grippers last FOREVER (I still use some grippers that are over a decade and a half old!)
Consider the following when making your gripper purchase:
If you are just starting out with your grip, I would look at the Guide and/or the Sport (60lb and 80lb respectively).
If you have a bit of strength, the Sport and/or the Trainer is the way to go (80lb and 100lb).
If you can close the Guide, you’ve got a pretty solid grip. If you can close the Sport, you have way above-average grip strength, in my experience.
A fun bonus with these grippers at your desk is that EVERYONE who sees them will try and pick them up and close them. Great way to start a conversation with your coworkers!
You may be thinking, “Eh, I’ve already got a gripper I bought from the store”. I’ll tell you that the strength in that gripper is probably minuscule compared to Ironmind’s. Time to upgrade!
You may also be thinking, “Eh, I’ve got a tennis ball/stress ball that I can keep by my desk and crush”. Both of those might be better than nothing, but not by much. The grippers will allow smoother movement and quantifiable progress. Did I mention they’re just $20 a pop?
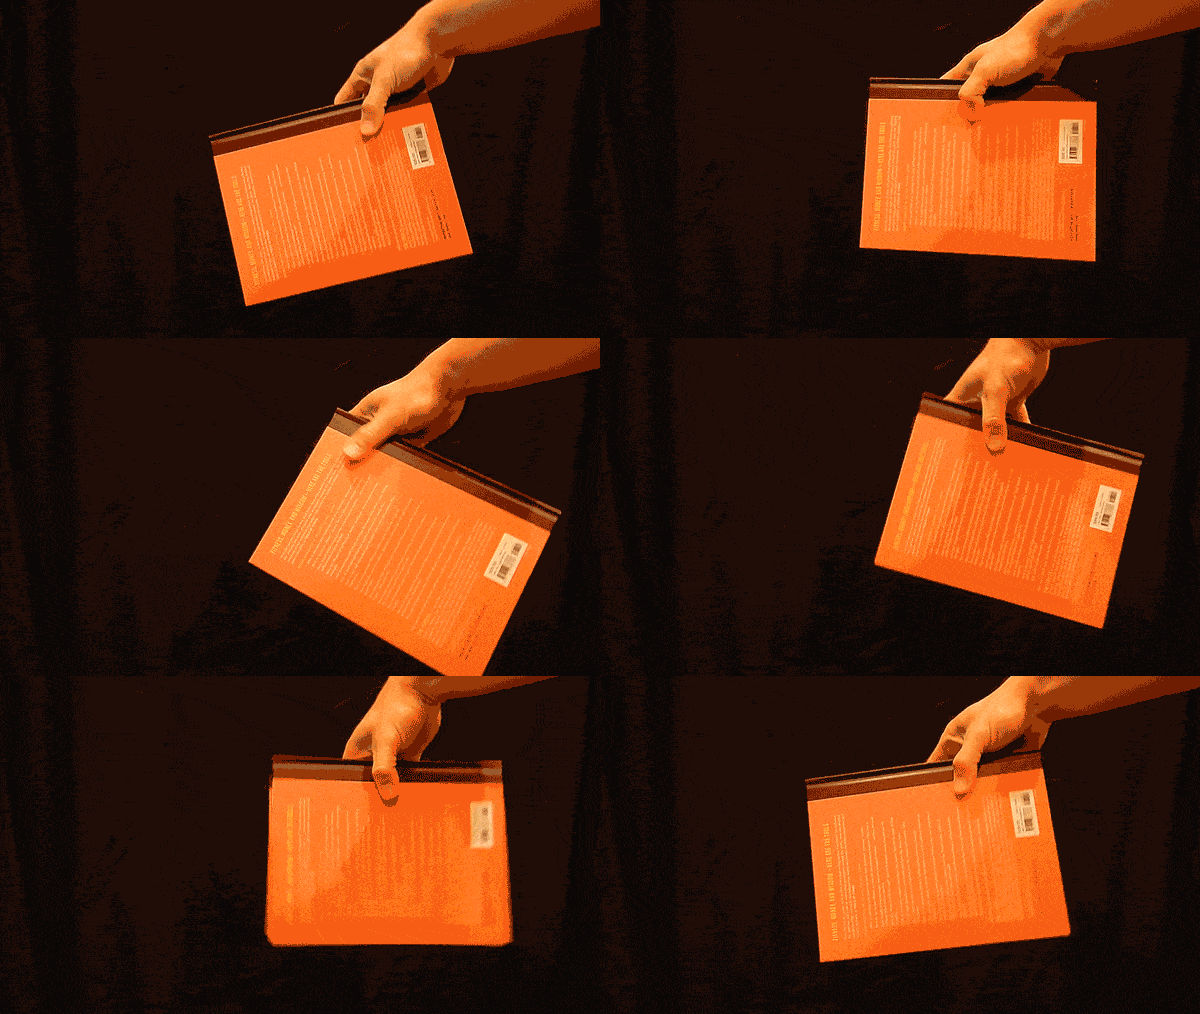
“Jim, I can’t wait. I want to work my grip NOW.” Ok, ok, grab the biggest, heaviest book in the office you have. Grab it in that pinch grip position (fingers on one side, thumb on the other). This may be easy, if so, then “walk the book” in your hand by moving your fingers up and down the spine while you hold it in mid-air. Do this for several trips. Tough!
How to Improve Your Grip Strength and Wrist Mobility At Home.
If you work out at home, there are still a few things you can do.
Bar hang: A home chin-up bar is one of the most useful pieces of equipment to have. Just like the gym version, you can put your feet on the ground to assist. Work up to one minute!
Grocery bag farmer’s walks: What’s better than taking only one trip to bring your groceries inside? Absolutely nothing. You can use those tough, reusable bags and load them up with anything. Stand in place or walk around the neighborhood.
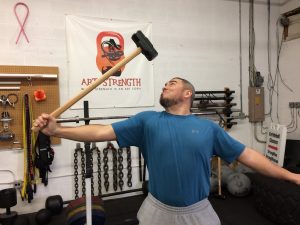
Sledgehammer/Barbell/heavy bar levering: As with the barbell levering at the gym, this is a tough exercise and should be approached slowly. Grab closer to the sledgehammer head to make it easy, farther to make it tough.
Get Started With Rings And Handstands, Level Up Your Grip!
No (wo)man is an island, and no exercise exists in complete isolation. These grip exercises are a blast, but we hope you can also use them to help strengthen a deadlift, or work toward your first chin-up.
There are also various bodyweight exercises that will help strengthen your upper body AND build your grip strength at the same time.
#1) THE FALSE GRIP HANG
For example, here is a video from our rings course in Nerd Fitness Prime on doing a false-grip hang – and then doing scapular retractions. This is a killer grip strength exercise:
The false grip is an incredibly challenging grip variation that one must learn to build up to a muscle-up (a pull-up that transitions into a dip). Just like before, you can put your feet on the ground to assist this exercise.
#2) CROW POSE
Here’s a video of an exercise that builds up grip and wrist strength, pulled from Nerd Fitness Prime (which contains a course on doing handstands):
A staple of yoga classes everywhere, though we’ll be focusing on it for a different reason than a yogi might. We’re using this exercise as a foundational exercise to build up into the handstand. You won’t believe how much grip strength is involved in the crow pose until you are digging your fingers into the ground!
A Strong Grip Is Always Helpful!
It’s been said, “There’s never been a strong man (or woman) with weak hands.”
We’d have to agree wholeheartedly. There is never going to be a point in life where you say “Boy, my grip was too strong!”.
You might have some questions about how to mix these exercises in with your normal routine, or how you can use these things to improve your lifts safely and without injury. Or maybe all of the above just overwhelmed the heck out of you and you’re trying to make sense of it all.
If that sounds like you, you’re in the right place.
I’m the lead trainer of the 1-on-1 NF Coaching Program, where we help busy, normal people like yourself build muscle, lose weight, and level up their lives!.
You can learn more about our coaching program by clicking on the image below and scheduling a call with us to see if we’re a good fit!
You have a pair of incredibly useful tools at arm’s length, might as well make the most of them!
We hope you now have a handle on things (have to bring it back full circle). Go out and get a grip!
Leave any questions you have on grip strength or wrist mobility below in the comments.
-Jim
PS: What should you do after you improve your grip and wrist strength? Get started on doing muscle-ups and downward dogs, which you can learn all from our new app!
I know what it’s like to hate exercise, and ALSO want to lose weight and see results. Ugh.
We’ve built an entire company and community around helping people overcome these obstacles – our Online Coaching Program helps people find exercises they love, and also how to make the right nutritional choices.
We are all on a unique journey and we’d love to help you with yours!
ExercIse Sucks. Do This Instead.
“But Steve, I don’t like to exercise!”
While some are like Odie and love to run around all day, others are like Garfield and feel like they must be allergic to exercise.
Exercise is merely a supporting actor, which is why we don’t ever NEED to spend time doing exercise we hate.
We’ve already talked extensively on Nerd Fitness on how to eat nutritiously, so I won’t hash that out here.
So let’s talk about exercise.
Sure, it would be great if we all strength trained 5 days a week and got super strong, but the reality is most of us don’t have that time – or the desire – to hit the gym.
Overweight people have a tendency to sit, while lean ones have trouble holding still and spend two hours more a day on their feet, pacing around and fidgeting, researchers are reporting in findings published today.
The difference translates into about 350 calories a day…
350 extra calories burned per day ain’t no joke!
As we cover in our “How many calories should I eat every day?” guide, burning an extra 350 calories per day can result in sustainable weight loss and maintenance over time for many.
Not only that, but when you factor in inertia (an object at rest tends to stay at rest, and an object in motion tends to stay in motion), it paints a pretty interesting picture:
We spend our lives trying to be more “efficient.” What if the key to weight loss is to be LESS efficient?
From standing up more frequently to parking FARTHER away from the grocery store, every additional step or movement counts. Today’s guide shares TONS of ways to get yourself used to moving more frequently.
I’m actually air drumming and shuffling my feet as we speak!
From dancing to yoga to climbing to roughhousing with your kids, it all counts.
This brings me to today’s point:
Exercise is a bonus. Exercise helps your heart get stronger, can help build muscle, usually gets you outside the house and absorbing vitamin D, and brings you a litany of other health benefits. Also, any additional calories burned is a bonus!
Exercise can help us make fewer unhealthy food choices. Instead of “I earned this” you can start telling yourself: “If I’m going to exercise regularly, I might as well make it worth it by eating right too.”
Daily exercise is a constant reminder that we are leveling up our lives – that we should continue to make other good choices or we’re practically wasting our time.
This is the type of stuff we focus on – with personalized instruction, with each of our online coaching clients.
Some clients are learning Olympic lifting, while others are simply focusing on taking the stairs more and tracking their food.
We are all on a unique journey and we’d love to help you with yours!
40 Ways to Exercise Without Exercising
#1) Hiking, especially with friends – Strap on a pair of shoes, get out of the comfy confines of your hobbit-hole, and go explore the world around you!
Make sure you follow our Beginner Hiking Guide on how to find a hiking spot near you, what shoes to wear, what to bring with you, and more.
#2) Walking – No time to hike? Go for a simple walk. Even a 15-minute brisk walk is enough time to get close to a mile walked, which gets you one step closer to Mordor.
Do you have a 30-minute meeting at work? Have a walking meeting instead. Steve Jobs was known for doing this.
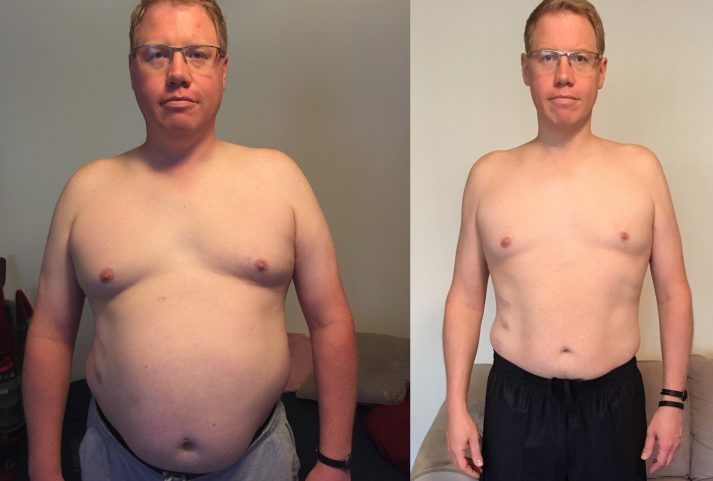
You should know Tim, a member of our Nerd Fitness community who lost 50 pounds – while injured – just by fixing his nutrition and going for long walks every day!
I’m proud that Tim used the philosophies laid out in our online courses under Nerd Fitness Prime to get his results!
#3) LARP – Live Action Role Playing. Might seem silly to those on the outside, but to those playing, it’s an amazing adventure that reminds us how awesome our imaginations are.
Also, depending on the game, you could be wearing a heavy costume, swinging heavy weaponry, and running for your life!
#4) Rock Climbing – I love rock climbing. It’s one of the best arm/back/forearm workouts in existence, you get to feel like a badass when you reach the top of the wall, and all climbing routes are graded so you can level up the challenge as you get stronger/fitter/better.
It’s a fit nerd’s dream!
#5) Geocaching – If rock climbing is a fit nerd’s dream, then geocaching is an adventure nerd’s dream brought to life. Become a real-life treasure-hunter (Lara Croft? Nathan Drake? You decide!), and get a great workout in while you’re at it.
Or, if you’re truly nerdy, you can do some Digital Geocaching with Pokemon Go or Harry Potter: Wizards Unite.
#6) Dancing – Ever tried serious swing dancing? You’ll be sweating within ten minutes. How about hip-hop? Drenched in sweat, and sore as hell the next day.
Zumba? Tango? Flamenco? You’d be surprised at what you can sign up for and what will elevate your heart rate.
#7) Roughhousing with your kids. I don’t have kids, but when I do, you can bet your ass I’ll be the dad out rolling around in the backyard with them. Don’t forget what it’s like to be a kid – it keeps you young.
#8) Climbing on stuff – A few years back, I attended a great conference, Midoricon, and I was walking through the woods with NF Rebel Joe (No, not THAT Joe).
It was awesome to see this guy, having lost 100 pounds since finding Nerd Fitness, explore the woods like it was no problem: climbing on stumps, balancing on fallen trees, climbing trees, and more.
We work with LOTS of Coaching Clients to get them outdoors and help build them “fun climbing programs” that burn tons of calories but don’t really feel like exercise.
Whether it’s Kung Fu, Muay Thai, Tae Kwon Do, Karate, or Capoeira (breakdance fighting, seriously), there’s a martial art out there that will make you feel like a badass.
And might help you defeat your archenemy.
#10 Consider a standing desk – Although we all know that correlation does not prove causation, it’s no surprise that there’s a strong correlation between sitting all day and an unhealthy lifestyle.
Why not fix your posture, strengthen your legs, get more “fidget time” in, and spend the day being more productive with a standing desk? I have THIS desk and it allows me to switch between sitting and standing.
#11) Have an active meeting – Hat tip to Charlie Hoehn on this one. If somebody wants to meet up with you for coffee, suggest something active: throwing a baseball, tossing a frisbee, going for a hike – anything that gets you up and moving.
I say yes to pretty much anybody that invites me to play golf. Wink wink.
#12) You know… that thing that consenting adults do?
Yeah. Do that.
Self-explanatory.
Moving on…
#13) Clean! – Ugh, nobody likes to clean the house/apartment. It’s not my favorite thing to do. So I instead make a game out of it.
I see how much I can accomplish with a single song blasting at max volume, while probably also dancing. I also CRUSH podcasts while doing the dishes.
Of course, after getting through one song, I figure “Welp, I’ve already started, might as well keep going.”
#14) Try handstands – This is a fun activity that builds up some serious arm and core strength and will leave you sweating bullets after even a few minutes.
So go find a park, go do handstands, cartwheels, somersaults, and whatever else makes you feel young again.
#15) Parkour – Our Beginner’s Guide to Parkour is one of the most popular on Nerd Fitness. I don’t care how old you are, there’s no reason you can’t get started with rolling around in your yard and vaulting over picnic tables and bike racks.
Or, you can do it in your office:
#16) Playout – Is Parkour too serious for you? Try a playout! Spiderman was on to something – climbing walls, swinging from skyscrapers, and popping flips around the bad guys.
You might not be able to swing between buildings, but you can definitely visit a playground in your area and get creative!
#17) Adult gymnastics – In the same vein as parkour, gymnastics will help you build some of the BEST real-world strength you can get with any type of exercise, and it’s all done in a playful way without a single weight being picked up.
Swing from rings, somersault, flip onto pads, and more.
There are gyms all over the country.
#18) Yoga – Build flexibility and strength, plus learn to freaking relax.
There are a million kinds of Yoga, including awesome stuff like Acro-Yoga, baby goat Yoga (not kidding), and Yoga with beer.
Sign up for a few different kinds and see which one lines up the best with what you’re looking for.
#19) Play video games that make you active – Beat Saber. DDR (Dance Dance Revolution) counts too. Just Move. Anything that gets you off your ass and moving!
Oh, what’s that? You’re playing a normal game like Grand Theft Auto V? Make a rule that you can only play while standing up, or that you have to do 10 push-ups every time you die.
That’s what I do to keep myself from spending twelve hours on the couch in marathon gaming sessions!
#20) Play on a playground – Go down the slide, swing across the monkey bars, climb the rope all, balance on the balance beam.
Create an obstacle course for yourself and see how quickly you can get through it.
Full guide to the most effective diet and why it works.
Complete and track your first workout today, no gym required.
#23) Bike to work – I know there are a lot of Rebels in our community who dropped a bunch of weight by making one change: they biked to work, or biked to their friend’s house, or started biking generally.
You get from Point A to Point B, you save money on gas, and you get a workout.
Plus, you can do it with friends!
Here’s our Guide to Biking if you want some help getting started.
#24) Play a childhood game – What games did you play as a child? Capture the flag? Kick the can? Simple tag?
Get a few friends together and give it a try – it will be the most fun you’ve had in a while!
#25) Park at the far end of the parking lot – Every step counts.
Every tiny decision that is slightly different than the “OLD you” counts.
#26) Take the stairs. It’s only two flights! And we are designed to move. You can do this.
Sure, you’ll get winded the first handful of times. But it eventually becomes routine.
And it all counts! Make a game out of it.
#27) Crush audiobooks while “exercising.” This is called ‘temptation bundling.‘ Pair something you love with an activity you’re trying to do more of.
But I bet if you could only listen to Harry Potter (for the 600th time) while walking on a treadmill, you’d be more likely to get to the gym.
#28) Build stuff. Whether you’re building a fort with your kid in the backyard, or trying to figure out why you have 5 extra screws in that IKEA dresser you’re putting together, building stuff involves lots of moving and bending and picking up and maneuvering.
Warning: you’ll swear no less than 100 times building furniture. Earmuffs!
#29) Sit in a squat, or pike position on the floor while watching TV. No, not leaning against the couch. Sitting up actively engaging your core!
You can also do some sort of stretch or movement like these bodyweight exercises during commercials (or in the 15 seconds between Netflix episodes!)
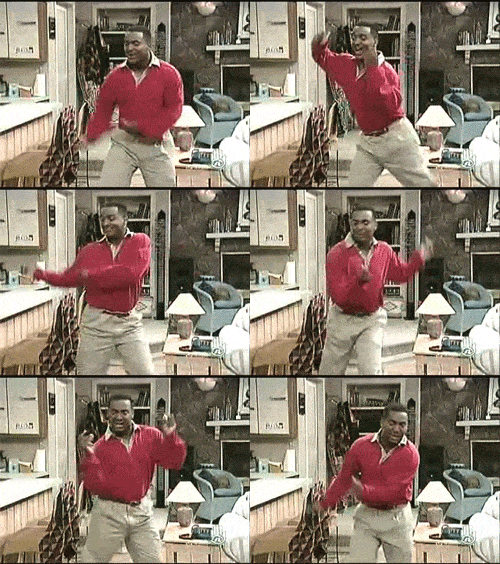
#30) Impromptu dance parties. Kids or no kids, I find that great Disney songs are fantastic for bringing out your inner child.
Blast the tunes, dance around the house, and be absurd. WHO CARES! As a wise woman once said…”Let it gooooooo.”
#31) Go for a walk while on the phone. What if you just decided you had to stand for all of your phone calls?
For starters, I know many people who do phone interviews while standing because it makes them more alert and a better guest.
Next: you’re gonna get so many steps in while on the phone without realizing it!
#32) Having an impromptu picnic. Instead of sitting and gorging yourself at the dining room table, why not eat on the floor?
Grab a blanket or a towel, eat in your living room or head out into the backyard, and make it a picnic!
You’ll need to adjust your posture and seating style constantly.
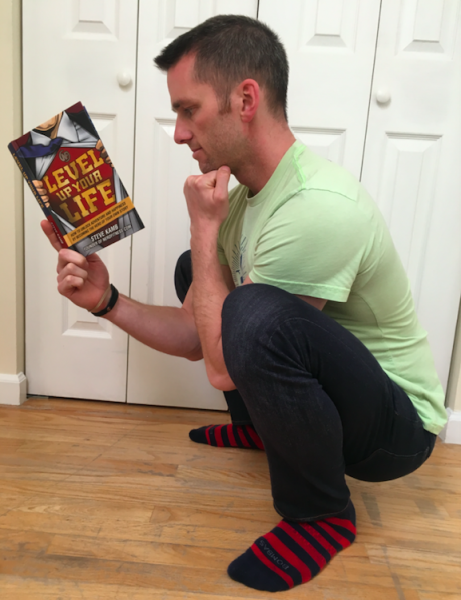
#33) Sit in a squat. We cover this in our “How to Squat” guide, but sitting in a deep squat – often for long timeframes – is built into us as a species! We’ve just become soft from sitting in chairs all day long.
I try to accumulate 15 minutes of “squat time” each day – sitting in a squat while reading a chapter in a book, or journaling, or answering an email with my laptop on the ground.
Here I am sitting in a squat while reading Level Up Your Life(available online and in bookstores nationwide!)
#34) The “Pull-up bar Tax”. Get yourself a door-frame pull-up bar. Put it on a door that you have to cross through regularly.
And every time you go through, you have to do either 1 pull-up, 1 negative pull-up, or 10 seconds of hanging from the bar.
#35) Lasers around the house. Set up colored string pulled tightly across your kid’s rooms or in certain hallways, and you have to go over and under the lasers each time you traverse the hallway.
Don’t touch the lasers!
#36) Climb a tree. Your level of safety and ability on this will be dependent on your experience here, but I remember climbing trees like a monkey as a kid and loving every minute of it.
Even if it’s just hanging from a tree branch or trying to scramble up to a low branch, it can be a great way to “exercise.”
#37) The floor is lava. This is both great for exercising around your apartment, for a fun date night or night with the kids, and for playing True American. Though one is slightly more healthy than the other.
#38) Casual Parkour. From avoiding cracks on the sidewalk to balancing on curbs, or jumping from tile to tile, or hopping up onto a bench and then back down, it all counts!
Just get yourself to move differently than you would have otherwise! We are currently working with a woman who has lost 100-pounds through our Coaching Program, and her exercise is all “fun parkour in the woods behind the house!”
#39) Literally fidget more! Yes, from tapping your toes to music and twitching your legs to the beat of the music. Getting up and sitting back down. Doing laps around your office.
You don’t need to get a standing desk or treadmill desk, but there’s a definite correlation between those that can’t sit still and body composition.[1]
#40) Your kid is a backpack! From piggyback rides to playing horsey, staying active with your kids is really powerful in instilling a love of fitness in them.
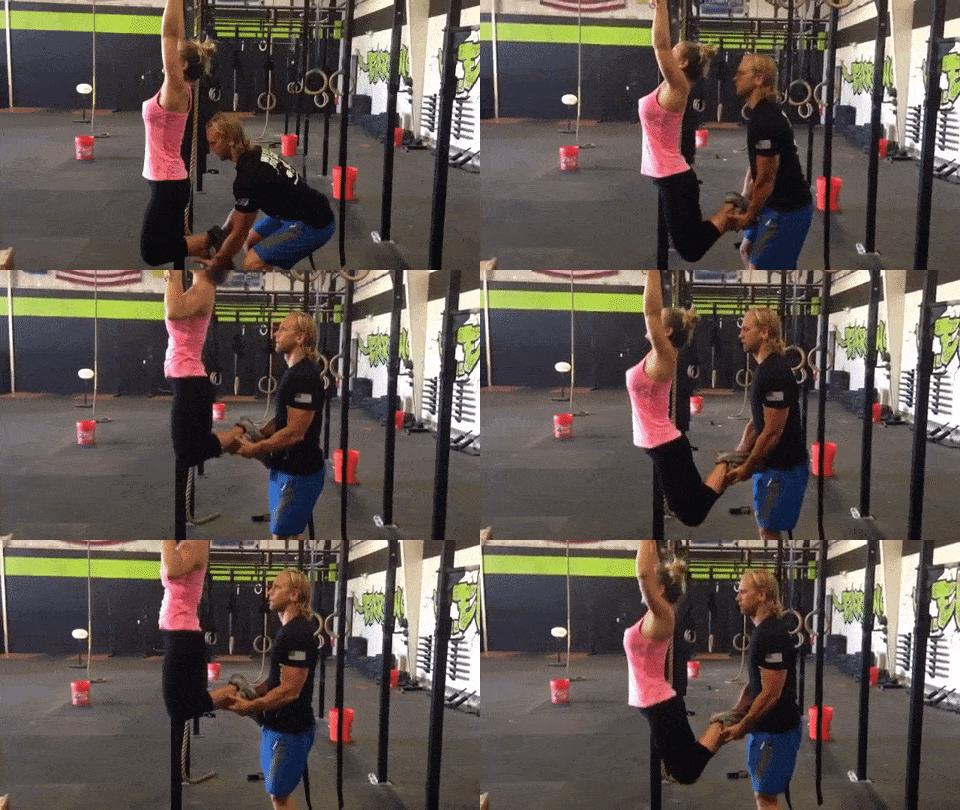
If you’re a badass mom like Brownwyn – a success story from Nerd Fitness Prime, you can even do pull-ups while your kid holds on!
Full guide to the most effective diet and why it works.
Complete and track your first workout today, no gym required.
Challenge yourself to Have fun: Next Steps!
If you are looking for more guidance beyond the 40 Fun Exercise Suggestions above, we have three options to continue your journey:
1) Join our epic Online Coaching Program! We create personalized programs for each customer based on their lifestyle, goals, and personality. From parkour in the park to just walking more with your children, or even “becoming a badass powerlifter,” we cater each experience to each person.
2) If you’re looking for a bunch of fun ways to exercise, check out NF Journey. Our fun habit-building app helps you move more frequently, eat healthier, and level up your life (literally).
We assign fun missions daily to get you to exercise in a way that doesn’t feel like exercise…because it’ll feel like a side quest instead.
Try your free trial (no credit card needed) right here:
3) Enlist in The Rebellion (it’s free)! Sign up for our biweekly newsletter and join the Nerd Fitness Rebellion!
I’ll send you tons of free guides and bonuses to help you get started on your journey today.
Sign up below:
Get your Nerd Fitness Starter Kit
The 15 mistakes you don’t want to make.
Full guide to the most effective diet and why it works.
Complete and track your first workout today, no gym required.
No matter which path you pick above, I want you to commit to trying something new, or doing something different, at some point in the next week:
Say yes before you can say no. Stop saying “I don’t have time” and realize you do. Stop saying “I can’t afford it” and find a way to make it a priority. Do all of this before you can talk yourself out of it. The best way to do that?
Commit in advance. Put down a deposit and make an investment in yourself. I pre-paid 6 weeks of swing dance lessons. Having already paid for it, I knew I’d be just throwing my money away if I didn’t attend.
Go with a friend. I went to my swing classes alone, which forced me to further develop my social skills, but if you happen to be TOO afraid to attend a class, get a friend to drag you there.
Expect to suck. If you are learning a new skill, expect to suck at it. You’ll get better as long as you remember to…
Have fun. Remember, we could get hit by a bus tomorrow. Every day above ground is a blessing, so enjoy it!
When in doubt, move more.
That one thing you always wanted to try but have been putting off?
Today’s a good day to get started. Just take that FIRST step.
Google classes in your city. Find a site that focuses on beginners, and read about it. If there’s a place to pre-pay or make a deposit, do it.
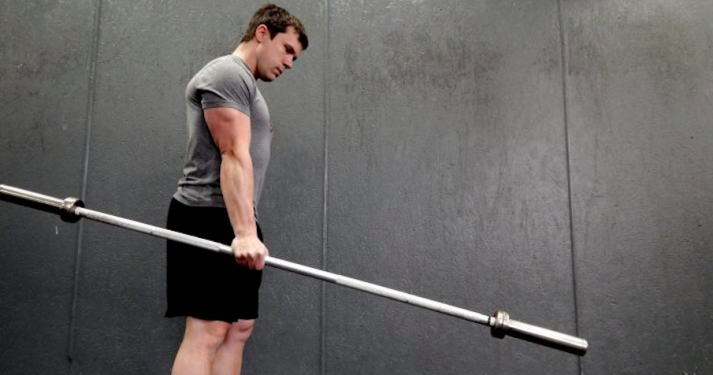
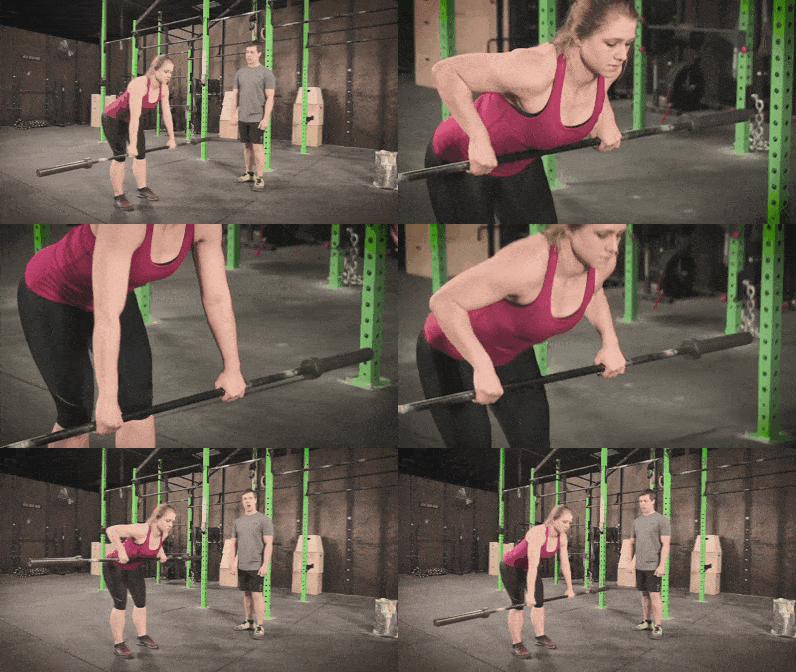
You’ve probably heard of the regular barbell row. You pick up a barbell, bend over at the waist (keeping your back straight), and pull the weight up towards your chest.
It looks something like this:
This can be a great exercise, but improper form could cause complications or you might not have access to a barbell and plates.
Luckily, the bodyweight row (or inverted row) takes care of all of that.
By the way, I’ll be using “bodyweight row” and “inverted row” interchangeably in this article.[1]
When doing this movement, you only need a bar to lean back from and your body weight. There’s also no extra stress on your back, like with a traditional barbell row.
As an added bonus, you get a decent core workout too.
I know, that’s worth celebrating…
Think of it like this: “bench press” is to “pushing” as “inverted row” is to “pulling.”
Balance FTW!
Why the inverted bodyweight row is so great:
I’m a huge fan of compound exercises (like the squat and deadlift, pull-ups and push-ups), and I’m also a huge fan of exercises that don’t require expensive machines or lots of extra bells and whistles.
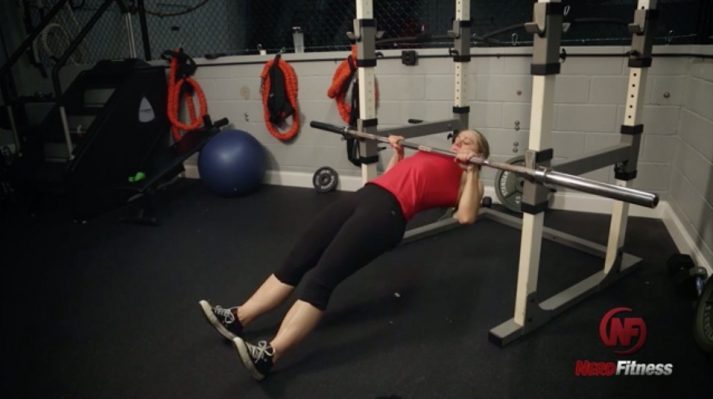
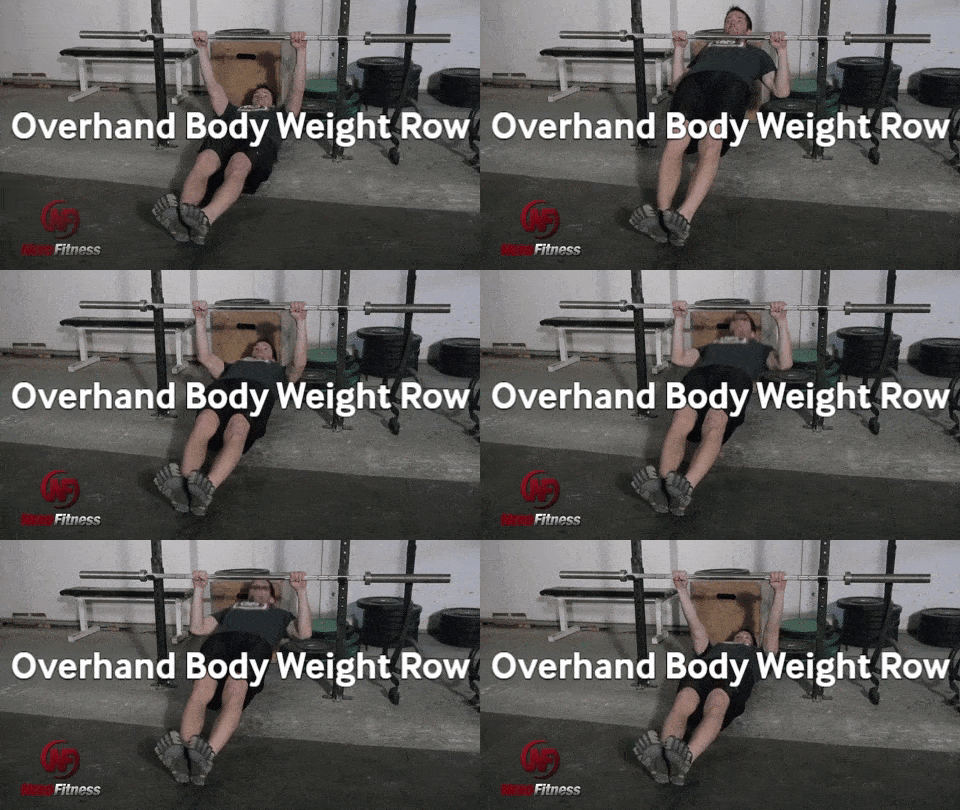
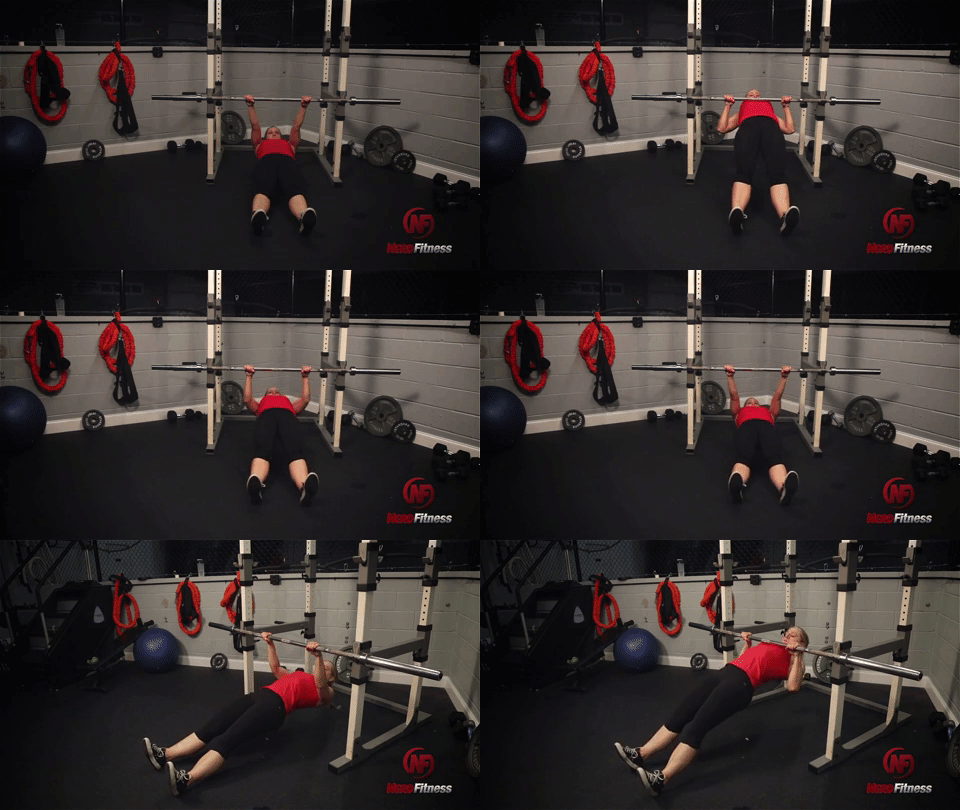
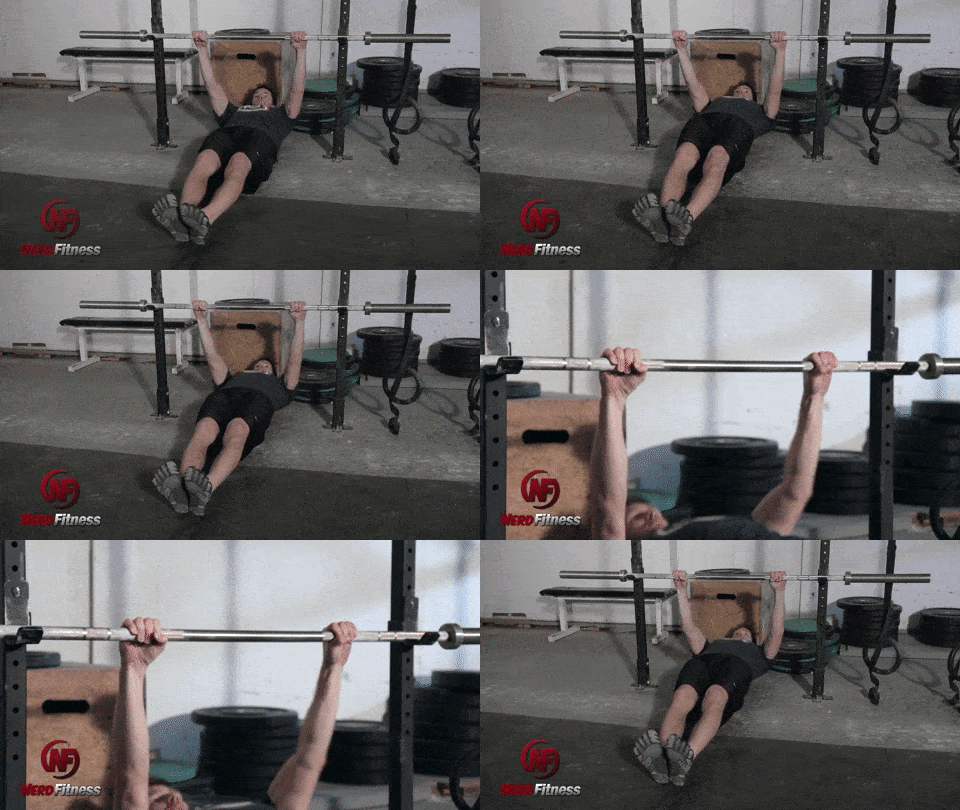
Set the bar (or your rings) around waist height. The lower the bar, the more difficult the movement becomes.
Position yourself under the bar lying face up. Lie on the floor underneath the bar (which should be set just above where you can reach from the ground).
Grab the bar with an overhand grip, slightly wider than shoulder-width (palms facing AWAY from you).
Contract your abs and butt, and keep your body in a completely straight line. Your ears, shoulders, hips legs, and feet should all be in a straight line (like you’re doing a plank).
Pull yourself up to the bar until your chest touches the bar.
Lower yourself back down with proper form.
If this movement is TOO difficult, nbd, we just need to back up a few steps.
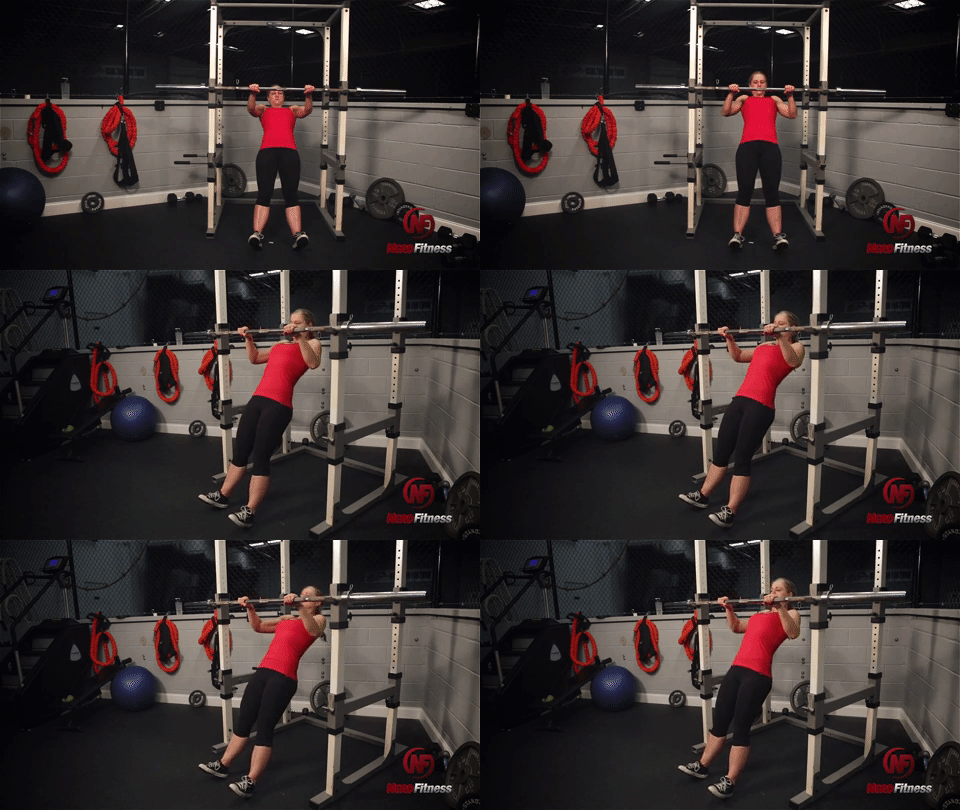
Set the bar higher so that when you lean back, your body isn’t down on the ground; maybe it’s only at a 45-degree angle.
We’ll walk you through a row progression right here.
Here’s Staci again demonstrating it at a higher angle:
By setting the bar higher, it takes more of your body’s weight out of the equation.
As you get stronger (and/or lose weight), you’ll be able to drop the bar until you’re parallel when pulling yourself up.
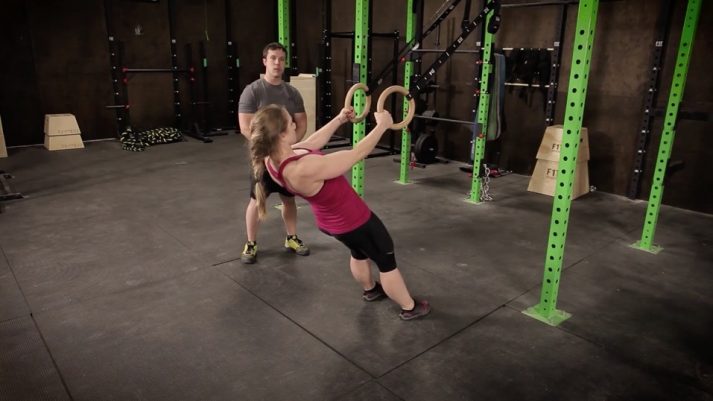
I grabbed a video of Senior Coach Staci from Team NF demonstrating a bodyweight row with gymnastic rings, but the instruction you’ll get in the video will really be helpful too.
How to do a bodyweight row (with video explanation):
To keep proper form when doing an inverted bodyweight row:
Don’t let your butt sag (squeeze your buttcheeks, flex your stomach, and keep your body rigid from head to toe).
Don’t flail your elbows. Grab the bar with your hands a little closer than you would if you were doing a bench press, and keep your elbows at that angle from your body.
Pull the bar towards the middle of your chest. Don’t pull the bar up towards your throat, or down towards your belly button. Right in the middle!
Keep your abs tight. Keep your abs tight throughout the whole routine. Your body should be a straight line the whole time, and the only thing moving is your arms.
Pull your shoulder blades down and back towards each other through the movement. Don’t shrug your shoulders. Imagine you’re trying to pinch a pencil between your shoulder blades to keep it from falling!
GO all the way. Don’t half-ass it. Lower yourself until your arms are completely extended, and raise yourself until your chest touches the bar.
How to Progress with Inverted Bodyweight Rows (6 Variations)
Let’s provide a blueprint on how you can level up your inverted bodyweight rows.
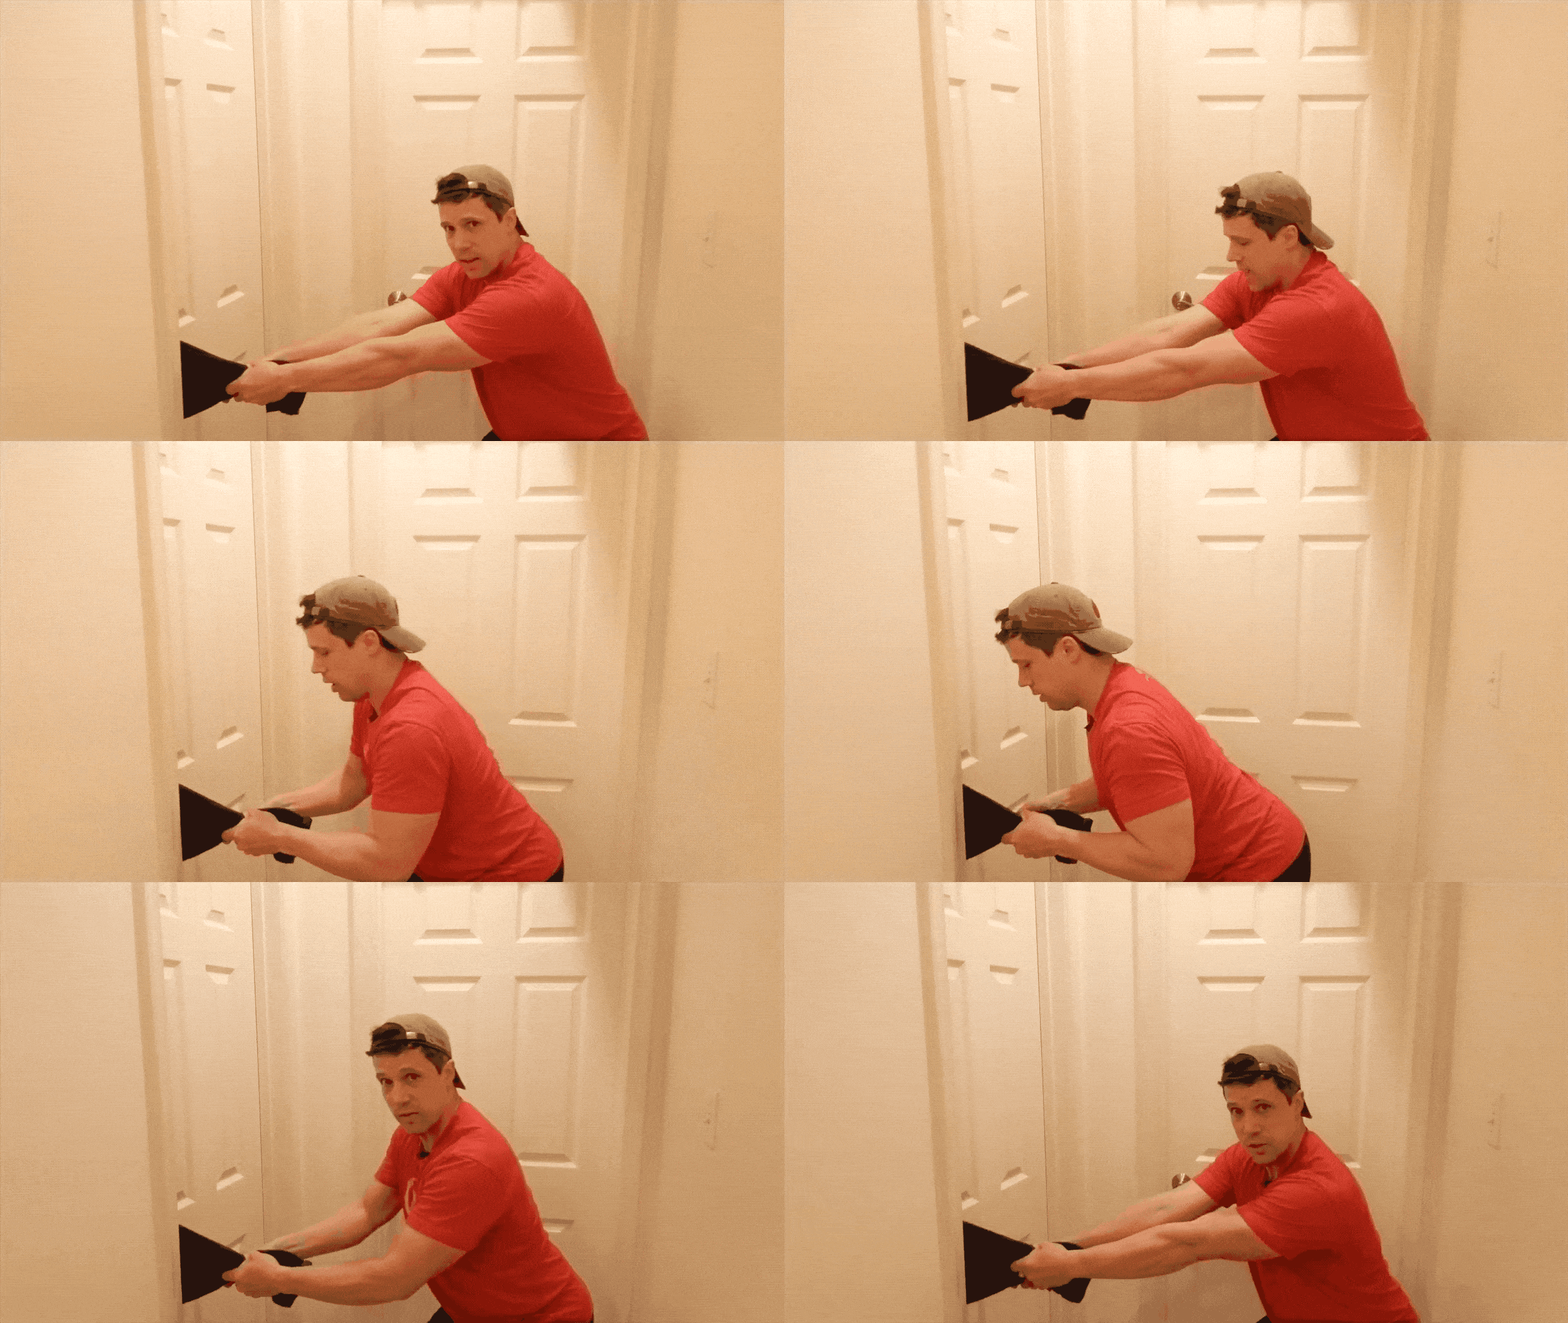
#1) Doorway Rows
At first, just start doing some rows in your doorway:
This will help you start training your “pull” muscles.
#2) Towel Rows
Still utilizing your doorway, you can use a towel to lean back even further to increase the challenge here:
Coach Jim walks you through setting up your towel row in this video, “No chin-up bar?? No problem!“
Next, try doing an inverted row, but set the bar high so it’s easier to perform:
#4) Inverted Row (Low)
Once your inverted rows become easy, lower the bar to increase the challenge:
#5) Elevated Inverted Row
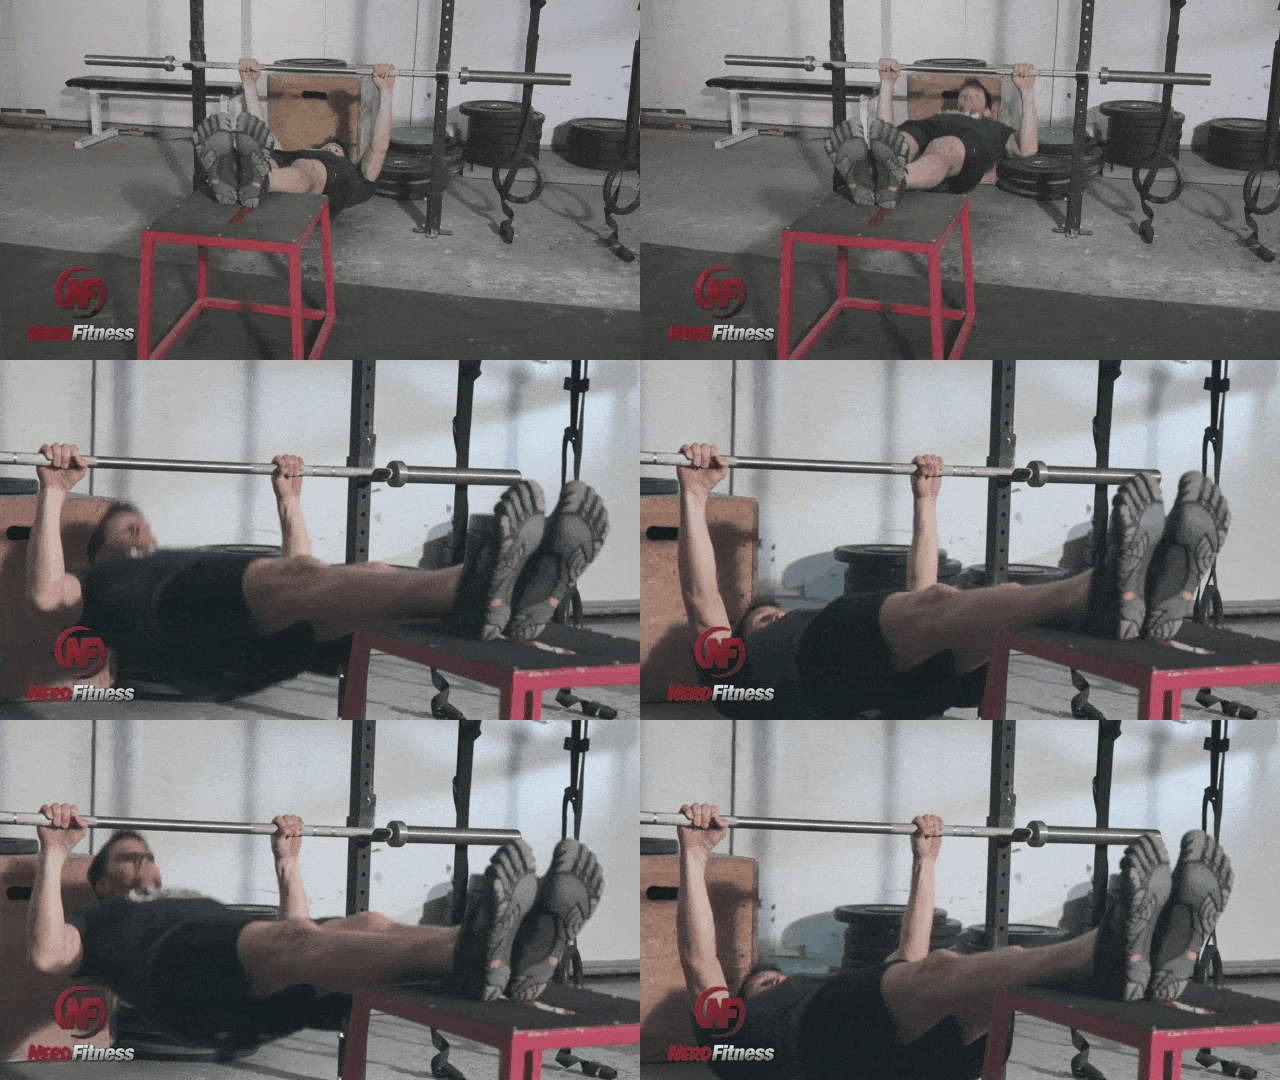
If you place your feet in the air, you’ll make this exercise even tougher:
#6) Inverted Row (Weighted)
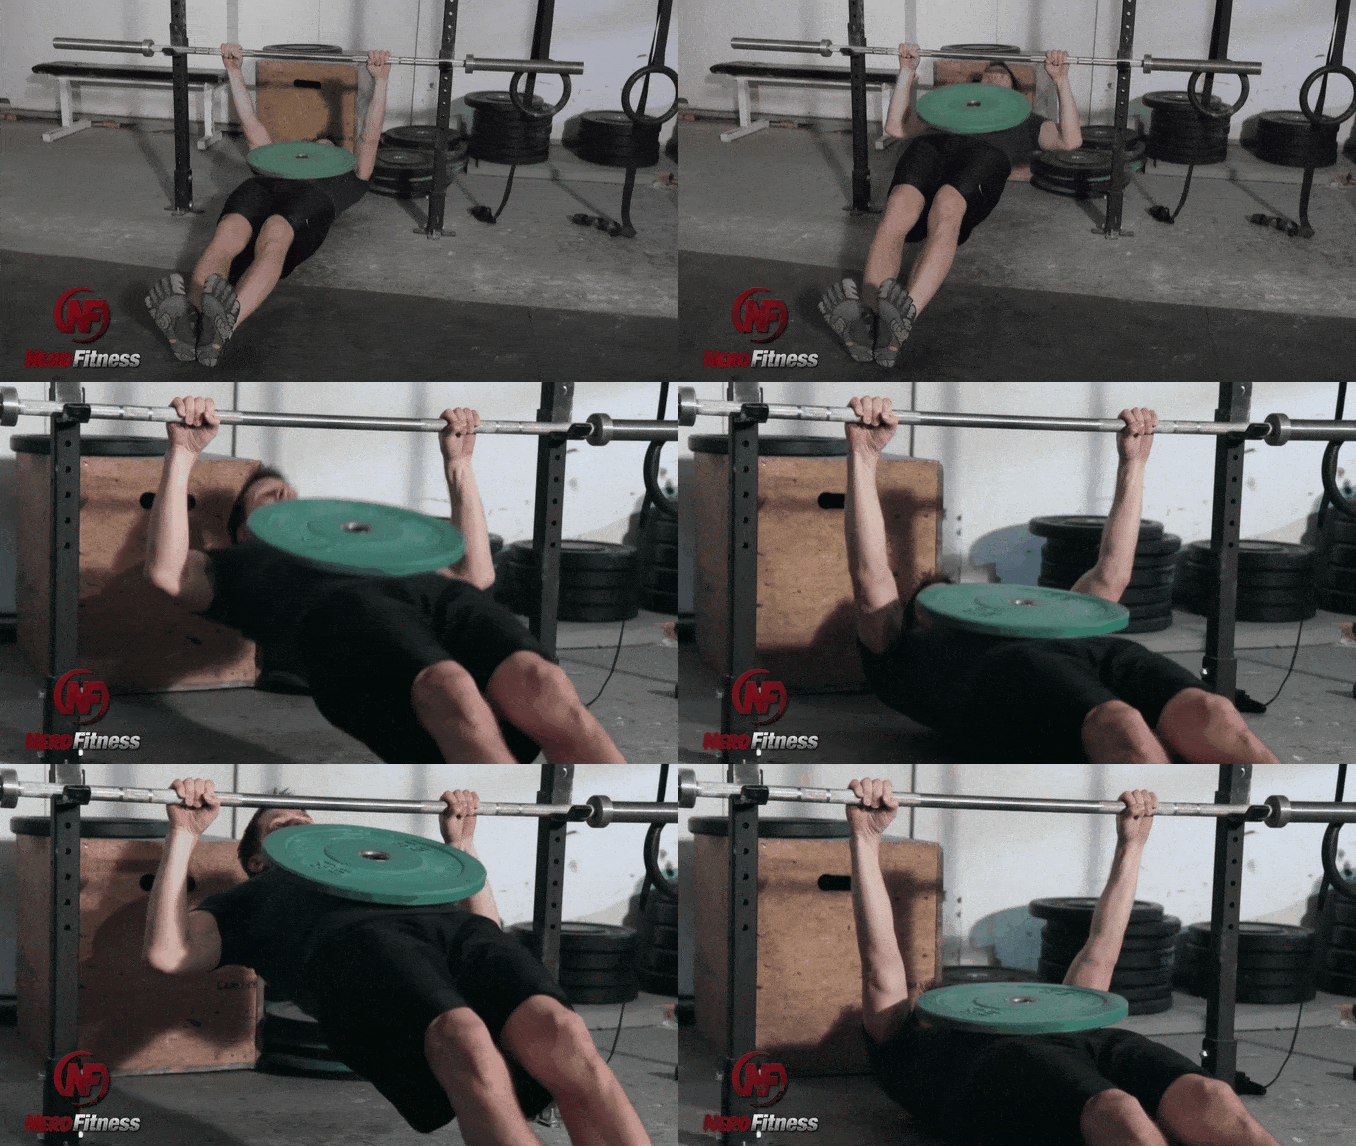
If you really want to up the difficulty of your inverted rows, try doing it with a little bit of weight attached to you:
When Should I Do Inverted Bodyweight Rows?
If you are building your own workout plan, you can mix in bodyweight rows wherever you normally do your pull exercises (pull-ups, pull-downs, rows, etc.).
Both days work my full body, I can do a full routine in less than 40 minutes, and I’m building strength.
If you can’t do dips on Day 1, you can do push-ups.
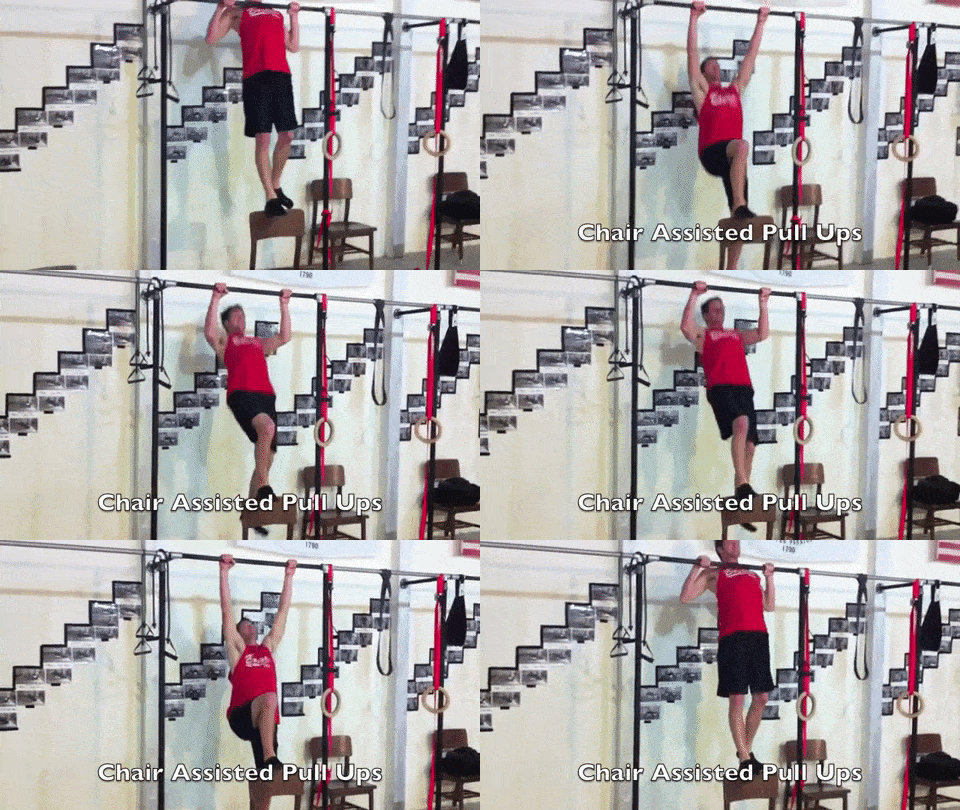
If you can’t do pull-ups on day 2, you can substitute assisted pull-ups.
On the rows, aim for 3 sets of 10. We cover this in our “sets and reps” article, but you can never go wrong with 3 sets of 10!
If you can’t do that, do 3 sets to however many reps you can do, and build your way up to 3 sets of 10.
Once you can do that, put your feet up on a chair, throw some weights in a backpack, put it on reverse (so the bag is hanging in front of you), and then do the rows.
Are you doing your moves correctly? Should you be lifting more weight or less? What do you eat to reach your goals?
We created the Nerd Fitness Coaching program to tackle these questions directly. Your own coach will get to know you, build a program based on your experience and goals, and check your form on each movement (via video):
How to Do Inverted Bodyweight Rows at Home
Just because you don’t have access to a gym doesn’t mean you can’t work out your back, you just need to get VERY creative.
Here’s how you can do Inverted Bodyweight Rows at Home:
PATH ONE: Use your kitchen table. Or your desk. Be very careful with this one.
Lie underneath your table so your head and shoulder are sticking out above it.
Grab the table edge with an overhand grip, and pull yourself up (just like it’s explained above).
Warning, don’t pull the table over with you, and make sure you don’t break the thing!
PATH TWO: Get a really thick wooden dowel or pipe, something strong enough to support your weight. Lie it across two of your kitchen chairs, and then lie down underneath it.
Make sure it’s sturdy, and the bar isn’t going to break/move on ya, and pull yourself up.
Don’t forget, you want to stay in balance.
If you don’t have a pull-up bar and gymnastic rings, find a way to do some bodyweight rows whether it’s between two chairs or under a table.
Any more questions about the inverted bodyweight row?
Leave em below!
-Steve
PS: Our new app Nerd Fitness Journey will walk you through doing simple rows, all the way up to a full pull-up! Instead of worrying about what to do next, simply follow the workouts built into the app!
PPS: Be sure to check out the rest of the Strength Training 101 series:
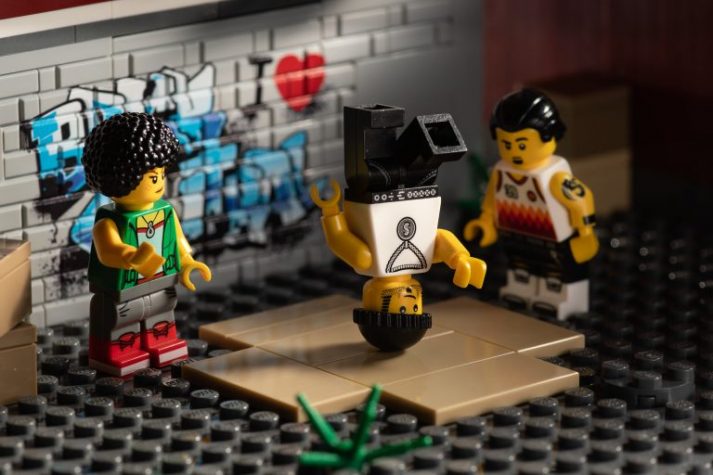
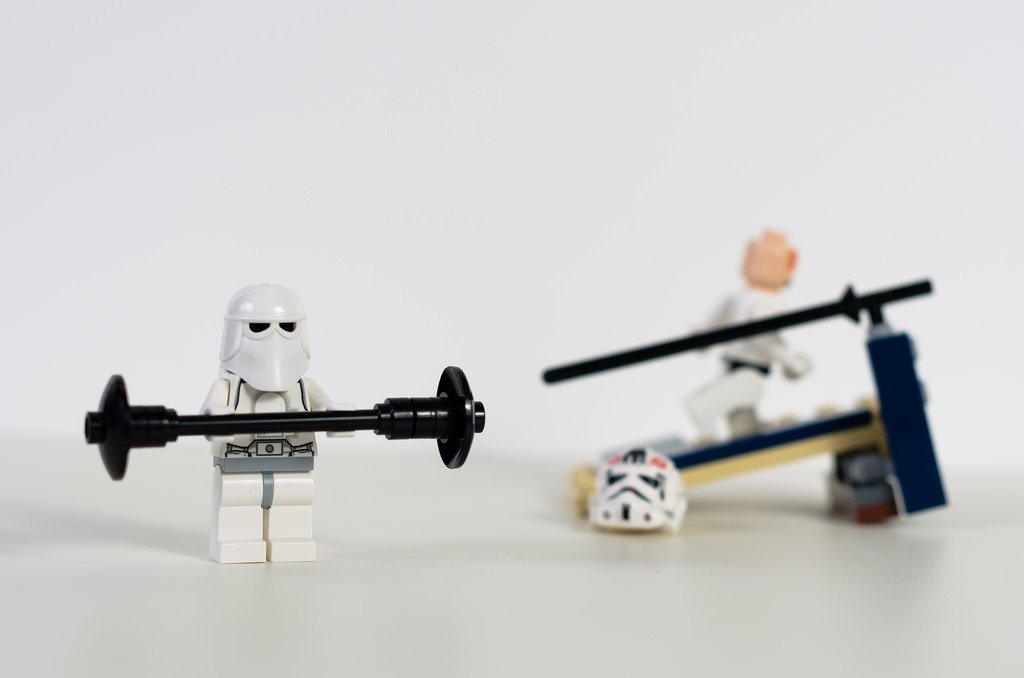
Want to get strong like these LEGO lifters but don’t how to start?
In this Beginner’s Guide to Strength Training (part of our Strength 101 series), you’ll have both the confidence to start getting strong with resistance training AND a plan to follow.
These are the exact strategies we use with our Online Coaching Clients to help them start strength training, and I’m excited to cover everything you need.
By the way, we’ve combined this article along with the rest of our strength articles into a “Strength Training 101: Everything You Need to Know” guide.
Grab it free when you join the Rebellion by putting your email in the box below.
Download our comprehensive guideSTRENGTH TRAINING 101!
Everything you need to know about getting strong.
Workout routines for bodyweight AND weight training.
How to find the right gym and train properly in one.
How Do I Start Strength Training?
Welcome to the first day of the rest of your life.
You’ll look back years from now and thank “Past You” for starting strength training today.
And I promise, you WILL start strength training today.
After all, strength training or resistance training doesn’t need to be scary or overcomplicated!
Strength training really comes down to two things:
#1) Movement of any weight against “resistance”(including your body weight) – Doing ANY exercise that pushes your muscles outside of their comfort zone, forcing them to rebuild stronger to prepare for the next challenge.
#2) Progressive overload: doing slightly more than last time (lift heavier weight or do 1 more rep) consistently. Your muscles will constantly have to adapt and rebuild themselves. These microscopic tears (that don’t hurt) force your muscles to go through hypertrophy, meaning they grow bigger and stronger so they can meet the demands of the exercise.[1]
Coach Jim explains the ins and outs of progressive overload in this video:
That’s all there is to it:do some resistance training and attempt to make it more and more challenging, and you’ll grow stronger.[2]
This means if you drop down and do ONE knee push-up right now, technically you’ve done a strength training workout.
It also means if you then do TWO knee push-ups tomorrow, then you are officially following a strength training routine.
In other words…
Now, there are many different “strength training” and “resistance training” paths.
Like a “skill tree” in a video game (with branching paths and progressions), you can progress up one path, and mix and match movements from others depending on the situation.
These paths depend on your goals and what equipment you have available to you.
What Are Some Examples of Strength Training?
Let’s chat about a few different types of strength training.
#1) BODYWEIGHT TRAINING
Bodyweight training is simply doing an exercise in which your own body is the “weight” you are “lifting.”
Duh.
This is the BEST place for anybody – regardless of weight or age – to start their strength training journey.
Why is this the best place to start? Two big reasons:
A) You always have your body with you (unless you are a ghost, in which case, this is awkward). This means you can work out ANYWHERE with bodyweight training:
B) Using your body for resistance training is the most “human” thing ever! By learning to push and pull and hang and squat and lunge, you are doing what your body is literally designed to do.
By getting strong with bodyweight movements, you’re making yourself antifragile and less injury-prone.
Now, it’s SCIENCE TIME!
While learning the movements with bodyweight exercises, you are allowing for proper communication to develop between your neuromuscular systems.
More efficient communication between your neuromuscular systems will result in something known as “proper motor unit recruitment.”
You may be asking yourself: what is a motor unit?
That’s okay because I was asking myself this same question.
A motor unit is a single motor neuron and the muscle fibers it innervates.
You can think of two different types of motor units:[3]
We all have small motor units, meaning that a single motor neuron innervates relatively few muscle fibers, and these smaller motor units are good for precise and detailed movements (e.g., moving your fingers).
We all also have large motor units, meaning that a single motor neuron innervates hundreds of muscle fibers, and these larger motor units are good for generating a lot of force (e.g., getting larger muscle groups like the quads to generate a lot of force to help in sprinting).
When you start strength training, you really are helping your muscles communicate bettertogether.[4] This is why we recommend starting with bodyweight exercises, to help start this process.
However, bodyweight training isn’t as easy to ‘scale’ the difficulty as some of the other strength training methods (“put more weight on barbell”), but you can get REALLY strong with just bodyweight training.
For example, you can start with knee push-ups, then go to regular push-ups, then elevated push-ups, then even up to things like handstands and handstand push-ups.
You just have to know HOW and WHEN to scale up (we can help there too).
#2) DUMBBELL TRAINING
Dumbbells are a great first step into the world of weight training and strength training:
Most gyms will have dumbbells, even if it’s a basic gym in your apartment complex.
A set of dumbbells doesn’t take up a lot of room, which means you can have a pair at home without a large footprint.
Dumbbells make it easy to add difficulty to a bodyweight movement: holding dumbbells while doing lunges, for example.
Dumbbell exercises can be less intimidating than barbell training for some, and are a step towards barbell training.
Dumbbells have an added stabilization challenge,[4] and will point out muscle imbalances pretty easily (“oh my right arm is stronger than my left arm.”).
Dumbbells allow for single-arm and single-leg exercises to be performed. This can allow you to strengthen any muscle imbalances and can come in handy especially after an injury.
You can scale easily. Once the 10-pound weights become too easy, pick up the 15-pound ones!
#3) KETTLEBELL TRAINING
A kettlebell is essentially a cannonball with a handle on it. They come in any weight imaginable, don’t take up a lot of room, and can be used in dozens of ways for a great compact workout.
Our 20-minute kettlebell workout has 8 simple exercises you can do with just one weight.
Although there are “adjustable kettlebells,” you’ll most likely be working with a single kettlebell, and then adjusting your movements for “progressive overload” (making the workout slightly more difficult each time).
If you are a member of a gym, they’ll probably have multiple kettlebells that you can use to level up.
#4) BARBELL TRAINING
Regardless of sex or gender age, if your goal is to get strong quickly, use 20 seconds of courage and get comfortable training with a barbell (I’ll help you, I promise):
“Progressive overload” is easy – you simply add weights to either side of the bar, allowing you to progressively lift more and more weight each week.
It’s much easier to go heavy safely – especially for lower body movements like the squat and the deadlift.
The biggest downside to barbell training is that in order to train at home, you need to have purchased a squat rack, a barbell, a bench, and enough weights for your house or garage (which can be an expensive investment, especially when starting out!).
Not sure which path to pick? You’re not alone – this stuff can be overwhelming. Check out our 1-on-1 Coaching Program. We get to know you and your goals, will check your form via video, and make adjustments based on your progress!
Which Strength Training Program is Right for Me?
So, what’s the best workout program to start as a beginner?
Realistically, it’s the one that you will ACTUALLY do.
Barbell training might be optimal in terms of building pure strength quickly, but if you don’t see yourself getting to the gym regularly – or you’re too self-conscious to enter the free weight section (for now) – no problem!
Conversely, bodyweight training might seem convenient and easy to start now, but if you can’t motivate yourself to work out at home, you might be better off joining a gym.[6]
So let’s get you a workout program!
As we cover in our “How to Find the Perfect Workout Plan (for you)”: MOST beginners will be best served by following a “full-body” or “total body” routine, 2 to 3 times per week, with a day of rest in between each workout.[7]
This full-body workout will have 4-5 big compound movements.
A compound movement is an exercise that recruits LOTS of muscles simultaneously and forces your body to work in unison. These compound exercises are considered multi-joint exercises meaning that they involve more than a single muscle group.[8]
An example would be the barbell squat, which recruits every muscle in your core, butt, and legs to work together to lift the weight.
This is WAY more efficient – and effective at building pure strength – than doing 5 different isolated leg exercises.[9]
Why do 5 exercises when 1 exercise will get you better results in 20% of the time?
To answer your next question, let me tell you about how many sets and reps you should do as a beginner!
Reps in the 1-5 range build super dense muscle and strength.
Reps in the 6-12 range build equal amounts of muscular power, strength, and size.
Reps in the 12+ range primarily build muscular endurance and size and also cardiovascular health.[10]
If you want more, Coach Jim breaks down different set and rep ranges in this video:
Many beginner strength programs will encourage you to keep things simple, doing just 5 sets of 5 reps for each exercise.
Personally, I encourage people to aim for a weight that they can lift for 8-10 reps. This gives you a chance to really work on your form and lift safely!
The max lifts will come later, my friend. You gotta learn to walk before you can run!
If your main goal is to get stronger and/or put on muscle, following a more traditional, pure-strength-style gym workout is going to get you there faster.
TRUTH BOMB: ANY strength training workout will help you reach nearly any goal provided you do two things:
Increase the difficulty of your workouts. This is that “progressive overload” stuff we were talking about earlier. Doing 1 more bodyweight squat, lifting 5 more pounds, or completing your circuit 10 seconds faster than the last workout. By forcing your body to constantly adapt, your muscles will never get complacent and have to keep burning extra calories and rebuilding themselves stronger.
Depending on your current situation, and how quickly you’re looking to cut through the “trial and error” and get expert guidance, I might have an interesting solution for you.
We have a pretty killer 1-on-1 Online Coaching Program here at Nerd Fitness. You’ll work with a coach that will build a workout program for your body type and goals, check your form to make sure you’re doing them safely, and even help plan out your nutrition too.
The 5 Best Beginner Strength Training Programs
“Alright Staci, are there any ‘out of the box’ beginner workout programs I can start following now?”
Yup! Let me share with you some of our suggestions:
Here are 5 resistance training workouts you can follow TODAY. Pick the level that you feel most comfortable with, and then level up when you feel ready:
#1) BEGINNER BODYWEIGHT WORKOUT:
Our Beginner Bodyweight Workout has a variety of rep ranges to promote endurance, strength, and cardiovascular health.
Complete one set of each exercise and then move directly to the next exercise:
Otherwise, you can move on to weight training when you feel comfortable!
#2A) BEGINNER NERD FITNESS DUMBBELL WORKOUT
If you are just getting started with dumbbells and you’re looking for a beginner workout program to follow, this is our Level 3 Gym Workout, “Dumbbell Division”:
10 goblet squats
10 push-ups
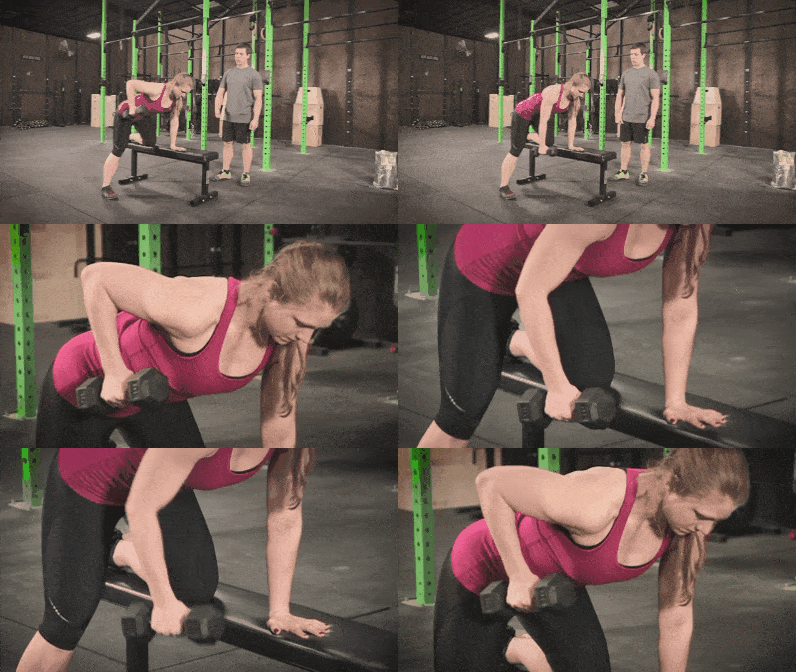
10 dumbbell rows per side
I knew you’d ask, so here is a Goblet Squat video explanation (from Nerd Fitness Prime):
So, probably not in a phone booth or a closet or a bathroom stall. But other than that, pretty much anywhere else.
Complete 3 Kettlebell Workout Circuits:
8 Halos (each side)
10 Goblet Squats
8 Overhead Presses (each side)
15 Kettlebell Swings
8 Bent Over Rows (each side)
6 Front Rack Reverse Lunge (per side)
#3) BARBELL TRAINING: 2-DAY WORKOUT SPLIT
As we cover in our “How to Train in a Gym” guide (where we take you from “lost sheep” to “barbell badass”), this routine is a much more focused weight training, strength-building workout that gets your feet wet with barbell training. Click on ANY exercise to learn how to do it properly.
WHAT ARE SOME OTHER POPULAR STRENGTH TRAINING PROGRAMS?
#1) “Starting Strength” is considered the gold standard beginner barbell weight training program by many. We highly recommend you pick up the actual book if you are serious about barbell training – it’s one of the most important training books you can ever read.
#2) Strong Lifts 5X5:A solid workout program that starts you out very slow, with just the barbell, and helps you master form before you get too heavy. It also keeps things VERY easy with “do 5×5.” Strong Lifts has been around for a long time and is a solid program.
#3) Jim Wendler’s 5/3/1: This program allows you a little more freedom to do exercises that you enjoy, or work on personal weaknesses, because you choose some of the assistance work.
Note: You can modify any of the barbell training programs to be done with dumbbells, if that’s what you have at home!
Lastly, you can always write your own workout plan! I wrote my own workouts for a decade and it taught me a LOT about training and health.
We do have our own 1-on-1 Online Coaching Program where you’ll work with a coach who will build a strength training workout program for your body type and goals, check your form on each exercise via video, and even help you plan out your nutrition too.
The simple-to-learn but tough-to-implement answer: lift enough so that you can get through the set, but not too much that you have NO fuel left in the tank at the end.
And then, try to lift sliiiightly more than last time.
Here are two common questions on strength training:
#1) How much weight should I start with?
If you are using dumbbells or a kettlebell, always err on the side of “too light” versus “too heavy.” You want to learn the movement correctly and build correct form.
If you are training with a barbell, ALWAYS start with JUST the bar, no matter the exercise (By the way, a standard barbell weighs 45 pounds).
#2) How fast should I add weight to the bar?
Here’s what we teach all of our coaching clients: add the minimum amount of weight each week you can, even if you THINK you can lift more. It’s better to finish a workout full of momentum and say “I can do more!” than defeated and saying “That was too much, crapola.”
Think of it this way, even if you are adding just 5 pounds per week to the bar, within a year you would be lifting 300+ pounds!
The National Strength and Conditioning Association (NSCA) recommends a similar approach:[14]
For less trained people (i.e., beginners), it is recommended that for upper body exercises you increase the load by 2 – 5 pounds and by 5 – 10 pounds for lower body exercises.
For more trained people (i.e., advanced), it is recommended that for upper body exercises you increase the load by 5 – 10 pounds or more and by 10 – 15 pounds or more for lower body exercises.
So go SLOW. Even slower than the NSCA recommends if needed.
Team NF’s Steve even bought little half-pound weights and increased many of his lifts by just 1 pound per week. It’s a big part of how he transformed (jokingly) from Steve Rogers to Captain America.
And if you are looking for this content in easily digestible form, make sure you download our free Strength 101 Guide when you join the Rebellion below:
Download our comprehensive guideSTRENGTH TRAINING 101!
Everything you need to know about getting strong.
Workout routines for bodyweight AND weight training.
How to find the right gym and train properly in one.
The 9 Best Strength Training Exercises to Learn
If you’re new to all this “strength training” stuff, hopping into a program and going from zero to sixty might be a recipe for failure.
Instead, be patient, and take the time to learn these movements first.
I’m going to share with you the 9 best strength training exercises that every beginner should master (scroll down for full video and explanations!):
1. Push-up: uses every push muscle in your body (chest, shoulders, triceps)
2. Bodyweight squat: uses every muscle in the lower body (quads, hamstrings, glutes, core)
3. Bodyweight row: works every “pull” muscle and helps prepare you for a pull-up!
4. Pull-up or chin-up: the best “pull” exercise in history! Everybody should have a goal to get their first pull-up.
5. Bodyweight dip: advanced “push” movement that targets your push muscles (chest, shoulders, triceps) in a different way than push-ups.
6. Barbell squat: the best bang for your buck on muscle building. recruits nearly every push muscle in your whole body, and a great core workout.
7. Barbell deadlift: the favorite exercise of every coach at Nerd Fitness. Uses every “pull,” leg, and core muscle in your body.
8. Barbell benchpress: as basic and powerful as they come. Uses every “push” movement in your upper body and can get you strong as heck!
9. Barbell press: press the bar above your head! Targets shoulders and triceps more than the chest.
All of the exercises listed above are considered functional (closed-chain) exercises. That means they relate to our everyday movements and can be used to predict our success in sports, recreational and occupational activities, and activities of daily living.[15]
When attempting all of these above-listed exercises, aim to master the movement and perform the exercise through its entire range of motion (ROM).
Why?
Because it will decrease your risk for injury, activate all of the appropriate muscle groups, and result in greater muscle hypertrophy.[16]
Let’s go over these now.
Click on any of these exercises to get a FULL explanation of the movement, step-by-step:
1) The Push-Up: The best exercise you could ever do for yourself when it comes to using your bodyweight for push muscles (your chest, shoulders, and triceps):
2) The Bodyweight Squat: This exercise serves a dual purpose: it is the foundation for building strength AND helps build proper mobility. If you are going to ever do barbell squats, you need to work on hitting proper depth with a bodyweight squat first!
3) The Inverted Bodyweight Row: Until you can get your first pull-up or chin-up, these exercises are GREAT to start building your pull-muscle strength: your back, biceps, and forearms.
4) The Pull-Up and Chin-Up: Once you can support your bodyweight above the bar, the world becomes your playground. No strength training routine should be without pull-up or chin-up work! (Click here if you can’t do a pull-up or chin-up yet?)
5) The Bodyweight Dip: As you start to get stronger with push-ups and need to find a way to increase the challenge, consider doing dips – warning: these are very advanced, but incredible strength-building exercises.
And now we’re into the best weight training exercises:
6) The Barbell Squat: Probably the best exercise when it comes to building strength and muscle throughout your whole body. It also burns crazy calories and makes life better. This is a MUST:
7) The Barbell Deadlift: Maybe the best exercise of all time. Actually no, it IS the best exercise of all time. It’s certainly the most primal: “pick the weight up off the ground. Done.”
This is a very technical lift, so make sure you read our article on how to do it with proper form:
8) The Barbell Press: Press a barbell above your head. This recruits all of the muscles in your chest, shoulders, and arms in order for you to lift the weight over your head.
As a bonus, you need to really flex and brace your core, which gets those muscles working too.
9) The Barbell Bench Press. Lie on a bench, and lower a barbell until it almost touches your chest. Pause, and press it back up towards the sky. Repeat! And get strong.
NOTE: All exercises were explained according to the guidelines that have been established by the NSCA.[17]
Your mission, should you choose to accept it: commit to trying ONE of these movements in the next week. Use 20 seconds of courage, recruit a friend who has lifted or trained before, and try your best.
And if you want somebody to help you put these into a workout program, teach you HOW to do these movements properly, and have the confidence to know you’re training correctly for your goals…
How to Know You’re Doing a Strength Training Movement Properly (Form Checks)
Always start out with just your body’s weight and make sure your movement is correct!
If it’s a barbell movement, use a broomstick (or PVC Pipe).
If it’s a dumbbell movement, use two sections of PVC or something else that is light and small to simulate a dumbbell.
When it comes to movements like squats, deadlifts, pull-ups, bench presses, your form is crucial. Develop good habits with lightweight and you will save yourself months of frustration later and will protect you from injury.[18]
If you’re struggling with certain elements of a movement, don’t get frustrated! Remember, proper communication between your neuromuscular systems needs to develop.
Do regular video form checks! Record yourself and watch the video.
Alternatively, an expert reviewing your specific movement can be invaluable.
If you’re looking for someone who can do video form checks, provide feedback, and adjust your workouts based on your progress, you can check out our 1-on-1 Online Personal Training!
I’ve had an online coach for 4 years and it’s changed my life.
You could also get expert guidance in person: Look around at your local strength and conditioning gyms and see if you could hire a coach (here’s how to find a good personal trainer) for one or two sessions just to go over the basic movements.
If you can’t do either of those two options, no big deal! Videotape yourself and compare it to the videos here in the articles. You can also post your video to the form check section of the Nerd Fitness Forums.
When I started, I really liked practicing all of the movements at home because I could watch a video online at the same time as I was watching myself do it in a mirror. Studies have found this can actually help![20]
Not only that, but you can find study after study after study that shows you the benefits of strength training for weight management when combined with “calorie restriction.”[22]
As we cover in our “Why Can’t I Lose Weight?” article, here’s why eating a caloric deficit and strength training is SO magical when combined:
When you strength train – by picking up something heavy – your muscles are “broken down” during the exercise itself, and then they rebuild themselves stronger over the next 24-48 hours.
Guess what happens during those 24-48 hours?
Your body will divert as many calories consumed as necessary to “Rebuild Muscle!”[23]
It also diverts additional calories to “Burn as Fuel” to handle this increased “muscle rebuilding” activity.
This means two amazing things:
Your metabolism is revved up for this time period, burning more calories than normal.
Rebuilding muscle is a calorie-taxing activity!
Not only that, but when you eat a caloric deficit, your body doesn’t have enough calories to fuel all the day’s activities. In these instances, your body will pull from your stored fat to make sure all the work still gets done.
This is the trifecta of physical transformation victory:
You get stronger and keep the muscle you have.
You burn through the fat you’re trying to get rid of.
You’re decreasing your body fat percent and keeping your muscle = look good naked.
In other words, strength training + eating right is the BEST path for weight loss out there! And yes, in certain situations, you can actually lose weight AND build muscle at the same time.
Coach Matt explains how to gain muscle WHILE losing fat in this video:
So how do you put this into practice? Pick one of the strength workouts in this article. Calculate your daily caloric needs. Learn about healthy eating. And start.
These are the types of things we work on with our 1-on-1 Coaching Clients: helping them lift weights confidently and eat correctly for their goals! Let us help you:
“Just Tell Me What Strength Training Program to Follow!”
Okay! Unless you are collecting underpants, you should now have a workout program you want to try out!
“Staci, this is a lot, can you just TELL me what to do?”
Okay fine.
Here are the steps again for you:
STEP #1: PICK YOUR WORKOUT PATH:
A) If YOU ARE TRAINING AT HOME. Pick one of these 3 based on what equipment you have:
STEP #2: TRY A NEW EXERCISE: In addition to following a workout program, I’m gonna push outside of your comfort zone – that’s where real growth happens.
STEP #3) HIRE A YODA: If you are somebody who just wants to be told exactly what to, how to train for your goals, and are good at following directions, consider hiring a coach.
I’ve been working with an online coach since 2014 and it has changed my life – and I do this stuff for a living!
STEP #4) JOIN THE REBELLION! If you like how we do things around here at Nerd Fitness, we’d love to have you in our community of misfits, mutants, and rebels!
Sign up in the box below and I’ll send you our free Strength 101 guide:
Download our comprehensive guideSTRENGTH TRAINING 101!
Everything you need to know about getting strong.
Workout routines for bodyweight AND weight training.
How to find the right gym and train properly in one.
No matter what you do today:
Don’t be afraid of doing anything wrong – truth be told, the majority of the people in the gym don’t have any idea what they are doing, and are just as nervous as you are!
Muster up your 20 seconds of courage if you need to, and let me know in the comments how it goes!
What questions do you have about getting started?
So, what’s the biggest thing holding you back from starting strength training?
-Staci
PS – Check out the rest of the articles in our STRENGTH TRAINING 101 series:
Powers SK, Howley ET. (2011). Exercise physiology: Theory and application to fitness and performance. New York: McGraw-Hill Humanities/Social Sciences/Languages.
in order to achieve your training goals or to see improvements, your training must gradually and constantly increase. (Haff G, Triplett NT. (2016). Essentials of strength training and conditioning. Fourth edition. Champaign, IL: Human Kinetics.)
When you first start strength training, your motor units don’t fire as quickly and smaller motor units that don’t generate a lot of force are recruited. This results in poor technique, you not being able to lift a lot of weight, and an increased risk for injury. However, as you continue working out and become more trained, your motor units fire more rapidly and your brain recruits larger motor units that results in improved technique, greater force generation allowing you to lift heavier weights, and a decreased risk for injury.
This study found that when the chest press exercise required higher stability requirements (dumbbells), it resulted in similar pectoralis major and anterior deltoid activation, lower triceps brachii activation, and higher biceps brachii muscle activity. These findings show that different modes of strength training will result in different patterns of muscle activation, with free weight modes (barbell and dumbbells) having more muscle activation than machine (Smith machine)
As you may recall, this will initially allow you to learn the movements and also allow for proper communication to develop between your neuromuscular systems.
Or maybe grab a friend. Research has shown that exercising with a partner has the potential to increase exercise motivation, adherence, intensity, and/or duration.
The American College of Sports Medicine (ACSM) simply recommends that a strength training program should be performed a minimum of two non-consecutive days each week, with 2 to 4 sets of 8 to 12 repetitions for healthy adults or 10 to 15 repetitions for older and frail individuals. Eight to 10 exercises should be performed that target the major muscle groups.
Haff G, Triplett NT. (2016). Essentials of strength training and conditioning. Fourth edition. Champaign, IL: Human Kinetics.
To be fair, both compound (closed-kinetic chain) and isolation (open-kinetic chain) exercises all have their time and place. Isolation exercises are better served to target muscle imbalances and to reverse the effects of muscle atrophy after sustaining an injury or having a surgical procedure.
For reference, the National Strength and Conditioning Association (NSCA) recommends 6-12 reps for 3-6 sets for muscle hypertrophy and more than 12 reps for 2-3 sets for muscular endurance.
Circuit training results in a higher excess post-exercise oxygen consumption (EPOC) resulting in great caloric expenditure when compared to traditional strength training with longer rest intervals in-between sets and exercises.
As we touch on in other articles, the two main drivers of muscle protein synthesis (i.e., muscle hypertrophy) are strength training and ingestion of protein.
We also recommend trying to minimize the rest interval in between each exercise as much as possible. Why? As mentioned earlier in this article, circuit training results in a higher excess post-exercise oxygen consumption (EPOC) resulting in great caloric expenditure (decrease fat mass and increase fat-free mass) when compared to traditional strength training with longer rest intervals in between sets and exercise.
Haff G, Triplett NT. (2016). Essentials of strength training and conditioning. Fourth edition. Champaign, IL: Human Kinetics.
Haff G, Triplett NT. (2016). Essentials of strength training and conditioning. Fourth edition. Champaign, IL: Human Kinetics.
Performing an exercise through its full ROM relates to the length-tension relationship, which states that muscles should be stretched to 100-130% of its resting length. The importance of stretching a muscle to 100-130% of its resting length is to ensure maximal cross-bridge interaction between actin and myosin. When one has maximal cross-bridge interaction that will result in more force being produced by the muscle and eventually greater improvements in muscle hypertrophy. Some examples of stretching muscles to 100-130% of its resting length include when the barbell touches the chest during the bench press exercise or when your thighs are parallel to the floor during the descent phase of the squat. Additionally, it is also recommended to perform the appropriate sequence of exercises to decrease your risk for injury (e.g., large before small muscle group exercises, multiple-joint exercises before single-joint exercises, and higher-intensity before lower-intensity exercises). Performing exercises in this sequence will ensure that the higher-intensity exercises will be performed with minimal muscle fatigue.
Haff G, Triplett NT. (2016). Essentials of strength training and conditioning. Fourth edition. Champaign, IL: Human Kinetics.
Both research investigations and clinical experiences have indicated that strength training is safe for healthy adults and older adults, frail older adults, and individuals with disorders and/or diseases. Cases of injuries associated with strength training have been found to be related to heavy and repetitive workload, unfavorable positioning or incorrect technique, and exercise selection.
Also keep in mind how you are practicing and learning the exercise. You can learn exercises by utilizing the whole method of practice, in which the whole technique is practiced intact. Or you can utilize the part method (AKA the whole-part-whole method). With this method, you practice the exercise in parts, and then recombine the parts back into the whole technique. The whole method is best used for simple movements (e.g., biceps curl), while the part method is best used for more complex lifts (e.g., power clean).
Observing the performance of another who is successful at performing a certain exercise is known as a vicarious experience. It has been found that vicarious experiences can enhance self-efficacy (i.e., belief in your own abilities) when observing successful performances.
More specifically, you want to seek a calorie deficit (hypocaloric diet) and this can best be established by subtracting 250-500 less kcal/day from what you normally consume. Additionally, you want to make sure you are still consuming adequate amounts of protein (1.2-1.6 g/kg bodyweight spread evenly throughout the day) to be protective of lean mass loss. Finally, carbohydrates and fat may be reduced from your normal intake to satisfy the needed caloric deficit at the expense of protein. However, make sure you are still consuming enough carbohydrates to maintain exercise performance and not cause a hypoglycemic response.
Like this study and this study and this one. Another research investigation found that during a 40% calorie deficit diet, consumption of a diet containing 2.4 g/kg/day of protein was more effective than consumption of a diet containing 1.2 g/kg/day of protein in promoting increases in muscle mass and losses of fat mass when combined with a high volume of resistance and anaerobic exercise (exercise 6 times per week [2 sessions of resistance training, 1 session of plyometric training, and 3 sessions of HIIT cycling]).
ATP is needed to power the synthesis of proteins that are used for muscle hypertrophy and a higher amount of oxygen is needed post-exercise to produce ATP. This results in two things: muscle hypertrophy happening and additional caloric expenditure. Additionally, without sufficient oxygen, our bodies have the potential to activate proteins that increase muscle fiber degradation and limit hypertrophy.
Or maybe you just don’t quite have the strength yet to hoist yourself up?
Either way, no problem!
We’ve been teaching people how to do pull-up alternatives in our Online Coaching Program with “no-bar pull-ups.” Today, we’ll show you all these tried and trusted workarounds.
By the way, all of these pull-up alternatives can be done in our sweet new app. Why not learn how to lift yourself up (even without any equipment) while you build your very own superhero?
You can test drive it for free (no credit card needed) right here:
Alright, let’s do this thang.
How to Do Pull-ups Without a Bar (5 Pull-up Alternatives)
Coach Jim walks you through 5 different levels of pull-up alternatives, depending on your experience level and what items you may have lying around the house.
Pull-up Alternative #1: Doorway Rows
Our first alternative is to simply use your doorway for bodyweight rows.
To perform a doorway row:
Stand in front of your doorway and grab both sides.
Place your feet a little closer to the doorway, so you’re leaning back.
Sit back so you put weight on your arms.
Pull yourself forward.
That’s it. The more you lean back, the tougher this will be.
To start, you can also just hang back to start building some “pull” strength.
Pull-up Alternative #2: Towel Doorway Rows
Our next alternative is to do doorway rows, but this time using a towel.
The towel might help you lean back even further, creating a more challenging exercise.
Take a towel, and fold it twice lengthwise. Then take your long, folded-over towel, and tie it around the door on the handle opposite side of you.
Make sure the door opens AWAY from you. You don’t want the door accidentally opening, which could cause an unexpected tumble.
Once you have your towel secured around the doorknob, perform rows by using each side of the towel.
Pull-up Alternative #3: Inverted Rows with Chairs
For this pull-up alternative, you’re gonna need two sturdy chairs and a broomstick (or dowel).
We’ll be combining them together, Voltron style, to form our own row station:
The important thing here is the setup. Give your newly created station a few gentle pushes to check the integrity of the structure. Only when you feel confident should you start performing inverted bodyweight rows.
Pull-up Alternative #4: Towel Pull-ups
Now, we’re gonna start doing some actual pull-ups…with towels.
You can either use a couple of sturdy hand towels or washcloths.
Tie an overhand knot in the corner of both towels, which will be used as your anchor.
Then place these knots over a door and close it. Make sure the knots are secure before you start doing your pull-ups.
Again, you’ll also want to make sure the door opens AWAY from you.
Doing towel pull-ups is going to be a great way to improve your grip strength, although if you find them a little too tough, you can use a stool to support your feet as you lift. This will help as you build strength.
Pull-up Alternative #5: Strap Pull-ups
You may or may not have some Forearm Forklifts hanging around, but if you do, you’ll have the perfect equipment for a pull-up alternative.
Forearm Forklifts are made to help you and a friend lift heavy furniture or equipment, but Coach Jim discovered they’re also pretty useful for doing pull-ups.
They have loops designed to hold your arms, which makes them easier to grip than a towel.
Tie a knot in them just like you would with a hand towel and use it to anchor them against your door.
For more ideas on how to train with stuff you may have around the house, check out How to Build a Home Gym.
The 6 Best Pull-up Alternatives (How to Get Your First Pull-Up)
Bodyweight rows are the PERFECT precursor to pull-ups – they work the same muscles, and have you lifting your own body weight, just at a different angle.
Our goal here will be to work towards a lower and lower angle, increasing the difficulty of the movement.
So at first, we’ll do rows with the bar higher up:
Then we’ll progress to getting the bar lower:
As soon as you’re doing bodyweight rows where your body is at a 45-degree angle or lower, you can progress to the next level.
Level 3 Pull-up Alternative: Assisted Pull-ups
At this point, you are going to start actually doing pull-ups…with a little bit of assistance.
We’ve got a few options for you.
#1) Assisted Pull-ups with Chair
Either one foot or two on the chair, depending on your needs. Your feet are ONLY there for support, use your upper body as much as possible.
#2) Assisted Pull-ups with an Exercise Band
You can get different types of exercise bands with different levels of strength, or a variety pack for easy progression.
Put your foot in the exercise band and pull yourself up.
Here’s a video on How to Tie the Resistance Band for Your Pull-up:
#3) Assisted Pull-ups with a Partner
Have a friend hold your feet behind you and help you complete each rep. Have them use the least amount of help possible to get you through your workouts.
Once you’re comfortable doing a form of assisted pull-ups and can do about 10 repetitions, it’s time to advance to the next level.
This is probably the TOUGHEST level before getting your pull-ups. If you get stuck on “assisted pull-ups” and “assisted chin-ups”, you’re not alone. This is where most people get stuck.
We work hand-in-hand with people like you to get them their first pull-up in our Online Coaching Program. If you don’t know how to fit these movements into your workouts, or you just want somebody to give you the exact workout to follow every day, we got you!
Level 4 Pull-Up Workout: Negative Pull-Ups
Our next level on our path for a pull-up is what we call “negative pull-ups.”
Grab onto the bar with an overhand grip
Jump so your chest is touching
Slowly lower yourself under control until you’re at the bottom of the movement.
As you continue to lower yourself down, you’ll build strength, eventually creating enough muscle so you can pull yourself up.
If you want more specific instructions on any of these levels or movements, check out our guide “Get Your First Pull-up” for more.
What Is the Easiest Type of Pull-Up? (Start With Chin-Ups)
The easiest pull-up variation for you to attempt will likely be the chin-up.
That’s why we have a Chin-up Challenge in our app, because we feel Rebels will have an easier time lifting themselves up with this variation, compared to a traditional pull-up.
For reference:
A CHIN-UP is when your hands are facing toward you:
A PULL-UP is when your hands are facing away from you:
Chin-ups are generally easier to perform than pull-ups because the wider grip of a pull-up isolates your lats, which means you get less assistance from your biceps.
Start with chin-ups. Once you get comfortable doing them, you can then work on more advanced variations. For ideas here, check out our guide How to Do a Pull-up.
When Should I Do My Pull-Up Alternatives? (Next Steps)
Generally, you want a 48 to 72-hour resting period before returning to train the same muscle group.
So take at least a day off before working on your “pull” muscles again.
This allows the area to heal properly so you can grow stronger.
When we designed a training routine for Nerd Fitness Prime members to get their first chin-up, we aimed for three workouts a week.
You could also do Tuesday, Thursday, and Saturday.
Even just working out Monday and Thursday – twice a week pull-up training – would allow you to see some great progress.
Feel free to do whatever works best for you.
If you want any more help with designing your workout, we got you.
Check out the option that best fits your goals:
Option #1) If you want a professional coach in your pocket, who can do video form checks, provide feedback, and adjust your workouts based on the equipment you have available, check out our 1-on-1 Online Coaching Program!
For example, let’s say you find yourself stuck indoors during a pandemic, and you want somebody to custom-build you a workout program based on the equipment and furniture you have. That’s where an online coach is a game-changer!
Personally, I’ve been working with the same online coach since 2015 and it’s changed my life. You can learn more by clicking on the image below:
Option #2) Exercising at home and need a plan to follow? Check out Nerd Fitness Journey!
Our fun habit-building app helps you exercise more frequently, eat healthier, and level up your life (literally).
Plus, it’ll teach you how to do pull-ups, even if you have zero experience (or any equipment).
Try your free trial right here:
Option #3) Become part of the Rebellion! We need good people like you in our community, the Nerd Fitness Rebellion.
Enlist below and we’ll send you our free Strength Training 101: Everything You Need to Know:
Download our comprehensive guideSTRENGTH TRAINING 101!
Everything you need to know about getting strong.
Workout routines for bodyweight AND weight training.
How to find the right gym and train properly in one.
Alright, now I want to hear from you!
Can you currently do a chin-up or pull-up?
What’s your favorite pull-up alternative?
Am I missing any tips or tricks for pull-ups without a bar?
Let me know in the comments!
-Steve
PS: If you want more pull-up goodness, make sure you check out: