Alright, brace yourself to get flipped-turned upside down.
Are Handstands Good for You? (3 Reasons Why Handstands Rule)
At Nerd Fitness we LOVE handstands like Eleven loves waffles.
Here are 3 reasons why handstands rule:
#1) Like other bodyweight training, there’s no excuse. If you have room to stand up, you have room to practice handstands.
#2) It recruits DOZENS of muscles in your body.
From arm strength to wrist mobility to core strength to shoulder mobility and muscular endurance, handstands do it all.
When you are trying to balance, it makes your body work as one complete unit.
#3) It scares you – yes, that’s a positive. We grow outside our comfort zone and for many people, just the thought of a handstand is enough to make their palms sweaty, knees weak, arms are heavy, vomi…
…nevermind.
The point is that the handstand is just as much of a mental challenge as it is a physical one.
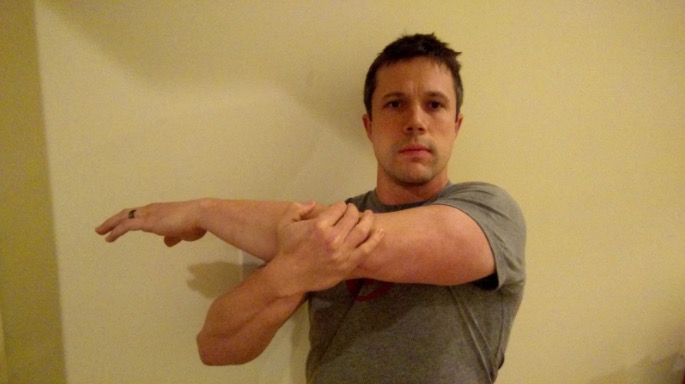
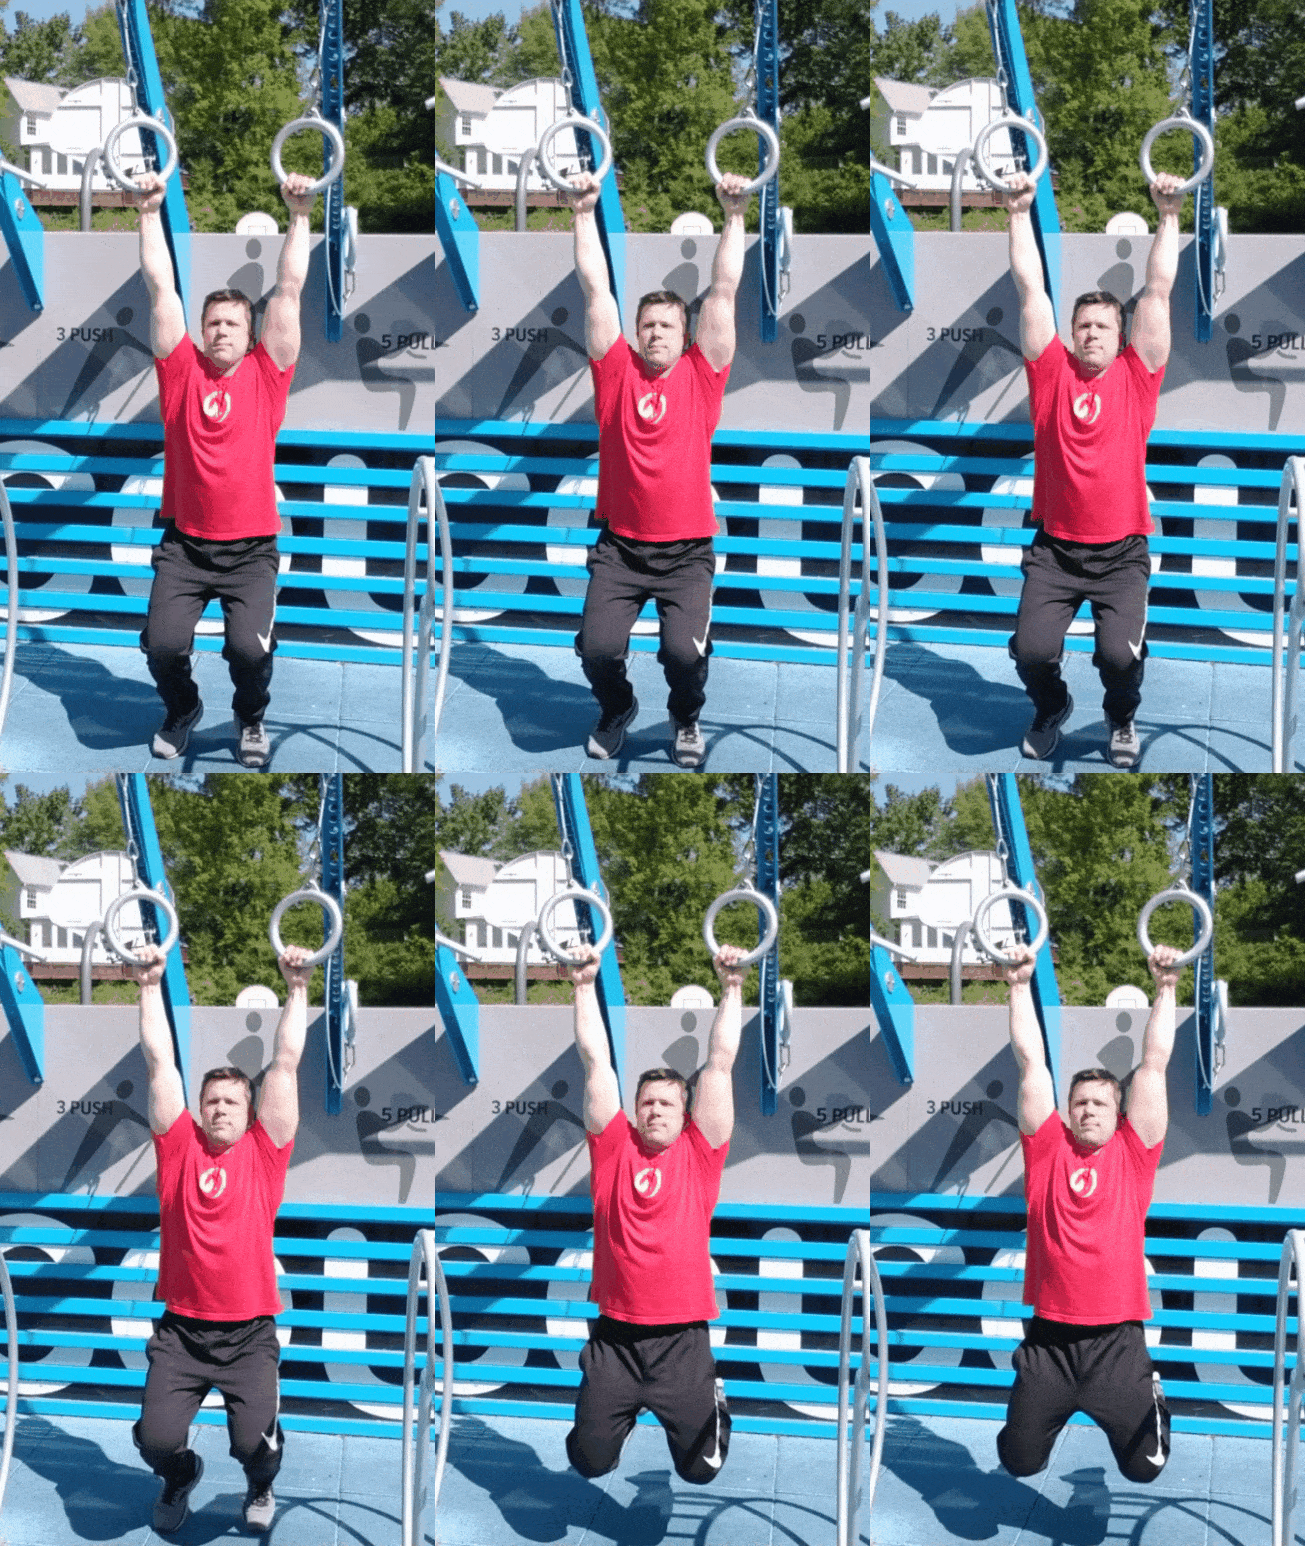
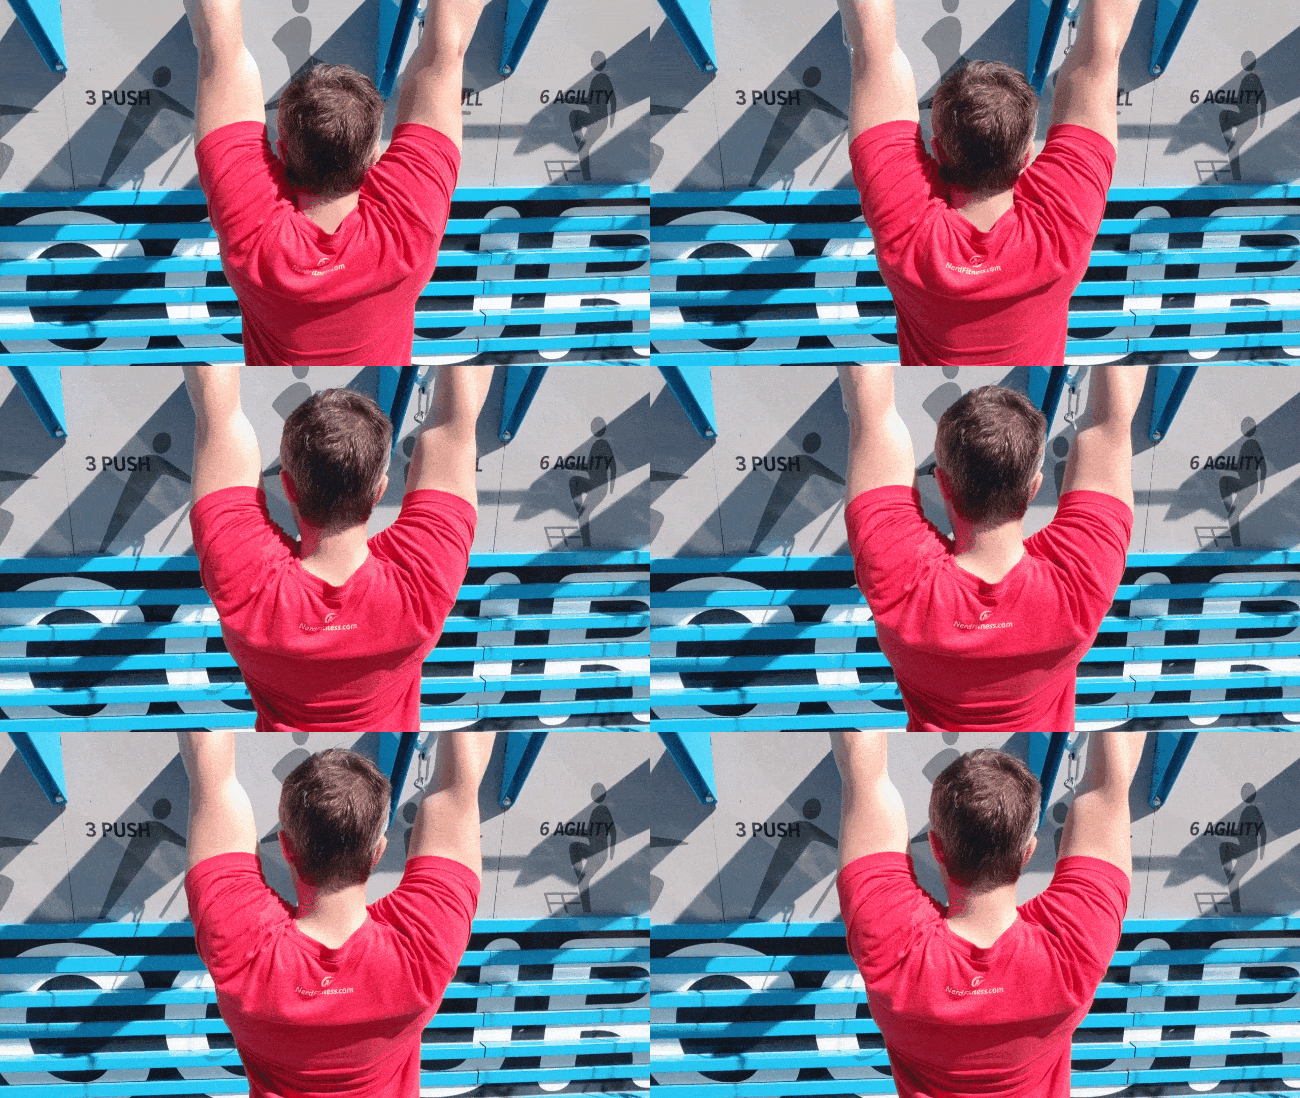
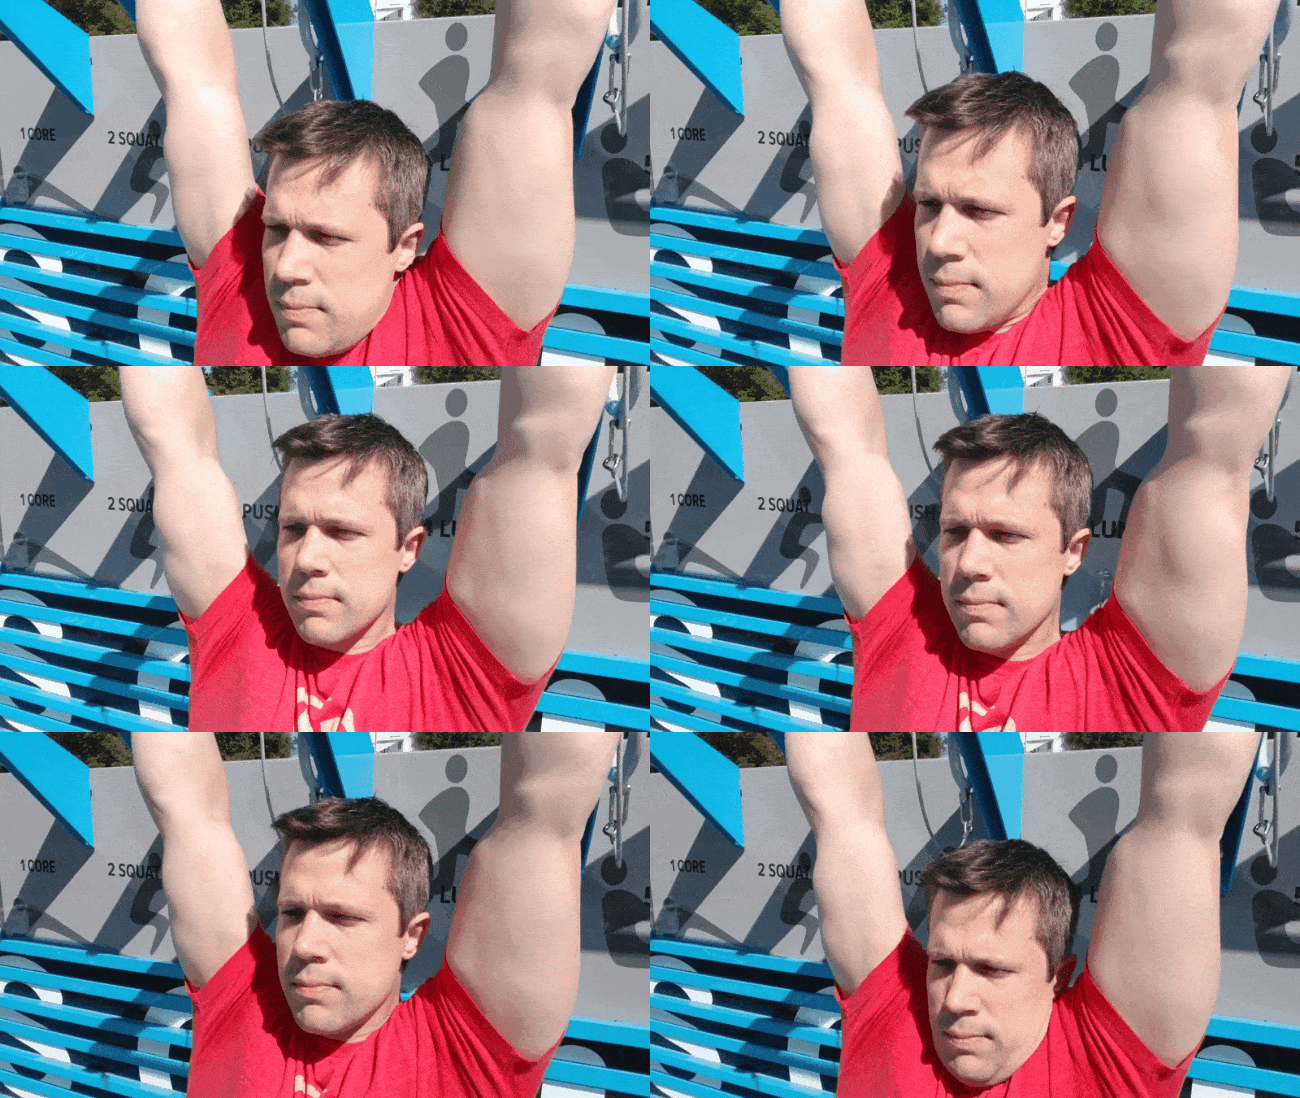
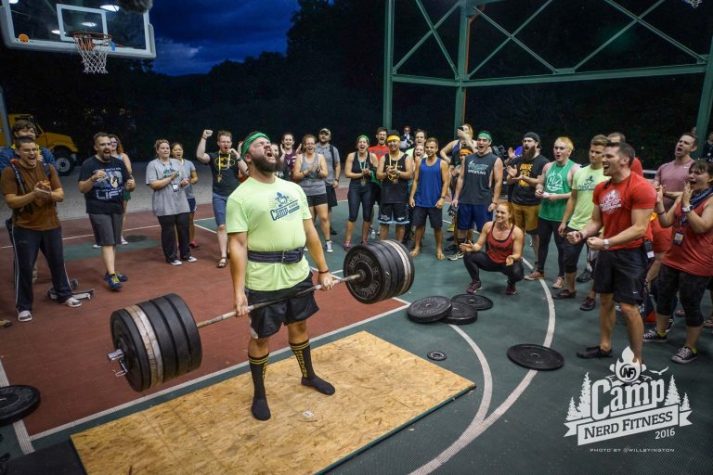
How scared do you think this guy gets on a regular basis?
That’s Coach Jim!
Master of the NF Fitness Universe, and our lead trainer for our Handstands Course and Nerd Fitness Coaching. You’ll be seeing a lot of him in today’s article because Jim can do handstands in his sleep.[1]
The Secret to Performing a Handstand
Sure, we need to build strength to support ourselves upside-down, but even that hurdle is overblown.
A proper handstand actually starts to feel easy.
That’s because once you’re balanced and aligned, it becomes uber-efficient. Just as you don’t exert yourself much if you stand straight with good posture, a good efficient handstand is the same way… it will soon start to feel effortless.
Actually, the biggest hurdle to overcome – especially at the beginning – is mental fear.
The voice/feeling in the back of your head that says “You could get hurt doing this!” SCARY!
And I won’t sugar-coat things, you CAN hurt yourself working on these skills… but it’s no different than if you walked into the gym first day, slapped 315 lbs on the bench press, and gave it a go.
Or went out and tried to run 13 miles without training.
The exercise itself isn’t dangerous, unless you attempt TOO much, too quickly.
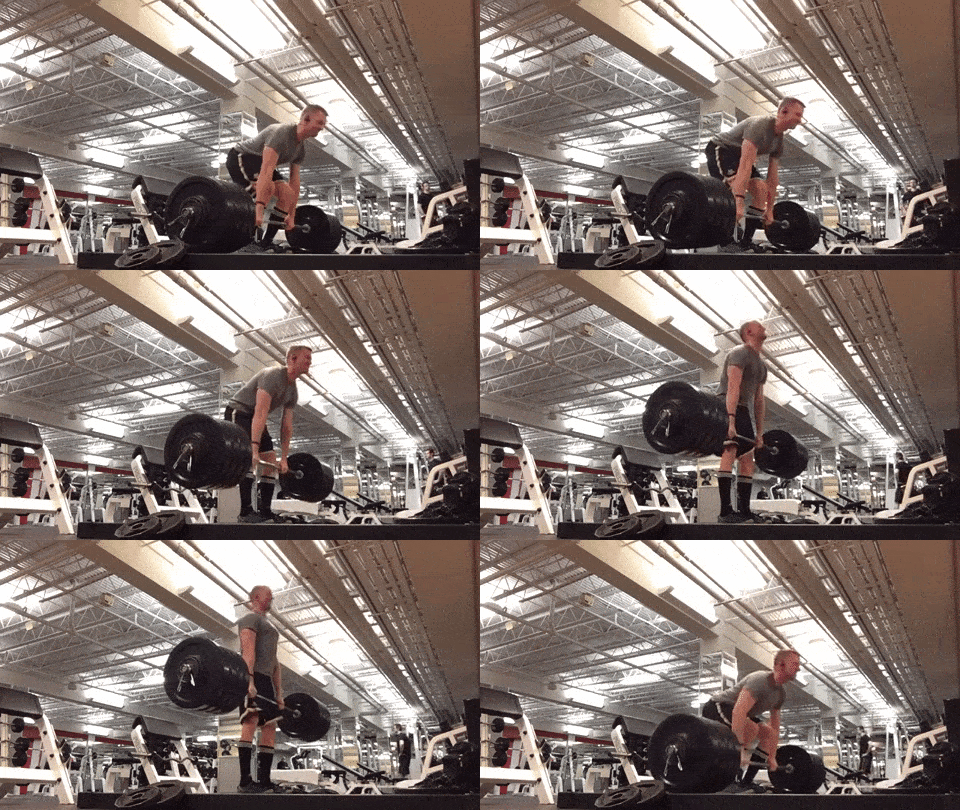
If you wouldn’t load up a bar to deadlift 500 lbs on your first day in the gym, why do so many people just kick and fling themselves up into a handstand, failing repeatedly, hoping one day they’ll “get” it?
So…
There’s a smarter way!
How do we overcome this fear and keep ourselves safe? Just like learning any other fitness skill: slow, easy, successful steps!
These small victories accumulate over time to bring us to our goals safely while having a lot of fun.
Are you ready to learn?
Sweet, we’ve got you covered. Read on for ways to safely progress to handstand mastery!
Handstand Progression Warm-Up Routine
For any handstand exercise, there is going to be a significant amount of stress on the hands and wrists. So, it’s important you stretch and warm things up.
Here is a video from our NF Handstands course going over some of our favorite wrist stretches to prepare to get upside-down. Go through each stretch about 10 times.
Let’s spotlight a few of these Handstand Warm-Up exercises:
#1) Forward and Back Wrist Stretch:
#2) Lifted Palms Wrist Stretch:
#3) Reverse Palm Stretch:
#4) Backhand Palm Stretch:
#5) Upside Down Wrist Stretch:
The trick with wrist stretches is to move in as many different ways as feels comfortable. Feel free to make the warm-up your own!
The shoulders are another stressed area in the handstand. There are several ways we can prepare them for work
A few rounds of jumping jacks:
Or arm circles
That will get the blood moving and the area ready.
From here, we’ll begin our journey leveling up your Handstand Progression.
We’ll start by having you work with some balance drills and some positional drills.
Nothing too crazy, and in fact some of these might seem TOO EASY. That’s fine! That’s what we want, remember?
We’re using small victories to motivate us. Landing on your head is not a great way to motivate anyone.
Ouch.
Want someone to build you a custom-made progression plan for doing your handstand? Our 1-on-1 Online Coaching Program will do just that, plus your coach can review your movements through our app so you’ll know your training correctly and safely.
Level 1 Handstand Progression: Quadruped Rocking
You may be thinking that feeling the balance of a handstand is going to be brutally difficult.
Not so!
We can start quite easily on our hands and knees in the quadruped position.
From here, we will simply rock forwards and backwards on our hands.
Seem familiar?
If you did the wrist mobility we described above, it’s the same motion!
As you are rocking back and forth, feel where the weight rests in your hands.
When you rock back, it sits more in the heel of your hands.
When you rock forward, you’ll feel it in your knuckles and fingertips.
Where do we want it on the handstand?
Right around the knuckles.
This is a balanced spot – similar to the balance you find when standing. You don’t sit all your weight on your heels, and you don’t lean all your weight forward, gripping your toes hard into the ground, do you?
Find and feel that balance when you rock.
When should you move on to Level 2 Handstand Progression?
Now would work!
Level 2 Handstand Progression: Hollow Body
The hollow body is one of the best ways to engage the midsection and stabilize the body. It will help to give your handstand a good shape.
Do you need to master the hollow body to master the handstand?
Not necessarily, as there are plenty of handstands out there that are a bit banana-shaped.
But the hollow body will help you create a more efficient position.
Here’s how to hold a hollow body for handstand practice:
#1) Start by laying down a yoga or exercise mat on the ground and laying on the ground face up.
#2) Think about pressing your lower back down into the ground and engaging your midsection like you’re coughing. You should still be able to breath!
#3) Once the midsection is set, tuck your knees to your chest and hold your shins like you’re getting ready for a wicked cannonball.
#4) Holding the shins will help you maintain that lower back and midsection position.
Still feeling good?
Then try rocking!
Rock your body forward and back slightly from the upper back to the lower back, like a rocking chair.
Head and feet stay off the ground.
If you are stable then you should move as one unit.
If you need more of a challenge, reach your arms by your ears, keep the knees tucked, and rock some more.
Without the hands holding the shins, the midsection really has to keep engaged in order to give you a smooth rock.
With any of these positions, work to rock for a full 15 seconds under control.
Once you can do so with arms extended, progress up to Level 3.
Level 3 Handstand Progression: Crow Pose
To enter Crow Pose, move forward from the Quadruped Rock position so that your knees are on the outside of your arms. You can even bend the elbows a little and rest your legs on them.
Rock forward in the same manner as before, putting a little more weight on the hands and a little less weight on the feet.
Important: this isn’t Assassin’s Creed… We are not making a leap of faith here!
Don’t jump!!!
We are simply looking for less and less weight on the feet.
Take things slow and easy – rising up on the toes when you can. When you are ready to pick the feet up and hold yourself off the ground on just your hands, it should come naturally.
Be sure to grab into the ground hard to hold and control yourself, and feel free to put down a pile of pillows or mats in front of you if you should fall!
Once you’re able to get both feet off the ground comfortably and safely, it’s time for Level 4 Handstand Progression.
If you find yourself stuck at the crow position or any other level, we are here to help!
Our coaches can review your progression and form to help you advance to the next level!
Level 4 Handstand Progression: Wall Walk
In this level, we’ll get started working toward something that actually looks like a handstand!
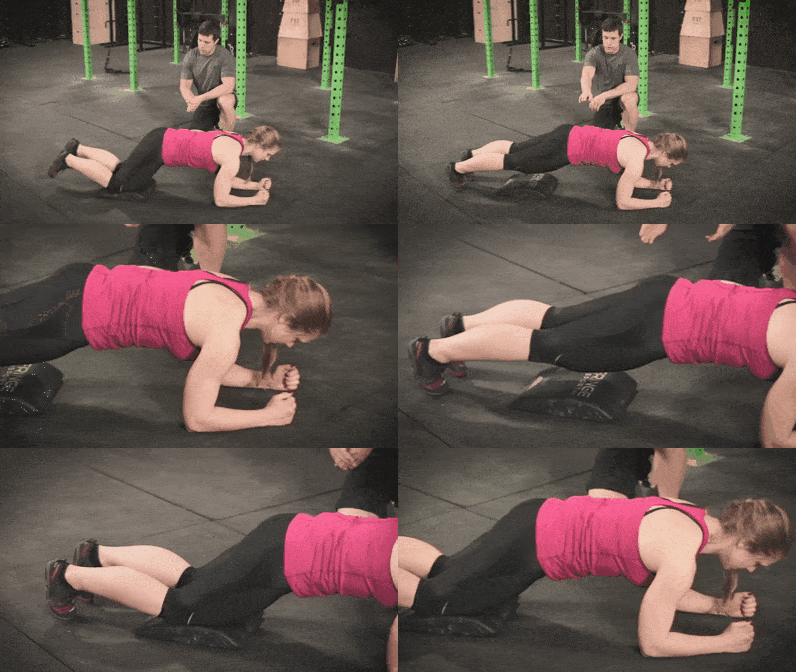
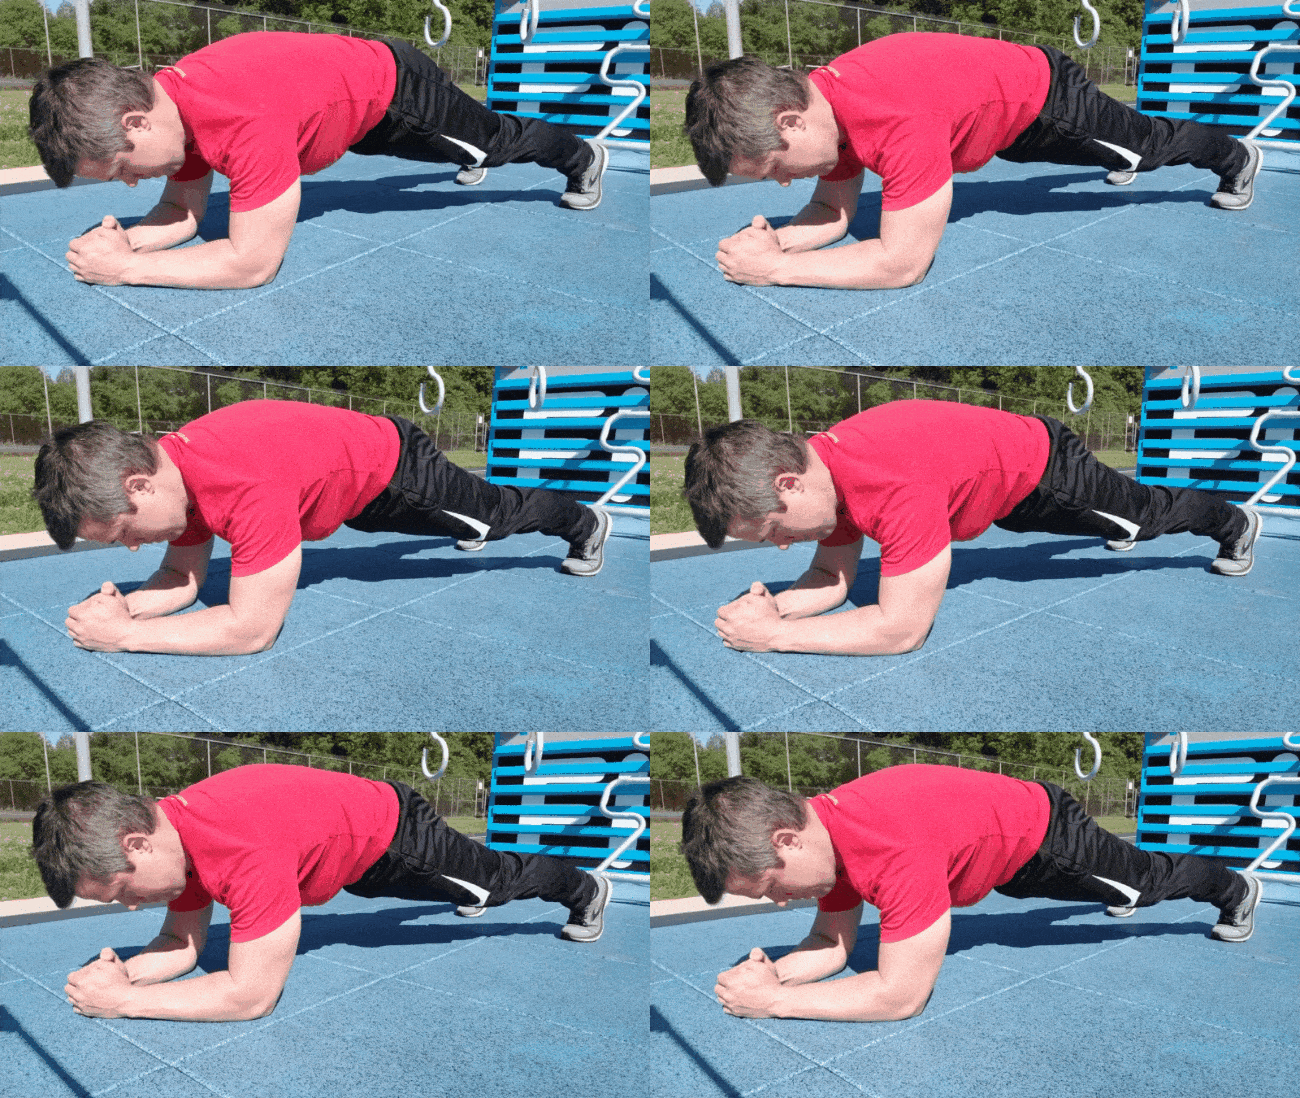
All we’re trying to do with this exercise is support our body weight on our straightened arms (just like the front plank or push-up).
So, the first level of this exercise is to simply get yourself up to the top of a push-up and hold. If that’s too hard, put your hands up on an elevated surface and/or rest on your knees and hands instead.
Once this is mastered, level up by simply lifting your hips in the air into a down dog position!
From here, it’ll be a matter of getting your feet onto a higher and higher surface.
Note: putting your feet up something even a few inches off the floor counts – small steps!
You can use something as simple as bumper plates:
As you progress, add more bumper plates (or whatever you’re using) so your feet are higher and higher.
Once you are supporting yourself with your feet on a high box, try walking your feet up the wall. (Think of it like a really tall box!)
Be careful at this step: Be sure you have enough energy to walk back down safely and second, that you don’t walk too close to the wall and risk flipping onto your back!
With each of these variations, we’re looking to build up to a solid 15 seconds under control before moving forward.
Once you’re at the point of lying vertically against the wall, you’re on your way to leveling up to a full handstand!
But first, we need to talk about how to bail safely.
Level 5 Handstand Progression: How to Bail out of a Handstand
As you start to get better with Wall Walks, and you practice getting closer and closer to completely vertical while upside down, there’s going to be instances where you start to “tip over.”
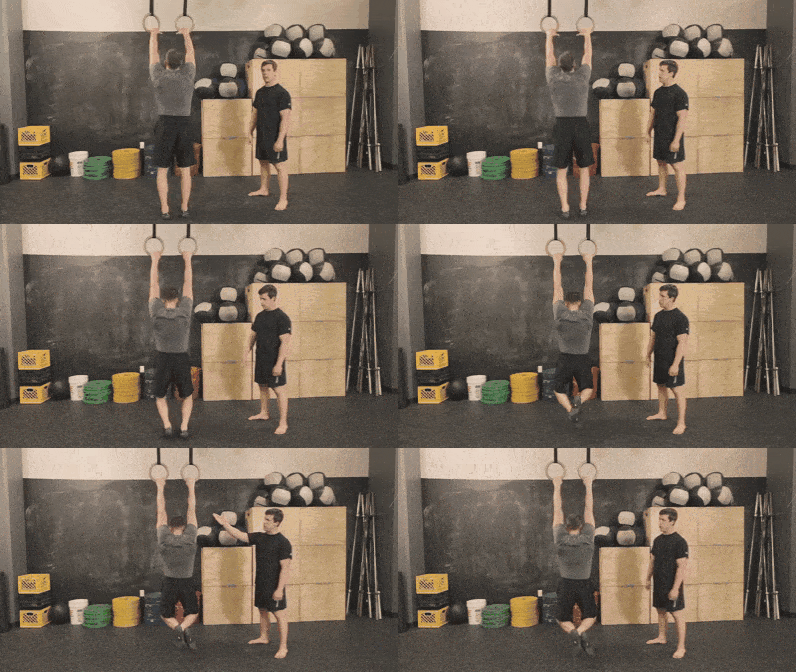
In order to safely return your feet to the ground, you’re going to want to do what we call a pirouette:
How to bail out of a handstand:
Get into a wall handstand.
Shift your weight to one arm (the planted arm), allowing the other arm to move.
Drive one leg into the wall (the one that’s on the same side as the planted arm), and lean the opposite leg forward.
Gravity pulls you around, and lets you lower your feet to the floor safely.
This is one of the most important skills you can learn as you develop your handstand practice, as it will allow you to safely exit any handstand without any risk of injury as you develop your balance!
Once you feel comfortable bailing out of a handstand, my dear rebel, it is time for Level 6!
Level 6 Handstand Progression: How to Do a Handstand
We are now ready for you to try a handstand!
It’s going to come down to you slowly but surely leaving the safety of the wall.
First, just try to take one leg off the wall during your wall walk:
When you’re comfortable taking one leg off, try switching them!
The objective is now is to switch your legs in a slow, smooth manner – one lifts off the wall while the other simultaneously moves back to the wall.
Once you get comfortable with this, it’s time to take both legs off the wall!
BOOM! Your first handstand!
Are you doing it right?
A good way to tell would be to record your handstand practice and review it against the videos here to check your form.
Want to have an expert review your form? Check out our 1-on-1 Online Coaching Program! Our spiffy mobile app lets you send a video of your handstand directly to your coach, who will provide feedback so you can perfect your technique.
They’ll also build a workout program that’s custom to your situation, which will have you doing handstands like Luke Skywalker in no time!
4 Tips and Tricks for Doing Handstands
Nothing beats patience and hard work, but there are a few tips and tricks we can provide that will allow you the best chance for success.
#1) Make sure you go through a proper warm-up: We’ve given you several options for the wrists and shoulders. Not only will a warm-up help prevent injury, but it will get the muscles and joints properly prepared to get the most out of your training.
#2) Prioritize Your Handstand: You can work the skill on its own time, and it won’t interfere or be interfered by anything else, but what if you’re doing other exercises during your workout?
When do you do your handstand? When you’re training in a swamp?
The best time to work the balancing drills (like your wall walk) is at the beginning of your workout, after you’ve warmed up.
These skills require concentration and a fresh focus to really benefit and progress with them.
Trying to balance after you’ve exhausted yourself with a tough cardio session is an exercise in futility (pun intended).
The best time to work the positional drills (like your quadruped rock) would be sometime during your strength session, and before your cardio.
These drills are not as dependent on completely fresh muscles, but we still don’t want to try and hold ourselves upside-down after a grueling workout.
#3) Don’t do too much, too soon.
We’ve mentioned this a million times because it’s so important. Taking on too much too soon is a way to develop bad habits and possibly injure yourself.
Ouch again.
Take your time! Enjoy and really master each step!
#4) Take it Easy: In the same vein, we want to look for success.
What do I usually see when people practice handstands: Someone kicking up 100 times and kinda getting a handstand once or twice.
How much sense does that make?
While we might not be batting 1,000 with all our attempts, but we should be looking to successfully complete around 8 out of 10 attempts. If we’re not? Then we might have taken on too much, too soon!
Let’s wrap up this guide and give you some next steps for your handstand practice.
The 5-Minute Rule: Practice Handstands Every Day and Be Amazed at What Happens
Commit to 5 minutes a day. That’s it. But do it every day.
I’ll see a lot of people go all-in for a single handstand session, and then not touch the skill for a week or more.
Dan Gable once said”
“If it’s important, do it every day.”
Now, this is a simplification, but with handstands, this is ESPECIALLY important.
When you first start out, your arms and shoulders may only be able to do 5 minutes before they are DONE.
Doing them for a short time each day is the best strategy to improve strength, endurance, and balance.
Want help progressing with handstands from here?I’ve got 3 great options for you!
#1) If you want step-by-step guidance on how to complete handstands, get stronger, and even eat better, check out our killer 1-on-1 coaching program:
#2) Exercising at home and need a plan to follow? Have questions you need answered? Join Nerd Fitness Prime!
Nerd Fitness Prime contains at-home exercise routines, live-streamed workouts with NF Coaches, a supportive online community, and group challenges.
Plus, you’ll gain access to all our online courses, including Nerd Fitness: Handstands, which will help you become a master at flipping upside down!
#3) Join The Rebellion! We have a free email newsletter that we send out twice per week, full of tips and tricks to help you get strong, get healthy, and have fun doing so.
I’ll also send you tons of free guides that you can use to start leveling up your life too:
Get your Nerd Fitness Starter Kit
The 15 mistakes you don’t want to make.
Full guide to the most effective diet and why it works.
Complete and track your first workout today, no gym required.
Alright, your turn:
Have you ever tried to kick up into a handstand?
What’s the one thing holding you back?
What questions can I answer?
-Steve
PS: One day I’ll be able to type articles like this while doing a handstand.
If you’ve ever asked yourself “Am I doing too little or too many reps and sets?” then this guide is for you.
This article is part of our Strength 101 series, and we’ll show you exactly how to determine the number of repetitions and sets for specific exercises, so you can build your own workout routine.
It sounds easy, but depending on your goals, the answer to “How many reps and sets should I do?” can vary greatly.
We work hand-in-hand with our Online Coaching Clients to create the correct workout program that suits their goals, needs, and available equipment
In today’s guide on workout programming, we’ll cover (click each to get right to that answer):
As Coach Jim mentions above, “Rep” stands for “repetition” and defines one complete motion of an exercise.
And one “set” is a consecutive number of reps without stopping.
And one “smorgasbord” is a buffet of food.
(This has nothing to do with this article, but it’s a fun word to say.)
As we mentioned throughout our Strength Training 101 series, how many reps and sets you should do is really going to be dependent on your goals.
For example, is your goal to improve:
Muscular endurance
Muscular hypertrophy
Muscular strength
Muscular power
Depending on what your goal is, the sets, reps, and rest intervals will change.
Oh, you’re just starting your strength training journey?
Well, make sure you grab our free guide, Strength Training 101: Everything You Need to Know. I’ll send it to you for free when you join the Rebellion (that’s us!).
Download our comprehensive guideSTRENGTH TRAINING 101!
Everything you need to know about getting strong.
Workout routines for bodyweight AND weight training.
How to find the right gym and train properly in one.
Alright, let’s break down reps and sets for you, because I can see you still have questions.
How Many Reps Should I Do?
Remember, “Rep” stands for “repetition” and is more or less one complete exercise.
The scientific term here is “sarcoplasmic hypertrophy,” as it focuses on increasing the amount of sarcoplasm, the non-contractile fluid found in your muscle.
Up to 30% of your muscle’s size is attributed to the sarcoplasm, so focusing on this type of hypertrophy helps build overall size (i.e., increased cross-sectional area of the muscle).
If you’re training for specific sports and just want to get stronger with more power – but not necessarily get bigger, this is the strategy for you.
This type of training focuses on strengthening the myofibril, the contractile part of the muscle, hence the name “myofibril hypertrophy.”
For this, target reps in the 1-5 range. And yep, that means you’re going to be picking up heavy weights, focusing all that concentrated effort into just one or a few reps.[4]
Something to note when lifting for strength and power: not only are you shocking your muscles, but you’re also putting a lot of pressure on your body’s central nervous system (CNS).
So what does this mean?
In a way, it means your body’s ability to communicate with its muscles has grown fatigued, and performance may suffer.
That’s why you may want to rest between 2-5 minutes in this range.
Oh, and your CNS will adapt and become stronger, which will be critical for building strength and power.[5]
Since powerlifting really taxes the central nervous system, you may be waiting 3-5 minutes between sets when training in this fashion.
TO RECAP, these are the rep ranges you should be considering:
Reps in the 1-5 range build super dense muscle and strength.
Reps in the 6-12 range build equal amounts of muscular power, strength, and size.
Reps in the 12+ range primarily build muscular endurance and size and also cardiovascular health.
I realize this is a lot to figure out, so if you are somebody – like me – who just wants to be told what to do and outsource all the worry of “Am I doing the right workout for my goals?” I got you covered!
I’d love to learn your story, and then build a custom program that fits your goals. We’ll help you with your nutrition, your workouts, and even check in regularly to keep you accountable!
How Many Sets Should I Do?
As explained above, a “set” describes a group of repetitions performed for an exercise without stopping.
For example, if you do 10 squats right now, you just did 1 SET of 10 reps of squats.
So let’s talk about the “correct” number of sets per exercise.
The simple answer: “Do 3-5 work sets of a given exercise.”[6]
Just make sure you’re not compromising your form.
At least he’s trying!
The National Strength and Conditioning Association (NSCA) will break this down, suggesting the following set ranges:[7]
2-3 will help build muscular endurance (12 to 20+ reps)
3-6 build muscular hypertrophy (6 to 12 reps)
3-5 build muscular power (3 to 5 reps)
2-6 build muscular strength (less than 6 reps)
“STEVE, JUST TELL ME WHAT TO DO.”
FINE! Pick a weight that feels light to you, and then do 3 sets of 10 reps.
If you’re not sure if “3 sets of 10” or “5 sets of 5” is right for you, we got you covered.
We’ll build a program that fits your goals, and then adjust it each month based on your progress. Never guess or wonder what you should be doing again.
How to Build a Workout Routine!
Now that you have “edumacated” yourself on how your specific goals influence the number of reps per set, and what sets actually are, you can build your workout program around this info.
TO RECAP, aim for 3-5 sets in the following rep rangers per exercise based on your goals:
Endurance: 12+ reps per set.
Hypertrophy (bigger muscles): 6-12 reps per set.
Strength (dense, powerful muscle): 1-5 reps per set.
Two points worth mentioning:
A recent study showed that heavier weight for low reps created more muscle mass than a higher volume (lower weight for more reps).[8]
Studies show that bodyweight training exercises can build muscle, but require a LARGE number of sets per rep, and pushing oneself to absolute failure.[9]
What this means: studies suggest targeting heavier weight with fewer reps for big lifts like squats and deadlifts to build muscle, while targeting high reps to absolute failure with bodyweight exercises for muscle building.
Just remember to rest enough between sets so you don’t fatigue your central nervous system too bad.[10]
One last point: Nutrition is still 90% of the equation!
Your rep range doesn’t matter nearly as much as you think, so don’t overthunk it!
It doesn’t matter if you train like a bodybuilder, you ALSO need to eat enough food to provide your muscles with enough calories to rebuild themselves bigger and stronger! This is the biggest mistake I see skinny people make when trying to bulk.
This brings me to my final point: because nutrition is 90% of the equation, your sets and reps don’t matter nearly as much as you think they do!
All that matters? Doing MORE this workout than the last workout.
Remember, how you build muscle and strength and burn fat: “progressive overload.”
One more rep than last time.
Doing one more set than last time.
Picking up a weight that’s 5 lbs. heavier than last week.
So get out of your own head, and START TODAY:
1) GET HELP: If you want expert guidance and accountability so you don’t have to figure out all of this stuff on your own, I got you.
Click the red button below to get the details about our amazing online coaching program:
2) FIGURING IT OUT OUT ON YOUR OWN!
Download our free Strength Training 101 Guide! You get it free when you join our Rebellion (the name of our awesome free online community). Sign up in the box below:
Download our comprehensive guideSTRENGTH TRAINING 101!
Everything you need to know about getting strong.
Workout routines for bodyweight AND weight training.
How to find the right gym and train properly in one.
BRAND new to any training? Start with this bodyweight routine, and aim for 3 sets of 10. Work on your form!
Remember: the goal should be to get stronger each workout.
Write down what you did last time, and then do MORE this time.
By continually challenging your muscles to do more, they’ll have to adapt by getting bigger, stronger, burning more calories, etc.
There are a lot of different truths and fallacies on plateaus and how your muscles can get “used” to working out and stop growing.
If that’s something you’re battling, here’s a way to continue making progress:
Spend a week in a different rep range with different amounts of weight.
This will introduce a little chaos into the system, which could be a good thing…unless you’re Batman.
What we’re talking about is muscle confusion theory, which is a preplanned period of variation.[13] Not, you know, wandering into the gym with no plan and just doing something different every time (whatever you feel like doing at that moment).
That won’t help.
But spend a week deliberating mixing it up. Then go back to your regularly scheduled routine and you’ll be right back on track.
Make sure you know what you want, and then design a plan to get there.
-Steve
PS: If you want a nice shiny app to tell you EXACTLY how many sets and reps to do, our shiny new app will do just that!
You can sign up for a free 7-day trial to Nerd Fitness Journey, which will build a workout around your experience level!
More specifically, the National Strength and Conditioning Association (NSCA) recommends executing more than 12 reps and having a rest interval in-between sets of 30-seconds or less for muscular endurance. Additionally, you want to focus on a load of 67% or less of your one-rep max (1RM). For example, if you squat 225 pounds for 1 rep, then 67% of that is ~150 pounds. (Haff G, Triplett NT. (2016). Essentials of strength training and conditioning. Fourth edition. Champaign, IL: Human Kinetics)
In one of the earliest studies examining the effects of concurrent strength and endurance training, Hickson and colleagues demonstrated that moderately trained runners and cyclists had improvements in treadmill running (13% improvement) and ergometer biking (11% improvement) to exhaustion at maximal work rates. In a more recent investigation by Aagaard and colleagues, highly trained national team cyclists improved their average power output and total distance covered in a 45-minute cycling test (8% improvement). Strength training has been reported to increase musculotendinous unit stiffness his results in an enhanced ability to store elastic energy during eccentric muscle actions (i.e., muscle lengthening), which in turn increases concentric muscle force (i.e., muscle shortening). This is thought to be one of the reasons why improvements in running economy, cycling economy, and cross-country skiing economy have been observed after a period of combined strength and endurance training.
More specifically, the NSCA recommends executing 6-12 reps and having a rest interval in between sets of 30 seconds to 1.5 minutes for muscular hypertrophy. Additionally, you want to focus on a load of 67-85% of your one-rep max or 1RM. (Haff G, Triplett NT. (2016). Essentials of strength training and conditioning. Fourth edition. Champaign, IL: Human Kinetics).
Again, we can provide some specifics from the NSCA. They recommend executing 6 or fewer reps and having a rest interval in between sets of 2-5 minutes for muscular strength. Additionally, you want to focus on a load of 85% or more of your one-rep max (1RM). The NSCA also recommends executing 3-5 reps and having a rest interval in between sets of 2-5 minutes for muscular power (multiple-effort event). Additionally, you want to focus on a load of 75-85% of your one-rep max (1RM).
If you’re interested, check out this article from Science Daily on the role the central nervous system plays in strength training.
A work set just means a set where you’re training with your heaviest weight. This doesn’t include any warm-up sets.
Haff G, Triplett NT. (2016). Essentials of strength training and conditioning. Fourth edition. Champaign, IL: Human Kinetics.
The effect of training volume and intensity on improvements in muscular strength and size in resistance-trained men: study
Effects of Low- vs. High-Load Resistance Training on Muscle Strength and Hypertrophy in Well-Trained Men: analysis
Other ways to mitigate wearing down your CNS include prioritizing the most important exercises by placing them first in a workout, use moderate-to-heavy loads, since these involve performing fewer total reps to achieve the hypertrophic stimulus, and be aware that adding extra volume of work (e.g., adding extra exercises, sets, and/or reps) to a workout may not necessarily produce superior effects, and dividing a single workout into more frequent workouts over the week may sometimes lead to better results.
To gain muscle mass it is recommended that you seek a calorie surplus (i.e., hypercaloric diet). This can be achieved by consuming an additional 250-500 kcal/day or 10-20% above your typical diet. You may also need to increase your protein intake to 1.6-2.2 g/kg of bodyweight spread evenly throughout the day. And finally, carbohydrates should be the focus of the remaining calorie surplus demands when considering fat intake levels should remain at 20-35% of kcals. This will result in a realistic gain in lean muscle mass of about 0.5 pounds per week.
If you’re trying to lose weight it is recommended that you seek a calorie deficit by consuming 250-500 less kcal/day or 10-20% below your typical calorie intake. Your protein intake should be 1.2-1.6 g/kg of bodyweight spread evenly throughout the day. And finally, carbohydrates and fat should be reduced from baseline to satisfy the needed caloric deficit at the expense of protein. However, enough carbohydrate should still be consumed to maintain performance because carbohydrates (muscle and liver glycogen) are the primary energy sources for higher-intensity exercise. This will result in a realistic weight loss goal of 1-2 pounds per week.
Numerous studies published in various exercise science, sports conditioning, and physiology journals have found that the pre-planned variation of acute program variables (changes in exercises, sets, reps, rest intervals, percent 1RM) is more effective at producing strength and lean body mass improvements than non-periodized programs.
As Coach Lauren mentions above, the “circuit” in circuit training comes from the fact that you do a sequence of exercises back to back to back, and then you repeat the sequence.
And then again.
You cycle through the planned sequence of exercises, or circuit, multiple times.
That’s circuit training.
Generally, you hit each major muscle group during one full circuit. You may do a lower body for one exercise. Then the upper body the next.
You’ll find all sorts of different circuit training sequences. Here are some things most will have in common:
Several different exercises. A normal circuit will have five to ten different movements per circuit. You’ll often hear these referred to as “stations.” Overhead press station, squat station, etc.
Little to no rest in between.The goal of circuit training is to keep your heart rate up. Ideally, if you’re physically able, you go from one exercise to another without stopping. Maybe you rest after the whole circuit. Maybe.
Rinse and repeat.Generally, you’ll run through your circuit a few times. Three rounds are common.
Make sense?
The point here is to work different parts of your body with different exercises, and then while those parts are recovering, you’re working on your other movements! This helps build cardiovascular health, while also improving muscular endurance and strength.
More importantly, for somebody with limited time, doing a strength training circuit is more effective at building strength and burning fat than an equivalent amount of cardio.
In other words, if you are trying to lose weight, you should be doing circuit training.
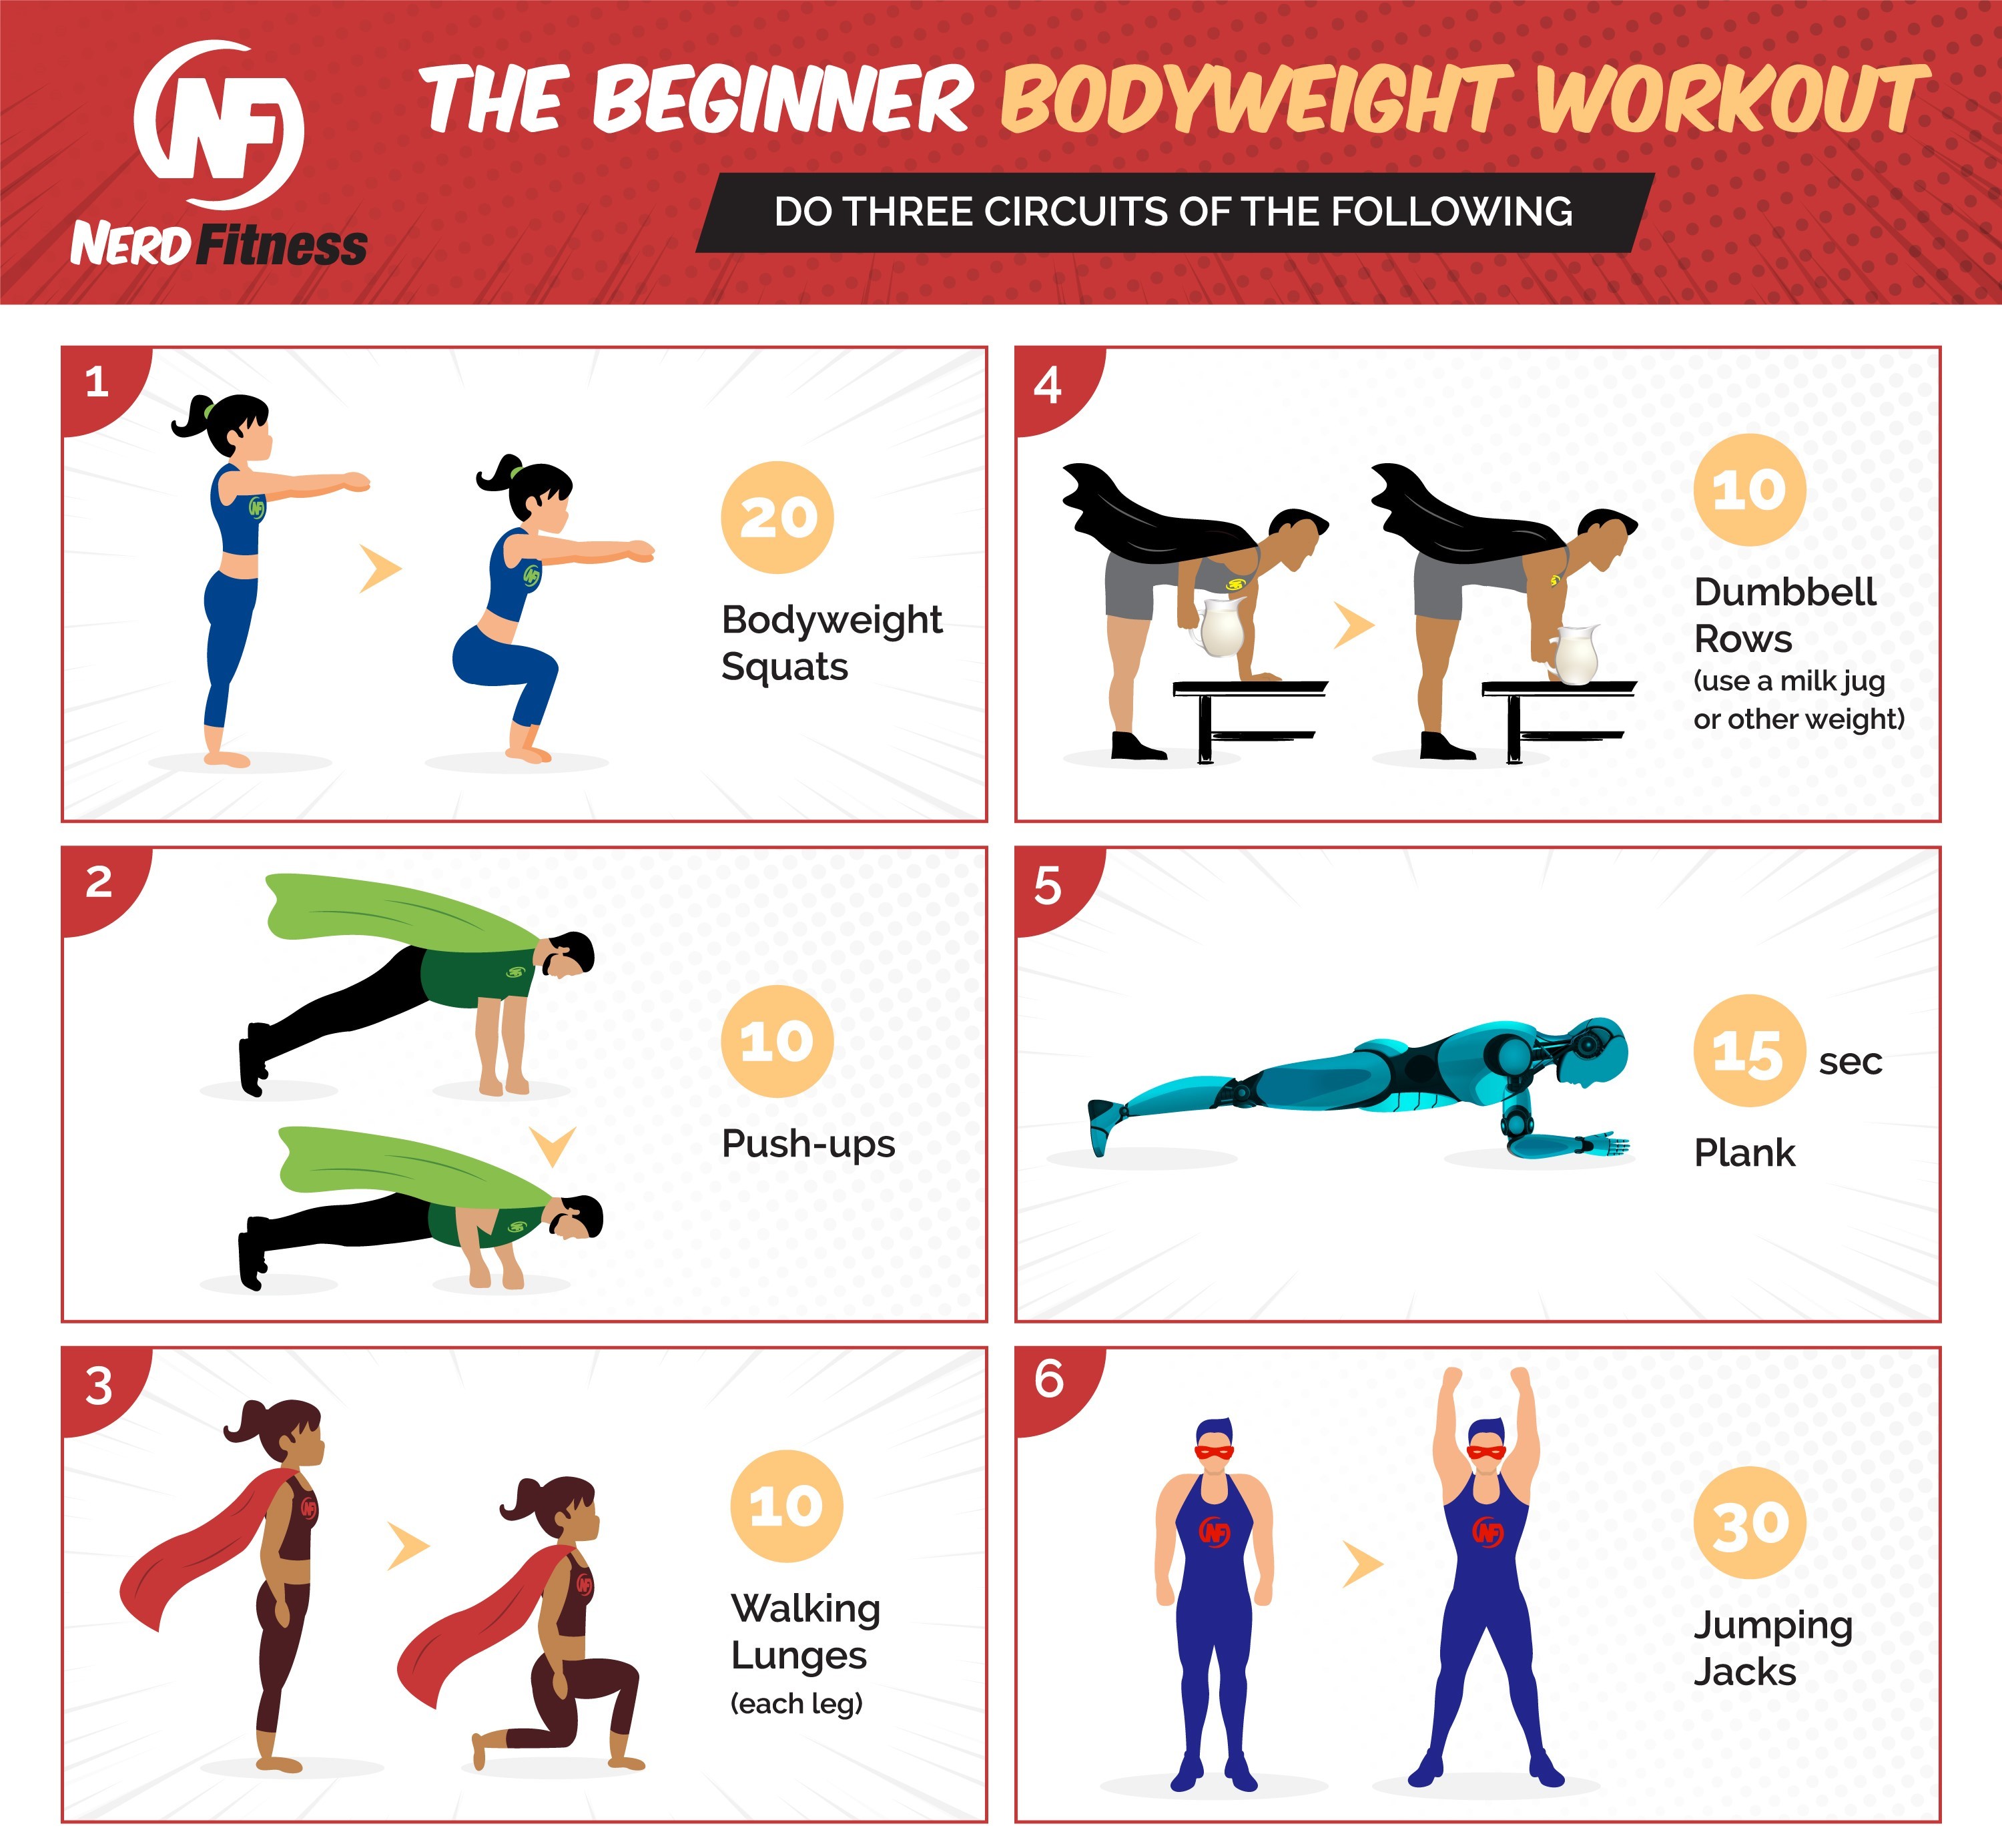
Our Beginner Bodyweight Circuitwould be a great place to begin, and you can download a worksheet to help you get started right here:
Grab Your Beginner Bodyweight Routine Worksheet. No Gym Required!
Complete this workout at home, no equipment required
Avoid the common mistakes everybody makes when doing bodyweight exercises
Learn how to finally get your first pull-up
Why Should I do circuit training?
Generally, you’ll hear exercise divided into strength training or aerobic exercise (cardio).
What’s the difference, you wonder?
Strength training. Strength training is also referred to as anaerobic exercise, which would be a short burst of energy for movement. Think of a push-up or pull-up. These exercises help build and tone muscle.
Aerobic Exercise.“Aerobic” means “needs oxygen.” Your heart rate increases to get oxygen where your body needs it, thus the word “cardio.” Running, biking, or jumping jacks would be examples of aerobic exercise.
The thing about a circuit is, you actually do both categories. Presses and lunges fall into strength training. Jumping jacks are cardio.
And since you aren’t stopping much in between stations, you’ll need more oxygen, and voila. Even more cardio.
With circuit training, you build muscle and burn fat WHILE building stamina.
As Michael Scott would say, “that’s a win, win, win.”
There’s some debate on what kind of exercise is better for weight loss: aerobic or anaerobic.
My thoughts?
If you’re limited on time and only can pick one, I would pick strength training: when you strength train, you break your muscles down, and your body needs to work extra hard over the next 24-48 hours to rebuild those muscles (with increased calories burned).
We work with our 1-on-1 Coaching Clients to create programs that combine both strength and cardio in a fun way – it really comes down to a program that you actually WANT to do.
Before and after your circuit training: Warm up and stretch
No matter which circuit you pick, I want you to start with one important thing:
Warm-up!
I cover why you should always warm up in an article found right here. It doesn’t have to be much though, give it about five minutes to get your muscles active and your heart rate up.
This will help you do exercises properly and help prevent injury. You can run in place, do air punches and kicks, or some jumping jacks.
Here is NF Senior Coach Staci (you might know her incredible story) showing you many beginner options you can use to warm up as well:
Did I just tell you to prepare for circuit training, with a circuit?!
Yes, yes I did.
If you’re curious, here’s my personal (advanced) warm-up:
THE NERD FITNESS ADVANCED WARM-UP:
Jump rope: 2-3 minutes
Jumping jacks: 25 reps
Bodyweight squats: 20 reps
Lunges: 5 reps each leg.
Hip extensions: 10 reps each side
Hip rotations: 5 each leg
Forward leg swings: 10 each leg
Side leg swings: 10 each leg
Push-ups: 10-20 reps
Spider-man steps: 10 reps
Our goal isn’t to tire you out. Instead, we want to warm you up.
That’s step one.
Completing your chosen circuit training routine would be step two.
Below, you’ll find 15 workouts you can follow along with! And if you like our style of workouts, you might like our new app, Nerd Fitness Journey!
Our fun habit-building app helps you exercise more frequently, eat healthier, and level up your life (literally).
Right now, you can try it for free for a full week (no credit card required). Jump in below:
Once you’ve done the above three times, go ahead and put your kettlebell away for your final step: stretches.
If you want a kettlebell worksheet for this workout, grab one by signing up in the box below:
Grab Your Beginner Kettlebell Routine Worksheet!
Complete this workout at home or gym with 1 kettlebell.
Avoid the common mistakes everybody makes when doing kettlebell exercises.
Build strength, burn fat, level up your life!
We also have a fun new adventure in our app that will allow you to train with your kettlebell right alongside Hack Morris (this will make sense more sense when start).
Jump in right now for your free trial:
Beginner Gym Circuit Training
If you have access to a gym, you have a lot of circuit options.
If it’s your first time stepping foot in a fitness facility, check out our Beginner’s Guide to the Gym. The gym can be a scary place, but we’ll give you a strategy to get comfy.
We’ll also walk you through each movement for both Days A and B below. I would recommend picking one of our 5 Beginner Gym Workouts, going through the leveled progressions, and working your way up to the circuits below:
Alternate your circuits on different days. Rest in between. “Day A” could be Monday. Rest Tuesday. Wednesday could be “Day B.”
We LOVE helping people get started in the gym, as we’re huge fans of barbell training and helping beginners build confidence with weight training! If that sounds like you…
Plus, you can download our full Strength 101 guide too, which has this routine along with other circuits to help you start building strength today:
Download our comprehensive guideSTRENGTH TRAINING 101!
Everything you need to know about getting strong.
Workout routines for bodyweight AND weight training.
How to find the right gym and train properly in one.
The Hotel Workout Circuit: For Travelers that Train
Sometimes, you just plain find yourself stuck in a hotel room. Maybe you can find the hotel gym, but I bet it’s terrible! It probably has 2 machines, a broken treadmill, and no free weights.
Ugh.
Instead, how about a workout circuit you can do in the room itself?! Utilize the furniture to its full potential.
Gimli “Shall I get you a box?” jumps: 7 box jumps – REALLY explode
Helm’s Deep-Squats: 9 bodyweight squats – get your ass to the ground
Tower of Orthanc Holds: 1 minute (Kick up against a wall and hold a handstand for as long as you can until 1 minute is complete, in as few as sets as possible. Check out our Guide to Handstands.)
“Army of Dead”lifts: 9 lightweight reps, barbell or dumbbell
Samwise Gamgee Carries: 1 minute (Demonstrated here by AKLulu carrying me at a NF meetup) A heavy sandbag over the shoulder works too. No sandbag? Just carry two dumbbells around the gym for a minute.
If you can get through a superset three times, consider yourself an honorary Ranger. Nothing found in Mordor can faze you.
Barbell Deadlift / Dumbbell RDL / Banded Good Morning / Regular Good Morning: 10 reps
Medicine Ball Slam / Quick Downwards Bodyweight Squat: 10 reps
Push-up to Renegade row (push-up, row left, push-up, row right, repeat): 5 Rows per side
Transverse Lunge and Chop: 5 reps each side
How many times do you do this circuit? AMRAP, or, As Many Rounds As Possible. I suggest setting a 12-minute timer and getting to work. Be careful though, because only Wolverine can heal automatically.
You’ll need actual rest.
Boom!
There are your nerdy circuits. Feel free to rock the soundtrack of the referenced movies during your workout. If you own a cape, now’s the time.
Complete List of Circuit Training Exercises
You can do any of the workouts in this article and get a great workout, but if you want to build your own workout, you can totally do that too!
Here is a list of exercises you can use to create your workout.
Simply pick a few, and do one after the other in as many circuits as you want!
Do 3 circuits with 10 reps of each exercise, one after the other!
Have fun and keep things interesting. And if you don’t want to build your own workout, that’s cool too! We have 15 free workouts in this article, and we can also do all the heavy lifting for you.
(Well, not literally DO the heavy lifting, but you know what I mean.)
We create custom workout solutions for busy people just like you in our 1-on-1 Coaching Program. Let us create a workout and help you make better food choices.
It’s like having a Yoda in your pocket (again, not literally).
How to Stretch After Circuit Training
Once you finish your workout, the final step (three) would be stretching and cooling down. No matter what circuit you go through, stretch after a workout. It can help a lot with muscle recovery.
Scope this video for an awesome stretching sequence to follow:
You could also do some yoga poses. For stretching, find what feels good and take your time. Let your heart rate come down while you stretch.
You could even do some foam rolling too if you’re a glutton for punishment!
YOUR MISSION: Complete one of the above circuit training workouts! If you don’t know which one to pick, start with the Beginner Bodyweight Circuit. It’ll get you used to the idea of hustling from one exercise to the next.
And you can do it in your living room!
If you’re looking for more hands-on instruction and customized guidance, check out our 1-on-1 Coaching program. You’ll work with our certified NF instructors who get to know you better than you know yourself, and then build a workout program that is specific to your exact goals.
Simply put, we tell you exactly what to do every day, and how to eat. And then, we check in with you regularly to make sure you’re doing it!
If you got this far in the article, I really want you to try one of these workouts. Right NOW. I always mention the most important step in a fitness journey is starting it. Today, start circuit training.
Once completed, I’d love for you to share your story with the community in the comments:
How’d it go?
Did you get through three full circuits?
Which routine did you pick?
Find a circuit you’re comfortable with, and do it.
Today, you’re gonna learn the importance of warming up, and how to warm up with specific video routines…because I’m a nice person.
This is so critical for training safely that whenever we design a workout for our coaching clients, it always starts with a proper warm-up. So I’m excited to share these warm-up tips and tricks with you too.
In this guide, we’ll cover the following (click to go to that section):
This stuff is so important because getting injured sucks.
And every single day I watch people wander into the gym, immediately lie down on a bench, and start cranking out their workout with a heavyweight within seconds.
This makes me weep for humanity.
These people are just WAITING to get injured. They’re essentially playing with dynamite (also not recommended).
So you’re reading the right article.
Also, if you’re interested in a program that tells you exactly how to warm up and work out, you may like our new app!
Nerd Fitness Journey will set you on an adventure that will tell you exactly when to workout, when to warm up, and when you should rest. No guesswork needed.
You can sign-up for a free trial right here:
Should I Stretch Before A Workout? No. Warm-Up Instead
Above all else, the most important thing you can do when working out is to warm up properly.
Now, you might be saying to yourself, “Come on. Surely it’s not the MOST important thing…”
To which I’d reply: “First, don’t call me Shirley. Secondly, if you don’t have enough time to warm up, then you don’t have enough time to work out.”
Boom!
So WHY is it so important?
Think of your muscles like rubber bands.
If you spend all day sitting at a desk, hunched over a keyboard, those rubber bands have gone almost completely unused.
Then, if you go to a gym and immediately start lifting heavy weights or sprinting really fast, those cold, unstretched rubber bands get pulled apart very quickly and can get snapped or pulled out of shape.
#Fail.
So, what about just regular, static stretching before working out?
However, dynamic warm-ups – what you’ll learn in this article and what we focus on with our 1-on-1 coaching clients – are AWESOME for prepping you to get ready to strength train:
Think of it like a pregaming for your muscles – except replace “alcohol” with “awesome.” By jumping around and getting your muscles loose, active, warm, and ready for action, you are putting your muscles through their full range of motion and getting them ready to start handling heavier loads (strength training).
As pointed out in this study, “warming up” can also help reduce soreness after a workout.
On top of that, doing a dynamic warm-up can help activate your central nervous system, priming your muscles for a great workout that produces your best effort.
Add “improved blood circulation” to the list of benefits of warming up, which will help you perform well in each exercise.
Need another reason? When your body is properly warmed up, your muscles and joints are ready for maximum flexibility, which means you can perform each exercise with PROPER form (like deep barbell squats, for example) that maximizes results and minimizes the risk of injury.
So, whether you are running or strength training…a proper warm-up is probably the most important 5-10 minutes of your day.
Still with me?
Great. If you have been injured in the past, and you’re learning to warm up so you can stop stalling out on your progress, let us help!
We create custom workout solutions with nutritional guidance for busy people like you.
In other words, we help you get strong and eat better, every step of the way.
Don’t overthink this: Your goal is to elevate your heart rate, put your muscles and joints through their range of motion to warm them up and make sure everything is functioning properly, and preparing your body to strength train!
If you read the above paragraph and thought: “Yes I am doing strength training, please tell me more Steve! More!”
Firstly, thanks for saying please – your mom taught you well.
Next: let us help get you strong, safely! We help busy people go from strength-training-newbie to strength training badasses.
Whether you’re doing bodyweight or new to weight training, we create a workout program and provide food guidance that’s specific to YOUR life.
3 Advanced Dynamic Warm-Ups And Videos
#1) Here is an Advanced Warm-up Circuit you can do anywhere:
Jump rope: 2-3 minutes (optional)
Jumping jacks: 50 reps(pull your shoulder blades back, extend arms and really focus on the movement)
Bodyweight Squats: 20 reps
Lunges: 5 reps each leg
Hip extensions: 10 reps
Hip rotations: 10 reps each leg (like you’re stepping over a fence)
Forward leg swings: 10 reps each leg.
Side leg swings: 10 reps each leg
Push-ups: 10-20 reps
Spider-man steps: 5 each leg
This particular warm-up might be more difficult than your actual workout, especially if you’re following something like The Beginner Bodyweight Workout.
Yes, there is a lot of work put on your hips, butt, legs, and core. As nerds/desk jockeys, these tend to be the muscles that are the tighest and least active, and thus most susceptible to an injury.
If your arms and chest are particularly tight or sore, you can throw two more movements as well:
Arm swings (holding your arms straight out to the side, and then swing them and cross them in front of your chest)
Shoulder rotations (holding your arms straight out to the side, and move your arms in a circular motion, making bigger circles each time)
Are you a runner?
#2) Check out our warm-up routine specifically designed for runners:
#3) Here’s another advanced dynamic warm-up for an endurance workout:
When it comes time for your workout, if you are doing heavy strength training (with barbells or dumbbells), make sure you do some warm-up sets before jumping into the weight you’ll be training with for EACH EXERCISE.
Always start with a set using just the bar to work on your form and get your body used to the movement.
Then, do a few sets of just a few reps with increasing weight (but won’t tire you out) and THEN start your workout.
It’s something we bring up before every workout in Nerd Fitness Journey, our new habit-building app! If you want, you can test drive it right now for free!
15 Best Dynamic Warm-Up Exercises To Prevent Injury
These are our favorite quick warm-up exercises that can help you prevent an injury during your workout!
Marching in place while swinging your arms.
Jumping jacks
Walking jacks
Arm circles and shoulder shrugs.
Mountain Climbers
Swinging toe touches.
Leg swings (forward)
Leg swings (side to side).
Hip rotations (like stepping over a fence)
Hip circles (like you’re hula hooping)
Bodyweight squats.
Push-ups.
Lunges.
Hip extensions.
Get into the habit of doing these exercises before doing any workout. They’ll help keep you mobile and limber and injury free. If you’re not sure how to do any of these movements, watch the videos for them below.
Oh, what’s that? You’re new to strength training and not sure what you’re doing? No problem!
We help people exactly like you.
Well, not exactly. You’re a unique snowflake, your mom loves you, etc.
What I mean is we help people like you to start strength training.
We do form checks, create custom workouts based on your equipment and time commitment, and more.
To Answer Your First Few Questions…
“Steve, I can’t do jumping jacks/I live on the second floor.”
That’s okay – the reason I love jumping jacks is that they work out all four of your limbs at once and get you bouncing around.
Instead, channel your inner Chuck Norris and do punches and kicks with each leg. I don’t care if you can’t kick higher than your shins and your punch wouldn’t kill a fly…just get those limbs flailing and warmed up!
You could also just do “Walking Jacks.”
“Um, your warm-up is tougher than my actual workout!”
The dynamic warm-up above is designed for people who are doing serious training.
If you are doing heavy deadlifts and squats and overhead presses, a proper warm-up could keep you out of a career-ending injury.
However, if you are just getting started with exercise and you’re only doing bodyweight exercises, obviously 20 real push-ups during your workout isn’t possible…
THAT’S OKAY. Think of the above as the warm-up you aspire to complete. In the meantime, do the best you can. Let’s say…
With enough consistency and persistency (not a word, but rhymed better and sounded way better than persistence), you’ll be busting out the full warm-up routine before kicking ass at your actual workout!
Don’t have a program to follow? Or tired of following a random plan online that’s not getting you results?
Check out our Online Coaching Program – we’ll take care of all the heavy lifting (except the actual “heavy lifting,” that’s your job).
Warm-Up Properly and Avoid Injury!
Hopefully, this is a post you bookmark, as it’s probably one of the most important ones I’ve ever written.
If you want to stay injury-free, put your body through a dynamic warm-up before you start your exercise.
If you are somebody who wants to follow a program that is tailor-made for their life and situation and goals, check out our popular 1-on-1 Coaching program.
You’ll work with our certified NF instructors who will get to know you better than you know yourself, answer any and all fitness questions you have, and program your workouts and nutrition for you.
What other questions can I answer for you about warming up properly?
I’m here to help!
-Steve
PS: Still here, but not sure what to do after your warm-up? Why not let our app tell you exactly what to do!
PPS: The companion post to this guide is “How to Stretch After a Workout.” Give it a read if you’re wondering about what post-workout routines you should try.
How I Bulked up After Years of Struggling as a Skinny Guy
Growing up, I was always the scrawny, skinny weak kid.
There was a reason I dressed up like Superman every other day for the first six years of my life:
Superman was strong, big, and powerful…and I wasn’t.
To this day, it’s still a big challenge for me to gain weight or build muscle.
When people tell me “must be nice to have been skinny growing up,” I explain that a killer flat top, my height (5’2″ until I was 16), four years of braces, and two Accutane treatments made sure I still got the full adolescent experience 🙂
When I was cut from the high school basketball team (which I thought was the end of the world), I signed up for a gym membership to get big and strong.
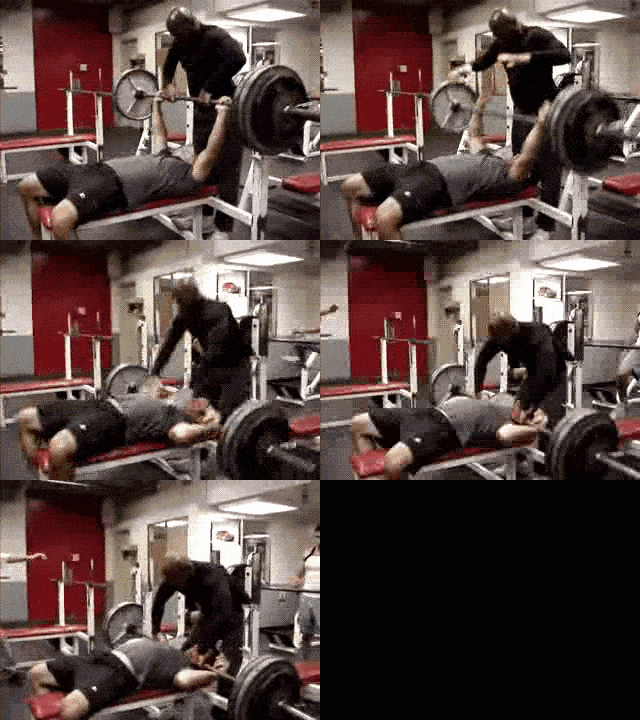
Within five minutes I had almost killed myself when loading up way too much weight for a set of bench presses.
Fortunately, I survived, and thus began my love affair with strength training.
I spent the next six years training in a gym, reading every muscle and fitness magazine I could find, drinking protein shakes religiously…and had about 3 pounds of muscle gain to show for it.
I just assumed “I’m one of those people who can’t gain weight.”
It turns out, I was doing it all wrong.
After graduating college, I moved to California, signed up for a gym membership, and received a few free personal trainer sessions.
Although I thought I had known it all (I had been training for 6 years in a gym! I read the muscle mags! I was in good shape already!), I still took the free sessions for the hell of it.
I’m so glad I did!
The trainer drastically simplified my workout and DOUBLED the amount of food I was eating.
I thought he was crazy at first, but I stuck with it.
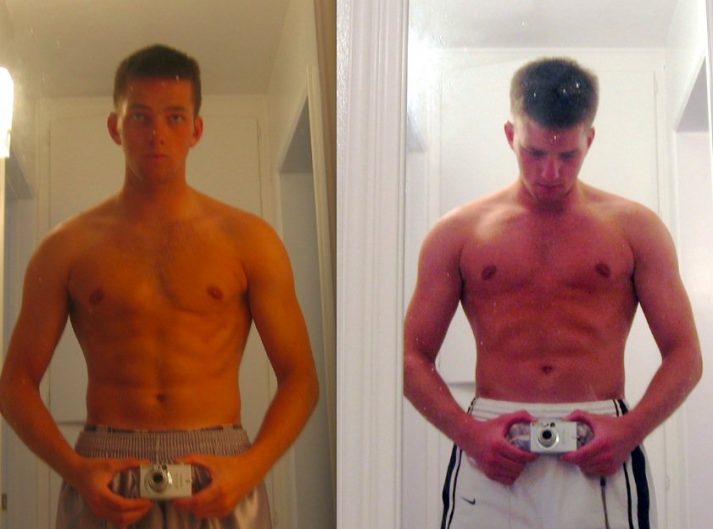
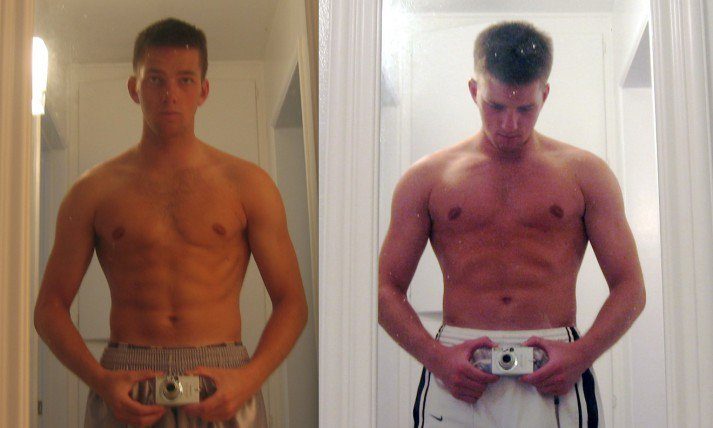
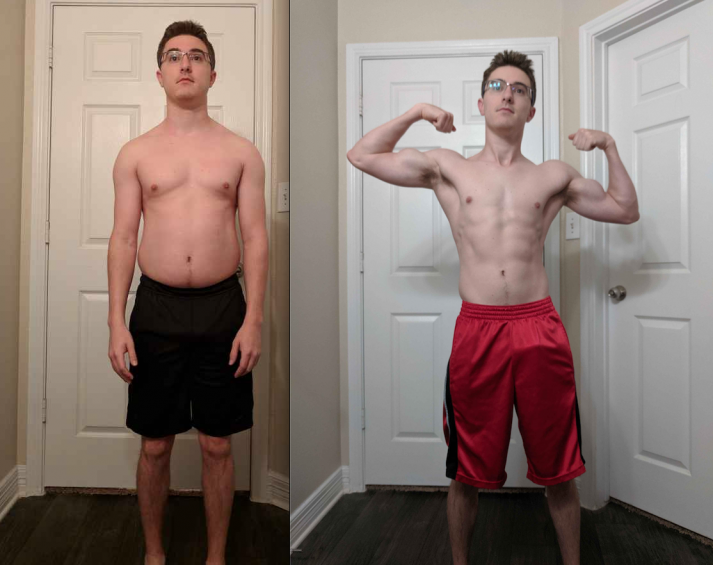
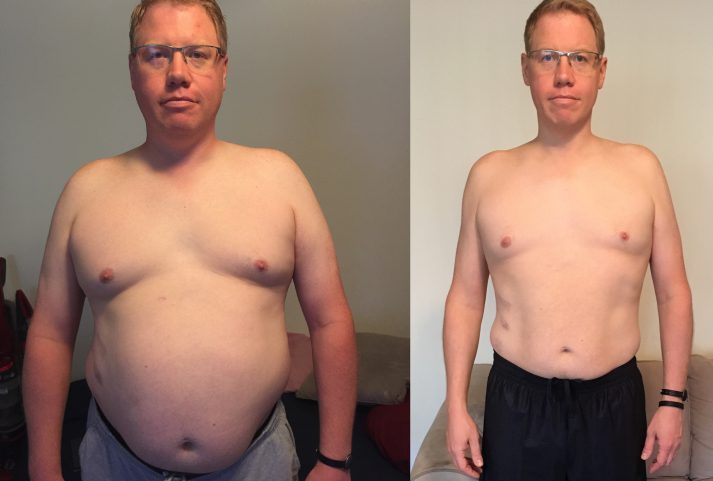
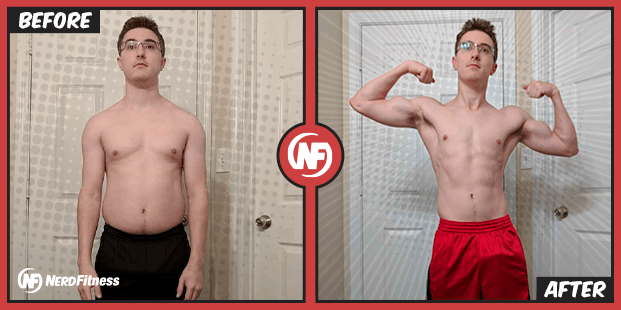
In 30 days, I had put on 18 pounds (pictured below), increased the strength in ALL of my lifts, and felt more confident than I ever had before in my life.
That’s when the lightbulb when off in my head: there’s a better way.
And thus began a radical redefinition of how I thought the human body worked, how muscle was built, and where I needed to put my priorities.
Since then, I’ve spent seven years learning everything I can about how muscle is built.
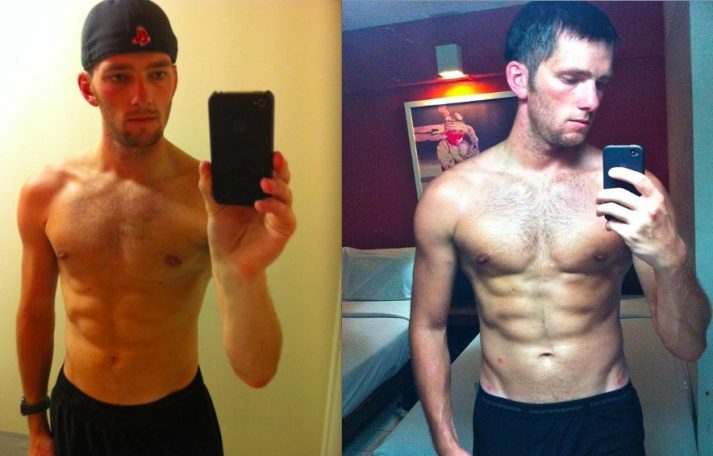
A few years back, I took an epic 35,000-mile trip around the world, and despite not having access to a gym for 6 months, I managed to once again pack on even more muscle and get myself in great shape without once picking up a weight (pictured below):
Again, my world was turned upside down.
I learned that gyms are not a requirement to build muscle and get stronger, though a great gym workout can certainly speed up the process.
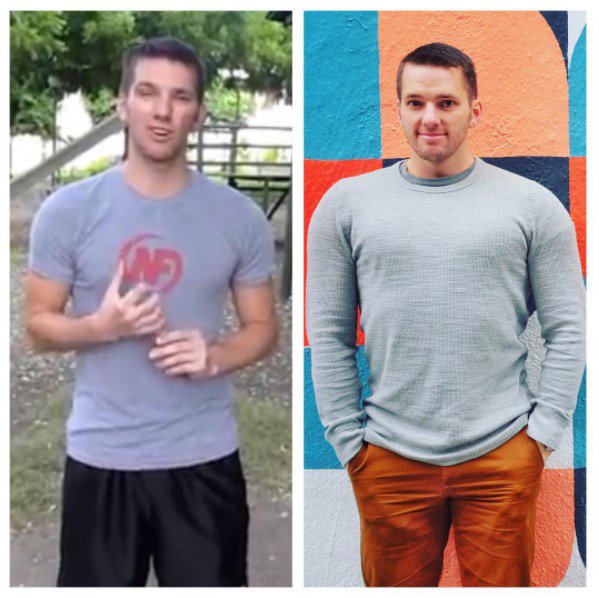
And after a few more years of up and down challenges, I had finally – jokingly – changed from Steve Rogers to Captain America (there’s a story behind this):
I’m still not the biggest guy in the world, nor will I ever be. I’m okay with that!
I’ve learned that anyone can pack on muscle, even skinny nerds like me.
If you’re skinny and want to get bigger, you’ll be fighting genetics the whole way, but do not let that deter you.
Anything is possible.
Today’s article outlines everything I’ve learned over the past 13 years of mistakes, successes, failures, and adventures.
The Most Important Thing for Putting on Muscle: Eat More Food.
As they say, muscle isn’t made in the gym, but in the kitchen:
If you want to bulk up, you’d be better off working out twice a week for 30 minutes and eating right, than working out 6 days a week and not eating properly.
I learned this the hard way.
I spent four years of college working out five days a week for 90 minutes a day trying to get bigger.
I drank protein shakes like I thought I was supposed to. I got a little stronger, but never bigger.
Why?
BECAUSE I DIDN’T EAT ENOUGH CALORIES.
When I get emails from people who lament the fact that they can’t gain weight, I always first ask about the person’s diet.
More often than not, that person thinks they are eating enough, but are definitely not.
Here’s the truth:
If you are not getting bigger, you are not eating enough.
Your body can burn 2000+ calories every day just existing (and then factor in exercise and, gulp, cardio – I’ll get to that in a minute), and you need to overload your system with calories in order for it to have enough fuel for the muscle building process.
Want to know how many calories you burn every day just existing?
Note: we have used The Mifflin-St Jeor Equation to create this calculator! [1]
For every person, the number of required calories for bulking up daily is different, especially when you factor in how much you move, fidget, and how much weight you need to gain:
For some people, it might be 2,500 calories a day.
For others, it might be 3,500 calories a day.
For others, it might be 5,000 calories a day.
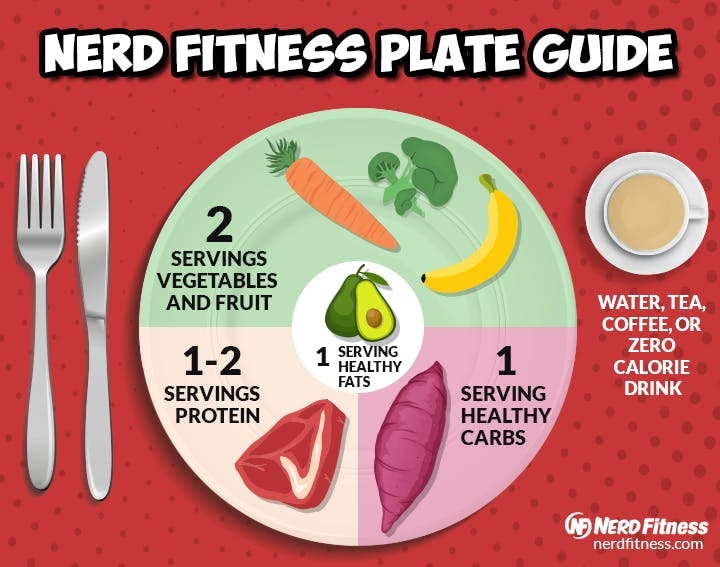
I don’t love calorie counting (I prefer a “Balanced Plate” approach), but I think for a newbie starting out, tracking calories for a few days is a great place to begin.
So, track your calories using something like MyFitnessPal over a few days and get an average.
I bet you’ll discover you’re eating significantly less than you thought you were.
LEARN HOW MANY CALORIES YOU NEED TO EAT FIRST.
And then eat MORE!
Spend the next two weeks eating an additional 300-500 calories per day above your TDEE (which you calculated above) and see how your weight adjusts (and how you look in progress photos!).
If you are not getting bigger, add an additional 300-500 calories per day and repeat the process.
Everybody’s results will vary, and thoughts are mixed on how quickly we can build muscle:
Under optimal conditions, some say you can expect to gain 1 pound (.5 kg) of muscle per week,
My results have shown that 2 lbs (1kg) per month is more realistic.
A 2016 study[2]revealed that strength training produced a 2.2 lb increase (1kg) increase in lean mass in 8 weeks.
Regardless of how fast you bulk up, it might be helpful for you to gain weight by putting on some fat with your muscle!
Here are things to consider if you overeat WHILE strength training: extra glycogen, some fat, and water stored in your body can be a good thing for your confidence and get you headed down the right path.
So, don’t listen to the sites or programs that say “gain 40 pounds of muscle in two months!”
Unless you’re on the juice (‘roids, not Hawaiian Punch), it’s going to be a slow, long process.
My advice: Rather than massive weight gain over a month, you’d be much better off gaining .5-1.5 lbs. (.25-.75 kg) a week, every week, for six months…and keeping the weight on!
Now, I know this stuff isn’t easy.
There’s nothing worse than spending 6+ months in a gym and doing what you think you SHOULD be doing, only to step on the scale and realize that you haven’t made any progress!
If you’re somebody who’s worried about wasting time, or you want to have an expert guide your nutrition based on your current situation, consider checking out our Online Training Program!
What Food Should I Eat to Bulk Up?
Let’s go through how you should be prioritizing your nutrition, nutrient by nutrient:
Protein: rebuilds muscle after you break it down.
Carbohydrates: provides your muscle with fuel and body weight with energy
Fat: helps your bodily functions and can also be burned as fuel in the absence of carbs.
Let’s look at each of these individually:
PRIORITY #1: PROTEIN
Protein can come from any number of sources, including:
After protein, in order for you to get bigger, you need to eat enough calories, and those calories should come from sources composed of carbs and/or fats.
Here are foods full of carbohydrates you can prioritize for bulking up:
Rice
Quinoa
Oats
Legumes and lentils
Sweet potatoes
Yams
Regular potatoes
Whole grain pasta
Whole grain bread
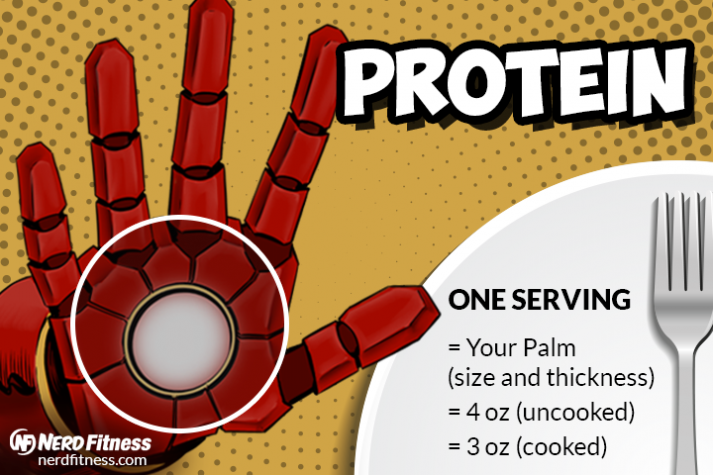
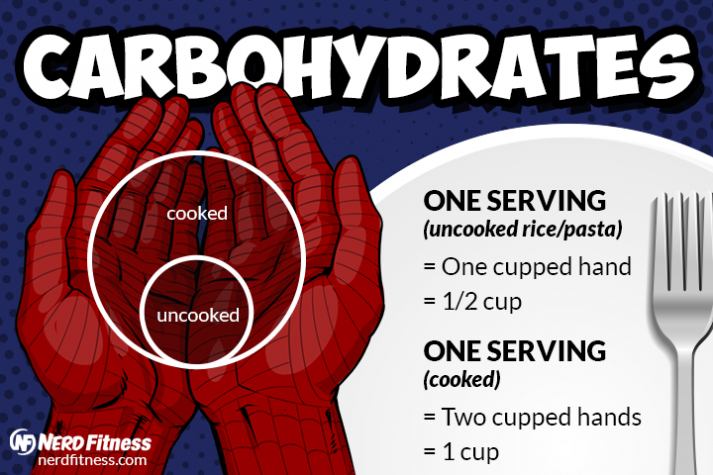
To help you get better at eyeballing serving sizes:
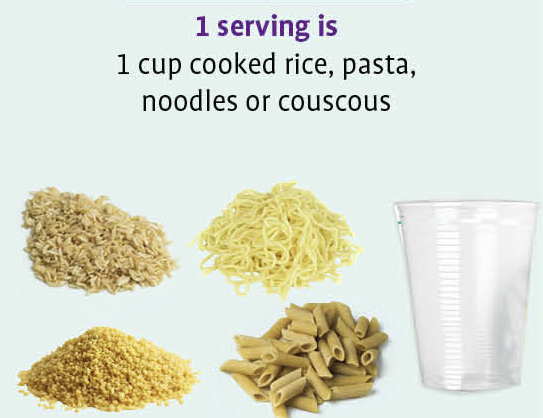
1 serving of a starchy carbohydrate is 1 cupped hand (uncooked), or your two hands forming a cup (cooked).
Here are some images to help you learn proper portion sizes (thanks to SafeFood):
In addition to consuming carbohydrates from these sources, it’s okay to consume plenty of fruit while trying to bulk up!
Fat is a macronutrient that you can eat that can help you reach your goals in the right quantity, as fat can be higher calorie and you can eat lots of it without feeling full.
Healthy fat can be found in foods like:
Avocado
Almonds
Walnuts
Macadamia nuts
Olive oil
Almond butter
Peanut butter
Science has recently come around on saturated fat too [4]. Once completely vilified, but now considered okay for moderate consumption.
Saturated fats can come from things like:
Whole milk
Full-fat dairy
Coconut oil
Grass-fed butter
Fatty cuts of meat
Lard
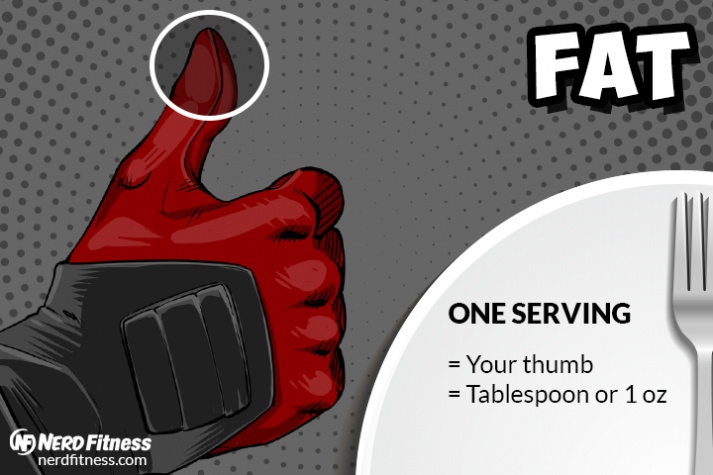
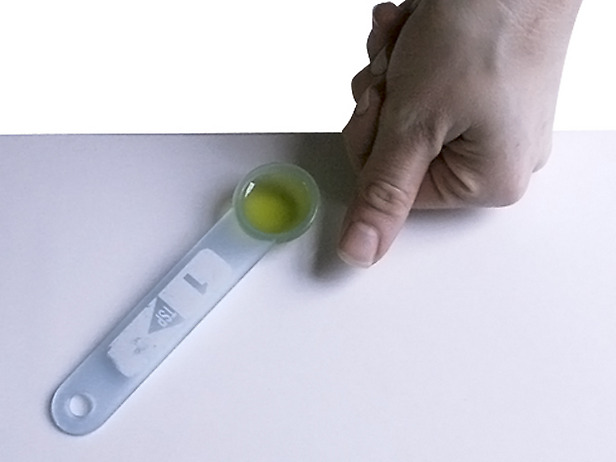
To help you gauge: a serving size of fat is roughly the size of your thumb!
For reference, this is a single serving of almonds (162 calories):
THIS is a serving of olive oil (119 calories):
As you can see, you can eat an extra 500 calories of “healthy fats” by eating lots of “heart-healthy” fats like nuts or adding more olive oil to your meals.
PRIORITY #4: VEGETABLES!
Last but not least, you need vegetables in your diet.
If you start to eat a lot more food, your “indoor plumbing” is going to really benefit from eating some high-fiber veggies with each meal:
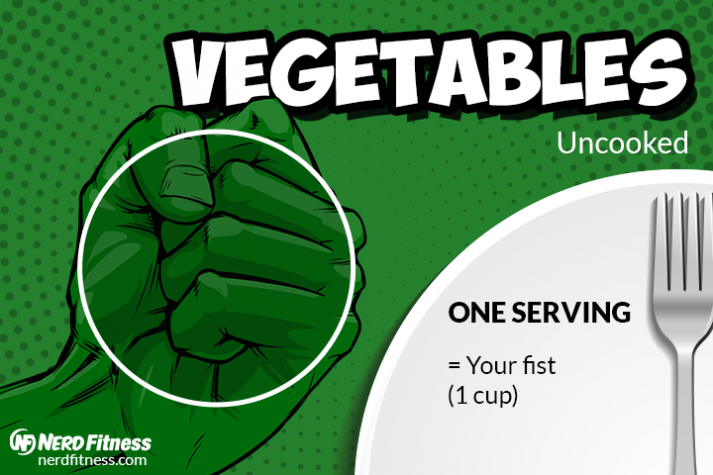
A serving of veggies is about the size of your fist.
Here’s a quick, non-complete list of veggies that can fill your plate:
Broccoli
Broccolini
Cauliflower
Spinach
Kale
Spaghetti squash
Brussels sprouts
Zucchini
Cucumber
Carrots
Onion
Asparagus
BRINGING IT ALL TOGETHER:
This plate and serving size stuff above is just to help you get started thinking about healthy food differently and in proper portion sizes.
Consume 1-1.5g per pound (2.2-3.3g per kg) of body weight in protein every day.
Consume the rest of your calories from foods composed of carbs and fats.
Always eat vegetables so that your body can actually PROCESS all this extra food.
If you are not gaining weight, add more carbs and/or fats to your meal.
It really does come down to the following:
If you are not gaining weight fast enough, you’re not eating enough. Increase your portions of carbs and fats!
Whenever we work with coaching clients who struggle to bulk up, this is the area we target: adding more carbs and fats to each meal.
What are the Best Popular Bulk-Up Eating Strategies?
If you read the previous section, you know that we have some pretty specific “best practices” on how to bulk up.
However, there are multiple strategies that can also work, and I’d like to cover each of those here too.
Depending on your budget, your taste in food, and your goals, these strategies will work better for some than others.
#1) The “Healthy” Bulk
I have followed this method to great success multiple times (including right now).
Ultimately, I follow the “real food” principles whenever possible (good sources of quality meat, tons of vegetables, minimal amounts of gluten and processed carbs), but I mix in some specific items that are calorie/carbohydrate dense to reach my calorie goals for the day.
This is the exact strategy we laid out in the previous section of this article.
Speaking of quality calories – how I recommend doing this – receive your Get Bigger Shopping List and Bulk Up Cheat Sheet by putting your email in the box below:
Download our free skinny guy’s guide to putting on muscle!
Enter your email below to download now
The Nerd Fitness “Get Bigger” Shopping List
Bulk like the Hulk with our rules for getting bigger
But for me at the time, it worked (and got me interested in diet research).
If you are super skinny and on a tight budget, this might be your only option, and that’s okay!
Foods that are high in calories include:
Whole milk
Cottage cheese
Cereal
Pasta
Rice
Potatoes
Ice cream
Juice
Peanut butter sandwiches
Meatball subs from Subway
Pizza
Burgers
Etc.
Whatever gets you to your caloric intake goal for the day.
When I put on my 18 lbs, I used to drink 3 CytoGainer shakes a day, because it was the easiest way for me to stay on target.
If you are training properly, a majority of these calories will go towards building muscle instead of putting on a lot of fat.
Steve’s thoughts: I’m not a big fan of this method much, as I’ve come to learn the quality of food is as important (if not more so) than quantity when it comes to your overall health, and we’re aiming for bigger AND healthier.
#3) GOMAD
Drink a gallon of whole milk every day along with your meals.
Sounds crazy, yup, but it works.
A gallon of whole milk is full of enough sugar, carbs, fats, and protein that when all said and done, results in 2400 calories consumed in liquid form.
Mix in vegetables and meat for healthy meals and you got yourself a simple-to-follow diet.
I’ve attempted this diet back in my younger days, and although my stomach hated me, I certainly had success with it, mostly because it was simple to follow and easy to understand.
Yes, it’s possible to bulk while following either of these diets:
If you are eating Paleo, you’ll want to eat LOTS of carbs and fats from calorie-dense foods like fruit, sweet potatoes, and nuts.
If you are going Keto, you’ll want to eat LOTS of fat from cheeses, nuts, oils, and so on.
If you have the budget and want to try it, go for it. You’ll be eating truckloads of nuts, avocados, and meat.
“WHICH STRATEGY IS BEST FOR ME?”
In our opinion, we’ve had the most success with Coaching Clients who adopt a “healthy bulk” strategy, #1 above.
It’s a focus on real food, a sustainable increase in calorie intake, and can be adjusted easily by adding or reducing total portions of carbs and fats.
But hey, you do you, boo.
What Supplements Should I take to Bulk up? How to eat more calories.
If you are struggling to consume enough whole foods every day, then here are some tips to help you reach your caloric goals to bulk up:
“WHAT SUPPLEMENTS SHOULD I TAKE TO BULK UP FAST?”
Most supplements are garbage
Plus, you should ALWAYS prioritize consuming real food over shakes and powders.
HOWEVER, if you are interested in bulking quickly, there are two I would recommend:
Protein Powder. A great solution for getting extra protein and calories in your diet and building muscle.[5] As we point out in our article on protein and protein shakes, mix and match your own ingredients and see how many calories you can get into a smoothie without breaking your blender.
Creatine supplement. It helps your muscles retain more water [6], and has been shown to increase the hormone IGF-1, which is needed for muscle growth[7]. It’s one of the only two supplements (along with protein) that I take regularly.
Outside of these two supplements, you really don’t need to prioritize supplementation, despite what the muscle magazines tell you! Hell, many of these muscle mags are OWNED BY SUPPLEMENT COMPANIES.
I’ll leave you with two more big suggestions on how to bulk up in this section:
#1) Liquid calories are your friend. Liquid calories can give us lots of calories without ‘filling us up,’ which is an easier way to consume enough calories every day without feeling overly full.
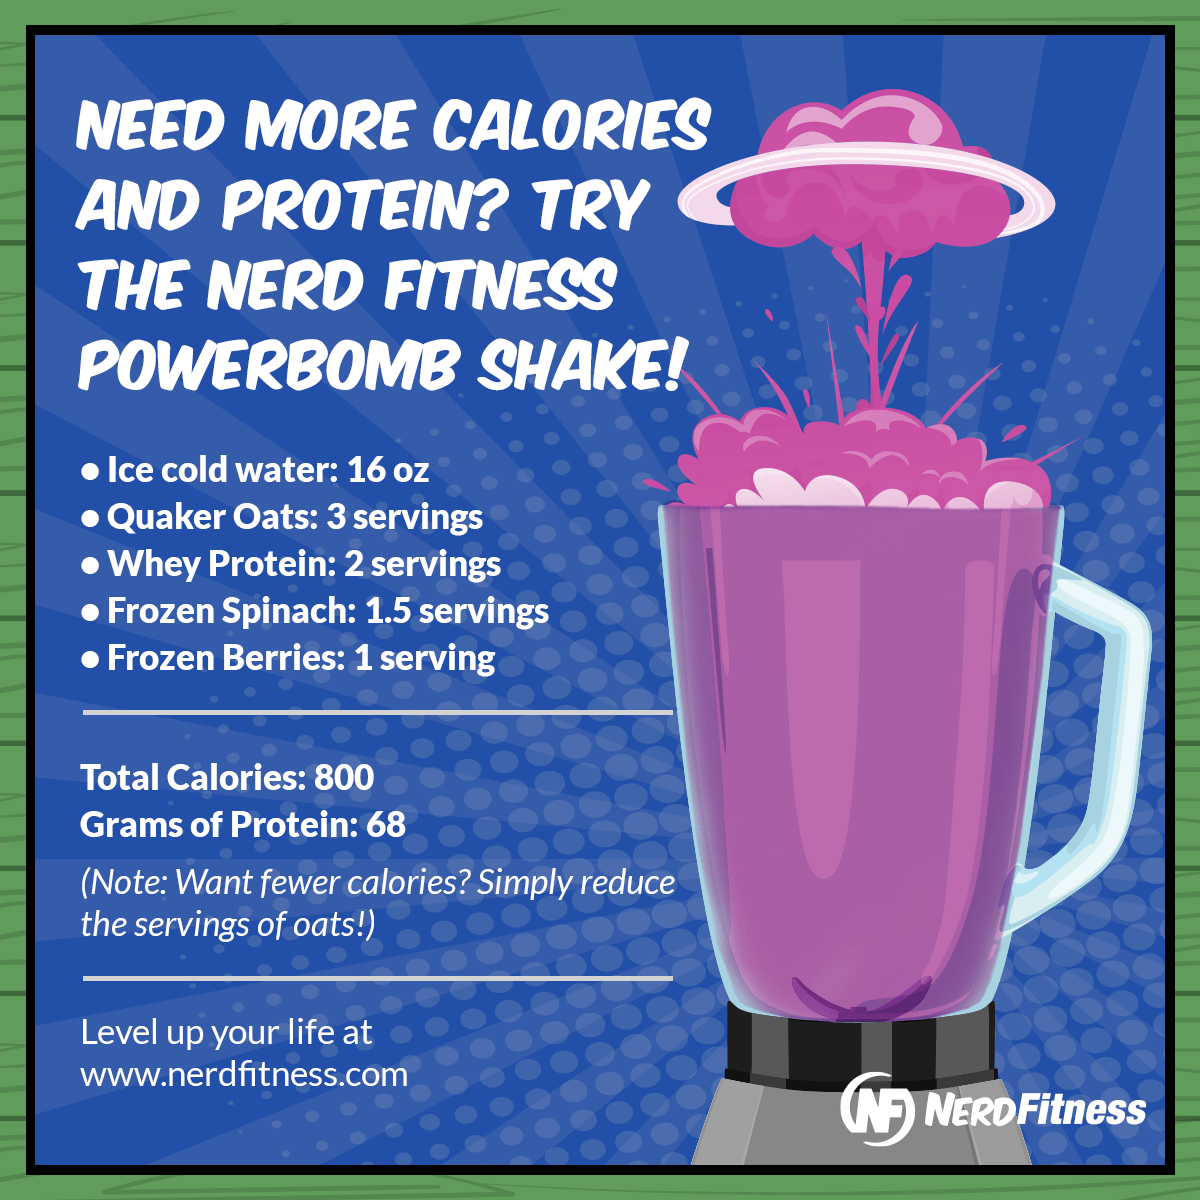
I personally get a huge chunk of my calories every day from making my own ‘Powerbomb Shake – from our Protein Guide
I put all of this into a Vitamix Blender – yep, it was expensive, but worth the investment. This blender has been used twice a day for 8 years without a single issue.
If you need even more calories consider adding whole milk, coconut milk, or almond milk instead of water.
You can also add a shot of olive oil to add calories/fats to a shake in the quest for MOAR MUSCLE!
#2) Train your Body to Eat More: If you are cooking rice, each week try adding in an extra quarter cup when you cook it.
And yeah, you have to FORCE your stomach to accept more food, even when you’re not hungry.
This is not enjoyable, as you often feel like you’re going to explode.
However, just like it’s necessary to force your muscles outside of your comfort zone to get bigger, you need to force your stomach outside of its comfort zone until it adapts to accepting more calories.
So, start by adding a little bit more food each day and soon enough your stomach will expand.
How to Grow Bigger Muscles: Get Stronger
When you strength train, your muscles are broken down and then get rebuilt stronger to adapt to the stress you have applied to it.
So every time you pick up a slightly heavier weight, you are increasing the challenge and forcing your muscles to adapt and get more resilient.
Follow a progressive overload strategy and eat enough calories, and you will get bigger.
You have two approaches to consider while bulking up:
PATH A: BODYBUILDER BULK. Follow a bodybuilder-type routine that focuses on isolation exercises that chops your body into different segments and works each of them out once a week.
You may have seen something like this:
Monday: Chest
Tuesday: Legs
Wednesday: Shoulders
Thursday: Back
Friday: Arms and Abs
I think these routines are fine, and you might even enjoy them.
However, they do require a fairly large time commitment at the gym, and you’ll be training 5-6 days per week.
PATH B: STRENGTH AND MUSCLE. Focus on full-body routines that contain compound exercises like squats and deadlifts that give us the most bang for our buck.
Every time you train, most of the muscles in your body are getting worked out.
Specifically, this path has you focusing on getting really strong at these movements:
If you can focus on getting really strong with the above exercises, and eat enough calories, you will also get bigger in all of the right places.
Path B is something we’re bigger fans of compared to Path A, and it’s what we recommend to our Coaching Clients.
Specially, we find it to be safer and also more time-efficient: you’ll be training just 2-3 days per week on this path (instead of 5-6 days per week with Path A).
Mark Rippetoe (author of Starting Strength, a must-read for anybody interested in the above exercises) lives for old-school barbell training (path B):
Why?
Because it works.
Just. Keep. Eating. And. Lifting.
Skinny Guy Workout Plans for Bulking Up
As we cover in our “How to build muscle” article, here’s a sample routine you can follow NOW to start bulking up.
After you do your dynamic warm-up, do the following workout:
Get stronger and the rest will take care of itself.
NERD FITNESS RECOMMENDATION: Feel free to pick WHATEVER workout program you want from wherever. If you don’t want to follow the workout above, consider these sources:
Now, don’t worry too much about which path is best.
Nutrition plays the most important role in bulking up, and any strength training plan will help you get bigger.
There are 3 studies I want to point out:
A recent study showed that a higher intensity workout (heavier weight for low reps) created more muscle mass than a higher volume (lower weight for more reps).[8]
Getting more volume (more sets of exercises) per week resulted in more mass compared to less volume (fewer sets of exercises), in this study[9].
Studies show that weight training creates superior “bulk up” results compared to bodyweight training,[10] but that doesn’t mean bodyweight training isn’t beneficial. Studies show that bodyweight training exercises can build muscle, but require a LARGE number of sets per rep, and pushing oneself to absolute failure.[11]
What this means: Don’t overthunk it.
Pick up heavy stuff for 3-4 sets of 5 reps. Pick up a weight that is heavy enough that you can only complete your specified number of reps.
Challenge yourself on bodyweight exercises, either by making them more difficult, adding weight, or doing high reps to failure.
And then do more next time.
What’s important is that you pick a plan and follow through with it while focusing on eating enough.
After a few months, you can reevaluate and then adjust based on how your body has changed.
On any of these days, feel free mix in bicep curls or tricep extensions or calf raises at the END of your workouts.
Focus on the big lifts first and get stronger with them.
How much weight should you lift? For every one of the barbell movements above, I start with just the bar, and then add weight in 5lb increments each week.
It’s important to get form right and get your body used to the movement for when you start to lift heavy weight.
How long should you wait between sets? Again, don’t overthink it. Waiting 2-3 minutes allows you lift heavier weight, and thus makes you stronger.
Waiting 60-90 seconds puts more of an emphasis on muscular size and endurance (as you’re resting for a shorter period)…but don’t overthink it. Do the next set when you’re ready.
A piece of advice from 8-time Mr. Olympia, Lee Haney: “stimulate, don’t annihilate.”
Don’t destroy yourself for the sake of destroying yourself; stopping one or two reps short of maximum effort can save you from overtraining and potential injury – remember that muscles are built in the kitchen!
If you’re already overwhelmed and just want somebody to tell you what to do, you’re not alone.
I’ve had a coach since 2014 and it’s the best investment I make in myself every month.
Can Bodyweight Training Help Me Bulk Up?
Yes, you can get bigger and stronger by doing exclusively bodyweight exercises.
Take a look at any Olympic gymnast: he is jacked, with giant muscles, all built with bodyweight exercises:
HOWEVER, it requires a very specific type of training regiment to see those results.
Studies show that weight training creates superior “bulk up” results compared to bodyweight training,[12] but that doesn’t mean bodyweight training isn’t beneficial.
Studies show that bodyweight training exercises can build muscle, but require a LARGE number of sets per rep. In other words, you’ll need to push yourself to absolute failure.[13]
So, here’s where the challenges arise:
Like with weight training above, you need to increase the difficulty in order for your muscles to adapt.
Because it’s often more challenging to add a few pounds to a bodyweight exercise to make it tougher – compared to putting a weight on a bar, you need to increase the difficulty of the bodyweight movement itself.
If you are trying to build size, you can also do sets where your rep ranges are in the 25-35 reps per set, and you are pushing your muscles to failure (woof):
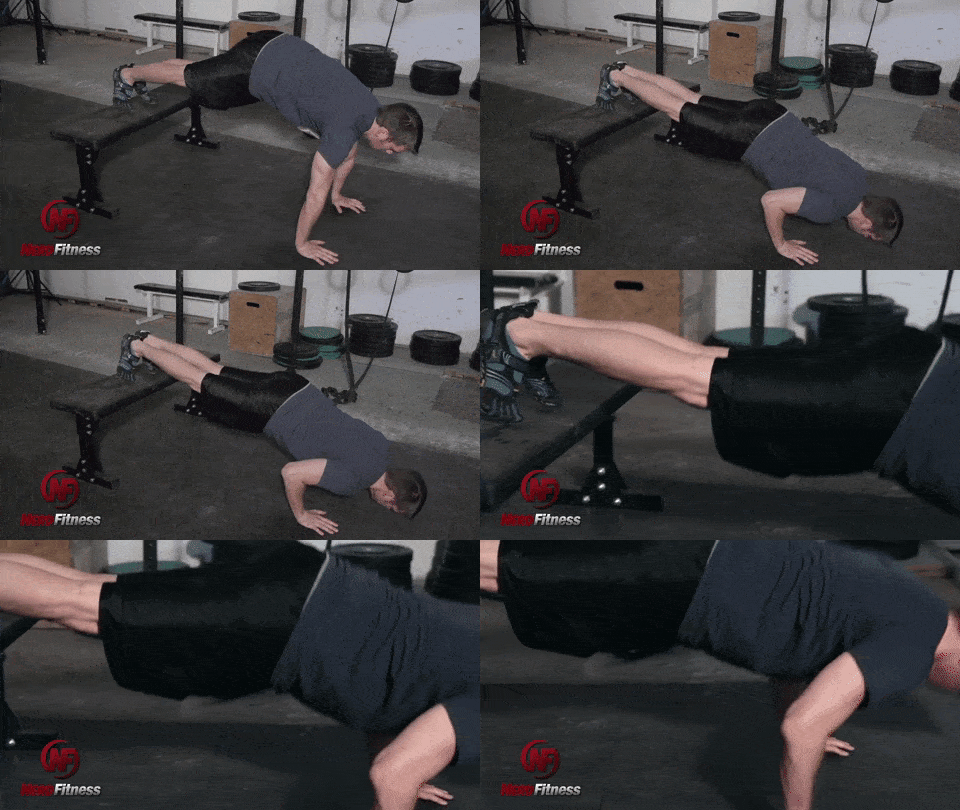
If you can do 4 sets of 15 push-ups, consider making them harder to progress. Do 4 sets of 15 push-ups with your feet on a bench.
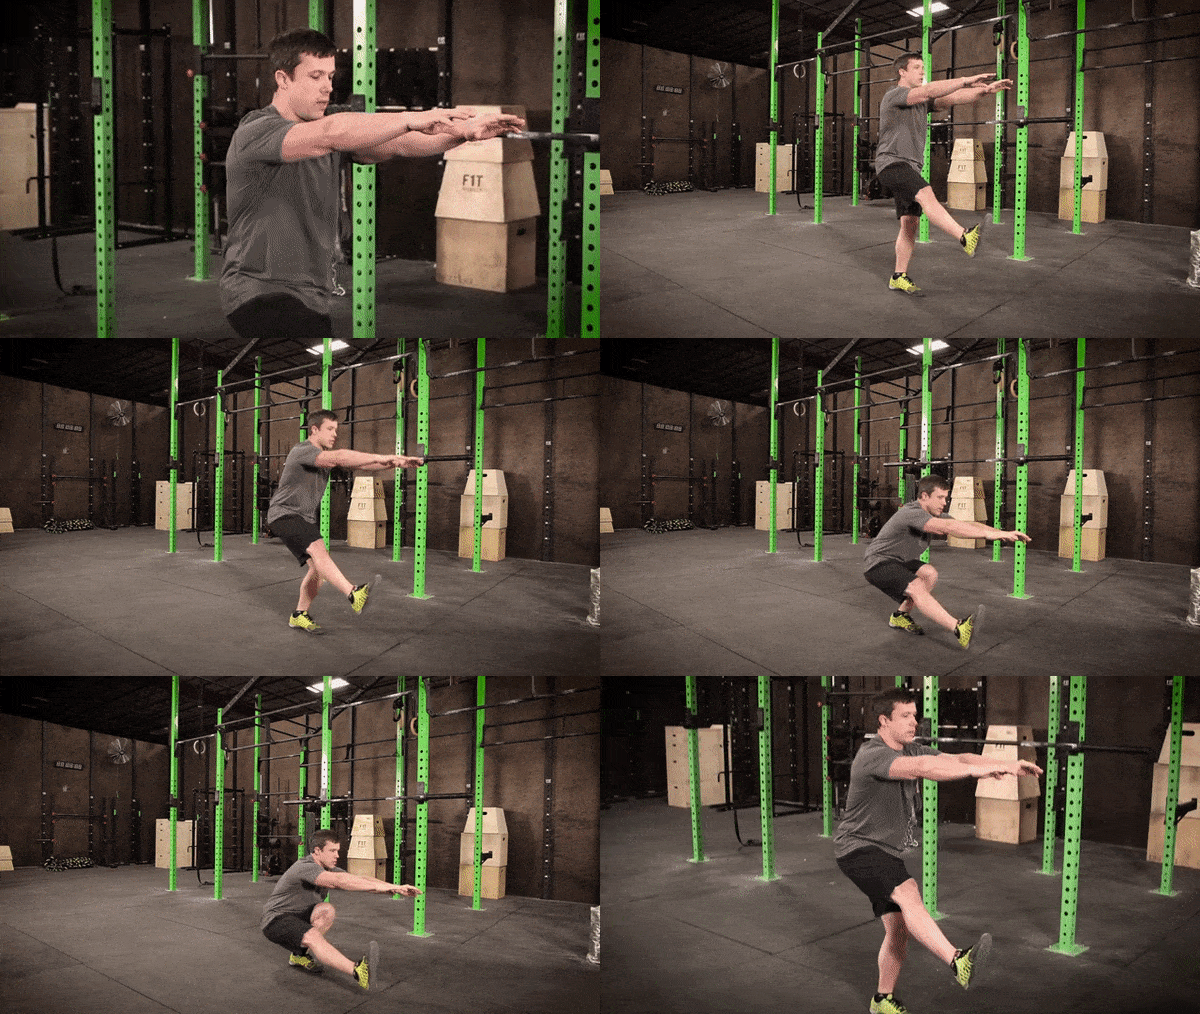
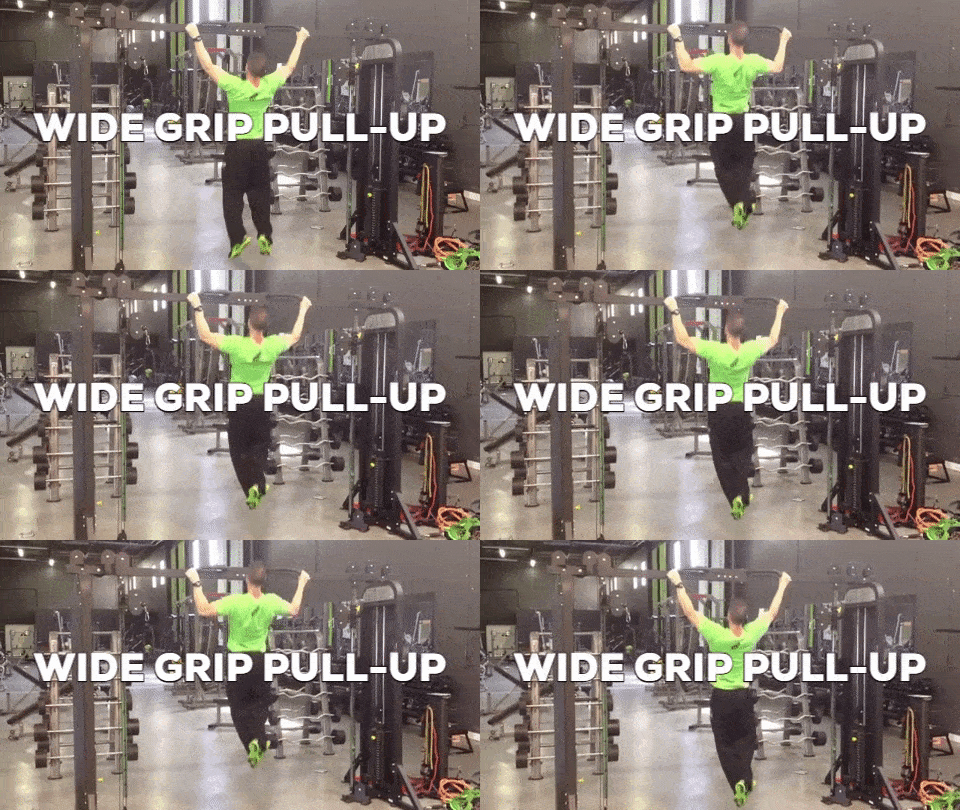
Bodyweight squats too easy? Work your way up to pistol squats (one-legged squats). 4 sets of 12 pull-ups not a challenge anymore? Great. Make them tougher. Go for a wider grip, an uneven grip, or weighted pull-ups.
I highly recommend beginners start to take a serious look at strength training with free weights; it’s much easier to record one’s progress, easy to add more difficulty (just add more weight!), and very structured.
In fact, I personally believe the best routine mixes both weights and bodyweight training. I have been working with my online coach for 4 years, and I’ve packed on size by following abarbell + bodyweight training routine.
Weight training for my lower body, advanced bodyweight movements for my upper body.
What it really comes down to is this:no matter what you have access to (a gym, barbell, dumbbells, or just a pull-up bar) you can find a way to build strength and muscle if you follow a plan and eat enough calories.
If you’re trying to bulk with just bodyweight, it might be worth enlisting the help of a coach to help you scale your bodyweight exercises correctly and in the proper sequence!
I am Skinny Fat: Should I gain or lose weight first?
If you are skinny fat (you have skinny arms and legs but have a gut), there are three paths available to you:
Get yourself down to roughly 12% body fat (~20% for women), and then start to increase the size.
By slimming down first, while building muscle, you don’t have to worry about buying BIGGER clothes first, only to then need smaller clothes once you start cutting the fat.
Then, once you decide to eat more and get bigger, if you notice your body fat percentage start to creep up, you can simply adjust until your body fat gets back in the acceptable range. Then keep building!
To recap, here’s what to do if you are skinny-fat:
Eat a caloric deficit while heavy strength training to build muscle while leaning out.
Once you reach a certain body fat percentage you’re happy with (probably 10-12%), then you can increase your caloric intake to build more muscle without putting on too much fat.
Proper Sleep and Rest for Putting on Muscle
Last but not least, the other important piece to this Triforce of muscle building:
Strength training, eating enough, and RECOVERY.
Your body builds and rebuilds its muscles during RECOVERY.
Our muscles generally need 48 hours or so to recover from their previous workout, so I do not recommend you do any serious strength training of the same muscle group on back-to-back days.
A word about cardio: if you are serious about getting bigger and stronger, lots of long-distance cardio will work against you.
It’s something Coach Jim brings up in the video “7 things I learned adding on 50 lbs of muscle”:
Your body has to burn so many calories for your runs that it doesn’t get to use any of these calories in the muscle-building process.
If you love to run/bike, that’s cool, as long as you know it’s slowing (or halting) your progress.
So, cut back on the running or cut it out completely.
Try mixing in sprints and interval training if you want to keep the cardio up without having to do all of the crazy distances. You can always add it back in once you accomplish your weight gain goals.
A few words on SLEEP: You need more of it when you are building muscle.
It’s that simple.
Don’t be surprised if after a heavy deadlift day you find yourself wanting to sleep for 10 hours.
It might mean less TV or less video games.
Again, if you are serious about getting bigger and stronger, don’t neglect sleep.
FAQ for Skinny Guys Trying to Bulk Up
QUESTION #1: “But I just want to get toned, I don’t want to get too bulky.”
That’s not a question, but I hear it all the time. Do NOT worry about getting too bulky. I’ve been trying to get “too bulky” my entire life – it takes years of concerted effort to pull that off.
I’m gonna guess you have 30+ pounds to gain before you’d ever even be considered “bulky.”
That means that if you struggle with weight gain, getting to the point where you are TOO bulky would actually be a good problem to solve.
As you start to put on weight if you ever find yourself getting a tiny bit too chubby, simply eat less at that point!
So, when in doubt, always err on the side of too many calories than not enough. If you’re not sure if you should eat or not, etc.
QUESTION #2: “But I don’t want to do that stuff, so I’m gonna do _____ instead.”
Again not a question. But hey, go for it. Give it a month, and see how your body reacts. If you’re getting bigger, stronger, and healthier, keep doing it.
If not, come back to this article and apply the lessons here!
Either plan will get you there. It’s 90% diet anyways.
What’s important is that you pick a plan, you progress, you keep track of your results, and you consistently progressively increase the load that you are moving (be it your body’s weight or an actual weight).
QUESTION #5: “I want to get bigger and faster and have more endurance and flexibility ALL at the same time, can I do that?”
I hate to say it, but building endurance and getting bigger simultaneously is brutally difficult.
As I point out in “How to build any physique,” compare a marathon runner’s body with that of a sprinter or gymnast. Put the running on hold for a while, and focus on getting bigger: you’ll get there faster.
When you decide to mix running back in, keep your calorie consumption high, and don’t forget to keep strength training!
You can still go for walks, and still get a good cardio workout by lifting quickly with minimal breaks between sets.
QUESTION #6: “Do I need to eat every three hours?”
Nope, you don’t have to:
The TOTAL number of calories you consume over the course of a day is more important than the timing of the meals.[14]
The same is true with protein intake: studies show it doesn’t matter WHEN you eat your protein. HOW MUCH you consume in a day is more important.[15]
In fact, there are actually some scientific benefits that can result from not eating all day and instead condensing it into a smaller window.
But eating more frequently might help…
If you struggle to get enough calories in your system, spacing out your meals might help you feel less full, or give you more opportunities to reach your calorie goal for the day.
I eat all of my calories between 12pm and 8pm, and still get bigger despite only eating 2 MASSIVE meals each day.
Don’t overwhelm yourself. Keep it simple. Get stronger, eat more food, sleep. Break this down into simple steps and goals that aren’t scary, and get started.
The best advice I can give you is to start and make adjustments along the way.
You’ll work with our certified NF instructors who will get to know you better than you know yourself, check your form, and program your workouts and nutrition for you.
2) If you want a roadmap for home workouts, check out NF Journey. Our fun habit-building app helps you exercise more frequently, eat healthier, and level up your life (literally).
Try your free trial right here:
3) Download our free Bulk Up Guide, which you can get when you sign up in the box below:
Download our free skinny guy’s guide to putting on muscle!
Enter your email below to download now
The Nerd Fitness “Get Bigger” Shopping List
Bulk like the Hulk with our rules for getting bigger
Lastly, I’d love to hear from you!
PLEASE leave your questions, eating or strength or otherwise below so we can answer them and become best friends and practice karate kicks in the garage:
How can I help you get bigger and stronger?
What part of this journey are you still struggling the most with?
What are your favorite bulking-up foods!?
Share with your friends in the comments so we can all go buy it in bulk at Costco.
-Steve
PS: Make sure you check out the rest of our Bulk Up guides:
Welcome to the Ultimate Beginner’s Guide to the Gym!
As part of our Strength 101 series, this guide will dive deep into everything you need to know about working out properly in a gym.
By the time you finish reading, you’ll never have to wonder “What should I do in the gym?”
Plus, I bet I also make you laugh once or twice with bad jokes and perfect gifs.
We’ve helped thousands of Online Coaching Clients build confidence and start strength training in the gym, so I worked with our coaches to create today’s Ultimate Beginner Gym Guide!
Okay, time to start working out. Let’s hit the gym and explore the following:
Regardless of your physique, if you are 400 pounds or 100 pounds, going to a regular commercial gym for the first time can be intimidating as hell.
And that’s only if you can get yourself to use 20 Seconds of Courage to walk in the door!
I explain exactly what I mean by it in this video:
I know many people who say “gyms are not for me,” or “gyms are dumb” and never even go into one, simply because gyms can be scary/not welcoming/not cool.
Now, if you CAN work up the courage to walk through the door, you’ll be faced with the following:
#1) People with pained looks on their faces dutifully using machines that somewhat resemble medieval torture devices.
#2) Others on cardio machines, treadmills, and ellipticals, and you can already picture yourself wiping out and ending up in a YouTube fail montage.
#3) Really strong jacked people picking up heavy free weights so effortlessly that you can’t help but instantly compare yourself to them…and get intimidated.
If you struggle with self-confidence, or you don’t love how you look, you might assume that everybody around you will be judging you the whole time and don’t want to subject yourself to this torture.
In fact, you might think that somehow you need to get in shape FIRST, and THEN you can go to the gym…
Wrong!
You go to the gym TO get in shape. And I will get you there.
If you are going to start using a gym, here are some truths you need to know:
Everybody around you is just as self-conscious as you are. Yes, that super jacked dude. Or that thin (or jacked) fit woman on the elliptical. They aren’t focused on you, because they’re too busy living inside their own head wondering if everybody is thinking about them.
Everybody starts somewhere. You don’t look good so that you can then go to the gym. You go to the gym to get stronger, more confident, and then look good.
MOST will applaud you for trying. When I see somebody who is severely overweight at the gym, it makes me happy – they’re trying to better themselves! That’s freaking AWESOME. This is the mentality 90%+ of the people will have.
MANY will be too self-focused to even notice you. These are the dudes lifting up their shirt in the mirror to check their abs, doing bicep curls in the squat rack, and/or making sure they take photos to post on Facebook to prove they did in fact go to the gym. #Fitspo #Instagram #OtherNonsensicalHashtags
A RARE few will judge. Though, they’re not just judging you, I promise. They’re judging EVERYBODY around you, because they can’t help but compare themselves to others and they’re terrible people. This is no different than in real life. Screw these people, haters gonna hate, slaters gonna slate.
Sure, you can say “people are mean, the gym is scary, I just won’t show up.” But then, the terrorists win. And so do those people. So f*** that!.
Instead, this is going to be your gym mentality:
Accept that some people suck (like anywhere in life), and most people are indifferent or focused on being self-conscious themselves. Everybody else will applaud you for trying and being there.
Make an epic Spotify playlist that makes you feel heroic.
Wear clothes that you feel comfortable in.
Keep your headphones on, zone out everybody, and go about your business. Imagine you’re the only one there.
These are tips Coach Matt brings up in his video How to Overcome Gym Anxiety:
We work with all of our Online Coaching clients who are worried about looking foolish in the gym. We know this is a huge challenge, so we create small levels and missions for our clients to get them comfortable in the gym.
We’ve helped people just like you go from sheepish beginner to barbell-wielding badass. Let us help you!
How Often Should I go to the Gym?
Many people think they need to hit the gym 6 days per week, dutifully alternating weight training with cardio and bootcamps to get that jacked/toned body they’re after.
That sounds exhausting and miserable to me…
…and I LOVE the gym!
So here’s what you need to know about gym frequency:
Go as much as you can, or as little as you want.
All of the workouts in this guide are “full-body workouts” which means they work out all of the muscles in your body.
And as we lay out in “Strength 101: Beginner Strength Workouts,” your muscles get broken down in the gym and then they rebuild themselves stronger over the next 48 hours.
For that reason, we recommend you hit the gym 2-3 times per week, with a day off or more in between each session.
This advice comes with a few caveats:
If you’re a single mom or working two jobs or just busy living your life and you can only go to the gym once, great! Once a week is better than zero times a week!
If you have specific athletic or cardiovascular goals you’re training for, then hitting the gym more frequently might get you faster results.
We craft our workout routines for our coaching clients around their schedules – some people hit the gym 5 days per week, while others only go once a week. We’re all unique snowflakes!
Okay! Now that we got THAT out of the way, are we ready!?
Great! Let’s level up in the gym!
Level One Gym Workout: First Day At the Gym
The toughest part about going to a gym for the first time is just walking through the door.
If you do that, you’ve already gone farther than 74% of the population (a totally made-up statistic that I’m using to prove my point), so give yourself a pat on the back.*
So on your first day in the gym, just GOING to the gym is a big step in the right direction. And I’m proud of you.
Note: You might need to also change into gym clothes if you’re coming from work. I know walking out onto the floor in gym clothes might be intimidating too (another chance to use 20 Seconds of Courage).
But now you’re wondering, “Steve you half-witted, scruffy-looking nerf herder, what do I DO on my first day at the gym?”
If you haven’t already done so, ask somebody at the front desk the following:
“Hey I’m new here, could I get a tour of the gym?”
“Excuse me, today’s my first day, can you point me in the direction of a place I can stretch?”
“Can you help me work the treadmill?”
Go full YOLO and try to figure these things out on your own.
If you’re able to get a personal tour, great! Ask the treadmill question when you get to them. If they can’t walk you through, just do a lap yourself and see where things are and who is doing what.
Pro tip (also works outside of the gym): pretend you’re confident – even if you’re dying inside – walk with purpose, and nobody will question why you’re doing what you’re doing.
So, when you’re ready, walk over towards the stretching area, and do a few basic mobility/warm-up stretches while continuing to get the lay of the land and see what people are doing (don’t stare excessively, cool? cool).
Roll your head in half-circles slowly, from shoulder to shoulder. 5 circles in each direction
Slowly roll your shoulders forwards and backwards. 10 each way.
Keep your legs stationary, and twist your torso, left and right. 10 twists on each side.
Quad stretch: Hold each stretch for 5 seconds. Do 3 on each side:
Cross one arm in front of your chest, then the other, as demonstrated here by lead coach Jim: Hold each stretch for 5 seconds. Do 3 on each side:
These movements have the awesome side-effect of you being able to look around the gym and get the “flow” of things, while still looking busy. Jim STILL uses this “trick” when checking out new gyms.
Really, just get your body moving. We don’t have to make you a gym warrior on Day 1. Some stretches and sightseeing will be good enough.
LEVEL 1 MISSION:
Take a lap around the gym and do your stretches.
If you walked out right now after doing these things, it’s still a win for Day 1 in a gym. Seriously – I don’t care what you do on Day 1 – as long as it leaves you feeling good enough to come back for a Day 2!
GYM LEVEL 1 RECAP:
Walking through the door makes you a winner.
Ask for a tour if you need to know where things are!
Change into workout clothes.
Stand in one spot, do a few stretches, get the lay of the land.
If you’re up for MORE or ready to level up consider going to the next level, become a cardio cadet!
Level 2 Gym Workout: Join the Cardio Cadets
Get on the treadmill and start it up, based on the staff’s instructions.
If you weren’t able to get instructions, many treadmills have a “quick start” button that will start things up.
Why start with just walking?
It gets you moving and out of your head! I know you’re smart – you’re reading NERD Fitness. But you also probably deal with “paralysis by analysis” a lot by overanalyzing everything, so we need to get OUT of our heads and get moving!!
So, for your first 10-15 minutes, just walk. Set the treadmill at 3mph or 3.5 or whatever speed is comfortable but not too strenuous.
A speed that gets you moving and gives you a chance to decide what you’ll do next while you look around the gym. (Aka, it gives you a chance to get out of your head and stop thinking everyone is looking at you. They’re not)
LEVEL 2 MISSION:
Do your Level 1 stretches, then spend 15 minutes walking, and then you are free to go home.
Repeat this as many days in a row that you need to until this starts to feel comfortable and you stop feeling self-conscious.
Scientists, Benedictine monks, and German scholars refer to such a thing as a “routine.”
As you get more comfortable, you can increase your walking speed or length of walking (20 minutes, 60 minutes, whatever)
If I’m gonna walk, I like to crush podcasts while doing so (My favorites: Watch out for Fireballs, Pardon My Take, and Bill Burr). Maybe you listen to Harry Potter on Audible.
Whatever floats your boat.
GYM LEVEL 2 RECAP:
What you do in the gym doesn’t matter – build the habit of going regularly.
Develop confidence at the treadmill with just walking.
Start to realize you have just as much of a right to be there as anybody else.
Give yourself a high five for being you.
This routine of walking and stretching might only be one day in the gym for you, or it might be two months of this before you finally feel like you don’t want to jump out of your own skin while in the gym.
Going to the gym is the habit I want you to build, so this is a great start. Remember, you should be thinking in terms of “days and years,” not “weeks and months”:
We have many coaching clients who spend MONTHS just walking and working up the courage to move beyond the treadmill. That’s cool. We’re all on our own journey, at our own pace, so go at the pace that fits YOUR schedule.
Level 3 Workout: Join the Bodyweight Brigade!
After getting comfortable with the stretching/treadmill routine, you may want to hop on a weight lifting machine at this point like the leg press or chest press machine.
Is this progress? Sure!
Can you do this? Absolutely!
But, but, but… we are going to recommend you try some bodyweight exercises instead as your next step.
Controlling your body through space (not outer space) is going to be more beneficial in the long run than strapping into a machine and moving through a set path.
If you can do bodyweight exercises proficiently, then stepping into a machine is “easy.”
The reverse is not always the case.
So, if we’ve convinced you to try some bodyweight exercises, then next thing is to identify a place in the gym you can do bodyweight exercises where you’re not in the way. This oftentimes might double as the place that some people are doing stretches, where you’ve already been before!
If you don’t know, ask the front desk or find a trainer! That’s what they’re there for!
LEVEL 3 MISSION:
After your 5 minutes of warm-up (Level 1) and 10 minutes on the treadmill (Level 2), your next step is to go to a place you can do the Level 3 Gym Workout:
10 bodyweight squats
10 push-ups
10 bodyweight squats
10 push-ups
10 bodyweight squats
10 push-ups
Can’t get through it all? No worries, do what you can.
This style of alternating one exercise with another is called a circuit workout, by the way!
If you don’t know how to do those movements well, watch coaches Jim, Staci, and myself show you how!
If you just did the above mini-workout for a month, you’d be off to a great start! If you’re feeling frisky and starting to find some confidence in the gym, it’s time to branch out more!
GYM LEVEL 3 RECAP:
Warm up on the treadmill with a 10-minute walk
Find a place where you can do bodyweight movements out of the way
Complete 3 circuits of 10 push-ups and 10 bodyweight squats each at a pace that works for you
Stay at this stage as long as you need, until you can move on!
Note: If you enjoy the bodyweight brigade, or you’re not quite ready to start doing weight training yet, that’s cool too.
Plus, if you want a FREE worksheet on how to level up your resistance training, without needing ANY weights whatsoever, you can grab yours right here:
Grab Your Beginner Bodyweight Routine Worksheet. No Gym Required!
Complete this workout at home, no equipment required
Avoid the common mistakes everybody makes when doing bodyweight exercises
Learn how to finally get your first pull-up
Level 4 Gym Workout: Join the Dumbbell Division
It’s time to wander into the place that strikes fear in the heart of most gymgoers:
The free weight section.
Gulp.
DO NOT FORGET THIS:If you are a 400-pound woman, or 85 years old, or a 100-pound man, you have just as much of a right to be in the free weight section as anybody else.
It might take yet another 20 Seconds of Courage to wander in there, so I’m challenging you to try it.
LEVEL 4 MISSION:
After you do 10 minutes of walking on the treadmill, go to the dumbbell section, grab a single 10 lb (4.5kg) dumbbell, and find a flat bench like this:
Stand next to that bench, and make sure nobody is using it. If somebody is at a bench nearby, ask them “is anybody using this bench?” If they say no, put your towel on the bench, your 10 lb dumbbell on it, and stand next to it.
We’re going to add a 1-arm dumbbell row to our circuit above:
The last dumbbell exercise to learn is the dumbbell Romanian deadlift (RDL). This is like a cousin of the bodyweight squat where we move through the hips more than the knees.
Grab a pair of dumbbells now, push your hips back and bow forward like you’re being polite. Or, you’re like one of those novelty “drinking birds.”
Bring the dumbbells down to about your knees, not to the ground, then stand back up.
You can see the exercise right here:
Every other workout, swap out the goblet squat for the dumbbell Romanian deadlift.
So our circuit is now alternating with each gym workout.
Do 3 circuits of each if you can! If the weight is too light, use heavier dumbbells the next time you train.
Level 4 Gym Workout: Dumbbell Division C:
10 goblet squats OR 10 dumbbell Romanian deadlifts
10 push-ups
10 dumbbell rows per arm.
GYM LEVEL 4 RECAP:
Remember you have just as much a right as everybody else to use the free weights.
Take a deep breath, go into free weights section, and get a 10 lb. dumbbell.
Learn to do a bent-over row and goblet squats.
Learn to do dumbbell Romanian deadlifts.
High-five yourself for weight training.
Training with dumbbells opens up infinite possibilities.
Okay, probably not INFINITE possibilities, but close enough.
If you are somebody that wants to learn how to train with dumbbells even more seriously, or you’re looking for ways to put that dumbbell set you have in your garage to proper use, let us help!
If you have a great program to follow, you can get in incredible shape with just a set of dumbbells.
Level 5: Enlist in the Barbell Battalion
The two final pieces of the puzzle are things I want for you so badly, I can taste it. These two exercises have changed my life, our lead coach Jim’s life, Staci’s life, and the lives of hundreds of thousands of people in the Nerd Fitness Rebellion:
And here is a quick video demonstration of the Squat, but I would REALLY read our full article!
And then I want you to find a squat rack:
THIS IS ONE TYPE OF SQUAT RACK (the barbell is NOT connected to the apparatus). USE THESE:
THIS IS A SMITH MACHINE (bar is attached to apparatus). THIS IS DIFFERENT FROM A “SQUAT RACK”:
Note: if you are training in a hotel gym, an apartment gym, or at some locations like Planet Fitness, they might NOT have a squat rack!
This can be for a variety of issues (liability, lack of space, most people just want to use a Smith Machine, etc.). They might even tell you, “A Smith Machine is the same thing.” It is not, in fact, the same thing. You hopefully can find a gym that has an ACTUAL squat rack with a free barbell.
If your gym doesn’t have a squat rack, and you want to start barbell training, I would consider finding a new gym or just hanging out in the Level 4: Dumbbell Division!
If using a squat rack scares the crap out of you: wait to attempt your FIRST trip to the squat rack when the gym is nearly empty, or recruit a buddy who knows what they’re doing. If there’s a special day you can go VERY early to the gym, or VERY late, or during the workday, do it then.
Watch this video from The Nerd Fitness Prime about how to set the ‘pins’ in the squat rack to put the bar at the proper height!
YOUR NEXT LEVEL 5 MISSION:
Attempt 1 set of a 5 barbell squats with JUST the bar (first ask the staff or a trainer how much the bar weighs: most standard barbells weigh 45 lbs (20Kg) but your gym might not have standard barbells).
You can then complete our tried and true circuit – replacing goblet squats with barbell squats.
So our circuit is now 3 circuits.
Level 5 Gym Workout: Barbell Battalion A:
10 barbell squats or 10 dumbbell Romanian deadlifts
10 push-ups
10 dumbbell rows/side
(See Level 4 for explanations on the Dumbbell deadlifts and rows)
Congrats! You’re using barbells! If you haven’t already read NF’s Senior Coach Staci’s transformation story of how she went from barely being able to lift a 10 lb dumbbell to now deadlifting 425 lbs, it’s a really inspiring story!
Speaking of Staci, let’s move on to her favorite exercise (and mine!)…
The deadlift movements starts with the weight on the ground, and ends with it back on the ground.
If you’ve got regular, large weights (usually 45 lbs/20 kgs) on each side then the bar sits the proper height off the ground.
Some facilities have lighter plates at that same large diameter. Use them.
If you are lifting less weight (or just using the bar to start off) then DON’T do the deadlift from the ground. The bar will be too low to the ground and mess up proper technique.
Instead, do the following to start your deadlifts at proper height:
1) Use blocks to adjust the barbell starting height:
2) Use the safety bars in a squat rack to set the height of the bar correctly!
3) Do the Romanian deadlift instead! (Whew, glad we learned that!). It’s the exact same movement as the dumbbell Romanian deadlifts, you’re just using a barbell instead.
START WITH A LIGHT WEIGHT – JUST the bar. As we cover in our “How much weight should I lift?”, you should ALWAYS start with just the bar.
And work on technique.
Only then should you start adding more weight, and add it slowly – you’ll be picking up heavy weights in no time, so don’t rush it.
Here’s Staci demonstrating a proper barbell Romanian deadlift from Nerd Fitness Prime:
Once you’ve started doing these two movements in your routine, your two alternating gym days will look like this. Simply alternate every time you go to the gym (with a day off in between sessions).
Focus on proper form, and slowly start to add weight to the bar.
You are now a gym “regular” and I salute you!
Now, I know the barbell squat and barbell deadlift are two complex, potentially scary exercises. It’s important to get your form correctly now when you are just lifting the bar, so that you don’t hurt yourself once you start adding weight!
If you want a professional to check your form, tell you when to add weight to the bar, and teach you other barbell movements, check out our online coaching program!
Level 6 Gym Workout: Gym Class Hero
Did I tell you that I’m proud of you yet? I really am, I promise. Your mom is proud too. So is your dad, but he just doesn’t know how to express it.
So now you’re thinking: “Steve, I did a barbell squat. It was terrifying but I did it. I tried deadlifts too and those are kind of fun.
What’s next? Give me MOAR!!”
It’s like you’ve finally learned to cook, and now you’re asking for more spices.
So, here in Level 6, we’re going to turn you into a full Gym Class Hero. And it requires you to learn a super standard, incredibly challenging exercise that also happens to be amazing for you…
Alternate inverted bodyweight rows with pull-ups or an easier pull-up variation every other workout.
So our circuit will be alternating these movements on your A and B Days:
LEVEL 6 DAY A CIRCUIT – 3 rounds of:
10 barbell squats
10 push-ups
10 pull-ups or pull-up alternatives!
LEVEL 6 DAY B CIRCUIT – 3 rounds of:
10 barbell Romanian deadlifts/regular deadlifts
10 push-ups
10 inverted bodyweight rows
Spice it up further! If you’ve read up to this point, and put the work in, we hope you feel like a Gym Class Hero, and you can start to build your own workout!
Coach Staci explains exactly how to design an exercise routine in this video:
SO what can you do to add some variety? Throw in or replace another exercise!
Want to do some planks? Put them in the circuit after your other movements!
Lunges to replace the squats or deadlifts one day? Sounds good!
There are a ton of different options for what to do and where to go.
If we’ve gotten you more comfortable in the gym, we’ve done our job!
WANT MORE HANDS-ON INSTRUCTION? If you’re looking to get out of the generic workout programs and follow along with a routine that fits your goals and lifestyle, consider checking out our 1-on-1 Coaching Program!
Sure, we help beginners get started with strength training. But we also help seasoned gym-goers take their training more seriously, and even help some folks start competing in powerlifting competitions.
I personally hired an online coach in 2014, and I’ve been with him ever since. It’s the best money I spend every month, and the best investment I make in myself.
We’ve worked with men and women like Leslie here, a single mom that lost 100 + pounds thanks to following Coach Jim’s program.
She now works on things like gymnastic training and handstands and deadlifts and squats!
Interested in having expert guidance in your pocket? Click on the image below to book a free call with our team!
Gym Etiquette: Tips and Tricks
I asked the entire 15-person staff in our Online Coaching Program – most of whom have trained clients in a gym for 5+ years – what information they would share with new gym-goers:
#1) Take your time. The above 6-level workout plan might take you 12+ months to move through, and that’s okay! I would rather you slowly wade into the water instead of terrifying yourself with the thought of cannonballing into the deep end and never even starting a gym routine.
Stick with what you know, and then bit by bit, one movement at a time, branch out and try new things.
Remember: “days and years,” not “weeks and months.”
#2) Do what makes you happy. You might have noticed above I didn’t mention things like bicep curls, bench press, cardio classes, spin class, etc.
If those things make you happy, start adding them to the mix. However, if you are only doing those things because you think you are supposed to, don’t!
The above 6-Stage strategy combined with a healthy nutritional strategy will get you 95% of the way to where you want to go.
I promise. Nerd’s honor.
#3) Write down everything you’re doing and track your progress. Keep a simple note on your phone, write in a notebook, use Evernote, whatever. Write down what you do so that you know what to do next time.
When you get stronger and things feel too easy, you know to move up in weight slowly (and record that too!).
Keeping track of everything is one of the easiest and most important ways to make progress. Staci, Jim, and I ALL still record every workout and never stop trying to get a teeny, tiny bit stronger with each session.
#4) It’s better to lift a TOO LIGHT weight than try one that’s TOO HEAVY. You want to finish the workout saying “hey I could do more, this is encouraging” rather than “that was too much, I hurt myself/failed/and I’m demoralized.”
#5) If you don’t know, ask somebody who works there. If you’re worried that you’re using a machine incorrectly, and you’re sheepish and self-conscious about it, ask somebody who works in the gym.
Usually, there will be trainers that work there walking around the floor – ask them! That’s what they’re there for.
They can help you set the safety bars and pins on the squat rack if you’re not sure how. They can tell you how to adjust the seat on a machine, or how the treadmill works. That is what they are there for!
#6) If you want to hire a trainer for a few sessions, it might be a great investment! Good trainers are hard to come by, but if you happen to like our style of doing things here at Nerd Fitness, we have our own 1-on-1 Coaching Program that will program your workouts and help you fix your diet:
#7) Work out with what you can work with.
If you are a member at a Planet Fitness or similar gym: Your gym might not allow you to do barbell deadlifts, might not have a squat rack, or ONLY have a Smith Machine. If this is true of your gym, this is okay!
Do the best you can with what you have. Like MacGyver.
You can still get quite strong with the dumbbell workouts and bodyweight movements in Stage 4! And you’ll be that much more prepared when you do start working with barbells if you eventually join a different gym.
#8) Don’t let perfect be the enemy of the good. Just going to the gym takes courage.
Trying a machine for the first time takes courage.
Picking up a dumbbell takes courage.
Using the squat rack takes a lot of courage.
Don’t worry about perfect, or having perfect form or the perfect routine after you finish this article, just START! It’s how we all learn: like scientists trying new experiments and subtly tweaking the variables.
These are our favorite tips and tricks with regard to the gym. But I’d be remiss if I didn’t also mention something equally important:
Gym etiquette!
We’ve created another article in this gym series called “29 Unwritten Rules to the Gym,” to make sure you won’t be an accidental ass in the gym.
This list includes some obvious things like wiping down the bench after you use it, or not monopolizing a squat rack, but then some other more subtle things that will keep you in everybody’s good graces!
How to Build the Routine of Going to the Gym.
If you read this far, 6000 words later, I have to imagine it means you’re really interested in getting started with strength training!
The first time going to a gym can be nerve-wracking and exciting, but it’s the 100th, 500th, 1000th trip to the gym where results get made.
1) Accountability! If you’re new to going to the gym, it’s really easy to fall off the wagon once life gets busy. For that reason, I encourage you to be accountable to somebody other than yourself.
2) Focus on hacking into the Matrix and setting up your system! Put your workout time and place into your Google Calendar so that you always know when your next workout is. Focus on creating an environment where you are more likely than not gonna DO THE THING you want to do (go to the gym). We call this “Building your Batcave.”
3) Cultivate a love of constant improvement. Imagine this: you’re no longer going to the gym just to lose weight or look good. Those things are a happy consequence of what you’re really there for:
Because you ACTUALLY like to work out!
I cannot tell you how many NF Coaching Clients I’ve seen message me and say “Holy crap Steve, I don’t know how it happened, but I actually LIKE working out now!”
Every week, you’re excited to hit the gym because:
You’re adding more weight to your squats.
You are attempting a new personal best for the deadlift.
You get to see your gym friend and hear how his day went.
You LOVE how you feel after the gym.
Getting there takes time and energy, but that’s really when life changes and sh** gets magical with regards to your health and fitness.
These are the tools we’ve created to help you turn the gym into something you look forward to:
1) Our popular 1-on-1 coaching program. No more guesswork, no wondering if you’re doing the right program, no shame or guilt. Just results that don’t suck, and a plan that doesn’t make you miserable.
We keep you accountable to make sure you actually do your workout, we answer any questions you have, and we cheer you on every step of the way:
2) If you want a daily prompt for doing workouts at the gym (or at home), check out NF Journey. Our fun habit-building app helps you exercise more frequently, eat healthier, and level up your life (literally).
Try your free trial right here:
3) Join the Rebellion! Our free community numbers in the hundreds of thousands scattered throughout the globe, and we need good people like you!
You can join by signing up in the awesome yellow box below, and I’ll send you a bunch of free guides and printable workouts, including our Strength 101 guide!
Download our comprehensive guideSTRENGTH TRAINING 101!
Everything you need to know about getting strong.
Workout routines for bodyweight AND weight training.
How to find the right gym and train properly in one.
PHEW!
Okay, by now you should have all of the tools you need to get started in the gym, but maybe you have more questions. If you do, I have answers!
Simply leave a comment below and I’ll do my best to answer it soon!
I’d love to hear from you too if you found this article helpful. Which gym workout are you following?
Have you made it all the way to Level 6 yet!?
-Steve
PS: Make sure you read the other 3 articles in our gym series:
If you can already do a pull-up (woot!), you might want to check out our article on proper pull-up form, although we’ll cover a lot of the same material here.
Let’s do this thang.
Tips on How to Start Doing Pull-Ups
In the video above, Coach Jim walks you through the exact progression system we use with our coaching clients who want to get their first pull-up (or chin-up).
Before we get into exercises to progress into a pull-up, let’s chat about some general strategies.
Consider the following three points when attempting to get your first chin-up or pull-up:
#1) This should hopefully be obvious, but the more you weigh, the more you have to lift in order to complete a pull-up.
If you’re truly serious about completing a pull-up, start by getting your diet under control.
Here are some resources to help you with weight loss:
Tried to lose weight in the past without success? I hear you, weight loss is super tough. Learn why in our article “Why Can’t I Lose Weight?” for a deep dive into the subject. We also have the 5 Rules of Weight Loss to help you get going.
Not sure what a proper diet looks like? Check out our Guide on Healthy Eatingfor a full lesson on nutrition.
In the above guides, you’ll find me stating that losing weight comes down to eating fewer calories than you burn. Not sure how many calories you need? Check out our guide on calculating your daily caloric requirements.
#2) MAKE YOUR “PULL” EXERCISES A PRIORITY. A lot of people do every other exercise before doing any back-related exercises, if they do any at all.
After warming up properly, your first exercise should always be the stuff that you want to work on the most – in this case, it’ll be your back muscles.
Until you get your first pull-up done, focus on the back exercises detailed in the levels and workouts in this guide.
#3) The progression we outline is a path that works for most people, but does NOT need to be followed to a T.
We give sample sets and reps and when to move up, but if you feel like you can progress sooner or want to try doing full pull-ups sooner than we recommend, that’s OKAY.
This is the slower progression method, where some people will want to do fewer reps and progress to the next levels sooner – that’s okay.
We recommend moving up to the next level when you can do 3 sets of 8 reps of a particular exercise. If you want the accelerated path, move on up as faster as you can do 3 sets of 5 reps. You do you boo.
Want someone to build you a custom-made progression plan for doing your first pull-up? Our 1-on-1 Online Coaching Program will do just that, plus your coach can review your movements through our app so you’ll know your training correctly and safely.
Level 1 Pull-up Workout: Bent Over Dumbbell Rows
We’re going to start with bent-over dumbbell rows, the most basic of back exercises, in case you’re starting from ABSOLUTELY square one.
Level 1 Pull-up Workout:
Bent-over dumbbell rows: 8 reps for each arm (or as many as you can do)
Whatever allows you to get to at least 5 reps a set.
Once you can do 3 sets of 8 reps (each arm), it’s time to pick up a heavier dumbbell.
This will allow you to get stronger and stronger.
Make sure you give yourself at least 48 hours until you do the Level 1 Dumbbell Rows again, so you can include these dumbbell rows for your workouts on:
Monday
Wednesday
Friday
As soon as you can do 3 sets of 8 reps, it’s time to move up to a heavier dumbbell.
Once you can lift a 25-pound (10kg) dumbbell or heavier, consider moving up to the next level.
If you are a little bit bigger than the average bear, you might want to stick with this step until you lose a little bit more weight and get stronger – maybe go to 35 or 40-pound (18kg) dumbbells.
Want help designing your own workout routine? I’ve got two options for you.
The first is to head over to “Build Your Own Workout Routine” and get your hands dirty. Our guide will walk you through building a full-body exercise program in 10 simple steps.
The second is to have a Nerd Fitness Coach do all the heavy lifting for you (not really, you still have to lift stuff), by having them build you a tailor-made workout routine:
Level 2 Pull-Up Workout: Inverted Bodyweight Rows
Bodyweight rows are the PERFECT precursor to pull-ups – they work the same muscles, and have you lifting your own bodyweight, just at a different angle.
For this level, we’ll provide you with two options: You can also make adjustments.
OPTION A: IF YOU HAVE ACCESS TO A GYM OR WANT TO JOIN A GYM:
You can follow the rest of this workout as part of our 6-Level Gym workout guide, which will help you go from total gym newbie to pull-up progressing badass!
At your gym, find your Smith Machine and set the bar at about chest height.
A higher bar makes the exercise easier to start:
And as you get stronger, you can set the bar lower:
4) Move up to Level 3 and progress with caution there.
If you are struggling with rows, you’re not sure you’re doing them correctly, or you’re not sure how to progress to the next level, check out our 1-on-1 coaching program.
It’s the type of program that helped single mom Leslie lose 100+ pounds and start training with gymnastic rings and handstands!
Level 3 Pull-Up Workout: Assisted Pull-Ups
Okay! It’s time to get to ACTUAL pull-ups here! Personally, I don’t like using the assisted pull-up machine in a gym as it doesn’t give you the full feeling of a pull-up, but it’s certainly better than nothing.
Instead, I recommend doing one of these alternatives:
#1) Assisted Pull-ups with a chair
Either one foot or two on the chair, depending on your needs. Your feet are ONLY there for support, use your upper body as much as possible.
You can also use a box or similar-sized object for the same result:
#2)Assisted Pull-ups with exercise band:
You can get different types of exercise bands with different levels of strength, or a variety pack for easy progression.
Put your foot in the exercise band and pull yourself up.
Here’s a video on How to Tie the Resistance Band for Your Pull-up:
#3) Assisted pull-ups with a partner:
Have a friend hold your feet behind you and help you complete each rep. Have them use the least amount of help possible to get you through your workouts.
HERE’S HOW TO DO AN ASSISTED PULL-UP:
Clench your butt and keep your abs tight throughout the exercise – try not to swing like crazy.
Keep your shoulder blades pinched behind you throughout the movement and focus on PULLING the bar down with your arms.
Use the least amount of assistance that you can handle – as soon as you can do multiple pull-ups with both feet on the chair, switch to just one foot.
If you’re using an exercise band, try to get a few bands of varying tension so you can decrease the resistance as you get stronger.
As soon as you can do 3 sets of 8 with assistance, it’s time to move on to Level 4.
For another reference, Coach Jim and Staci show you how to do a variation of assisted chin-up right here:
This is probably the TOUGHEST level before getting your pull-ups. If you get stuck on “assisted pull-ups” and “assisted chin-ups”, you’re not alone. This is where most people get stuck.
We work hand-in-hand with people like you to get them their first pull-up in our Online Coaching Program. If you don’t know how to fit these movements into your workouts, or you just want somebody to give you the exact workout to follow every day, we got you!
Finally, a workout that includes Level 3 pull-up exercises
Alright, so we’ve started off great! We’re working those pulling muscles and assisted variations – but an actual chin-up might feel miles (or kilometers) away. Heck, just holding onto the bar may be a challenge without some assistance.
What should we do now?
How about we work on holding onto the bar!?!
Before we work on doing full range, unassisted chin-ups or pull-ups, it’s really helpful to be strong and confident in holding unassisted parts of the movement. This is where Top Holds and Bar Hangs come in! #1) A Top Hold is exactly what it sounds like – we hold the top position of the chin-up or pull-up for several seconds (5 to 10). You’ll likely find holding the top of the chin-up (palms facing you) easier than the pull-up.
This is definitely something that you want to first do assisted. We’ll then work to transfer more weight – bit by bit over several workouts – off our feet and onto our arms until we’re holding ourselves unassisted at the top.
Using a band is a good option for assisted chin-ups, but using a box, bench, or another sturdy object will be a better option here.
It will allow you to shift that weight onto your arms a little easier.
That said, if all you have is a band for this exercise then that’s ok! Look to use thinner and thinner bands, while lifting the feet and knees up a bit to further reduce assistance (as the band won’t be stretched as far).
#2) On the other side of the movement, we have the Bar Hang…which is pretty much what it sounds like too!
To perform a bar hang:
Grab the bar with palms facing towards you or away from you. You’ll likely find hanging with palms facing away from you to be a bit more comfortable. Either direction will help strengthen up your grip.
Just like with the top hold, you’ll want to start assisted then work to shift your weight from your feet onto your arms until you’re hanging unassisted.
To further supercharge this exercise: once you are hanging unassisted, work on retracting your shoulders down away from your ears.
Like so:
And so:
This small movement is TOUGH (and you can even practice it assisted) but getting strong here will set your shoulders in an even better position for your first chin-up/pull-up.
We’ll look to hang from the bar (assisted or unassisted) for a total time of 30 seconds to 1 minute. At first this time may be broken up into several sets (e.g., 10 seconds, 10 seconds, 10 seconds), but you should eventually work up to one full set.
So how should we integrate either of these into our training?
#1) For the Top Holds, do this at the start of your workout (after your warm-up) for 3 sets of 5 seconds. Make sure you give it your all! Really squeeze the muscles tight and put as much weight on the arms as possible!
With all that effort, you’ll want to give yourself 30 seconds to a minute rest in-between. I know that sounds like a lot for just 5 seconds of work – but if you were working hard enough, you’ll need it!
#2) For the Bar Hang, do this at the end of your workout for 30 seconds to a minute. Again, look to complete this in as few sets as possible, while making the exercise as challenging as possible. Move from assisted to unassisted, with the shoulders retracted downwards.
If you have to take a break during the bar hang time, then take enough rest so that the next hold is productive.
Here Are the Exercises You Can Include for Your Level 4 Workout Routine:
Monday:
Top Hold (Assisted or Unassisted) – 4 sets of 5 seconds
Assisted Pull-ups – 3 sets of 8 repetitions
Bar Hang (Assisted or Unassisted) – 30 seconds total time
Wednesday:
Top hold (Assisted or Unassisted) – 4 sets of 5-10 seconds
Bodyweight Rows – 3 sets of 8 reps
Bar Hang (Assisted or Unassisted) – 30 to 60 seconds total time
Friday –
Top Hold (Assisted or Unassisted) – 4 sets of 5 seconds
Assisted Chin-ups – 3 sets of 8 reps
Bar Hang (Assisted or Unassisted) – 30 seconds total time
When you’re able to perform the Top Holds and Bar Hangs unassisted, then it’s time to move to the next level!!!
LEVEL 4.5 PULL-UP WORKOUT: (THE HIDDEN LEVEL)
What’s this??? Secret hidden exercises?
I just wanted to bring your attention to a great addition to any of these workouts – especially as things really ramp up.
Ready for it?
It’s . . . the front plank!
The front plank (or any of your favorite midsection stabilization exercises) is a great exercise to do, should holding a Top Hold or a Bar Hang prove tough.
If you haven’t already felt it during the previous pull-up workouts – your middle needs to be involved too!
During a pull-up or chin-up, if we squeeze through the midsection and glutes, the nearby muscles are able to contract stronger through a phenomenon known as muscle irradiation.
Besides sounding like something the Fantastic Four encountered in space, this cool “trick” can help engaged nearby muscles in the midsection, including those big back muscles that pull us up!
You can see muscle irradiation for yourself if you’ve ever been asked to flex your biceps for someone. You’ll instinctually squeeze your hand tight, because it helps the biceps engage stronger!
If needed, throw in some front planks work near the end of your workout.
You can even start on your knees:
Look to hold 30 seconds to one minute of total time.
Alright, back to our regular scheduled programming!
Level 5 Pull-Up Workout: Negative Pull-Ups
Okay! We are now DANGEROUSLY close to getting our first pull-up!
The big step at this level is doing a negative pull-up:
Grab onto the bar with an overhand grip
Jump so your chest is touching
Slowly lower yourself under control until you’re at the bottom of the movement.
WARNING: This can be very dangerous if you’re very overweight, which is why I’d recommend moving slowly through steps 1-3 first.
However, once you have a decent amount of back strength (which you got from Levels 1, 2, and 3), doing negatives is a great way to build arm and back strength.
You have two options for negative pull-ups:
Hop up on a chair to get above the bar and then lower yourself back down. The name of the game is “in control.”
Jump above the pull-up bar, and then begin to lower yourself back down IN CONTROL.
You don’t need to lower yourself so slowly that one repetition destroys you…lower yourself at a controlled speed – Counting to “three Mississippi” during the movement is a good tempo.
Here are the exercises you can include for your Level 5 Workout Routine:
Alternatively, we can do all of the heavy lifting for you (well, not ALL the heavy lifting) – we’ll create a specific workout so all you have to do is log into your NF Coaching App each morning and do the workout your coach prescribed!
Level 6 – Doing Your First Pull-up or Chin-up
OH BOY! My dear Rebel, it’s time for a…
At this point you have two options:
A chin-up is when you grab the bar with an underhand grip with your palms facing towards you.
Many find chin-ups slightly easier than…
A pull-up is when you grab the bar with your palms facing away from you. Seeing as this is a pull-up guide…
HOW TO DO A PULL-UP, STEP-BY-STEP:
Grab the bar with a grip slightly wider than shoulder-width, with your hands facing away from you.
Start from a dead hang.
Engage your shoulders, pull them down and back towards each other (like you are pinching a pencil between your shoulder blades!)
Flex your stomach, pull your body until your chest touches the bar.
Slight pause, yell out “I’m a champion!”
Lower yourself all the way back down to a dead hang.
We cover all of this and more in our post “How to Do a Proper Pull-Up,” but the above will get you started
Depending on your weight, your level of fitness and strength, and how far along you are in these progressions, you might be able to start with even more than one pull-up.
At this point, you can be a full Gym Class Hero by following a Gym Workout with these movements in there for your “pull” exercises:
Level 6 routine weekly schedule:
Monday:
Pull-ups – 4 sets of 1-2 reps (move onto the next exercise if you can’t perform a rep)
Assisted Pull-ups – 3 sets of 8 reps
Bar Hang (Unassisted) – 60 seconds total time
Wednesday:
Negative Chin-ups – 4 sets of 1 rep
Bodyweight Rows – 3 sets of 8 reps
Bar Hang (Unassisted) – 60 seconds total time
Friday:
Chin-ups – 4 sets of 1-2 reps (move on to the next exercise if you can’t perform a rep)
Assisted Chin-ups – 3 sets of 8 reps
Bar Hang (Unassisted) – 60 seconds total time
Congratulations! You’re now doing pull-ups. Make sure you watch the video above to make sure you’re doing pull-ups with proper form. Nearly everybody does them incorrectly, with bad form.
Want to make sure you have proper form with your pull-ups? Check out our 1-on-1 Coaching program! Our spiffy mobile app lets you send video of your pull-ups directly to your coach, who will provide feedback so you can perfect your technique.
They’ll also build a workout program that’s custom to your situation, which will have you doing sets of 10 pull-ups in NO time!
Level 7 – Advanced Pull-up Moves
Once you’re able to do 3 sets of 10 pull-ups or chin-ups, you have a few options:
OPTION #A: Continue to get better at doing more reps – 3 sets of 12, 3 sets of 15, 4 sets of 20, etc.
OPTION #B: Start doing other types of pull-ups.
Here are some advanced pull-ups you can try:
#1) WIDE GRIP PULL-UPS (grab the bar WAY out with both hands):
OPTION #C) Add weight with a weight belt and do weighted pull-ups or weighted chin-ups:
Personally, my favorite thing to do in a gym is weighted pull-ups; if you’re at this level and interested in doing so, here’s what you need to do:
Get a weight belt. I bought this one on Amazon and it’s worked out incredibly well for me. I’ve tried doing the whole “put weights in a backpack” and it certainly works, but the angle of the weights hanging off your back is weird. With a weight belt, the weight hangs down between your legs (not a euphemism) so it feels more natural.
Add small amounts at a time. Most gyms will have 2.5 lb (roughly 1kg) weights; you might feel stupid putting on a big weight belt and only hanging a tiny weight off it, but you need to start somewhere.
Consistently add more weight. I’ll warm up with two sets of 5 pull-ups with no extra weight, and then do 3 sets of 5 weighted pull-ups. If I can complete all 3 sets of 5 reps (with my chin over the bar for every rep), I’ll make a note to add 2.5 or 5lbs (1 or 2kg) to my weight belt for the next time.
Here’s how to incorporate these Level 6 exercises into your gym workout routine:
Friday – Wide Grip Pull-ups – 3 sets of maximum repetition
(The following week, I’d alternate by doing the chin-ups without weight, and then doing weighted pull-ups
Where do you go from here? How about working towards one of the most impressive exercises of all time? The MUSCLE UP (warning: uber advanced)!
Our new app, Nerd Fitness Journey, not only has an adventure to get you your first pull-up, but we’ll also show you exactly how to do cool bodyweight tricks like the muscle-up too. No guesswork needed here, just jump into the app and follow the missions and workouts for the day.
You can try your free trial TODAY, right here:
Lift Yourself Up (A Life With Pull-Ups)
No matter your starting point, you CAN do pull-ups.
And you WILL do pull-ups with this guide.
You don’t need to follow the progression above exactly – it’s merely one path that you can take in order to reach the promised land…where the pull-ups flow like wine and the women instinctively flock like the Salmon of Capistrano.
Or Bronwyn, who lost 50+ lbs and now does chin-ups with her daughter on her back!
For people looking for the next step, we’ve built 3 options that might float your boat:
1) If you are somebody who wants to get results like the women above and follow a tailor-made pull-up strength program designed around their life and goals, check out our popular 1-on-1 Online Coaching Program.
You’ll work with our certified NF instructors who will get to know you better than you know yourself, check your form, and program your workouts and nutrition for you.
#2) Exercising at home and need a plan to follow? Check out Nerd Fitness Journey!
Our fun habit-building app helps you exercise more frequently, eat healthier, and level up your life (literally). We even have an awesome adventure to help you get your first pull-up!
Try your free trial right here:
3) Join our free community, the Nerd Fitness Rebellion, and we’ll send you our free Strength 101 Guide, which you can get when you sign up in the box below:
Download our comprehensive guideSTRENGTH TRAINING 101!
Everything you need to know about getting strong.
Workout routines for bodyweight AND weight training.
How to find the right gym and train properly in one.
Follow the path that works for your schedule, your experience, and your level of comfort with this movement – there’s no shame in going slowly and progressing safely.
And if you’re gung ho about pull-ups, ready for negatives and trying to squirm for that first rep, feel free to go for it. Just be safe.
When you DO finally do a pull-up, I want to be the first to know – email me at steve@nerdfitness.com and tell me about it!
For the Rebellion,
-Steve
PS: Check out our other three articles on pull-ups:
No matter which at-home workout you pick, I want you to start with one important thing:
Warm-up!
I cover why you should always warm up in an article found right here. It doesn’t have to be much though, give it about five minutes to get your muscles active and your heart rate up.
This will help you do exercises properly and help prevent injury. You can run in place, do air punches and kicks, or some jumping jacks.
Here is NF Senior Coach Staci (you might know her incredible story) showing you many beginner options you can use to warm up as well:
If you’re curious, here’s my personal (advanced) warm-up:
Advanced Warm-up Routine:
Jump rope: 2-3 minutes
Jumping jacks: 25 reps
Bodyweight squats: 20 reps
Lunges: 5 reps each leg.
Hip extensions: 10 reps each side
Hip rotations: 5 each leg
Forward leg swings: 10 each leg
Side leg swings: 10 each leg
Push-ups: 10-20 reps
Spider-man steps: 10 reps
Our goal isn’t to tire you out, instead we want to warm you up.
That’s step one.
Completing your chosen at-home workout would be step two.
Below, you’ll find 8 sequences you can follow along with!
I warn you, the above sequence will hurt… in a good way. You should be proud if you can get through this three times.
Do you want to get as strong as possible so this workout ain’t no thang?
Sign up in the box below to grab our guide, Strength Training 101: Everything You Need to Know. It’ll teach you all of these advanced bodyweight exercises!
Download our comprehensive guideSTRENGTH TRAINING 101!
Everything you need to know about getting strong.
Workout routines for bodyweight AND weight training.
How to find the right gym and train properly in one.
Home Workout #3: The 20-Min Hotel Routine
Sometimes, you just plain find yourself stuck in a hotel room. Maybe you can find the hotel gym, but I bet it’s terrible! It probably has 2 machines, a broken treadmill, and no free weights.
Ugh.
Instead, how about a 20-min workout you can do in the room itself?! Utilize the furniture to its full potential.
If you don’t have time to run through the whole sequence, no problem!
Depending on how much time you have during the day, you can do your whole workout at once, or break up your training into four different sessions throughout the day (with each session being ONE of the exercises).
Here’s a sample day for your No-Equipment Workout:
Wake up, do 40 jumping jacks to warm up, and then do bodyweight squats.
At lunch, you grab your suitcase (if you’re at work, milk jug if you’re at home) and do inverted rows.
After work, you do another 50 jumping jacks and then do your push-ups.
After dinner, you do your planks while watching TV.
You could even split it up over two days if needed, but the goal would be to do the whole sequence at once.
The main Angry Birds Workout article describes in detail Levels 1-6, but here’s Level 3 for you:
Bonus points if you somehow do this no-equipment workout in a cave, as that’s how Bruce Wayne would roll.[1]
This workout is separated into two days for you.
Here’s a video for the first day:
Batman No-Equipment Workout Day 1:
Rolling squat tuck-up jumps: 5 reps
Side-to-side push-ups: 5 reps
Modified headstand push-ups: 5 reps
Jump pull-up with tuck / Pull-up with Tuck-up: 5 reps
Handstands against wall: 8 seconds
Here’s a video for the second day:
Batman No-Equipment Workout Day 2:
‘180 Degree’ jump turns: 5 reps
Tuck front lever hold: 8 seconds
Tuck back lever hold: 8 seconds
Low frog hold: 8 seconds
This is a relatively advanced workout already, but if you want to progress to the next level, check out the main Batman Bodyweight Workout for tips on how to do just that.
NOTE: This is NOT a beginner program, and should not be attempted unless you have been training consistently and can do multiple repetitions of pull-ups and push-ups with great form.
Like this perfect push-up:
And this perfect pull-up:
Here’s how the PLP Progression works:
Day 1:
Pull-ups: 10 reps
Push-ups: 10 reps
Lunges: 10 reps (each leg)
Day 2:
Pull-ups: 11 reps
Push-ups: 11 reps
Lunges: 11 reps (each leg)
Day 3:
Pull-ups: 12 reps
Push-ups: 12 reps
Lunges: 12 reps (each leg)
How long do you keep doing this?
As originally envisioned by Chad Waterbury, the PLP Workout lasts 60 days.[3]
Yeah…by the end of it, you’ll be doing more than 50 pull-ups.
There are two versions:
If you can do 10 straight pull-ups: Start day 1 with 10 reps of each.
If you cannot do 10 straight pull-ups: Start day 1 with 1 rep of each.
Complete your required reps each day in as many sets as you need, whenever you need to. The goal is to do it in as few sets as possible, but enough so that you can complete each rep with proper form.
If you want to advance to the Jedi Knight or Master Levels, check out The Star Wars Workout, which will also offer you a full description of each move.
Bonus No-Equipment Workout: The Playground Circuit
Do you have a nearby playground? Why not work out there?! If you have kids, you can do it together. Or let them ignore you.
The trick here is to couple your home workouts with adjustments to your nutrition.
We’re big believers that you can’t outrun your fork, so any successful weight loss plan will include a focus on building a healthy plate.
That will look something like this:
If you want some help on adjusting your nutrition, I’ve got two great resources for you:
The Nerd Fitness Guide to Healthy Eating. This massive resource will help you slowly adjust your nutrition, without forcing you to give up the food you love (yes, you can still eat pizza here and there). No more diets, instead we’ll work on building habits together.
Nerd Fitness Coaching. If you want to take it to the next level, one of our trained professionals can help you adjust your way of eating to help you reach your goals. No shame. No judgment. Just a like-minded nerd who will show you the way.
I have two resources to help you design your own no-equipment workout:
The 42 Best Bodyweight Exercises: This guide will teach you how to perform the best bodyweight exercises – no equipment required! Check it out if you are unfamiliar with any of the movements referenced in today’s guide.
How To Build Your Own Workout Routine: Once you’re comfortable with a handful of bodyweight exercises, use this guide to pull them all together into a full-body workout!
That should get you going on building a workout you can do in the comfort of your own home.
Want more? Alright, eager beaver, I got you.
We built THREE options for people just like you:
1) If you want step-by-step guidance, a custom workout program that levels up as you get stronger, and a coach to keep you accountable, check out our killer 1-on-1 coaching program:
2) If you want a daily prompt for doing workouts at home, check out NF Journey. Our fun habit-building app helps you exercise more frequently, eat healthier, and level up your life (literally).
Try your free trial right here:
3) Join the Rebellion! We need good people like you in our community, the Nerd Fitness Rebellion.
Sign up in the box below to enlist and get our guide, Strength Training 101: Everything You Need to Know. It’ll help you start incorporating these bodyweight moves into your training.
Download our comprehensive guideSTRENGTH TRAINING 101!
Everything you need to know about getting strong.
Workout routines for bodyweight AND weight training.
How to find the right gym and train properly in one.
Alright, your turn: I’d love to hear how your home training is going!
Which workout above did you try? Did you make one of your own?
Leave a comment below with your results or any questions you have on working out at home.
For the Rebellion!
-Steve
PS: If you were going to buy one piece of equipment to utilize in your home, a kettlebell would offer you a lot of versatility:
I get multiple emails and messages per day asking:
“Steve, what should I do for a workout?”
Well, partner, today is your lucky day.
I’m gonna help build you a custom workout program, step-by-step!
After all, a workout should be developed around a person’s age, goals, nutritional strategy, free time, etc.
Not only that, but it’s easy to overcomplicate this process – there are an infinite number of exercises, sets, reps, and programs to choose from.
Now, if you’re somebody that wants to skip all of that, and JUST want to be told what exactly to do:
We build customized workouts for our Online Coaching Clientsand would love to have you. We get to know your story and struggles, your goals, and your lifestyle, and develop a workout plan that fits your schedule.
Now, if you’re more of a “figure this stuff out on my own” kind of person – we’re going to dig into how to build your own workout plan today!
We’ve also created a free resource for folks who want to build their own workout but would love some more specific direction and instruction.
You can download our free guide, Strength Training 101: Everything You Need to Know, which covers all of this stuff in a single guide:
Download our comprehensive guideSTRENGTH TRAINING 101!
Everything you need to know about getting strong.
Workout routines for bodyweight AND weight training.
How to find the right gym and train properly in one.
OKAY! Are you ready to start building your own routine and want to know how it’s done?
Whatever your goals are, it’s good to write them down and be aware of what you’re trying to accomplish.
These goals will shape HOW you build your workout.
An effective way to create goals is by using the SMART method, which stands for specific, measurable, attainable, relevant, and timely.[1]
Specific – Your goals must specifically state what is to be accomplished. They must be clear and easy to understand.
Measurable – Your goals must be measurable so you can tell if you’re making progress or not. For example, I want to gain 5 pounds of muscle. To track your progress you will need body composition equipment that is designed to assess your fat and muscle mass.
Attainable – Your goals should be realistically attainable. Remember, a realistic amount of muscle mass to gain per week is about 0.5 pounds. For example, gaining 5 pounds of muscle should realistically take about 10 weeks
Relevant – Your goals must be relevant to your particular interests, needs, likes/dislikes, and abilities. Another thing to remember is that your goals need to be generated by you and you alone!
Timely – Your goals must have a timeline for completion. If your goal is to gain 5 pounds of muscle then a reasonable end-point should be at minimum 10 weeks.
A SMART goal is a good goal.
QUESTION 2: How much time can you devote to exercise?
If you can do an hour a day, that’s fantastic.
But maybe you have a wife or husband, three kids, a dog, two jobs, and no robot butler…
…then maybe you only have thirty minutes, twice a week.
That’s fine too!
Also, break up your workout! According to the American College of Sports Medicine (ACSM), if you accumulate three 10-minute bouts of exercise throughout the day to total 30 minutes of exercise, then that is as effective as someone who does one 30-minute bout of exercise.[2]
Now, no matter how much time you have, developing the most efficient workout is crucial.
Why spend two hours in a gym when you can get just as much accomplished in 30 minutes, right?
So whether you are building muscle or looking to lose weight, a strength training workout will get you the results you’re after (when combined with the right eating strategy!)
While we’re talking about time, let me quickly mention something important:
As we mention in that guide, here are some realistic timeframes for weight loss or muscle gain:[3]
If you are trying to lose weight it is recommended that you seek a calorie deficit by consuming 250-500 fewer calories per day below your typical calorie intake. This will result in a realistic weight loss goal of 1-2 pounds per week
If you’re trying to gain muscle mass, then it is recommended that you seek a calorie surplus by consuming 250-500 additional calories above your typical calorie intake. This will result in a gain in lean muscle mass of about 0.5 pounds per week.
Unless you’ve been strength training for years and know what you’re doing, we recommend that you pick a full-body routine that you can do 2-3 times a week.
You want a workout routine that has at least one exercise for your:
Quads (front of your legs).
Butt and hamstrings (back of your legs).
Chest, shoulders, and triceps: (“push” muscles).
Back, biceps, and grip ( “pull” muscles).
Core (abdominals and lower back).
I have a trick for you: by targeting compound movements that recruit multiple muscles at the same time, you can build a full-body routine that uses only four or five exercises.
How’s THAT for efficiency!?!
A compound exercise would be the yin to the yang of the isolation exercise.
Think of a push-up (compound):
Compared to bicep curls through a machine (isolation):
Compound exercises have been found to result in improvements in aerobic endurance, muscular fitness, and flexibility, since you’re recruiting all sorts of muscle groups at once.[5]
Where an isolation exercise would be a single-joint movement involving only one single muscle group, like the biceps, in our example above.
I will say, there is a time and place for implementing compound and isolation exercises.
You don’t need to make things more complicated than this!
(Not that we humans have a tendency to overcomplicate things to the point of paralysis and inaction…)
Ahem.
If you’re not sure how to do any of the movements above, click on their links for thorough write-ups and video demonstrations.
Pick one exercise from EACH category above, specifically ones that scare you the least, and that will be your workout every other day for the next week.
Get really good at these basic movements and focus on getting stronger each week (I’ll cover how below).
If you get really strong at squats, deadlifts, pull-ups, and push-ups, you will build an incredible physique to be proud of.
Plus, building strength with these exercises will also help in other areas such as improving your performance in sports, decreasing your risk of chronic diseases (e.g., CVD) and premature mortality (an early death).[6]
*mic drop*
**picks up mic**
Then, once you get confident in those movements, feel free to add some variety.
Why?
If you do the same exact routine, three days a week, for months and months, you might get bored, and start slacking…
Do deadlifts every Wednesday, but change up the sets and reps you pick!
If you hit a plateau or find yourself getting bored, pick a different exercise to improve so you’ll stay challenged, and you’ll actually DO the workout!
I know it’s really easy to overcomplicate this process as there’s an infinite number of exercises, sets, reps, and programs to choose from.
And yes, we have a solution for people that JUST want to be told what exactly to do: our uber-popular 1-on-1 coaching program pairs you with your own Nerd Fitness Coach who will get to know you, your goals, and your lifestyle, and develop a workout plan that’s specific to not only your body, but also to your schedule and life:
Step #3: How Many Sets And Reps Should I Do?
SIMPLE ANSWER: Not including a warm-up set or two, I recommend:
If you can do more than 15 reps without much of a challenge, consider increasing the weight or the difficulty of the movement. This is true for things like lunges, bodyweight squats, push-ups, pull-ups, etc.
There are some other generally accepted ‘rules’ – as pointed out in Starting Strength – about how to determine how many reps you should target per set, based on your goals:
Reps in the 1-5 range build super dense muscle and strength (called myofibrillar hypertrophy).
Reps in the 6-12 range build a somewhat equal amount of muscular strength and muscular size (this is called sarcoplasmic hypertrophy).
Reps in the 12+ range build muscular endurance.
A 2015 study [10] called into question the best rep strategy for building muscle or size:
It appears that high-intensity resistance (sets of 3-5 reps) training stimulates greater improvements in some measures of strength and hypertrophy in resistance-trained men during a short-term training period [compared to sets of 8-10 reps].
What this means: Do not freak yourself out by worrying if you should do 4 sets or 5 sets of 8 reps or 10 reps.
Our advice would be to START with lighter weights and more reps as you learn the movement, and then decide if you want to stay at higher reps and lower weight or vice versa.
You do you, because either way will get you results!
The only thing you need to worry about: get stronger the next time you do that movement.
Either pick up a heavier weight, or do 1 more repetition than last time.
“JUST GIVE ME THE ANSWER!”
Keep your TOTAL (all exercises combined) workout number of sets for all exercises in the 15-25 set range, with 8-10 reps per set:
5 exercises total, each with 4 “work sets” is a good start.
Remember, the most important part is to get started – you’ll learn how your body responds and you can adapt as you go.
What you DON’T need to do: multiple exercises for each body part with 10 sets.
This will result in significant fatigue during your workout increasing your risk of sustaining an injury. It can also result in overtraining, in which you will experience a decrease in performance and plateauing (will not see muscular improvements).[11]
So calm down you eager beaver.
A BIG CAVEAT:How you eat will determine if you get bigger or stronger. Nutrition is 80-90% of the equation. So pick a range that feels good, and then focus on nutrition.
And if you don’t want to figure any of this out and just want to be told exactly how what exercises, sets, and reps to do, our online coaches can take care of that for you.
Step #4: How Long Should I Wait Between Sets?
Keep it simple, you “smart, good-looking, funny, modest person” you.
Below is a basic formula for you to determine how long you should wait between sets, but this can be adjusted based on your level of health.
The goal is to wait the least amount of time you need, but still rest enough that you can perform all reps of the next set safely and properly!
Adequate rest in-between sets will allow your body to regenerate energy, so you can execute the next set of reps with good form and technique, therefore, decreasing your risk of injury.
I’ll provide some guidelines for how long to rest based on how heavy you’re lifting (not rules set in stone!):
1-3 Reps (lifting heavy for strength/power): Rest for 3 to 5 minutes between sets.
4-7 Reps (lifting for strength): Rest for 2 to 3 minutes between sets.
8-12 Reps (lifting for size/strength): Rest for 1 to 2 minutes between sets.
13 Reps+ (lifting for endurance): Rest long enough to recover to allow you to do the next long-ass set!
If you need more or less rest than the above recommendations, that’s fine.[13]
Do the best you can, record how long it takes you to rest between sets, and try to rest for shorter periods in the future.
Your body will adjust as you get stronger and healthier!
If you want more information on how much you should lift, how many reps, and when to scale certain movements or adjust your workout, check out our Strength 101: Everything You Need to Know.
It’s free when you join the Rebellion with your email in the box below:
Download our comprehensive guideSTRENGTH TRAINING 101!
Everything you need to know about getting strong.
Workout routines for bodyweight AND weight training.
How to find the right gym and train properly in one.
The simple-to-learn but tough-to-implement answer:
Lift enough so that you can get through the set, but not too much that you have NO fuel left in the tank at the end.
How do you determine how much that is?
Trial and error.
ALWAYS err on the side of “too light” versus “too heavy” when starting out.
It’s better to say “I bet I could have done more!” instead of “That was too much, and now I need to go to the hospital!”
Plus, when you start working out, you’re actually programming your neuromuscular systems to do the movement correctly.[14] You can’t rush this, so it’s best not to start off too heavy.[15]
If a person can do two reps (or more) over their set goal, then they should increase the load.
How much should you increase weight?
For less trained people (i.e., beginners), it is recommended that for upper body exercises you increase the load by 2 – 5 pounds and by 5 – 10 pounds for lower body exercises.
For more trained people (i.e., advanced), it is recommended that for upper body exercises you increase the load by 5 – 10 pounds or more and by 10 – 15 pounds or more for lower body exercises
I will say, if you’re doing exercises with just your body weight, you need to make each exercise more difficult as you get in shape – once you get past 20 reps for a particular exercise and you’re not gassed, it’s time to mix things up.
20 bodyweight squats too easy? Hold some weights high above your head as you do the next set. Eventually, you can scale up to do exercises like the pistol squat:
And if you’re not sure how to scale bodyweight movements, or you are interested in mixing things up and want guidance…
Step #6: How Long Should I Exercise For? How Long Should My Workout Be?
Easy answer: 45 minutes to an hour.
Longer answer: If you’re doing 15-25 sets of total exercise (3-5 sets for your 5 exercises), you should be able to get everything done within that 45-minute block.[17]
Now, factor in a five or ten-minute warm-up, and then some stretching afterward, and the workout can go a little bit longer.[18]
If you can go for over an hour and you’re not completely worn out, try increasing the intensity.
You’re getting a cardiovascular workout by consistently moving from exercise to exercise.
You’re exercising different muscles back to back, giving each muscle group a chance to recover, but in a condensed amount of time. Efficiency for the win!
If you’re familiar with CrossFit, many of the workouts are built on circuit principles.
This is also the most effective way to make you involuntarily swear at inanimate objects because you’re so tired and beat up.
And lastly, we love building circuit training routines for our Coaching Clients – and we’d love to build them for you too:
Step #8: How Many Days per Week Should I Train?
We get this question quite a bit, usually from overeager beavers who decide they are going to go from “sitting on the couch watching The Office on repeat” to “exercising 7 days per week.”
I would advise something different.
I mean you can still watch The Office…
…but you don’t need to be training 7 days a week!
We don’t want you burning out quickly and falling back to square one, a concern we mention in our guide “How Often Should I Work Out?“
Just pick “exercise” that’s fun for you and that won’t exhaust your muscles.[26][[26]]However, don’t forget that recovery is key to preventing injuries and allowing the body to rebuild itself after the stress of exercise. If you are looking to exercise on your off days we suggest that you cross-train. Cross-training involves engaging in a training routine or exercises that are different from what you normally would do. For example, if you always run for cardio, we would suggest that you change things up and go on the elliptical or bike. This allows you to stay active on your off days while also allowing the muscles that are always stressed from running to rest and recuperate. (Haff G, Triplett NT. (2016). Essentials of strength training and conditioning. Fourth edition. Champaign, IL: Human Kinetics).[[25]]
Also, here’s a lifehack: Program your workouts INTO your Google calendar (or Outlook).
You’re much more likely to do a workout that has been planned for in your work week!
Alternatively, you can hire a coach to program your workouts for you, so every day you know exactly what you need to do!
Step #9: Keep Track Of Everything!
Last but not least, keep a workout journal!
As they say, that which gets measured gets improved.
You should be getting stronger, faster, or more fit with each day of exercise.
Around these parts, we say “Level up your life, every single day.”
If you want to build from scratch, great! Let’s break it down into easy chunks with this recap:
ALWAYS warm up – 5-10 minutes on a bike, rowing machine, jumping jacks, running up and down your stairs, etc. Get the blood flowing and your muscles warm.[29]
Pick one exercise for each big muscle group – quads, butt and hamstrings, push, pull, and core.[30]
Do 3-5 sets for each exercise.
Do 5-10 reps per set for each exercise.
Determine how many reps and how long you’ll wait between sets for each exercise. Keep it simple. 60 seconds.[31]
Increase your efficiency and work your heart by doing supersets or circuits. This results in a higher EPOC meaning greater caloric expenditure and weight loss!
Give yourself permission to mess up, learn a little, and keep improving as you train more regularly!
More often than not, when I email people back and tell them how to build their own workout, they generally respond with:
“Steve, can’t you just TELL me what to do? I’m afraid of building a crappy workout.”
Why we built THREE options for people like that:
1) If you are somebody who wants to know they are following a program that is tailor-made for their life, situation, and goals, check out our Online Coaching Program.
You’ll work with our certified NF instructors who will get to know you better than you know yourself and program your workouts and nutrition for you.
2) Exercising at home and need a plan to follow? Check out Nerd Fitness Journey!
Our fun habit-building app helps you exercise more frequently, eat healthier, and level up your life (literally). Plus, NF Journey will build a workout for you!
Try your free trial right here:
3) Join the Rebellion (our free community) and I’ll send you free guides, workouts, and worksheets that you can read at your leisure.
We need good people like you!
Download our comprehensive guideSTRENGTH TRAINING 101!
Everything you need to know about getting strong.
Workout routines for bodyweight AND weight training.
How to find the right gym and train properly in one.
I certainly encourage you to try and build your own workout routine.
It can really help you develop a sense of excitement and pride when you start to get in shape based on your workout!
If you have more questions, or have a workout program you’re really proud of, share it in the comments below!
-Steve
PS: Check out the rest of our beginner content. I promise, it kicks ass 🙂
American College of Sports Medicine. ACSM’s Guidelines for Exercise Testing and Prescription. Philadelphia: Lippincott Williams & Wilkins, 2000
Read, “Effect of short moderate intensity exercise bouts on cardiovascular function and maximal oxygen consumption in sedentary older adults.” Souce, BMJ Journals
(Spano MA, Kruskall LJ, Thomas DT. (2018). Nutrition for Sport, Exercise, and Health).
American College of Sports Medicine. ACSM’s Guidelines for Exercise Testing and Prescription. Philadelphia: Lippincott Williams & Wilkins, 2000
Haff G, Triplett NT. (2016). Essentials of strength training and conditioning. Fourth edition. Champaign, IL: Human Kinetics
Remember, it all comes down to a caloric deficit or surplus. if you are trying to lose weight it is recommended that you seek a calorie deficit by consuming 250-500 less calories per day below your typical calorie intake. This will result in a realistic weight loss goal of 1-2 pounds per week. If you’re trying to gain muscle mass, then it is recommended that you seek a calorie surplus by consuming 250-500 additional calories above your typical calorie intake. This will result in a realistic gain in lean muscle mass of about 0.5 pounds per week. Source: Spano MA, Kruskall LJ, Thomas DT. (2018). Nutrition for Sport, Exercise, and Health
American College of Sports Medicine. ACSM’s Guidelines for Exercise Testing and Prescription. Philadelphia: Lippincott Williams & Wilkins, 2000)
This goes back to the progressive overload principle. Remember, in order to achieve your training goals or to see improvements, your training must gradually and constantly increase Source: Haff G, Triplett NT. (2016). Essentials of strength training and conditioning. Fourth edition. Champaign, IL: Human Kinetics.
If you do not progress your workout, then you will reach a plateau because your body has met the demands of your exercise or stress that you have placed upon it. If you progress your workout (e.g., do more reps, lift heavier weights, do different exercises, etc.), then those microscopic tears (that don’t hurt) will happen and your muscles will go through hypertrophy and grow bigger and stronger. Source: Powers SK, Howley ET. (2011). Exercise physiology: Theory and application to fitness and performance. New York: McGraw-Hill Humanities/Social Sciences/Languages).
You’ll see a few different recommendations around this. The National Strength and Conditioning Association (NSCA) recommends 6-12 reps for 3-6 sets for muscle hypertrophy and more than 12 reps for 2-3 sets for muscular endurance (Source: Haff G, Triplett NT. (2016). Essentials of strength training and conditioning. Fourth edition. Champaign, IL: Human Kinetics). While the American College of Sports Medicine (ACSM) simply recommends 8-12 reps for 2-4 sets for healthy individuals (Read, American College of Sports Medicine position stand. Progression models in resistance training for healthy adults. Source, PubMed.
Read, “Musculoskeletal adaptations and injuries due to overtraining.” Soucre, PubMed.
Excessive muscle fatigue, often resulting by engaging in higher intensity exercise or engaging in exercise with short rest intervals has been found to increase one’s risk for muscle strains due to fatigue eliciting poor exercise technique. For more, read “Muscle strain injury: diagnosis and treatment.” Source, PubMed.
The NSCA also has guidelines in-place to help you determine your rest intervals in-between sets: 2 to 5 minutes for strength and power, 30 seconds to 1.5 minutes for hypertrophy, and 30 seconds or less for muscular endurance (Haff G, Triplett NT. (2016). Essentials of strength training and conditioning. Fourth edition. Champaign, IL: Human Kinetics).
Plus, ACSM has a basic recommendation of 2 to 3 minutes (American College of Sports Medicine. ACSM’s Guidelines for Exercise Testing and Prescription. Philadelphia: Lippincott Williams & Wilkins, 2000). So we don’t have to get overly dogmatic here.
More efficient communication between your neuromuscular systems results in proper motor unit recruitment. A motor unit is a single motor neuron and the muscle fibers it innervates. We have small motor units, meaning that a single motor neuron innervates relatively few muscle fibers, and these smaller motor units are good for precise and detailed movements (e.g., moving your fingers). On the other hand, we have large motor units, meaning that a single motor neuron innervates hundreds of muscle fibers, and these larger motor units are good for generating a lot of force (e.g., getting larger muscle groups like the quads to generate a lot of force to help in running) (Powers SK, Howley ET. (2011). Exercise physiology: Theory and application to fitness and performance. New York: McGraw-Hill Humanities/Social Sciences/Languages; Heckman CJ, Enoka RM. Motor unit. Compr Physiol. 2012 Oct;2(4):2629-82. doi: 10.1002/cphy.c100087. PMID: 23720261).
When you first start strength training, your motor units don’t fire as quickly and smaller motor units that don’t generate a lot of force are recruited. As you continue working out and become more trained, your motor units fire more rapidly and your brain recruits larger motor units that can generate more force allowing you to lift heavier weights. This is why the progressive overload principle is important! As your neuromuscular system communicates more efficiently, you will see improvements in your exercise technique and muscle adaptations (e.g., hypertrophy) taking place.
Haff G, Triplett NT. (2016). Essentials of strength training and conditioning. Fourth edition. Champaign, IL: Human Kinetics.
According to ACSM and the CDC, all healthy adults aged 18-65 years should participate in moderate-intensity aerobic physical activity for a minimum of 30-minutes on five days per week, or vigorous-intensity aerobic activity for a minimum of 20-minutes on three days per week. Additionally, every adult should perform activities that maintain or increase muscular strength and endurance for a minimum of two days per week. Performing exercise at a moderate-to-vigorous intensity will result in greater caloric expenditure and weight loss. (American College of Sports Medicine. ACSM’s Guidelines for Exercise Testing and Prescription. Philadelphia: Lippincott Williams & Wilkins, 2000).
The NSCA recommends a 5-10 minute warm-up to prepare the body for the exercise session, and the exercise session should be followed by a 5-10 minute cool-down to bring the body back down to rest (Haff G, Triplett NT. (2016). Essentials of strength training and conditioning. Fourth edition. Champaign, IL: Human Kinetics).
The ACSM and other researchers have found that if you ACCUMULATE 10-minute bouts of exercise throughout the day that can be as effective as one who does one 30-minute bout of exercise. Read, “The Effects of Continuous Compared to Accumulated Exercise on Health: A Meta-Analytic Review.” Source, PubMed.
Circuit training results in a higher excess post-exercise oxygen consumption (EPOC) resulting in great caloric expenditure when compared to traditional strength training with longer rest intervals in-between sets and exercises. Read, “Circuit weight training and its effects on excess postexercise oxygen consumption.” Souce, PubMed.
Haff G, Triplett NT. (2016). Essentials of strength training and conditioning. Fourth edition. Champaign, IL: Human Kinetics
Oh, and even if you aren’t doing a ciruict, don’t use your cell phone for other purposes besides using it to listen to music! Other cell phone functions such as texting and talking have been found to lower the intensity of exercise resulting in lower caloric expenditure, and disrupt balance leading to a greater risk of musculoskeletal injuries. Read, “The Impact of Cell Phone Use on the Intensity and Liking of a Bout of Treadmill Exercise.” Source, PubMed. Read, “The impact of different cell phone functions and their effects on postural stability.” Source, ScienceDirect.
The NSCA recommends 2-3 training sessions for novice or beginners, 3 sessions if using total body training or 4 sessions if using a split routine for intermediates, and 4-6 sessions for advanced lifters (Haff G, Triplett NT. (2016). Essentials of strength training and conditioning. Fourth edition. Champaign, IL: Human Kinetics).
Strength training results in microscopic muscle tears in the muscles. This causes a cascade of events eventually leading to muscle repair and growth (i.e., hypertrophy). Our muscles adapt to the overload stress of strength training immediately after each bout of exercise, but it takes roughly eight weeks to see physical improvements (Powers SK, Howley ET. (2011). Exercise physiology: Theory and application to fitness and performance. New York: McGraw-Hill Humanities/Social Sciences/Languages).
Adequate recovery is essential to prevent overtraining. When we become overtrained, our injury risk increases and we reach a plateau and no longer see any improvements from our training. For more, read “The effects of resistance training, overtraining, and early specialization on youth athlete injury and development.” Source, PubMed.
This applies to all healthcare professionals who are working with clients, athletes, military personnel, special populations (e.g., cardiac rehab). These healthcare professionals are tracking everything so they can see if you are improving or not. And if you’re not improving, that is okay. At least you know and then you can start making changes to your exercise routine: change your exercises from bodyweight to free weights; change the number of sets and rep; shorten or lengthen your rest intervals, etc.
And if you’re not improving, that is okay. At least you know and then you can start making changes to your exercise routine: change your exercises from body weight to free weights; change the number of sets and rep; shorten or lengthen your rest intervals, etc.
A traditional warm-up usually consists of two components. The first is a general warm-up of 5-10 minutes of low- to moderate-intensity aerobic exercise, such as jogging or stationary cycling. The second is a specific warm-up that involves less intense movements similar to the sport or activity about to be performed. This second part involves performing dynamic stretches such as high knees, butt-kicks, skipping, shuffling, carioca, etc. The purpose of this type of warm-up is to allow the body to gradually adjust to the demands of exercise by allowing for increases in heart rate, blood flow, muscle temperature, and core body temperature (Haff G, Triplett NT. (2016). Essentials of strength training and conditioning. Fourth edition. Champaign, IL: Human Kinetics).
These big muscle groups allow for everyday activities to be performed with more ease and for you to maintain a more independent lifestyle for a longer period of time. For more, read “American College of Sports Medicine position stand. Progression models in resistance training for healthy adults. Source, PubMed.
But remember, the sets, reps, and rest intervals will change as your training goals change.
The longer your workout the more fatigue you will experience, therefore, increasing your risk of injury. Keep your cell phone in the locker room if you’re having a difficult time keeping your workout to less than an hour!
The same rules apply as for the warm-up. After you are done with your exercise session perform 5-10 minutes of low- to moderate-intensity aerobic exercise. The second part of the cool-down will consist of static stretching instead of dynamic stretching. Static stretching involves slowly moving a muscle to the end of its range of motion and then holding that position for a period of time (10-30 seconds or 30-60 seconds for its greatest benefits). You should stretch the muscle enough to feel a slight discomfort, but don’t go too far where you start to feel pain. For more, read “American College of Sports Medicine position stand. Quantity and quality of exercise for developing and maintaining cardiorespiratory, musculoskeletal, and neuromotor fitness in apparently healthy adults: guidance for prescribing exercise.” Source, PubMed.
Remember, the only way you’re going to know if you’re improving and if your program works is if you’re recording the data. If it’s not working, at least you can catch it early and make the necessary adjustments.
So you want to lose weight and get in shape, but don’t want to leave your house?
Well, as your fitness Yoda, I will teach you a great bodyweight workout routine that you can do ANYWHERE: In your living room, at a park, or in a galaxy far, far away…
These are the types of workouts we build for our busy Online Coaching Clients, and I’m pumped to share it with you today!
Let’s dig into the different parts of this workout and get to the action:
You just need to make sure you have the right program to follow.
Enter the Beginner Bodyweight Workout.
I’m going to take you through a basic home workout today that can be completed anywhere – in your house, apartment, out at a park, in your basement, on the moon, wherever.
Beginner Body Weight Workout Video & exercises
This is the Beginner Bodyweight Workout (3 Circuits):
20 Bodyweight squats.
10 Push-ups.
10 Walking lunges (each leg).
10 Dumbbell rows (use a milk jug or other weight).
15 Second Plank.
30 Jumping jacks
We turned this bodyweight workout into a fun infographic, because that’s how we roll around here:
In a circuit routine, you’ll do each exercise in succession without a break in between (if you’re able).
Once you’ve finished all exercises in the circuit, do it again.
If you’re still able after the 2nd run-through, go for a third.
Because all of these exercises come one after another, you’re bound to get tired – and that’s okay!
It’s better to stop and take a break than to do an exercise incorrectly.
Before you start, don’t forget to do a Dynamic Warm-Up – Make sure to get your heart rate pumping and get your muscles warmed or you’re just asking for injury.
You can run in place, jump rope, do a few push-ups, pedal on a stationary bike, do some punches and kicks, jog up and down your stairs, and/or twist and swing your arms and legs to get them moving!
“HOW OFTEN SHOULD I DO THE BEGINNER BODYWEIGHT WORKOUT?”
Do this routine 2-3 times a week, but never on consecutive days.
You don’t build muscle when you’re exercising, you build muscle when you’re resting, so try not to do a strength training routine (of the same muscle groups) two days in a row.
In addition to checking out our Online Coaching Program, make sure you download the worksheet for this workout by joining the Rebellion (our free online community)!
I’ll send it to you right away when you sign up in the box below:
Grab Your Beginner Bodyweight Routine Worksheet. No Gym Required!
Complete this workout at home, no equipment required
Avoid the common mistakes everybody makes when doing bodyweight exercises
Note: We have helped hundreds of 1-on-1 Coaching clients get started with strength training and other awesomeness – but EVERYBODY starts with bodyweight training like these movements and this workout!
Is Bodyweight Training Effective for Weight Loss?
The question of the day is:
Is bodyweight training effective for weight loss?
Yep! Bodyweight training can be great for weight loss, as long as you have your nutrition dialed in.
If you don’t…then no, it won’t be your magic bullet.
We’ve actually developed our own 10-level nutrition system and mindset blueprint in Nerd Fitness Prime, but let me break this down into some basics:
Eat natural, whole foods whenever possible.
Cut back on sugar and liquid calories wherever you can. The stuff is in everything!
Put vegetables and fruit on your plate!
Know your fats and carbs – these are the foods we can overeat without realizing it.
Make sure you get enough protein each day (meat, chicken, fish) – this helps with rebuilding muscles and things like that.
You can download a Free 10 Level Diet Guide too when you join the Rebellion and sign up in the box below:
Download our free weight loss guide
THE NERD FITNESS DIET: 10 Levels to Change Your Life
Follow our 10-level nutrition system at your own pace
What you need to know about weight loss and healthy eating
3 Simple rules we follow every day to stay on target
The raw honest truth:how you eat will be responsible for at least 80% of your success or failure.
If you’re doing bodyweight workouts because you’re interested in losing weight, know that training is only 10-20% of the puzzle!
If you need help figuring this all out, or you just want your own Yoda to tell you what to do, you’re in the right place!
We’ve been helping busy people like you train at home and make better food decisions without hating life! It’s our 1-on-1 Online Coaching Program, and it might be a great fit for you.
Schedule a call with us to learn more by clicking on the image below:
After the Beginner Bodyweight Workout: Next Steps!
Do this Beginner Bodyweight Workout for the next 4-6 weeks and focus on getting better.
If doing just one circuit of the workout was really challenging, no big deal!
Write down how you did, and try to do just 1 more rep or exercise next time through.
The whole point is “do a bit more than last time.”
I also have MULTIPLE options for you to take for your next step too. Pick the option below that best aligns with your goals and timeline:
1) If you want step-by-step guidance on how to lose weight, eat better, and get stronger, check out our killer 1-on-1 coaching program:
2) If you want a daily prompt for doing workouts at home, check out NF Journey. Our fun habit-building app helps you exercise more frequently, eat healthier, and level up your life (literally).
Try your free trial right here:
3) Join the Rebellion! We need good people like you in our community, the Nerd Fitness Rebellion.
Sign up in the box below to enlist and get the Beginner Bodyweight Workout sheet so you can print out the sheet and train at home!
Grab Your Beginner Bodyweight Routine Worksheet. No Gym Required!
Complete this workout at home, no equipment required
Avoid the common mistakes everybody makes when doing bodyweight exercises
Learn how to finally get your first pull-up
I’d love to hear how this workout went for you, and how else we can help!
This is what we’ve dedicated our lives to, and you’re now part of a killer community.
Welcome to the Nerd Fitness Rebellion!
You can do this, we got your back!
-Steve
PS: If you’re looking for more workout routines to follow, I got you covered:


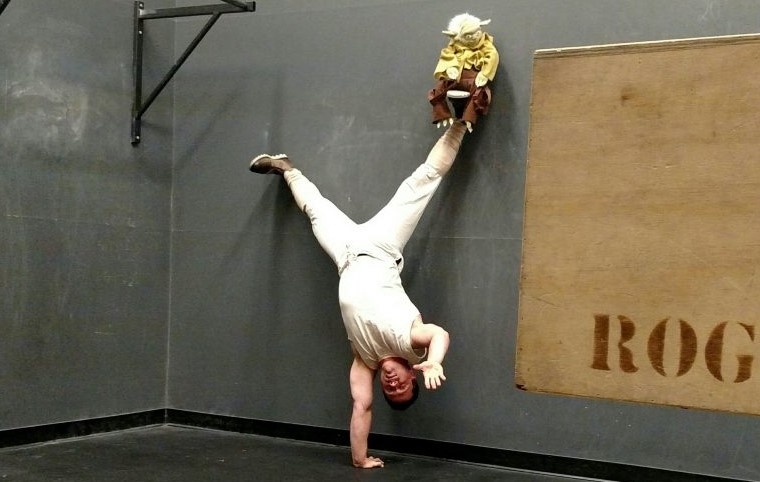








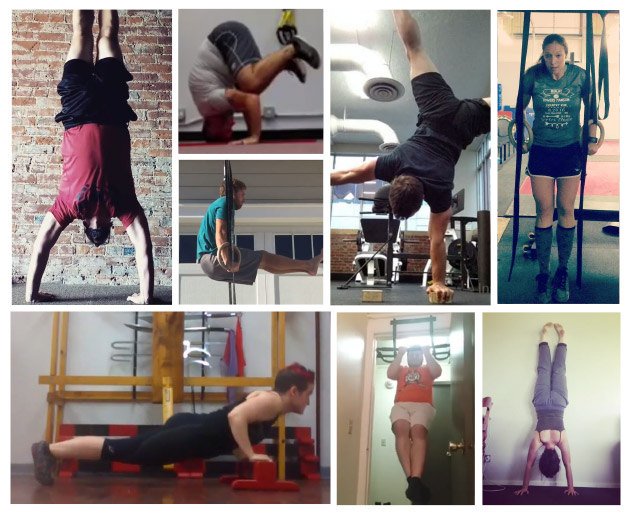

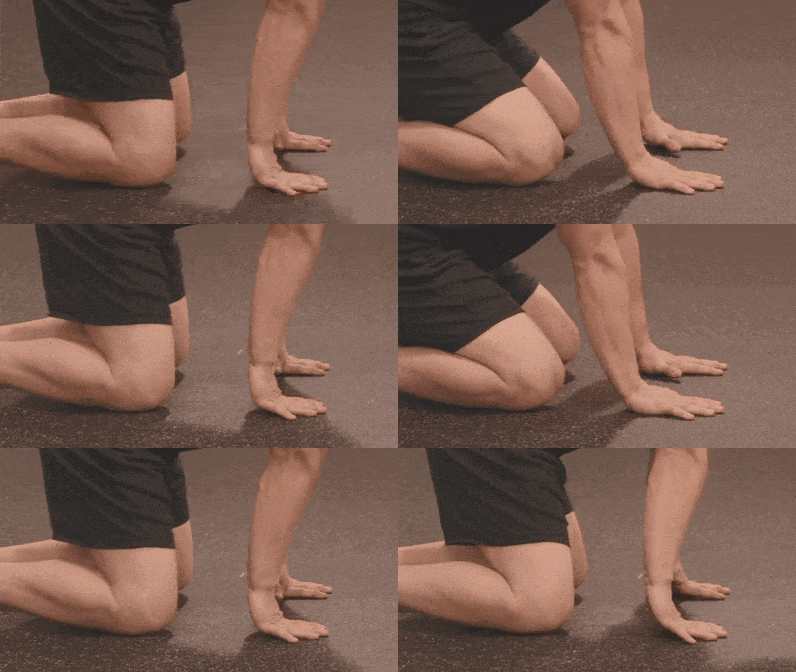
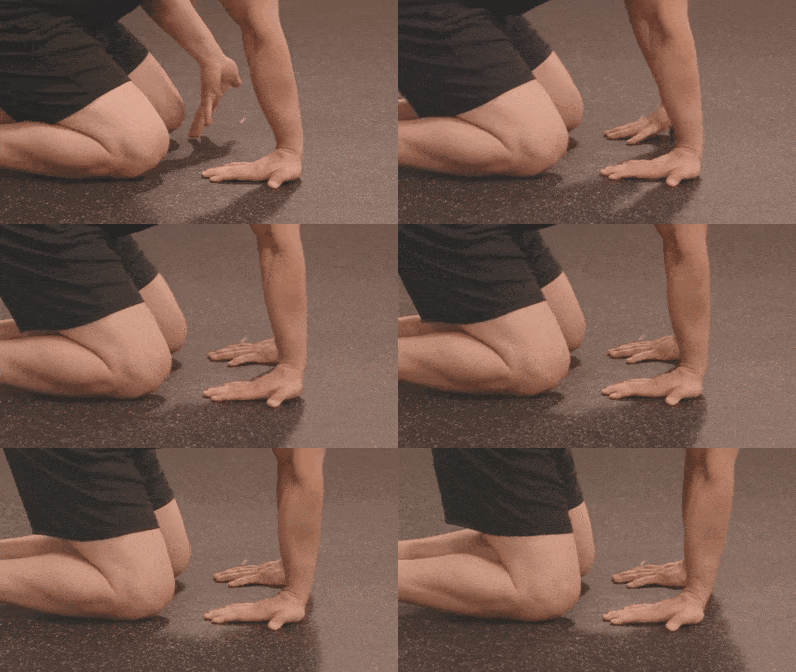
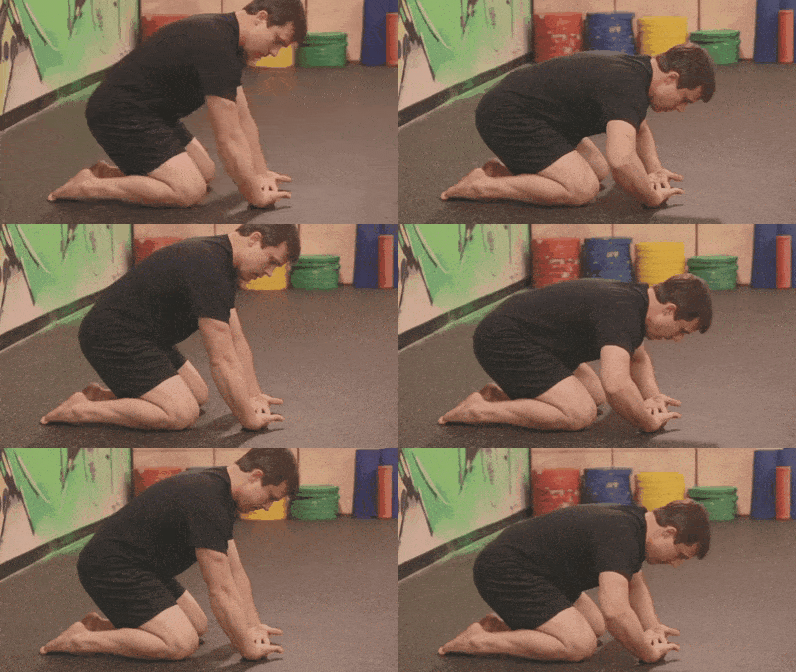

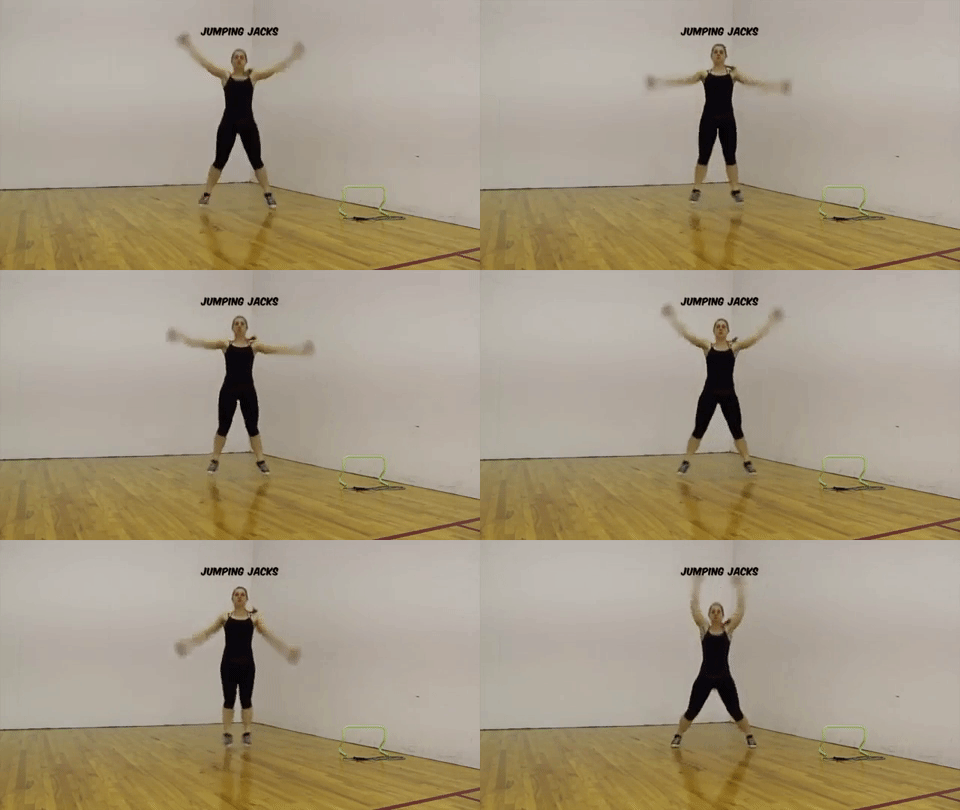
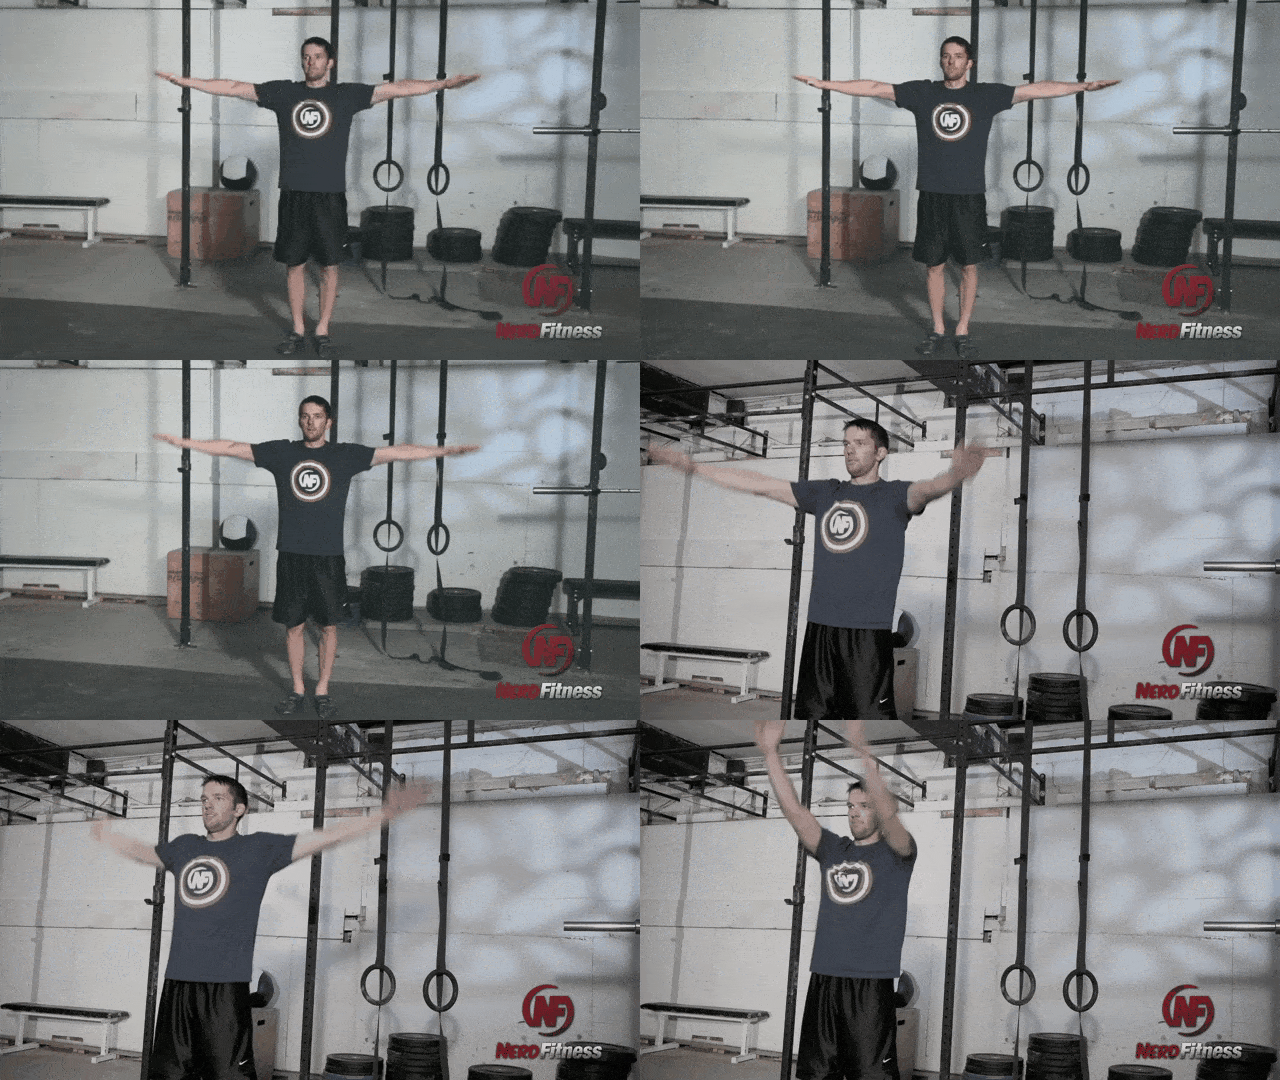

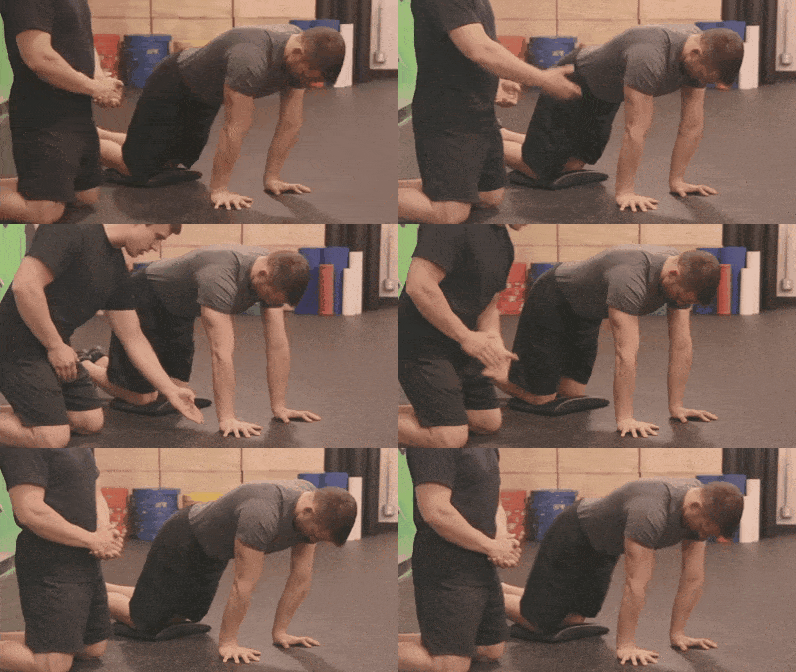
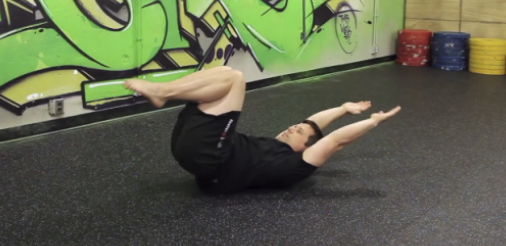

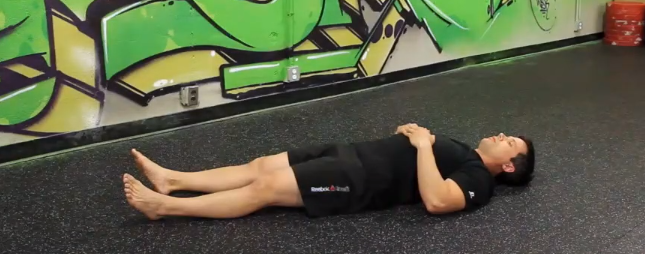
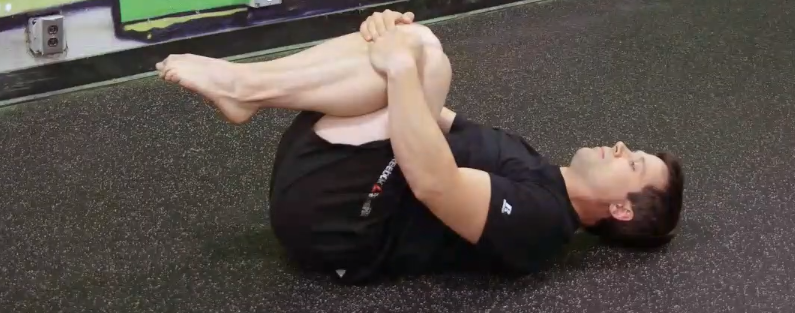
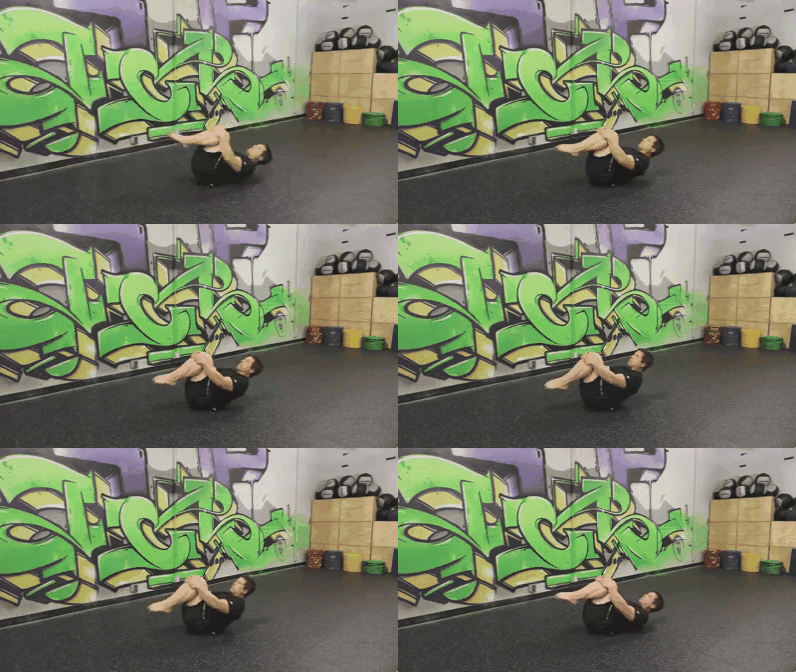
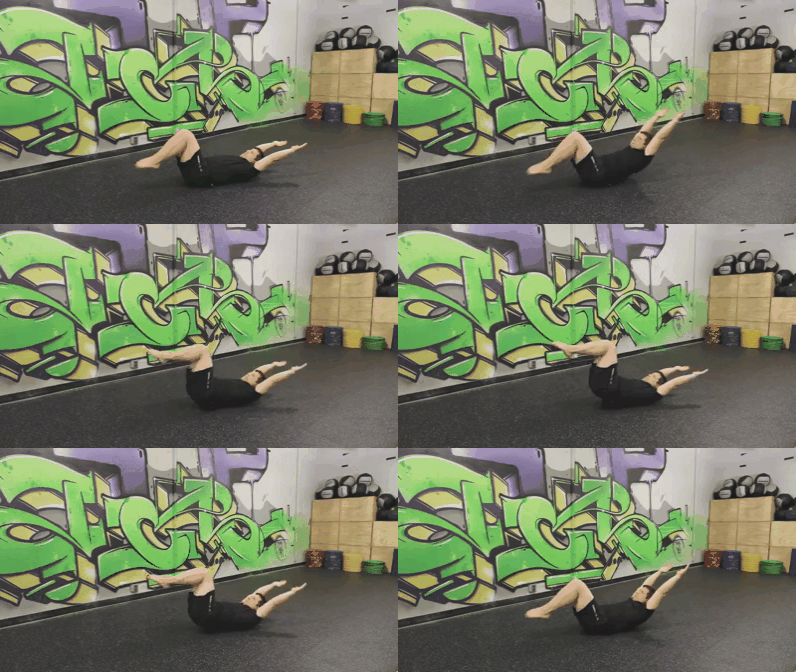
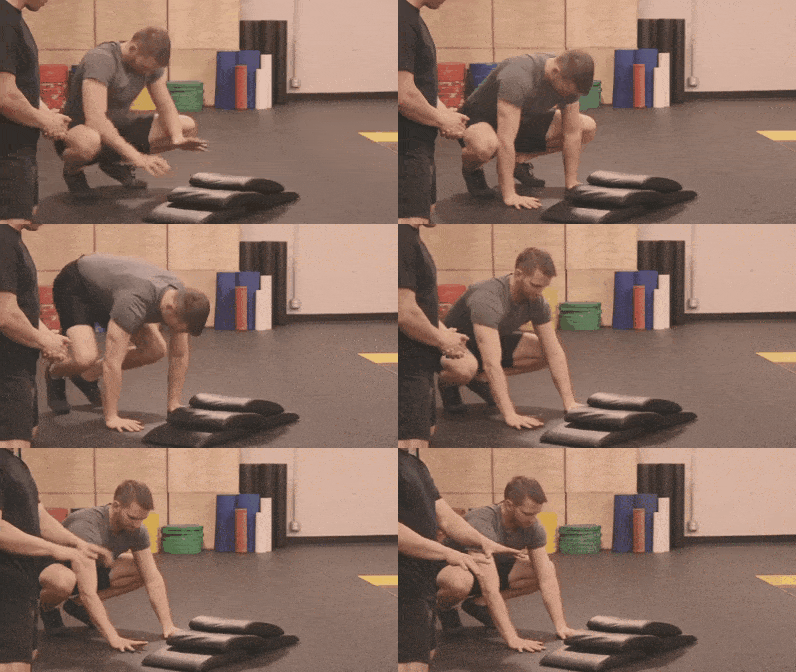
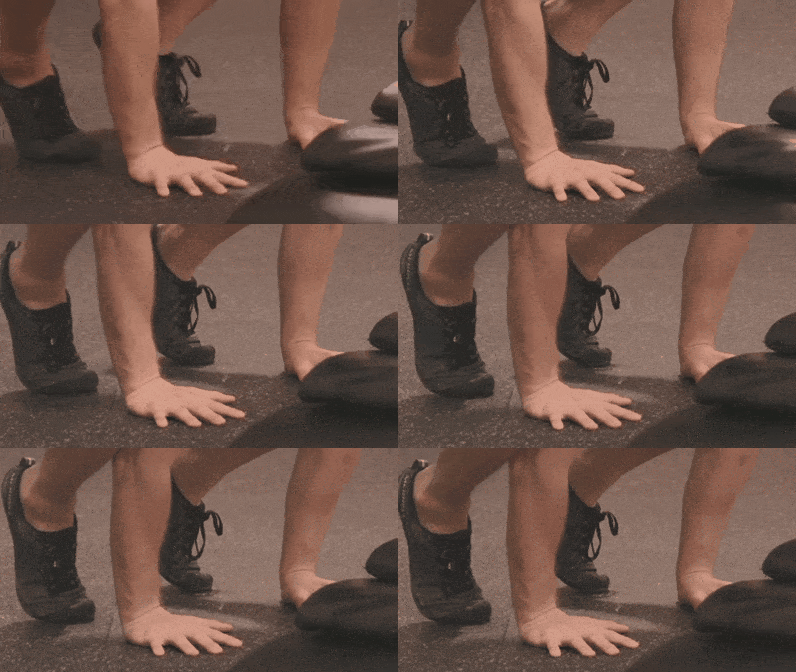

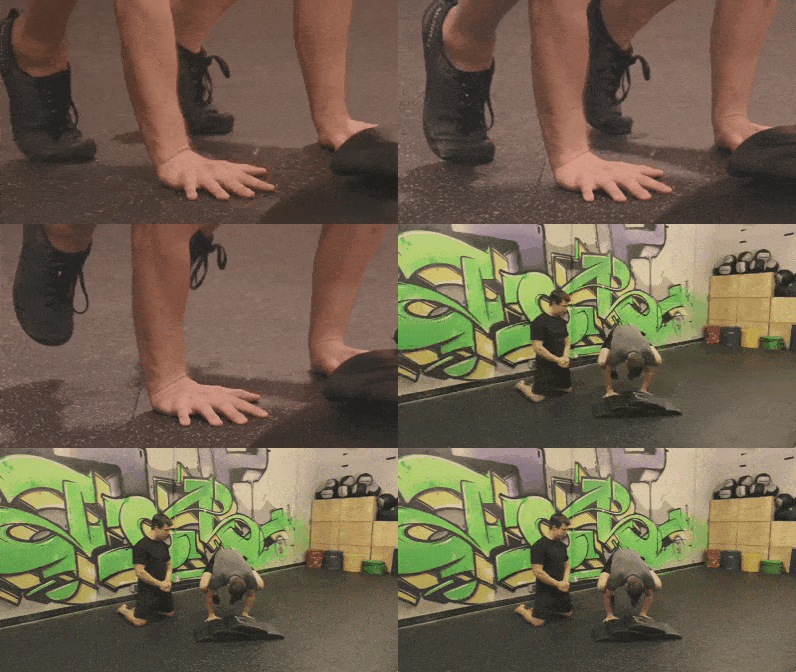

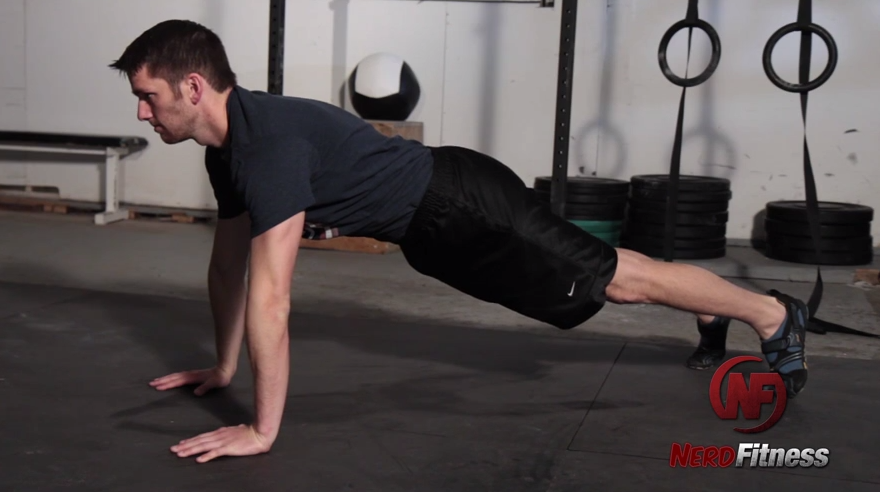
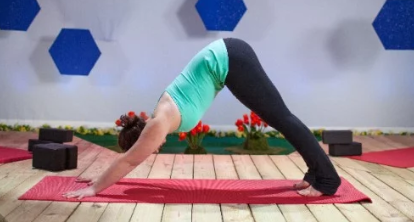

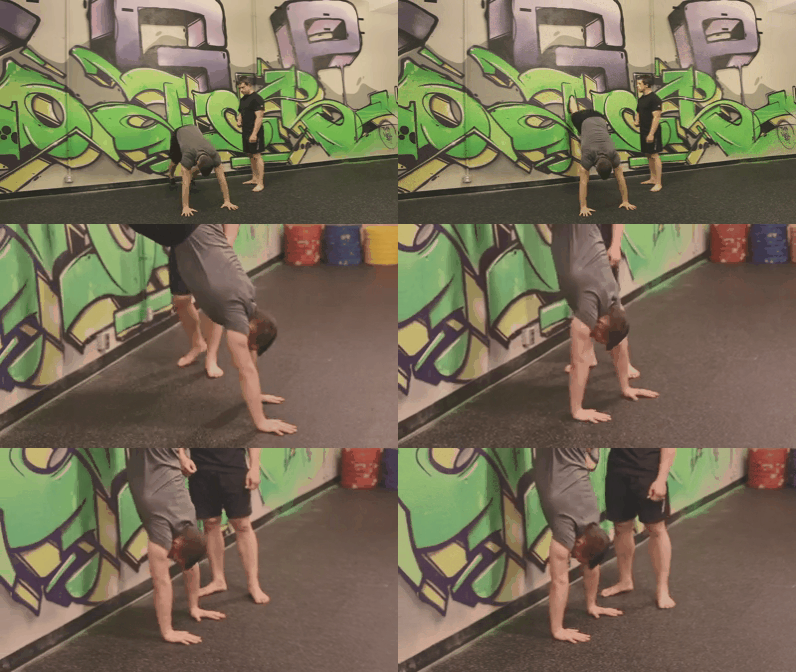

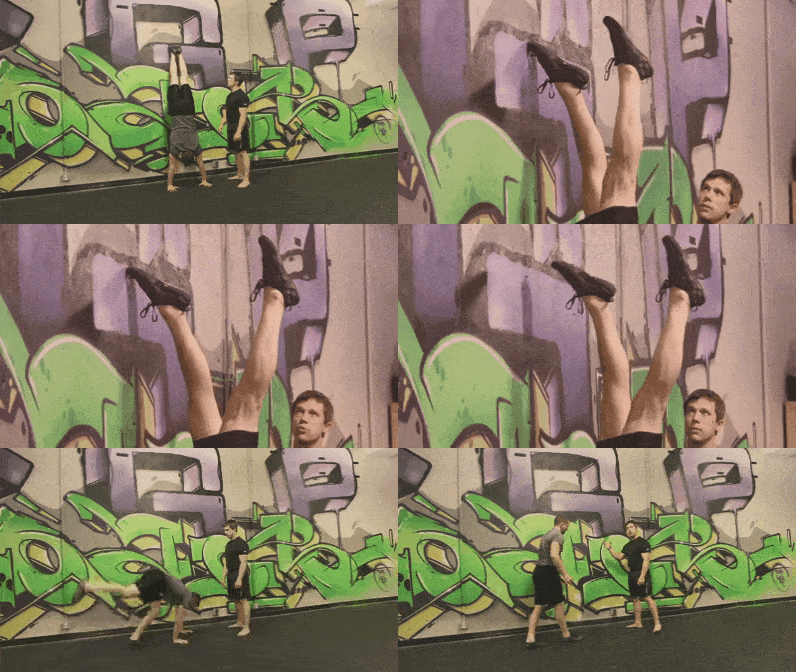

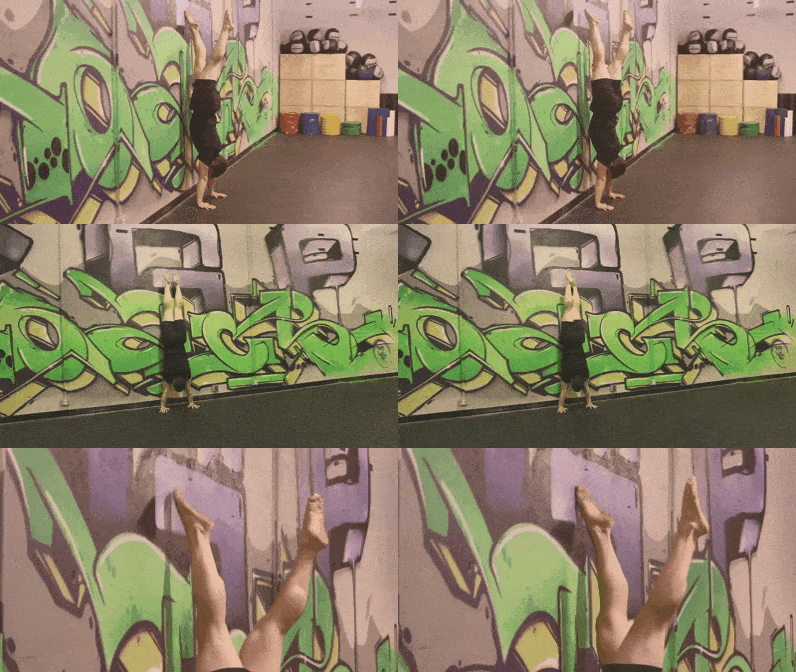
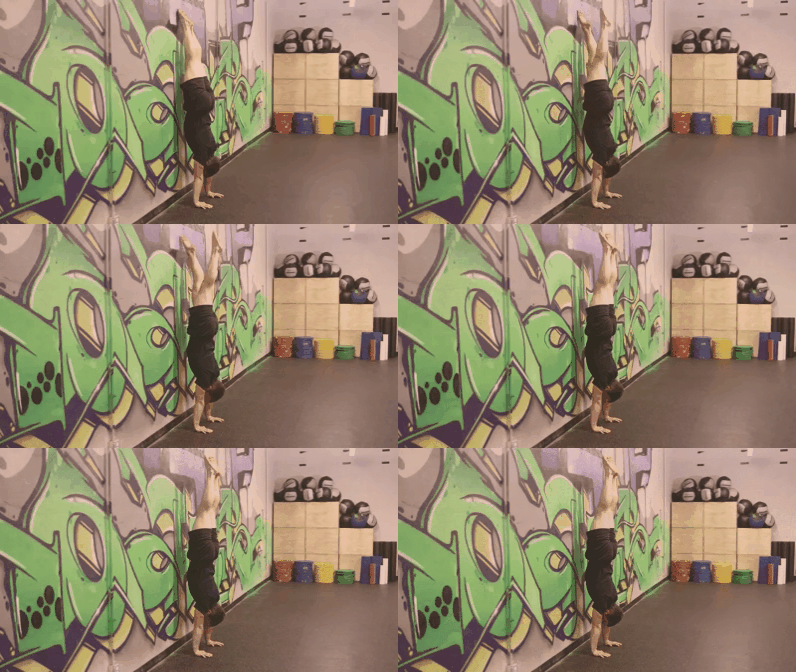
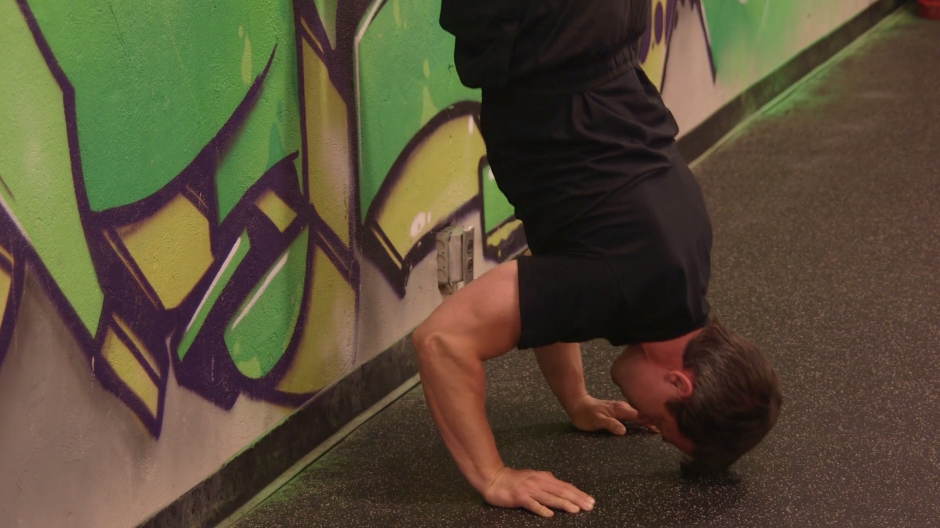








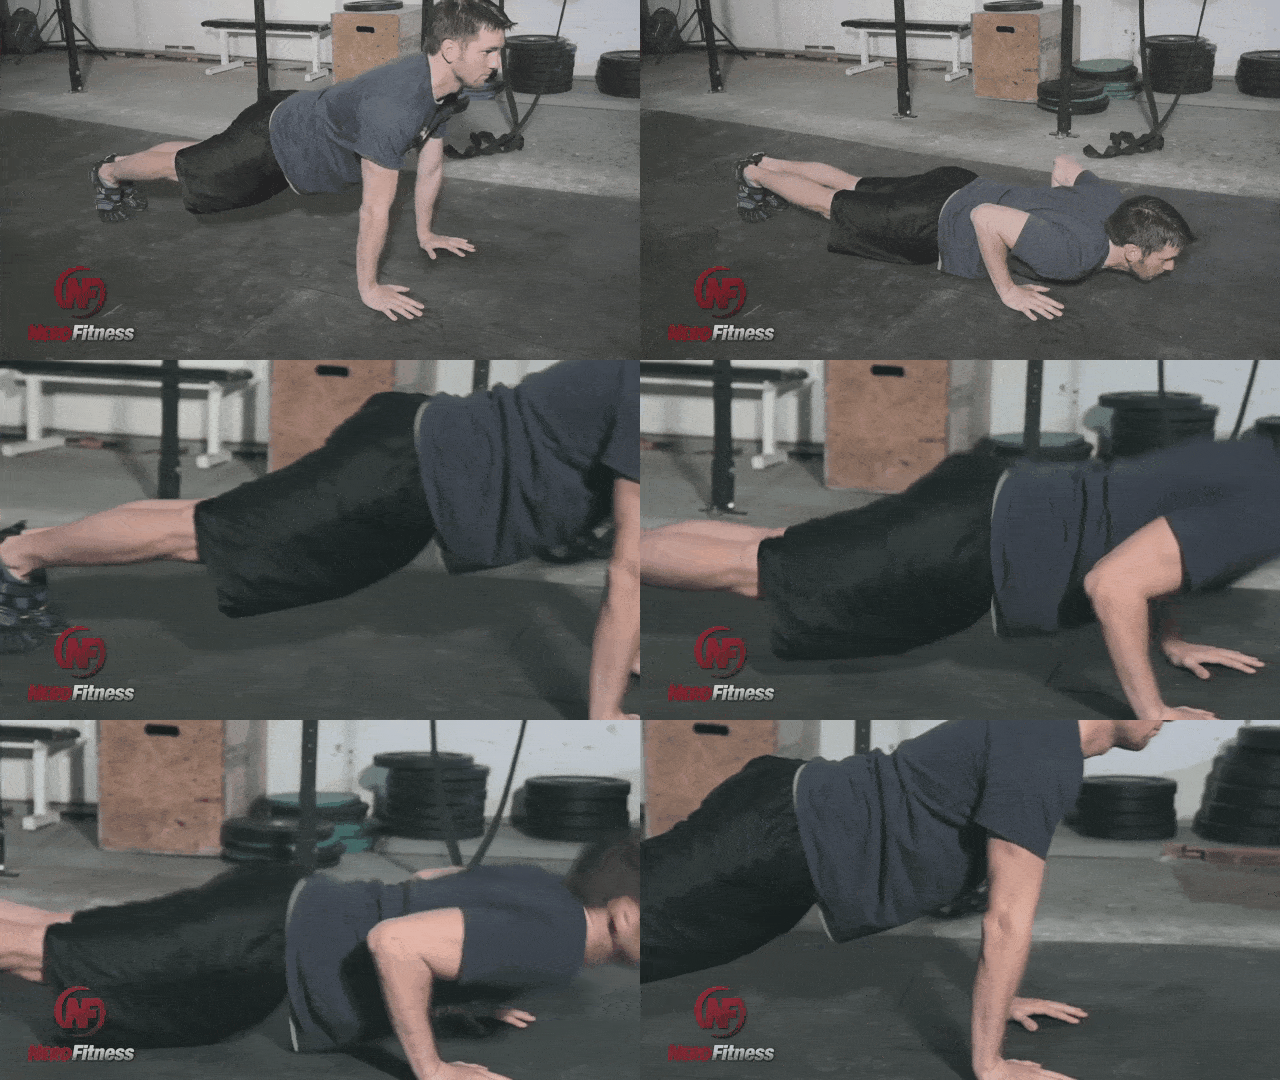













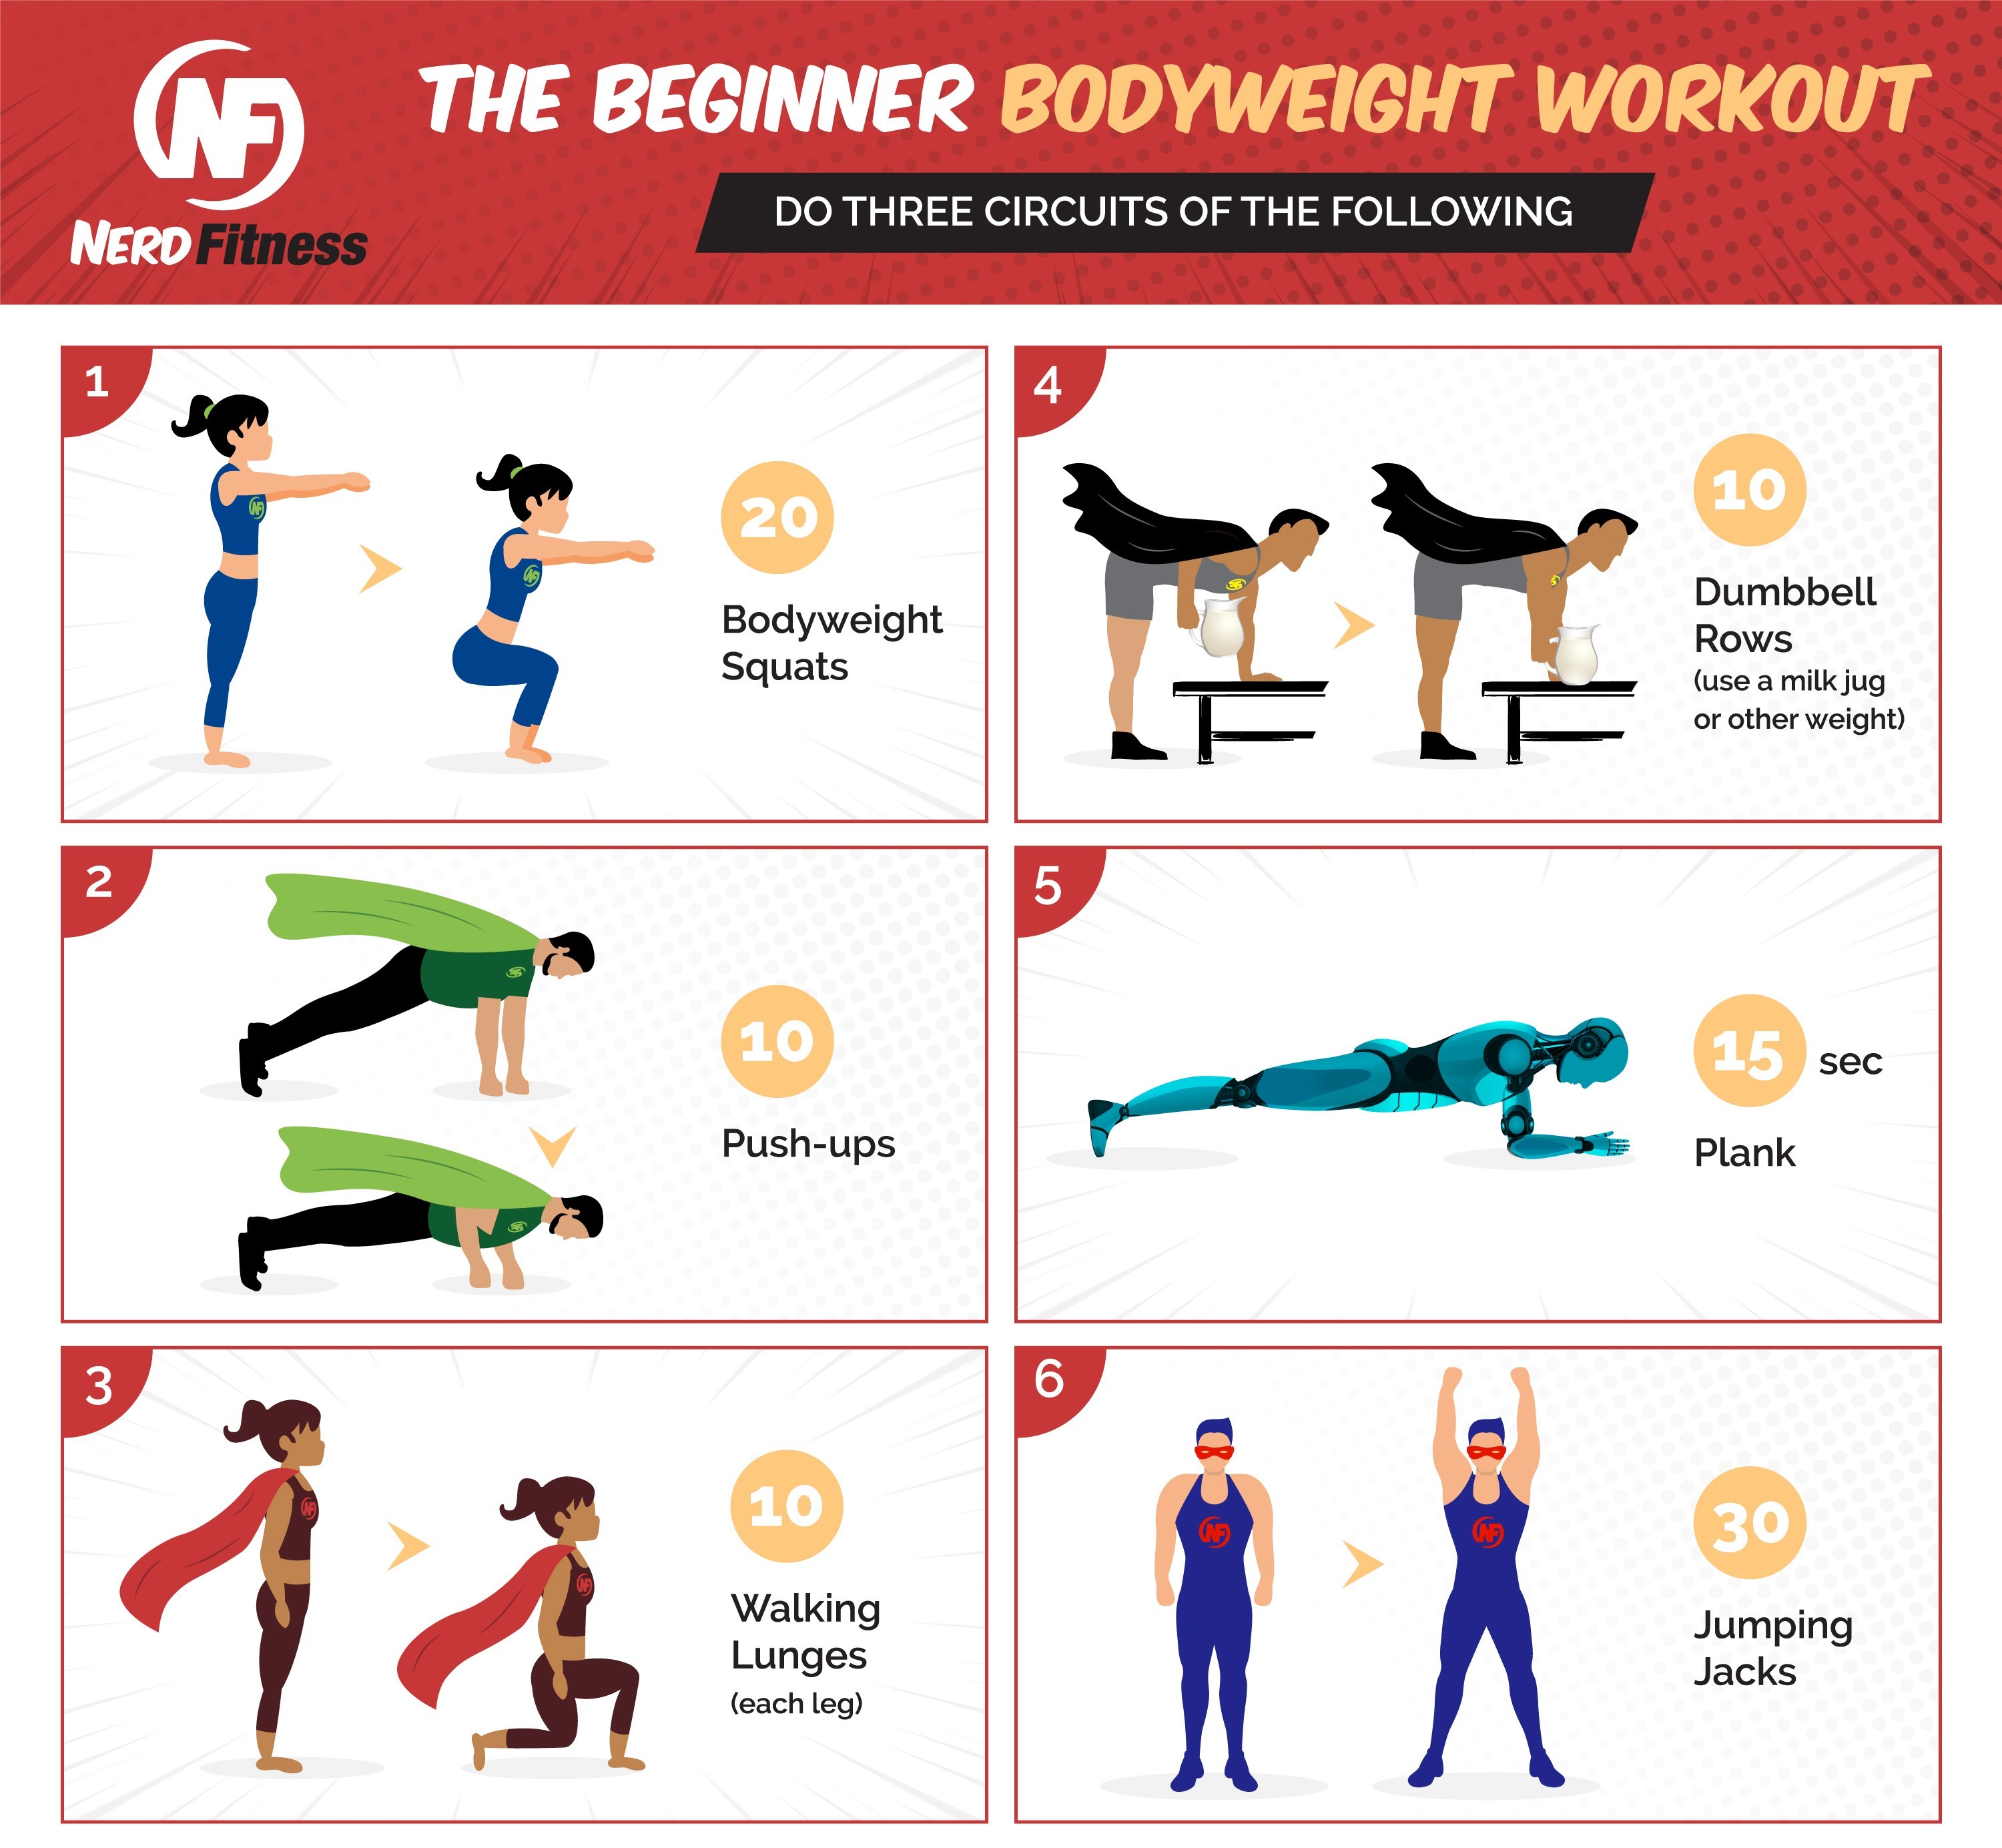


 If you have access to a gym, you have a lot of circuit options.





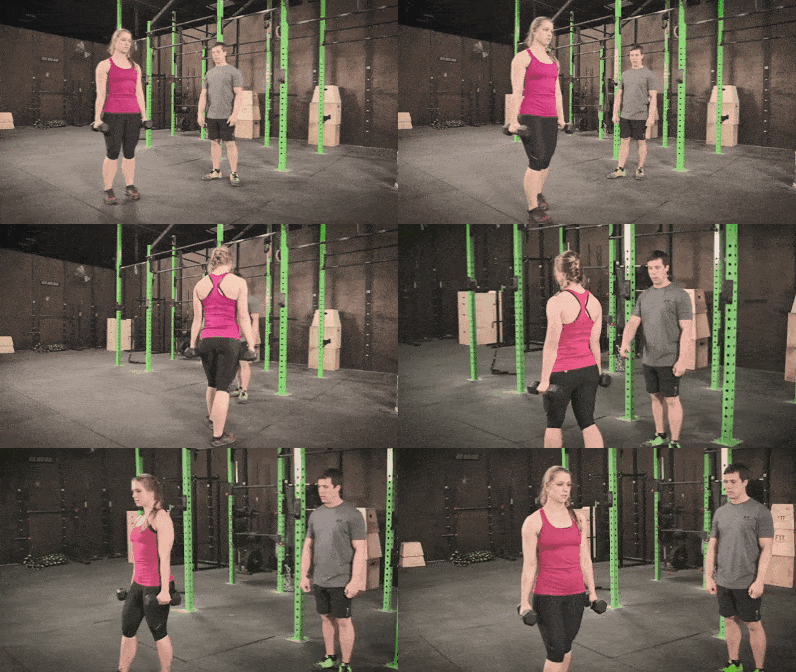





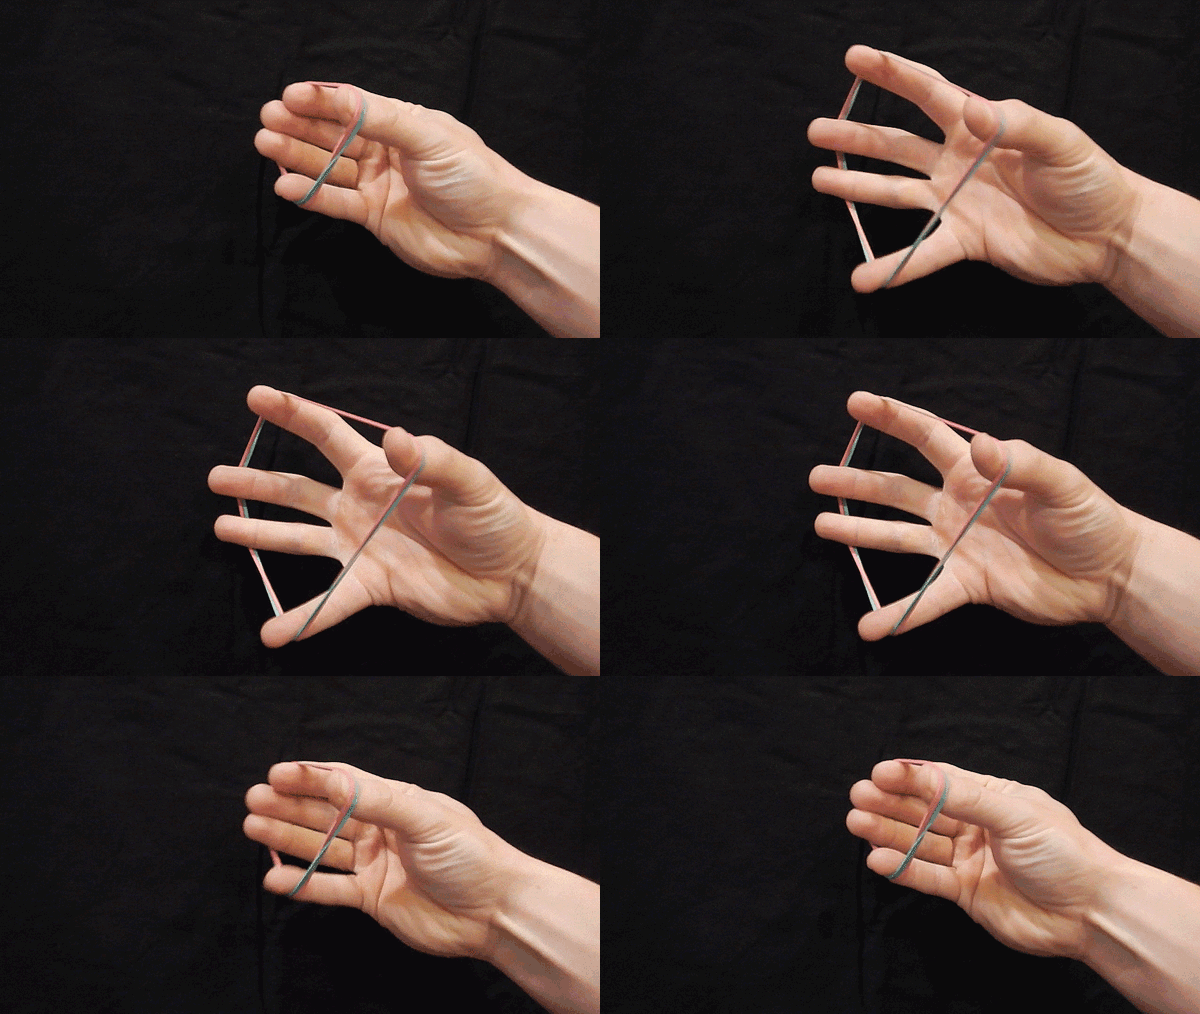

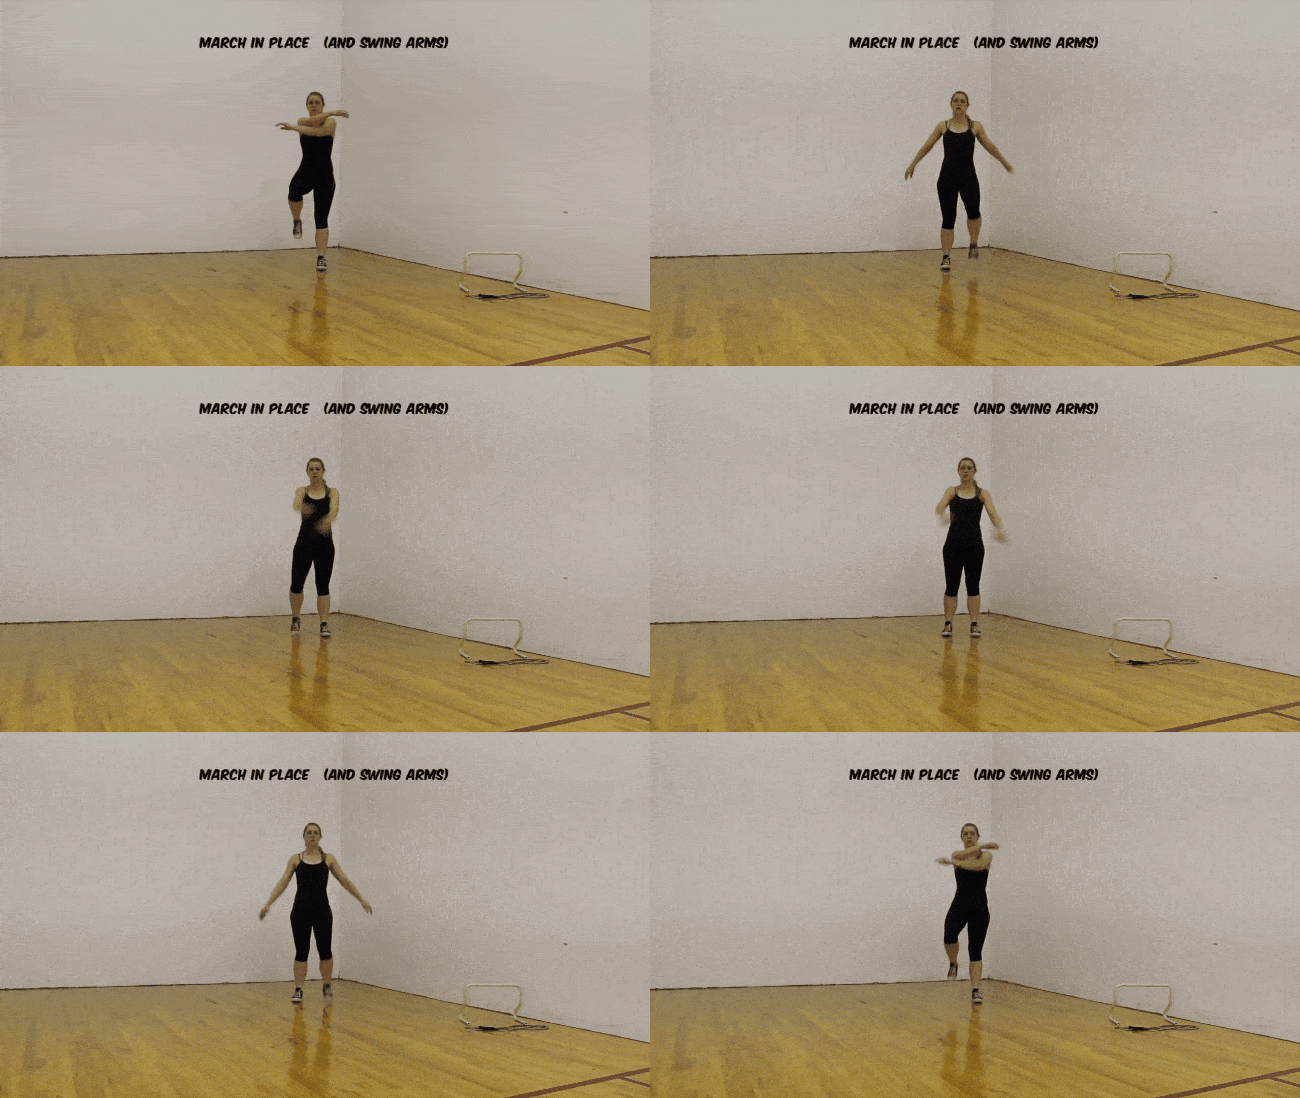
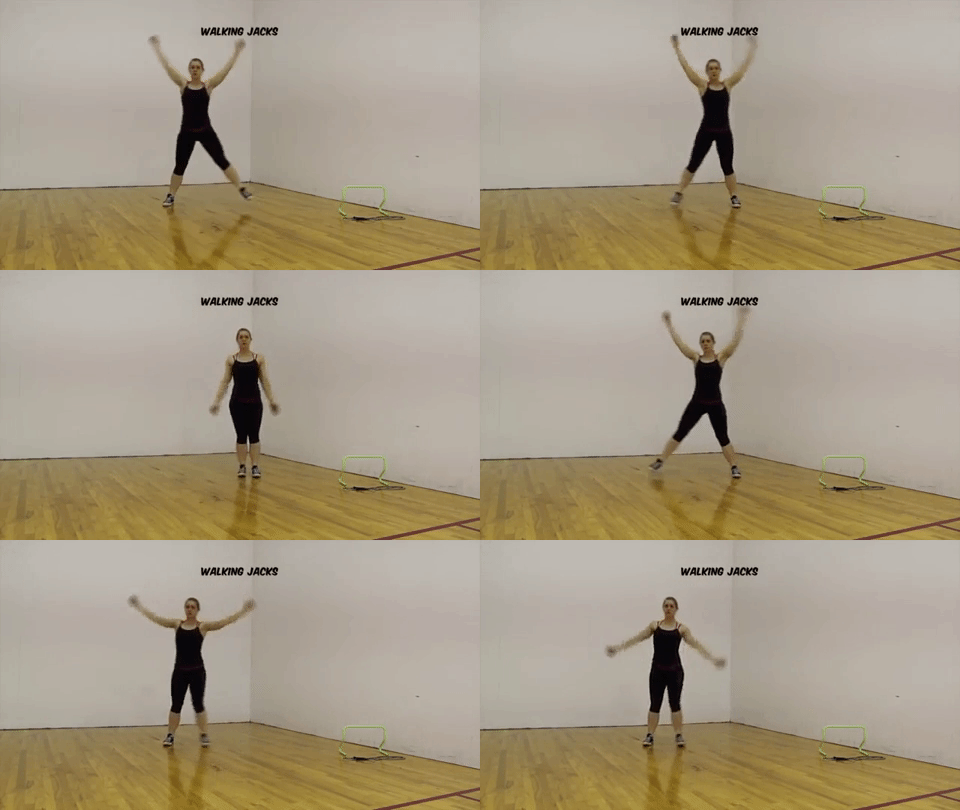
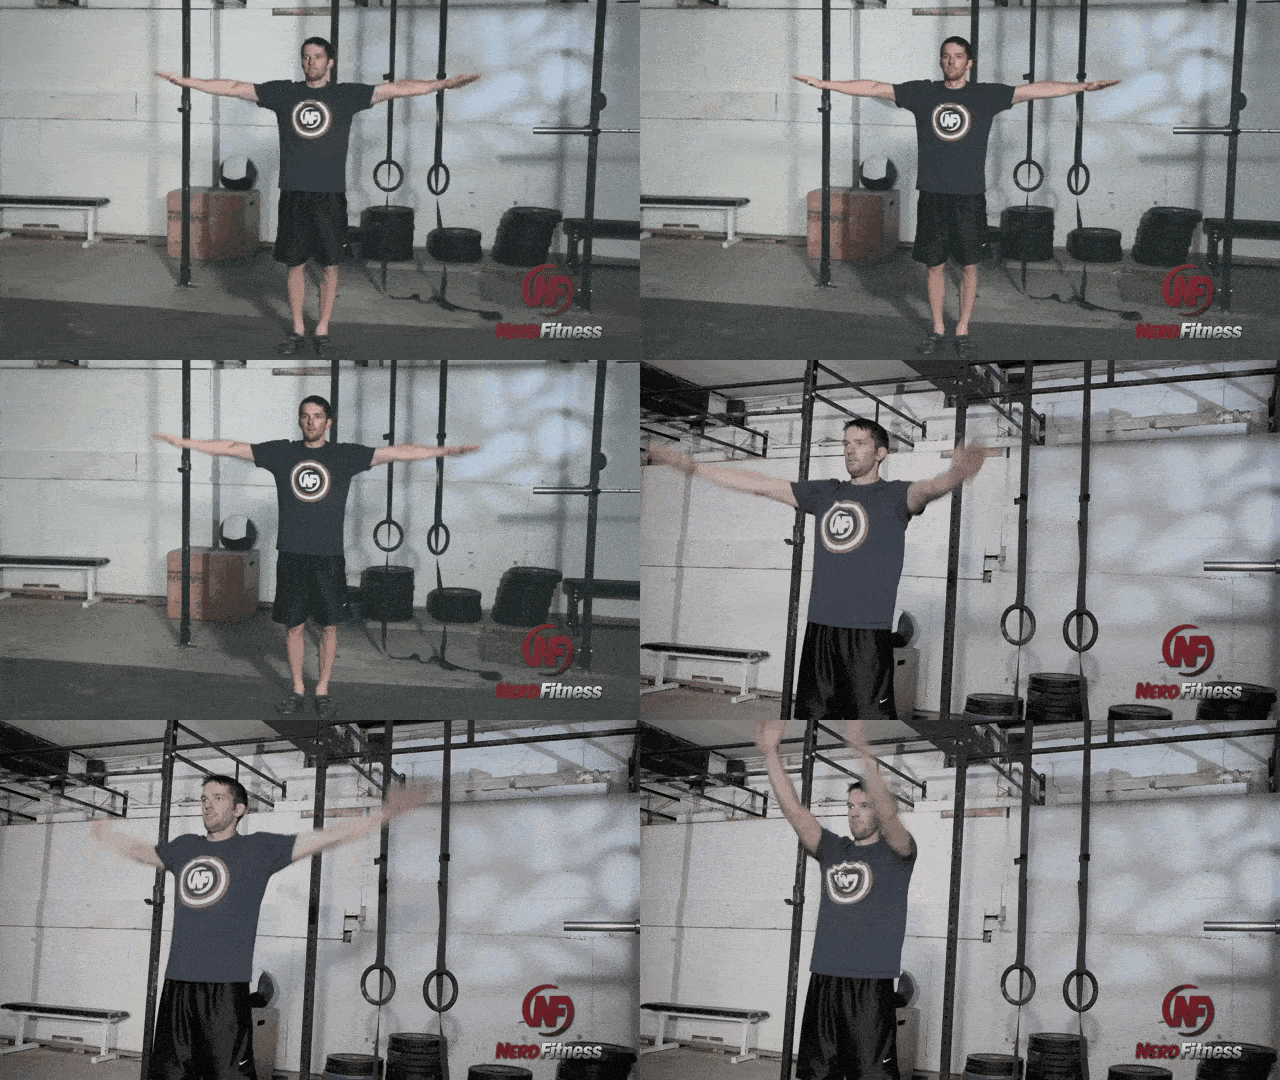
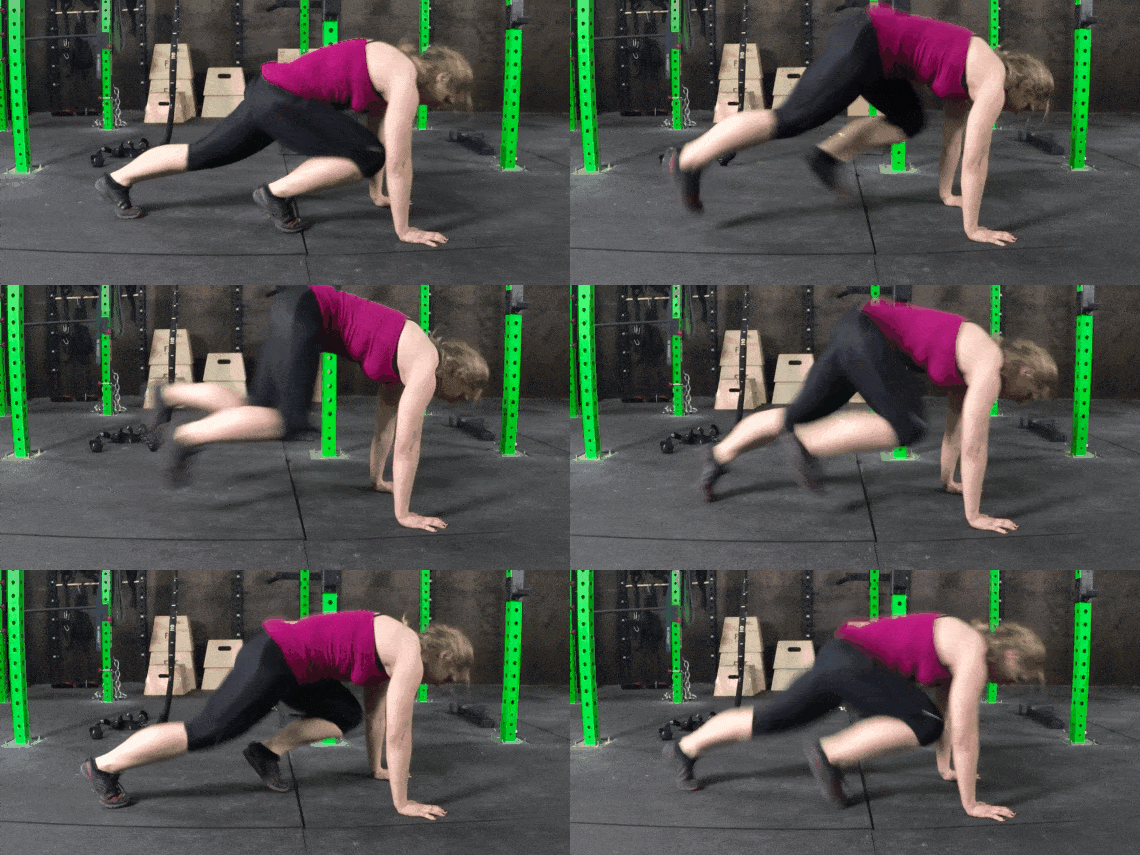
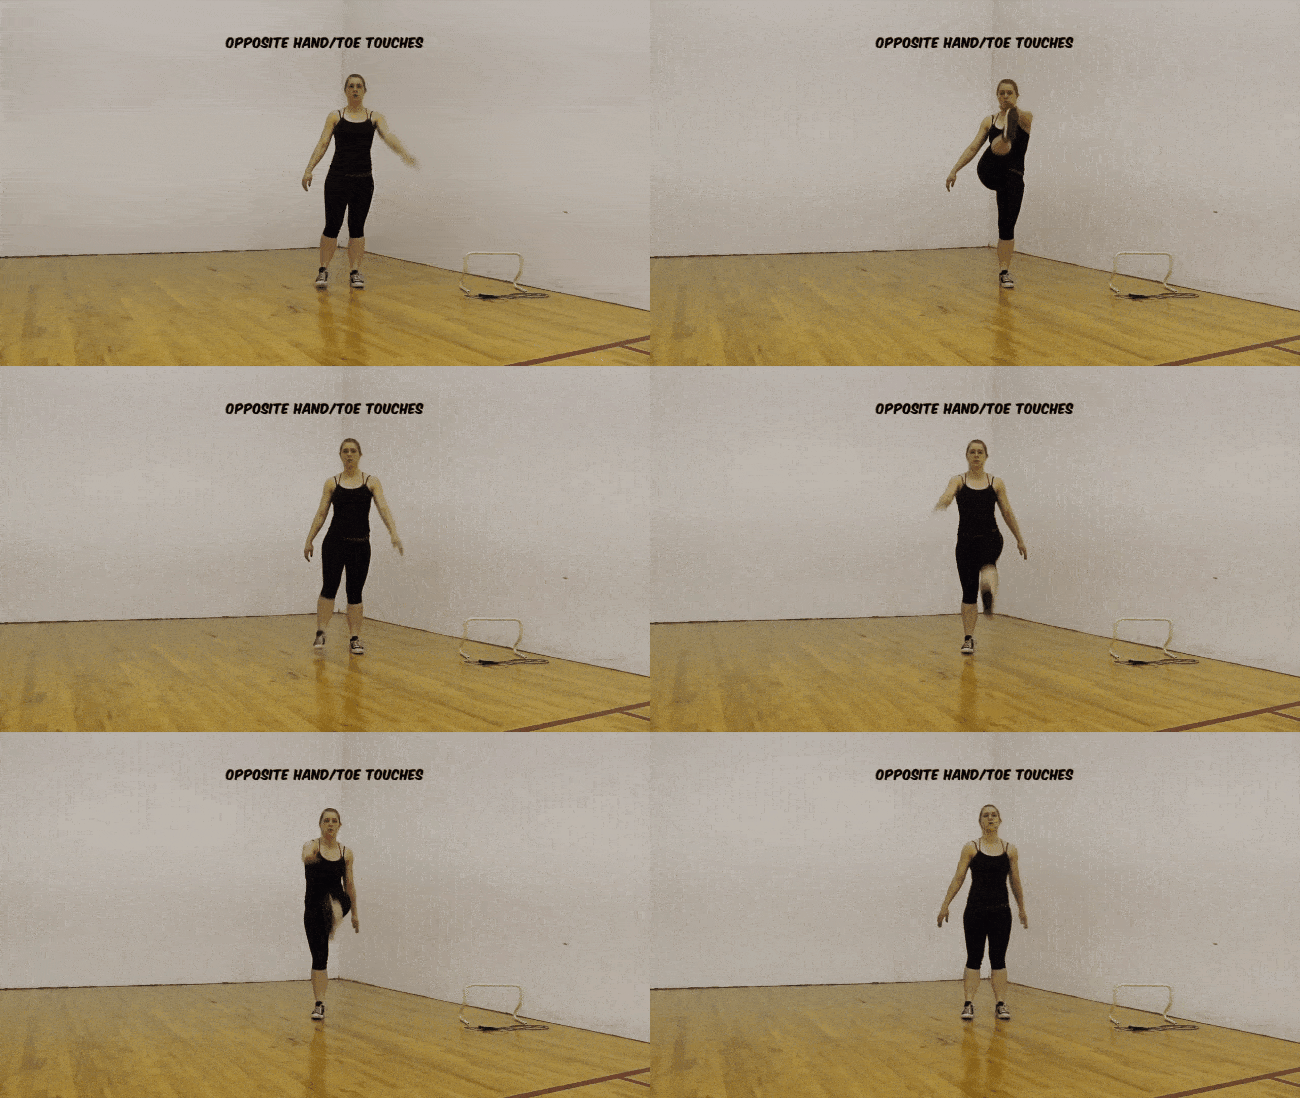
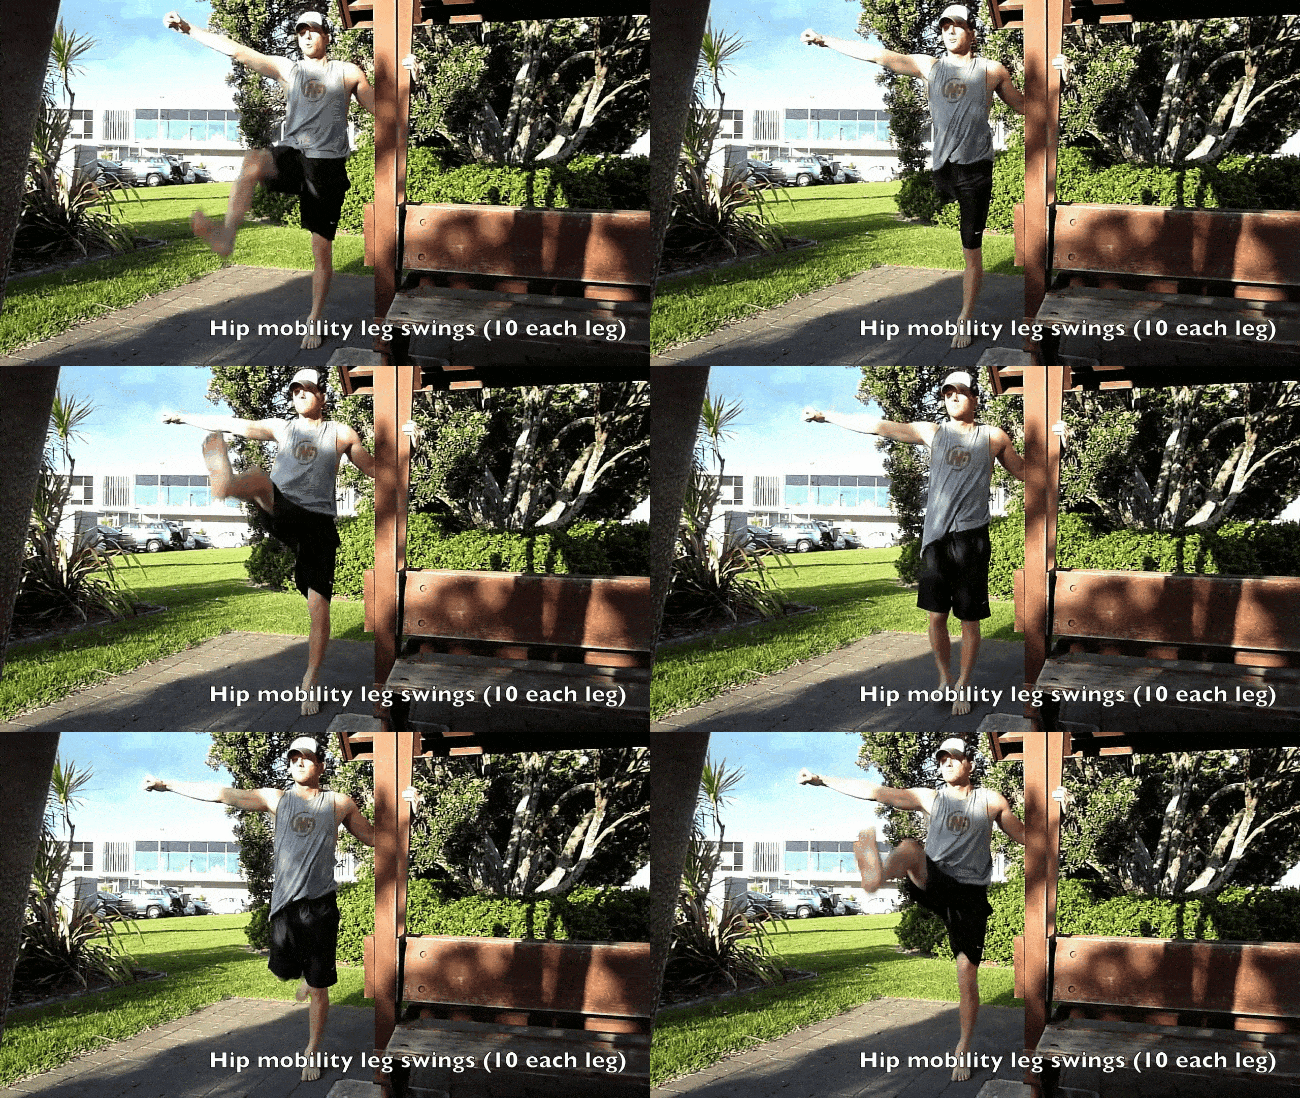
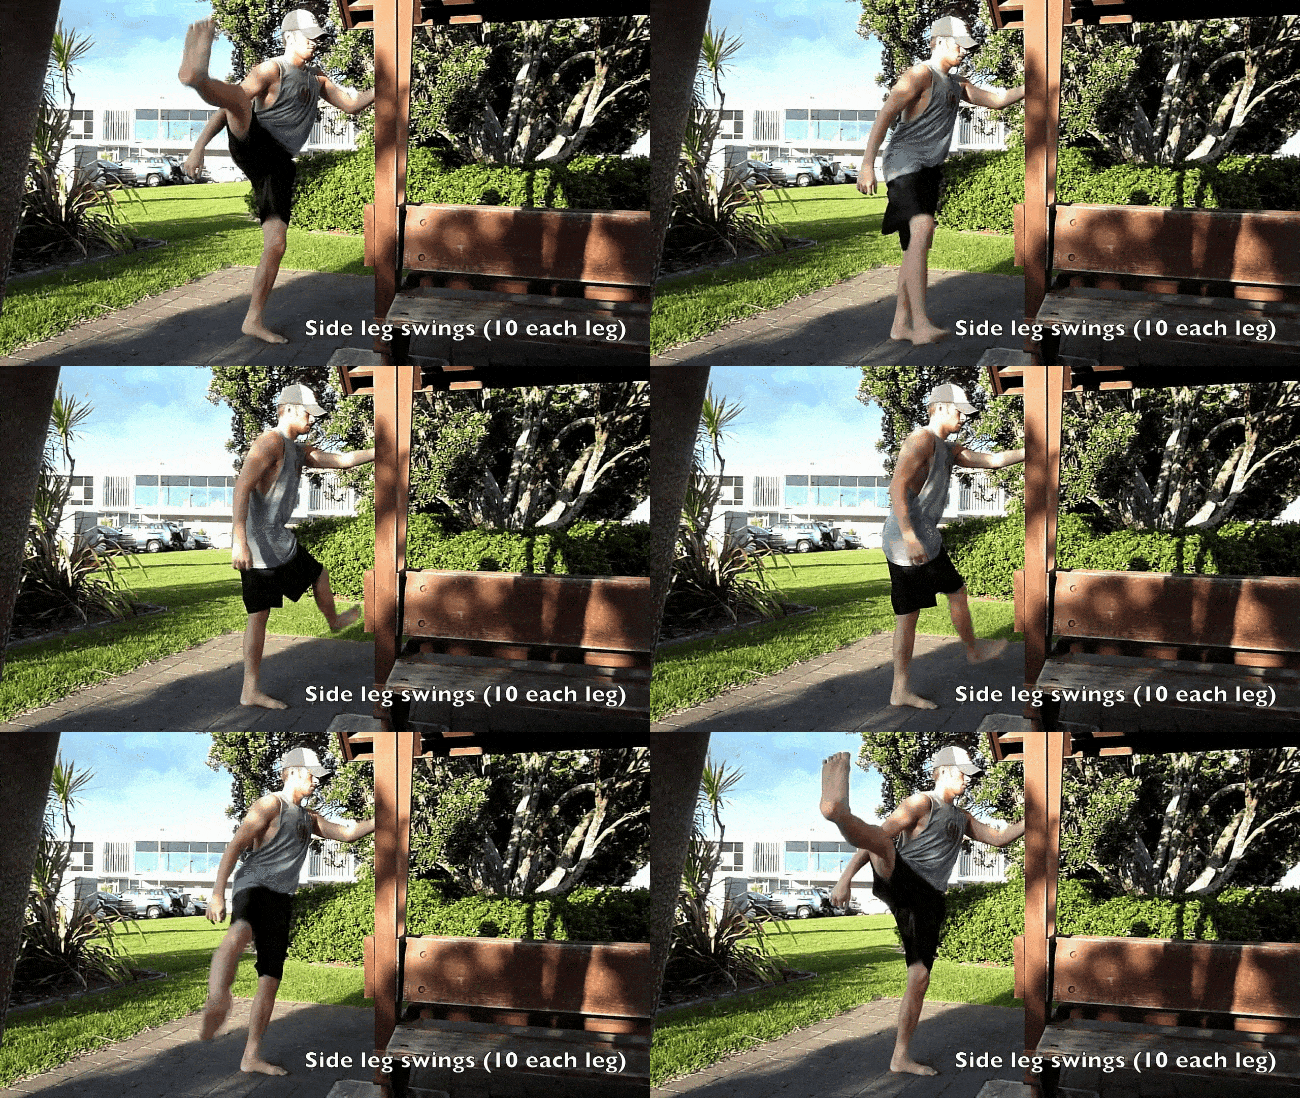
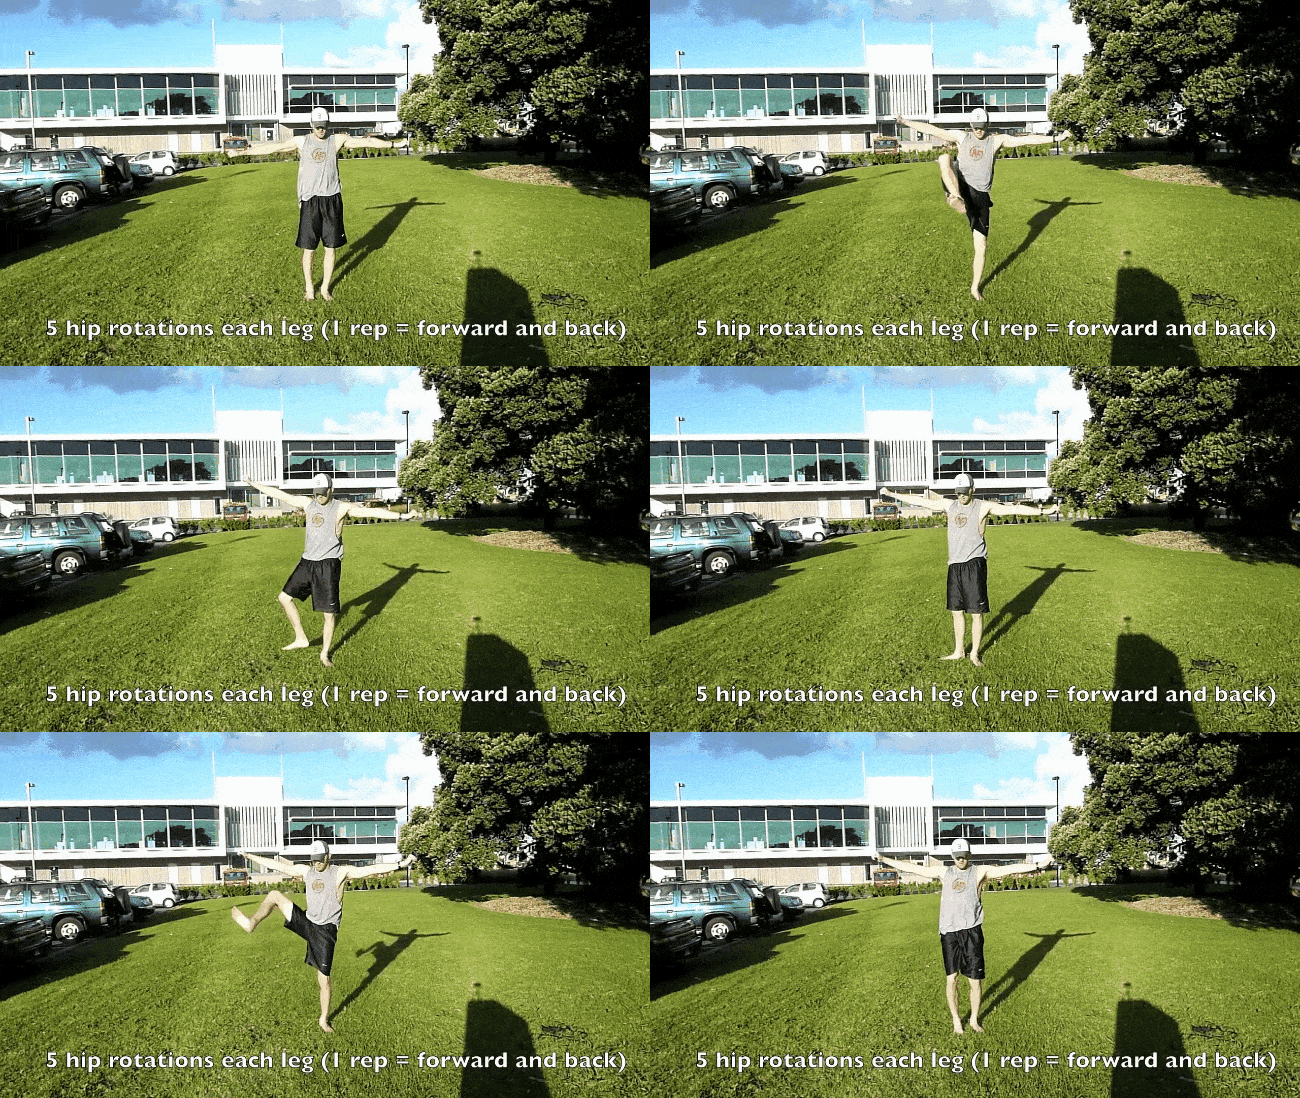

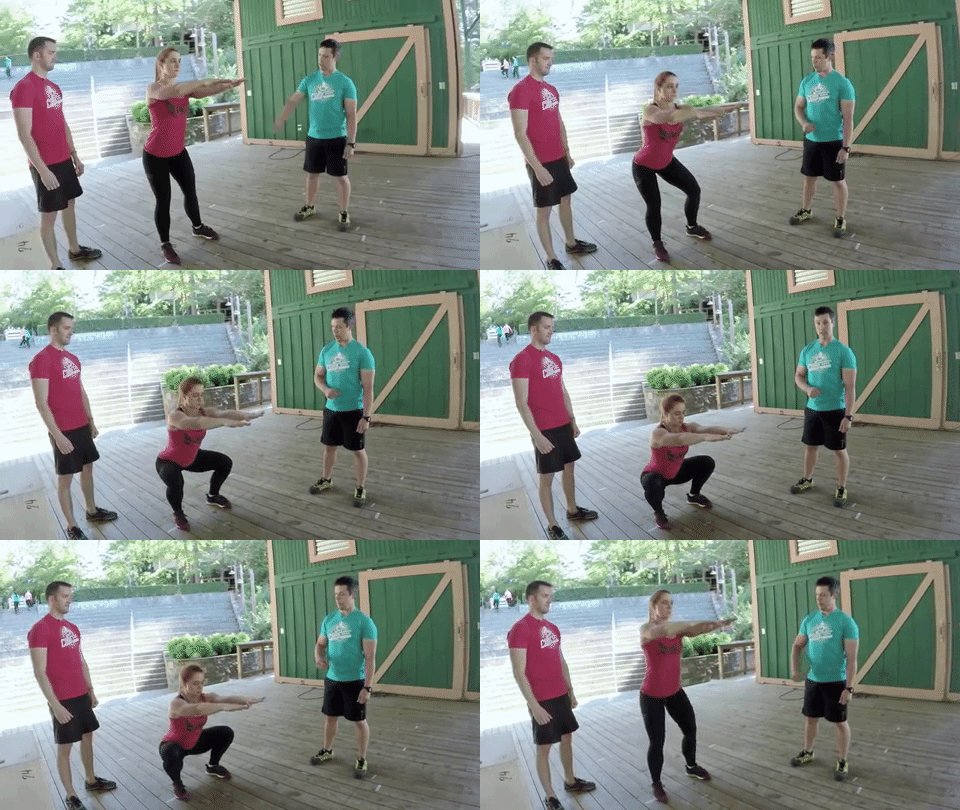
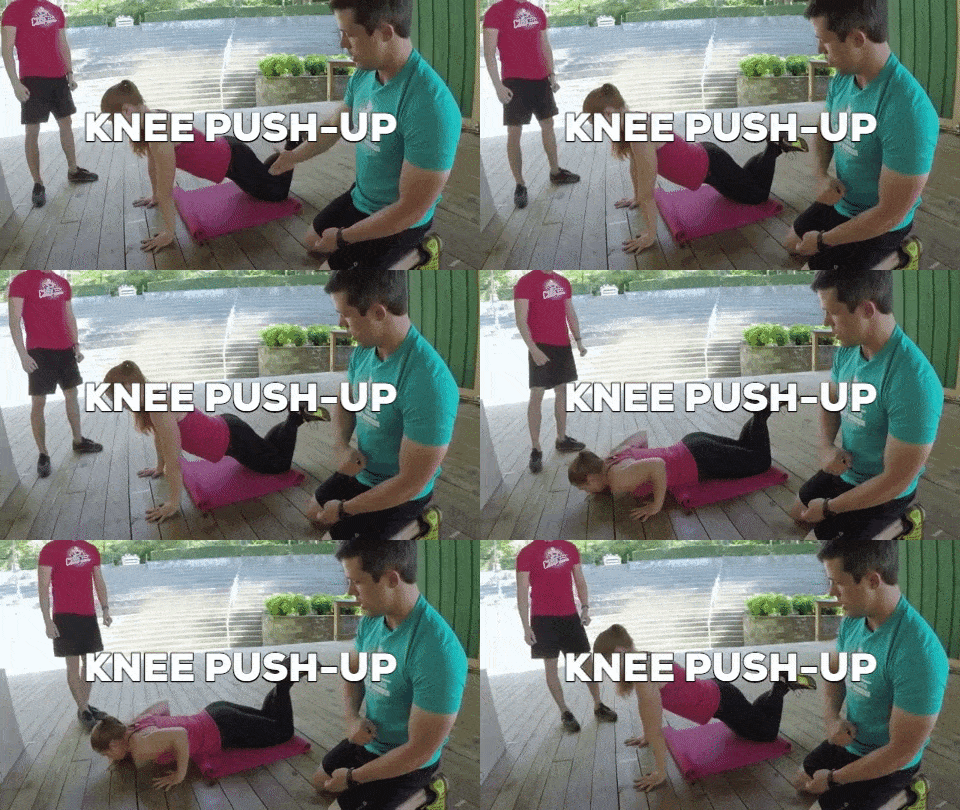
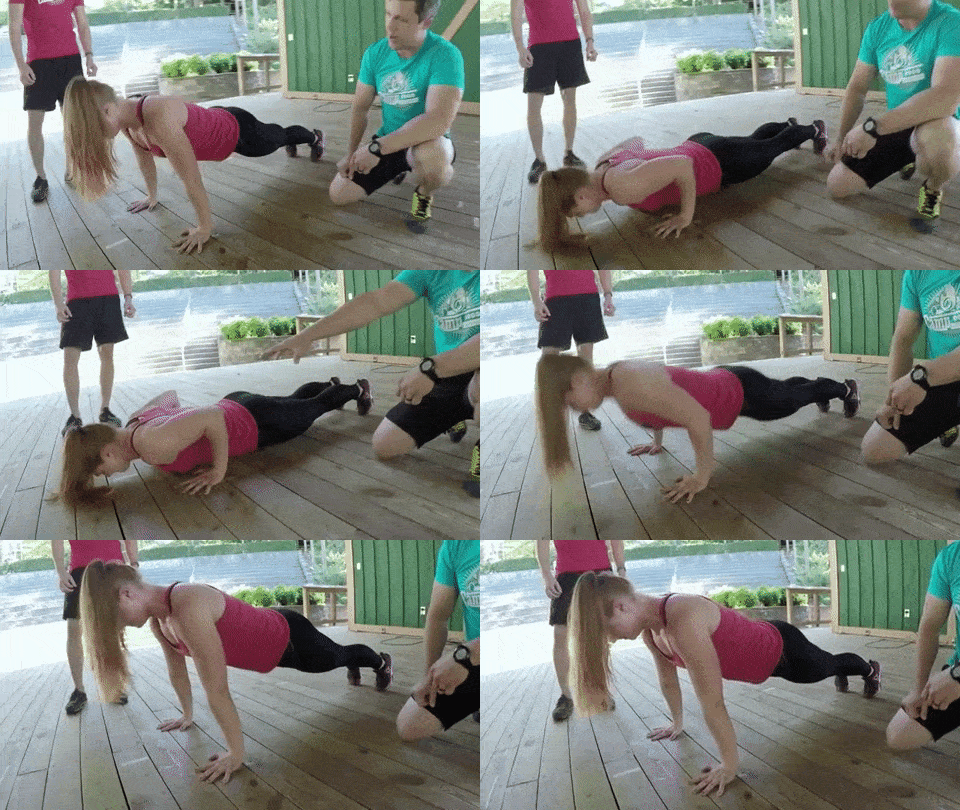
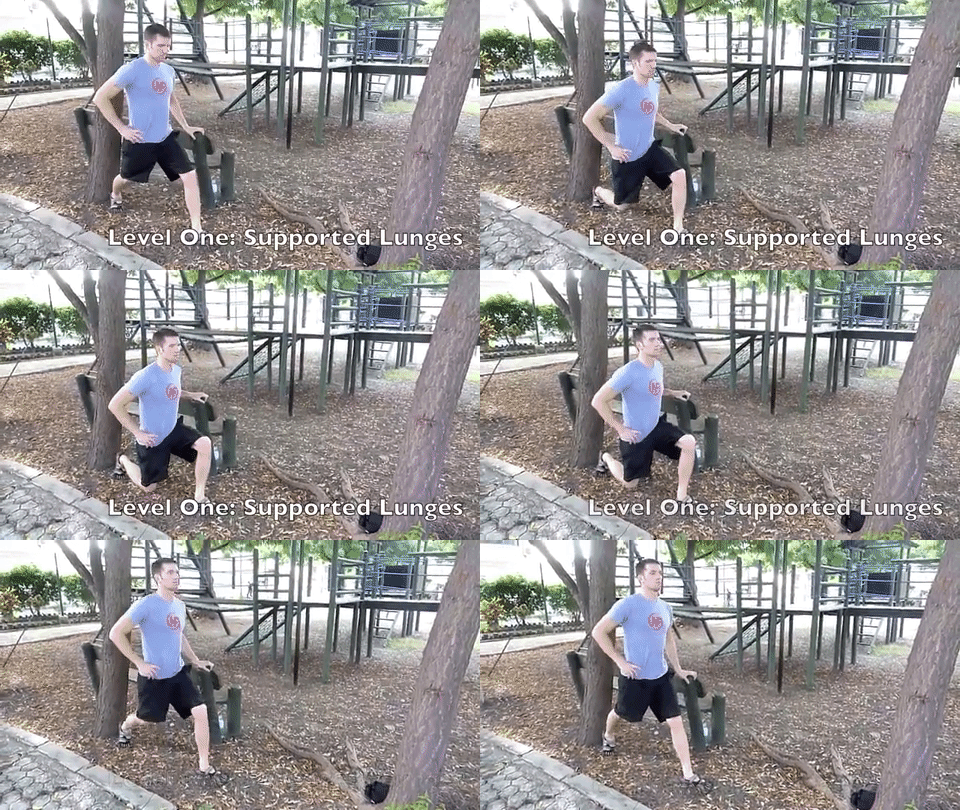

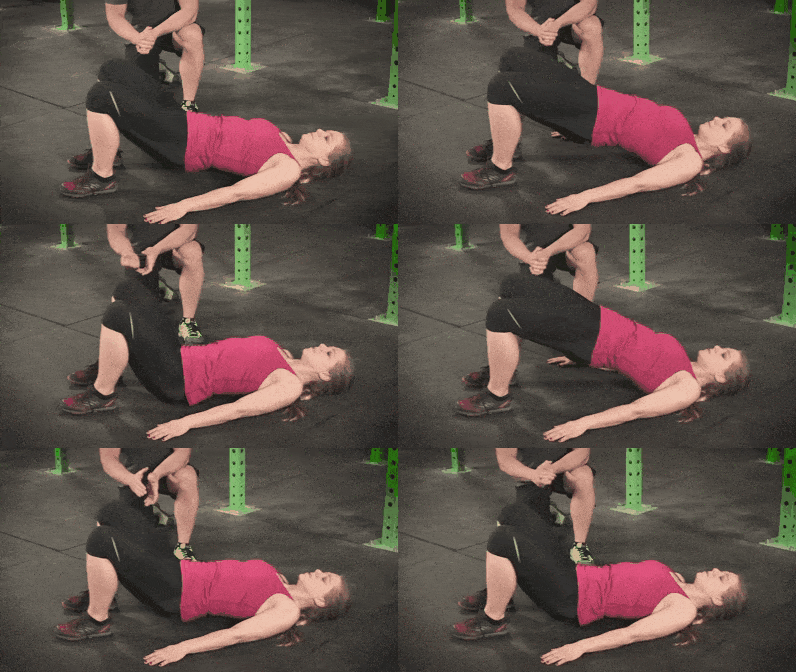



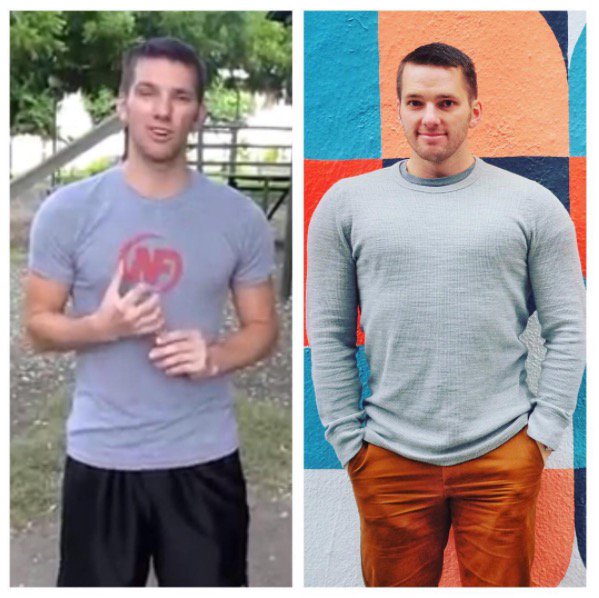
 Growing up, I was always the scrawny, skinny weak kid.