In the past 6 months alone, I’ve spent more time in a Dentists chair than I think I have my whole life. And it’s only been in the past couple of years that I also added seeing a Dental Hygienist…
Neck mobility may not be something you think about often, yet we use (and abuse) our necks more than we might realize. Think about this scenario: your phone buzzes with a new text message, and you look down at the screen, open the notification, and begin to scroll. Before you know it, 20 minutes have passed, you’re still caught in a scroll hole and now your neck hurts.
The feeling of soreness, tension, or stiffness is not in your head. It’s called “tech neck,” a modern-day issue that can lead to chronic pain, limited range of motion, or even spinal-related injuries.
While this is incredibly common, it doesn’t have to be your reality. If you’ve noticed aches, pains, or restricted mobility in your neck, here’s what you need to know—and how you can start finding relief.
Tech Neck: The Science
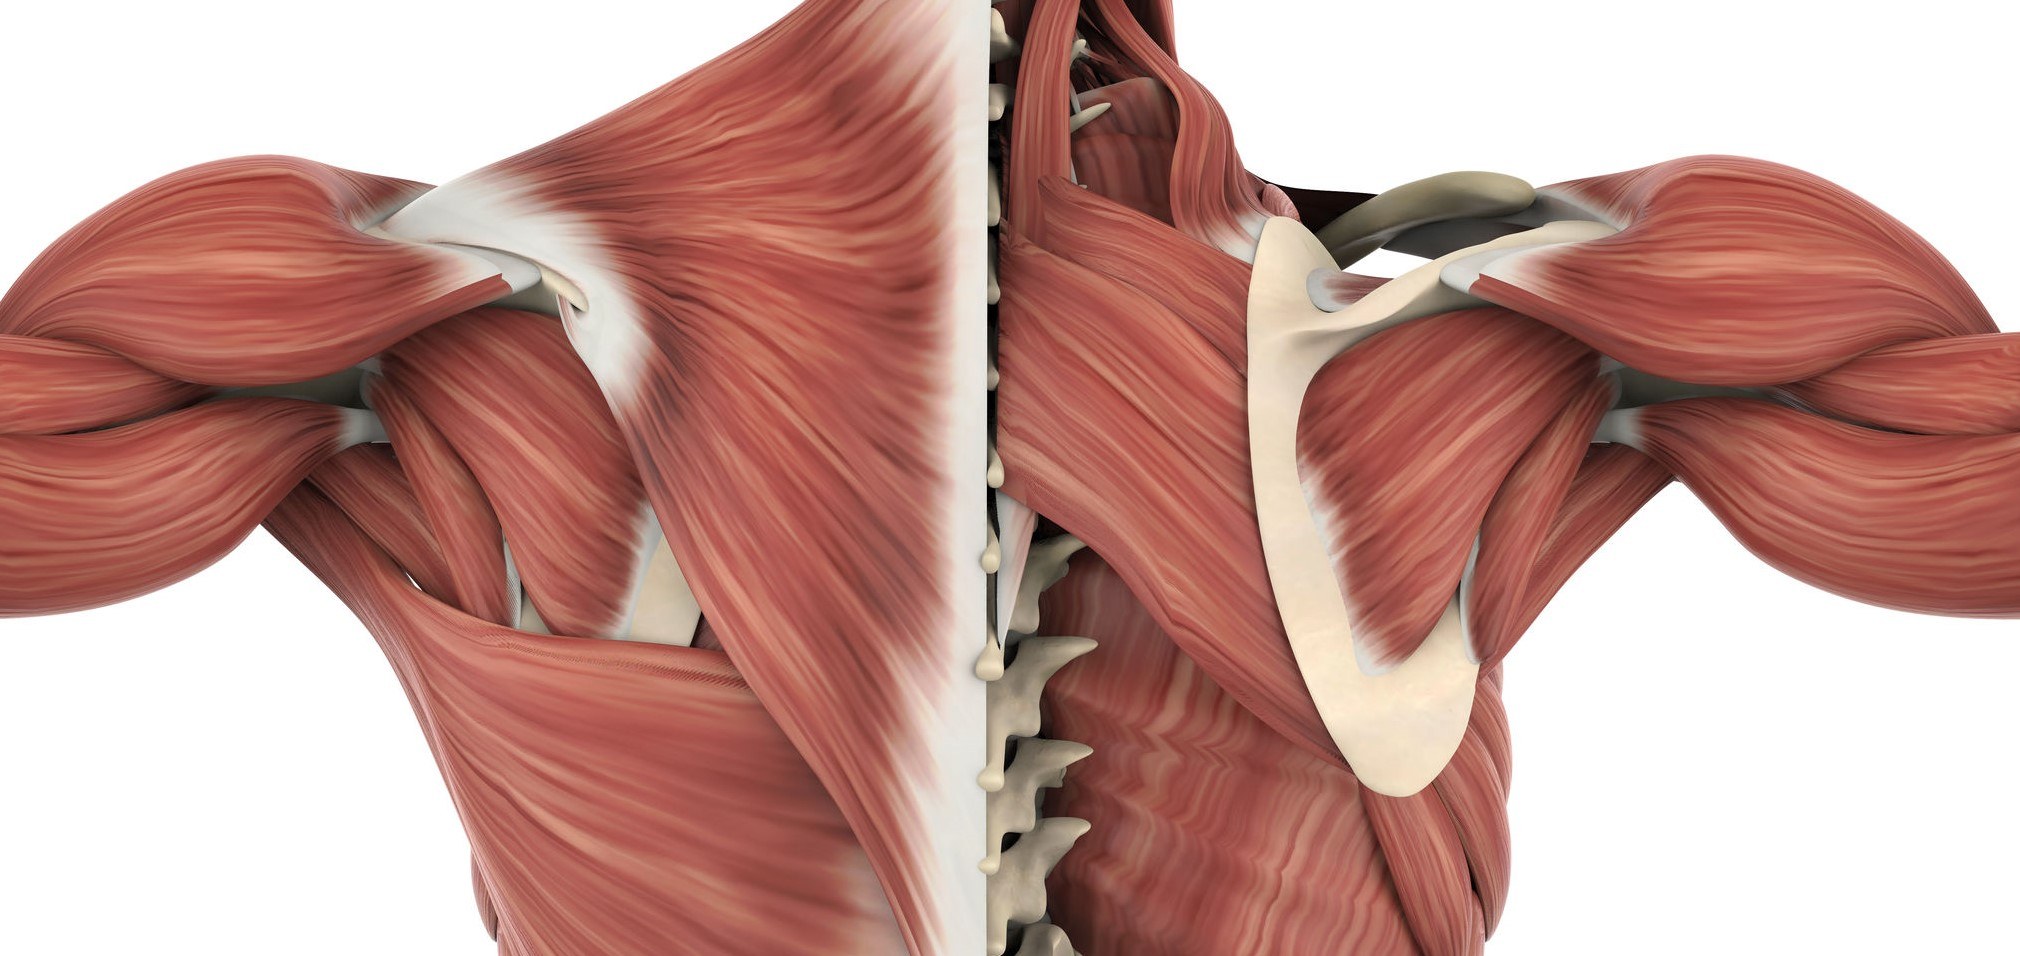
Tech neck is the forward pronation of your cervical spine (neck region) where it connects to the brain stem. This causes an unnatural posture in which the spinal vertebrae round, the shoulders slump, and the chin tucks into the chest. While you’re in this position, the tendons, ligaments, and muscles of your neck and shoulders can become tight, strained, or compressed.
Not only does this exert pressure on the neck itself, but it can also provoke tension headaches or musculoskeletal pain in other areas of the body. Researchers from Harvard Medical School estimate that seven in 10 people will deal with this issue at some point in their lives, and while mobile device usage is not the sole culprit, it is a frequent cause.
In fact, a recent study in the PLOS One Journal found a strong correlation between the amount of time someone spends looking at a phone and the severity of their neck or spinal discomfort.
If tech neck persists untreated over a long period of time, your risk of certain injuries and other health concerns could also escalate. According to the International Journal of Environmental Research and Public Health, neck pain is the eighth most common source of disability among 15–19-year-olds who, uncoincidentally, have grown up in a world of ubiquitous smartphone use.
Continual damage to the cervical spine as a result of tech neck can eventually lead to one or more of the following complications:
Disc protrusion
Chronic misalignment
Acute jaw pain
Dizziness or vertigo
Ear or vision problems
Hand or foot tingles
Joint inflammation
Ataxia (lack of motor control)
Cardiac or lung issues
Here’s the good news: you don’t have to live in pain, or be at risk for these complications. Pilates is a powerful tool for soothing your discomfort and strengthening your neck mobility.
Neck Mobility Stretches to Ease Pain and Tightness
Pilates is one of the best ways to build strength, improve mobility, and ease any tension you experience in your neck. These gentle but effective exercises will stabilize the muscles, improve alignment and posture, alleviate stiffness or soreness, and protect against injuries.
Chin Tucks
Sit comfortably on your mat or in a chair. Take your fingers to your chin and do a little push on the chin to tuck the chin toward the neck and bring it back up. Notice how the skull slides back and up at the top of the spine and then back down. This helps you shift out of the forward neck posture.
Pilates Chest Lift
Lay on your back, knees bent, and feet flat on the ground. Interlace your fingers and place your hands behind your head to support your neck. Bring your elbows into your peripheral vision and slide your shoulders away from your ears. Take an inhale, and as you exhale, create a slight tuck of your chin and curl up off the ground. Imagine that you’re folding in the middle of your rib cage as you move up. Lengthen your spine with control back down to starting position.
Swan Prep
Lie on your stomach, forehead gently resting on the mat, hands under your shoulders, and toes flat on the ground. Imagine there’s an ice cube under the belly button. Tighten your core by raising your belly button above the ice cube so it doesn’t melt. Inhale, lengthen your spine toward the end of your mat and lift just slightly into the upper back. Imagine that you have an orange or apple between your chin and your chest as you slide your shoulders down away from your ears.
Remember to use your upper back muscles, sliding your shoulder blades down into your back pockets and opening up across your collarbone.
Gentle Neck Movements
Sitting straight up and down, gently shift your gaze from side to side. Afterward, gently nod your head forward and backward as well. You can easily do this movement throughout the day in your chair to help ease any unwanted tension or straining.
Boost Neck Mobility and Reduce Pain
Chronic pain doesn’t have to be a normal part of life. You can ease soreness, tightness, and pain, in your neck and otherwise, with Pilates. In the Lindwell app, you’ll find a variety of workouts that target neck pain. All of these allow you to create relief and strengthen to avoid future discomfort. Work these stretches into your daily and weekly movement routine to prioritize neck mobility that supports the habits of your daily life.
Besides the grunting and the weights dropping, there is a secret code of conduct that is totally foreign to any newcomer on what to do and not to do.
These rules of etiquette aren’t just for newbies!
I see a lot of “veterans” who completely disregard them or just simply aren’t aware of what they are doing. So whether it’s your 1st or 500th time in the gym, let’s explain how to properly behave.
Also, if you’re nervous about the gym, turning people from “noob” to “warrior” is what we do in our 1-on-1 Online Program. But we don’t take ourselves too seriously, so we’ll program fun missions like “Play on the Treadmill” and “Lift One Easy-Peasey Weight” to ease into it. If you’re interested, check out more here:
#1) Getting Started and Preparation
If I had to summarize every gym rule into three simple, guiding principles, they would be as follows:
Be aware of your surroundings.
Act like it’s your equipment.
Be cool.
Simple, right? Everything else is just a specific example of these three principles. Now, I’m not trying to be a Johnny Buzzkill with all these rules.
Nobody Likes Johnny Buzzkill.
Instead, they’re meant as a way to keep you and other gym goers safe, help you feel more confident and comfortable, and get the most out of your gym visit.
1) Read the rules at your gym!
This seems obvious, but when you step into the gym, take a look around at any rules that are posted on the walls. They are there for a reason! And if you’re not sure about a rule, ask a staff member! Some things that are 100% perfectly fine for one gym may not be okay for another gym.
Examples:
Is chalk (for your hands-on moves like deadlifts or pull-ups) allowed or not? Some facilities don’t want to have to clean up the mess, while others allow you to coat the place like Tony Montana’s mansion.
Are you allowed to drop weights and/or deadlift? Some facilities in office buildings won’t allow this, as it makes a ton of noise for other tenants.
Can you take your shoes off? Some people like “barefoot” training, but some facilities want you to keep your shoes on at all times for legal/safety reasons.
I could go on and on with various discrepancies, but in the end, it’s always going to come down to house rules. It doesn’t matter if you agree with the house rules or not, even if they are silly and should be ignored. Just like your dad used to say.
2) Shower / clean your workout clothes!
Yes, I know it sounds funny to shower before your workout, but I’m putting this rule of etiquette in here in case it has been a few days since you’ve last showered.
“I’ll just work out and shower afterward, never mind that I currently smell like a like a turd covered in burnt hair.”
People should not be able to smell you coming.
Keep things fresh!
On the same note, I know some people will work out, cram their sweaty gym clothes in a gym bag and then let them sit there and marinate until their next workout. After a few rounds of this, the clothes are likely to hop out of the bag themselves and start running around.
Gym shorts might be able to go for two workouts in a row, but shirts that have probably soaked up some armpit sweat should go straight from the gym into the hamper.
If you’re not sure this rule applies to you, this rule applies to you.
3) Use a Towel / Wipe down equipment
Cleanliness should be a given when sharing equipment, right? I’d hope so, but we’ve probably all seen the person who doesn’t use a towel and/or leaves a big sweaty puddle on the bench before they run off. This is gross.
Don’t be that person!
Use a towel (or bring one if one isn’t provided), and be sure to wipe down all surfaces your skin touches when you’re done with the equipment.
Any facility should have wipes or a spray bottle with disinfectant throughout the gym that you can use to spray and wipe down a piece of equipment. Not sure? Ask the staff!
This rule is pretty big, because as I say, “there’s nothing worse-a than MRSA”. (My mom was a microbiologist, so I can make that joke).
4) Put Equipment Away!
This falls into the “what if this stuff was yours” department. After you finish an exercise, put stuff back where it goes!
Don’t wait until the end of your workout; you should be cleaning up as you go along! Not sure where something goes? Ask the staff!
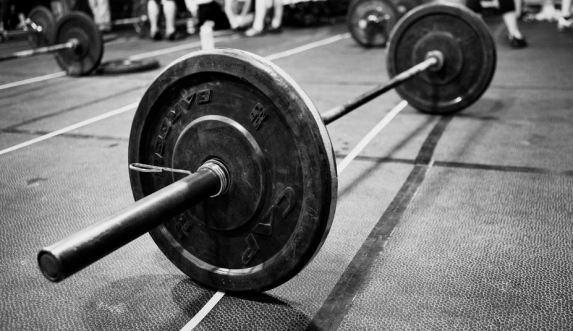
If you are lifting and using a bar, please please please put the weights back in some semblance of order. This is just common courtesy.
Your apathy becomes somebody else’s responsibility, which is not cool.
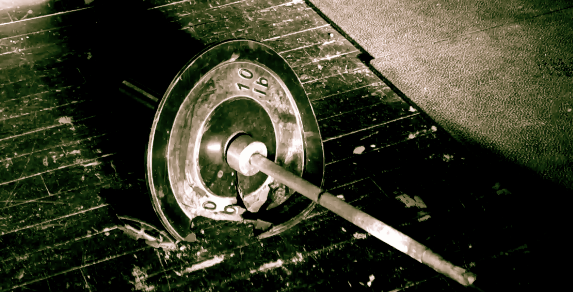
Don’t do this:
Ugh.
5) Warm-up / Stretching
What’s to be said about warming up and stretching? Just that you should make sure that you’re not setting up camp in a walkway.
For most gyms, it should be fairly clear where you stretch and warm up (there will often be mats or foam rollers around the area). If you’re not sure, just look for a spot where you don’t think you’ll be in anyone’s way.
You’d be surprised at how many people set up to stretch with all of their stuff in the middle of a thoroughfare and then get mad when you have to step over them.
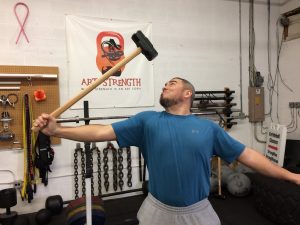
I see it all the time. Someone grabs a pair of dumbbells, then proceeds to stand directly in front of the whole rack and curl, shrug, or flap their arms up and down – like they’re a mother bird protecting their eggs from predators.
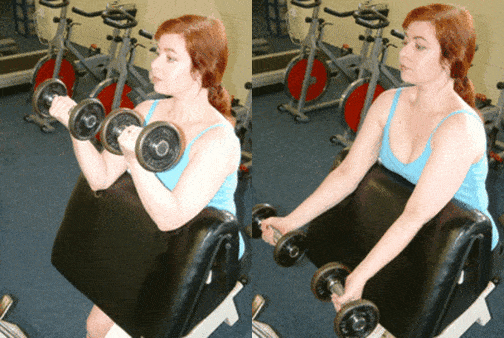
95% of the time, it’s curls.
I don’t care what exercise you do, but please just get your dumbbells and take a step away so others can use the dumbbells too!
I know some people want to use different weighted dumbbells back to back, but I swear you won’t lose your pump if you take an extra 10 seconds to walk the dumbbells back to the rack. You might even build up your grip strength a little more with the impromptu farmer’s walks!
2) Give people space
Move around the weight room like you’re defensive driving. If someone picks up a pair of dumbbells, just give them space to the front and side. With practice, you’ll start to anticipate what exercise they might do, and where their arms (and the dumbbells) will be.
You can still move and walk around them, but just walk a wider circle if needed. Getting smacked with a dumbbell is no fun for anyone involved. Walking blindly through the dumbbell section is like walking blindly through a windmill farm.
Weights can be lifted, swung, or circulated from anywhere at any time. Keep your head on a swivel, and move slowly if you see somebody with a weight.
3) Don’t block someone’s view of the mirror
There’s a reason that any gym has a mirror behind its dumbbell rack – people like to watch themselves lift weights!
Now, for many, this may be a vanity issue, but for most, this is just to watch their form.
(Note: looking in the mirror during larger/heavier movements like the squat and deadlift is not recommended).
Regardless, don’t block someone’s view if it can be avoided! When you see someone looking intensely into the mirror and lifting dumbbells, then do your best to stay out of their line of sight. You can certainly walk in front of them, but give them some clearance and be quick!
4) Don’t drop the dumbbells – only dumbos do this
Another common practice in nearly any gym is finishing a set with dumbbells, letting out a huge gasp, like you are Aquaman and just came to the surface of the ocean, then dropping/slamming the dumbbells to either side of your bench.
There are some weights that are meant to be dropped (more on that below) but dumbbells are NOT one of them. Structurally they don’t respond well to repeated drops, and you are very likely to break one of the dumbbell heads off. I have seen this countless times.
If your workout destroys the equipment you are using, you’re doing it wrong. And nobody thinks you’re cool dropping your weights, I promise. Even if they’re heavy.
Nobody cares.
Actually, they’ll care…if the dumbbell rolls or bounces onto their foot.
Don’t be that person.
#3) Barbels and Other Equipment
I’m sure there are plenty of people reading this who wish they could work out with no one else at the gym. I hear ya. Unfortunately, this is rarely the case, and many of us have to get to the gym when everyone else is there.
How do we share? It’s no different than how you were supposed to share your toys as a toddler.
1) Check if the equipment is free first
If I’m approaching a squat rack, a bench, a lifting platform, or anything else that someone may be using, I’ll get into my hunting and tracking mode – looking for signs that another lifter may be in the area.
Is there a towel laid out on it? (Usually a sign something is being used)
Are there other pieces of training equipment laying around, like a notebook, backpack, or weight belt? (Also a good sign something is still being used)
Is there a loaded barbell? (50-50 that the equipment is being used. People are TERRIBLE at putting away weights – see my photo above)
After this quick assessment, look around the gym and see if anyone is coming over to that piece of equipment or looking at you. If it seems that someone is beelining toward me, eyes locked, then I ask them “Is this free? Are you using this?”.
If there are people immediately around a piece of equipment, I’ll wait until they are resting, then ask them if they saw anyone using this particular piece of equipment. When that person has their headphones on, this exchange is often just a non-verbal point in their direction, then a point at the equipment. Essentially asking them “Excuse me, are you using this?”
Writing all this out, I am starting to realize all the non-verbal cues and communication I’ve picked up over the past few decades in the gym. Bro sign language, as it were.
2) Saving equipment
So you’ve deemed the equipment is yours to use, score.
But now you want to save it while you go get a quick drink of water. No problem! A simple way to do this is to drape your towel over the bench or bar. This is like a “reserved” card on a table at a restaurant. I’ll often put my training log on the bench or under the bar too, as this is a further deterrent to someone swiping your stuff.
Note: this doesn’t mean you can just drape a towel over equipment, leave for 10 minutes, and then get mad when you come back and somebody else has taken it over!
If you need to step away from the equipment for whatever reason, don’t leave for more than 30 seconds!
And if you need to go to the bathroom or leave for longer than this, please relinquish the equipment to others who are ready to train at that moment.
3) “Working in” with someone
So there’s a piece of equipment that you want to use, but someone is using it right now! I go through a few thoughts in my head:
Can I do this exercise elsewhere or substitute another exercise? There are countless examples I could rattle off, but this will be something you’ll get to figure out as time goes on.
Should I ask to “work in” with this person? If the other person is doing the same exercise and/or around the same weights as you planned, then it makes sense to ask to work in.
If you are squatting 95 lbs (awesome!) and they are deadlifting 495 lbs, then it would involve a lot of weight changes (and moving the bar) and most people will say “no” to working in. Ask yourself if working in will cause a bunch of logistical problems. If the answer is “yes”, it’s best to wait.
If all lights are green, ask if you can work in with someone. When they finish a set, you can then change weights if needed and get in a set yourself. After your set, help them change the weight back to what they were using. If you’re not sure what to do, just talk to the person!
You may ask to work in, and someone says “no” or “I have just a few more sets”. If that’s the case, you wait for the equipment or find something else to do. It’s nothing personal! I’ll ask them:
“How many more sets do you have?”
“How much more time do you have?”
And then determine what to do from there. If it’s just a few minutes, definitely wait.
If you are waiting for a piece of equipment to free up, you can stand nearby, but don’t hover! That’s annoying! The person knows you want that piece of equipment.
There are definitely best practices for circuits at the gym:
Pick things that are close together It drives me crazy to start working out on a piece of equipment, and then somebody comes out of nowhere and says they are using that equipment – they were just busy doing another exercise on the other side of the room. Pick exercises/equipment that keeps your roaming area small.
FORGET about complicated circuits when the gym is busy. Is the gym busy? Forget about trying to get a squat rack AND a bench AND a chin-up bar. Pick one. There’s the classic CrossFit workout “Linda” that has you using three different barbells with different weights for different exercises, plus a bench (for the bench press). If you ever try running this in a busy gym, people have the justifiable right to throw you out the window.
Less complicated circuits during busy gym times might be a barbell exercise, followed by a bodyweight exercise. Or even something on the chin-up bar, followed by a bodyweight or dumbbell exercise in that immediate area.
Learn to share!
Whatever you do, don’t occupy multiple pieces of equipment and then lollygag or mess around on your phone instead of actually doing the workout.
This will draw the ire of your fellow gym goers faster than anything.
#5) the Squat Rack, the Bench Press, and Lifting Platform
I recommend you read this section, even if you think you’re miles away from using either of these.
(And if you’re scared to use the rack or the platform, check out our Beginner’s Guide to work your way up!).
Here at the squat rack, bench press, or lifting platform, the chance of injury increases if you’re careless due to more weight being lifted/thrown around. So let’s go down some rules of etiquette to remember.
1) Stay out of a lifter’s “bubble”
Unless you are spotting them (another article entirely), you’ll want to stay around 3 feet (1 meter) or more away from another lifter. This is safety for you, and to not distract them. When in doubt, wait until they are completely done with the lift before moving around them.
2) Stay out of a lifter’s line of sight
This might not sound intuitive, but if you can – stay out of the lifter’s line of sight (area directly in front of them for about 10 feet/3 meters) when they are getting ready to lift, or when they are lifting.
This is VERY distracting to be walking/moving around when they are lifting.
3) Leave someone alone if they are getting ready for a lift
People don’t just instantaneously squat or deadlift. There is often mental preparation before one actually grabs the bar. This is a terrible time to talk to the lifter at all (except if they are in immediate danger).
How do we know if the lifter is getting ready? They’ll often be facing the bar, looking serious, perhaps eyes closed in focus. Look for these cues and give the person their space. Speak with them after a lift, after some time has passed.
4) Bail the bar correctly / Don’t destroy equipment
For ANY exercise you do, if you are destroying the equipment in the process (e.g., dropping and breaking dumbbells, bending bars), then you are doing something wrong.
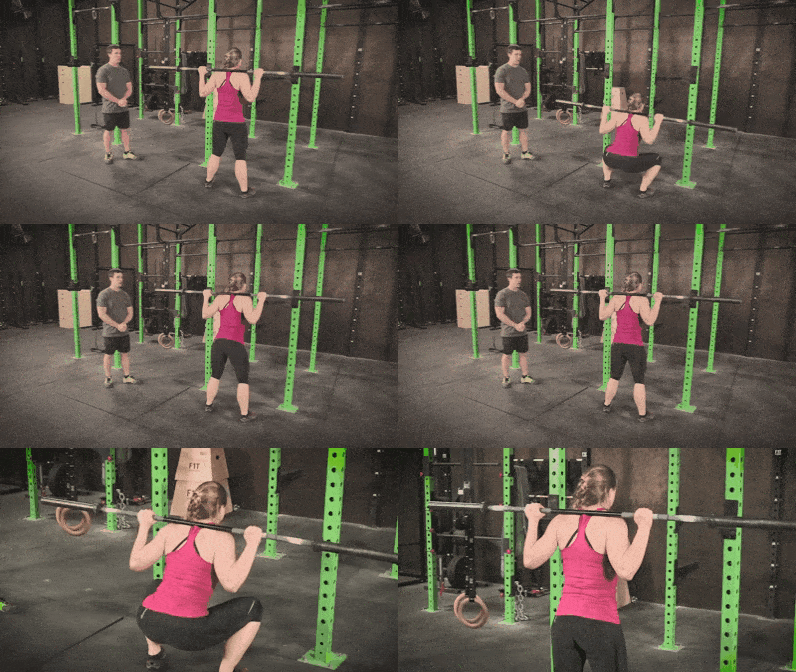
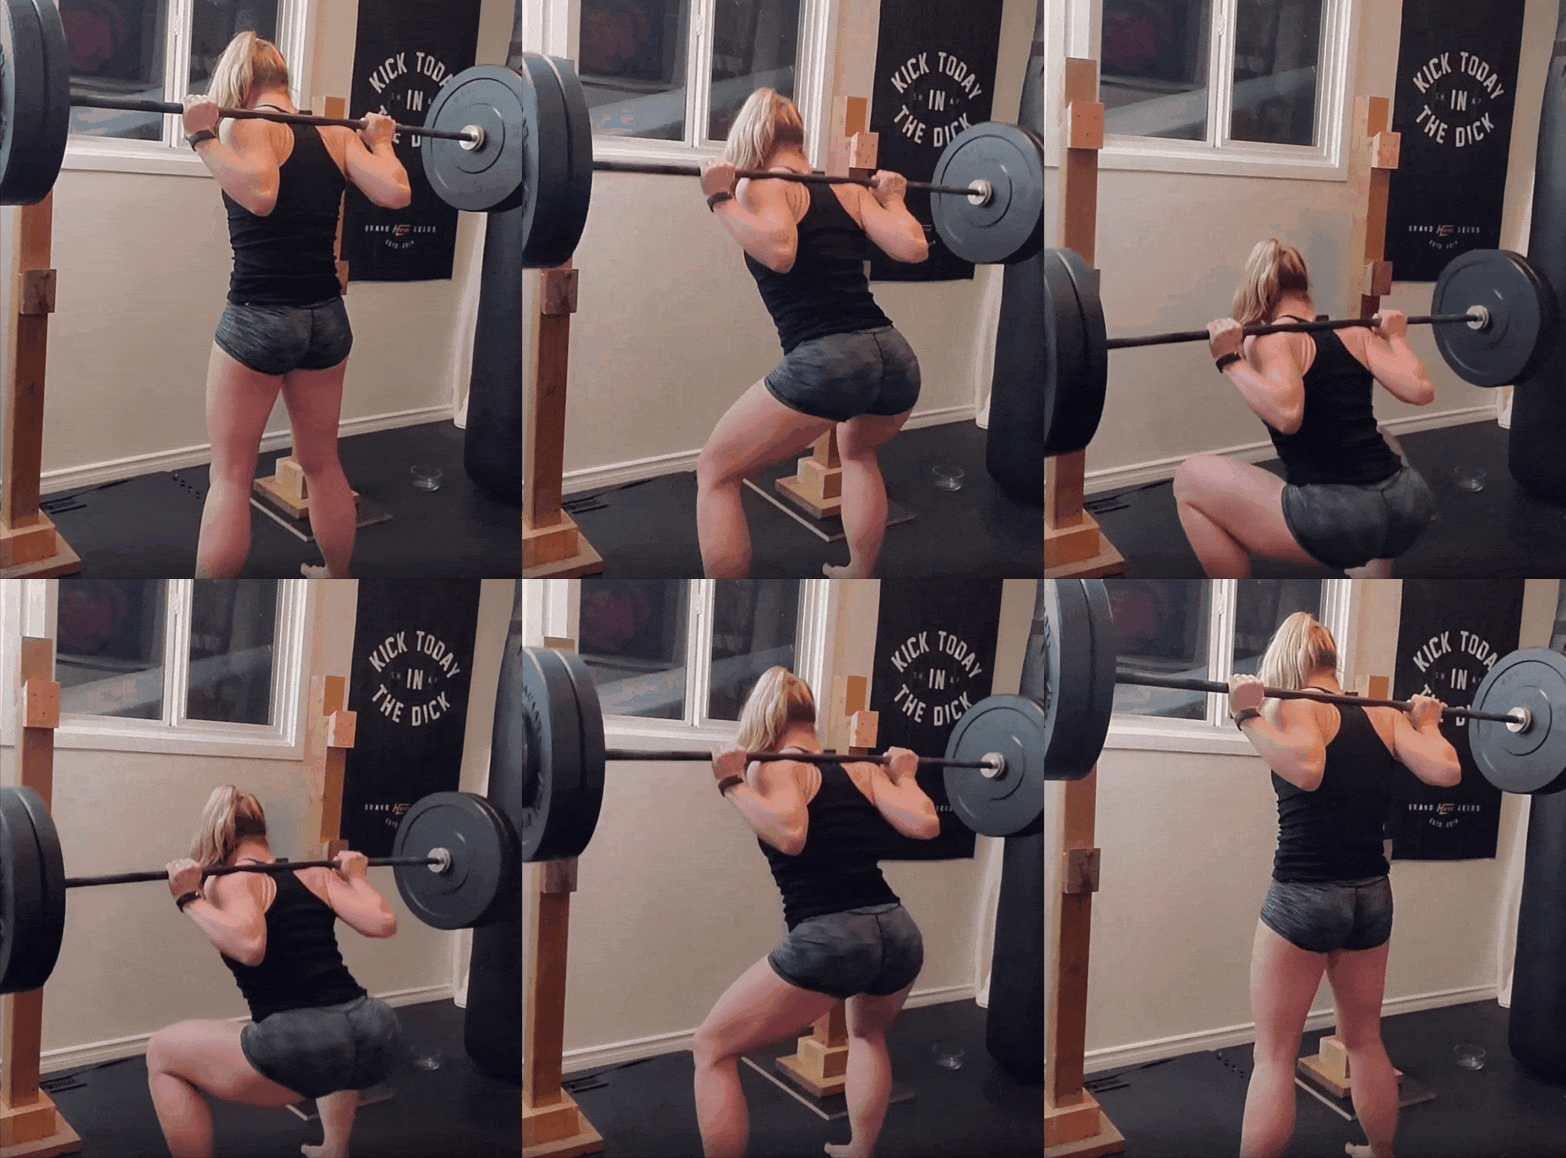
For something like the back squat, set the squat rack safety pins to just below your squat depth, and place the bar down on the pins if you get caught:
If you throw the bar backwards off your shoulder while in a squat rack, it will tend to bounce off the pins and bend/ruin the bar.
If you are lifting outside a squat rack with bumper plates, it’s completely fine to drop the bar to the ground behind you. Buck the bar back and get your butt out of the way.
For more, here’s How to Bail Out of a Back Squat:
If all of this scares the heck out of you, use weights that you are confident you can lift (no need to bail), and/or ask a staff member. Just remember that when you bail, both you AND the bar should be in good shape afterward!
5) Use the right bar!
The standard barbell in most gym is 45 lbs/20 kg, BUT some gyms may have women’s bars (33 lbs/15 kg), and even practice bars (15 lbs/5 kg). If you load a 15 lb bar (often made of lightweight aluminum) up with 45 lb plates, you can easily bend and ruin the bar.
Again, we advise against destroying your gym’s equipment. If you’re not sure of bar weight – ask a staff member (that’s what they’re there for!) or even a fellow lifter.
6) Unload the bench press, and squat weights properly: DANGER DANGER
This may be less a matter of etiquette and more a matter of safety, but make sure you unload a bench press or squat fairly evenly from both sides. This may take a little longer as you take off a single plate from one side, then a single plate from another side, but trust me when I say it is absolutely the way you have to do things.
If you take ALL the weight off one side and leave the other side with a ton of weight on it (anything more than a 45 lbs/ 20 kg differential concerns me), then you put the bar in a very unbalanced position, and it can easily flip sideways off the bench or squat rack, especially if bumped.
I pray you never see this happen, as it is scary and can cause serious injury to yourself or others around you.
7) Asking for or giving a spot
A “spot” is just an assist during a lift. We could write an article just about this (and Critical Bench has written an excellent one). If someone asks you for a spot and you feel uncomfortable, simply decline and say you’re not comfortable with it! They’ll understand!
If you are in need of a spot, simply ask someone nearby who looks strong and is currently available. In your gym career, you’ll probably be spotting bench press 99.9% of the time.
Before I give or get a spot, I’ll make sure we are both clear on the following key points:
“Do you want a lift off or not? (help taking the bar off the rack)”
“How many reps are you going for?”
Anything else that’s special should be laid out before the bar is out and moving. Lots to cover, and again I’ll defer to the Critical Bench article if you want to read more!
8) Don’t do curls in the squat rack
This rule is comically universal. The point of it that the squat rack should be used for squatting, overhead pressing, perhaps benching, and for doing all these other barbell exercises that are often hard or impossible to do elsewhere.
If you’re curling (or doing anything else) in the squat rack that could EASILY be done elsewhere, then people will call you out on it.
This goes for many exercises. If you can do that movement somewhere else, but you’re taking up the location of a place where only specific exercises can be done, you might be tarred and feathered by the locals.
Fair warning!
#6) General Gym Atmosphere
We’ve talked about preparation. We’ve talked about specific areas of the gym. Let’s go back to general gym etiquette:
1) Getting advice from randos
For as long as there have been gyms, there have been “bros”. And for as long as there have been “bros”, there has been “bro science”. This generally means the type of advice thrown around the gym that may be true, false, or just plain ludicrous.
Men: Feel free to listen to any advice given, nod your head politely, and then continue on with your workout as before. If you are genuinely curious, just research the advice later. Steve recently had an old man tell him squatting below parallel was going to ruin his knees – Steve politely nodded, then got back to squatting deep.
Women: Feel free to listen to any advice given, nod your head politely, and then continue on with your workout as before. Women may find themselves being talked down to by a male gym member – given “advice” or off-hand comments.
Our Senior Coach Staci, who deadlifts 400+ pounds, often has bros remind her “the big ones are 45-pound plates, don’t hurt yourself.” She then proceeded to load up 4 of them on either side of the bar and outlift the bro. He shut up quickly, but there’s always another one to take his place, sigh.
Her advice for this situation:
“If someone treats you like you’re an idiot, or if they start telling you you’re doing things wrong, I always reiterate a very simple and polite line: ‘I appreciate your input, but I’ve got to finish my workout now. I’m on a tight schedule.’
It doesn’t matter what they said or if they’re wrong. Just move on.”
2) GIVING advice to randos
Unless someone is putting themselves or others in immediate danger, I don’t give unsolicited advice. Even if someone might need it, no one appreciates the “know-it-all”, and you never know someone’s goals, previous or current injuries, or experience.
They could be doing EXACTLY what they need to be doing!
3) Making noise / expletives
While some gyms may forbid you from making noise, many are fine with you making a bit of noise while you lift.
Every gym is going to have a different atmosphere, but generally speaking, you’re fine making some noise as you fight through a tough part of a lift (think of a karate “kiai!”).
Yelling and screaming loudly and continuously, like someone electrified your barbell, is often frowned upon because it is very distracting to other people working out.
Expletives? If you’re in a gym that is fine with curse words during lifting, you’ll soon know it. Just assume that people don’t want to hear you drop F-bombs around them. Weight training is cathartic, but we don’t need to get that crazy.
4) Dropping weights
We’ve already talked about dumbbells (don’t drop them) and barbells in the squat rack (bail correctly, don’t just drop a bar onto metal pins).
The one time it’s perfectly acceptable to drop weights is when using bumper plates. These are plates that are coated in rubber and often used for Olympic Weightlifting (the clean, the jerk, and the snatch). These bumper plates can be safely dropped and this makes bailing out of an Olympic lift much safer.
If you are not used to hearing this type of weight drop, it will sound like a bomb went off to you! No fear! You will soon get used to this common sound in the gym.
If you are dropping these weights yourself, don’t just drop them and let them fly wherever. Keep your hands by the weight to keep them in your lifting area.
When in doubt about dropping weight – ask the gym staff!
5) Don’t stare and No Creepin’
This is good life advice, but in the gym this can be incredibly distracting to someone working out (and a little creepy). I know that whatever the person is lifting may be impressive, but standing and staring – in their line of sight – is quite distracting!
I include this because it’s happened to me. Cleaning some weight, and had a guy stand in front of me (no) about two feet away (no) and watch me lift, like I was a television (no, no, no). Staci deals with the same. And gentlemen, just because you’re staring at somebody through 8 different mirror reflections – if you can see them, they can see you. You’re not clever, you’re creepy.
6) Cell phone use
We understand that having a cell phone on the gym floor is useful – whether using it as a timer, tracking your workouts, or filming your workout/technique.
Just refrain from loud, distracting conversations on the gym floor (take it elsewhere!). If you can talk on the phone loudly throughout the entirety of your workout (which I’ve seen people do), you’re doing it wrong.
Also, don’t occupy a piece of equipment if you’re going to sit there scrolling through Instagram or Facebook. You’re there to train, so train!
Lastly, the gym is not your private filming studio. Any filming should be done so that the number of other people in your video is reduced or eliminated.
Not everyone wants to be an “extra” in your Instagram video! Also understand that people aren’t always on the lookout for your cellphone filming, so have some patience if people walk in front of your camera – they don’t know it’s on or what you’re doing.
7) Drinking water and eating food on the gym floor
What about bringing a gallon of water with you around the gym? If that’s your thing, and you reallllllly like water, go for it. Just don’t spill it please.
Everything else can wait until later. I’ve seen people eating a wide range of things on the gym floor. Ick.
8) What if someone is being uncool?
As I mentioned before, if someone is doing something that is an immediate danger to themselves or others, it’s fine to step in and give them warning right then and there. It’s more important that we keep all our fellow gym-goers safe, than worry about offending someone.
If someone is doing some of the other things on this list (and someone eventually will), you can feel free to tell them yourself.
HOWEVER, most people will not take kindly to this, even if they’re in the wrong. The easiest thing to do is bring it to the attention of the gym staff. They will deal with it in the best way possible – because that is part of their job!
No More Accidental Assery, Congrats!
This might look like a monster list of things you HAVE to remember before you step foot into the gym.
Please, don’t stress and don’t get overwhelmed. We’re laying these etiquette rules out there because Rebels ask us about these all the time. We all want to be more comfortable in the gym, and knowing just a few of these things can help with that. Think of this as a resource you can refer back to when you need to catch up.
Remember, most of these come back to the following:
Be aware of your surroundings
Act like it’s your equipment
Be cool
The rest is just details – Ones you’ll know by heart as you continue your fitness journey. Always remember to have fun!
What’s the most absurd thing you’ve seen somebody do while in a gym?
Have any other tips for your fellow gymgoers?
Leave it in the comments below!
-Jim
PS: Still here? Want even more help? You got it.
1) Our popular 1-on-1 coaching program. No more guesswork, no wondering if you’re doing the right program, no shame or guilt. Just results that don’t suck, and a plan that doesn’t make you miserable.
We keep you accountable to make sure you actually do your workout, we answer any questions you have, and we cheer you on every step of the way:
2) If you want a daily prompt for doing workouts at the gym (or at home), check out NF Journey. Our fun habit-building app helps you exercise more frequently, eat healthier, and level up your life (literally).
Try your free trial right here:
3) Join the Rebellion! Our free community numbers in the hundreds of thousands scattered throughout the globe, and we need good people like you!
You can join by signing up in the awesome yellow box below, and I’ll send you a bunch of free guides and printable workouts, including our Strength 101 guide!
Download our comprehensive guideSTRENGTH TRAINING 101!
Everything you need to know about getting strong.
Workout routines for bodyweight AND weight training.
How to find the right gym and train properly in one.
First things first: yes, healthy balance does exist and yes, you can tap into self-compassion, even in your hardest moments. While different seasons bring new challenges, there’s always a way you can center, focus, and reconnect with self-compassion if only for a few moments each day.
Our approach to Pilates at Lindywell reminds us of this. If we simply show up to our mat, we can move our bodies in a way that invites balance and self-compassion. The same is true in life, but the first step is making it possible to show up for ourselves no matter the season.
Let’s take the mindset that we incorporate into our Pilates workouts off the mat and into life to create a healthy balance and tap into your self-compassion.
1. Create Healthful Healing Spaces
One of the most beautiful things about coming to your mat is that the time you spend there allows for connection with yourself, your mind, and your body. It also presents an opportunity to leave judgment at the door and let your body (not your mind) do the talking. Finally, being on the mat is a chance to move your body in a way that strengthens, stretches, nourishes, and connects.
You can create spaces that invite these same experiences off the mat in your home. This doesn’t mean you need to re-design your living room as a peaceful, yogic, Ashram or get rid of all things technology.
Instead, use the following ideas to create spaces in your home that allow you to access balance, connection, and self-love more consistently:
Repaint your bedroom. Turn your bedroom into a space that encourages calm and relaxation by painting your walls with colors that promote ease and help you feel cozy. Benjamin Moore recommends Palest Pistachio, Simply White, Porcelain, Yarmouth Blue, Natural Cream, Black Pepper, or Silver Fox. Check out some low-VOC paint products to promote an even healthier space.
Leave your phone charger in the kitchen. Don’t take your phone into the bedroom with you at night. If you can, leave it charging in the kitchen so you’re not tempted to pick it up first thing in the morning, which activates your stress hormones. Instead, use those first moments of the morning to focus on what you’re grateful for or take a few deep, centering breaths.
Ditch the mirrors. While mirrors can help make a space feel bigger, they’re also a temptation to self-objectify every time you walk by one. Consider removing unnecessary mirrors throughout your home so you can focus on being in and loving your body, rather than trying to make sure it looks “good enough.”
2. Simplify More to Stress Less
Pilates is a simple movement practice. While we can use balls, a Reformer, a trapeze table and so much more, we don’t have to. In fact, many of our workouts in the Lindywell app don’t require any equipment at all, which makes it more accessible and easier to commit to consistently.
For example, if you have a hectic week because you have an important deadline coming up (focus) you can use one-sheet meals or crockpots (modify) so you can still take care of your mind and body but save the large, more extensive grocery shop for next week (create compassion).
Use this simple framework to find balance and self-compassion no matter what’s happening in your life.
3. Get Intimately Familiar With What Your Body Needs
Here’s the thing about balance: it’s different for everyone. What feels good and balanced to you may not feel great for someone else. The same goes for Pilates, which is why we always offer modifications and options for a wide variety of needs, abilities, and fitness levels.
You can take this practice into your own life by becoming an expert on what your body needs and then giving it the modification or option it needs to feel nourished and taken care of.
In our modern world, however, it’s easy to disconnect from our body (and stay that way) as we rush through life, focus on the next thing, and then sleep and do it all over again. To get familiar with what your body needs, and use that to create more balance and self-compassion, bring these practices into your routine:
Breathwork: Your breath is an immediate gateway to connection with the body because it takes you out of your head to the physical sensation of breathing. We have a variety of breathwork sessions in the Lindywell app. Use this resource to get familiar with intentional breathing, find practices that fit your schedule and desires, and connect deeper with yourself and your body.
Mindful movement: I love how Mindful.org explains mindful movement: “Mindful movement allows us to check in with our bodies and get moving in a way that can help us lower stress, release stagnant energy, and strengthen our mind-body connection.” With this in mind, don’t just take a walk or do a Pilates class—be mindful as your foot hits the sidewalk or your weight shifts between your hands on the mat. The goal is to feel the sensations of your body to connect, listen and get familiar with how it communicates with you. Your body has its own unique language, you just have to learn it.
3 minutes of centering: Take three minutes to simply be with yourself and center at least once each day. During this time: Sense into your muscles; do you feel any tension or pain? Notice your breathing; is it shallow and fast or slow and deep? Tune into your emotions; are you feeling sad or overwhelmed? Happy or fulfilled?
Bring these practices into your daily routine and remember that developing this connection with your body takes time. As you tune in, however, and hone the skill, you can start to know exactly what you need, when you need it. This allows you to create more balance and practice more self-compassion at any moment.
You Can Cultivate Healthy Balance and Self-Compassion
Life is always ebbing and flowing, and each season brings with it its own unique challenges. This is both the beauty and struggle of life, but it doesn’t mean we can’t create balance and love ourselves through it all. Use these ideas, tips, and strategies to cultivate a greater healthy balance and tap into your store of self-compassion so you can feel good no matter what’s going on.
I hadn’t really planned on sharing a gift guide this Christmas, then I figured why not?! Someone out there might still be looking for some last minute inspiration! I’ve picked a few things, all of which I have tried myself…
This guide will tell you everything you’ve ever wanted to know about CrossFit but were too afraid to ask (Including “Is CrossFit good for losing weight?”).
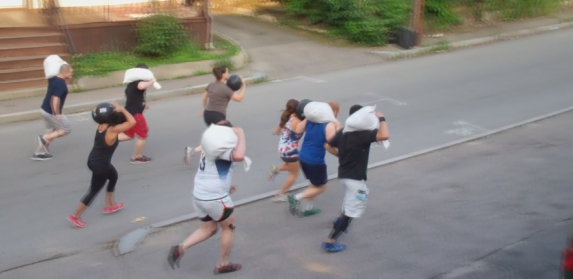
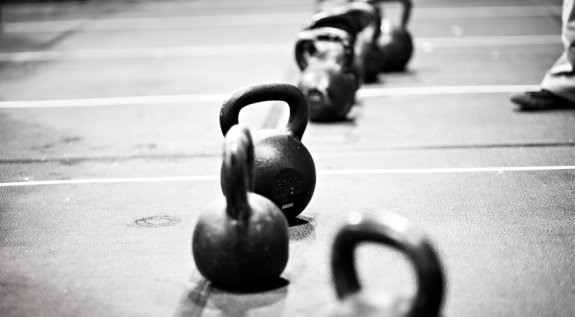
If you’ve ever questioned why people run around parking lots with sandbags, you’re in the right place.
Many of the coaches in our Online Coaching Program have been CrossFit instructors or gym owners, so this is what we do best: help people start strength training confidently and without injury.
CrossFit can be AMAZING…for the right person…with the right CF coach.
Luckily, this guide is going to help you figure out both of those things!
In this Beginner’s Guide to CrossFit, we’ll cover:
With constantly varied, high-intensity functional movements, CrossFit is a training philosophy that coaches people of all shapes and sizes to improve their physical well-being and cardiovascular fitness in a hardcore yet accepting and encouraging environment.
Here’s the definition of CrossFit from the official site:
CrossFit is the principal strength and conditioning program for many police academies and tactical operations teams, military special operations units, champion martial artists, and hundreds of other elite and professional athletes worldwide.
Our program delivers a fitness that is, by design, broad, general, and inclusive. Our specialty is not specializing.
Combat, survival, many sports, and life reward this kind of fitness and, on average, punish the specialist.
CrossFit contends that a person is as fit as they are proficient in each of ten general physical skills: cardiovascular/respiratory endurance, stamina, strength, flexibility, power, speed, agility, balance, coordination, and accuracy.
Or, in nerd speak – CrossFit is a training program that builds strength and conditioning through extremely varied and challenging workouts.
Each day the workout will test a different part of your functional strength or conditioning, not specializing in one particular thing, but rather with the goal of building a body that’s capable of practically anything and everything.
Like moving boulders.
CrossFit is extremely different from a commercial gym…and not just because you won’t find any ellipticals, weight machines, or Zumba.
Not that there’s anything wrong with some of those things. We work with our coaching clients to find the style of exercise that works best for them.
If you want to mix up strength training with other fun exercises…
Can Beginners Do Crossfit? (8 Things to Consider)
According to the CrossFit site:
This program “is designed for universal scalability, making it the perfect application for any committed individual regardless of experience.
We’ve used our same routines for elderly individuals with heart disease and cage fighters one month out from televised bouts. We scale load and intensity; we don’t change programs.”
What that means is that every day there is a particular workout prescribed (you’ll often see this written as “Rx’d”) for everybody that comes to CrossFit.
Rather than having one workout for older women and another for hardcore athletes – there’s ONE workout each day that is completely scalable based on your skill.
For example, if the workout calls for barbell squats with 135 pounds but you can only do squats with the bar (45 pounds), then that’s where you’ll start.
If you’re injured and can’t do squats at all, a similar movement will be substituted, and if the number of reps is too many for your current ability, that will be reduced.
As you get stronger and more experienced you’ll work your way towards eventually doing the workouts as prescribed.
Now, although CrossFit can be for everybody, it certainly ISN’T for everybody. In this blogger’s humble opinion, CrossFit is perfect for a few types of people:
#1) Beginners to weight training– If you have NEVER weight trained before (or trained only on machines), CrossFit is a great place for you to start (provided you have a great coach, which I’ll cover shortly).
You’ll learn how to do all of the important lifts in a super supportive and nonjudgmental environment. You might even find that…GASP…you love strength training!
#2) People looking for support and community – This is the appeal to CrossFit for me: every CrossFit gym has a really tight-knit community feel to it.
You’re not just a membership payment to them; you’re a person that needs support.
When Nerd Fitness gyms start popping up (don’t think it won’t happen!), I’ll be drawing a lot of inspiration from CF as to how members are so supportive and inclusive of each other.
#3) Fitness fanatics – You know those people that love to work out every day and feel like something is missing if they don’t?
The general protocol is 3 days on, 1 day off, but many CrossFitters end up at the gym more frequently. It’s addicting.
#4) Masochists – I mean that in the nicest way possible. CrossFit often rewards people for finishing workouts in the least amount of time possible.
This means that you’ll often be in situations where you are using 100% of your effort to finish a workout, exhausting yourself, and forcing yourself to push through the struggle.
#5) Former athletes – CrossFit has built-in teamwork, camaraderie, and competition.
Almost all workouts have a time component to them, where you either have to finish a certain number of repetitions of exercises in a certain amount of time, or the time is fixed and you need to see how many repetitions you can do of an exercise.
You get to compete with people in your class, and go online to see how you did against the world’s elite CrossFit athletes. There is even an international competition for those that become truly dedicated.
There are a few people for whom I don’t think CrossFit would be as beneficial, but this doesn’t mean they won’t enjoy it:
#1) Specialists – CrossFit prides itself on not specializing, which means that anybody who is looking to specialize (like a powerlifter) will not get the best results following the standard CrossFit workout schedule.
If you want to be good at a specific activity, that’s where your focus should be.
#2) Sport-specific athletes – Like the specialists, if you are an athlete training for a sport, you’d be better off finding a coach that is trained in getting great performances out of athletes in your specific sport.
Every sport has special movements that require certain types of power in specific muscles.
CrossFit prepares you for everything, but won’t improve your specific sport skills unless you are training for those specific sport skills! Many athletes choose to combine CrossFit with sport-specific workouts (see things like CrossFit Football) in their off-season for conditioning, but that’s up to each sport’s coach.
#3) Solo trainers – Some people, myself included, love to work out alone: my training is my meditative time each day. CrossFit is group training, which means you won’t have the opportunity to get your stuff done on your own.
If you are somebody that likes the IDEA of CrossFit, but you like to train on your own and you still want expert guidance and accountability…
I have a great solution for you!
Our 1-on-1 Coaching Program helps people EXACTLY like you! We create custom workouts and nutritional guidance based on your personality, the equipment you have access to, and your busy life. Let us help you get strong.
How Dangerous is CrossFit?
In short, yes, CrossFit can be dangerous.
But that could be said of literally any sport or exercise.
Or driving a car.
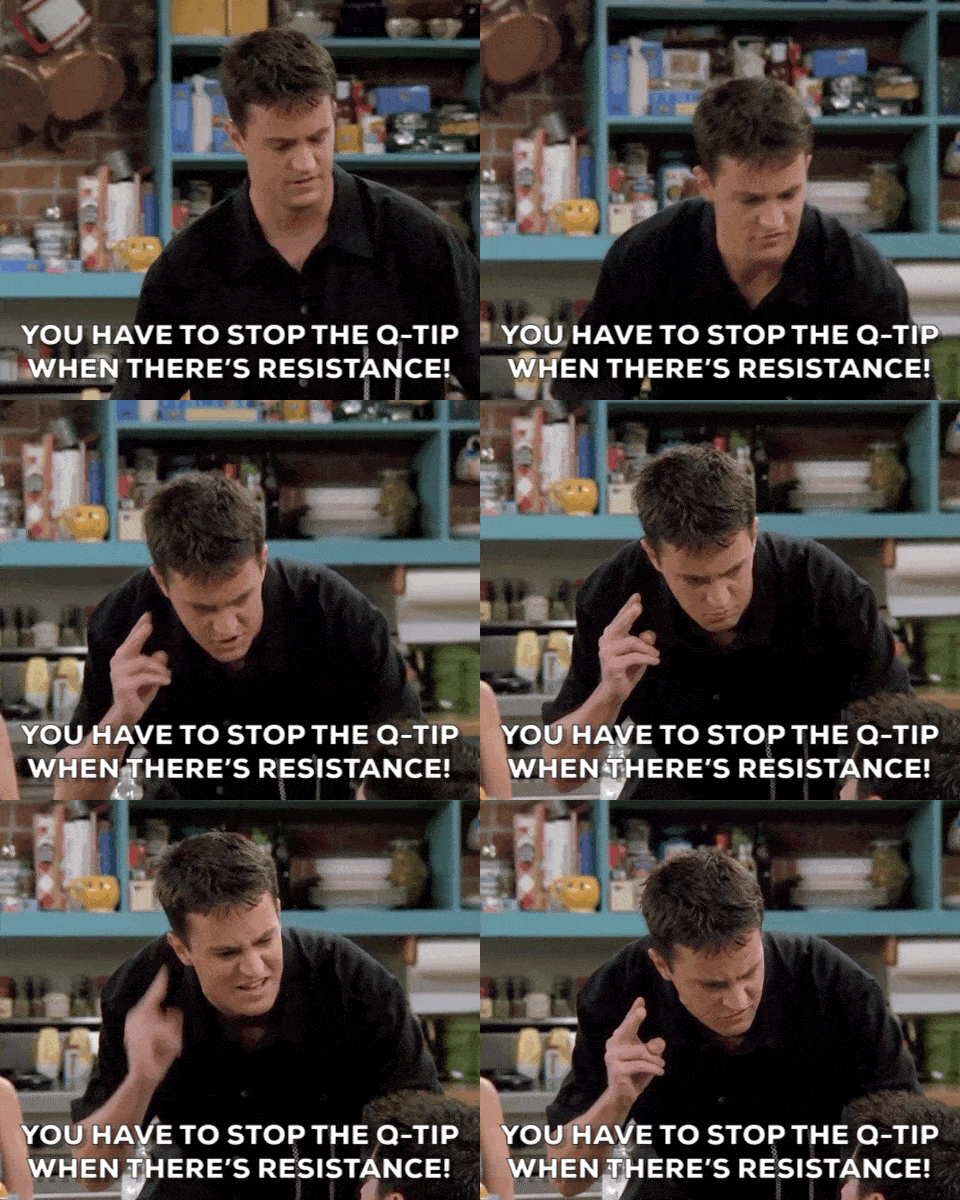
Or using a Q-tip.
In the wrong situations, with the wrong coaches, and for a person with the wrong attitude, CrossFit can be dangerous:
1) During a CrossFit workout, you’re often told to complete a number of strength training or endurance exercises as fast as possible, or complete as many repetitions as possible in a certain amount of time.
For that reason, it’s REALLY easy to sacrifice form in exchange for finishing the workout quicker. If you don’t have somebody spotting you or telling you to keep your form correct, then you’re in trouble.
When it comes to strength training, improper form (especially at high speeds with heavy weights) is the FASTEST way to get seriously injured.
If a CrossFit gym is run by inexperienced and unproven coaches – which definitely happens – then things like this happen and they happen frequently.
Due to the nature of competition, the motivating atmosphere, and people’s desire to do well, many people in CrossFit often push themselves beyond their personal limitations (which can be a good thing)…but oftentimes they push themselves too far.
I totally get it.
In my first CrossFit experience a few years ago, I almost made myself puke because I wanted so badly to finish with a good time.
Later, I did another CrossFit workout that I hadn’t properly prepared for and cranked out 100 pull-ups quickly…and I ended up walking around with T-rex arms for a WEEK because I physically could not straighten them.
Not kidding.
3) In some extreme cases with a VERY small portion of CrossFitters (or similar types of workout programs), an incredibly serious medical condition called rhabdomyolysis can take place.
When people push themselves too hard, too much, too fast, their muscle fibers break down and are released into the bloodstream, poisoning the kidneys.
At CrossFit, some coaches refer to this as “Uncle Rahbdo,” though it’s not something funny or enjoyable.
You can read all about the condition and issues it can cause here. This typically occurs with ex-athletes who have not exercised for a while and come back trying to prove something, and end up working at a higher intensity than their body can handle.
So, like with any activity, you can have people that like to push themselves too far, too hard, too fast, and too often.
Unfortunately, due to the nature of CrossFit (where this behavior can be encouraged and endorsed by the wrong coach), you can end up in some serious danger if you don’t know when to stop or have a coach that will tell you when to stop.
Personally, I find these issues to be more with individual people than with the CrossFit system as a whole, but it is the nature of CrossFit that attracts these people and encourages them to behave dangerously.
If you like the idea of strength training, but are a bit worried about starting with CrossFit, I hear ya.
We help people like you with our 1-on-1 Online Coaching Program. We create workout programs that are tailored to your experience, and adjust them based on your progress.
We do video form checks, you can text back and forth any questions with your coach, and more.
We also have our massive Strength Training 101 guide so you know exactly how to get started and even provide you with specific workouts to follow! Get it free when you sign up in the box below and Join the Rebellion!
Download our comprehensive guideSTRENGTH TRAINING 101!
Everything you need to know about getting strong.
Workout routines for bodyweight AND weight training.
How to find the right gym and train properly in one.
What’s a CrossFit Class Like?
Let’s say you’re interested in joining a CrossFit class, but you don’t know what you’re getting into!
Practically every CrossFit gym around the world will let you come in and try out a class for free, so contact your local gyms and find out what dates and time they’re having newbie sessions.
This is how CrossFit classes are usually structured:
Introduction class – For people who have never tried CrossFit before. Usually, there’s a quick overview, and then a basic bodyweight movement workout, and then they talk to you about joining. These are usually free.
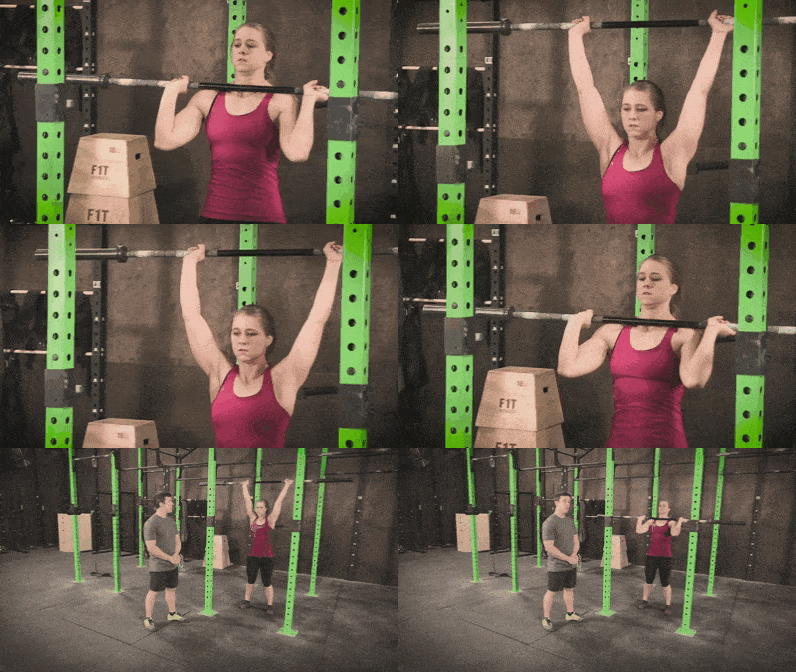
On Ramp/Elements – If you’re interested in joining the regular CrossFit workout, you’ll most likely be required to go through the On Ramp/Elements course. The purpose of these is to teach you the nine foundational movements of CrossFit and all about proper form. No matter how experienced you are, these are valuable and worth the time and money. Even if you think you have perfect form on your squats, deadlifts and/or overhead presses:
It’s amazing what can be fixed when you have a trained set of eyes watching you do them.
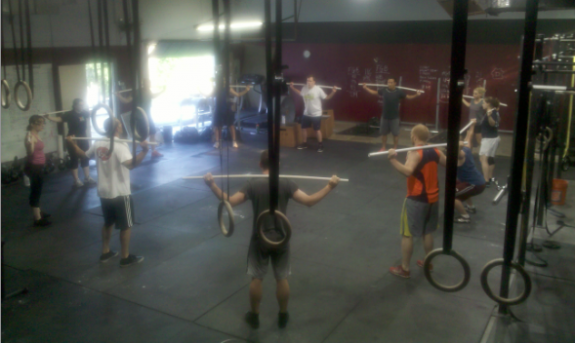
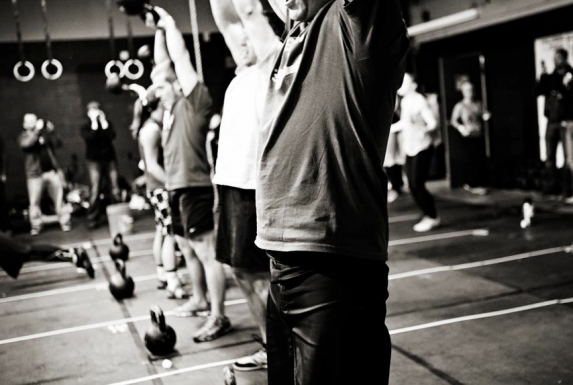
Regular classes: This is what you’re probably used to seeing or hearing about. A regular CrossFit class takes anywhere from 45 minutes to an hour. Everybody starts at the same time, there are instructors walking around helping out and keeping track, and everybody is supporting each other and probably swearing a lot.
Most CrossFit gyms will split their classes into three or four sections:
Dynamic warm-up – Not jogging on a treadmill for 5 minutes, but jumps, jumping jacks, jump rope, squats, push-ups, lunges, and pull-ups. Functional movements, stretches, and mobility work that complement the movements you’ll be doing in the workout that day.
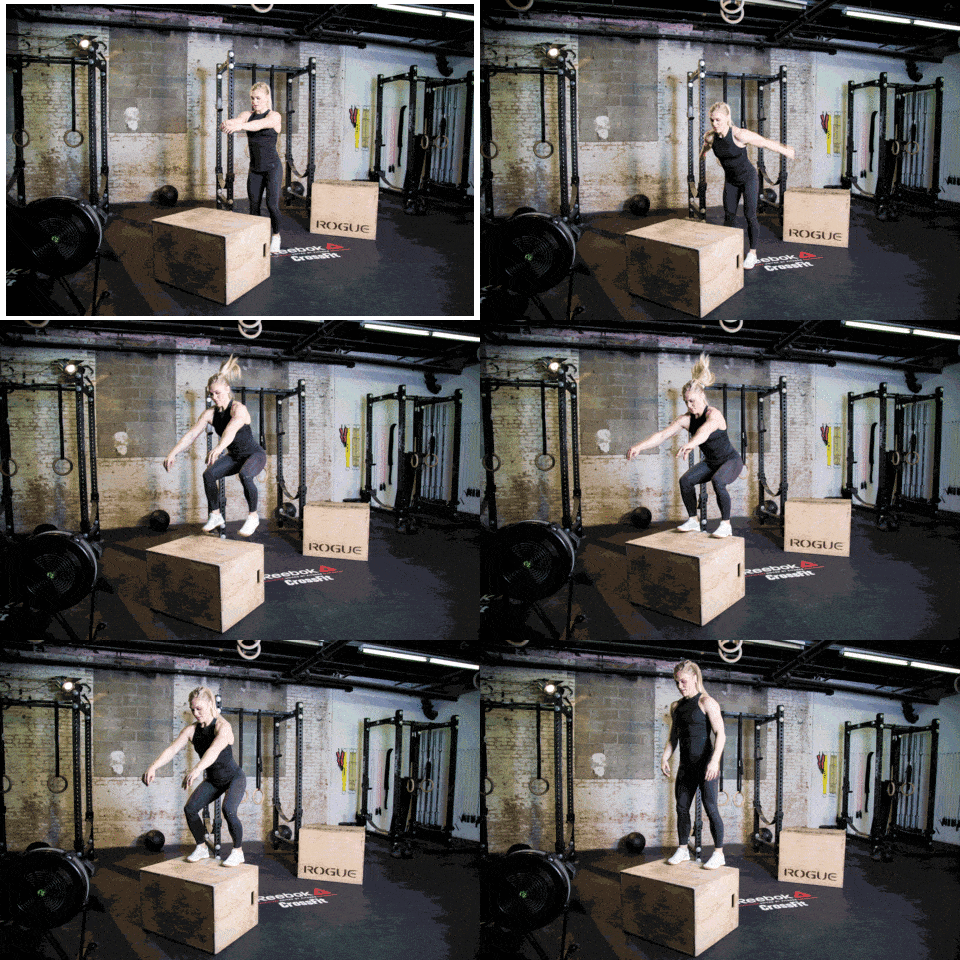
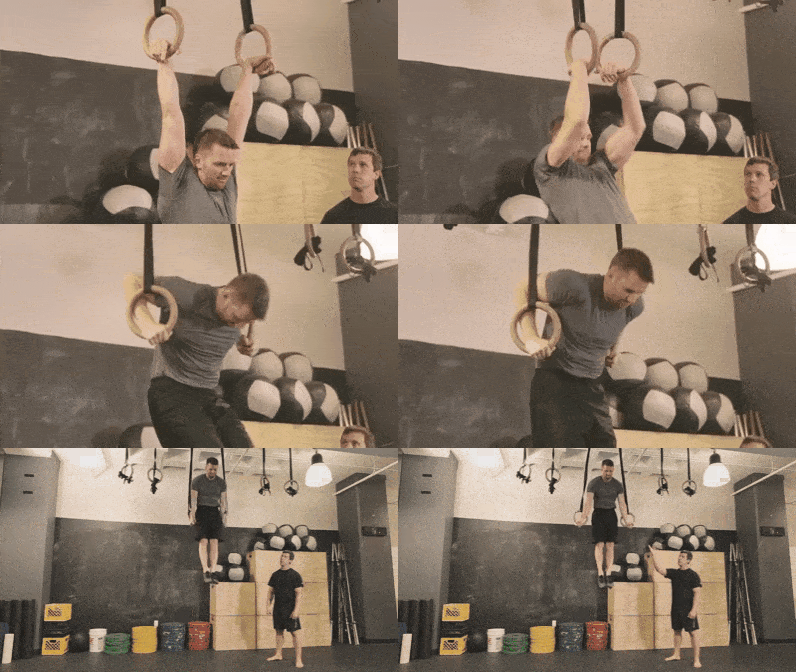
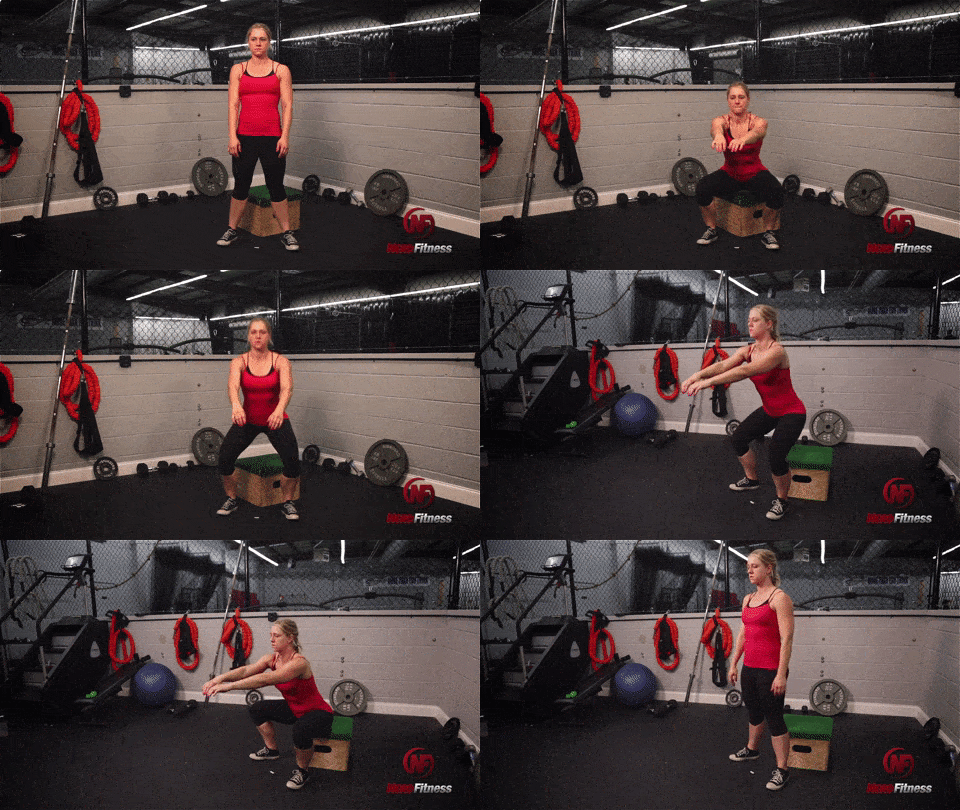
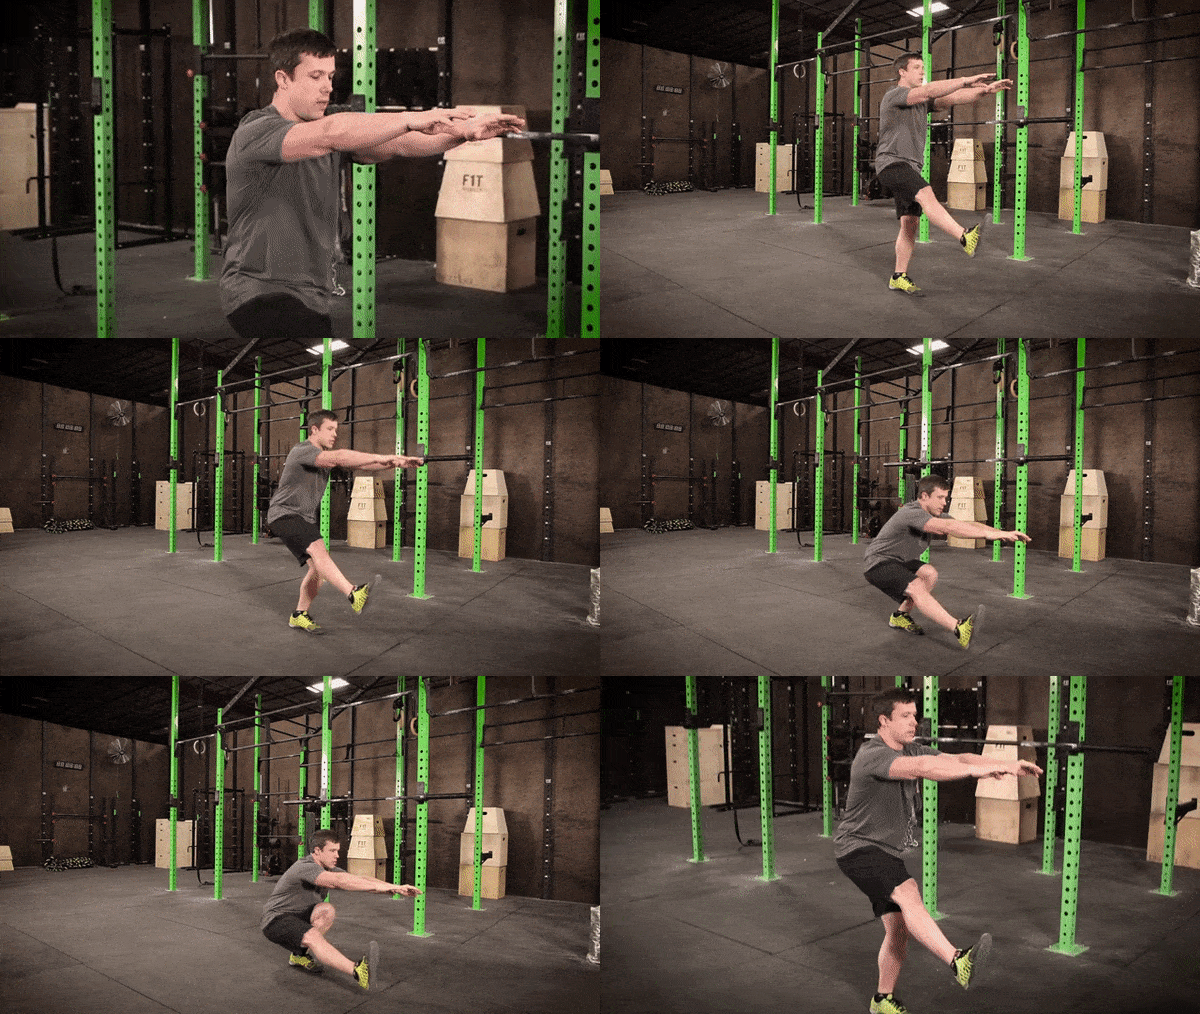
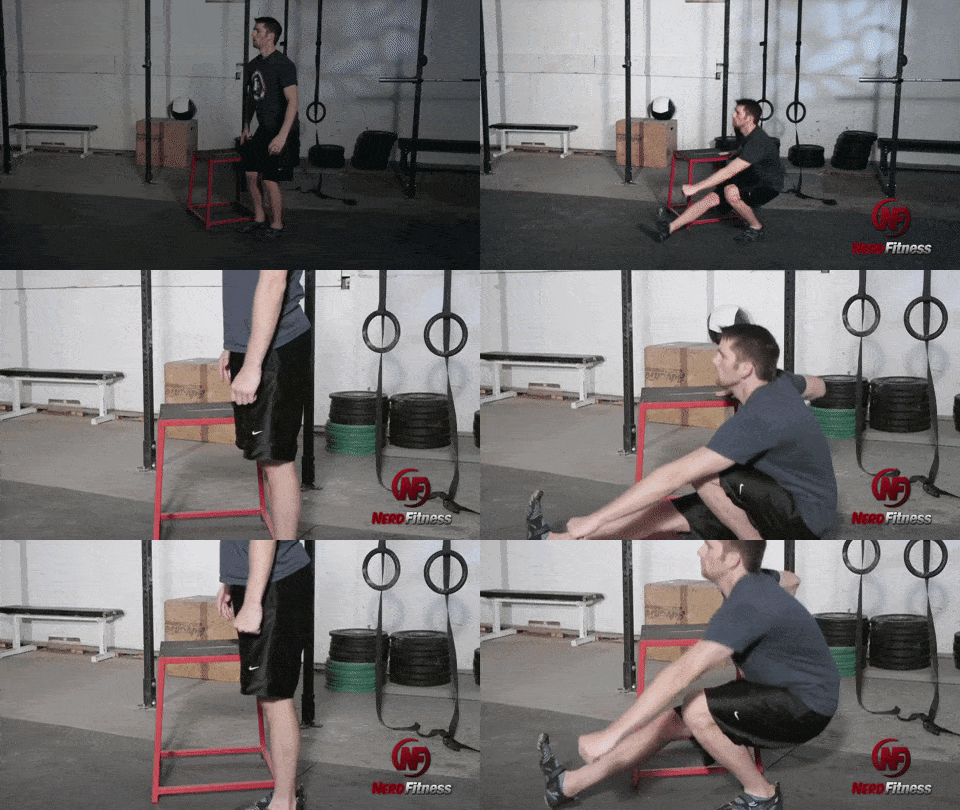
Skill/Strength work – If it’s a strength day, then you’ll work on a pure strength movement (like squats or deadlifts). If it’s not a strength day, then you’ll work on a skill and try to improve, like one-legged squats or muscle-ups:
WOD – the workout of the day. This is where you’ll be told to do a certain number of reps of particular exercises as quickly as possible, or you’ll have a set time limit to do as many of a certain exercise as possible.
Cooldown and stretching – Either as a group, or you’re allowed to stretch out on your own. This would also be the time for people who pushed too hard to go puke in a trash can and stretch their stomach muscles.
How to Find a CrossFit Gym
So, let’s say you’re interested in trying out a CrossFit class or maybe joining a CrossFit gym.
Other than picking the one that’s closest to you, why not put a bit more thought into it? This isn’t like picking a commercial gym – the community and coach are so freaking important.
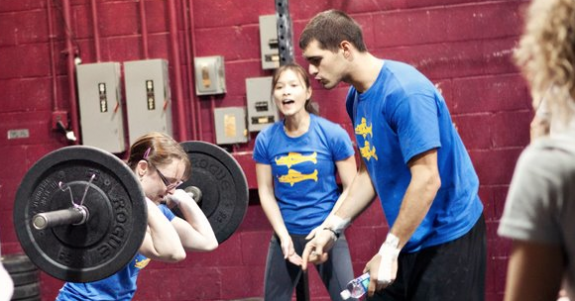
First and foremost, you need a gym with competent, experienced coaches.
You should be able to see through that particular CrossFit gym’s website – not the main CF site – who the coaches are and how long they have been teaching, including their certifications.
Here’s a quick breakdown of what you might see from coaches:
CrossFit Level 1 –an ANSI-accredited certification. This means the person went to a weekend-long course and passed the exam. You’re taught the basic movements, how to scale each movement, but not really much more. There are no specifics on how to deal with injuries, anatomy, etc.
CrossFit Level 2– This is the next level up from Level 1, and involves far more in-depth training in coaching.
Certified CrossFit Level 3 Trainer – This is for coaches who have passed both the Level 1 & Level 2 certification courses as well as a CrossFit-specific exam.
Certified CrossFit Level 4 Coach – Given after an assessment/evaluation of a coach’s abilities, and the highest certification level available.
Other non-CrossFit certifications from personal training organizations, powerlifting programs, kettlebell programs, etc.
There’s big money in CrossFit these days, which is why so many gyms are opening up all over the country. Make sure to do the research on who your coaches are, and if they have actual coaching experience.
The other important thing to check out is PROGRAMMING!
CrossFit programs can be truly random, and an inexperienced coach can accidentally program back-to-back workouts that use the same muscle groups in the same way, not giving you enough time to recover.
On every CrossFit gym’s website, there’s usually a blog where they post the workout of the day.
Look over this for the gym you want to check out and see what they typically do. If they do high-rep cleans three days in a row, they obviously don’t program well.
Or if you see every day for a week with heavy shoulder movements, be wary!
Remember, most CrossFit gyms will let you attend one class for free. If you have a few in your area, try out each of them once before making your decision.
Go to each one and make note of the other members:
Are they supportive of each other?
Did they introduce themselves and welcome you?
Were the coaches nice and hands-on with their advice during the workout?
A good community can be absolutely critical for success, so picking the right gym that fits your personality and situation is super important.
If you’re not sure how to find the right gym, or you want nutritional help and form checks as you’re trying to figure this stuff out…
Can I Do CrossFit at Home?
Every day, CrossFit.com puts out the workout of the day (or WOD), which can be done at home, in a commercial gym, or in a CrossFit gym.
Every CrossFit gym will put out their own WOD as well, which can be different from the CrossFit.com site – if you happen to find a local CrossFit site that you enjoy but don’t attend full-time, it’s more than okay to follow their workouts.
The best news about this is the workouts are posted free of charge to anybody that is interested in doing them.
CrossFit gyms can be prohibitively expensive, so if you love CrossFit but are looking to save money, you can follow along at home or in your office gym provided you have the right equipment.
Many times, you’ll run into situations where you can’t complete a particular workout because you don’t have the right equipment. Do the best you can with what’s available to you, and keep track of how you made your modification for tracking purposes.
Now, there are a few challenges with following CrossFit at home or by yourself in a gym:
Nobody is checking your form – CrossFit requires many incredibly specific movements; if you start by yourself at home, you’ll never know if you’re doing them incorrectly and could severely hurt yourself as you increase the amount of weight with which you work.
Lack of communal camaraderie – A HUGE part of CrossFit is the supportive community aspect that comes with each gym. I guarantee you’d finish a workout a few seconds (or minutes) faster if you had 50 people screaming your name and cheering you toward the finish line.
You probably don’t have all of the equipment – If you’re working out at home, you probably don’t have a full squat rack, bumper plates, kettlebells, medicine balls, and so on….so you’ll often be creating your own workouts that are modified versions of the online versions. You might also not be able to bounce and throw your weights around like CrossFitters tend to do 🙂
You will want to buy all of the equipment – The more you do it, the more you’ll want to do it properly. This might not cost as much as an actual box, but it will cost you.
Even with all of these negatives, it could save you quite a bit of money each month by not joining a gym, so I don’t blame you – just be smart about it.
If you’re somebody that does want to train at home or doesn’t have access to a CrossFit gym you can trust, there are two things to consider:
Making sure you’re doing your exercises correctly so you don’t develop bad habits.
Personal accountability (somebody to check in on you and cheer you on)
Our coaches work with clients to build workout programs specific to their situation and goals and do form checks on each exercise with their clients via video (to make sure they don’t hurt themselves). Plus, your coach comes with you no matter where you are in the world!
What is a CrossFit Workout I Can Try?
One of my favorite “first time” CrossFit workouts is a benchmark workout named Cindy.
It’s a simple bodyweight circuit (we love workout circuits at NF) and can be done practically anywhere – the only equipment you need is a pull up bar. It’s a favorite for travelling, and shorter versions of it (3 rounds) is often used as a warm-up.
Cindy is 20-minute AMRAP (“as many rounds as possible”):
What this means is that you put 20 minutes on the clock and then do as many rounds as possible (AMRAP) of 5 pull-ups, 10 push-ups, and 15 squats before the time runs out. There is no scheduled rest in between rounds – as soon as you finish your 15 squats you start on the pull ups again.
Now, let’s look at each movement and how to scale it down if necessary.
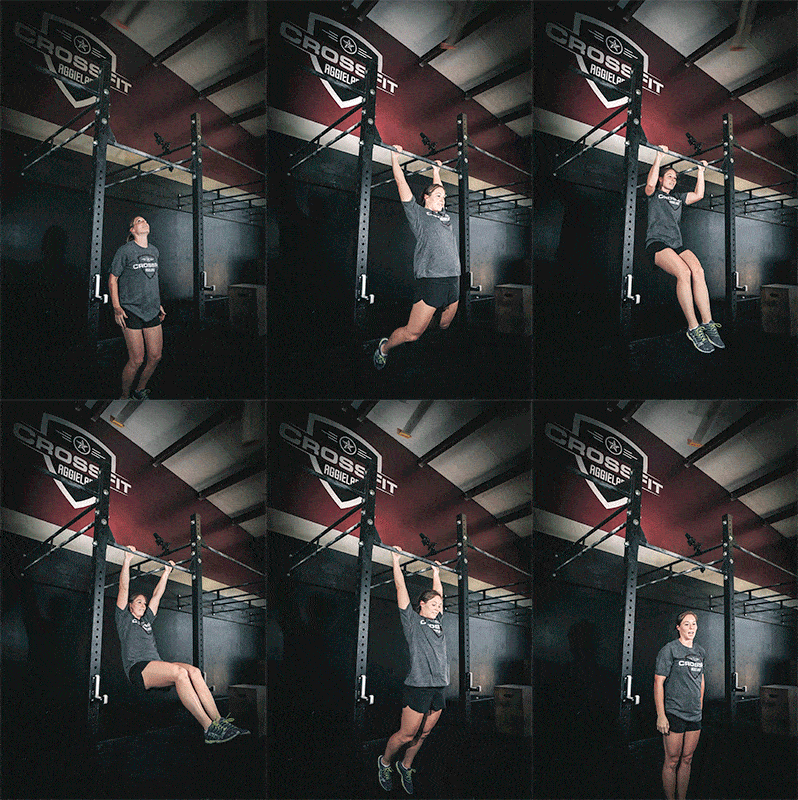
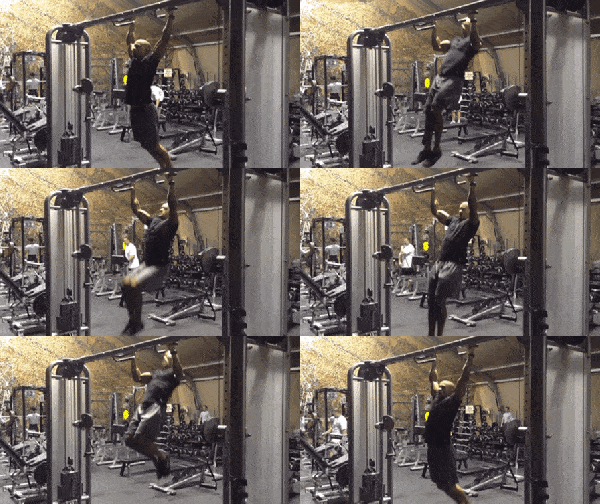
5 pull-ups –You’re allowed to kip these (which is a useful skill any time that your goal is not pure strength).
10 push-ups – The standard CrossFit push up is chest to the deck, but if you can’t do that, you can substitute knee push-ups or wall push-ups.
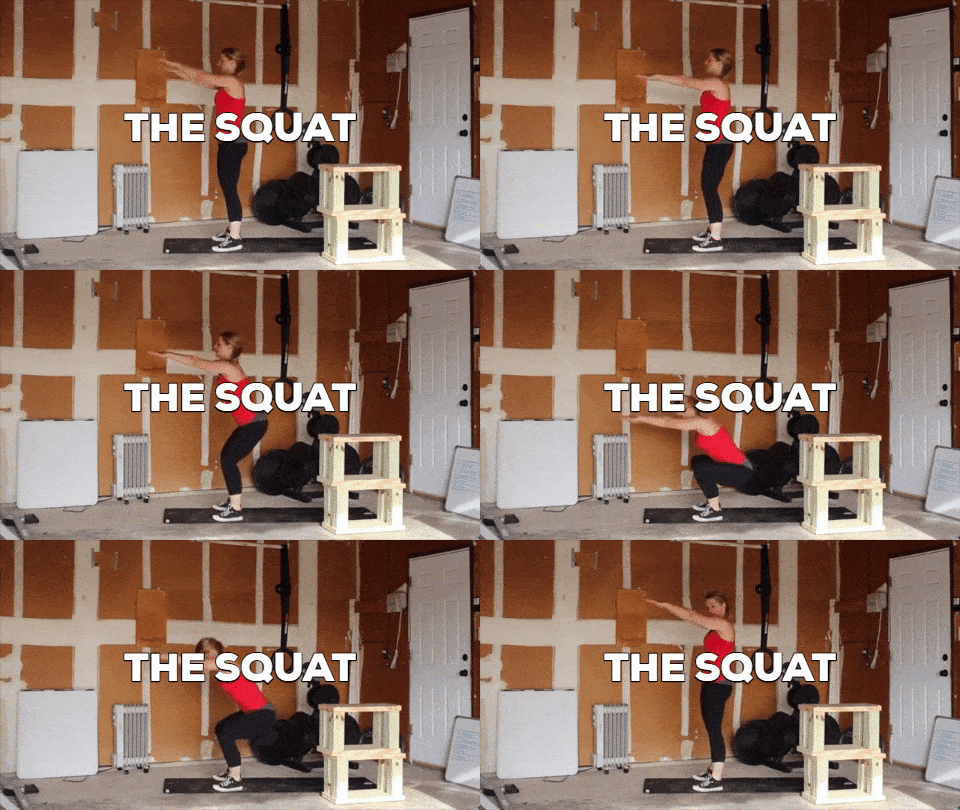
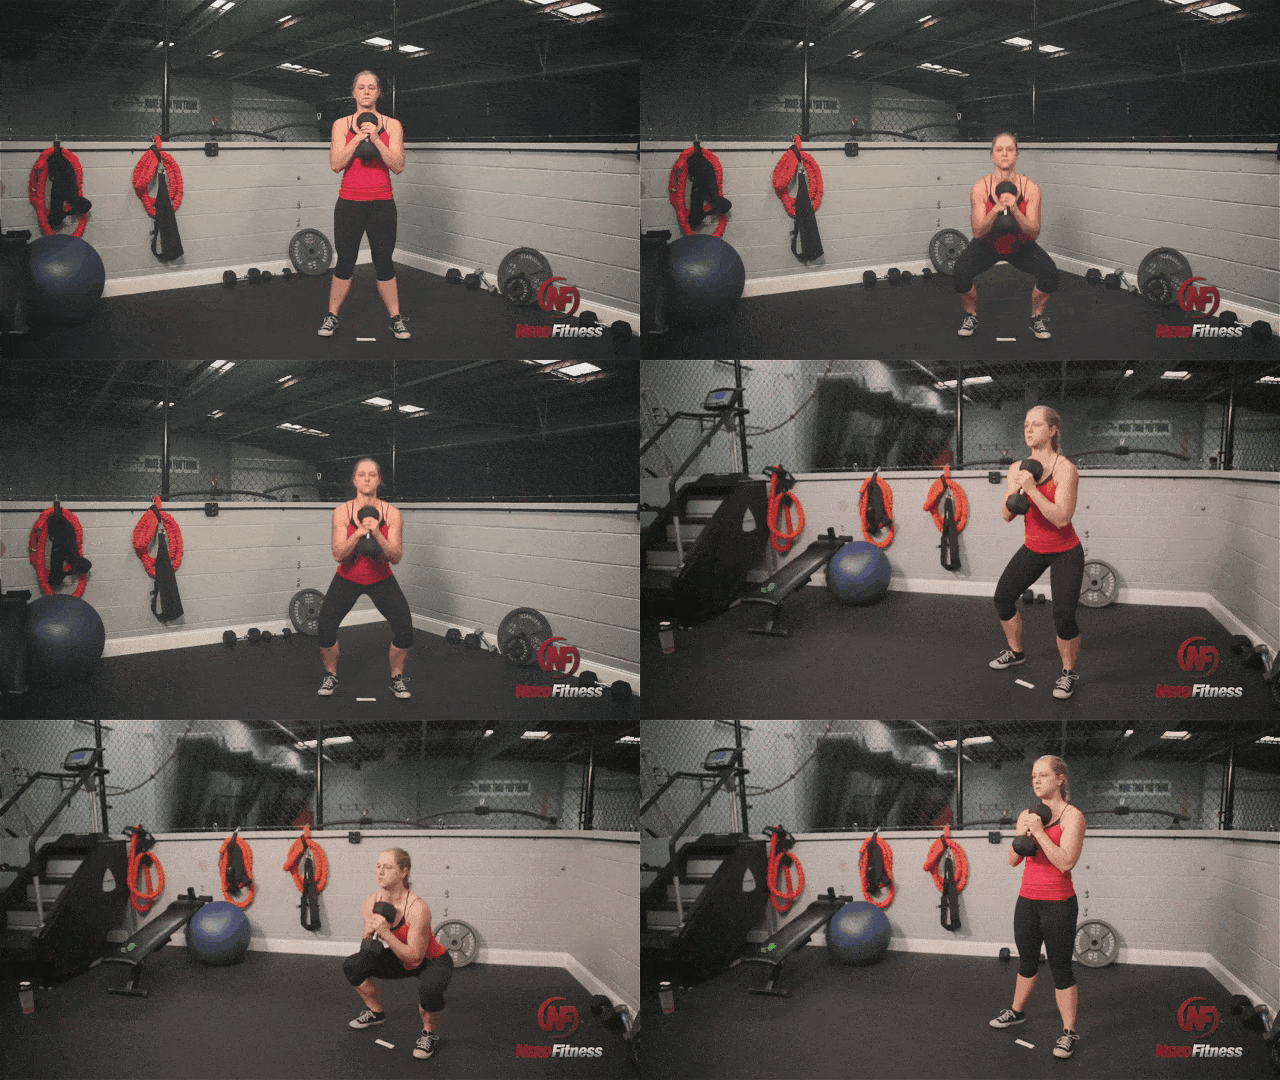
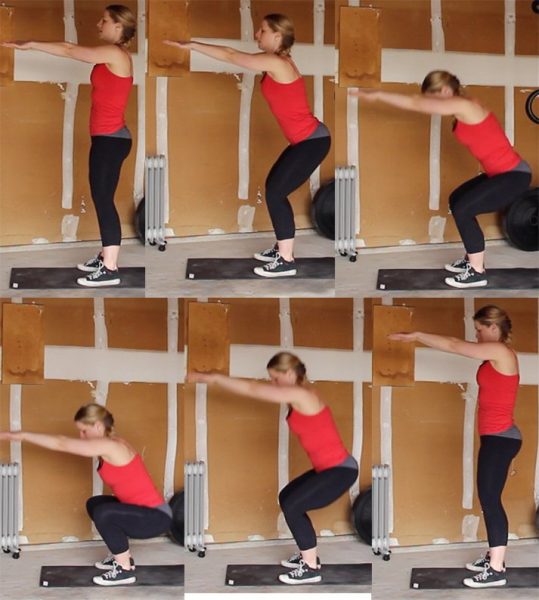
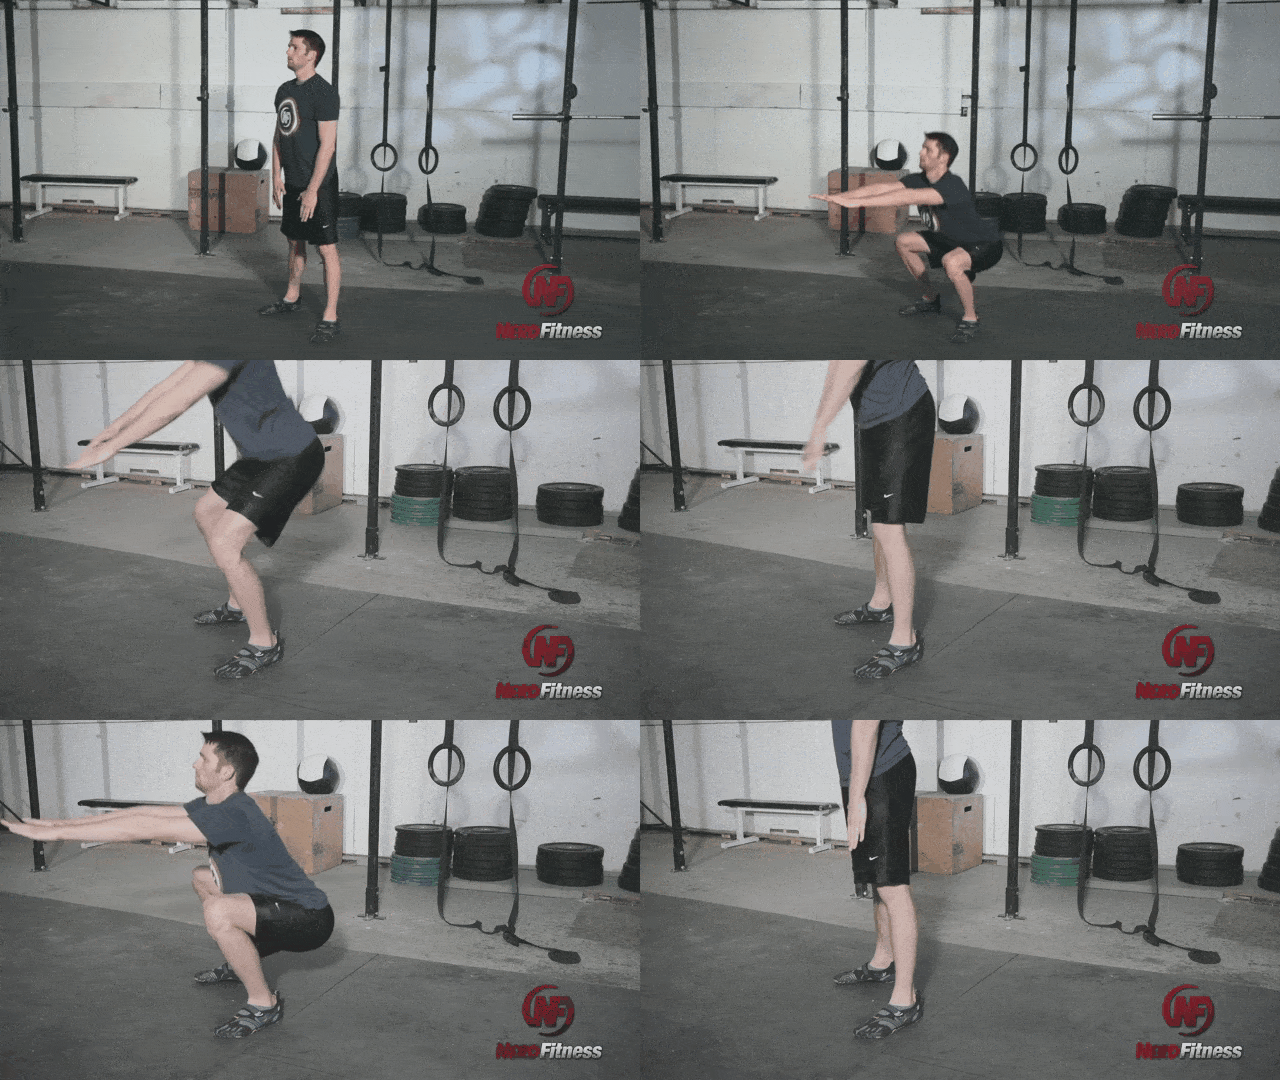
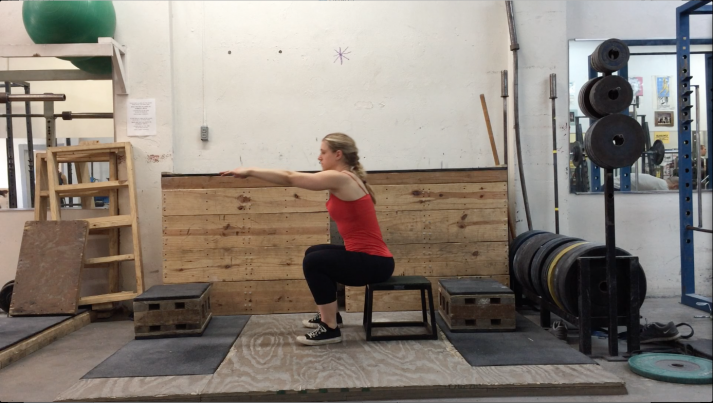
15 squats – this is a basic air squat, with no weight.
There are also other variations of this workout for beginner athletes. Some examples are:
AMRAP 20min:
3 Pull-ups
6 Push-ups
9 Squats
AMRAP 12min
5 Pull-ups
10 Push-ups
15 Squats
AMRAP 12 min
1 Pull-ups
4 Push-ups
7 Squats
AMRAP 10 min
1 Pull up
4 Push-ups
7 Squats
Sound too easy? Go faster.
While you are getting strength benefits from this workout, the goal of this workout is more metabolic conditioning, so making the movements harder (like switching to divebomber push-ups) isn’t something you would want to do here.
You can find some of the other benchmark workouts here.
And if you want a fun series of workouts you can follow along with at the gym or home, let us create a custom workout solution for you! We’ll even help you start eating better too so you can reach your goals:
Frequently Asked Questions on CrossFit:
#1) “Why is CrossFit so expensive?”
CrossFit has group classes. Think of yoga classes – they are typically $10-20 each. It’s not like a normal gym where there are hundreds of members who come in, use the elliptical for 20 minutes and go home – there is a coach teaching the class.
#2) “Is CrossFit just classes? If I want to work out in addition to my CrossFit classes, would I need a separate gym membership?”
At most CrossFit gyms, yes – it’s just group classes. Some CrossFit gyms have “open gym” hours – but not many are open for use 5am-11pm like your local commercial gym.
#3) “Do I have to eat Paleo Diet if I do CrossFit?”
Absolutely not. Paleo is the diet recommended by CrossFit and a lot of CrossFit gyms have paleo challenges – but you don’t have to (and I’ve never had it pushed on me).
#3) “What is a kipping pull-up? Isn’t that cheating?”
A kipping pull-up is a form of pull-up where you swing your body and use the momentum and a hip drive to get your body to the bar.
It’s not cheating because it’s not meant to be the same exercise as a dead-hang pull-up.
Some workouts call for a dead-hang pull-up – and in those you would not be allowed to kip.
#4) “Will CrossFit make me lose weight?”
If you work hard and change your diet. Diet will be 80% of success or failure, but combine a healthy diet with CrossFit and I’d bet anything you start to look better, get stronger, and feel better within 30 days.
However, if you eat like garbage and do CrossFit, your results will vary. It’s why we preach focusing on your nutrition above all else!
#5) “What’s with the girls’ names for workouts? Why do people say things like ‘We’re doing Mary at CrossFit today!’?”
CrossFit has what are called “benchmark workouts” with female names (they also have “Hero WODs” named for fallen military/police/fire personnel).
CrossFit’s reasoning is this: “…anything that leaves you flat on your back and incapacitated only to lure you back for more at a later date certainly deserves naming.” (CF Journal – Issue 13, September 2003)
GREAT community aspect. Unlike a commercial gym, you actually get to know the people at your box. Most gyms will have outings that a LOT of people show up to. There’s always that feeling of teamwork and camaraderie.
Constant coaching and support – In a commercial gym you have no clue if you’re doing an exercise right or not. While it’s not 1:1 training, you have a coach with you during every workout to help out.
If you don’t show up, not only do people notice, but they call you and ask where you’ve been. The only time that happens in a commercial gym is when you miss a session with your overpaid trainer.
Leveling up – Because you get to keep track of how much you’re lifting, and you know how many reps and sets you’re doing, you get to see constant improvement. You also get to advance at your own pace, slowly working your way up toward doing the workouts as prescribed.
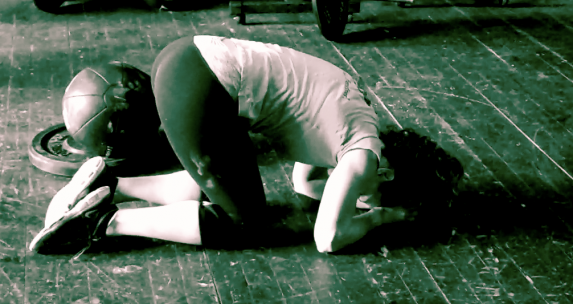
Humbling yet encouraging – Yeah, you might end your workout lying on your back, but you have a sense of accomplishment when you finish a workout faster than last time.
Competition – It’s amazing how much further you’ll push yourself when surrounded by other people cheering you on and competing with you.
It introduces SO MANY people to weight lifting, especially women who would have never ever attempted to get off the treadmill and strength train. It’s like a gateway workout – you learn what you love and can specialize further from there.
It’s a good outlet for former athletes who like to compete. After playing competitive sports through high school and college, all of a sudden there’s nothing left to compete in – CrossFit gives people that outlet.
You get to find out what you’re made of. CrossFit can be miserable, but it can also teach you how to push through mental barriers, build mental toughness and more.
It builds great physiques (look good naked). While so many women say they want that “toned” look and try to get it with hours of cardio, those bodies are being built every day in CrossFit gyms. Seriously, while their goal is performance rather than aesthetics, take a look at any serious CrossFit female athlete and tell me she doesn’t look incredible!
It builds good muscular endurance and all-around fitness – your body is prepared for pretty much any athletic situation through smart CrossFit programming.
The Negatives of CrossFit:
Not great for specialization – You kind of get good at a lot of things, but not great at any one particular thing. If you want to be a great powerlifter or athlete, you’d be better suited finding a sport-specific coach.
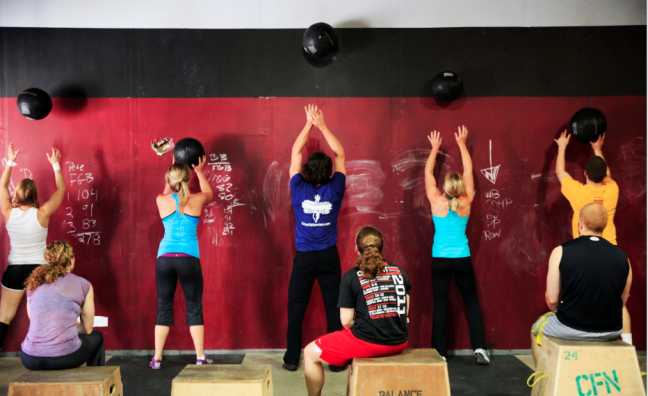
Lack of consistency – You rarely do the same workout twice, which makes it incredibly difficult to track your progress. You might go down one week on squat strength and be disappointed, but it’s because you destroyed your legs two days earlier with 150 “wall balls.”
Odd programming – As you’ll read in another critique later in this article, I don’t agree with some of the workouts that are prescribed at some CrossFit gyms. For example, some workouts might call for high reps of snatches; these are Olympic lifts that require perfect form in order to be done successfully. Doing 30 reps of them is a surefire way to sacrifice form and dramatically increase the risk of injury.
Price – CrossFit boxes can be two or three times the monthly cost of a commercial gym, and this is just for the group classes, not use of the facilities any time you want.
A bad coach can REALLY cause problems – You’re doing advanced moves that often take months of learning to do right; with heavy weights, this can lead to horrible injuries. Make sure you have a great coach that doesn’t rush you into anything!
Almost everything is for time or most reps possible, which means form starts to slip in order to finish quicker. This can be fixed with a coach…but I still find it to be an issue.
You start to talk a language nobody understands – talking to a CrossFitter is like talking to somebody in a foreign language. CrossFit people oftentimes forget that nobody outside of CF understands what half the stuff they say means, so they shout out achievements or accomplishments and explain how quickly they did specific exercises…but they don’t realize nobody really cares!
You can get addicted! This can go in either Pro or Con depending on how you look at it, but I know many people that started going to a CrossFit and now all they do or talk about is CrossFit. After a month or two, for better or worse, you might find yourself married to your CrossFit gym and community.
Some CrossFitters drink WAYYY too much “kool-aid.” You’ll run into CrossFit people who think CrossFit is the be-all, end-all training solution, and anybody that doesn’t do CrossFit is a wuss. If you can do 20 pull-ups, they can do 22, and do them faster than you, after doing 25 handstand push-ups and running 400 meters. I tend to dislike elitists no matter what they are elitist about, and CrossFit is no exception.
Depending on where you fit on that Pro vs Con list, you probably are starting to make your mind up about whether CrossFit is for you.
If you like the IDEA of CrossFit but aren’t sure it’s for you, we help people like you through our 1-on-1 Coaching Program. We create custom workout programs, offer video form checks, and provide nutritional guidance to help you reach your goals safely!
Other Critiques and Articles on CrossFit
If you’re new to CrossFit, you might not know that it is an INCREDIBLY polarizing topic.
If you have 15 minutes to kill, a quick look at this anti-Crossfit timeline (created by a person who truly dislikes CrossFit) will explain why so many people are pissed off about it.
We’ve tracked down a few other articles, some biased, some not, that explain a lot of the background and why CrossFit is the way it is.
I LOVED this critique of CrossFit by 70’s Big, which I found to be incredibly fair and very objective. The fact that the author starts with “Note: Read ALL of this before attacking me” goes to show you how hardcore some CrossFitters can be.
Although long, this article does a GREAT job explaining why CrossFit is the way it is, coming from a guy who has a CrossFit II certification and spent a few months following the main site workouts.
This paragraph sums up the appeal of CrossFit:
CrossFit can be fun, especially if you’re a person who hasn’t done anything physically challenging since playing sports, or ever.
Athletes enjoy it because it because it provides that difficulty that their training did. Unathletic people like it because it makes them feel athletic.
People who never had good social group experiences like it because, even if they are crazy, CF communities are always positive, supportive, and good-natured.
CF brings people together and makes them compete every day in a society that shies away from competition. The challenge creates a heightened sense of self-worth that develops into being an elitist..
…The forum addicts are proud of the fact that they think other populations can’t do what they can do. They revel in the fact that they got injured doing CF. They want to push so hard that they vomit.
This only reflects a certain percentage of the CF population, yet the worst part of any population will create the stereotype.
I have a few problems with CrossFit. The conditioning often doesn’t apply an optimal stress and it’s superfluous.
It doesn’t have any real element of consistent strength training…It has entirely too much frequency at high intensity and almost always results in injury.
It doesn’t follow a logical application of stress to induce adaptation…but CrossFit gets people to do something rather than nothing.
It also gets the exercising population to do something better than 45 minutes on the elliptical.
…It’s a nice gateway into other forms of training and the people are always great.
This T-Nation article also does a solid job of explaining the potential pitfalls of CrossFit and tracks down some big names to give their input:
Alwyn Cosgrove notes that this “all over the place” programming can be dangerous: “A recent CrossFit workout was 30 reps of snatches with 135 pounds.
A snatch is an explosive exercise designed to train power development.
Thirty reps is endurance. You don’t use an explosive exercise to train endurance; there are more effective and safer choices.
Another one was 30 muscle-ups. And if you can’t do muscle-ups, do 120 pull-ups and 120 dips.
It’s just random; it makes no sense.
Two days later the program was five sets of five in the push jerk with max loads. That’s not looking too healthy for the shoulder joint if you just did 120 dips 48 hours ago.”
Mike Boyle adds, “I think high-rep Olympic lifting is dangerous. Be careful with CrossFit.”
Turned off from CrossFit after reading all of that?
I hear you – it really comes down to having a GREAT CrossFit gym being the difference maker.
If you’ve had a bad experience, or you just want to know you’re going to start strength training on the right foot and you like our style here at Nerd Fitness…
First, I’m obviously a fan of CrossFit. I do it on a regular basis and have my CrossFit Level 1 Trainer Certificate, but I didn’t start out with CrossFit and it’s not all I do – so don’t think I’m completely biased here 🙂
I think if you find the right box, CrossFit is an awesome choice for a lot of people.
It’s different every day, so it’s never boring, someone is writing your workouts for you so you don’t have to think about it, and it’s fun.
When I don’t show up, people notice and ask where I was.
It gets you to do things you wouldn’t do on your own. I would never go running or rowing on my own – but if it’s in the WOD, I don’t have a choice.
Also, I’ll go and do things that I would never do before (such as yoga classes, or spending a Saturday afternoon doing hill sprints) because I know it will help me get a better time on a WOD later on.
My biggest issue with CrossFit is that it has no quality control across the boxes – all you need to start an affiliate is to pass the CF-L1 course and pay a $3000 affiliate fee, and once you are affiliated there are no check-ins or anything; you just have to pay the fee every year.
I have now been to 13 CrossFit gyms in my travels and while most of them were great, the quality of a few of them scared me.
I would absolutely love to see CrossFit take some of the money they are making now that it’s becoming more mainstream and invest in a quality control system.
I personally struggle on a regular basis because I’m much more interested in heavy strength training than anything else – and I’m one of those people who really likes seeing very linear graphs and results to my training, and I do want to specialize.
I have a very hard time creating workout plans because with CrossFit, you never know what’s coming next.
I’m lucky enough to have a coach that will work with me and will also let me do my own strength training and work the WODs around that.
Does it work? Well, what’s your goal? If it’s to get in better shape or to lose weight, then yes, it works. However, it’s not some cure-all magic pill – as with any other training program, you will get out of it what you put into it.
So do I think you should try it? Of course, if you want to and aren’t afraid of putting in a little work to get what you want.
And here are my thoughts. I’m just a nerd who happens to love strength training and is the goofball who wrote this article:
I understand the appeal, and I love the community aspect of it…but it’s just not for me.
I like feeling like I just had a great workout, but I don’t enjoy feeling like I want to die at the end of each workout – I know that’s how I’d feel at the end of each CrossFit workout because of my competitiveness.
The biggest reason for me why I’m not a CrossFitter? Well, other than my crazy travel schedule… I LOVE working out alone.
I know at CrossFit I’d be part of a team workout and constantly ripping myself for not being as good as the guy next to me.
From a programming standpoint, I don’t agree with some of the workouts (mostly the high-repetition Olympic lifting), but I understand that there are GREAT CF trainers that create amazing programs.
I love that it gets people started with barbell training and heavy lifting, because nothing makes me happier than watching guys doing proper squats and women doing deadlifts 🙂
Like with anything related to fitness, a good coach can be the difference between a great CrossFit experience and a dangerous one.
I think everybody should try it (your first trip will be free) and decide if it’s for you. If you decide it isn’t for you – that’s okay!
I’ll admit that CrossFit isn’t for me and I have no intentions of ever joining a CrossFit gym, but I don’t have any problems with others doing it if they enjoy it and they’re safe.
However, when the day comes that I open Nerd Fitness gyms (and it’ll happen), I’m going to be taking a LOT from CrossFit on how to build a great, supportive gym environment and community…something you won’t find at any commercial gym.
My final advice: If you’re interested, give it a shot. If you can afford it, and you enjoy it, keep doing it. If you don’t or can’t afford it, don’t. And don’t feel like less of a person because of it 🙂 I’ll still like you.
If you’re somebody that thinks similarly to Staci and I, and you’re looking for a Yoda to help you get strong without needing to join a specific gym or attend classes at certain times, check out our 1-on-1 Coaching Program!
Any More questions about CrossFit?
Good lord that took a while.
Thanks for taking the time to get through it, as it took Staci and I a few weeks of research, hours of writing, and LOTS of back-and-forth conversations to put this post together.
I’ll throw one final mention in there for our Nerd Fitness Coaching Program, where we pair NF Coaches with busy people like you:
We create your workout programs and adjust the intensity based on your progress.
We provide video form checks to make sure you’re doing each movement correctly.
We help you get your nutrition in order to line up with your goals.
If you have read this far, I commend you.
You just read 6,500 words about CrossFit which means you’re probably serious about taking your physical fitness into your own hands.
Now, you just need to act.
Let’s go! Go do a workout RIGHT NOW, CrossFit gym or no CrossFit gym.
If you don’t know where to start, start here. You can do it right in your living room.
ALSO, if you’re interested, Nerd Fitness Journey has an intermittent fasting adventure that you can start today!
This fun habit-building app helps you exercise more frequently, eat healthier, and level up your life, all while building your very own superhero!
Sign-up for a free trial right here:
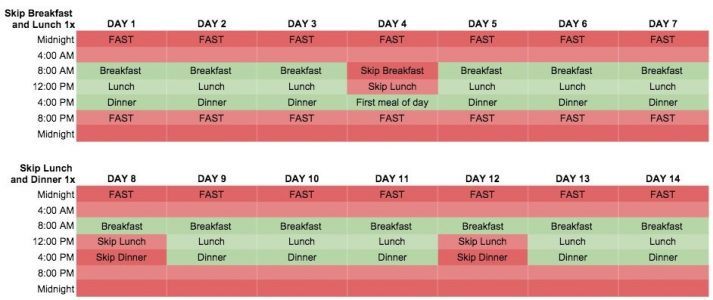
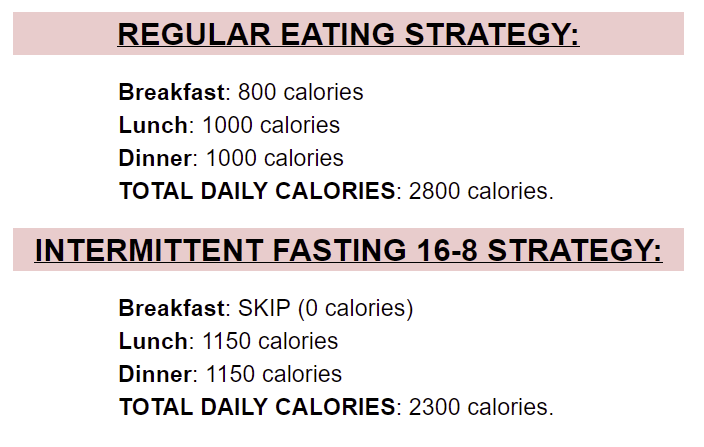
What is Intermittent Fasting?
“Conventional wisdom” isn’t that smart.
We’re going to take two widely accepted healthy eating “rules” and turn them on their head:
RULE #1: You HAVE to eat first thing in the morning: Make sure you start off with a healthy breakfast, so you can get that metabolism firing first thing in the morning!
“Eat breakfast like a king, lunch like a prince, and dinner like a pauper.”
There are even studies that show those that eat earlier in the day lose more weight than those who ate later in the day or skipped a meal.[1]
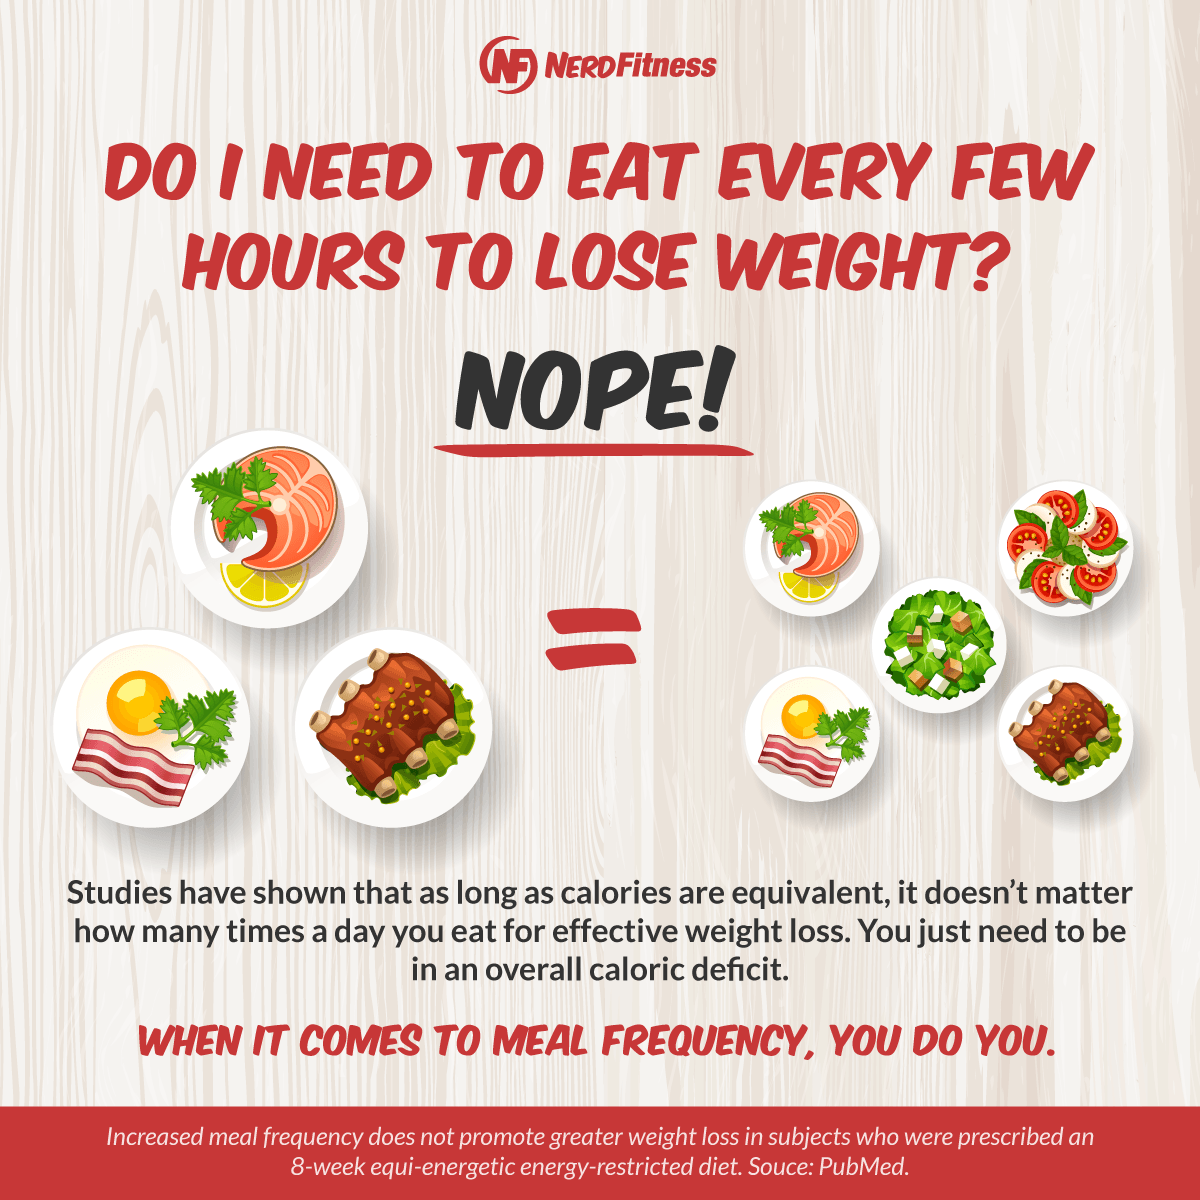
RULE #2: Eat lots of small meals for weight loss. Make sure you eat six small meals throughout the day so your metabolism stays operating at maximum capacity all day long.”
In other words, “eat breakfast and lots of small meals to lose weight and obtain optimal health.”
But what if there’s science and research that shows SKIPPING BREAKFAST (the horror! blasphemy!) can help with optimum human performance, mental and physical health improvement, maximum muscle retention, and body fat loss?
That’s where an Intermittent Fasting Plan comes in.
Intermittent fasting is not a diet, but rather a dieting pattern.
In simpler terms: it’s making a conscious decision to skip certain meals on purpose.
By fasting and then feasting deliberately, intermittent fasting generally means that you consume your calories during a specific window of the day, and choose not to eat food for a larger window of time.
There are a few different ways to take advantage of intermittent fasting, which I learned about from Martin over at LeanGains, a resource specifically built around fasted strength training:
#1) INTERMITTENT FASTING 16/8 PLAN
What it is: Fasting for 16 hours and then only eating within a specific 8-hour window. For example, only eating from noon-8 PM, essentially skipping breakfast.
Some people only eat in a 6-hour window, or even a 4-hour window. This is the “feasting” and “fasting” parts of your days and the most common form of Intermittent Fasting. It’s also my preferred method (5 years running).
Two examples: The top means you are skipping breakfast, the bottom means you are skipping dinner each day:
You can adjust this window to make it work for your life:
If you start eating at: 7AM, stop eating and start fasting at 3pm.
If you start eating at: 11AM, stop eating and start fasting at 7pm.
If you start eating at: 2PM, stop eating and start fasting at 10pm.
If you start eating at: 6PM, stop eating and start fasting at 2AM.
#2) INTERMITTENT FASTING 24-HOUR PLAN
Skip two meals one day, where you take 24 hours off from eating. For example, eat on a normal schedule (finishing dinner at 8PM) and then you don’t eat again until 8PM the following day.
With this plan, you eat your normal 3 meals per day, and then occasionally pick a day to skip breakfast and lunch the next day.
If you can only do an 18 hour fast, or a 20 hour fast, or a 22 hour fast – that’s okay! Adjust with different time frames and see how your body responds.
Two examples: skipping breakfast and lunch one day of the week, and then another where you skip lunch and dinner one day, two days in a week.
Note: You can do this once a week, twice a week, or whatever works best for your life and situation.
Those are the two most popular intermittent fasting plans, and the two we’ll be focusing on, though there are many variations of both that you can modify for yourself:
Some people eat in a 4-hour window, others do 6 or 8.
You’ll need to experiment, adjust to work for your lifestyle and goals, and see how your body responds.
Let’s first get into the science here behind Intermittent Fasting and why you should consider it!
How Does Intermittent Fasting Work?
Now, you might be thinking: “okay, so by skipping a meal, I will eat less than I normally eat on average (2 meals instead of 3), and thus I will lose weight, right?”
Yes.
By cutting out an entire meal each day, you are consuming fewer calories per week – even if your two meals per day are slightly bigger than before. Overall, you’re still consuming fewer calories per day.
In this example, you’re eating LARGER lunches and dinners than you normally do, but by skipping breakfast you’ll consume 500 less calories per day.
And thus, weight loss!
This is highlighted in a recent JAMA study[2] in which both calorie restricted dieters and intermittent fasters lost similar amounts of weight over a year period.
That doesn’t tell the FULL story, as the timing of meals can also influence how your body reacts.
Intermittent Fasting can help because your body operates differently when “feasting” compared to when “fasting”:
When you eat a meal, your body spends a few hours processing that food, burning what it can from what you just consumed.
Because it has all of this readily available, easy-to-burn energy (thanks to the food you ate), your body will choose to use that as energy rather than the fat you have stored.
During the “fasted state” (the hours in which your body is not consuming or digesting any food) your body doesn’t have a recently consumed meal to use as energy.
Thus, it is more likely to pull from the fat stored in your body as it’s the only energy source readily available.
Burning fat = win.
The same goes for working out in a “fasted” state.
Without a ready supply of glucose and glycogen to pull from (which has been depleted over the course of your fasted state, and hasn’t yet been replenished with a pre-workout meal), your body is forced to adapt and pull from a source of energy that it does have available: the fat stored in your cells.
Why does this work? Our bodies react to energy consumption (eating food) with insulin production.
The more sensitive your body is to insulin, the more likely you’ll be to use the food you consume efficiently, and your body is most sensitive to insulin following a period of fasting[3].
These changes to insulin production and sensitivity can help lead to weight loss [4] and muscle creation [5].
Next: Your glycogen (a starch stored in your muscles and liver that your body can burn as fuel when necessary) is depleted during sleep (aka during fasting), and will be depleted even further during training, which can lead to increased insulin sensitivity.
This means that a meal following your workout will be used more efficiently: converted to glycogen and stored up in your muscles or burned as energy immediately to help with the recovery process, with minimal amounts stored as fat.
Compare this to a regular day (no intermittent fasting): With insulin sensitivity at normal levels, the carbs and foods consumed will see full glycogen stores and enough glucose in the bloodstream, and thus be more likely to get stored as fat.
Back to fasting: growth hormone is increased during fasted states (both during sleep[6]and after a period of fasting). Combine this increased growth hormone secretion:[7], the decrease in insulin production (and thus increase in insulin sensitivity [8]), and you’re essentially priming your body for muscle growth and fat loss with intermittent fasting.
The less science-y version: Intermittent fasting can help teach your body to use the food it consumes more efficiently, and your body can learn to burn fat as fuel when you deprive it of new calories to constantly pull from (if you eat all day long).
TL/DR: For many different physiological reasons, fasting can help promote weight loss and muscle building when done properly.
I know Intermittent Fasting can be overwhelming for many, which is why we sought to simplify the practice for our new app: Nerd Fitness Journey.
When you get started, we won’t have you jumping into the deep end. Instead, we’ll provide small missions so you can gradually grow accustomed to skipping meals.
If you want, you can sign-up for a free trial right here:
Should I Eat 6 Small Meals a Day?
There are a few main reasons why diet books recommend six small meals:
1) When you eat a meal, your body does have to burn extra calories [9] just to process that meal. So, the theory is that if you eat all day long with small meals, your body is constantly burning extra calories and your metabolism is firing at optimal capacity, right? Well, that’s not true.
Whether you eat 2000 calories spread out throughout the day, or 2000 calories in a small window, your body will burn the same number of calories processing the food [10].
So, the whole “keep your metabolism firing at optimum capacity by always eating” sounds good in principle, but reality tells a different story.
2) When you eat smaller meals, you might be less likely to overeat during your regular meals. I can definitely see some truth here, especially for people who struggle with portion control or don’t know how much food they should be eating.
However, once you educate yourself and take control of your eating, some might find that eating six times a day is very prohibitive and requires a lot of effort. I know I do.
Also, because you’re eating six small meals, I’d argue that you probably never feel “full,” and you might be MORE likely to eat extra calories during each snack.
Although grounded in seemingly logical principles, the “six meals a day” doesn’t work for the reason you think it would (#1), and generally only works for people who struggle with portion control (#2).
If we think back to caveman days, we’d have been in serious trouble as a species if we had to eat every three hours. Do you think Joe Caveman pulled out his pocket sundial six times a day to consume his equally portioned meals?
Hell no! He ate when he could, endured and dealt with long periods of NOT eating (no refrigeration or food storage) and his body adapted to still function optimally enough to still go out and catch new food.
A recent study (written about in the NYT, highlighted by LeanGains) has done a great job of challenging the “six-meals-a-day” technique for weight loss [11]:
There were [no statistical] differences between the low- and high- [meal frequency] groups for adiposity indices, appetite measurements or gut peptides (peptide YY and ghrelin) either before or after the intervention. We conclude that increasing meal frequency does not promote greater body weight loss under the conditions described in the present study.
That’s why we made this:
Should I Try intermittent fasting? (6 Things to Consider)
Now that we’re through a lot of the science stuff, let’s get into the reality of the situation: why should you consider Intermittent Fasting?
When you fast, you are also making it easier to restrict your total caloric intake over the course of the week, which can lead to consistent weight loss and maintenance.
#2) Because it simplifies your day. Rather than having to prepare, pack, eat, and time your meals every 2-3 hours, you simply skip a meal or two and only worry about eating food in your eating window.
It’s one less decision you have to make every day.
It could allow you to enjoy bigger portioned meals (thus making your tastebuds and stomach satiated) and STILL eat fewer calories on average.
It’s a point that Coach Matt makes in this video on intermittent fasting:
#3) It requires less time (and potentially less money). Rather than having to prepare or purchase three to six meals a day, you only need to prepare two meals.
Instead of stopping what you’re doing six times a day to eat, you simply only have to stop to eat twice. Rather than having to do the dishes six times, you only have to do them twice.
Rather than having to purchase six meals a day, you only need to purchase two.
#4) It promotes stronger insulin sensitivity and increased growth hormone secretion, two keys for weight loss and muscle gain. Intermittent fasting helps you create a double whammy for weight loss and building a solid physique.
#5) It can level up your brain, including positively counteracting conditions like Parkinson’s, Alzheimer’s, and dementia.
As explained here in this TEDx talk by Mark Mattson, Professor at Johns Hopkins University and Chief of the Laboratory of Neurosciences at the National Institute on Aging, fasting is grounded in serious research and more studies are coming out showing the benefits:
#6) Plus, Wolverine does it:
If adamantium-clawed superheroes do Intermittent Fasting, it can probably work for you too, if you can make it work for your particular lifestyle and situation!
If you’ve tried implementing something like this in the past and not had success, I hear ya!
That was the specific problem we set out to solve when we created Nerd Fitness Journey, our fun habit-building app. The tasks and missions we assign are small – like drinking a glass of water or taking a 5-minute walk – so the steps you take won’t be too scary.
You can try out the app (including our Intermittent Fasting missions) for free right here:
What Are the Negative Effects of intermittent fasting?
In my own experimentation with Intermittent Fasting since 2014, I have found very few negative side effects with Intermittent Fasting.
The biggest concern most people have is that Intermittent Fasting will lead to lower energy, focus, and the “holy crap I am hungry” feeling during the fasting period and ruin them.
People are concerned that they will spend all morning being miserable because they haven’t consumed any food, and thus will be miserable at work and ineffective at whatever task it is they are working on.
The following are my thoughts and experiences, and your results may vary:
Yes, the initial transition from EATING ALL THE TIME, to intermittent fasting MIGHT be a bit of a jolt to your system; it was for me.
However, once I got through the transition after a few days, my body quickly adapted and learned to function just as well only eating a few times a day.
Although I fast for 16 hours per day with no issues, the following might help assuage your fears that skipping breakfast will cause your body to eat itself and your brain to implode:
After 48 hours of fasting in a recent study[12], “cognitive performance, activity, sleep, and mood are not adversely affected in healthy humans by two days of calorie-deprivation.” You’ll be fasting for far less time than that.
“So why do I feel grouchy and lethargic when I skip breakfast?”
In this nerd’s humble opinion, a good portion of the grumpiness is a result of past eating habits. If you eat every three hours normally, and normally eat as soon as you wake up, your body will start to get hungry every three hours as it is now used to consuming food every three hours.
If you eat breakfast every morning, your body expects to wake up and eat food.
Once you retrain your body to NOT expect food all day every day (or first thing in the morning), these side-effects become less of an issue. In addition, ghrelin (a hormone that makes you hungry [13]), is actually lowest in the mornings and decreases after a few hours of not eating too. The hunger pains will naturally pass!
Personally, I found this grumpiness subsided after a few days and now my mornings actually energize me.
It’s important to understand that Intermittent Fasting is NOT a cure-all panacea. Don’t delude yourself into thinking that if you skip breakfast and then eat 4,000 calories of candy bars for lunch and dinner that you will lose weight.
If you have an addictive relationship with food and you struggle with portion control, figure out your calorie goals and track your calorie intake in your meals to make sure you’re not overeating.
If you skip breakfast, you might be so hungry from this that you OVEREAT for lunch and this can lead to weight gain. Again, the important thing here is that with an intermittent fasting plan, you’re eating fewer calories than normal because you’re skipping a meal every day.
Think about it in caveman terms again. We certainly found ways to survive during periods of feast and famine, and that remains true today. Imagine if you needed to eat in order to be active and alert: what would hungry cavemen do?
They would go find food, and that probably required a ton of effort. It actually takes our bodies about 84 hours of fasting [14] before our glucose levels are adversely affected. As we’re talking about small fasts (16-24 hour periods), this doesn’t concern us.
AN IMPORTANT CAVEAT:Intermittent Fasting can be more complex for people who have issues with blood sugar regulation, suffer from hypoglycemia, have diabetes, etc. If you fit into this category, check with your doctor or dietitian before adjusting your eating schedule. It also affects women differently (there’s a whole section dedicated to that here).
Can I Build Muscle and Gain Weight While Intermittent Fasting?
I still eat roughly the same number of calories I was consuming before, but instead of eating all damn day long, I condense all of my calorie consumption into an eight-hour window.
11 AM Work out with heavy strength training in a fasted state.
7 PM Consume the second portion of my calories for the day in a big dinner.
8 PM – 12 PM the next day: Fast for 16 hours.
In a different method, my friend Nate Green packed on a crazy amount of muscle while fasting for a full 24 hours on Sundays – so it is possible. [15]
I’m not kidding when I say this has revolutionized how I look at muscle building and fat loss.
Ultimately, this method flies in the face of the typical “bulk and cut” techniques of overeating to build muscle (along with adding a lot of fat) before cutting calories to lose fat (along with some muscle) and settling down at a higher weight.
I prefer this method to the bulk-and-cut technique for a few reasons:
There’s far less of a crazy swing to your weight. If you are putting on 30 pounds and then cutting 25 to gain 5 lbs of muscle, your body is going through drastic swings of body mass. Your clothes will fit differently, you’ll have different levels of definition, and your body will wonder what the hell is going on.
You’re consuming less food and thus spending less money. Rather than overeating to put on 1 pound of muscle and 4 pounds of fat in a week or two, you’re aiming to eat exactly enough to put on 1 pound of muscle without adding much fat on top of it. Yeah, it’s a delicate balance, but there’s far less swing involved. You are just slowly, steadily, and consistently building muscle and strength over many months.
There’s never a need to get “vacation-ready”: we all want to look good naked, right? When you are just adding muscle, you don’t need to worry about getting your body ready before by drastically altering your diet (avoiding a miserable crash diet like the Military Diet). [16]
You can make small adjustments and stay on target. Keep your body fat percentage low, build strength and muscle, and if you happen to notice your body fat creeping up, cut back on the carbs. Within two weeks you should be back at your preferred body fat percentage and can continue the muscle-building process.
A note on BCAA consumption. Martin from LeanGains [17] recommends consuming Branched Chain Amino Acids (BCAA’s) as a supplement with regards to fasted training to aid your muscles through your workout.
Personally, I used BCAAs for about 6-8 months during my initial start with fasted training (consuming them before training), though haven’t used them in the past 2+ years. I didn’t notice any adverse effects to not taking them with regard to my performance. Your value may vary!
Now, it should go without saying that if you want to build muscle while fasting, you need to work out. Specifically, by lifting heavy.
If you want help building a workout routine designed to create muscle, I have 3 options:
#1) “Build Your Own Workout Routine” and get your hands dirty. Our guide will walk you through building a full-body exercise program in 10 simple steps.
#3) Try the workouts in our fun habit-building app, Nerd Fitness Journey!
NF Journey will guide you through a workout routine that can be done anywhere, all while creating your very own superhero! No guesswork needed, just follow the progression plan laid out in the app and grow strong!
You can give it a free test drive right here:
Should You Do Intermittent Fasting and the Keto Diet?
By only eating fat and protein, your body must adapt to run on fat for fuel instead of carbohydrates. In the absence of carbs/glucose, your body converts fats to ketones and uses them for fuel.
This process is called “ketosis,” and there are two ways for a body to enter ketosis:
Eating in a way that induces ketosis (very low carb, high fat).
Fasting…Hey, that’s what you’re reading about right now!
We actually have an amazing success story here on Nerd Fitness, Larry, who followed our strategies, went Keto and start intermittent fasting. He ended up losing weight, getting stronger, AND overcame the challenges of rheumatoid arthritis (click on the image for his story)!
Here’s how the fasting portion of it works:
As your body enters a fast period when there are no sources of glucose energy readily available, the liver begins the process of breaking down fat into ketones.
Fasting itself can trigger ketosis.
Fasting for a period of time before kicking off a Keto-friendly eating plan COULD speed your transition into the metabolic state of ketosis, and fasting intermittently while in ketosis could help you maintain that state.
I personally love fasting for the simplicity: I skip breakfast every day and train in a fasted state. It’s one less decision I have to make, it’s one less opportunity to make a bad food choice, and it helps me reach my goals.
WHY KETO + IF WORKS = eating Keto can be really challenging. And every time you eat, it’s an opportunity to do it wrong and accidentally eat foods that knock you out of ketosis.
You’re also tempted to overeat.
So, by skipping a meal, you’re eliminating one meal, one decision, one chance to screw up.
Note: if you’re thinking “Steve, am I losing weight because I’m skipping 1/3rd of my meals for the day, AND eliminating an entire macronutrient?”, then you’d be right.
Both Keto and IF have secondary effects that could also be factoring in – physiological benefits which I explain in both articles.
Your value may vary!
You need to decide what works for you.
You probably won’t become “keto-adapted” (your body running on ketones) just skipping breakfast every day – your body will still have enough glucose stored from your carb-focused meals for lunch and dinner the day before.
In order to use fasting to enter ketosis, the fast needs to be long enough to deplete your carb/glucose stores, or you need to severely restrict carbohydrates from your meals in addition to IF in order to enter ketosis.
MORAL OF THE STORY: Experiment and try different strategies that will work for you.
By skipping a meal or minimizing carbohydrate intake, you’re more likely than not to lose weight:
You can do intermittent fasting without eating a Keto Diet and lose weight.
You can do a Keto Diet without intermittent Fasting and lose weight.
That’s actually why we designed Nerd Fitness Journey to be a step-by-step progression plan. Our nutrition adventure won’t have you abandoning all carbs on Day 1 (which probably won’t work), but instead will have you create small habits that you can follow permanently.
If this sounds like a winning strategy for you, check out our free trial of the app right here:
Does Intermittent Fasting Have Different Effects on Men and Women?
The quick answer is: “yes, Intermittent Fasting can affect men and women differently.”
Anecdotally, we have many women in our online coaching program that swear by Intermittent Fasting, while others have had adverse effects.
Let’s dig into the science and studies.
A recent PubMed summary concluded that “fasting can be prescribed as a safe medical intervention as well as a lifestyle regimen which can improve women’s health in many folds [18].
Now, in that extract, many of the studies cited are focused on specifically calorie restriction (and not just fasting), and they also say that “future studies should address this gap by designing medically supervised fasting techniques to extract better evidence.”
Digging into the PubMed Archives brought me to the following conclusions [19]:
One small study (with 8 men and 8 women, all non-obese) resulted in the following: “Glucose response to a meal was slightly impaired in women after 3 weeks of treatment, but insulin response was unchanged. Men had no change in glucose response and a significant reduction in insulin response.”[20]
Another small study (8 women) studied the effects on their menstrual cycles after a 72 hour fast – which is significantly longer than any fast recommended in this article: “in spite of profound metabolic changes, a 72-hour fast during the follicular phase does not affect the menstrual cycle of normal cycling women.” [21].
Yet another study tracked 11 women with 72 hour fasts (again, longer than we’d recommend) and it found that “Fasting in women elicited expected metabolic responses – included increased cortisol (a stress hormone) – and apparently advanced the central circadian clock (which can throw off sleeping patterns). [22]
Those studies above, in working with small sample sizes, and different types of fasting than recommended here, would lead me to believe that fasting affects men and women differently, and that many of the weight loss benefits associated with intermittent fasting (that affect insulin and glucose responses) work positively for men and negatively for women.
There are also a series of articles[23] out there that dig into the potential reproductive health issues, stress challenges, induction of early-menopause [24] associated with fasting (and calorie restriction) for women.
Precision Nutrition – a great resource – recommends not attempting Intermittent Fasting as a woman if:
The challenge associated with all of this is that there aren’t enough long-term studies, with large enough sample sizes, specifically targeting female humans, with relation to the different types of Intermittent Fasting.
ALL OF THIS TO SAY: It does appear that men and women will have different experiences with intermittent fasting; we’re all unique snowflakes (yep, especially you), and your body will be affected by intermittent fasting differently than the person next to you.
There is enough evidence as cited in the articles and studies above that would give me pause to recommend Intermittent Fasting for women, especially if you are considering getting pregnant in the near term.
If you are looking to attempt fasting for weight loss reasons, my research has shown me that Intermittent Fasting could be less effective for women than men with regards to weight loss, and thus you would be wise to keep your efforts elsewhere:
Now, if you’ve read the above warnings, you are still curious about Intermittent Fasting, and you want to give it a try as a female, that is your choice!
You know your body best.
So, get blood work done, speak with your doctor and get a check-up.
Give intermittent fasting a shot, track your results, and see how your body/blood work changes as a result of Intermittent Fasting and decide if it’s right for you.
Your mileage may vary, so speak with a doctor or find a doctor versed in intermittent fasting plans and treat it like an experiment on yourself!
Top 6 Questions about Intermittent Fasting
1) “Won’t I get really hungry if I start skipping meals?”
As explained above, this can be a result of the habits you have built for your body. If you are constantly eating or always eat the same time of day, your body can actually learn to prepare itself for food by beginning the process of insulin production and preparation for food.
After a brief adjustment period, your body can adapt to the fact that it’s only eating a few times a day. The more overweight you are, and the more often you eat, the more of an initial struggle this might be.
Remember, your body’s physical and cognitive abilities most likely won’t be diminished as a result of short-term fasting.[25]
2) “Where will I get my energy for my workouts? Won’t I be exhausted and not be able to complete my workouts if fasting?”
This was a major concern of mine as well, but the research shows this might not be the case: “Training with limited carbohydrate availability can stimulate adaptations in muscle cells to facilitate energy production via fat oxidation.”[26]
In other words, when you train in a fasted state, your body can get better at burning fat for energy when there are no carbs to pull from!
3) “I like the idea of fasted training, but I work a regular 9-5 or a night shift and can’t train at 11AM as you do. What am I supposed to do?”
Depending on your training schedule, lifestyle, and goals, go back to the portion above where I talk about the 16/8 protocol and simply adjust your hours of fasting and feasting.
Don’t overthink this. If you can’t train until 5pm, that’s okay. Consume a small meal for lunch, or shift your Intermittent Fasting window to eat all of your meals in the 8 hours post-workout. Better to do that than abandon it as a lost cause and have 0% compliance.
If you are an elite athlete, speak with a coach or nutritionist about your specific concerns and expectations. Otherwise, make intermittent fasting work for you Consider trying the 24-hour protocol below instead of the 16/8 protocol.
If you train later in the day (say, 7pm) but break your fast before training (aka Lunch), make it a smaller meal focused around fats and protein – which should be a solid goal even if you aren’t Intermittent Fasting! Try to time your carb and big meal consumption to happen AFTER your workout.
If you exercise BEFORE work, but then don’t eat until lunchtime: consider a protein supplement immediately after your workout, or simply wait until lunch to start eating. See how your body responds and adjust accordingly.
Do what you can, and don’t psyche yourself out! Get started and adjust along the way.
4) “Won’t fasting cause muscle loss?”
We’ve been told by the supplement industry that we need to consume 30 g of protein every few hours, as that’s the most amount of protein our body can process at a time.
Along with that, we’ve been told that if we don’t eat protein every few hours, our body’s muscle will start to break down to be burned as energy.
Again, NOT TRUE! Our bodies are quite adept at preserving muscle even when fasting [27], and it turns out that protein absorption by our body can take place over many many many hours.
Protein consumed in a shorter period of time has no difference on the body compared to protein spread throughout the day.
5) “What about my body going into starvation mode from not eating?”
Now, the thought process here is that when we don’t feed ourselves, our bodies assume calories aren’t available and thus choose to store more calories as opposed to burning them, therefore eliminating the benefits of weight loss with fasting.
Fortunately, this is NOT true.
Starvation mode is significantly overblown and sensationalized these days. It takes a dramatic amount of starvation, for a long, long, long time, before your body kicks into “starvation mode”. We’re talking about 24-hour or 16-hour fasts here, and starvation mode takes significantly longer than that.[28]
In other words: starvation mode should not be factoring into your decision here.
5) How much should I eat while intermittent fasting?
If your goal is weight loss, you still need to consume fewer calories than you burn every day to lose weight. If your goal is bulking up, you’ll need to consume more calories than you burn every day. Intermittent Fasting isn’t a cure-all, it’s a PART of the puzzle.
To start, begin intermittent fasting and eat your normal sized meals and track your weight and performance. If you are losing weight and happy with the progress, keep doing what you’re doing! If you are NOT losing weight, you could be eating too much. It’s a message I really strike home in our guide “Why Can’t I Lose Weight?”
Lastly, if you want a plan for slowly “wading into the water” calorie restriction, check out our new app!
Nerd Fitness Journey has missions where you tally the calories you normally eat, keep a food journal, and plan your next meal. We do all of this BEFORE we recommend even taking any food off your plate.
To learn more on why, start your free trial right here:
8 Tips and Tricks about Fasting
#1) Don’t freak out! Stop wondering: “can I fast 15 hours instead of 16?” or “what if I eat an apple during my fasted period, will that ruin everything?” Relax. Your body is a complex piece of machinery and learns to adapt. Everything is not as cut and dry as you think.
If you want to eat breakfast one day but not another, that’s okay. If you are going for optimal aesthetic or athletic performance, I can see the need to be more rigid in your discipline, but otherwise…freaking chill out and don’t stress over minutiae!
Don’t let perfect be the enemy of good when it comes to your intermittent fasting plan.
#2) Consider fasted walks in the morning. I found these to be very helpful in reducing body fat, and also gave my day a great start to clear my mind and prepare for the day.
Simply wake up and go for a mile walk. Maybe you could even start walking to Mordor?
#3) Listen to your body during your strength training workouts. If you get lightheaded, make sure you are consuming enough water.
If you notice a significant drop in performance, make sure you are eating enough calories (especially fats and protein) during your feasting window.
And if you feel severely “off,” pause your workout. Give yourself permission to EASE into intermittent fasting and fasted workouts. This is especially true if you are an endurance athlete.
#4) Expect funny looks if you spend a lot of mornings with breakfast eaters.
A few weeks back I had a number of friends staying with me, and they were all completely dumbfounded when I told them I didn’t eat breakfast anymore.
I tried to explain it to them but received a bunch of blank stares. Breakfast has become so enGRAINed (zing!) in our culture that NOT eating it sounds crazy.
You will get weird looks from those around you…embrace it. I still go to brunch or sit with friends, I just drink black coffee and enjoy a conversation.
#5) Stay busy. If you are just sitting around thinking about how hungry you are, you’ll be more likely to struggle with this. For that reason, I time my fasting periods for maximum efficiency and minimal discomfort:
My first few hours of fasting come after consuming a MONSTER dinner, where the last thing I want to think about is eating.
When I’m sleeping: 8 of my 16 hours are occupied by sleeping. Tough to feel hungry when I’m dreaming about becoming a Jedi.
When I’m busy: After waking up, 12 hours of my fasting is already done. I spend three hours doing my best work (while drinking a cup of black coffee), and then comes my final hour of fasting: training.
#6) Zero-calorie beverages are okay. I drink green tea in the morning for my caffeine kick while writing. If you want to drink water, black coffee, or tea during your fasted period, that’s okay. Remember, don’t overthink it – keep things simple! Although be aware that Dr. Rhonda Patrick over at FoundMyFitness believes that a fast should stop at the first consumption of anything other than water, so experiment yourself and see how your body responds.
If you want to put milk in your coffee, or drink diet soda occasionally while fasting, I’m not going to stop you. Remember, we’re going for consistency and habit-building here – if milk or cream in your coffee makes life worth living, don’t deprive yourself.
There are MUCH bigger fish to fry with regards to getting healthy than a few calories here and there during a fast.
80% adherence that you stick with for a year is better than 100% adherence that you abandon after a month because it was too restrictive.
If you’re trying to get to a minimum bodyfat percentage, you’ll need to be more strict – until then, however, do what allows you to stay compliant!
Track your calories, and see how your body changes when eating the same amount of food, but condensed into a certain window.
Sign up for Nerd Fitness Journey, where the Intermittent Fasting Adventure will help you track your compliance with skipping meals:
#8) Don’t expect miracles. Yes, Intermittent Fasting can potentially help you lose weight, increase insulin sensitivity and growth hormone secretion (all good things), but it is only ONE factor in hundreds that will determine your body composition and overall health. Don’t expect to drop to 8% body fat and get ripped just by skipping breakfast.
This is just one tool that can contribute to your success.
Getting Started with Intermittent Fasting: Next Steps
Intermittent fasting can potentially have some very positive benefits for somebody trying to lose weight or gain lean body mass.
Men and women will tend to have different results, just like each individual person will have different results. The ONLY way to find out is through a conversation with your doctor and self-experimentation.
There are multiple ways to “do” an Intermittent Fasting Plan:
Fast and feast regularly: Fast for a certain number of hours, then consume all calories within a certain number of hours.
Eat normally, then fast 1-2x a week: Consume your normal meals every day, then pick one or two days a week where you fast for 24 hours. Eat your last meal Sunday night, and then don’t eat again until dinner the following day.
Fast occasionally: probably the easiest method for the person who wants to do the least amount of work. Simply skip a meal whenever it’s convenient. On the road? Skip breakfast. Busy day at work? Skip lunch. Eat poorly all day Saturday? Make your first meal of the day dinner on Sunday.
After that, get started! Take photos, step on the scale, and track your progress for the next month.
See how your body responds.
See how your physique changes. See how your workouts change.
And then decide if it’s something you want to keep doing!
4 years later, I have no plans on going back to eating breakfast. Sorry General Mills and Dr. Kellogg!
If you’re worried about all of this stuff, or aren’t sure when to eat and stop eating, try out our new app!
The Intermittent Fasting Adventure within Nerd Fitness Journey was specifically designed for a beginner who is interested in experimenting with fasting.
Plus, if you learn fasting isn’t for you, you can follow along with other nutrition adventures for sustainable paths for weight loss.
You can try it for free right here:
But enough about me, let’s talk about you!
I’d love to hear what questions you have!
What are your questions about intermittent fasting?
What are your concerns?
Have you tried intermittent fasting?
Have you had success with it, either with muscle gain or weight loss?
Thanks for leaving your comment, I’m excited to get the conversation started.
-Steve
PS: Before you take off, grab our Intermittent Fasting Worksheet to help you start your fasting practice:
Download a free intermittent fasting guide and worksheet!
Complete outline of the Intermittent Fasting Protocol
Worksheets for tracking when you eat and how long you fasted
PPS: Make sure you check out the rest of our guides on losing weight:
CAVEAT: I’m a dude and can only speak from anecdotal evidence in speaking with women who have done IF, parsing studies, and trying to draw some conclusions that will help you make a decision
Glucose tolerance when doing alternate day fasting: study
Short-term fasting in normal women: absence of effects on gonadotrophin secretion and the menstrual cycle: PubMed Extract
Endocrine and chronobiological effects of fasting in women: Abstract
Do you find your grip a limiting factor in the gym (I see you chin-ups and deadlifts)?
Or in everyday life (looking at you, pickle jars)?
If so, don’t worry! We’ve got a handle on this (pun 100% intended).
As the lead trainer of our 1-on-1 Online Coaching Program, I’m going to outline a number of helpful, handy (sigh) stretches and exercises to help eliminate pain and build you some powerful, useful hands and a strong grip.
Now, it goes without saying that the hands and forearms are anatomically complicated areas.
I am also not your mother, or your doctor. If anything in the article below causes pain, or your pain is not alleviated by these stretches – call in the pros!
See a physical therapist or sports massage practitioner.
Why Grip Strength And WRist Mobility Is So Important: Basic Holds.
We use our hands for EVERYTHING.
Whether it’s everyday tasks like carrying groceries, opening jars, and lifting suitcases, or gym-related activities like chin-ups, rows, and deadlifts.
Of course, you probably also type at your computer for hours – with resulting aches and pains at the end of the workday.
Guess what?
Stretching out the hands and building up a strong grip can help in all of those areas.
A strong grip has even been correlated to lower mortality rates – and you can also imagine the usefulness of a stronger grip for aging individuals if they happen to slip.
Our point is that it’s always better to have a stronger grip!
This is a favorite area of expertise for me. I’ve worked my grip for years and years, and have even won some grip competitions:
In fact, I’m currently typing this one-handed while squeezing coal into diamonds with my other hand.
Not really, but I promise my grip strength is above average.
SO WHERE TO START?
The hands are complex, and training them can seem just as complicated.
We’ll simplify matters a bit and you can categorize the grip exercises into the following general types:
#1) CRUSH
This is what you probably think of when you think of a “strong grip”. This is the whole hand closing in around something. A strong handshake. None of that dead-fish handshake stuff!
#2) PINCH
Think of making an alligator mouth with your hands, and chomping down. In this grip, there tends to be a lot more work/stress on the thumb. This is important to work, as the thumb is a vital part of a strong grip!
#3) SUPPORT
This is similar to crush, but rather than the ability to close, this type of grip tests the ability to hold.
#4) EXTENSION
Every action has an opposite reaction, right? This type of grip work is all about strengthening the opposing muscles. We were built to grab and hold onto things, so these muscles will not be as strong.
Wrist movement and wrist stability are the focus here. In order to be able to transfer energy from the body through the hands (for opening those pickle jars) we need to make sure every link in the chain is strong.
PUTTING IT ALL TOGETHER
When putting together a grip routine of your own, it’s a good idea to cycle through these different types of grips over the course of the week, in order to work different muscles and different angles.
If you have to pick just a few, I’d put my money on stretches, crushing, and extension to get your hands strong and keep them healthy!
Before we go further, I want to mention that if you’re improving your grip as part of a strength training practice, you’ve come to the right place! We have a free guide Strength Training 101: Everything You Need to Know, that will walk you through every aspect of building muscle and growing stronger. Want in?
Grab it for free when you join the Rebellion (that’s us!) below:
Download our comprehensive guideSTRENGTH TRAINING 101!
Everything you need to know about getting strong.
Workout routines for bodyweight AND weight training.
How to find the right gym and train properly in one.
How to Improve Your Grip Strength and Mobility Quickly.
Here are the best exercises you can do to strengthen your grip quickly:
Dumbbell head grab: Put a dumbbell on its end and pick it up by the head. Could anything replicate a pickle jar more? Be careful with this exercise if the dumbbell is too big, as the thumb can easily be strained if it’s stretched too far. Hold for time (~30 seconds) or go for heavier weight.
Farmer’s walks: Grab a pair of heavy dumbbells (heavy for you) and walk around! Don’t have space to walk? Just stand there! 30 seconds minimum!
Plate curls: A wrist strengthener that works the biceps too! Anything past 25 lbs becomes insanely hard. ~10 repetitions. Watch the face!!
Plate pinches: If you’ve got a pair of smooth metal plates, you can sandwich them together with the smooth side out. You can also use thick bumper plates. Pick them up with one or two hands and hold for time (~30 seconds) or go for heavier weight. World class grip athletes can pick up a pair of 45 lb plates with one hand!
Barbell finger rolls: How to work the crushing grip without grippers. You can use an empty bar or load up some weight. Get the bar to your fingertips, then squeeze and crush! ~10 repetitions.
Towel chin-ups: Regular chin-ups too easy? Throw a pair of gym towels over the bar and challenge that grip. A great exercise to prepare for rope climbing!
Next, let’s talk about some stretches and exercises to perform at the gym.
#1) STRETCHES AT THE GYM
The only addition I have to your stretching routine that can be done at the gym is banded wrist stretches. The addition of the band can help open up your wrist joint a bit more. The band should be pulling in the opposite direction of the stretch (fingers face one way, band pulls the other way).
10-15 repetitions.
#2) EXERCISES AT THE GYM
While we recommend picking up some grippers as specialized grip equipment, there are TONS of options to work the grip at the gym with existing equipment! This is certainly not an exhaustive list, but should give you plenty of ideas.
The one warning I give for any of these exercises is WATCH YOUR TOES. The grip can give out fast and unexpectedly, so we don’t want to crush any little piggies!
This list is certainly not exhaustive, but it’ll get you started!
Other Easy-Grip Exercises to Integrate:
Bar hang: Simply hanging from the bar or gymnastic rings will build up your grip strength! If you can’t hang freely, put your feet on the ground for an assist. Couldn’t be simpler! Work up to one minute or more!
Wrist curls/Reverse wrist curls: What many may think of when they think of “grip strength” exercises. Not bad for some wrist strength. ~10 repetitions. Pictured – Left: Wrist curls, Right: Reverse wrist curls.
Barbell levering: We’re getting into crazy town with this one. An unbelievable wrist exercise that is not for the beginner. Grab the bar with one hand, off-center, and lift it to parallel. You can lift to the front and the back. I would also recommend using a 15 lb/5 kg bar, or one of those lighter “bodypump” bars for this. The leverage is crazy! This can also be done at a faster pace with PVC pipe.
Things can get really crazy when you start combining exercises…Plate pinch farmer’s walks with bumper plates, anyone?
…and speaking of NF Coaching, if you’re worried that your grip strength is holding back your training, we can help!
Our certified coaches can do an assessment, design a program to increase your grip and overall strength, and provide support and accountability. It’s kind of like having a coach in your pocket (not literally – via an app).
Plus, our coaching app lets you record and send a video of your movement directly to your coach, so you can take comfort knowing you’re training correctly:
How To Improve Grip Strength and Mobility At The Office.
Alright, you’re ready to jump into grip strength training!
I’ve outlined a number of stretches and exercises for you to do, no matter where you are and what equipment you have. Skim over and see what you can add to your daily mix or gym training!
#1) STRETCHES AT YOUR DESK
You might be reading this while sitting at your computer right now.
We put a LOT of stress on our hands and wrists over the course of a day, so take the time to take care of these hard workers!
Below is a quick and dirty stretch routine, just three moves. This is good for a warm-up or just for overall hand health. We spend a lot of the day at our computer with our elbows bent and our hands in a pronated position (palms turned down), therefore stretches with our elbows extended and hands supinated (palms turned up) is a good idea.
The stretches from the video:
Fingers back, palms on desk: You can stretch straight backwards, or rock gently left to right. 10-15 repetitions.
Finger back, palms lifted off desk: You can lift the palms and get a bit more stretch through the fingers and first knuckle. Again, stretch straight backwards, or rock gently left to right. 10-15 repetitions.
Fists together, back of hands on desk: Make two fists, with the thumbs on the outside of your fingers. Bend your elbows and put the knuckles together like two cogs in a machine. Bend your elbows and put the back of your hands fully on the desk. Keep your fists together (this will be tough) and fists tightly closed (this will also be tough) as you bend and flex your elbows. 10-15 repetitions.
Give it a shot, I bet your hands feel noticeably different (and better) afterward.
If you have additional time, the first two stretches can also be done with your fingers forward!
You can also stretch the thumbs out on the desk. Moving into and out of the stretch shown below. You may be surprised how good this feels if you’ve never done it before. Again, 10-15 repetitions.
A final stretch, if you have the time between updating Excel and checking Facebook for the 100th time (I kid, I kid), is stretching your wrists in the direction of your thumb.
If you think about how your hands are often oriented on your keyboard, you’ll see that they are often bend toward your pinky.
So let’s stretch them in the opposite way! Make like you’re about to karate chop someone with one hand. With the other hand, grab the chopping hand and pull it sideways in the direction of your thumb.
Going gently into and out of this stretch for 10-15 repetitions. It may not feel as intense as the previous stretches, but it will still help.
This is certainly not an exhaustive list of hand and wrist stretches, but it should give you plenty to work with!
#2) EXERCISES AT YOUR DESK
Do you know there’s already an excellent piece of grip-strengthening equipment present in many offices? What is that?
The rubber band!
Snag one off that rubber band ball in your desk and do these simple rubber band extensions:
If one band gets too easy, put two or more on! This is a super easy exercise to do while you’re on a phone call or that conference call (that you’re not paying attention to anyway) that gets the blood moving through the hands and helps balance out your vice-grip like hands.
Another grip exercise that can easily be done at your desk is closing grippers. Now, this does require an investment (~$20/gripper), but you’ll find that these grippers last FOREVER (I still use some grippers that are over a decade and half old!)
Consider the following when making your gripper purchase:
If you are just starting out with your grip, I would look at the Guide and/or the Sport (60lb and 80lb respectively).
If you have a bit of strength, the Sport and/or the Trainer is the way to go (80lb and 100lb).
If you can close the Guide, you’ve got a pretty solid grip. If you can close the Sport, you have way above average grip strength, in my experience.
A fun bonus with these grippers at your desk is that EVERYONE who sees them will try and pick them up and close them. Great way to start a conversation with your coworkers!
You may be thinking, “eh, I’ve already got a gripper I bought from the store”. I’ll tell you that the strength in that gripper is probably minuscule compared to Ironmind’s. Time to upgrade!
You may also be thinking, “eh, I’ve got a tennis ball/stress ball that I can keep by my desk and crush”. Both of those might be better than nothing, but not by much. The grippers will allow smoother movement and quantifiable progress. Did I mention they’re just $20 a pop?
“Jim, I can’t wait. I want to work my grip NOW.” Ok, ok, grab the biggest, heaviest book in the office you have. Grab it in that pinch grip position (fingers on one side, thumb on the other). This may be easy, if so, then “walk the book” in your hand by moving your fingers up and down the spine while you hold it in mid-air. Do this for several trips. Tough!
How to Improve your Grip Strength and Wrist Mobility At Home.
If you work out at home, there are still a few things you can do.
Bar hang: A home chin-up bar is one of the most useful pieces of equipment to have. Just like the gym version, you can put your feet on the ground to assist. Work up to one minute!
Grocery bag farmer’s walks: What’s better than taking only one trip to bring your groceries inside? Absolutely nothing. You can use those tough, reusable bags and load them up with anything. Stand in place or walk around the neighborhood.
Sledgehammer/Barbell/heavy bar levering: As with the barbell levering at the gym, this is a tough exercise and should be approached slowly. Grab closer to the sledgehammer head to make it easy, farther to make it tough.
Get Started With Rings And Handstands, Level Up Your Grip!
No (wo)man is an island, and no exercise exists in complete isolation. These grip exercises are a blast, but we hope you can also use them to help strengthen a deadlift, or work toward your first chin-up.
There are also various bodyweight exercises that will help strengthen your upper body AND build your grip strength at the same time.
#1) THE FALSE GRIP HANG
For example, here is a video from our rings course in Nerd Fitness Prime on doing a false-grip hang – and then doing scapular retractions. This is a killer grip strength exercise:
The false grip is an incredibly challenging grip variation that one must learn to build up to a muscle-up (a pull-up that transitions into a dip). Just like before, you can put your feet on the ground to assist this exercise.
#2) CROW POSE
Here’s a video of an exercise that builds up grip and wrist strength, pulled from Nerd Fitness Prime (which contains a course on doing handstands):
A staple of yoga classes everywhere, though we’ll be focusing on it for a different reason than a yogi might. We’re using this exercise as a foundational exercise to build up into the handstand. You won’t believe how much grip strength is involved in the crow pose until you are digging your fingers into the ground!
A Strong Grip Is Always Helpful!
It’s been said, “There’s never been a strong man (or woman) with weak hands.”
We’d have to agree wholeheartedly. There is never going to be a point in life where you say “Boy, my grip was too strong!”.
You might have some questions about how to mix these exercises in with your normal routine, or how you can use these things to improve your lifts safely and without injury. Or maybe all of the above just overwhelmed the heck out of you and you’re trying to make sense of it all.
If that sounds like you, you’re in the right place.
I’m the lead trainer of the 1-on-1 NF Coaching Program, where we help busy, normal people like yourself build muscle, lose weight, and level up their lives!.
You can learn more about our coaching program by clicking on the image below and scheduling a call with us to see if we’re a good fit!
You have a pair of incredibly useful tools at arm’s length, might as well make the most of them!
We hope you now have a handle on things (have to bring it back full circle). Go out and get a grip!
Leave any questions you have on grip strength or wrist mobility below in the comments.
-Jim
PS: What should you do after you improve your grip and wrist strength? Get started on doing muscle-ups and downward dogs, which you can learn all from our new app!
Also, if you’re in a hurry, we’ve compiled all our strength and weight training content into one handy guide called (appropriately): Strength Training 101: Everything You Need to Know.
Grab it for free when you join the Rebellion (that’s us!) below:
Download our comprehensive guideSTRENGTH TRAINING 101!
Everything you need to know about getting strong.
Workout routines for bodyweight AND weight training.
How to find the right gym and train properly in one.
Alright, cue the music. Let’s do this thang.
What are Compound Exercises?
Let’s compare “compound exercises” to “isolation exercises”:
Compound exercises require more than one muscle group working together to complete the movement. This replicates the way your body naturally moves.
Isolation exercises more or less train one specific muscle group. For example, the leg extension machine focuses on your quads, so it “isolates” training that muscle.
Front squats would be an example of a compound exercise, because it engages your entire lower body and core, and quite a bit of your upper body too, as you perform the movement:
As opposed to biceps curls, which more or less just trains your biceps:
As we explain in our Guide to Functional Fitness, whenever possible you want to focus on compound exercises.
Why?
Because in everyday life, you don’t use your muscles in isolation!
When you’re placing luggage in the overhead bin, hoisting a bag of dog food from the floor, or hauling your kid to bed, you’re using your muscle groups together.
Just like you would with a compound exercise.
Plus, since you’re using multiple muscle groups at once, you’re taxing your body more when training. This can provide more efficient use of your time in the gym.
In other words, why do three different exercises when you can just do one?
Now that we’ve got that out of the way, let’s get to working out.
The squat exercise serves a dual purpose – it is the foundation for building strength AND helps build proper mobility. If you are going to ever do barbell squats, you need to work on hitting proper depth with a bodyweight squat first!
Once you can support your body’s weight above the bar, the world becomes your playground. No strength training routine should be without pull-up or chin-up work! (Can’t do a pull-up yet? We got you.)
Muscles trained with the pull-up:
All of your back muscles (Latissimus dorsi, rhomboids, trapezius)
This exercise is simple: press a barbell above your head.
Muscles trained with the overhead press:
Pectoral
Triceps
Deltoids
Rhomboid (Back muscles)
Abs
All the muscles in your chest, shoulders, and arms are engaged in order for you to lift the weight over your head. As a bonus, you need to really flex and brace your core, which gets those muscles working too.
Here are step-by-step instructions on how to perform the overhead press:
To do a weighted lunge, have the bar across your upper back and step out with your right leg. Lower your hips until your back leg’s knee almost touches the ground. Explode up and back by pushing off with your front leg. Repeat on your other side.
Muscles trained with the barbell lunge:
Quads
Glutes
Hamstrings
Your core (as you stabilize yourself and the weight)
Note: The above might be tough if gyms are closed around you. If that’s so, here’s how to build a gym at home (using household equipment).
Start Performing the Best Compound Exercises (Next Steps)
Your mission, should you choose to accept it: commit to trying ONE of these compound movements in the next week. Use 20 seconds of courage, recruit a friend who has lifted or trained before, and try your best.
We all start somewhere!
Speaking of starting out…
Have you yet to do ANY of these compound exercises?
Always start out with bodyweight moves and make sure your form is correct!
If it’s a barbell movement, use a broomstick (or PVC Pipe).
You can pretend you’re Harry Potter after:
When it comes to movements like squats, deadlifts, pull-ups, bench press, etc. – your form is crucial. Develop good habits with lighter weight and you will save yourself months of frustration later and will protect you from injury.
If you’re struggling with certain elements of a movement, don’t get frustrated! Just understand that you’ll have areas in which you can improve.
When I started, I really liked practicing all of the movements at home because I could watch a video online at the same time as I was watching myself do it in a mirror.
Still uncomfortable with the movements after that? Look around at some local strength and conditioning gyms and see if you could hire a coach (here’s how to find a good trainer) for one or two sessions just to go over the basic movements (or consider working with an online coach).
No matter what path you take, the most important thing you can do: START NOW!
Don’t overthink it. Just pick a compound exercise and learn how to do it. We can add more exercises to your routine down the road.
Want a little help getting going? The perfect next step to start your strength training journey!
You got it.
Here’s how Nerd Fitness can help you:
#1) If you want a coach in your pocket, who can do video form checks, provide feedback, and adjust your workouts based on your progress, check out our 1-on-1 Online Coaching Program!
I’ve had an online coach since 2015 and it’s changed my life. You can learn more by clicking on the box below:
#2) If you want a daily prompt for doing compound exercises at home, check out NF Journey. Our fun habit-building app helps you exercise more frequently, eat healthier, and level up your life (literally).
Plus, you get to build an awesome superhero in the process!
Try your free trial right here:
#3) Join the Rebellion! We need good people like you in our community, the Nerd Fitness Rebellion.
Sign-up below and receive our free guide Strength Training 101: Everything You Need to Know. It includes step-by-step instructions for the Best Compound Exercises covered in today’s guide.
Download our comprehensive guideSTRENGTH TRAINING 101!
Everything you need to know about getting strong.
Workout routines for bodyweight AND weight training.
How to find the right gym and train properly in one.
Alright, enough from me. Your turn:
Do you agree with my list of best compound exercises?
Am I missing any?
Any tips or tricks for a newbie just getting started?
One of the best exercises for you, whether you’re trying to build muscle or lose weight (or both) HAS to be the squat.
However, it’s also an exercise I see nearly EVERYBODY do incorrectly.
We do video form checks with every Online Coaching Client to make sure they’re squatting correctly, and we use a LOT of the same cues and instruction we cover in this guide!
So have no fear…
After reading this big ass squat guide (pun intended, I suppose?) – part of our Strength 101 series – you can start performing this compound exercise safely and effectively.
Click any link below or scroll down to read the whole guide:
Squats are one of the most foundational functional movements in our lives. Let’s talk about the benefits and why you should be squatting all the time.
#1) We’re designed to squat: We’ve been squatting since we were babies, but as we get older and sit in unnatural positions all day, our squat form goes from perfect to terrible.
Crap.
In many countries, people often sit in a full squat for hours at a time.
From an evolutionary standpoint – it makes sense that we are genetically designed to, and can be really good at – squatting.
Before modern-day furniture and technology, you didn’t stop sitting in a full squat once you got older like we do today…you continued squatting your entire life.
#2) Squats are a compound movement that recruits most of our muscles – this means it’s a movement that uses multiple muscle groups and joints (your hip and knee joints) to complete.
A simple bodyweight squat – which I’m demonstrating above – uses almost every muscle in the core and lower body.
If you add a dumbbell or barbell into the equation, I would even argue that they use every single major muscle group to complete.
In addition to every muscle in your “legs,” you need your:
Hips
Back
Core
Shoulders
Arms.
Nothing is left out with this monster movement.
Because of the utilization of a large amount of muscle groups, squats cause your body to increase our anabolic hormone production, helping us lose fat and build muscle.[1]
#3) Squats will help strengthen your bones and your muscles (and your knees!), and can also increase flexibility.
Increasing the strength in your knees and hips (and entire body) reduces your chance of injury while doing both athletic movements and everyday life things (such as shoveling the driveway or standing up and sitting down).
And by learning to squat deeply, safely, you’re improving your range of motion and helping make you antifragile and protecting yourself against future injury.
Bazinga!
If your goals are to:
Build muscle and get stronger, squats will get you there faster.
Lose weight and get ‘toned,’ squats will get you there faster.
Look better naked, squats will get you there faster.
Get healthier and happier, squats will get you there faster.
Feel like an absolute badass in the gym, squats will get you there faster.
In short, squats are amazing.
(See what I did there?)
My name is Staci Ardison, I’m a Senior Coach at Nerd Fitness, and my life has been absolutely transformed by barbell training, which is why I’m so excited to share this guide with you.
I am so excited to teach you how to squat today, as I’ve taught tons of coaching clients how to get started too.
Let’s start off by taking a look at the bodyweight squat – the first move you should master before you add weight.
How to Do a Bodyweight Squat With Proper Form
The setup for the squat exercise is incredibly simple.
Stand with your feet slightly wider than your hips.
Your toes should be pointed slightly outward – about 5 to 20 degrees outward (the wider your stance, the more you’ll want to rotate your feet outward).
Look straight ahead and pick a spot on the wall in front of you.
Look at this spot the entire time you squat, not looking down at the floor or up at the ceiling.
I go over the setup of a bodyweight squat and the full movement in this video:
1) Put your arms straight out in front of you, parallel to the ground. Keep your chest up and proud, and your spine in a neutral position.
2) Your weight is on your feet – it should be on the heels and the balls of your feet, as if they were pasted to the ground. You should be able to wiggle your toes the entire movement (though that’s not a part of squatting!).
3) Keep your entire body tight the entire time, your core flexed like you’re bracing to be punched in the gut!
4) Breathe deeply into your stomach, break at your hip and push your butt back. Keep sending your hips backwards as your knees begin to bend.
It’s important to start with your hips back, and not by bending your knees.
5) As you squat down, focus on keeping your knees in line with your feet.
Many new lifters need to focus on pushing their knees out so they track with their feet.
When your knees start to come inside the toes, push them out (but not wider than your feet).[2]
Make sure your knees aren’t moving inward toward each other through the movement – this is very common.
6) Squat down until your hip joint is lower than your knees (what we call “parallel” in the squat game). Note: if you THINK you might not be squatting deep enough, you probably aren’t!
Once at the bottom, it’s time to stand back up from your squat:
7) Keeping everything tight, breathe out and drive through your heels (keep the balls of your feet on the ground as well).
8) Drive your knees outward (away from each other) the same way you did on the way down, and squeeze your butt at the top to make sure you’re using your glutes.
Here is a video from us nerds at Team Nerd Fitness (with instructions from Jim, lead trainer at our 1-on-1 Online Coaching Program) that will teach you good form on a bodyweight squat, including all the mistakes NOT to make:
Once you can do multiple sets of 15+ deep bodyweight squats with proper form, it’s time to move onto barbell squats!
If you are confident in doing bodyweight squats and want to work up to a barbell squat, follow our Gym Workout Level 4 Program, which includes dumbbell goblet squats, a good stepping stone to barbell squats:
The majority of the population has some sort of mobility issue (including myself!) that they are working on fixing.
We have LOTS of 1-on-1 coaching clients who are new to squatting, and it often comes down to ankle flexibility and hip mobility.
If you spend all day, every day, sitting in a desk chair, this might be you.
If you want us to help you fix your squat depth and start getting stronger, that’s what we’re here for!
How to Set Up Properly For The Barbell Back Squat
#1) Find your squat rack! It’ll look something like this, with an unattached barbell:
A. Squat Stand:
B. Power Cage/Squat Rack:
C. Half Rack (Least favorite*):
*I don’t like Half-racks without adjustable safety bars – if you want to squat deep the barbell might hit the immovable bars! Not cool. Aim for the A or B options if you have the choice!
Note: a squat rack is NOT the same thing as a Smith Machine, where the barbell is attached to the machine, and slides up and down two bars:
You do NOT want a Smith Machine.
You need a completely unattached barbell in order to do a barbell squat properly and safely. Don’t squat in a Smith Machine.
Coach Jim explains why in this video:
#2) Set the height of the bar to be about the same height as your collarbone.
Not sure how to set the height of the bar? I got you:
If your options are either too high or too low, it’s always best to set the pins slightly lower than you need them.
You don’t want to have to get up on your toes to rack/unrack the bar, especially as the weight gets heavier.
#3) Decide if you are going to do a high bar squat, or a low bar squat. Either is fine, but there IS a difference:
The “Low Bar Back Squat” is the most common form done by beginners, general lifters, and powerlifters.
It’s also the form taught in Starting Strength, one of the best books for beginners on the market.
So we’ll be focusing on that version for the rest of this section:
#4) Always squat with just the bar to start – as we discuss in “How much weight should I be lifting,” even if you’re planning on squatting 500 lbs, always start with just the bar!
How to Do a Proper Barbell Back Squat, Step By Step
1) Facing the bar, step under it, and put your hands around it on either side of you.
For this type of squat in our example, we are going to want a thumbless grip, so that our wrists are properly aligned with our forearms.
The width of your grip will be dependent on flexibility, but generally, a narrower (hands closer to your shoulers) grip will help create a meaty shelf for you to place the bar on the muscles in your upper back.
If you lack the flexibility for the narrower grip (which is super common), start out wider, then slowly bring it in as you get more flexible.
See the difference here between a “high bar, wrapped grip” (Left) and “low bar, thumbless grip” (right):
And now time to DO A BARBELL BACK SQUAT!
Definitely watch the video above and listen to the instructions, and then read this description when you need to restart:
With the weight on your shoulders, step back from the supports.
Your feet should be slightly wider than hip-width apart.
Your toes should be slightly pointing outward.
Flex your stomach, squeeze your glutes, inhale deeply into your stomach.
Move your butt back, squat down slowly.
Continue to drop until the tops of your legs are parallel or lower (the crease of your hip is below your waist).
Explode back up to the starting position.
After your set is complete, walk carefully forward to return the weight to the rack, and lower it down safely onto the supports.
High-five yourself, you just did a barbell squat!
Not sure if you squatted deep enough?
Record yourself! 95% of the people I see doing squats in a gym don’t go deep enough!
Nervous about squatting correctly? Yes, I am a mind reader, and yes we can help you!
If you want an expert to check your squat form check out our 1-on-1 Coaching program. Our coaching app lets you record and send a video of your movement directly to your coach, who will provide specific feedback and build a custom program just for you.
Interested? Click below to jump on a free call with our team to see how our online coaching program will get you the results you’re after:
How To Bail Out of a Squat Safely
If you are going to squat, you have to know how to “fail” at squatting safely! After all, there’s nothing scarier than being stuck in the bottom of a squat movement and not knowing how to get out of there!
A squat is very different from a barbell deadlift in that aspect: if you fail on a deadlift, you just don’t pick up the weight.
If you fail on a squat, you’re trapped under a bar…with potentially a lot of weight on it.
This can lead to SERIOUS injury. So please, learn how to bail out of a squat safely before you start attempting to do heavy barbell squats.
This will help give you the confidence to push yourself and get stronger!
7 Common Mistakes When Doing Squats
The squat is a basic movement, but those new to lifting often fall victim to a handful of common mistakes.
Let’s take a look at some of the big problems and how to fix it!
#1) Coming up on your toes with your knees forward during your squat
It’s important to keep your heels on the ground the entire time you’re squatting.
You should be driving down through your heels, and in order to do that, they need to be on the ground!
While some of your weight will be on the balls of your feet, you never want all of your weight to be on the balls of your feet or your toes.
You should be able to lift your toes up off the ground and wiggle them at any point and it shouldn’t change anything about your squat.
#2) Not going deep enough on your squats
Your squat should hit at least parallel (middle image above) – where your hip joint goes below the knee.
Depending on what you’re training for, you can go lower, but in order to maximize the muscles worked in the squat, it needs to be done to at least parallel or lower (you can see lower in the upper right image).
If you squat above parallel (a partial squat) you’re leaving the hamstrings out of the movement. This puts more pressure on the knee – the force put on your knee is actually reduced as you drop below parallel.
Unfortunately, there’s a lot of misunderstanding about squats and knee issues.
The deeper the squat, the more glutes that are activated as well.[3] This will result in more muscle being created from the squat, as shown by this infographic:
Now, a deeper squat is typically harder, both strength and flexibility wise.
However, depending on your goals, squatting to parallel may make more sense.
If you’re struggling hitting depth there could be many causes – you could have poor ankle mobility, tight hip flexors and/or hamstrings, weak glutes, or poor pelvic alignment (among many other things).
This is something we work closely with our coaching clients on, and often prescribe ankle and hip mobility drills to help clients reach proper depth on squats!
#3) Knee Positioning
When you squat, you want your knees to track along with your toes.
This means if you are looking down at your knees and feet, your knees should be aligned at the same angle as your feet throughout the movement.
This infographic shows you the correct knee position for a squat:
Everyone’s exact positioning is going to be slightly different, but they should not be on the outside or the inside of the foot.
#4) Back Positioning
Your chest should be up and your shoulders should be back, like you’re King Kong about to pound your chest proudly.
Your body should stay in this position the entire time.
You don’t want your shoulders to round forward, but you also don’t want to hyperextend your back either.
Keeping your spine in a neutral position will help your spine safe and build a strong foundation throughout the heavy squat movement.
#5) Head Positioning
Many coaches will tell their lifters to look up, as that is the direction in which you want to be moving, but this is actually the last thing you want to do.
Take a second quick and look at the ceiling (I’ll wait! 🙂 ).
Now, see that position your neck vertebrae are in? That is a very unsafe position for your spine to be in, especially when more weight starts getting included in the equation.
You also don’t want to be looking directly at the floor.
Look straight out in front of you the entire time, with your head in a “neutral” position. Your chin should be in a position where you could hold a tennis ball between your chest and your chin.
#6) Attempting to keep your shins vertical.
Unless there is a current underlying knee issue that would cause additional pain – the shin can and should go past vertical in the squat. This will often allow a deeper squat which will build more strength and stability in the knee.
A forward lean in the shins is also present when we engage in any number of daily activities such as walking up steps or standing up from a chair. Squat as deep as you are able, but do not focus on holding a vertical shin.”
#7) Too much weight on the heels/on the outside or inside of feet during your squat
When trying to fix coming up on your toes, or your knee positioning, it is common for people to focus so much on keeping their weight on their heels that they forget to keep the balls of their feet on the ground!
Some of your weight will still be on the ball of your foot – if you are truly only having weight on your heels, it’s pretty hard to balance.
To the same effect, if the inside of your foot or the outside of your foot comes up off the floor, this is also not a good thing!
How do you know if you’re making these mistakes? Simple!
Record yourself doing squats.
I do.
And so does anybody else who is serious about improving their squats.
Often we look VERY different than we think we look when doing an exercise, so having a video of the movement is often the only way we can improve.
If you can’t self-diagnose your squat challenges, let us help!
Squat Variations for Beginners (Box Squat):
In this section, we’re going to go over some squat variations to help you improve your form and build confidence before hitting the free weights section of the gym.
If you’re struggling to do a squat correctly, don’t fret!
I’m going to teach you about…
BOX SQUATS!
Squatting to a box will help teach you to sit back and keep your weight on your entire foot, instead of squatting with your knees forward and up on your toes.
Squatting back to a box is also great for people who have bad knees and can’t do bodyweight squats anymore.
You can do box squats with a barbell as well, but for this explanation, we’re just going to keep it simple with bodyweight box squats.
In order to do this, find a box or a chair that is the right height so when you sit on it, you are at parallel with your squat.
Your options include things like step stools, milk crates, or the smallest box at the gym (there’s usually a set of plyo boxes, and the shortest is around 10″.)
The lower the box, the more it will help you develop stronger hips and low back – the box at exactly parallel will help you more with quad strength.
Set up exactly as if you were going to do a regular bodyweight squat, only standing about a foot in front of the box.
1) Breathe in deeply, brace your core, move your butt back, and keep your knees in line tracking in the same direction as your toes, and squat back until you sit completely on the box.
Don’t plop back on the box, make it slow and deliberate while keeping your entire body tight.
2) Now, don’t move! Think about your positioning:
Are your back and core still super tight?
Is your weight on your heels and your midfoot?
Is your head in a neutral position?
Great, now stand up by driving your hips upward, don’t let your weight shift forward and onto your toes (drive through your heels!), shoulders and chest up, knees out keeping them lined up with your toes.
For your first few, feel free to sit on the box while you evaluate your positioning, but as you get better at them, sit back and then quickly stand up again.
You know you’re doing a good squat when you can stand back up from the bottom of a squat position without having to lean forward and use momentum to get up.
You can squat, touch your butt to the box, and then stand back up without having to shift your weight around!
KEEP THAT BUTT BACK!
How to Perform a Front Squat
If you’re up for a similar-but-different squat, try…
The barbell front squat!
A front squat moves the weight from behind you to in front of you, which requires different muscles and mobility in different places.
I personally alternate front squats and back squats on my leg days.
I know all of this can be overwhelming, so the important thing is that you START! I realize I sound like a broken record at this point, but I really want you to begin strength training today.
We created our free guide, Strength Training 101: Everything You Need to Know, just for that purpose. I’d love to send it to you, because I know it’ll help you overcome any fears and confusion and have you getting stronger TODAY
Get it when you sign up in this box below – I’m excited to hear what you think of it!
Download our comprehensive guideSTRENGTH TRAINING 101!
Everything you need to know about getting strong.
Workout routines for bodyweight AND weight training.
How to find the right gym and train properly in one.
How to Perform a One-Legged Squat (The Pistol Squat)
In the video above, Coach Jim shows you how to perform the one-legged squat, also known as the pistol squat.
To perform a one-legged squat:
Squat down on one leg as low as you can go.
Keep the heel flat on the ground and lift the other leg out in front of you.
It’ll look something like this:
If this is too much, work on performing an assisted one-legged squat.
Perform an assisted one-legged squat by holding onto a doorframe, squat rack, rings or another stable object, then squat down on one leg as low as you can go.
How to Start Squatting Like A Pro
Squats are awesome.
How awesome? Look at that woman above owning her squat before owning her putt!
Once you’ve mastered the Back Squat, give Front Squats a try!
And if you want to learn more about squats, or you’re looking to build more confidence before you get started, we have a few options for you:
You’ll work with our certified NF instructors who will get to know you better than you know yourself, check your form, and program your workouts and nutrition for you.
2) If you want a snazzy app to teach you exactly how to start crushing squats, check out NF Journey. Our fun habit-building app helps you exercise more frequently, eat healthier, and level up your life (literally).
Try your free trial right here:
3) Download our free Strength 101 Guide, which you can get when you sign up in the box below:
Download our comprehensive guideSTRENGTH TRAINING 101!
Everything you need to know about getting strong.
Workout routines for bodyweight AND weight training.
How to find the right gym and train properly in one.
And I’d love to hear from you! PLEASE leave your questions, squat or fitness or otherwise below so we can answer them and become best friends:
What struggles do you have when trying to squat?
What questions do you have?
If you haven’t squatted before, what else do you need us to tell you to give you the confidence to start squatting TODAY!?
-Staci
PS: Be sure to check out the rest of the Strength Training 101 series:




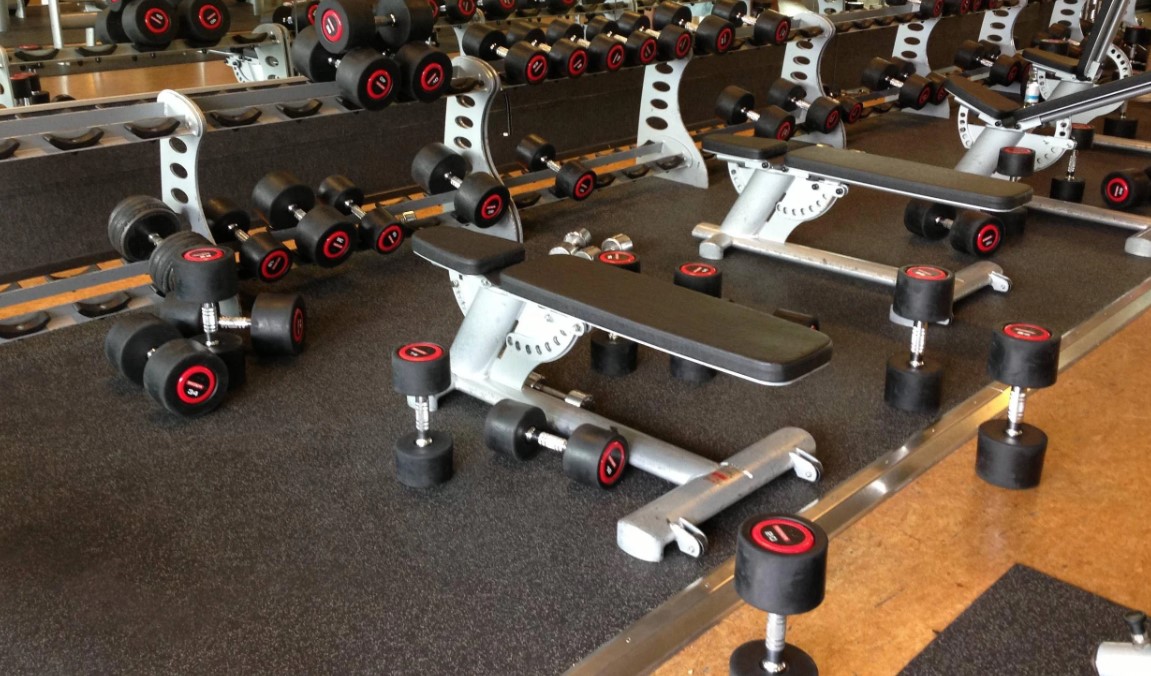




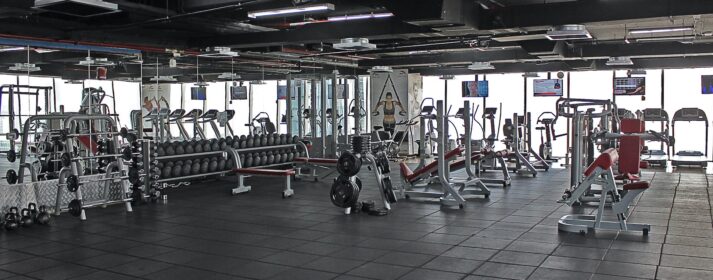




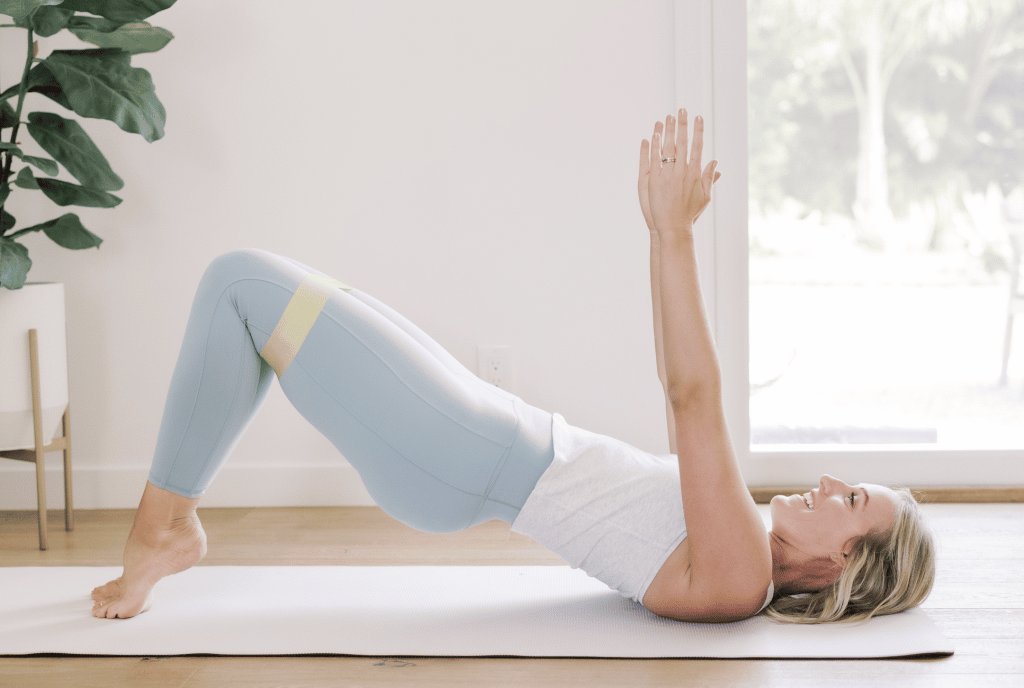
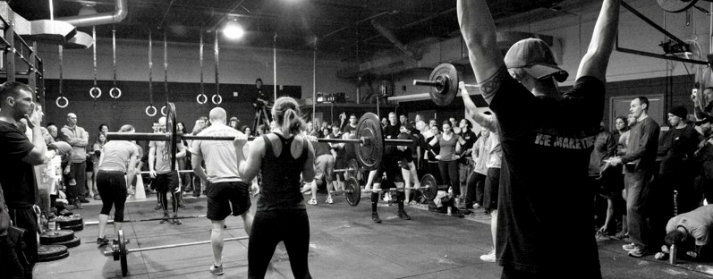
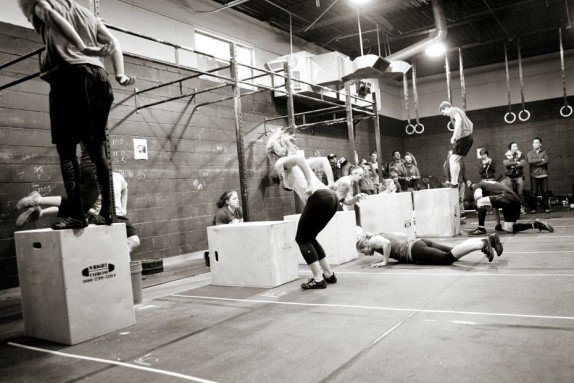 CrossFit is advertised as “the sport of fitness.”