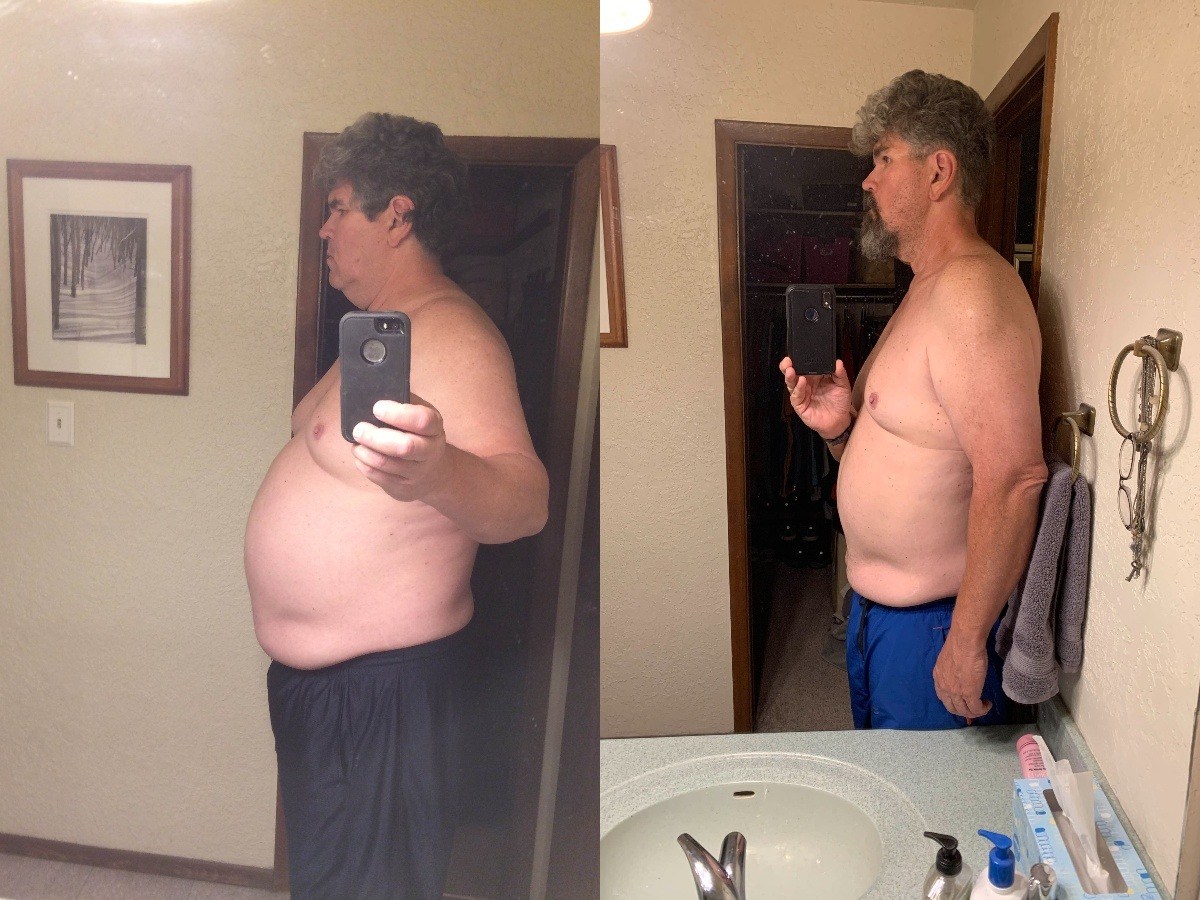
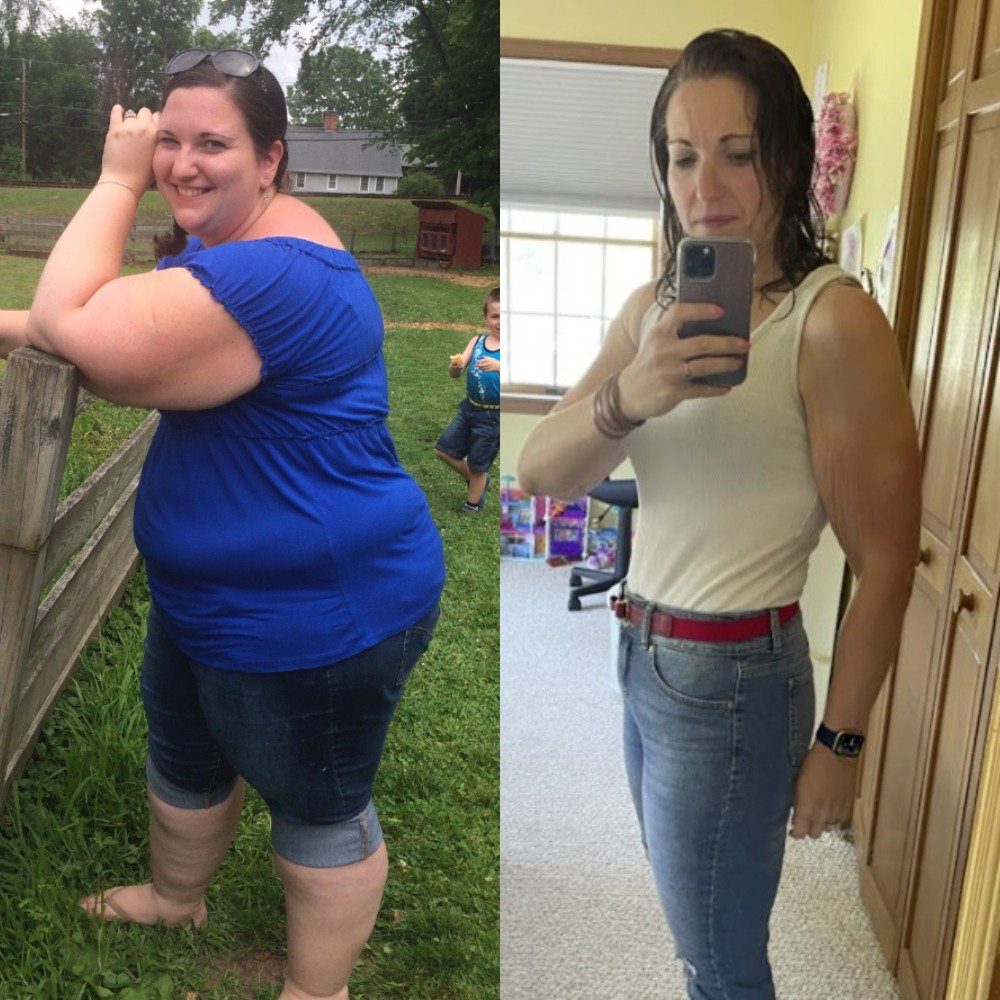
Balancing hormones naturally is not only possible, but it’s also one of the best ways to help bring your body back into balance. If you’re wondering how to do this, you’re not alone. In fact, nearly 50 percent of women in the U.S. experience hormonal imbalance, according to a recent survey from Dr. Anna Cabeca, certified OB/GYB and author of The Hormone Fix.
In addition, 43 percent of women also report negative effects on their health due to hormonal imbalance, which is a reminder that resolving this issue is so important.
My hormone diagnosis came 1.5 years ago when I discovered that adrenal insufficiency led me to have extremely low levels of estrogen, progesterone, and cortisol. My key symptoms were exhaustion, irritability, weight fluctuations, and inability to relax.
While I’m still working to improve my levels, I feel much better than I did a year ago. I am still very much on this healing journey and have to work really hard to mitigate and reduce the stressors of daily life (even when they don’t feel like stress, they are still stressors).
For me, the natural lifestyle changes have been so impactful, which is why I want to share some of them here with you. In addition, I’m sharing a little bit about hormones and hormone imbalance because this education is so important for women.
This article is not to be substituted for medical advice. Please seek the support of a professional if you’re struggling to balance your hormones or if symptoms persist.
Hormones and Hormone Imbalance: An Overview
Hormones are chemical signals in the body that help regulate a variety of internal processes that contribute to your mental, emotional, and physical wellness. A hormonal imbalance means there is either too much or not enough of a certain hormone in your bloodstream.
Because hormones influence such a wide scope of physiological functions, even the smallest imbalance can have serious health implications. For example, all of the following issues are commonly associated with a chronic, untreated hormonal imbalance:
Abnormal metabolism
Irregular menstruation
Sexual dysfunction
Insomnia
Adult acne
Infertility
Diabetes
Thyroid problems
Gastrointestinal issues
Anxiety or depression
Chronic fatigue
High cholesterol
Unexplained weight fluctuations
Possible Causes of Hormonal Imbalance
If you notice one or more of the previous symptoms on a consistent basis, but can’t seem to figure out the cause, it could mean there’s a hormonal imbalance. Figuring out what’s at the root of this is key to finally finding the relief you’re craving.
According to the journal Endotext, any stimulus that disrupts the endocrine system (the network of organs that manufacture and release hormones) could result in an imbalance. That means there are a lot of potential causes and these are some of the most common:
Chronic stress
Insufficient diet
Excessive alcohol or caffeine
Electronic overstimulation
Viral or bacterial infections
Not enough sleep
Head trauma
Pregnancy
Menopause
Autoimmune diseases
Abnormal skin growths
Too much or too little exercise
Certain medications
Tips for Balancing Hormones Naturally
In some cases, hormone replacement therapy or other medical intervention is recommended to rebalance the hormones. While HRT can be necessary at times, here are some key lifestyle changes you can make to support the healing journey of rebalancing your hormones.
1. Consume Enough Protein
Protein is a vital nutrient because it contains essential amino acids, which the human body cannot produce on its own. The endocrine system uses those amino acids to create peptide hormones, which are needed for:
Brain function
Physical development
Energy metabolism
Appetite
Mood stabilization
Reproduction
Cardiovascular health
Stress management
Some nutritious sources of protein include fish, lean poultry, nuts or seeds, chickpeas, lentils, eggs, and kale or spinach. My favorite ways to get more protein are quick and easy egg scrambles (sometimes I add extra egg whites to my two scrambled eggs for additional protein) and smoothies with protein powder or collagen powder that is also high in protein.
Log into the Lindywell app to find a wide variety of recipes packed with protein that can help rebalance your hormones.
2. Make Time for Regular Exercise
Insulin is a hormone that helps your cells convert sugar to burnable energy in the bloodstream. If the cells lose sensitivity to insulin, you can develop insulin resistance which puts you at risk for metabolic syndrome, diabetes, unexpected weight gain, or heart disease. Fortunately, exercise boosts insulin sensitivity for up to 72 hours, so the more often you move, the more you’ll prolong this benefit and help rebalance this hormone.
I know I’m a Pilates instructor (so just a little biased!), but Pilates truly is one form of exercise that can help you reap all of these benefits, while not over-taxing your system. This is so important if you’re in a state of hormonal imbalance.
If you want to experience the power of Pilates, try a 14-day free trial of Lindywell. In our app, you’ll find hundreds of Pilates workouts, along with recipes and guided breathwork sessions!
3. Eat Foods That Support a Healthy Gut
Another way to regulate insulin and balance your hormones is to maintain a diverse gut microbiome. Your intestines are home to trillions of microorganisms that boost immunity and metabolism and the goal is to have a diverse and appropriate level of microbiome in the gut.
To optimize gut health, consume a diet rich in antioxidants, fiber, probiotics, and prebiotics. Think: leafy greens, berries, cacao, legumes, almonds, whole grains, or fermented foods.
4. Integrate Mindfulness in Your Routine
When you feel stressed, the adrenal glands release cortisol, which is also known as the stress hormone. When chronic stress is present and cortisol levels stay elevated, you may experience brain fog, anxiety, depression, overeating, hypertension, or heart issues.
This is why stress management plays a crucial role in balancing hormones and was critical for the shifts I’ve experienced and how I’m feeling as well. There are many ways to reduce your stress with lifestyle changes. For me, it was important to get more intentional about my schedule and practice breathwork regularly.
If this resonates for you, learn more about the benefits of breathwork for reducing stress in our podcast episode, Using Breathwork as a Path to Wellness.
5. Moderate Alcohol and Caffeine Intake
In most cases, it’s not problematic to consume alcohol and caffeine in moderation (unless you have an intolerance or dependence on them). In excess, however, both substances wreak havoc on your hormones, specifically the pituitary hormones estrogen, testosterone, and progesterone.
Enjoying a moderate intake of alcohol and caffeine, or letting it go altogether, is a simple way to promote hormonal balance. Note that this is a lifestyle shift that may take time. If you’re used to multiple cups of coffee or a few glasses of wine a day, you can slowly wean yourself down to just one or none over the course of a few weeks to give your body time to adjust.
6. Get Adequate Sleep
While sleep deprivation wasn’t an issue for me, it is the culprit for many women experiencing hormonal imbalances. Here are a few reasons why this is such an important lifestyle factor to consider as you heal:
Your brain requires uninterrupted sleep to release the growth hormone, which in turn promotes muscle and bone density.
Sleep deprivation affects melatonin secretion, which can impair the sleep-wake cycle and cause issues such as fatigue or insomnia.
While it can be challenging to get adequate sleep for many reasons (hello hectic work schedules and parenting), it’s best to aim for at least seven hours each night as often as possible.
For me, the challenge was calming my mind in the evening and unplugging from work to reduce stimulus and unwind. Allowing my cortisol levels to lower and my melatonin levels to rise was (and is) a very important part of my journey and something that may be supportive for you to focus on as well.
Learn More About My Experience
If you’ve been diagnosed with a hormonal imbalance, it can be supportive to hear from others who have as well. That’s why I regularly share my story and talk about hormones on the Balanced Life Podcast. Here are a few episodes to check out if you want to learn more about my experience and this topic:
If your health feels “off,” but it’s hard to put your finger on the exact cause, consider whether there’s a hormonal imbalance at play. If so, understanding the root and then balancing hormones naturally with these simple, but important shifts can be just what you need to get back to feeling like yourself again.
The tutorials ahead are from our premium course Nerd Fitness: Handstands, which you gain access to under a Nerd Fitness Prime membership. I would encourage you to check out if you like what you see here.
Alright, brace yourself to get flipped-turned upside down.
Are Handstands Good for You? (3 Reasons Why Handstands Rule)
At Nerd Fitness we LOVE handstands like Eleven loves waffles.
Here are 3 reasons why handstands rule:
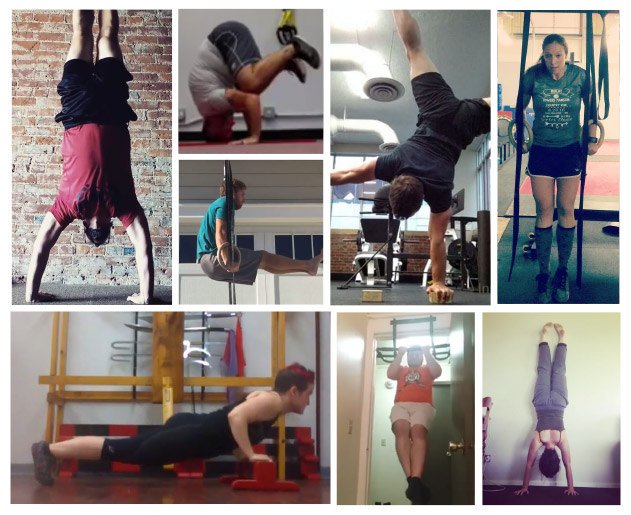
#1) Like other bodyweight training, there’s no excuse. If you have room to stand up, you have room to practice handstands.
#2) It recruits DOZENS of muscles in your body.
From arm strength to wrist mobility to core strength to shoulder mobility and muscular endurance, handstands do it all.
When you are trying to balance, it makes your body work as one complete unit.
#3) It scares you – yes, that’s a positive. We grow outside our comfort zone and for many people, just the thought of a handstand is enough to make their palms sweaty, knees weak, arms are heavy, vomi…
…nevermind.
The point is that the handstand is just as much of a mental challenge as it is a physical one.
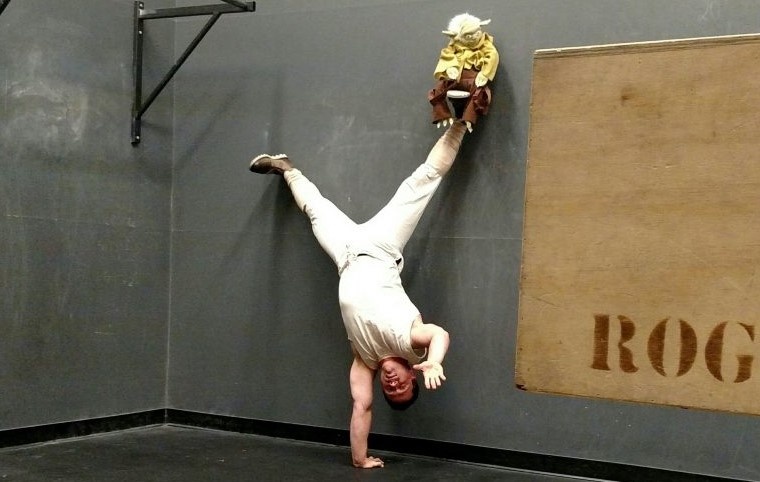
How scared do you think this guy gets on a regular basis?
That’s Coach Jim!
Master of the NF Fitness Universe, and our lead trainer for our Handstands Course and Nerd Fitness Coaching. You’ll be seeing a lot of him in today’s article because Jim can do handstands in his sleep.[1]
The Secret to Performing a Handstand
Sure, we need to build strength to support ourselves upside-down, but even that hurdle is overblown.
A proper handstand actually starts to feel easy.
That’s because once you’re balanced and aligned, it becomes uber-efficient. Just as you don’t exert yourself much if you stand straight with good posture, a good efficient handstand is the same way… it will soon start to feel effortless.
Actually, the biggest hurdle to overcome – especially at the beginning – is the mental fear.
The voice/feeling in the back of your head that says “you could get hurt doing this!” SCARY!
And I won’t sugar-coat things, you CAN hurt yourself working on these skills… but it’s no different than if you walked into the gym first day, slapped 315 lbs on the bench press, and gave it a go.
Or went out and tried to run 13 miles without training.
The exercise itself isn’t dangerous, unless you attempt TOO much, too quickly.
If you wouldn’t load up a bar to deadlift 500 lbs on your first day in the gym, why do so many people just kick and fling themselves up into a handstand, failing repeatedly, hoping one day they’ll “get” it?
So…
There’s a smarter way!
How do we overcome this fear and keep ourselves safe? Just like learning any other fitness skill: slow, easy, successful steps!
These small victories accumulate over time to bring us to our goals safely while having a lot of fun.
Are you ready to learn?
Sweet, we’ve got you covered. Read on for ways to safely progress to handstand mastery!
Handstand Progression Warm-Up Routine
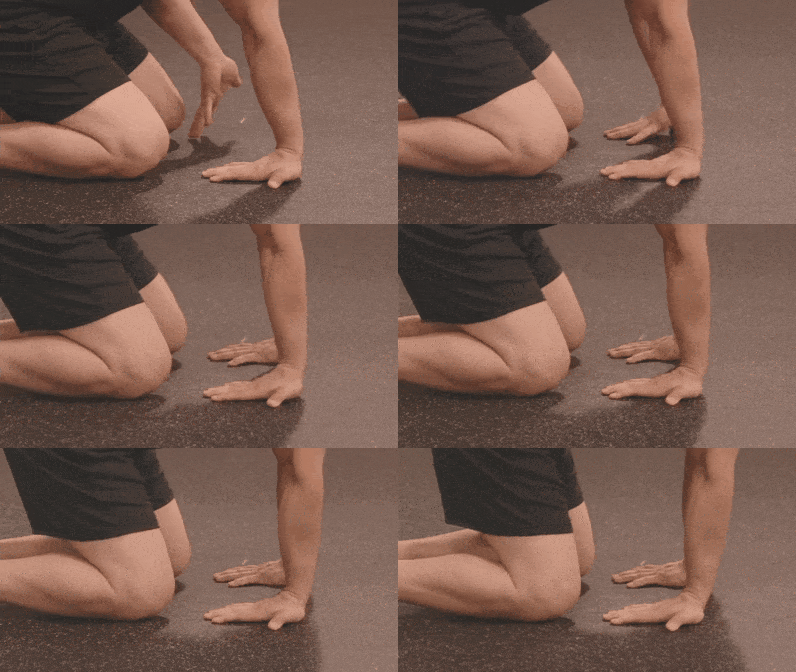
For any handstand exercise, there is going to be a significant amount of stress on the hands and wrists. So, it’s important you stretch and warm things up.
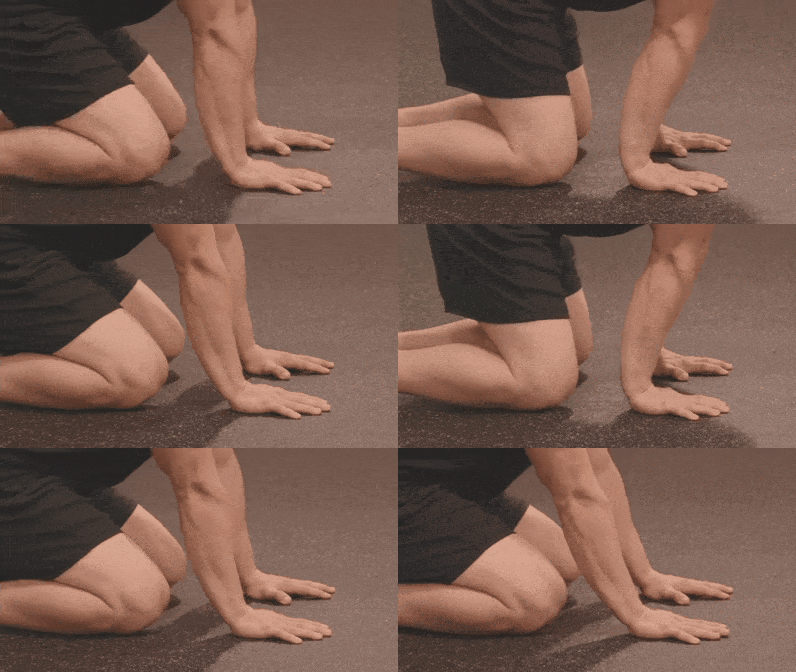
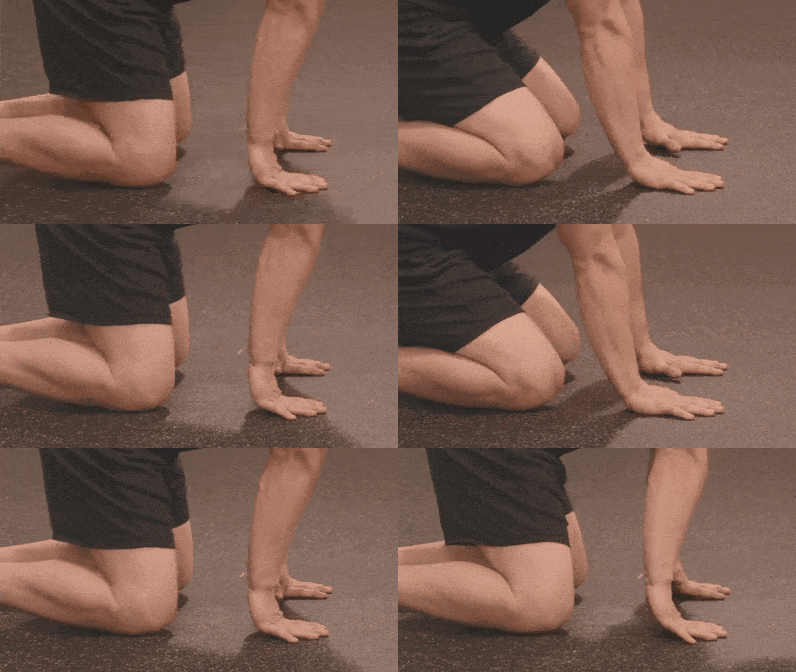
Here is a video from our NF Handstands course going over some of our favorite wrist stretches to prepare to get upside-down. Go through each stretch about 10 times.
Let’s spotlight a few of these Handstand Warm-Up exercises:
#1) Forward and Back Wrist Stretch:
#2) Lifted Palms Wrist Stretch:
#3) Reverse Palm Stretch:
#4) Backhand Palm Stretch:
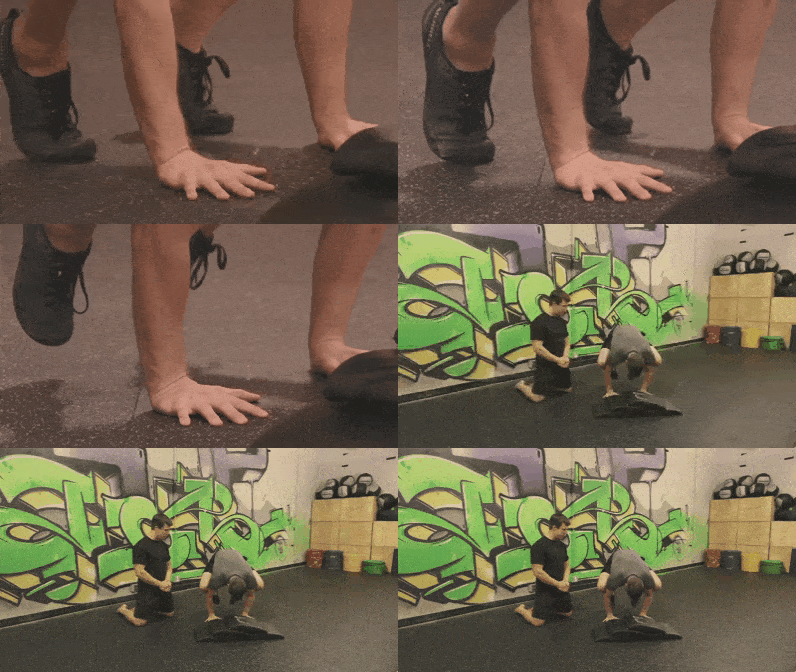
#5) Upside Down Wrist Stretch:
The trick with wrist stretches is to move in as many different ways as feels comfortable. Feel free to make the warm-up your own!
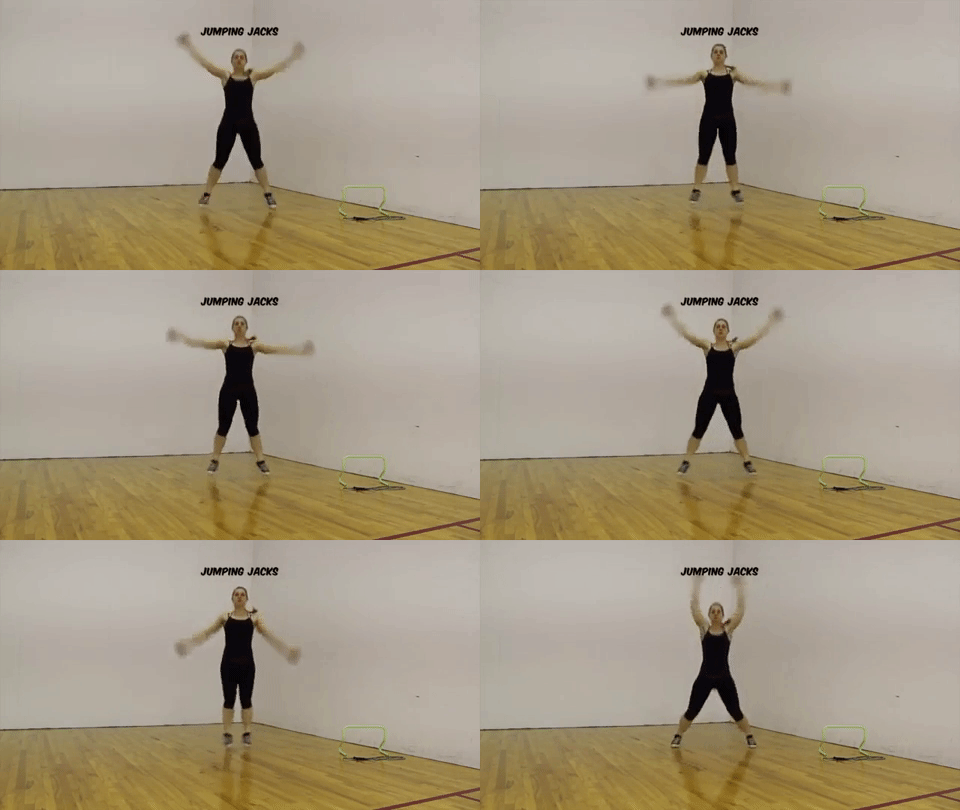
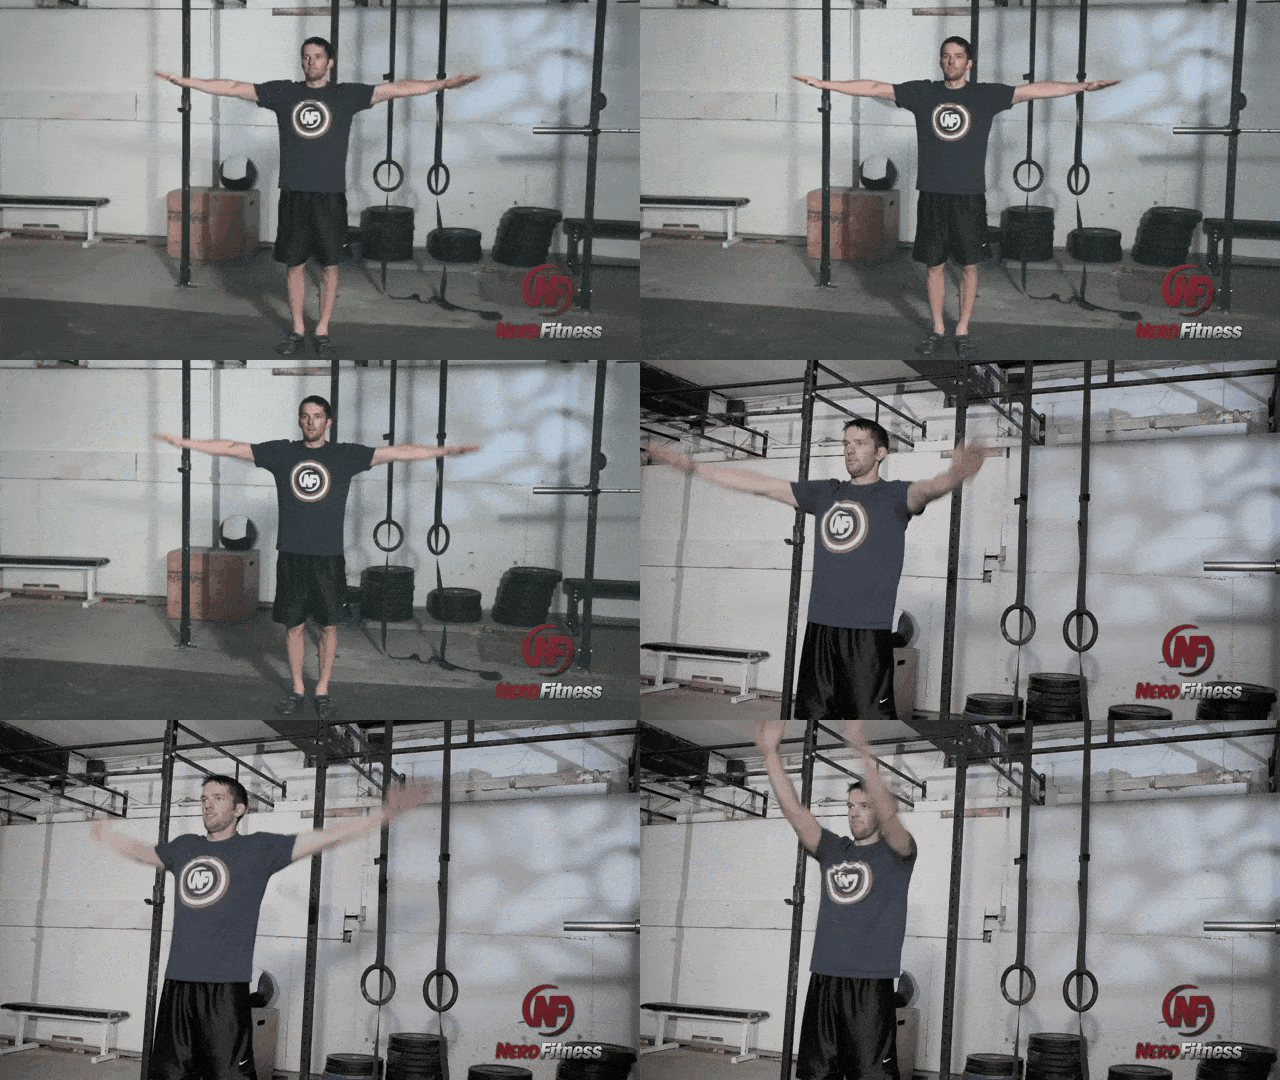
The shoulders are another stressed area in the handstand. There are several ways we can prepare them for work
A few rounds of jumping jacks:
Or arm circles
That will get the blood moving and the area ready.
From here, we’ll begin our journey leveling up your Handstand Progression.
We’ll start by having you work with some balance drills and some positional drills.
Nothing too crazy, and in fact some of these might seem TOO EASY. That’s fine! That’s what we want, remember?
We’re using small victories to motivate us. Landing on your head is not a great way to motivate anyone.
Ouch.
Want someone to build you a custom made progression plan for doing your handstand? Our 1-on-1 Online Coaching Program will do just that, plus your coach can review your movements through our app so you’ll know your training correctly and safely.
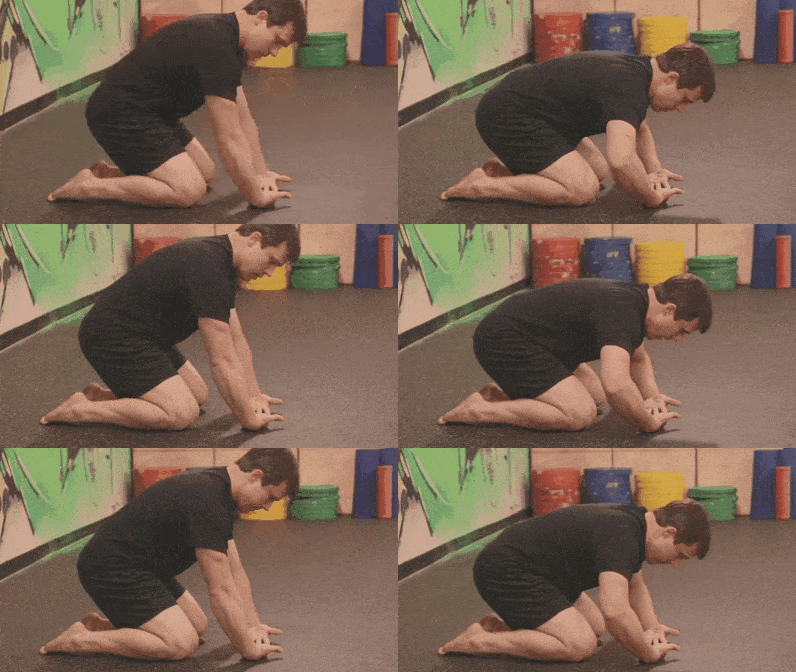
Level 1 Handstand Progression: Quadruped Rocking
You may be thinking that feeling the balance of a handstand is going to be brutally difficult.
Not so!
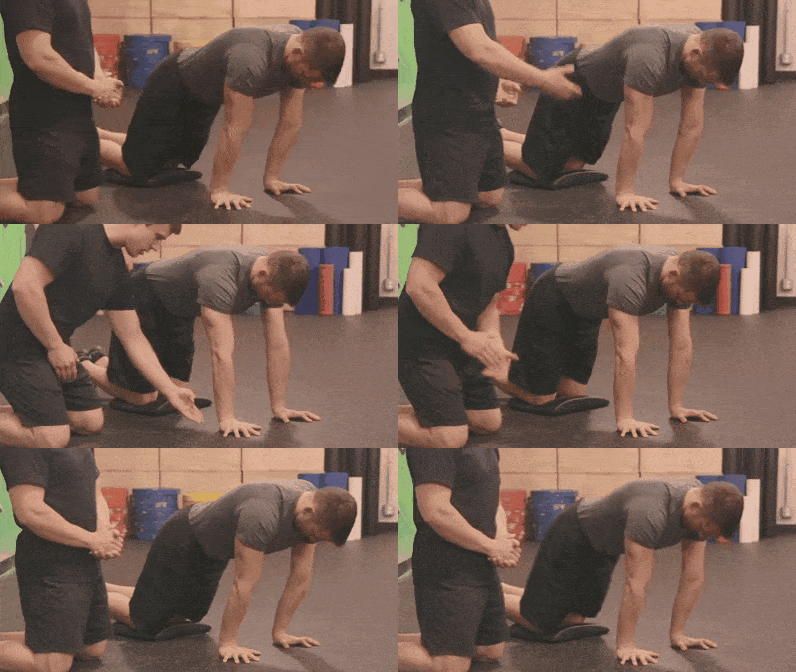
We can start quite easily on our hands and knees in the quadruped position.
From here, we will simply rock forwards and backwards on our hands.
Seem familiar?
If you did the wrist mobility we described above, it’s the same motion!
As you are rocking back and forth, feel where the weight rests in your hands.
When you rock back, it sits more in the heel of your hands.
When you rock forward, you’ll feel it in your knuckles and fingertips.
Where do we want it in the handstand?
Right around the knuckles.
This is a balanced spot – similar to the balance you find when standing. You don’t sit all your weight on your heels, and you don’t lean all your weight forward, gripping your toes hard into the ground, do you?
Find and feel that balance when you rock.
When should you move on to Level 2 Handstand Progression?
Now would work!
Level 2 Handstand Progression: Hollow Body
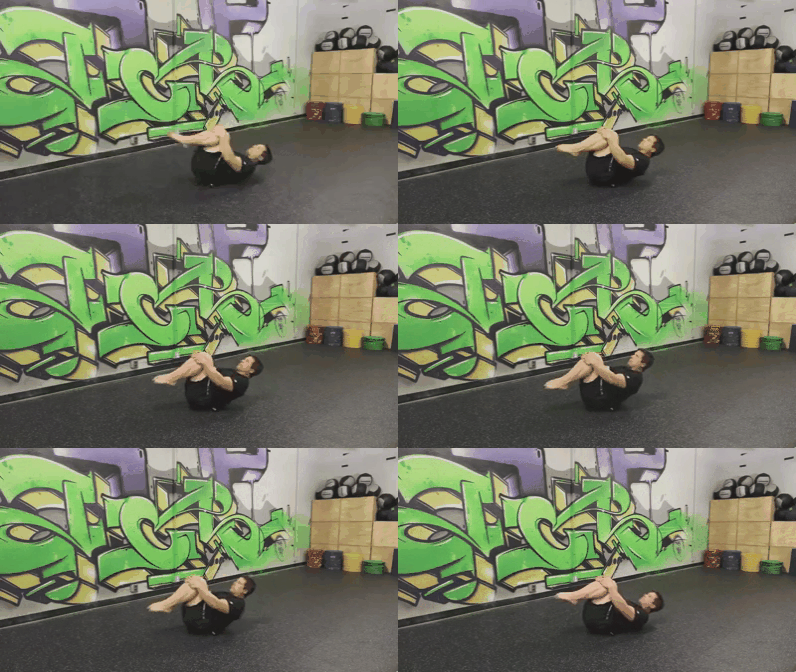
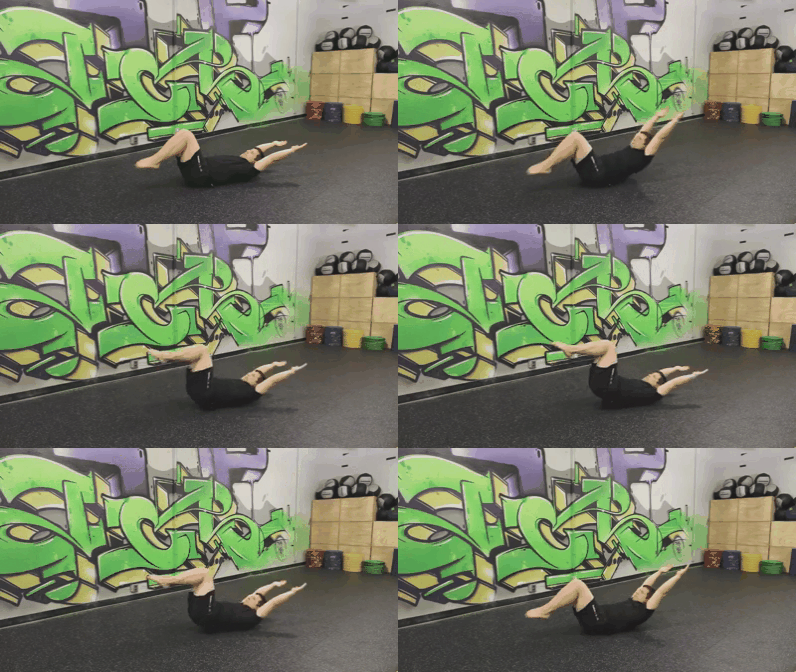
The hollow body is one of the best ways to engage the midsection and stabilize the body. It will help to give your handstand a good shape.
Do you need to master the hollow body to master the handstand?
Not necessarily, as there are plenty of handstands out there that are a bit banana-shaped.
But the hollow body will help you create a more efficient position.
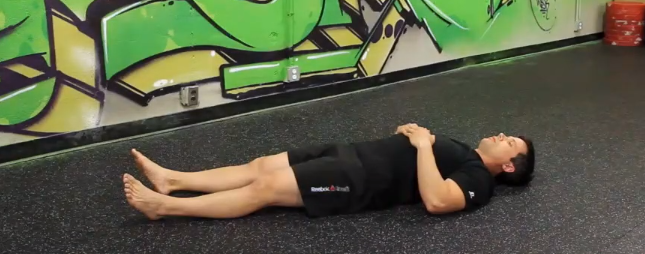
#1) Start by laying down a yoga or exercise mat on the ground and laying on the ground face up.
#2) Think about pressing your lower back down into the ground and engaging your midsection like you’re coughing. You should still be able to breath!
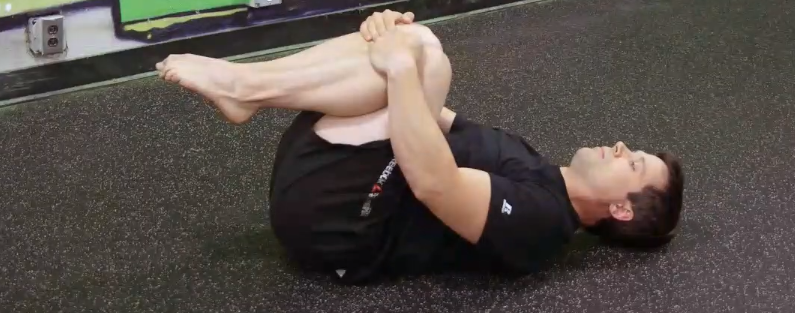
#3) Once the midsection is set, tuck your knees to your chest and hold your shins like you’re getting ready for a wicked cannonball.
#4) Holding the shins will help you maintain that lower back and midsection position.
Still feeling good?
Then try rocking!
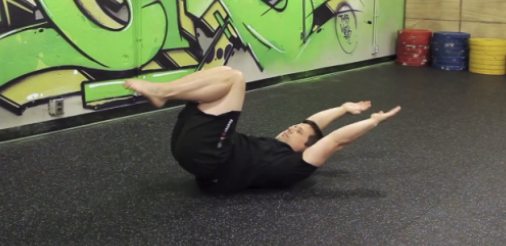
Rock your body forward and back slightly from the upper back to the lower back, like a rocking chair.
Head and feet stay off the ground.
If you are stable then you should move as one unit.
If you need more of a challenge, reach your arms by your ears, keep the knees tucked, and rock some more.
Without the hands holding the shins, the midsection really has to keep engaged in order to give you a smooth rock.
With any of these positions, work to rock for a full 15 seconds under control.
Once you can do so with arms extended, progress up to Level 3.
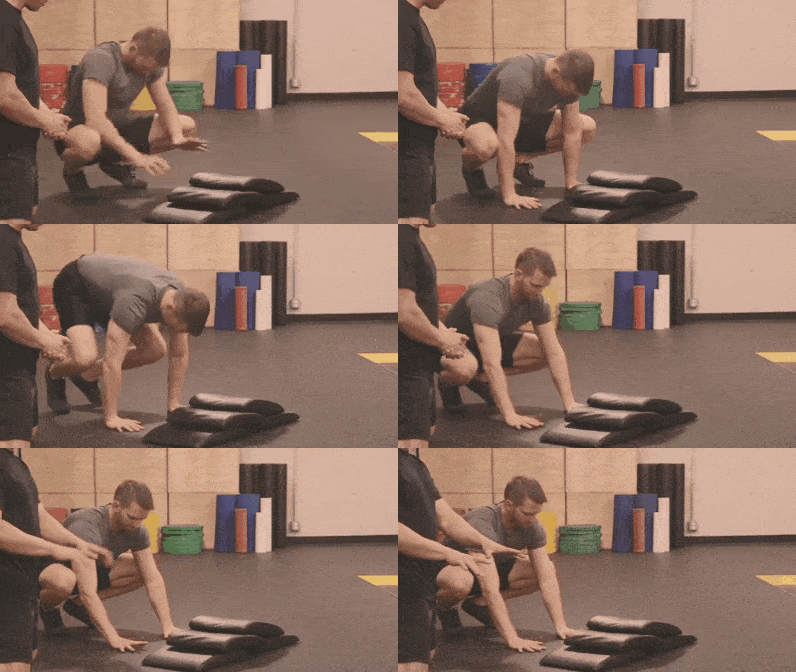
Level 3 Handstand Progression: Crow Pose
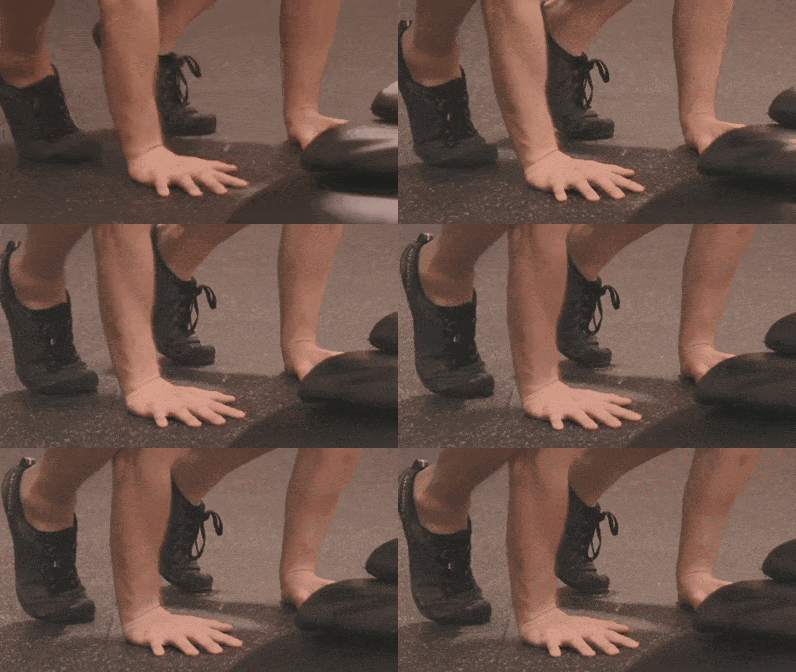
To enter Crow Pose, move forward from the Quadruped Rock position so that your knees are on the outside of your arms. You can even bend the elbows a little and rest your legs on them.
Rock forward in the same manner as before, putting a little more weight on the hands and a little less weight on the feet.
Important: this isn’t Assassin’s Creed… We are not making a leap of faith here!
Don’t jump!!!
We are simply looking for less and less weight on the feet.
Take things slow and easy – rising up on the toes when you can. When you are ready to pick the feet up and hold yourself off the ground on just your hands, it should come naturally.
Be sure to grab into the ground hard to hold and control yourself, and feel free to put down a pile of pillows or mats in front of you if you should fall!
Once you’re able to get both feet off the ground comfortably and safely, it’s time for Level 4 Handstand Progression.
If you find yourself stuck at the crow position or any other level, we are here to help!
Our coaches can review your progression and form to help you advance onto the next level!
Level 4 Handstand Progression: Wall Walk
In this level, we’ll get started working toward something that actually looks like a handstand!
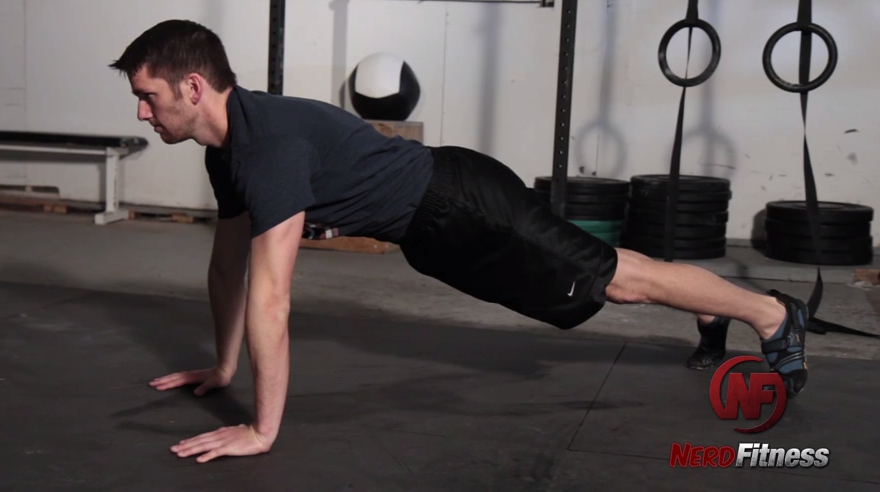
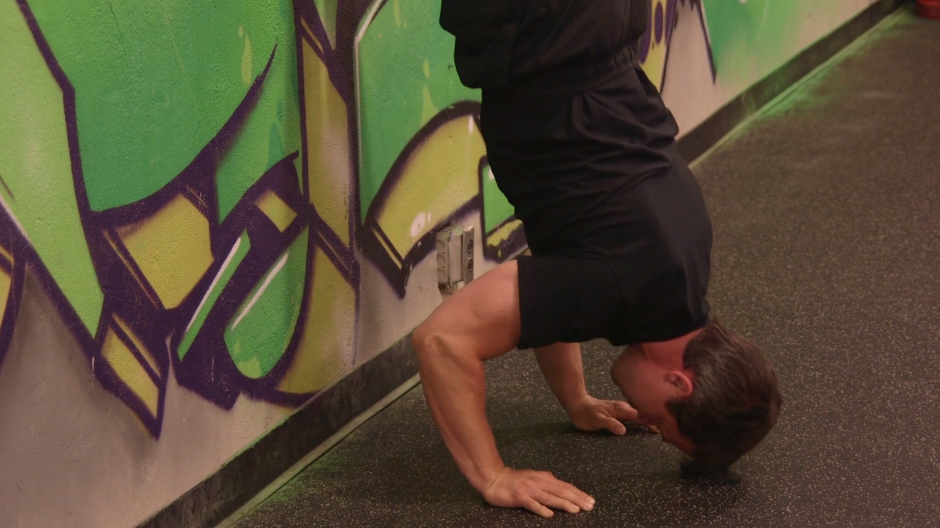
All we’re trying to do with this exercise is support our bodyweight on our straightened arms (just like the front plank or push-up).
So, the first level of this exercise is to simply get yourself up into the top of a push-up and hold. If that’s too hard, put your hands up on an elevated surface and/or rest on your knees and hands instead.
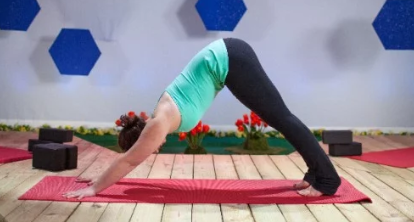
Once this is mastered, level up by simply lifting your hips in the air into a down dog position!
From here, it’ll be a matter of getting your feet onto a higher and higher surface.
Note: putting your feet up something even a few inches off the floor counts – small steps!
You can use something as simple as bumper plates:
As you progress, add more bumper plates (or whatever you’re using) so your feet are higher and higher.
Once you are supporting yourself with your feet on a high box, try walking your feet up the wall. (Think of it like a really tall box!)
Be careful at this step: Be sure you have enough energy to walk back down safely and second, that you don’t walk too close to the wall and risk flipping onto your back!
With each of these variations, we’re looking to build up to a solid 15 seconds under control before moving forward.
Once you’re at the point of lying vertically against the wall, you’re on your way to leveling up to a full handstand!
But first, we need to talk about how to bail safely.
Level 5 Handstand Progression: How to Bail out of a Handstand
As you start to get better with Wall Walks, and you practice getting closer and closer to completely vertical while upside down, there’s going to be instances where you start to “tip over.”
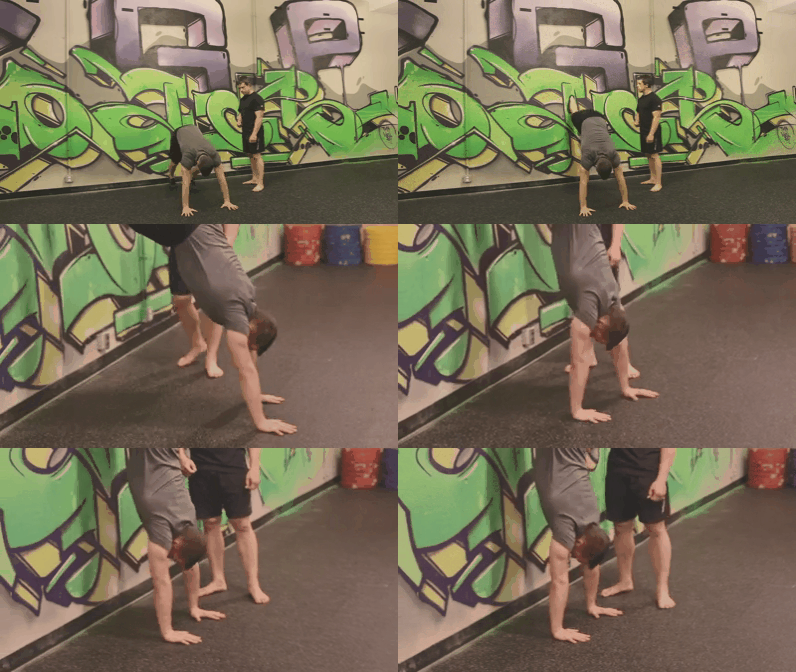
In order to safely return your feet to the ground, you’re going to want to do what we call a pirouette:
How to bail out of a handstand:
Get into a wall handstand.
Shift your weight to one arm (the planted arm), allowing the other arm to move.
Drive one leg into the wall (the one that’s on the same side as the planted arm), and lean the opposite leg forward.
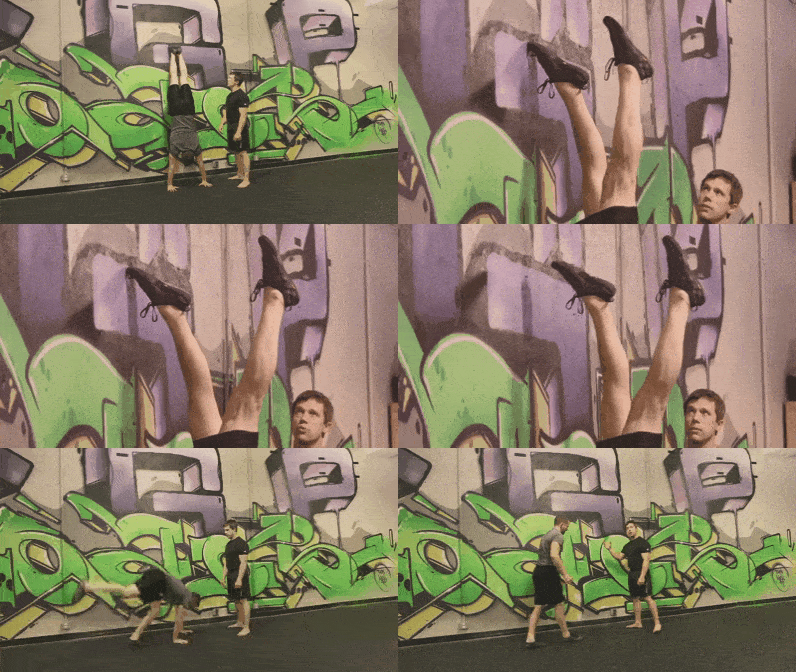
Gravity pulls you around, and lets you lower your feet to the floor safely.
This is one of the most important skills you can learn as you develop your handstand practice, as it will allow you to safely exit any handstand without any risk of injury as you develop your balance!
Once you feel comfortable bailing out of a handstand, my dear rebel, it is time for Level 6!
Level 6 Handstand Progression: How to Do a Handstand
We are now ready for you to try a handstand!
It’s going to come down to you slowly but surely leaving the safety of the wall.
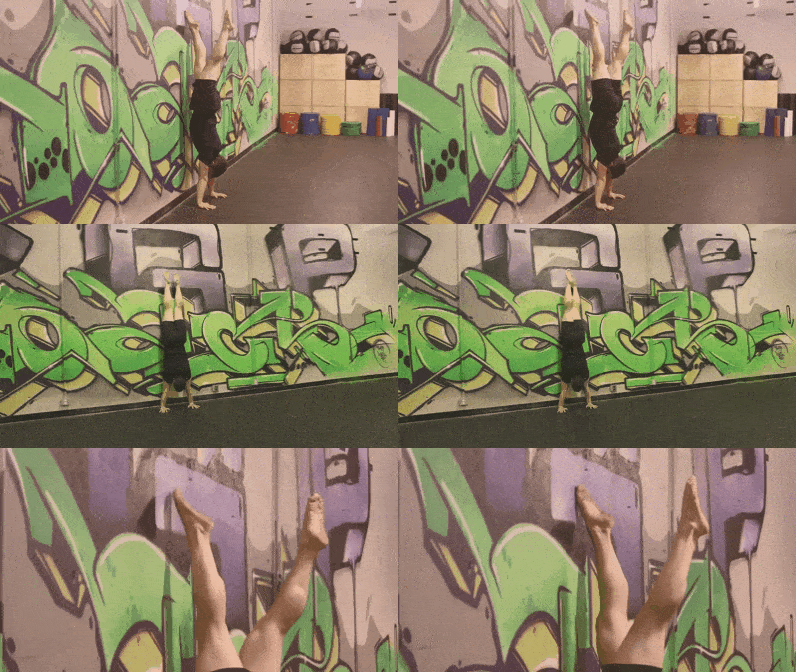
First, just try to take one leg off the wall during your wall walk:
When you’re comfortable taking one leg off, trying switching them!
The objective is now is to switch your legs in a slow, smooth manner – one lifts off the wall while the other simultaneously moves back to the wall.
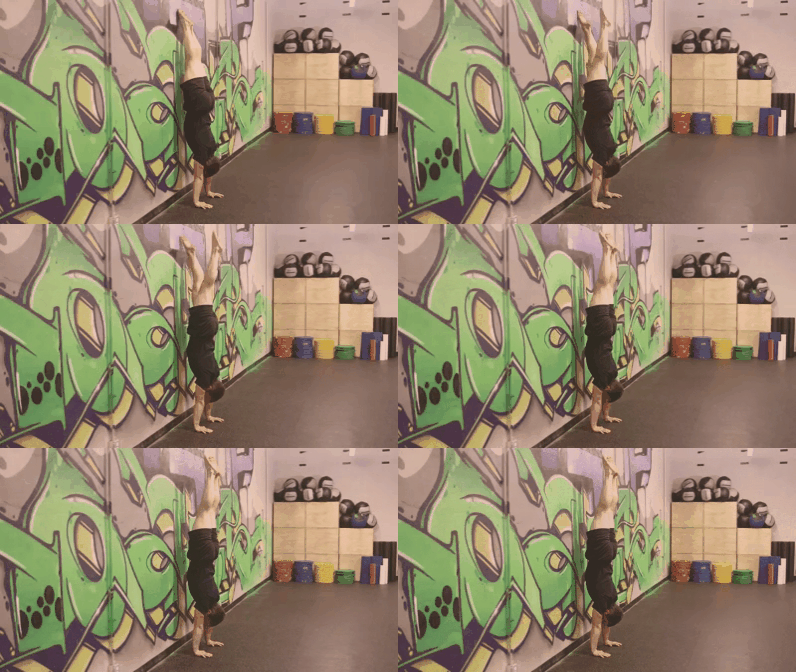
Once you get comfortable with this, it’s time to take both legs off the wall!
BOOM! Your first handstand!
Are you doing it right?
A good way to tell would be to record your handstand practice and review it against the videos here to check your form.
Want to have an expert review your form? Check out our 1-on-1 Online Coaching Program! Our spiffy mobile app lets you send a video of your handstand directly to your coach, who will provide feedback so you can perfect your technique.
They’ll also build a workout program that’s custom to your situation, which will have you doing handstands like Luke Skywalker in no time!
4 Tips and Tricks for Doing Handstands
Nothing beats patience and hard work, but there are a few tips and tricks we can provide that will allow you the best chance for success.
#1) Make sure you go through a proper warm-up: We’ve given you several options for the wrists and shoulders. Not only will a warm-up help prevent injury, but it will get the muscles and joints properly prepared to get the most out of your training.
#2) Prioritize Your Handstand: You can work the skill on its own time, and it won’t interfere or be interfered by anything else, but what if you’re doing other exercises during your workout?
When do you do your handstand? When you’re training in a swamp?
The best time to work the balancing drills (like your wall walk) is at the beginning of your workout, after you’ve warmed up.
These skills require concentration and a fresh focus to really benefit and progress with them.
Trying to balance after you’ve exhausted yourself with a tough cardio session is an exercise in futility (pun intended).
The best time to work the positional drills (like your quadruped rock) would be sometime during your strength session, and before your cardio.
These drills are not as dependent on completely fresh muscles, but we still don’t want to try and hold ourselves upside-down after a grueling workout.
#3) Don’t do too much, too soon.
We’ve mentioned this a million times because it’s so important. Taking on too much too soon is a way to develop bad habits and possibly injure yourself.
Ouch again.
Take your time! Enjoy and really master each step!
#4) Take it Easy: In the same vein, we want to look for success.
What do I usually see when people practice handstands: Someone kicking up 100 times and kinda getting a handstand once or twice.
How much sense does that make?
While we might not be batting 1,000 with all our attempts, but we should be looking to successfully complete around 8 out of 10 attempts. If we’re not? Then we might have taken on too much, too soon!
Let’s wrap up this guide and give you some next steps for your handstand practice.
The 5-Minute Rule: Practice Handstands Every Day and Be Amazed at What Happens
Commit to 5 minutes a day. That’s it. But do it every day.
I’ll see a lot of people go all-in for a single handstand session, and then not touch the skill for a week or more.
Dan Gable once said”
“If it’s important, do it every day.”
Now, this is a simplification, but with handstands, this is ESPECIALLY important.
When you first start out, your arms and shoulder may only be able to do 5 minutes before they are DONE.
Doing them for a short time each day is the best strategy to improve strength, endurance, and balance.
Want help progressing with handstands from here?I’ve got 3 great options for you!
#1) If you want step-by-step guidance on how to complete handstands, get stronger, and even eat better, check out our killer 1-on-1 coaching program:
#2) Exercising at home and need a plan to follow? Have questions you need answered? Join Nerd Fitness Prime!
Nerd Fitness Prime contains at-home exercise routines, live-streamed workouts with NF Coaches, a supportive online community, and group challenges.
Plus, you’ll gain access to all our online courses, including Nerd Fitness: Handstands, which will help you become a master at flipping upside down!
#3) Join The Rebellion! We have a free email newsletter that we send out twice per week, full of tips and tricks to help you get strong, get healthy, and have fun doing so.
I’ll also send you tons of free guides that you can use to start leveling up your life too:
Get your Nerd Fitness Starter Kit
The 15 mistakes you don’t want to make.
Full guide to the most effective diet and why it works.
Complete and track your first workout today, no gym required.
Alright, your turn:
Have you ever tried to kick up into a handstand?
What’s the one thing holding you back?
What questions can I answer?
-Steve
PS: One day I’ll be able to type articles like this while doing a handstand.
Before you fork out some cash for a personal trainer, read this guide!
It’ll help you spot the difference between a bad personal trainer and an AMAZING trainer.
And trust us, having the right trainer can make ALL the difference in the world.
There’s nothing worse than spending 6+ months in a gym (and thousands of dollars) with a trainer, only to step on the scale and realize that you haven’t made any progress.
It’s…
I’ve worked with good trainers and bad trainers over the past 16 years, have worked with the same online personal trainer since 2014, and we have a team of 15 personal trainers on Team Nerd Fitness.
Long story short, we know our stuff, and we’ll give it to you straight.
Whether or not you want to check out our 1-on-1 Online Training Program, this guide is going to help you with all the details.
In this guide we’ll cover the good, the bad, and the ugly when it comes to personal trainers – both in-person and online:
As Coach Matt explains in the video above, the first question you need to ask when hiring a personal trainer: do they match up with your goals?
And yep, that means we’re going to have to pick some goals in the first place!
So start by picking your goals and then determine if the trainer you’re paired up with is the right fit for you. Like dating, you can meet somebody who’s amazing but not right for you.
If somebody is a competitive marathon runner, they might not be a great powerlifting coach, and vice versa.
So, start with your goals for finding a personal trainer:
These goals will largely determine the type of trainer you’re looking for.
MISTAKE #1: Not making sure your trainer has expertise in the area you want to train in.
Expertise in one area does not necessarily make them a good fit in another!
After that, you’ll want to think about what you NEED from your personal trainer:
Are you looking for a powerlifting coach to show you the basics (squat, deadlift, bench) so your form is right? Just a few sessions up front and a few later down the line to confirm you’re on the right path might suffice.
Are you new to working out or looking to kick start your first 2 months of training with 2 sessions per week to keep you disciplined?
What type of person are you? Do you need more hands-on guidance throughout your workouts, or more space to take ownership and thrive on your own? Do you need somebody who will cheer you on or do you need tough love from somebody to call you on your bullshit?
Once you set proper expectations with what you want and how long you need a trainer for, then you can pick out one that hopefully will work for you.
How to find a good personal trainer
Once you find a trainer you are considering working with, the next step should always be an in-depth conversation.
MISTAKE #2: Blindly accepting what your trainer tells you without making sure you fit together!
They SHOULD be listening to you completely and hear your full story.
They SHOULD ask about any past issues with injuries or experience with exercise. If you’re injured or have any deficiencies, they should know this so they can create a great program for you.
They SHOULD ask you about your nutrition. If they don’t ask about your nutrition, you’re going to be wasting your time.
They SHOULD practice what they preach. They don’t have to be an Olympian, but should have a healthy lifestyle.
They SHOULD tell you about their expertise and how they can help you. They should be able to share past successes of clients with you or point to their credentials and history of success.
They SHOULD set proper expectations. You won’t get ripped in a month, but they can let you know it could take many months to get in shape or build the right kind of habits.
That’s what to look for. These are the things we specifically focus on with our 1-on-1 online coaching program. We love helping people in a way that fits their lifestyle, at a pace that they feel great about, while actually having fun.
What are the Signs of a bad personal trainer?
Beware the “entertainment exercise” trainers with a routine that isn’t catered to your goals.
MISTAKE #3: Thinking a workout is more effective because it’s confusing.
Many trainers just try to confuse you with needlessly complex movements, and put all their clients through roughly the same cookie-cutter plan.
Why? because they know it makes them look knowledgeable without actually needing to do something effectively:
“Now balance on this bosu ball while doing these dumbbell squat lunge curls and standing on one foot with your tongue out! Muscle confusion!
I hope you saved some energy for the row machine.”
Tough workouts are great, but remember that while it’s easy to get someone tired (“go do 100 burpees!”), it’s harder to help someone slowly improve and build momentum.
Sure, it might elevate your heart rate and tire you out, but if it’s not building towards your goals in a way that you couldn’t do at home, what are you paying for?
They might also have just obtained a basic certification and stopped their education there, relying on ‘conventional wisdom’ rather than doing the research and building the experience.
If your trainer says any of the following phrases, run for the high hills:
“Yeah you don’t want to squat too low – it’s bad for your knees.”
“Use this machine; it’s safer for you than free weights” (unless you have an injury)
“Yes, you should be using mostly your back. That’s why it’s called the back squat”
I have overheard all of these sound bites from real trainers in real gyms, and it made me weep like the Native American in the 1970s pollution ad:
Your trainer should be results-focused, not focused on scheduling you a new session and keeping you around.
I often see clients working with trainers for months and months and that client never looks any different.
The trainer is just interested in cashing another check.
Remember,your personal trainer works for YOU: Don’t let them build a program that doesn’t actually fit your needs!.
Do they adjust your workout to take care of any pre-existing injuries you may have, or do they just give you a cookie cutter workout?
Are they encouraging or helping you succeed in the way you want to be encouraged, or are they scrolling through Instagram models on their phones while you’re doing your sets?
Are they putting in the time so they can see you get results, or are they putting in the time so they can check the box and collect your money?
You’re paying money for this person’s expertise and attention – it’s not too much to ask to find somebody who takes those things seriously.
What certifications should a personal trainer have?
There are a wide variety of personal trainer certifications and other “credibility indicators.”
The more traditional path – a degree in exercise science or kinesiology may mean the trainer in question is knowledgeable about the human body.
However, that doesn’t speak to any experience they may or may not have coaching in real-world circumstances.
6 of the most popular personal trainer certifications are:
T-Nation provides a rundown of the pros and cons from a trainer’s perspective that we feel is also useful insight from a client’s perspective. Be sure to check them out if you want to learn more about what’s behind your trainer’s certification.
CrossFit certifications are completed in a single weekend. While a CrossFit certification does not make a trainer bad (there are plenty of excellent CrossFit coaches out there!), it does not guarantee excellence either.
A certification from NPTI – the National Personal Training Institute – is a credential gained from going to a school for personal training (rather than attending a single class or taking a test).
While no certification can fully promise excellence, we believe trainers with NPTI certifications are worth your consideration.
CAVEAT TO ALL OF THIS: Plenty of trainers who have NO certification are incredible, and plenty of other trainers have the most elite certifications and are terrible trainers.
MISTAKE #4: Blindly accepting a trainer’s credentials or discounting a trainer without certain credentials.
Certifications can be a starting point, but they shouldn’t be the determining factor.
One of the most important things to look for in your trainer isn’t a credential or certification at all, but real experience and an enthusiasm for helping you reach your goals.
For example:
Looking to powerlift or get into Olympic lifting? Look for someone who has successfully competed in their fields, or someone who actually coaches athletes who do compete!
Need to lose a lot of weight? Ask a trainer to share with you success stories from people who are like you.
In our view, finding a trainer with proven experience and a track record of performing or coaching (or both) in the area of your goals is the most valuable step you can take to ensure quality.
The credential is only a starting point.
Trainers aren’t cheap, but the benefits can be priceless.
Remember, you aren’t paying simply for their time with you. You’re paying for the years and years they’ve spent learning, training, and coaching.
It’s the years behind the certification that makes their time so valuable, so expect the cost of a trainer to be significantly more than the cost of a basic membership at your gym.
How much does a personal trainer cost? Are Personal Trainers Worth it?
The cost of a personal trainer can vary dramatically depending on:
Where you live (in an expensive city, small town, etc.).
The quantity and duration of your training sessions.
What kind of training you are looking for.
But you want specifics.
The average North American trainer charges $55 for an hour session.[1]
That’s an “average” so let’s break it down a little.
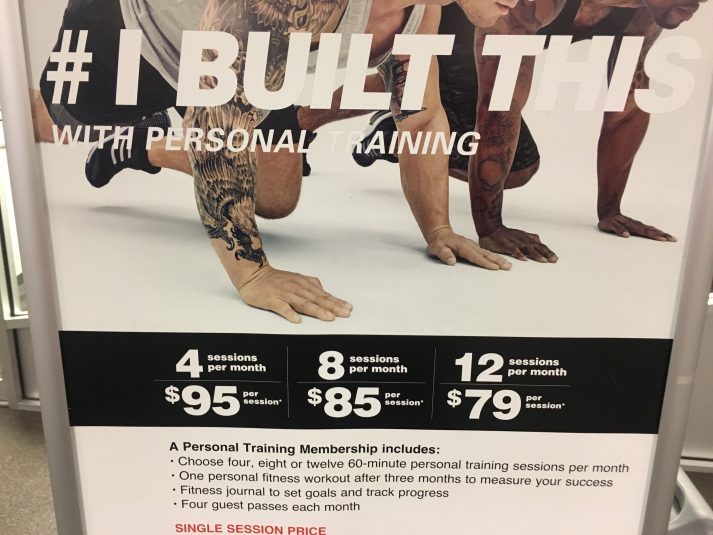
Here are the prices for working with a trainer in various capacities at my generic commercial gym in the NYC area (definitely on the more expensive end):
4 sessions per month: $95 per session = $380/month
8 sessions per month: $85 per session = $680/month
12 sessions per month: $79 per session = $948/month
Is this pricing more or less than you expected?
Here is how much a personal trainer costs at:
Global Gyms: Most big box gyms offer personal training:
LA Fitness: you can expect to pay about $60 per session.
24-Hour Fitness: it’ll be about $80 per session.
Anytime Fitness: as little as $35 a session.
Luxury Gyms: If you go to a more upscale gym like Equinox, expect to pay “luxury” prices of $110+ an hour.
In-Home Personal Training. If you don’t want to head to the gym, you can actually have a personal trainer come to your home. The cost on this could be all over the place, but a rough average would be about $65 for an hour session.
Different trainers will have different qualifications and expertise, leading to vastly different training experiences.
This can be really important.
MISTAKE #5: Thinking “more expensive” automatically means “better results.”
Cost is not the right metric. VALUE is the right metric!
Depending on your goals and the results you’re after:
$30 per session might be overpaying for a crap trainer who gives you a generic workout and doesn’t care about you.
$100 per session might be a STEAL if it’s an amazing trainer that gets to know your life and your personality, motivates you in the way you need to be motivated, and helps you get past a plateau when you stall.
That’s why remembering your “get in shape” goals is critical when buying a personal trainer.
If you’re looking to do 5 sessions to improve your powerlifting technique, that’s different than hiring a trainer to be with you in person 3x a week to get you to the gym.
HOW TO THINK ABOUT HIRING A TRAINER:
You’re not just paying for an hour of somebody’s time.
You’re paying for their years of experience, schooling, training, and expertise.
You’re paying to outsource ALL of your fitness questions to somebody who knows what they’re doing.
Somebody who gives you the confidence you’re training correctly.
So instead of “I am paying this trainer for 1 hour, this is too expensive,” what you’re really paying for is confidence, momentum, and (hopefully) results.
As somebody who has worked with an online trainer since 2014, I would pay any amount of money to my coach (just don’t tell him that) because I love getting results after years of struggle.
Our pricing comes in at a less-expensive price than 4 sessions per month with a trainer.
In addition to building you a workout program for the month, we also help you with your nutrition, mindset, and goals, and answer all the questions you have.
#1) Freedom to fit your schedule. With an online personal coach, you can train when and where you want to fit your schedule – your coach builds the workout program for you ahead of time, so you can fit it in at your convenience.
Compare this to a traditional coach, and you’re at the mercy of their busy schedule. If they only have time Friday morning at 8am, and you’re not a morning person, conflict ensues.
#2) Persistent worldwide accountability. I’m borrowing this phrase from a NF Coaching Client, Jeff (his success story is great). No matter where in the globe you are, your online trainer comes with you.
Which means the accountability never stops. If you travel for work, your coach can plan for that and build you a special travel routine. Getting relocated for work? No problem – your coach will still be there.
#3) Nutritional guidance. With most traditional personal trainers, you engage with them only during your scheduled visits: they help you work out and that’s about it.
With an online personal trainer, you’re connected whenever you have access to the internet. And I would imagine that MOST online coaching programs, work with you on the most important part of the equation: eating healthier!
AKA everything that happens in the 23 hours outside of the gym.
#4) More cost-effective. Most in-person personal trainers are expensive, especially if you work out with them two or three times a week.
That’s because if your trainer is working with you, they can’t work with anybody else at the same time.
When you work with an online coach, because you aren’t training with them 1-on-1 in the gym, they can provide more cost-effective guidance.
When you factor in their availability via chat and their help on habits and your nutrition, you’re looking at a life-changing experience if you find a coach that fits your personality.
When comparing online coaches versus regular coaches, I’m going to share the cons as if you have the option between a GREAT online coach and a GREAT in-person coach.
Neither of those is guaranteed.
Here are the cons of an online coach when compared against a real-life equivalent:
#1) Your coach can’t do the work for you. There’s nothing stopping you from skipping a workout and lying to your online coach that you did it. Nobody wins in this scenario, but I can totally see it happening.
So yeah, an online coach can’t pick up the weight for you, and they can’t yell at you to put down the donut. You have to do the work!
#2) No real-time feedback and instant form check. If you’re learning how to powerlift, or you’re going for a particular heavy lift, having a coach right there is HUGE.
They can tell you to move your squat slightly wider. They can guide you through the movement and consistently remind you – even when tired – to keep great form.
Although we do form-check videos, where we have coaches and clients send clips back and forth to each other, it’s not the same as having somebody critique you in real-time.
If you’re looking to nail a particularly challenging lift, or learn a dangerous gymnastics move, working with a trained professional in person is invaluable.
#3) The value of sunk cost. If you pay for a month of online coaching, there’s nothing inherently motivating you to go to the gym when it’s cold and you’re tired – your coach can’t yell at you, and you’re not letting anybody down in the moment when you don’t make it.
Compare this to working with a real coach in person.
You paid $100 for a session, and if you don’t show up, that money is *POOF* gone. So you tell yourself, “I already paid for this, and my coach is gonna be mad, I should probably go.”
And then you go. And you’re so glad that you did.
Although your online coach can notice that you haven’t signed in on your app, and they can ask what’s going on, this is after the fact compared to an in-person coach getting stood up.
I wouldn’t say one format is clearly better than or superior to another. It really depends on what you’re after and the circumstances of your situation.
MY PERSONAL EXPERIENCE: I’ve been working with an online trainer since 2014, and it’s truly been life-changing for me.
I had some goals that had evaded me despite a DECADE of effort, and it took a great coach to coax out the right strategy. It’s how I say (jokingly) that I went from Steve Rogers to Captain America.
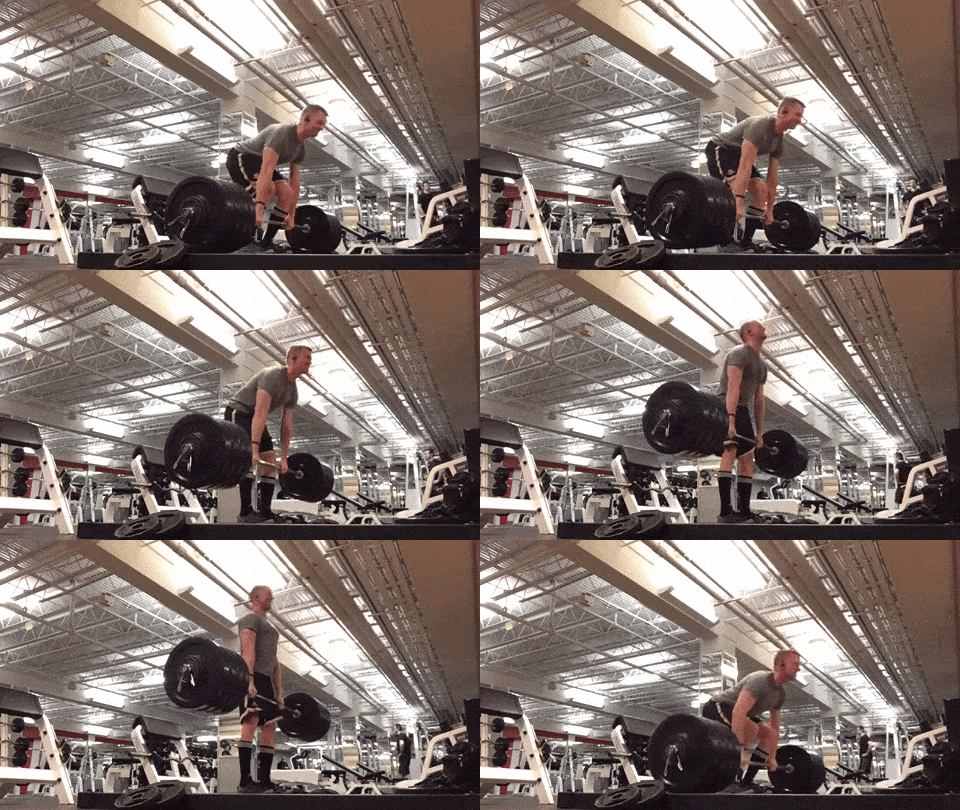
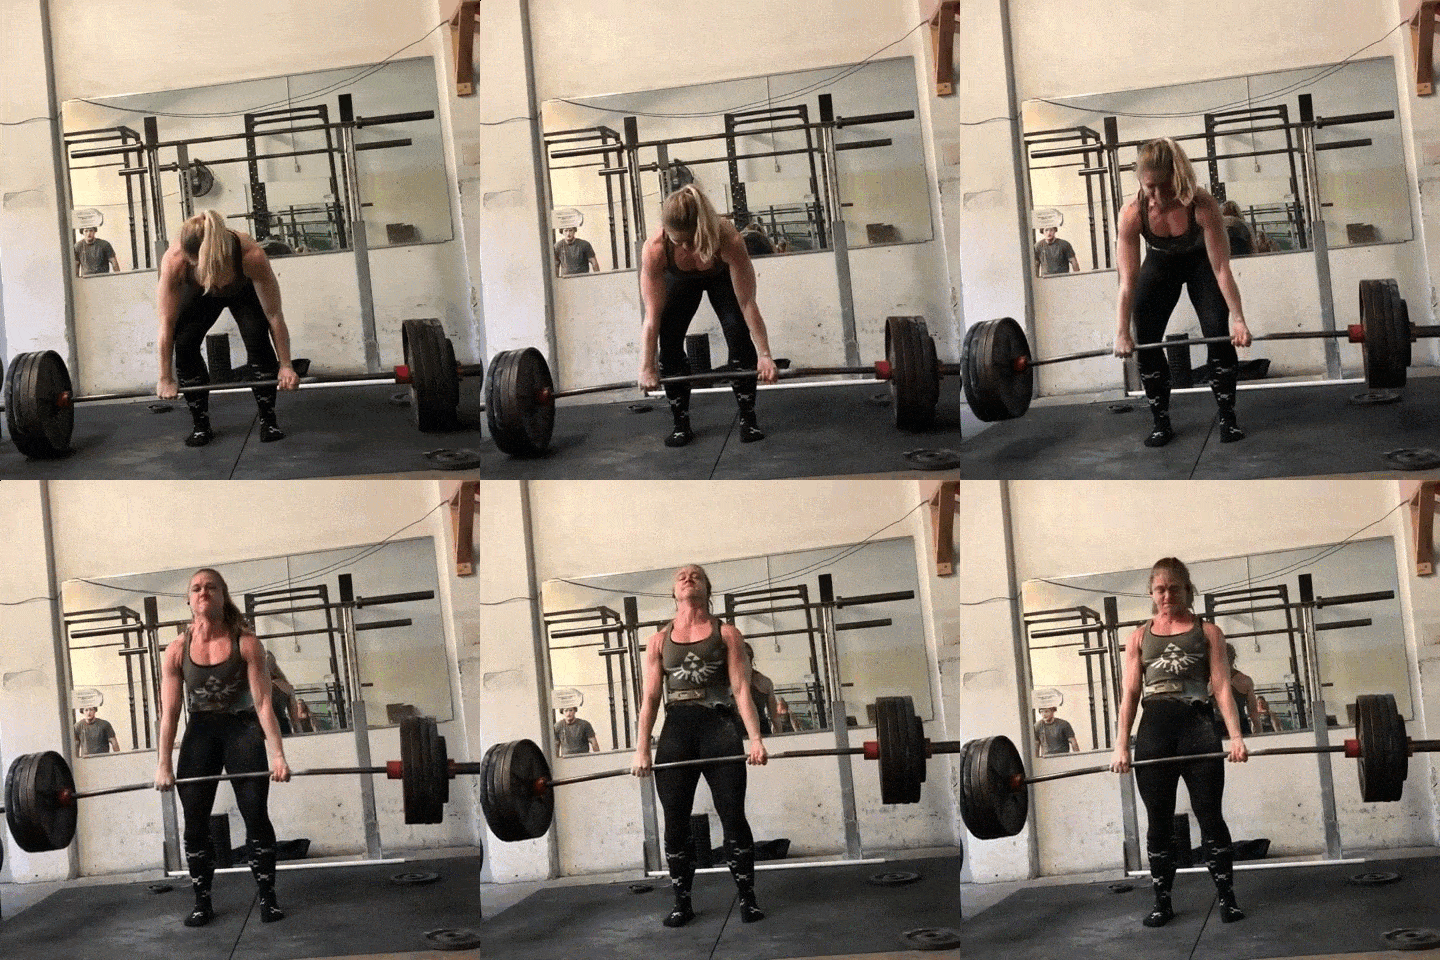
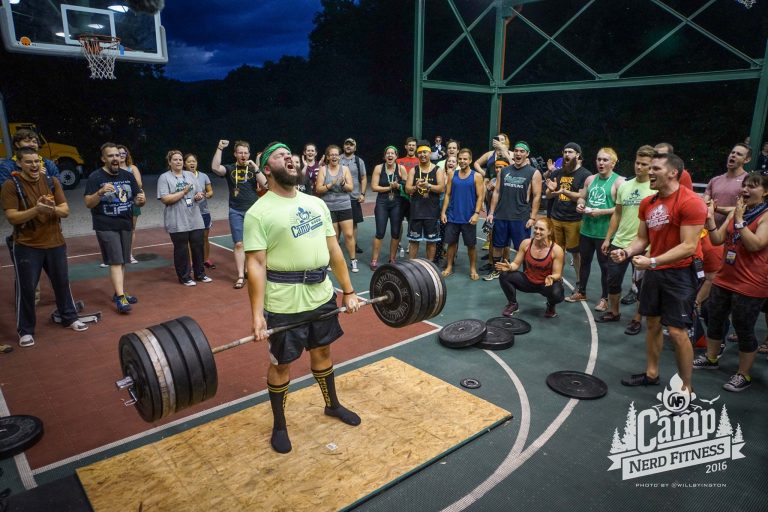
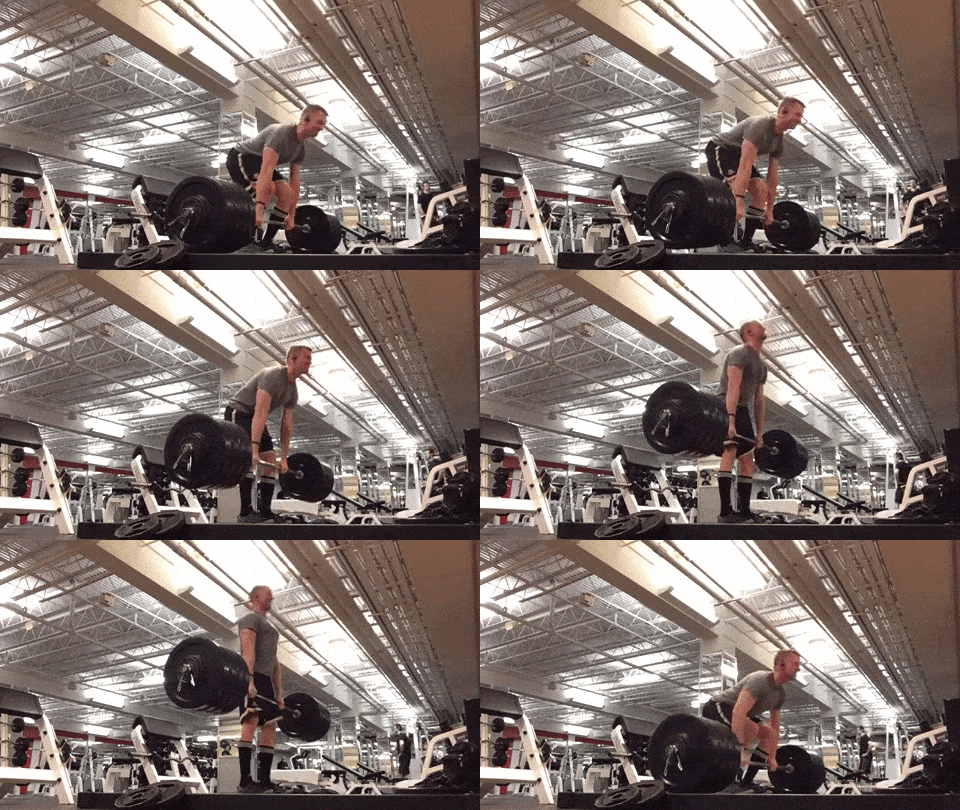
And it was my coach’s programming that got me a 420-pound deadlift at a bodyweight of 172 pounds:
I’m not gonna set any powerlifting records, but I’m healthier, happier, and stronger each and every month, and I’m damn proud of that.
For somebody that can’t afford a top-of-the-line professional coach for each session, having an online coach to build your programming and guide your food choices is a verrrrry close second.
How to hire a personal trainer
HERE’S MY ADVICE: Give your new personal trainer 5 sessions before making a decision that things aren’t working out (sessions are often sold at a discount in a package).
The first session is often exploratory, explanatory, and introductory, and the trainer needs to test your limits and movements to build upon that.
This isn’t a “get fit quick” strategy, but rather one that could take months and months for you to find the right person to aid you on your journey.
Don’t expect miracles in a day!
A few words of wisdom if you do hire a trainer:
DO NOT USE YOUR TRAINER AS AN EXCUSE: Too many people will hire up a trainer and give no effort in the gym or the kitchen.
Then, when they fail to see results they can turn to their friends and say “man, my trainer is terrible, THAT’S why I’m not losing weight/getting stronger/etc.”
This happens so much more often than you’d think. A trainer is a guide, like Morpheus.
You have to take the pill and walk through the door yourself.
MAKE CRITICISM CONSTRUCTIVE CRITICISM: Often when the trainer asks them to do something (walk every day, throw away junk food, eat a vegetable), the client/trainee comes back with 1,001 reasons why they can’t do that.
No compromise or discussion of possible solutions. This stinks.
Instead of saying “no,” offer an alternative solution and negotiate a plan: “I don’t really like broccoli, do you have a way to make vegetables taste better?”
In other words, don’t look for problems, look for solutions.
IF YOU ENJOY WORKING WITH YOUR TRAINER: Let them know and continue working with them.
The more information you can give them on your progress, the easier it will be for them to alter your program as you go on.
IF YOU DON’T ENJOY WORKING WITH YOUR TRAINER: That’s okay too. Not all relationships end in marriages.
I think you can be honest with them and let them know that it’s not a good fit and you will not be continuing to work with them.
Good trainers at this point will ask what they could have done better.
Trainers who are simply after your money may guilt trip you or beg you to stick around. Try somebody new and keep the search going.
REMEMBER: this is a lifelong quest, and you’re on the hunt for a great guide to help you on your journey.
They won’t do the work for you, and they can’t work miracles.
Have proper expectations, do what you’re told, and this could be the best investment you’ll make in your entire life!
Trainers in the Rebellion, what did I miss?
Those who have had experience working with Trainers, any wisdom to share from your experience?
One final note: Going to a gym is intimidating, especially if you’re starting out.
If you are in a location where there aren’t any great trainers, you don’t have access to a gym, or you’re just not ready to work with somebody in person, consider checking out our Online Coaching Program!
Schedule a free call to learn more by clicking on the image below:
If you have questions about what you need to look for when it comes to training with a coach in person, or even questions about working with an online trainer, leave them in the comments below so I can chime in!
This High-Intensity Interval Training (HIIT) guide is probably the best interval training guide in the galaxy.
My justification for such a bold claim?
We’re really good at this stuff, AND we have dinosaurs and Muppets.
Plus, lots of great gifs:
We build custom interval training programs just like the ones in this guide for our 1-on-1 Online Coaching Clients, including workouts for at home, the gym, or even while traveling.
In this Ultimate Guide to Interval Training, we’ll cover:
If you’re interested in starting a HIIT practice (which you are, ’cause you’re here), you may want to try our new app! It contains a fun adventure that will take you from sitting on your couch to a full HIIT workout – with plenty of benchmarks in between for you to find your groove. No guesswork needed, just jump into the app and follow it’s next steps.
You can sign-up for a free trial right here:
Alright, let’s do this thang.
What is Interval Training? What is HIIT?
In 2018, High-Intensity Interval Training (HIIT) was ranked the number one fitness trend by American College of Sports Medicine.[1]
They wrote:
HIIT typically involves short bursts of high-intensity exercise followed by a short period of rest or recovery and typically takes less than 30 minutes to perform.
Essentially, HIIT is just following a specific regimen where you vary your speeds and intensity throughout a shorter run, swim, bike, or row.
Any exercise can be a form of HIIT, but here’s a common routine:
Jogging lightly for three minutes.
Pushing yourself harder for a minute (run or sprint).
Repeating this cycle 4 more times.
Because everybody is busy and overwhelmed, fast results in the least amount of time is why most people discover HIIT.
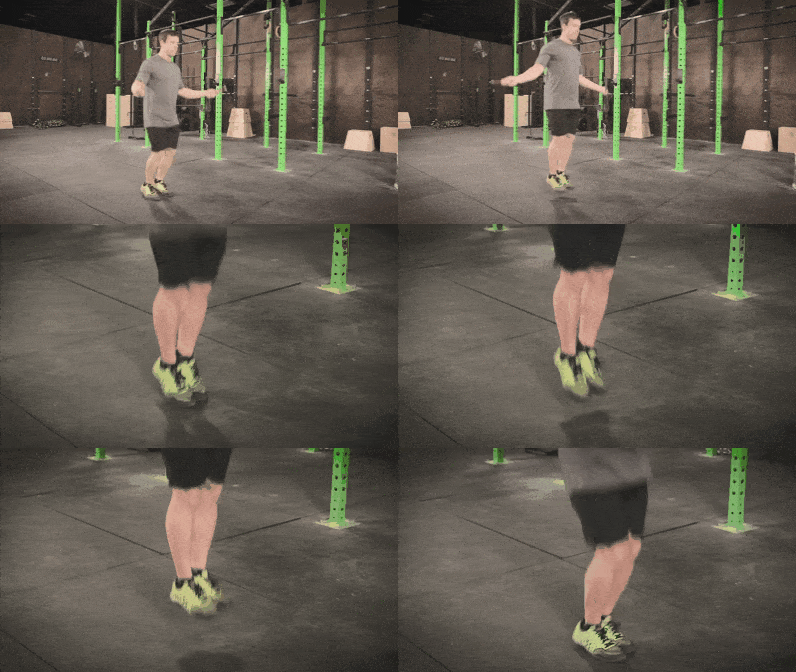
Plus, you can do HIIT with just about anything, including a jump rope:
You may be asking, “Steve, just how short and intense are we talking about here? Also, your new haircut looks spiffy.”
Thank you, you’re very kind.
So let’s explore the pros and cons of intervals.
What are the Benefits of HIIT? Why Should You Do Interval Training?
The 1996 landmark Tabata study demonstrated the benefits of extreme HIIT.[2]
Dr. Izumi Tabata, from Japan’s National Institute of Fitness and Sports, was obsessed with interval training.
The doctor sought to see exactly what kind of gains were obtained from short, intense, periods of exercise. He conducted an experiment with Olympic athletes on stationary bikes and put them through intense bouts of exercise followed by short periods of rest.
The results were fascinating.
Tabata found:
That 6 weeks of moderate-intensity endurance training did not affect anaerobic capacity, but that 6 weeks of high-intensity intermittent training (HIIT) may improve both anaerobic capacity and VO2max simultaneously.
Let’s translate that: compared to regular cardio, HIIT had a greater impact on improving BOTH:
Aerobic increases (endurance).
Anaerobic increases (power).
Even crazier?
Tabata was able to demonstrate improvements in his athletes with just FOUR-MINUTE bursts.
So what’s happening here?
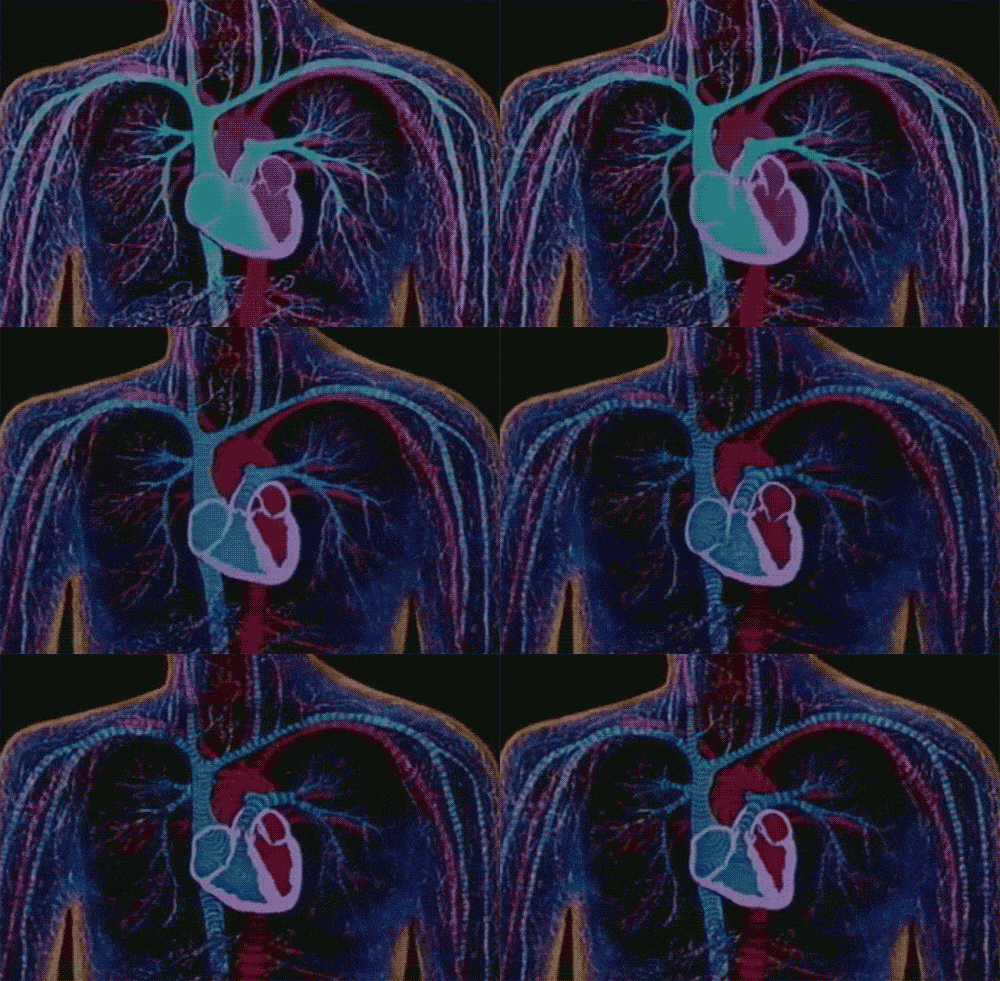
Simple: your heart is a muscle.
If you keep your heart beating at a constant rate, never expanding it outside of its comfort zone, it will never grow stronger.
By introducing chaos and pushing your muscles outside of their comfort zone, they must adapt and grow more resilient in order to survive.
Intense interval training challenges your heart by constantly forcing it outside of its comfort zone.
Coach Jim explains 7 different ways to achieve progressive overload in this video:
Since Tabata’s 1996 study, many other trials have shown the positive impact of interval training.
Here are some of the benefits of High-Intensity Interval Training:
#1) HIIT can burn lots of calories in a short amount of time.
Revving up your effort requires more out of you, including calories.
One study backed this up, finding HIIT burned about 20-30% more calories than regular cardio.[3]
The researchers stated:
These data suggest that individuals can burn more calories performing an HIIT session than spending the same amount of time performing a steady-state exercise session.
The name of the game here is “intensity.” The more intense you go, the more calories you’ll burn.
#2) HIIT for lowering blood sugar.Managing blood sugar is really important for health, not just for diabetics.
Those trying to lose fat should be aware of their blood sugar and corresponding insulin levels.
The good news for our current discussion? HIIT has been shown to help lower and manage blood sugar levels.[6]
#3) HIIT for heart health. Touching on the “antifragile” topic again, HIIT has been shown to help with overall cardiovascular health.
It does so in the same way traditional endurance training does, but at a fraction of the time (almost half).[7]
Alright, let’s chat about how to actually do some interval training.
What’s an Example of Interval Training? How to Do Interval Running
The key to HIIT is being able to go from “easy” to “difficult.” All sorts of different exercises can get you there:
Aerobic (cardio).
Bodyweight (strength training).
Resistance (weight training).
HIIT is generally associated with running (aerobic), so we’ll devote this section to just that.
The easiest way to experiment with HIIT would be to run.
Here’s how to start with a basic HIIT running workout. Go to a park in your neighborhood. Warm-up with some light jogging, high knees, and mobility – leg swings, arm swings, etc,
And then begin your workout!
Run/jog at a brisk pace for 30 seconds.
Jog/walk at a slower pace for 2 minutes.
After your rest, shoot for another 30-second run/jog.
Continue until you get tired or after about ten “push/rest” intervals.
And BAM! You just did HIIT.
Don’t get disheartened if you find yourself stopping a lot during your first week of HIIT training.
You’ll be surprised how quickly you get better at this!
Also, “running” or “jogging” is subjective. Whatever walking fast means to you is great. Do that for your periods of intensity.
It should be noted, that the entire “Couch to 5K” concept rests on interval training through running.
It’s all broken down into “walking,” “jogging” and “running.”
If you’re curious, check out our in-depth Couch to 5k review. If you want to start interval training, “Couch to 5K” could be a good way to do it.
More of an indoor person?
Consider a treadmill, where it actually sets intervals for you based on your desired difficulty.
Just be careful on it…
We’ll be talking about machines a lot more in the next section, but a treadmill is all you need to do a HIIT workout.
Experiment with the speed and incline to find a setting that you would consider “intense.” Many machines can be programmed to flip between this and an “easy” setting.
And you know what that means… boom! It’s built for HIIT.
When we designed NF Journey (our awesome new app), we used an “intense” and “easy” interval switch for most of the workouts.
If you want, you can sign-up for a free trial right here to see what I mean:
How do HIIT Workouts Work? (More HIIT cardio to choose from)
There are a lot of different aerobic exercises for HIIT cardio.
For example, you could jump on a bike, which is like HIIT running but with wheels (duh):
Every spin class is based on HIIT cycling (SoulCycle, Flywheel, or even your local gym now has spin classes).
Elliptical. If it has a dial for resistance, it can be used for interval training. For a couple of minutes, go on low resistance (0-2 level). Then crank up the resistance for one minute (up to 8-10). Repeat this process 12 times, which will give you a 20-minute workout.
Stair Climber. Much like the elliptical, alternate between periods of low intensity for two minutes, then one minute for high intensity. The difference with the climber is the dial will control the speed of the stairs. Be careful.
Rowing Machine. Start with a two-minute warm-up. On minute three, row like you’re being chased by the Kraken for a full 60 seconds. Then catch your breath. The rowing machine might be hard to do for a full 20 minutes, since it’s a lot of upper body. Shoot for ten minutes at first.
Jumping Rope.Jumping rope is a full-body exercise. Also, it’s fun. There’s no dial here, your own body controls the pace of the jump. Follow the same two-minute easy, one-minute intense as above. Jump rope can also be done with friends!
So far we’ve just been talking about aerobic exercises.
Let’s cover our other categories, of bodyweight and resistance.
What Are the Best HIIT Exercises? (Two Other Forms of Interval Training)
“Steve, this all sounds great. But I hate running!”
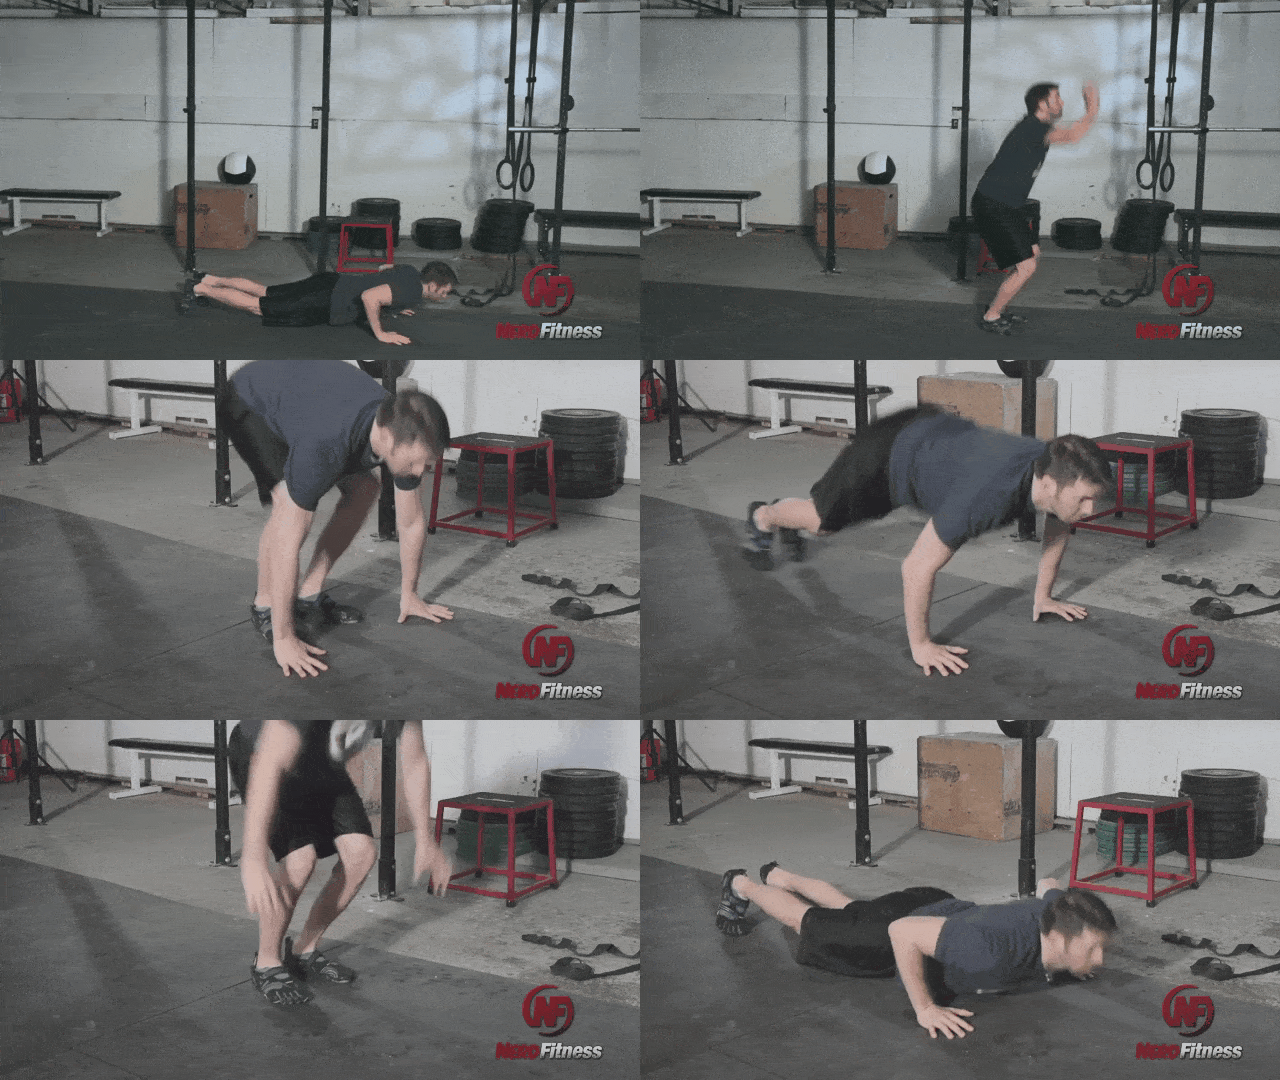
Burpees. Stand up, then squat down, kick your legs out, do a push-up, bring your legs back in, and explode up into a jump. Try to do 20 repetitions, then rest for two minutes. Repeat until you hate yourself:
Push-ups. For 20 seconds, do as many push-ups as possible. Rest. Then do it again. If you’re worried about proper form, check out our push-up guide and watch this:
Pull-ups. Same idea as above, do pull-ups for 20 seconds, then rest. If you can’t do a pull-up, we got you covered in our pull-up progression guide:
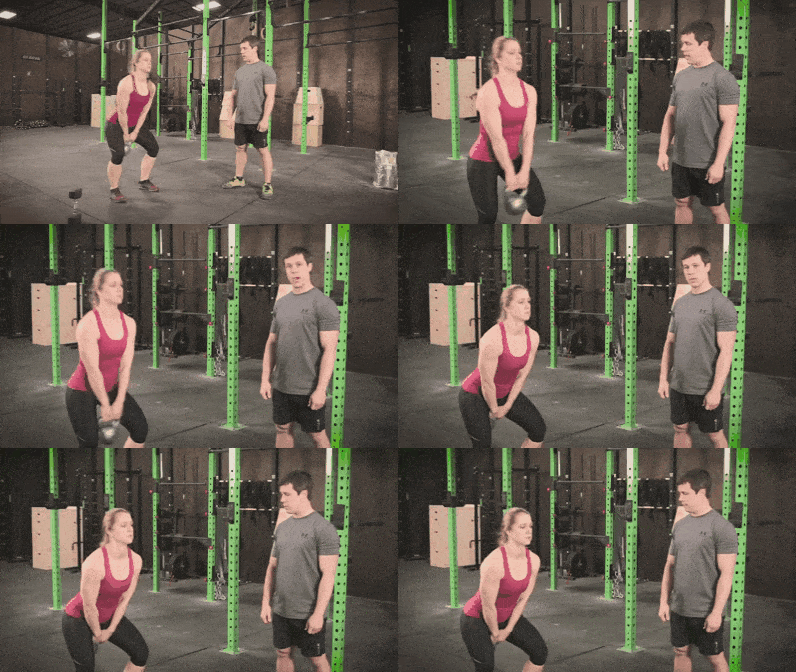
Kettlebell swing. For ten minutes, do 20 kettlebell swings on every minute.
This will be intense, and worthy of congratulations when you’re done. Check out our 20 Minute Beginner Kettlebell Workout for everything you’ve ever wanted to know about kettlebells.
Battle ropes.If your gym has battle ropes, they’ll be a great tool for HIIT. For intensity, the amount of slack in the rope determines the load. The more slack on the rope the tougher, and more intense, the workout. Also, don’t get stuck in just up and down movements. Some variation will help target different muscles.
Weight lifting.The critical piece will be moving from one exercise to another quickly enough. For example, hustling from the bench press to the lat bar: we call this circuit training!
To answer your next question: yes, you can also do circuit training as a form of HIIT.
Circuit training is going through a sequence of exercises, or stations, back to back.
Coach Lauren explains the ins and outs of circuit training in this video:
So in a circuit, you could go from push-ups to pull-ups, back to push-ups, only resting briefly from one exercise to another.
Circuit training would be perfect to mix into a HIIT workout, since you can design your circuit to be very intense.
Plus, there’s a Batman workout hidden in there. You’re welcome.
We create custom HIIT programs for busy people like you that are ACTUALLY fun. If you’re looking for a supportive coach to guide you and tell you exactly what to do each day, we got you covered!
If you just want a beginner circuit to get started with, you can try out our Beginner Bodyweight Workout Routine. Plus you can download a free worksheet to track your progress with this circuit when you join the Rebellion below:
Grab Your Beginner Bodyweight Routine Worksheet. No Gym Required!
Complete this workout at home, no equipment required
Avoid the common mistakes everybody makes when doing bodyweight exercises
Learn how to finally get your first pull-up
Oh, what’s that? You want to have even MORE fun while getting the benefits of HIIT?
Sure. Let’s think outside the box:
Basketball, tennis, soccer, and Ultimate (frisbee) are AMAZING styles of exercise that use interval training (it’s all start and stop!).
Run here, catch this, and wait for the next round to start.
That’s what we’re looking for in a HIIT workout.
So pick a form of FUN exercise that gets your heart racing faster and slower throughout the activity (yes, I suppose even THAT activity would count).
Is HIIT Good for Losing Weight? Is Interval Training Good for Losing Weight?
My guess is that you’re reading this article because you’re trying to get the most efficient “bang for your buck” when it comes to getting in shape.
And HIIT is a great form of exercise and COULD help with weight loss.
I will, however, lower some of these outlandish claims that exist in the media.
For example, Time magazine calls HIIT “miraculous” in one article.[8]
That’s a little much, even for me, who writes for a living on why you should work out and likes using hyperbole for effect.
Seriously, I’m better at it than ANYBODY ON THE PLANET.
Ahem.
Cardio, strength training, and HIIT all have many benefits.
However, a meta-study reviewed HIIT compared to steady-state cardio, specially looking at fat loss.
Regular exercise is an integral component of long-term weight management. However, unless implemented in very large volumes, short-term exercise in isolation (including HIIT) is unlikely to produce clinically meaningful fat loss.
What’s that mean?
As long as your energy expenditure is the same (and you’re in a caloric deficit), steady-state cardio is equivalent to HIIT for fat loss.
In other words, if you want to lose body fat, how you eat will be responsible for 80% of your success or failure.
It doesn’t matter how many intervals you do – it’s not gonna help you lose weight if you don’t also fix your nutrition.
Oh, and if you want help along the way, don’t forget about our Online Coaching Program:
Mistakes to Avoid When Doing High-Intensity Interval Training
There’s a lot to consider when embarking on a HIIT practice.
No matter which routine you end up starting with, make sure you follow these words of wisdom:
Ease into it. As the saying goes, “you must walk before you can run.” The importance is building a HIIT practice. If you need to go “less intense” before progressing to “intense,” that’s fine. It’ll help build your aerobic capabilities (endurance), which will be important when working on intensity. Start with walking.
Keep proper form. Doing your movements correctly will help prevent injury. Here’s how to run properly. This is even more critical in your later intervals, where you may be exhausted and tired. If you find yourself breaking form, go ahead and slow down. Intense isn’t worth an injury.
Get rest. Our bodies actually build muscle while we are resting. So take some “off days” from your HIIT practice. Want to stay active on these days? Do some fun exercise!
Take it easy, focus on your form, and make sure to prioritize rest.
HIIT Timer Recommendations
HIIT centers on doing intervals.
One moment it’s intense, the next you’re onto a short rest break.
A good way to know when it’s time to go from one sequence to the next is a timer. A loud “beep” can tell you when it’s okay to catch your breath or when you have to kick it in gear.
Here are 5 HIIT timers you can try out:
Runtastic. Don’t let the name fool you, this free app is for more than just running. You can customize for many different interval workouts, depending on what exercise you go with. And the interface looks slick.
Seconds. It’s free and customizable to any form of HIIT. It can also integrate with your music, which is pretty sweet.
Seven. If you’re new to HIIT, Seven would be a good app for you. It’s free, plus it has illustrations for exercises. You also get to customize your own virtual personal trainer, which may be the future of fitness. The bots are coming…
Sworkit.First off, it’s a clever name (taken from “Simply Work It.”) Second, it’s free. Third, it can display your workout, goals, and calories burned. I like it.
J&J Official Seven Minute Workout. This free app from Johnson & Johnson is actually really awesome. It has premade workouts you can choose form based on your fitness level, or tweak them to make it your own.
Also, we need to talk about interval timers. Most of the apps referenced are completely customizable.
For example, you can change the intense interval from 120 seconds to 90 seconds.
This is critical because it’s up to you to decide how long you can do intense vs. rest.
Generally, folks recommend one minute of intensity and then two for rest when doing HIIT.
However, this all depends on the individual, and the exercises performed.
For example, burpees are tougher to do than jumping over a rope:
So feel free to make changes like 30 seconds of intensity and three minutes of rest. Make it your own.
Whatever way you chose to do HIIT, is fine, as long as you actually do it. The benefits of HIIT kick in when going HARD for you.
In other words, you don’t have to be an Olympic athlete to get the benefits of HIIT.[10]
A light jog totally works. Just don’t do it in a mascot costume.
As we discussed, if you’re consistent, you’ll improve.
So don’t stress about where you have to start.
For now, download an app and get going. Ours will help you train with HIIT too:
I hate multiple choice. Pick a HIIT workout for me!
Let’s power walk as our form of HIIT.
This is an example of a beginner HIIT workout we might prescribe for our Coaching Clients who are starting to train for their first 5K.
Let’s do seven intervals, two minutes each:
Warm-up. For three minutes, walk at an easy pace.
Intervals.For the first 60 seconds, power walk, like you’re trying to beat someone to the front of the line at Starbucks.
For the next 60 seconds, just walk.
Repeat six more times.
Cool down.You can do some more light walking, or a little bit of stretching here would be great.
Total time: 20 minutes.
I want to stress, that you can do just about any exercise in exchange for this routine. Just minus “power walk” and add “push-ups and bodyweight squats”
It’ll still be a great HIIT workout.
“But Steve, that’s still multiple choice!”
Right, right… sorry. Stick to power walking! Done!
How to Start Interval Training now
Do our power walking routine above. It’s a great place to start.
If you’re looking for EVEN MORE stuff to do, we have a few options for ya:
1) Check out our popular 1-on-1 coaching program. You’ll work with our certified NF instructors who will get to know you better than you know yourself and program your workouts and nutrition for you.
2) Exercising at home and need a plan to follow? Check out Nerd Fitness Journey!
Our fun habit-building app helps you exercise more frequently, eat healthier, and level up your life (literally).
Try your free trial right here:
3) Enlist in the Rebellion! We need good people like you in our community, the Nerd Fitness Rebellion.
Sign up in the box below to enlist and get our guide, Strength Training 101: Everything You Need to Know. It’ll help you start incorporating interval training into your workouts.
Download our comprehensive guideSTRENGTH TRAINING 101!
Everything you need to know about getting strong.
Workout routines for bodyweight AND weight training.
How to find the right gym and train properly in one.
There are a zillion ways to do HIIT, so don’t let the options paralyze you.
Pick one. Anyone. And get to it.
Interval training, in any form, is a solid fitness choice and a great practice to have in the workout arsenal.
Any questions?
Which HIIT workout style is your favorite?
Leave it in the comments below!
-Steve
PS: Make sure you check out the rest of our content on interval training:
This study demonstrated the benefits of HIIT on ‘recreational active’ participates, showing that the Tabata principles work on regular folks too, not just Olympic athletes.
Although a lot changed when it came to mass events over the last few years, when it comes to race preparation, a lot didn’t change. However, it’s time this post got an update since I first wrote in way back…
You’ve come to the right place, because this is what we do!
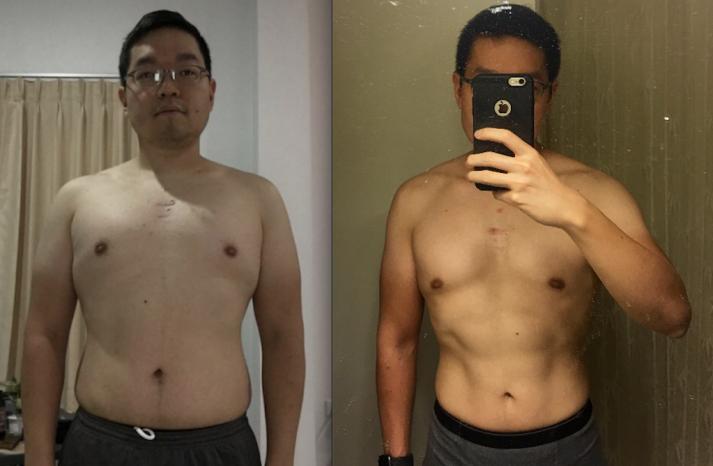
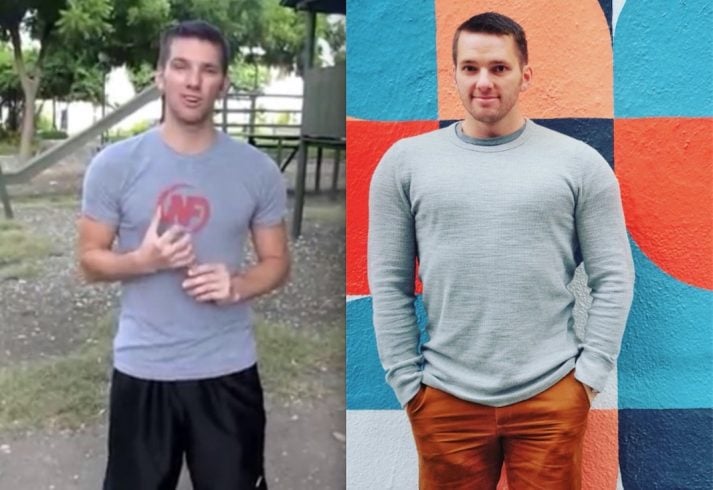
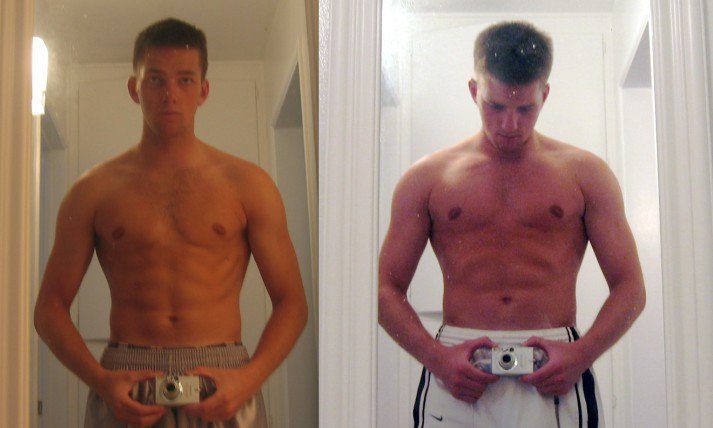
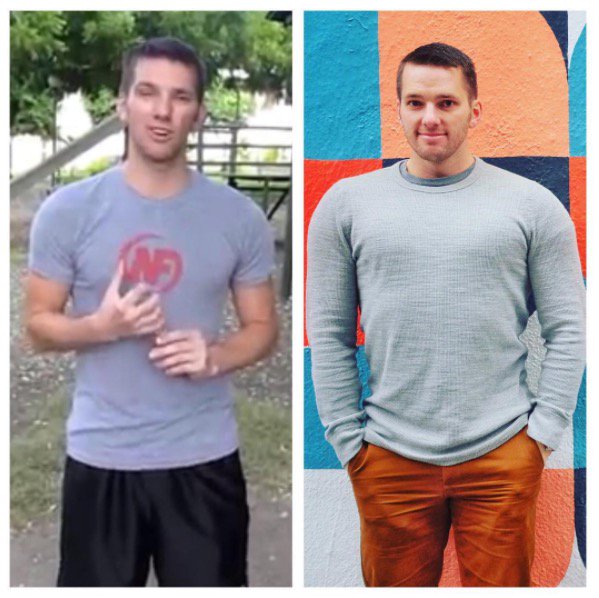
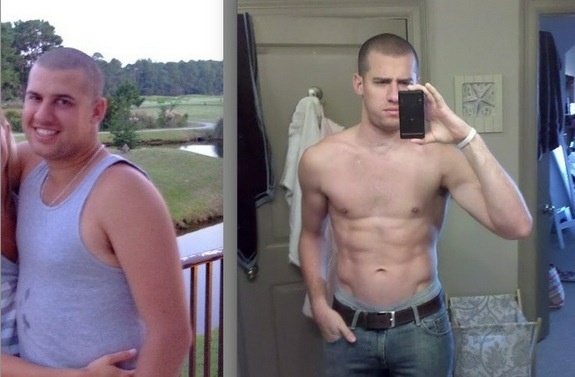
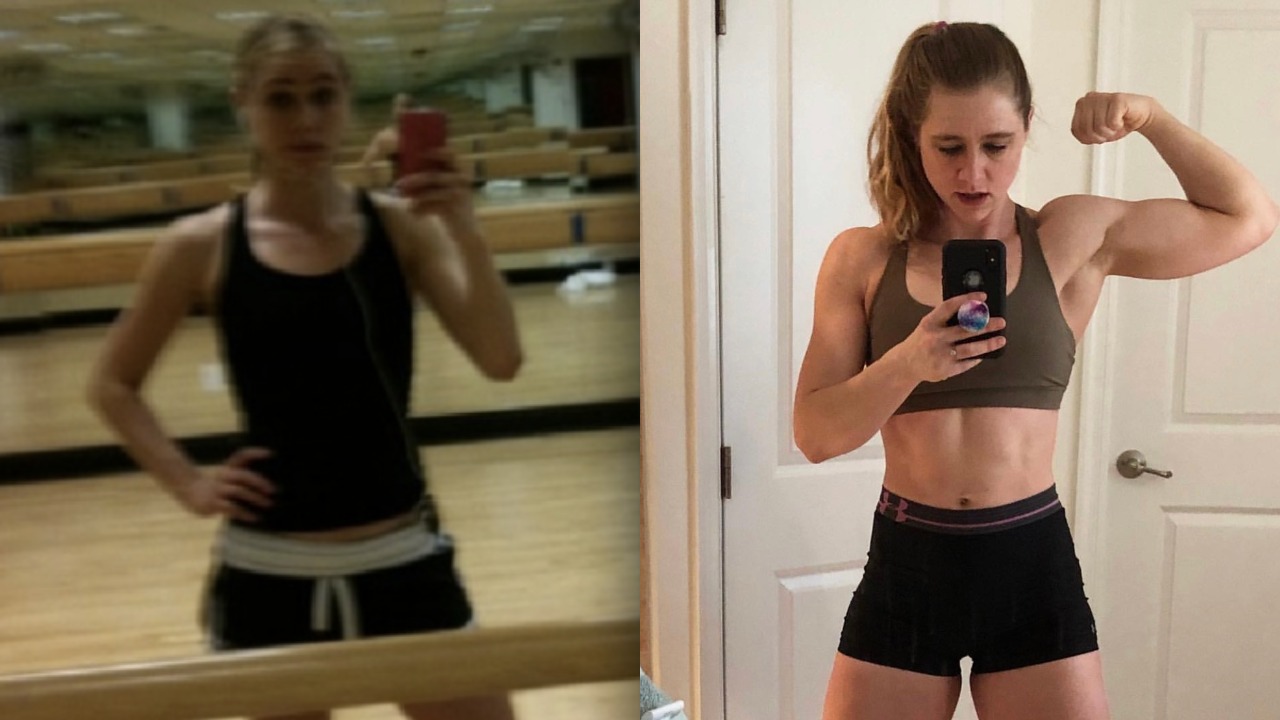
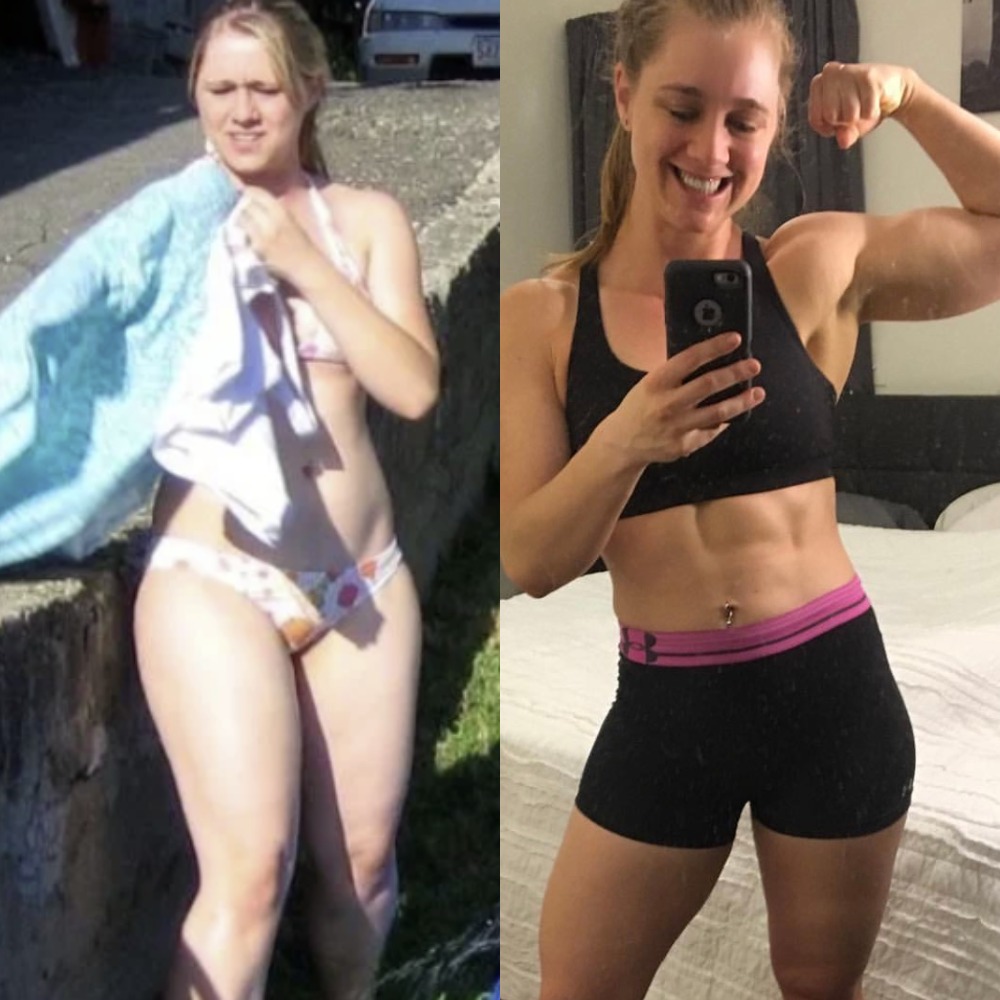
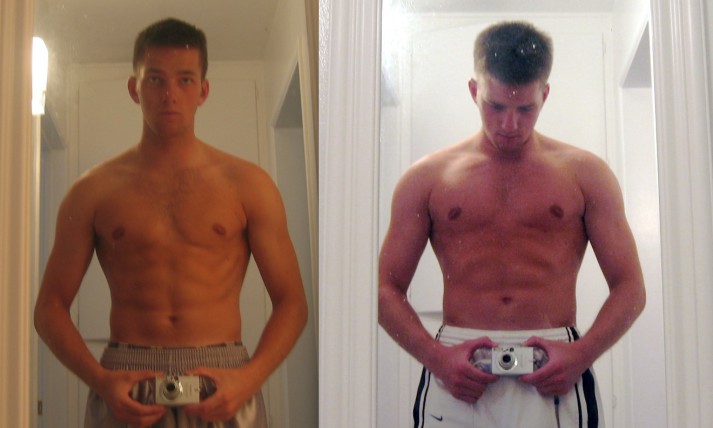
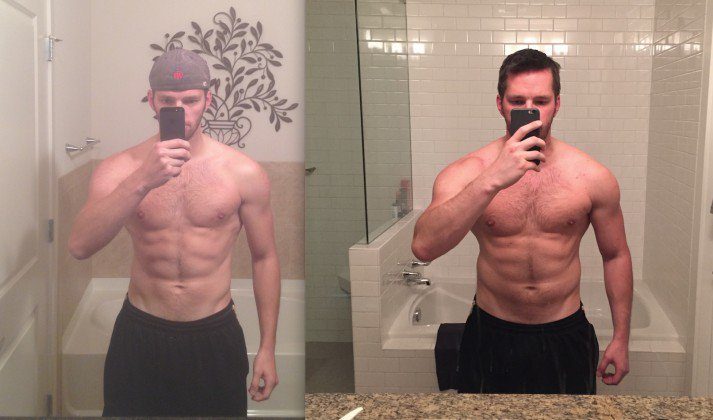
This guide covers the exact weight gain strategies I’ve used to go from my “before” (on the left above) to reach my “after” (on the right above). Believe it or not, that “before” photo is me after a DECADE of strength training and trying to get bigger.
It’s the stuff in this guide that finally allowed me to actually get results (the after).
It’s also exactly how we help our online coaching clients: nutritional guidance and workout plans that line up with their goals.
Oh, and if you sign up in any of the yellow email boxes throughout, you can download our “Gain Weight and Build Muscle” Shopping List and Cheat Sheet to hang on your fridge!
Download our free skinny guy’s guide to putting on muscle!
Enter your email below to download now
The Nerd Fitness “Get Bigger” Shopping List
Bulk like the Hulk with our rules for getting bigger
Let’s start putting on weight right NOW.
These are the 12 lessons I wish I knew when I started trying to get bigger (click to jump right to that lesson):
“If you’re not gaining weight, you’re not eating enough food.”
It’s science and thermodynamics.
Allow me to explain: depending on your current size and level of activity, your body burns 1200-2500+ calories every day just doing all of its daily processes:
Breathing.
Keeping your heart beating.
Powering your liver, kidneys, and brain.
Powering your movement.
Rebuilding muscle.
And dozens of other things. We burn a lot of calories just keeping the lights turned on.
Here’s the problem: because your body efficiently uses up all of the calories you consume every day, there are no calories left over to build muscle (or get stored as fat).
Note: we have used The Mifflin-St Jeor Equation to create this calculator![1]
Hooray! You now know estimates of your Basal Metabolic Rate (calories you burn existing) and TDEE (calories you burn while moving throughout the day)![2]
So, in order to get bigger, you need to eat ABOVE this TDEE number consistently.
Although there is SOME variation regarding metabolism variability, it’s insignificant when compared to the effect of the more important part of the equation:
We overestimate how many calories we’re eating each day, we don’t account for the calories we burn through movement or exercise, and there aren’t enough calories left over to create a “caloric surplus.”
And without that surplus, we’ll never gain weight or get bigger.
MY STORY: I had been training in a gym for 6 years without gaining size.
It comes down to your personal preference. You might struggle to eat 3000 calories in 3 meals, so having 6 500-calorie meals throughout the day might make you feel less bloated and full.
Your results may vary!
See the next section for tips and tricks on WHAT foods you should eat to gain weight.
If you want somebody to help keep you accountable and help you actually bulk up safely and quickly, we have a pretty great online coaching program that has helped people reach their weight gain goals safely and quickly.
Rule #2) What Foods Should I Eat to Gain Weight?
If you want to build muscle, target whole foods that come from high-quality, high-calorie sources whenever possible.
Sure, you could obtain 3500 calories eating Taco Bell, Twinkies, candy, and Mountain Dew. However, this isn’t a good long-term solution to gaining weight and building a good physique (goodbye health).
Trust me, I know. I put on 18 pounds in 30 days by eating meatball subs from Subway, drinking whole milk, eating McDonald’s, and drinking weight gainer shakes.
I certainly wasn’t healthy, and today I’m much more intelligent and knowledgeable about how to bulk up safely.
Consume at least 1-1.5g per pound (2.2-3.3g per kg) of body weight in protein daily.
Consume .25-.4g per pound (.5-.8g per kg) of body weight in fat daily.
Consume the rest of your calorie goals from healthy carbs.
Eat vegetables so that your body can process all the extra food.
If you are not gaining weight, add more carbs and/or fats to your meal.
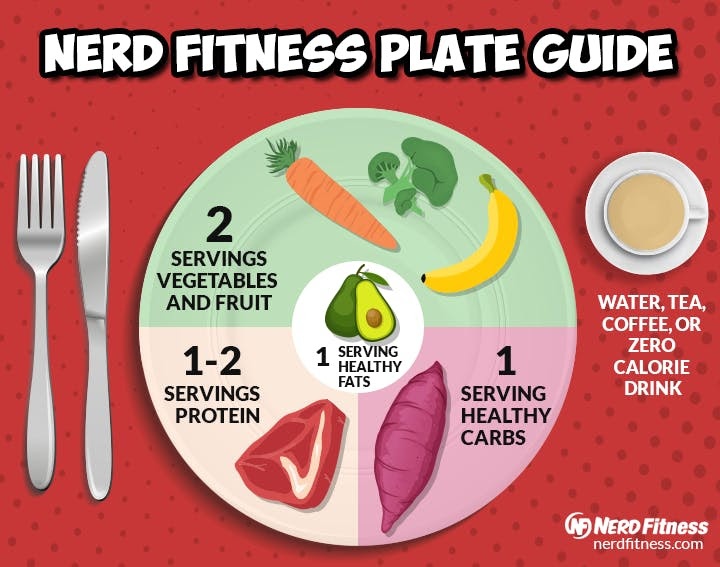
We’re going to start building a Balanced Plate, like so:
The most important macro we’re going to focus on is protein.[6]. Studies show you’re more likely to put on the right kind of weight with a high-protein diet compared to a low-protein diet.
So that’s where we’ll start.
FOOD PRIORITY #1: PROTEIN
Protein can come from any number of sources, including:
As you can see, you can eat an extra 500 calories of “healthy fats” by eating lots of “heart-healthy” fats like nuts or adding more olive oil to your meals.
PRIORITY #4: VEGETABLES!
Last but not least, you need vegetables in your diet.
If you start to eat a lot more food, your “indoor plumbing” is going to really benefit from eating some high-fiber veggies with each meal:
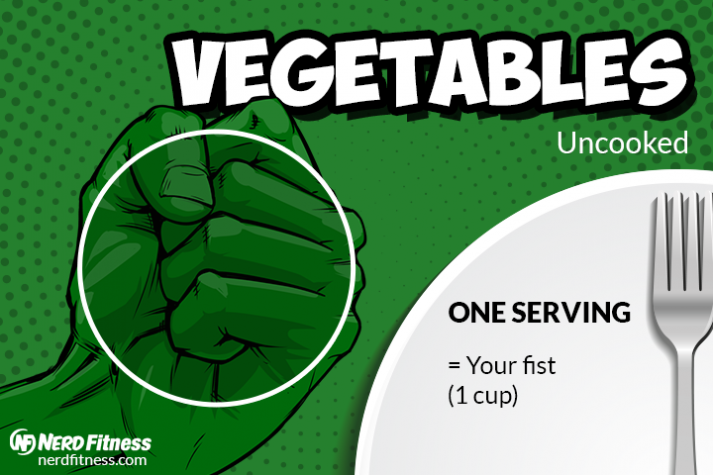
A serving of veggies is about the size of your fist:
Here’s a quick, non-complete list of veggies that you can choose:
Broccoli
Broccolini
Cauliflower
Spinach
Kale
Spaghetti squash
Brussels sprouts
Zucchini
Cucumber
Carrots
Onion
Asparagus
“BUT STEVE, I REALLY STRUGGLE TO EAT ENOUGH CALORIES FROM WHOLE FOODS EVERY DAY!“
I do as well. It’s why I consume a good portion of liquid calories every day too.
It’s a surefire way to make sure you hit your calorie goals.
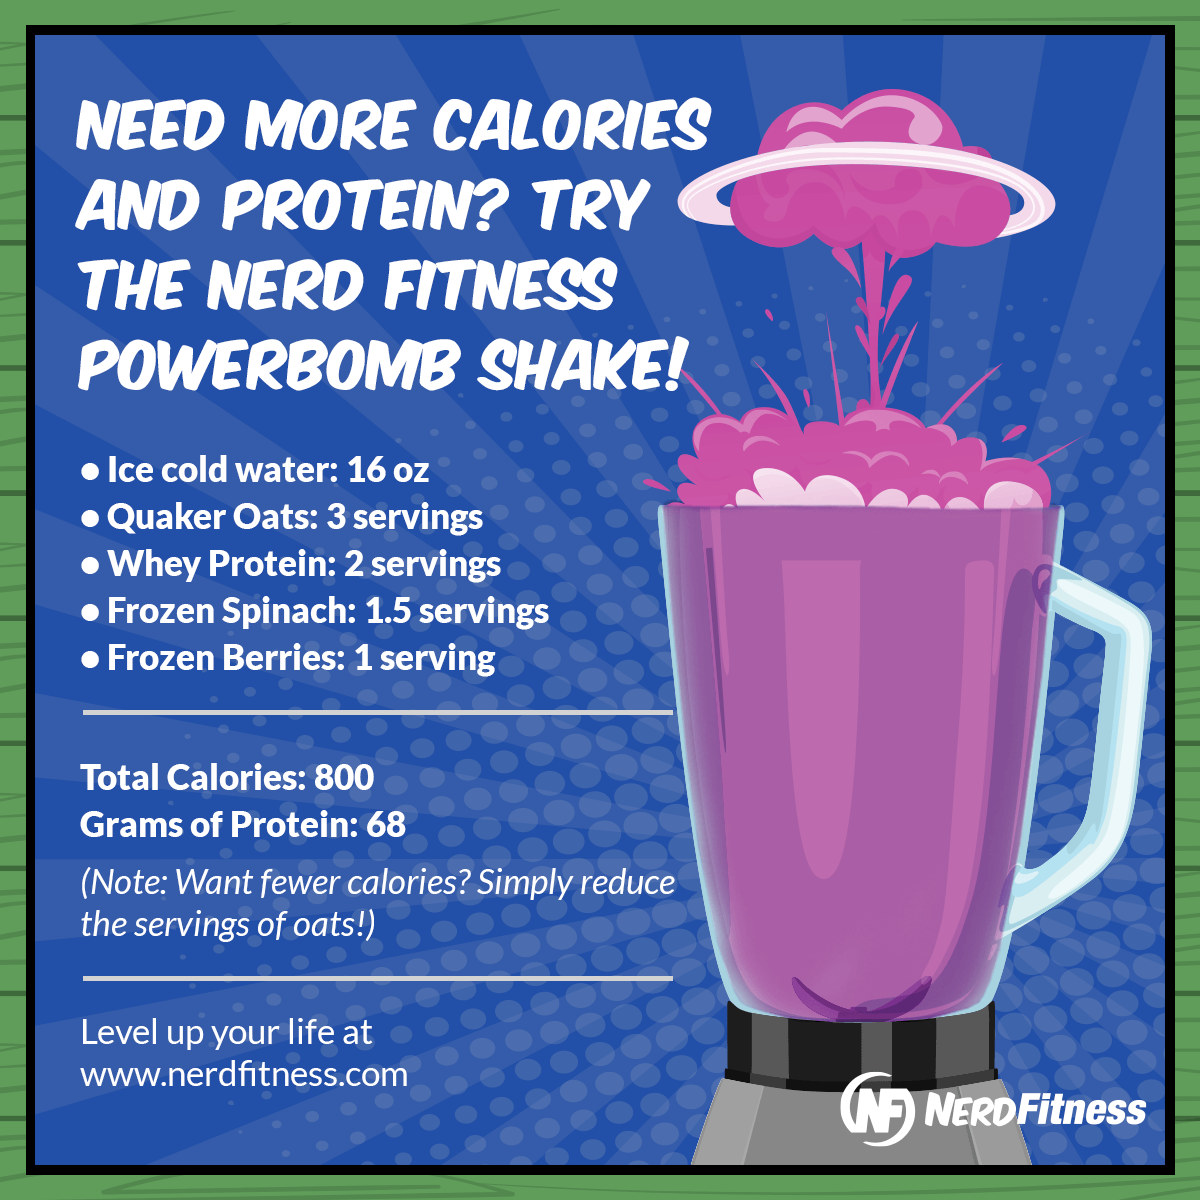
As I lay out in our massive Protein Shake Guide, creating high-calorie protein shakes to eat between meals can be the game changer:
Also, download our Skinny Guy Guide which has both lessons and a shopping list you can use to prioritize eating the right high calorie, high-quality foods!
Download our free skinny guy’s guide to putting on muscle!
Enter your email below to download now
The Nerd Fitness “Get Bigger” Shopping List
Bulk like the Hulk with our rules for getting bigger
If you’re of healthy weight, active, and wish to build muscle, aim for 1 g/lb (2.2 g/kg).
If you’re going to be strength training while getting bigger, intakes up to 1.50 g/lb (3.3 g/kg) may help you minimize fat gain.[13]
Let me simplify it for you:target at least 1 gram of protein per pound of body weight (2.2 grams per kg).
Provided you’re a healthy individual with a healthy liver, you don’t need to worry about eating too much protein[14] – you should be more concerned with eating too little protein.
Long story short: studies suggest you will not put on the right kind of weight without consuming enough protein!
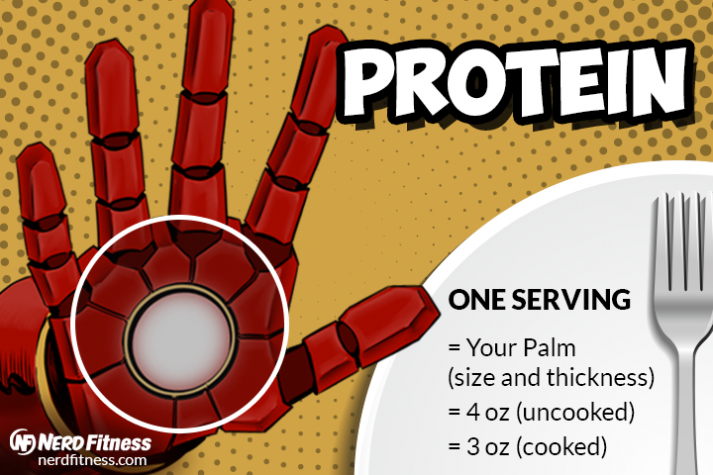
Okay, so let’s talk portions. Here’s how much protein is in a palm-sized serving of food:
4 oz (113 g) of chicken has around 30 g of protein.
4 oz (113 g) of salmon has 23 g of protein
4 oz (113 g) of steak has 28 g of protein.
EXAMPLE TIME!
Let’s say you weigh 150 pounds (68 kg).
That would mean a day of eating could be:
1 serving of protein with breakfast: protein shake (30g).
2 servings of protein with lunch: 2 chicken breasts (60g).
2 servings of protein with dinner: 2 portions of steak (56g).
Creating a high-calorie protein shake with foods like frozen fruit, oats, milk, and a scoop of protein can be huge.
It’s how I hit my goals every day!
MY STORY: I am currently bulking up, and according to my online coach, I need to eat 3200 calories with 240g of protein on workout days (I weigh 172 pounds).
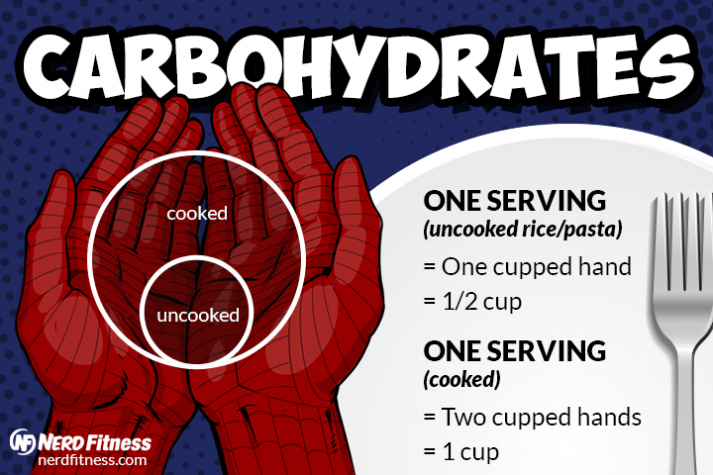
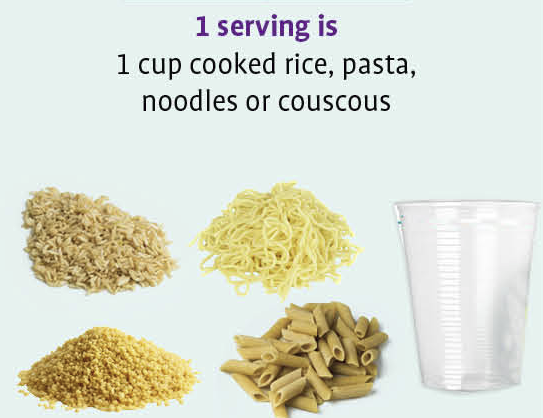
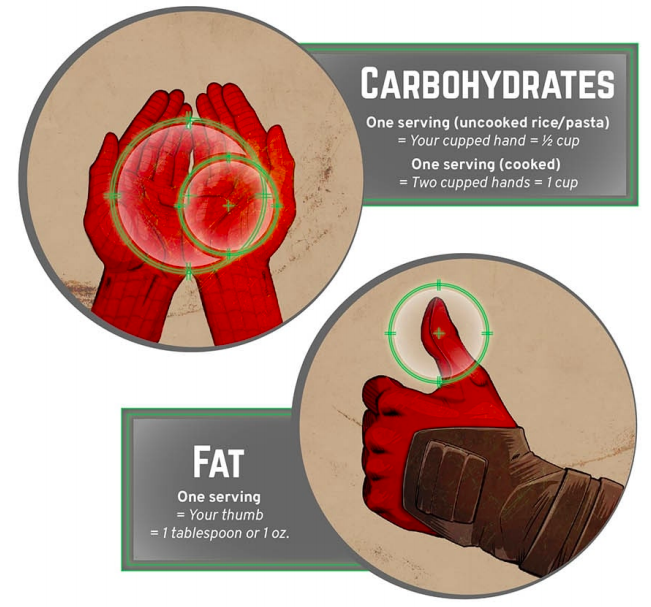
Target 2 portions of carbs, and 2 portions of fat in your meals.
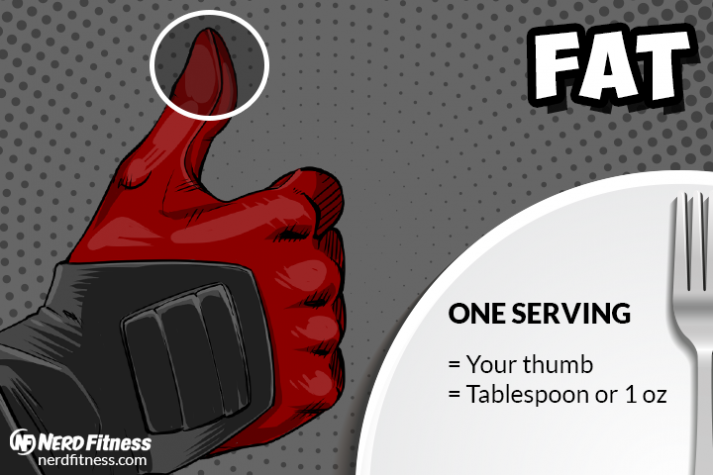
Remember, our portions look like so:
If you’re not gaining weight, increase those numbers even more.
This is all about math! Not getting bigger = need MOAR food.
What about other foods like pizza, pasta, candy soda? Sure, you can get away with consuming less healthy things ON OCCASION (pizza, subs, etc.) but avoid fueling yourself with ONLY junk food.
If you’re not sure specifically what you should be eating for protein, carbs, and fats, download our “Get Bigger” Shopping List by putting your email in the box below:
Download our free skinny guy’s guide to putting on muscle!
Enter your email below to download now
The Nerd Fitness “Get Bigger” Shopping List
Bulk like the Hulk with our rules for getting bigger
My advice: Rather than chasing massive weight gain over a month, you’d be much better off gaining .5-1.5 lbs. (.25-.75 kg) a week, every week, for six months…and keeping the weight on!
So, how do you know if your efforts are working? Simple.
If the scale is moving UP, keep doing what you’re doing.
If the scale is NOT moving: EAT MORE.
If you’re ever unsure if you’ve eaten enough that day, eat more.
Once you start to get a good feel for how many calories you eat each day, try to eat the same meals to keep it easy.
Still convinced you can’t gain weight even after tracking things? Let us help. I too was convinced that it was my “fast metabolism,” until I learned from my personal trainer that I simply wasn’t eating enough.
Rule #6) What Are the 10 Best Exercises For Weight Gain?
Up until this point, we’ve only talked about the weight gain portion.
Do Steps 1-5 above, and you’ll put on plenty of weight.
HOWEVER, if you’re not also training correctly, you’ll just be getting fat, and not building muscle!
Get as strong as possible with these exercises while eating enough calories and protein, and you will gain the right kind of weight! It’s how I bulked up correctly:)
Important point: don’t worry about isolation exercises like triceps extensions, shoulder shrugs, bicep curls, or crunches.
You can certainly do them, but only AFTER you’ve done your heavy lifts for the day!
All of the compound exercises listed here use every muscle in your body, and when you overload your body with calories and protein, those muscles will grow.
Want more workouts to follow? Read through our Strength Training 101 series that will answer all your questions!
Terrified to even step foot into a gym? We understand! Check out our Beginner’s Guide to the Gym article for some basic strategies and workouts.
Want somebody to tell you EXACTLY how to exercise and how to eat? Check out our 1-on-1 Coaching Program.
Rule #7) How to Strength Train to Gain Weight
If you are going to get bigger, you need to consistently increase the difficulty with every workout.
Every time you train, your muscles break down and have to rebuild themselves.
You are teaching them to say “I must get bigger and stronger in case I have to do that again!”[16]
So how do you progressively overload your muscles?
Lift more weight than last time.
Do more sets or reps than last time.
Wait less time between sets than last time.
Do a more difficult movement or variation.
If you did 3 sets of 5 reps of squats at 95 pounds last week, go for 3 sets of 5 reps at 100 pounds this week!
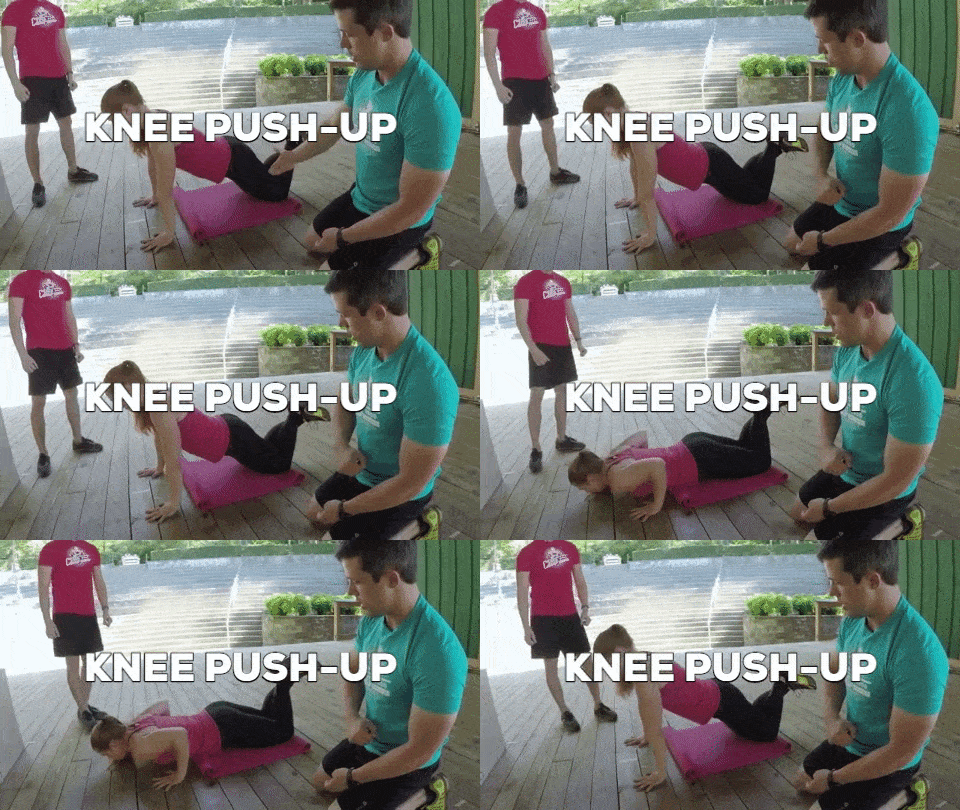
Did knee push-ups last month?
Great, try to do regular push-ups this month.
Coach Jim breaks down the ins and outs of progressive overload for you in this video:
The trick with progressive overload is to continuously increase the challenge, and the best way to do that is by tracking your workouts!
Write down how you train, so that way you know exactly how to get stronger next time. I use Evernote on my phone, but you can use an old school notebook or whatever floats your boat.
In addition to the protein shakes mentioned back in Rule #3, consider a creatine supplement – it allows your muscles to store more water – which will both help you potentially lift heavier and improve your performance in the gym!
If you don’t want to build your own workout routine, or you’re not sure how and when to scale up your workouts for the best results, let us build a routine for you!
Our coaches will build a workout program for your goals, and every day you can check your coaching app and know exactly what to do:
Rule #8) How Many Days Per Week Should I Exercise to Gain Weight And Get Bigger?
Muscles are made in the kitchen and while sleeping, NOT in the gym.
When you train, you are essentially ripping apart and breaking down your muscles.
Then, during the next 48 hours, as you are eating a caloric surplus and recovering, your muscles get rebuilt bigger and stronger.
For this reason, never exercise the same muscle before it’s ready.
In other words, try not to exercise the same muscle on two consecutive days.
Here are the best common practices for weight gain: Do a gym workout 3-4 days a week with a day off in between each (while consuming plenty of calories). This is plenty of training to promote muscle growth and weight gain.
Long story short: pick up a heavy weight in the gym 3-4 days a week for an hour.
“Inadequate sleep impairs maximal muscle strength in compound movements when performed without specific interventions designed to increase motivation.”
Think of it this way:
Building muscle is hard work, your body can use all the help (and calories) it can get. Your body is doing nothing but lying there and building muscle while you’re sleeping. [19]
If you are only getting 6 hours or less, you’re not going to get all the benefits of your exercising and diet, and not giving yourself the best chance to gain weight and grow bigger.
We often spend quite a bit of time with our coaching clients working with them on their sleep and environmental habits! From turning off the TV an hour earlier to even becoming a morning person, we build fun missions and challenges for our clients around stuff like this to get results.
Rule #10: Should You Do Cardio While Trying to Gain Weight?
Depending on how you currently feel about running, this next sentence will either make you happy or miserable:
“Running might work against your efforts to gain weight and build muscle.”
When you run, your body uses up calories to fuel your runs. This leaves fewer calories left over to build muscle.
Now, nobody will refute the benefits of improved cardiovascular health, nor would I EVER tell you to not do an exercise that you find fun.
In addition, a 2016 study[20] showed that doing endurance training AND strength training actually created larger muscle hypertrophy in untrained subjects than just resistance training alone.
What this means:
If you’re somebody that runs and enjoys it, great!
If you’re trying to get bigger, here’s what I would recommend:
Find a way to increase your food intake, and still know that you might be building muscle slightly slower than if you ONLY did strength training.
Cut back on running until you reach your goal weight/size, and then introduce it back into your routine.
Is your SOLE focus on getting bigger? Do 3 things:
Eat (a lot).
Lift (heavier).
Sleep (a lot).
Interested in giving your heart a workout without steady cardio?:
Do higher volume strength workouts. Sets of 20 barbell squats is QUITE the cardio workout.
Want to incorporate cardio the RIGHT way into your life, along with strength training, to start gaining weight?
Our coaching program builds custom programs to help people just like you reach your goals.
Rule #11: Realize you will put on some fat, and that’s okay.
With all of this eating, you will probably put on some fat along with your muscle.
That’s okay!
You might even be skinny enough that a bit of extra “cushion” on you is a good thing!
If you are trying to put on MOSTLY muscle and minimal fat gain:
Target at least 1.5g of protein per pound of body weight (3.3g per kg).
Eat a caloric surplus that is 250cal over your current TDEE.
And then fine-tune it from there:
You’re trying to thread the needle of “only build muscle, don’t add fat” which is fairly advanced and challenging.
As this 2017 study points out[21], “Protein overfeeding or the consumption of a high protein diet may not result in a gain in body weight or fat mass despite consuming calories that exceed one’s normal or habitual intake.”
This is incredibly challenging, and you do run the risk of not eating enough to build muscle. In addition, you might build less muscle than had you consumed a larger surplus of calories.
It’s important to build a system that sets you up for weight gain success.
It comes down to two things:
Don’t miss workouts.
Don’t miss meals.
So do whatever you need to do to make those things happen!
Here’s my final piece of advice: If you want permanent success, stop thinking in terms of “How fast can I gain weight?” and instead think:
“What can I do today that feels sustainable enough that I can stick with it for a year?”
This is how I get results, and how you can use the tools and tips in this article to get results too. Build small habits that become permanent parts of your life, and the results you’ll get will be permanent too.
Now, if you’re somebody that wants even MORE guidance, and specific instructions to follow, I got you:
1) Our 1-on-1 online coaching program, work with a member of Team Nerd Fitness that gets to know you and your situation. We’ll provide expert guidance and accountability, a custom workout, and regular ongoing support:
2) Exercising at home and need a plan to follow? Check out Nerd Fitness Journey!
Our fun habit-building app helps you exercise more frequently, eat healthier, and level up your life (literally).
Try your free trial right here:
3) Sign up for our free email list, the Nerd Fitness Rebellion! Join a few hundred thousand rebels just like you and I’ll send you a bunch of free guides too. I’m nice like that.
Download our free skinny guy’s guide to putting on muscle!
Enter your email below to download now
The Nerd Fitness “Get Bigger” Shopping List
Bulk like the Hulk with our rules for getting bigger
To recap our full article, here are the “12 Rules To Gain Weight Quickly”:
A high protein diet (3.4 g/kg/d) combined with a heavy resistance training program improves body composition in healthy trained men and women–a follow-up investigation.
“Examine: can eating too much protein be bad for you?”
Today we are going to teach you everything you’ve ever wanted to know about body fat percentage but were too afraid to ask.
We’ve been helping thousands of people get their body fat percentage to their desired level through our 1-on-1 Online Coaching Program, and I’m pumped to share with you our strategies in this guide.
Plus, lots of cute animal videos as rewards for reading each section.
Fair warning: lots of half-naked people of all different shapes and sizes in this guide!
In this Body Fat Measurement Ultimate Guide, we’ll cover:
If you have been struggling with your weight (and having too high of a body fat percentage) for a while, I know how frustrating that can be.
It’s why we built our popular 1-on-1 Online Coaching program, so this time things can be different. Your NF Coach will help you track the right metrics (like body fat percentage) and set the right goals.
What is Body Fat Percentage?
In its simplest form: body fat is the amount of fat in your body, compared to everything else:
your organs
muscles
bones
tendons
water
any demons currently possessing you
and so on
Both men and women carry different amounts of body fat percentage due to…you know…being different.
A super ripped male bodybuilder who is minimizing body fat percentage could have a percentage down as low as 3-4%, while a super ripped female bodybuilder who is minimizing body fat percentage would only get as low as 8-9%.
A male athlete could be in fantastic shape and have 10% body fat, while a women at a comparable level of athleticism and appearance might be at 18-20% body fat.
To take the comparison to the other end of the spectrum, an overweight male at 30% will look vastly different than an overweight woman at 30%.
Feel free to take a break with this video of a lion cub hanging out with a puppy and a rabbit.
What are Some Examples of Body Fat Percentage?
Below, you’ll see images of what people look like with different amounts of body fat.
Some Examples of Body Fat % for Men:
Some Examples of Body Fat % for Women:
A quick note: your body fat percentage is just the amount of body fat you have.
It has nothing to do with the amount of muscle mass you have, which means you can have two people with the same amount of body fat percentage that look WAY different from each other.
Are you surprised about what you thought and what the actual percentages look like?
If so, don’t worry about it – most people have no idea what their body fat percentage is, and will often over or underestimate it pretty dramatically.
We’ll get into what’s a good number to AIM for, and how to measure it next.
We work with both men and women in our Online Coaching Program, and help them reach a level of body fat that they’re happy with.
More importantly? We do it sustainably, and without making you only eat chicken and broccoli.
You have unlocked this video of a baby sea otter trying to sleep on mom:
What Should My Body Fat Percentage Be?
Here is the “generally accepted” (yeah, I don’t like this term either) chart for women and men when it comes to body fat percentage:
Women
Men
Essential fat
10-12%
2-4%
Athletes
14-20%
6-13%
Fitness
21-24%
14-17%
Acceptable
25-31%
18-25%
Obese
32% plus
26% plus
In what I’m sure is news to nobody, body fat is essential to survival – fat protects your internal organs, provides you with necessary energy stores in times of peril, and more.
“Essential fat” means the minimal amount of fat required for survival – Anything less than this amount would mostly likely result in organ failure, but even approaching this amount of body fat is dangerous.
It’s for this reason that bodybuilders, who can minimize their body fat to the “essential fat” level only do so when prepping for a show – during the rest of the year they maintain a higher body fat percentage so that they can stay healthy and function properly.
If you are looking to have that “ripped” or “toned” look, you’ll want your body fat percentage to hover in the “athletes” section.
If you’re just looking to get healthy and look in the mirror with pride, aim for the Fitness range.
Once you get into the upper ends of “acceptable” and “obese,” a decrease in body fat percentage would benefit your health.
Now, I’m going to GUESS you’re reading this article because you’re interested in reducing your body fat percentage.
For starters, you need to determine what’s an optimal goal for you:
If you are trying to look like Ryan Reynolds or Jessica Beil in Blade III, good luck! You’ll need to aim for a body fat percentage of 6-8% (men) or 13-15% (women). Note: your athletic/strength gaining performance will most likely suffer at this percentage, and can be really really challenging to maintain. Your call.
If you are interested in getting that coveted six pack, drop your body fat down to the 8-11% range for men and 15-17% range for women.
If you are an athlete and interested in optimal athletic performance, aim for a body fat percentage around 15% (men) or 20% (women). NF team member Staci trains much better at 20% body fat than at 15% body fat.
If you are just interested in looking pretty good and feeling pretty good, anything less than 18% for men and anywhere in the 20-23% range for women should get you the “hey, lookin pretty good!” response from your friends.
Ladies: if you are concerned about menstruation or fertility, it has been said not to drop below 15% body fat. Studies are conflicted on this, your results may vary, but I thought it was worth mentioning!
Want a step-by-step plan to follow that will help you lower your body fat percentage safely and permanently? Great!
You’ve unlocked the “cute baby pigmy goat jumping around” video:
How Do I Calculate or Measure my Body Fat Percentage?
This question I get asked above ALLLLLL others.
There are seven main methods that you can use, each with varying levels of accuracy and cost:
Here’s How to Calculate Your Body Fat %:
1) Take a Look – This might be my favorite method, although it requires a trained eye and isn’t exact. By having an accurate progression of pictures from week to week and comparing a picture of yourself, you can determine somewhat closely what your body fat percentage is.
Make sure to note the difference in the two men, both at 10% body fat further down the page.
2) Body Fat Calipers – Pick up a set of calipers for $5. Pull the fat away from your muscles, pinch them with the caliper, take the measurements, and look at a chart to figure out your body fat percentage. Some recommend using one test site, some multiple.
In my experience, I have found that these calipers tend to slightly underestimate body fat percentage (mine tell me that i’m 9 or 10% when I’m really 12%, and Staci’s say she’s 17% when she’s more like 20%), but are surprisingly accurate considering how cheap they are.
However, the accuracy isn’t as important as the fact that you pinch and measure the same area, under the same conditions, from week to week. By doing so, you can track overall trends in how the measurement changes to make sure you’re on the right path.
3) The measurement method – By taking measurements (like the US Navy measurement or the YMCA measurement), you can calculate your body fat percentage. I have found, as have others, that this method isn’t incredibly accurate as it can very easily overestimate your body fat.
Considering it only takes a few points of data, this is not surprising.
4) Body fat scales and monitors– An electrical current is sent through your body and uses “biometrical impedance analysis.” I don’t really like this method, as I find the number that it spits out can be horribly inaccurate.
Because they send an electrical current through your body, the amount of water you are carrying can drastically adjust this number too.
5) The Bod Pod – The method calculates your body fat percentage by using air displacement to measure your body mass, volume, and density. This is also pretty darn accurate, but also pretty darn expensive at usually around $75 per session. Find a bod pod location by putting in your location in the right hand column.
6) Water displacement – Although very accurate (within 1-3% percent), it’s expensive, tedious, and a huge pain in the butt. If anybody has any experience with a water displacement test, please share your story in the comments.
7) DEXA Scanning– This is considered the most accurate method, as it actually takes a full dual X-ray of your body composition and gives you numbers. You can get this done at a health facility, and involves you lying on an X-Ray table for about 10 minutes. It’s typically expensive, anywhere from $50-150 per session depending on where you are located.
VERY IMPORTANT: If you are going to start testing your body fat percentage, do whatever you can to test yourself under the same conditions each and every time.
For example: every Monday morning, on an empty stomach, while drinking a single glass of water. This way, even if you’re not getting the correct body fat percentage (due to user error), you’ll at least get a consistent incorrect body fat percentage and can calculate how much you lost or if you are progressing in the right way.
“Steve, just tell me the best method!”
If you have the money, and you have a Bod Pod center close to you, then I’d say this would be the best combination of practicality and accuracy.
If you don’t have the money, then I would go with a simple body fat caliper, along with the “take a look” method of taking weekly photos. Take a photo of yourself each week and compare the photos week to week to see if you can notice more definition in your muscles (which happens when you start to reduce your body fat percentage!).
Here’s the thing with body fat percentage: although it’s fun to know and fun to see it getting lower as you get leaner, methods to track it can often be inaccurate.
Take multiple tests with your preferred methods and understand that even then it might be off by 1-3% in either direction. So, track overall TRENDS and go off how you look, and that will get you 95% of the way there.
It comes down to this: Look in the mirror, and compare your progress photos: do you like how you look and are you moving in the right direction? Awesome.
DON’T like what you see?
Let us help!
Our Online Coaching Program is changing people’s lives every day. We help folks like you make better food choices, follow the right workout program for your goals and keep you accountable!
Another section, another reward.
You’ve unlocked the “baby otter attacks a stuffed animal walrus” video:
What’s the Best Way to Lower Body Fat Percentage?
Alrighty! Let’s say you’re interested in dropping your body fat percentage, like my childhood friend Saint above.
Staci (follow her full success story) also followed the principles of Nerd Fitness to get her results and significantly reduce her body fat percentage:
I’m sliiiiiightly biased, but both Saint and Staci, along with 35,000+ other students, reduced their body fat percentage by following the methods we teach all clients in our 1-on-1 Online Coaching Program.
Not only that, but Staci is now one of our Lead Coaches!
As you’ll read below, the biggest piece of the puzzle to getting to a low body fat percentage is having the right nutritional strategy of consistent caloric restriction, the right mental attitude, a supportive network of people to help you, and a plan to follow.
We know how tough it can be to change your diet. If you’re not sure what to eat, or you’re sick of trying a diet only to give up a few weeks later, I got you covered.
It’s something I’m really proud of, and I know it’s helped a lot of people: our 10-level Nerd Fitness Diet Cheat Sheet. Pick the level you’re comfortable with, stick with it for at least 2 weeks, and then level up when ready and follow the next level! Simple.
Grab your cheat sheet free, along with 4 other free guides, when you sign up in the box below – I’m confident it can help you reduce your body fat percentage permanently.
Download our free weight loss guide
THE NERD FITNESS DIET: 10 Levels to Change Your Life
Follow our 10-level nutrition system at your own pace
What you need to know about weight loss and healthy eating
3 Simple rules we follow every day to stay on target
I can’t teach you everything in a quick article, though I can absolutely give you some overall tips and tricks below to get you started.
Here are the Nerd Fitness methods we recommend to all coaching clients get down to a lower body fat percentage.
Note: these are JUST suggestions, your results may vary!
If you only want to drop a few percentage points (to a healthier weight), you can start with the advice at the top, and work your way down towards the bottom as you get lower and lower – the closer you get to single digits (dudes) or low double digits (ladies), the more strict you need to be with your diet and training.
Don’t forget to calculate your daily caloric needs first! If you are not strength training while eating a caloric deficit, you will most likely be losing muscle along with fat, which is not optimal but will help you lose body fat.
Do this consistently and you’ll start to lose body fat.
2. Lift heavy thingsand move frequently – When you strength train with heavy objects (or with intense bodyweight training), you get stronger and keep the muscle mass that you already have.
3. Incorporate sprints into your off days – When you run sprints, you create a similar afterburner effect with strength training, meaning extra calories burned after the completion of your workout.
4. Consume enough protein, experiment with lower carb or lower fat – Set your caloric intake to be low enough that your body must pull from fat stores to fuel itself, resulting in fat loss.
I’d recommend consuming enough protein to keep your muscles growing and rebuilding, while determining what’s best for your body to make up the rest of your calories each day: many people work better on a low carb diet.
5. Work out in a fasted state, consider intermittent fasting – Although advanced techniques to get to super low body fat percentages are beyond the scope of this article, here’s another tactic if you want to drop the last few percentage points:
Strength train in a fasted state, and don’t consume your first meal of the day until AFTER your workout.
Added bonus: by skipping a meal occasionally, you’re more likely than not to end up in a caloric deficit compared to when you were eating 6 meals per day.
I’ve been training in a fasted state for 5 years with zero issues on energy, but your results will vary.
6. Not losing weight? You’re eating too much! Get more accurate with your tracking. Consider a cheap food scale to make sure you’re actually eating the number of calories each day you think you’re eating.
Example: I eat 1 serving of oats each day. If you look at a container of oats, it says “1 serving = 1/2 cup, or 40 grams.” I then put half a cup of oats on a food scale, and it weighed 60 grams. This means that every day, I was eating 1.5 servings of oats, not 1 serving.
7. Hire a Coach! Doing all of this stuff alone is absolutely manageable, it just requires a lot of trial and error. If you are somebody that wants to work with a trainer, here’s how to find a good trainer!
Oh what’s that? You want a coach you can take with you everywhere, that will check your form AND help you with food and essentially do everything except the actual heavy lifting of weights?) Sure!
Along with the above, keep reading Nerd Fitness articles, join our community, and start to implement the philosophies here and you’ll be on the right track.
The important thing to remember: this is NOT an overnight process. The best thing you can do is start treating yourself like a science experiment.
Implement the suggestions above, track your bodyfat and see how it changes, and then course-correct and adjust based on results!
And another big thing to remember:
TEMPORARY CHANGES GET TEMPORARY RESULTS.
If you starve yourself to get shredded but then rebound aggressively by eating buckets of ice cream when you’re “done,” say goodbye to those abs!
Also, here’s a video of a wombat. Because, wombats:
Is BMI the Same as Body Fat Percentage?
When you go to a doctor, they will most likely ONLY calculate your Body Mass Index (BMI).
Body Mass Index looks at your height and weight; based off this ratio, it tells you whether you are underweight, normal, overweight, or obese.
Seems pretty straightforward right? Obviously, as your weight increases disproportionately compared to your height, you are more likely to be overweight.
Notice I just said “more likely.”
Here’s why: Your BMI isn’t directly correlated to your body fat percentage – it only factors in your height and weight. It will give you the same reading if you’re made of 180 pounds of pure muscle, or 180 pounds of pure Cheetos.
For example, if I was six feet tall and 185 pounds with a body fat percentage of 10%, I would be put in the same “overweight” category as a guy who was six feet tall, 185 pounds, and a body fat percentage of 25%.
If two women have the same amount of body fat, and one tends to carry more water weight or have bigger bones than the other, one woman could be considered “overweight” while the other might be “average.”
For example: LeBron James is considered borderline obese when measured on the BMI scale, at a height of 6’8″ and 250 pounds.
Of course, unless you look like LeBron James, or you can see your abs, disregarding BMI is missing the point.
I do believe BMI can be helpful if you are above 20% body fat (men) or 25% (women). Both your BMI and your body fat percentage would tell you that fat loss can be a worthwhile goal.
HOWEVER, as soon as you start to get serious about your body weight and training and drop down to flat stomach levels of body fat percentage, then BMI becomes less of an accurate indicator of health.
If you like our style here with cute animal videos and fun content, let us help you reach your body fat and BMI goals with our 1-on-1 Online Coaching Program!
You’ve unlocked the final reward: “the hedgehog boat”:
What Other Questions Do You Have on Body Fat Percentage?
And that concludes today’s lesson on body fat percentage, friend!
I do most of my work in coffee shops these days, so I hope you understand the amount of work and the ridiculous number of awkward Google searches that had to happen in order to bring this post together.
Now, I know this is one of those super complicated topics, so I’d love to help any other way than I can.
You’ll work with our certified NF instructors who will get to know you better than you know yourself, and program your nutrition and workouts for you.
If you are fired up and want to start reducing your body fat percentage in a healthy, sustainable way, consider trying our 10 Level Nerd Fitness Diet – we’ll send you a cheat sheet telling you exactly how to change your diet each week so you don’t get overwhelmed!
Grab your NF Diet sheet along with four guides to help you reduce your body fat percentage when you sign up in the box below:
Download our free weight loss guide
THE NERD FITNESS DIET: 10 Levels to Change Your Life
Follow our 10-level nutrition system at your own pace
What you need to know about weight loss and healthy eating
3 Simple rules we follow every day to stay on target
We’ve helped tens of thousands of people transform into real life superheroes.
Either way, continue to poke around Nerd Fitness – all of our content is focused on helping you get results in a fun, non-condescending, supportive, and (most importantly) effective way.
Also, if you’re willing to put in the time, you WILL get the results you’re after.
Okay, time to watch more cute animal videos 🙂
-Steve
PS: Admittedly this article took 10 hours longer than it needed to, because I kept getting lost in YouTube watching cute animal videos!
If you are interested in learning how to gain weight the right way, you have come to the right place!
My name is Staci Ardison.
I overcame an eating disorder, discovered a love for heavy strength training, and now I help women like you get stronger for a living.
Believe it or not, I’m 50 pounds heavier in the photo on the right (and WAY stronger, and healthier, and happier!).
I’m currently a Senior Coach here in the Nerd Fitness Coaching Program, where we train women to pick up heavy weights, get strong, and build confidence.
Speaking of picking up heavy weights, here I am deadlifting 455 pounds:
This is what I LOVE to do.
In this Ultimate Guide to Building Muscle as a Woman, I’m going to be covering:
“If you want to gain weight, eat more calories than you burn regularly. Want to put on the right KIND of weight? Exercise and eat the right way too.”
Now, there’s plenty of nuance to this when comparing men and women:
Due to our natural hormones, it’s generally more difficult for people with typical female anatomy to gain muscle than people with typical male anatomy.[1]
We have a lot of factors (such as hormonal birth control) that have been proven to make it even harder as well.[2]
But that doesn’t mean it’s impossible!
It just means we have to work harder for it.
Ugh, I know.
Now, one thing I want to touch on quickly: if you see a woman who is absolutely jacked and at an extremely low body fat percentage, I guarantee she has been working her butt off for a very long time with the goal of building muscle.
It’s not something that happens overnight, or by mistake.
In addition, some women with larger amounts of muscle mass choose to take steroids to help assist them in gaining muscle, because we simply don’t have the hormones naturally to get to that size.
So if you’d like to build muscle, but not as much as a professional bodybuilder – don’t worry, it’s not something that happens by accident.
With that out of the way, let’s talk about body fat and body types:
As we point out in that body fat percentage guide, we women can look very different at any weight depending on our body shape and how much muscle we have. It comes down to our own personal goals!
This guide is going to primarily focus on two things:
How to eat to gain weight and build muscle.
How to strength train to build muscle.
We’ve helped thousands of women with our online coaching program, many of whom are trying to gain weight and strength train for the first time in their lives.
Everybody is on their own journey, at their own pace, and everybody will end up with different results too!
Should Women Build Muscle? (7 Reasons Women Should Grow Muscle)
If it can be harder for women to gain muscle (compared to men), why go through the trouble?
I’m glad you asked!
Here are the top 7 reasons why women should strength train:
#1) When you’re stronger – everyday life is easier. No need to call for help to get that 50lb bag of dog food off the top shelf, or carrying an air conditioner unit up a flight of stairs. LIFE is easier when you’re stronger.
#2) Less injury risk – when you build strong muscles, you’re also building stronger bones, ligaments, and tendons, making you less prone to injury doing things you love (like playing in a quidditch league).[3]
#3) Helps combat age-related muscle loss,[4] allowing us to remain independent longer as we age:
#4) Muscle is harder to maintain, which means you need to eat more just to hold on to it.[5]
#5) Reduce pain – having a strong body makes living easier on your joints, as well as allows you to hold a better posture, and reduce back / hip pain.[6]
#6) Appearance – this is a personal preference! Some women like to have a lot of muscle, and some don’t. While you can’t spot reduce fat, you can choose to build more muscle in specific areas, changing your body shape. Growing up, I was an extreme pear shape, but due to strength training, I now have more of an hourglass shape.
#7) Live longer – want to spend more time on Earth? Strength training and growing muscle will help you do just that.[7]
How to Eat to Gain Muscle as a Woman
As we said above, gaining weight comes down to thermodynamics and science.
Every day, we burn a certain number of calories just existing, which is called our BMR (basal metabolic rate). We then factor in our daily activity level, and get a number that is called our “total daily energy expenditure.” You can calculate yours below.
(Note: we have used The Mifflin-St Jeor Equation to create this calculator! [8]).
Since we want to gain weight, we want to take our TDEE and add 250 calories to it to get our daily goal. This should result in gaining about half a pound per week.
Now, although eating ANY EXTRA calories from any source will result in weight gain, our goal is to gain the RIGHT kind of weight, in a healthy way.
And thus, we’ll be focusing our efforts on a “healthy muscle building” strategy.
We could easily add more calories each day, and gain weight quicker, however, the slow method gives you the best chances at gaining mostly muscle, with minimal fat. The faster you try to gain weight, the higher the percentage that will likely be fat – so starting off at half a pound per week is a great place to start!
In addition to the number of calories we’ll be adding, we also want to pay attention to the type of foods we’re eating.
As we cover in our “Nerd’s Guide to Healthy Eating,” we’re going to build muscle by consuming the three big macros in the correct quantities:
Protein: rebuilds muscle after you break it down.
Carbohydrates: provides your muscle with fuel and body with energy.
Fat: helps your bodily functions and can also be burned as fuel in the absence of carbs.
Let’s look at each of these individually:
PRIORITY #1: PROTEIN
Protein can come from any number of sources, including:
As we cover in our “How much Protein do I need?”, claims for the amount of protein required for muscle growth vary wildly from source to source (and athlete to athlete).
Here is our recommendation:
If you’re of healthy weight, active, and wish to build muscle, aim for 1 g per pound of body weight (2.2 g/kg).
If you’re an experienced lifter on a bulk, intakes up to 1.50 g/lb (3.3 g/kg) may help you minimize fat gain.
Let me simplify it for you:
“To build muscle, target at least 1 gram of protein per pound of body weight (2.2 grams per kg).”
If you’re curious, from our healthy eating article, this is what a portion of protein looks like:
Here’s how much protein is in a serving of food:
4 oz (113 g) of chicken has around 30 g of protein.
Fat is a macronutrient that can help you reach your calorie goals (in the right quantity), as fat can be high in calories. Plus, you can eat lots of it without feeling full. Helpful if you’re trying to put on weight.
Healthy fat can be found in foods like:
Avocado
Almonds
Walnuts
Macadamia nuts
Olive oil
Almond butter
Peanut butter
Science has recently come around on saturated fat too.[10] Once completely vilified, but now considered okay for moderate consumption.
Saturated fats can come from things like:
Whole milk
Full-fat dairy
Coconut oil
Grass-fed butter
Fatty cuts of meat
Lard
To help you gauge: a serving size of fat is roughly the size of your thumb!
For reference, this is a single serving of almonds (162 calories):
THIS is a serving of olive oil (119 calories):
As you can see, you can eat an extra 500 calories of “healthy fats” by eating lots of “heart-healthy” fats like nuts or adding more olive oil to your meals.
PRIORITY #4: VEGETABLES!
Last but not least, you need vegetables in your diet.
As you start to eat more food, your stomach, intestines, and other bodily functions will thank you for consuming more high-fiber vegetables!
A serving of veggies is about the size of your fist.
Here’s a quick, non-complete list of high-fiber veggies that can fill your plate:
Consume 1-1.5g per pound (2.2-3.3g per kg) of body weight in protein every day.
Consume the rest of your calories from foods composed of carbs and fats.
Always eat vegetables so that your body can actually PROCESS all this extra food. I like to aim for half of my plate of vegetables.
If you are not gaining weight, (and you’re hitting your protein goals), add more carbs and/or fats to your meal.
It really does come down to the following:
If you are not gaining weight fast enough, you’re not eating enough. Increase your portions of carbs and fats!
Whenever we work with coaching clients who struggle to build muscle, this is the area we target: adding more carbs and fats to each meal.
8 Strength Training Exercises For Women to Build Muscle
Years from now, you’ll look back and thank “Past You” for starting strength training today.
And don’t worry, I’m going to tell you exactly what to do so you can start strength training TODAY!
Here’s why strength training is so important: when you eat a caloric surplus (more calories than your body needs each day), the extra calories have to go somewhere.
If you don’t do any exercise, your body will choose to store the extra calories as fat for later.
However, when you strength train, your muscles are broken down. Then they’ll use the extra calories to rebuild themselves bigger and stronger over the next 48 hours!
“Staci that sounds great, but I’ve never strength trained before, and I don’t know what I’m doing…Halp!” You might be saying into your computer or phone.
Fear not! I’ll help. Strength training doesn’t need to be scary or overly complicated.
Simply put, “strength training” means two things:
#1) “Movement of any weight against “resistance” (including your body weight) – Doing ANY exercise that pushes your muscles outside of their comfort zone, forcing them to rebuild stronger to prepare for the next challenge.
#2) Progressive overload: doing slightly more than last time (lift a heavier weight or do 1 more rep) consistently. Your muscles will have to constantly adapt and rebuild themselves stronger. This is called “progressive overload.”
Coach Jim breaks down different strategies for progressive overload in this video:
This means if you drop down and do ONE push-up or knee push-up right now…
Here’s what you need to know about strength training:
Strength training is one of the BEST things you can do for yourself.
Strength training will help you put on muscle while eating in a surplus.
While you can’t spot reduce fat, you can focus on building more muscle in specific areas, which can help you attain the specific look you’re going for.
If you don’t like the gym, you don’t need to go, ever. But I hope you do. Because that’s the easiest way to start training with weights.
Regardless of your fitness level, body fat percentage, strength level, or biological sex, you have every right to be in the free weights section in the gym, training with heavy weights, with everybody else. The people in the gym who are very strong with a lot of muscle started somewhere, too!
I used to be a CrossFit instructor, and my favorite thing about CrossFit was that it destigmatized barbell training and heavy lifting for many women.
In order for us to strength train and build muscle, we’re going to approach this intelligently.
We’re not going to pick up small dumbbells and do lots of reps.
We’re not going to sit down at various machines and scroll through our phones while doing leg curls.
Instead, we’re going to:
Get very strong with compound movements that recruit LOTS of muscles to work together.
Do our workouts quickly and get out of there. The workout should take no longer than 45-60 minutes.
This is how we efficiently build muscle in the minimum amount of time. What are the exercises that we’re going to target?
1) The Push-Up: The best exercise you could ever do for yourself when it comes to using your bodyweight for push muscles (your chest, shoulders, and triceps):
2) The Bodyweight Squat: This exercise serves a dual purpose: it is the foundation for building strength AND helps build proper mobility. If you are going to ever do barbell squats, you need to work on hitting proper depth with a bodyweight squat first!
3) The Inverted Bodyweight Row: Until you can get your first pull-up or chin-up, these exercises are GREAT to start building your pull-muscle strength (your back, biceps, and forearms).
4) The Pull-Up and Chin-Up: Once you can support your body’s weight above the bar, the world becomes your playground. No strength training routine should be without pull-up or chin-up work! (Click here if you can’t do a pull-up or chin-up yet):
And now we’re into the best weight training exercises:
5) The Barbell Squat: Probably the best exercise when it comes to building strength and muscle throughout your whole body. It also burns crazy calories and makes life better. This is a MUST:
6) The Barbell Deadlift: Maybe the best exercise of all time. Actually no, it IS the best exercise of all time. It’s certainly the most primal: “pick the weight up off the ground. Done.”
7) The Barbell Bench Press. Lie on a bench, squeeze your shoulder blades to keep your back tight, and then lower a barbell until it almost touches your chest. Pause, and then press it back up towards the sky. Repeat! And get strong.
8) Barbell Overhead Press: Stand with your feet about shoulder-width apart and lean back by pushing your hips forward. While keeping your entire body tight, press the bar overhead.
Once the bar passes your forehead, move your body back under the bar by driving your torso forward and back into a standing position. At the top of the lift shrug your shoulders slightly and lock your elbows.
These are some of the best compound exercises you can complete in order to build muscle. Want more muscle? Great! Get stronger at these movements!
One quick note: when I first started lifting, it took a while to build up the strength to be able to bench press or overhead press with the 45-lb bar. If your gym doesn’t have a lighter bar, dumbbells are a great option!
Your mission, should you choose to accept it:
Commit to trying ONE of these movements in the next week. Use 20 seconds of courage, recruit a friend who has lifted or trained before, and try your best.
I have three options for you next:
Select one of the muscle-building routines for women in the next section.
Work with me and our coaching program to follow a custom strength training routine for your goals.
5 Muscle Building Workout Routines For Women
I’m going to walk you through three different levels of strength training, and by the end of today, you’re going to know exactly how to get started.
My advice: do 2-3 strength training routines per week, with 1-2 days off in between. As the saying goes: “muscle isn’t built in the gym, it’s built in the kitchen!”
So your goal should be to do a strength training routine, and then make sure you eat a caloric surplus so that your body has enough calories to rebuild your muscles bigger and stronger!
10 Dumbbell rows (use a milk jug or other weight).
15 Second Plank.
30 Jumping jacks.
We also have a downloadable worksheet of this beginner’s workout that you can print out and hang on your fridge to track your progress! Get it when you sign up below:
Grab Your Beginner Bodyweight Routine Worksheet. No Gym Required!
Complete this workout at home, no equipment required
Avoid the common mistakes everybody makes when doing bodyweight exercises
Learn how to finally get your first pull-up
LEVEL 2: DUMBBELL WORKOUT
If you have dumbbells at home or access to a gym, you can pick our Level 4 workout from our 6-Level Gym Workout Routine.
So your Dumbbell Workout is 3 circuits of the following:
10 goblet squats (holding the dumbbell like a goblet with 2 hands):
If you like this Kettlebell workout and want to follow along on a worksheet, simply print out our Kettlebell Workout and bring it with you:
Grab Your Beginner Kettlebell Routine Worksheet!
Complete this workout at home or gym with 1 kettlebell.
Avoid the common mistakes everybody makes when doing kettlebell exercises.
Build strength, burn fat, level up your life!
LEVEL 3: BARBELL GYM WORKOUT
Here’s a Barbell workout you can follow from our Level 5 Gym Workout Routine.
BARBELL BATALLION WORKOUT A:
3 sets of 10 barbell squats
3 sets of 10 push-ups
3 sets of 10 bodyweight rows:
BARBELL BATALLION WORKOUT B:
3 sets of 5 barbell Romanian deadlifts (video pulled from our courses in Nerd Fitness Prime)
3 sets of 10 bench presses:
3 sets of 5 pull-ups, assisted pull-ups, or negative pull-ups:
PICK A WORKOUT, AND GET STARTED!
The whole point is to do challenging movements that really make your muscles work, and then try to do ONE more rep, or lift a SLIGHTLY heavier weight next time!
Still overwhelmed? Check out our coaching program. We get to learn your story, and then build a program and strategy around your goals that you CAN do.
10 Tips for Building Muscle as a Woman
I interviewed multiple other coaches on our team and asked for their best advice on how to build muscle as a woman.
Here’s what they said:
Susy (Coach, BS in Psychology, Certificate III & IV in Fitness, 5+ years of experience)
Tip #1: Food is your friend when you are looking to build muscle and get stronger – your body will need fuel, so you may need to eat more on the days that you work out!
Tip #2: Strength and muscle building requires structure to your workouts – you progress through getting better at specific movements, so make sure that you enjoy the style and structure of your workouts so that you can be as consistent as possible.
Tip #3: Your progress will always be fastest if you avoid injury, so correct form and listening to your body is super important. Your muscles will fatigue and feel sore, but joint pain and sharp, stabby pain means something isn’t moving quite right.
Kerry (Coach, NASM-CPT, 6+ years of experience)
Tip #4: Fall in love with the process. Getting stronger is a journey, one that is both rewarding and challenging. So no matter where you are starting from, take the time to celebrate each small step along the way towards a more badass version of yourself!
Christy (Coach, BS in Applied Health/Fitness, National Personal Training Institute Graduate, Precision Nutrition Certification, 6+ years of experience)
Tip #5: To get strong, you gotta lift weights. When lifting weights to get strong, you gotta be okay with testing your boundaries every now and then.
After exercising with your current weight, for the next training session…stop…and try a few reps with the next weight UP to test it out! It might surprise you how much more weight you can lift!
Here are some other tips to help you build muscle.
Tip #6: Boost your testosterone naturally: Consume enough saturated and monounsaturated fats, keep your sugar intake low, and make sure you’re getting enough Vitamin D and Zinc.
These are items linked with boosting your testosterone naturally.[12]
Speaking of testosterone – I know you may think of this as a “male” hormone, but it plays a huge part in women muscle building,[13] fat loss,[14] increase bone mass,[15] and many other health-related issues[16](remember: estrogen is made from testosterone).
Men make about ten to fifteen times what we make naturally,[17] but it doesn’t mean we don’t need it too.
Another way we can help our testosterone levels is to watch our cortisol levels.
Cortisol is a hormone that is promoted by stress and reduces free testosterone levels (in addition to signaling for your body to store fat).[18]
Steve drinks two smoothies a day to reach his protein goals and you can check out our Guide to Protein Shakes for his personal recipe.
On the go with no blender? I like to keep protein powder with me in a small Ziploc bag – that way I can grab a bottle of water, rip off the corner of the Ziploc bag, and use that as a funnel to get the powder into the water bottle. Then, just replace the cap and shake and you’ve got a protein-filled snack!
Tip #9: Get more sleep! When you build muscle, your body is working overtime, burning extra calories. It’s going to need some time to recover. Remember, muscle is built when you rest, not when you actually lift.
Go to bed!
Tip #10: Start today!
Gaining muscle comes down to eating right and strength training. Let’s get you lifting today!
You’ll work with our certified NF instructors who will get to know you better than you know yourself, check your form, and program your workouts and nutrition for you.
2) If you want an exact blueprint for growing strong, check out NF Journey. Our fun habit-building app helps you exercise more frequently, eat healthier, and level up your life (literally).
Try your free trial right here:
3) Join the Rebellion! We need good people like you in our community, the Nerd Fitness Rebellion.
Sign up in the box below to enlist and get our guide, Strength Training 101: Everything You Need to Know. It’ll help you begin your journey on building muscle.
Download our comprehensive guideSTRENGTH TRAINING 101!
Everything you need to know about getting strong.
Workout routines for bodyweight AND weight training.
How to find the right gym and train properly in one.
Lastly, I’d love to hear from you!
PLEASE leave your questions, eating or strength or otherwise below so we can answer them and become best friends and practice karate kicks in the garage:
How can I help you get bigger and stronger?
What part of this journey are you still struggling the most with?
What are your favorite bulking-up foods!?
Share with your friends in the comments so we can all go buy it in bulk at Costco.
-Staci
PS: Make sure you check out the rest of our Strength Building Articles!
“Testosterone in women–the clinical significance” Source; PubMed
Check out this study “Exogenous androgens influence body composition and regional body fat distribution in obese postmenopausal women–a clinical research center study” Source: PubMed
“A concise review of testosterone and bone health” Source: PubMed
Check out this interesting interview with Dr. Stephanie Faubion on testosterone in women. Source: MayoClinic
You can check out this study “Circulating Testosterone as the Hormonal Basis of Sex Differences in Athletic Performance” for more: PubMed.
Check out “Effects of mindfulness meditation on serum cortisol of medical students” for a study on meditation lowering cortisol levels. Source: PubMed.
Today, we’re answering both of them (and much more).
Walking is a great form of exercise and something we often recommend to folks starting our coaching program. Some have had great success walking, including Megan, who has a daily practice to maintain her weight loss journey.
How Many Calories Does Walking Burn? (Calorie Calculator)
In true Nerd Fitness fashion, we scienced the crap out of this, and even created a handy calculator for you – simply put your stats in the calculator here:
A few things to remember about the above equation:
There’s a difference between gross calories (total calories) expended and net calories (additional calories) expended! Your body burns most of its calories every day JUST by existing.
Gross calories: calories burned while walking PLUS the calories burned just existing
Net calories: ADDITIONAL calories you burned thanks to exercise.
Also, our calculation is an ESTIMATE. You’re a unique snowflake, and no box or formula can capture your awesomeness/uniqueness. This equation below is JUST a starting point!
Also, if you don’t feel like playing with our calculator (boo), here’s how many calories you burn walking:
On average, a mile burns about 100 calories when walking.
Another point: ANY exercise pales in comparison to a much more important part of the weight loss equation: nutrition.
If you’ve come this far, and you want to learn more about why walking is so amazing, continue reading.
And you’re damn right, I’ll show you exactly how to walk to Mordor too.
What Are The Benefits of Walking?
We are designed to walk. It’s in our DNA, and it’s a huge part of our emergence as the dominant species on this planet (along with opposable thumbs, big brains, and Nintendo).
Let’s get the basic stuff out of the way:
Every day, it’s recommended by the CDC that we walk around five miles, or 10,000 steps.[1]
Hence the reason why your Fitbit – which I’ll get to shortly – has that 10k step goal as its default number.
Unfortunately, we Americans tend to average HALF that: 2.5 miles or 5,000 steps.
And I’d imagine that people who work outdoors or have more physically active jobs drag that average wayyyy up.
Which leaves us desk jockeys, who don’t walk nearly enough.
We use our feet to get us from the front door, to our car, to our desk, to our car, to our front door, to our couch… where we put them up while watching four hours of TV before going to bed.
Not walking enough can be a big factor in the creep-up of weight gain over the years.
You might have questions like:
Can I walk more to lose weight?
Is walking REALLY good for me?
Do I need to do more intense exercise?
Long story short:
You should walk more and it can help you lose weight and be healthier.
Short story long…
Here’s why walking is important:
#1) Walking burns calories without exhausting you.If you walk the recommended mileage each day (5 miles instead of just 2.5), it can lead to a tremendous amount of weight loss over time.You’ll burn an extra 100 calories walking just ONE more mile each day than normal: When that’s multiplied out, it’s an extra 700 calories burned per week, which results in approximately a pound of fat lost every five weeks, or 10 pounds in a year. You can scale up your distances to get your desired results!
#2) Walking doesn’t add to training stress. If you are strength training regularly, adding in more weight training or running can lead to burnout, breakdowns, and injuries. If you are trying to look like a super-hero, extra cardio sessions (or long-distance cardio sessions) might kill your gains. But you can just walk. You can walk great distances, provided you’ve built up your body’s physical ability, and not get tired or sore – walking (especially outside while soaking in some sunlight) can make you feel better, not worse.
#3) Walking is low impact. Unlike running, which can wreak havoc on people’s joints if they run improperly or are severely overweight, walking doesn’t have those impact issues. If you go for a walk and your feet or joints hurt, you’re doing it wrong – read the next section!
#4) Walking can burn fat. Because walking is low impact and low intensity, your body doesn’t need to pull much glycogen and glucose stores to fuel itself, which happens when you strength train or push yourself into “aerobic training” with higher intensity cardio. Proponents of intermittent fasting suggest walking in a fasted state in the morning before eating anything in order to help burn extra fat. It’s a little controversial, so this will have to be something you attempt and measure for yourself.
#5) Walking relieves stress. Seriously! Put on your favorite playlist, and go for a pleasant walk around your neighborhood or through the woods as the sun is going down. It’s a recipe to forget the worries of your day.
Bonus points if you can get someone to follow you with a boombox:
#6) Walking improves mental health (especially in older hobbits). Walking can improve mental health, increase brain size, improve memory, and is correlated with improved, longer lifespans.[2]
How Walking Can Change Your Life
If you are severely overweight and can’t run or strength train, walk on.
If you are building muscle and bulking up, walk on.
If you are trying to lose weight, walk on.
If you struggle with following a routine, or have failed in the past with weight loss, walk on.
Why? I’m a HUGE fan of small habit change and tiny victories – walking is the PERFECT habit builder. If you’re brand new and starting out, go for a walk TODAY and begin your journey to Mordor.
This afternoon, go for a five-minute walk. Tomorrow morning before work, before breakfast, as SOON as you wake up, put on your shoes, and go outside for a five-minute walk. No snoozing, no lying in bed, no checking email or Twitter. Put on your headphones, pick your favorite song, go outside, and start walking.
Here’s Why Walking Can Change Your Life:
Walking for just five minutes a day is the start of a new habit.Every morning for a few weeks, you’ll have to force yourself to walk. Initially, it will take effort and willpower to walk instead of snoozing. However, with each passing day of success, you’ll need to use less effort and willpower to get out the door. After all, it’s only five minutes, right? Once it’s something you do automatically without thinking, you can add on to it by increasing your walk time.
Walking briskly outdoors in the fresh morning air can be a great caffeine-free wake up call! If you make walking the FIRST thing you do in the morning, especially if you’re doing it before anybody else is awake, there will be zero distractions and no reason to say “sorry, I didn’t have time.” Of course, we like caffeine too (in moderation).
Walking will give you a chance to gather your thoughts and clear your head before the day begins. We’re constantly distracted at home: TV, iPads, smartphones, etc. Walking is so primal – no gadgets, just walking. Many people cite walking as the impetus for their creative or intelligent breakthroughs.
Walking and successfully building a habit will give you a habit blueprint to follow for anything else you’d like to accomplish: “Hey, I was able to make walking a habit, what else can I tackle in the same way?” Slow and steady wins. One foot in front of the other, my friend.
How to Walk Properly
“Uhhh, Steve, I know how to walk. I do it every day!”
Welp, if you’re starting from only walking from your car to the office, we need to make sure you’re walking the right way for when you push that mileage up.
Let’s start with your feet, provided you’re not gonna glue hair to your feet and go barefoot to become a hobbit.
I recommend walking in shoes that have a wide toe box and minimal drop (height at the heel vs height at the toes), as we discuss in our monster post on healthy feet and footwear:
You might not be used to walking with minimal cushioning under your heels, so walk slowly and land softly. Walking on softer surfaces to start isn’t a bad idea either.
We were designed before the invention of big clunky shoes… thus, we should be able to walk without big clunky shoes.[3] If you are interested in going barefoot as a runner, get started by walking short distances first. Your feet will toughen up (though they probably won’t grow hair quite like Frodo and Sam), your joints and muscles around your feet and ankles will strengthen, and your knees will deal with less stress.
When going for a lazy stroll, focus on landing softly, which is much easier when you don’t have thick-soled shoes to cushion your stride: land softly with your heel barely touching before rolling onto the middle (ball) of your foot, and then push off. You might need to take shorter strides than you’re used to if you were a big heel striker with a long stride.
If you’re aiming to walk quickly and up the intensity, shorten your stride and aim to land in the middle of your foot while pumping your arms. This is more easily done when walking uphill (which is also a great way to burn extra calories).
Is Walking Enough for Weight Loss?
Can walking help you lose weight?
You’re darn right it can!
The above photos are from Don, one of our coaching clients. Don credits his daily walking practice with helping him lose 85 pounds!
He’s not our only example of walking for weight loss:
Megan, who I mentioned earlier, is another client who walks daily to maintain her weight loss.
Case closed?
Of course not!
Both Don and Megan also made adjustments to their nutrition to reach their amazing results.
One of the Rules of the Nerd Fitness Rebellion is that we know “you can’t outrun your fork.” No amount of exercise can counter a bad diet, as your nutrition will be responsible for 90% (not an exaggeration) of your success or failure.
Here’s an example:
Let’s say you go for a 5-mile walk, which takes you 90+ minutes.
If you then consume a 20 oz Gatorade and a small bag of Fritos (a typical snack for many here in America), you will have already undone all of the calories burned while walking.
Depending on your nutrition and love/hatred for exercise, this is either great news or bad news!
The BAD news: you can’t eat very badly in mass quantities and then expect to lose weight with a bit of exercise every week, even if it’s strenuous.
The GOOD news: Even if you dislike exercise, you can avoid exercise and still lose weight! Instead, put ALL of your focus instead on fixing your nutrition, and then go for a walk every once in awhile.
Oh, and if you want to see if a Nerd Fitness Coach can build you a program to lose weight while doing movements you enjoy (like walking), click on the button below:
The Best Practices for Walking (Tips and Tricks)
Here’s how to improve your walking technique:
#1) Focus on posture! Head up! Shoulders back! Walk with a confident stroll – practice this one in the morning if you’re not used to walking like this. It’s also a great way to appear instantly more confident; we nerds and hobbits need all the confidence we can get! Look around at your surroundings with your head up, arms swinging in rhythm.
You can also do some well-placed neck swings and jacket removals:
#2) Walk uphill to burn more fat. If you are walking on a treadmill, set it to an incline to increase the intensity and thus increase the amount of fat burned. Just don’t be that person who sets the incline way up, then holds onto both sides and leans their body back to be perpendicular with the incline. Keep good posture, lean forward into the incline, shorten your stride, and pump your legs.
#3) Hiking is a great way to practice walking, enjoy the scenery, and play Lord of the Rings in the woods with plastic swords and capes. Not that you should do that (you totally should). Here’s a beginner’s guide to hiking!
#4) When walking downhill, especially while barefoot (or wearing minimalist shoes), keep that stride short and be careful on how you are walking. Make sure your knee is bent when you land and absorb the impact rather than jamming the impact through your heel, knee, leg, hips, and lower back.
#5) Consider going for “fasted walks” in the morning. When you wake up first thing in the morning, your body has burned through most of the carb-fueled energy stores during the night. This means when you go for a walk first thing in the morning, your body is more likely to have to pull from the only fuel source available to it: fat! This is the entire philosophy behind things like Intermittent Fasting or really low-carb diets like the Ketogenic diet.
#6) Get yourself a sturdy walking stick, if only so you can use it to battle imaginary ogres, goblins, cavetrolls, etc. It can also make you feel far more adventurous than if you’re just walking, and help you get up hills and land softly when going back down.
#7)Try Temptation Bundling. Load up an audiobook or your favorite podcast, and tell yourself that you can ONLY listen to the book or podcast while walking.
Is a Fitbit Helpful for Walking? (Which Fitness Tracker Is Best for Me?)
If you’re somebody who has been interested – or is getting interested – in walking, you’re probably familiar with step-tracking devices:
Personally, I’m a huge fan of fitness wearables, but not for the reasons you’d think.
For starters, you’re wearing a constant reminder that you are prioritizing movement, which can only be positive. You can even trigger it to remind you to get up and move every hour.
It can also allow you to see how many steps you normally take, and thus allow you to prioritize moving MORE.
Although Fitbit has a history of being sued for the inaccurate heart-monitor portion of its devices, I’m less concerned about heart rates and 100% accuracy of step distance, and instead think in terms of personal improvement.
Just like with tracking your bodyfat percentage or your weight, “that which gets measured gets improved,” and that carries over to your total steps. The fact that you’re tracking it means you’re going to be more aware of it, which means you’re going to be more likely to be able to improve it.
And that’s why, in a weird way, I’m not very concerned about the total accuracy of these devices. Even if your scale is off by 5 pounds, or your body fat caliper is inaccurate by 1%, as long as you use the same device and measure in the same way under the same conditions, you can track trends and paint the picture of your health and whether or not it’s improving!
And that’s what these fitness trackers should be used for: a reminder and a trend tracker!
What you SHOULDN’T do: take your fitness tracker as gospel, and use that to calculate down to the calorie and macro how much food exactly you can consume.
What you SHOULD do: track your trend over time, and see if you can improve your average. Use the technology to aid your fitness quest. Use the community portion of the band to compare your stats against friends and get some positive friendly peer pressure to get you off your ass.
Okay, if nerdy fitness technology isn’t nerdy enough for you, let’s go full-nerd.
How to Actually Walk to Mordor
Did you know it’s 1779 miles between Hobbiton to Mount Doom? [4]. We can actually determine how far Sam and Frodo walked, and then set out on the journey ourselves! It’s one thing to go for a stroll around your neighborhood. It’s another to know that, “If I take one more step, it’ll be the farthest away from home I’ve ever been.”
So let’s take a look at how far we need to walk first:
458 miles: Go from Hobbiton to Rivendell.
462 miles: Set out with the Fellowship from Rivendell, through Moria, to Lothlorien.
389 miles: From Lothlorien, down the Anduin, to Rauros Falls.
470 miles: Follow Frodo and Sam on the quest from Rauros to Mt. Doom.
535 miles: From Minas Tirith to Isengard
693 miles: From Isengard to Rivendell.
397 miles: From Rivendell to Bag End.
467 miles: (bonus!) Follow Frodo to the Grey Havens and return home with Sam.
Following this path, you need to walk a total of 1779 miles to get from Hobbiton to Mt. Doom. Then it’s time to destroy the ring and get carried to Minas Tirith by the Great Eagles.
Then you’ll walk 1625 miles back to Bag End (and an additional 467 miles if you’re interested in doing a round trip to the Grey Havens).
Obviously, you don’t need to move at the same speed as the hobbits (18 miles on the first day is no joke! Damn, those hobbits covered some ground!), but it’s still fun to track your walks and your total miles to see where you’d be on your journey.
However, like Frodo and Sam, it starts with the first step.
I’ve created a Google Doc that you can copy for yourself to track your distances to follow Frodo and Sam on your journey to destroy the One Ring.
Here’s how to do it:
Open the document, and then click on “file,” “save a copy,” and then you can edit your own copy of the document.
Track your distances with a pedometer, Fitbit, your iPhone or Android phone.
Input your distances and work towards completing each section of the journey over months. As you input your distances, it will automatically let you know when you reach each destination so you can get you started on the next one. 5 miles a day on average will have you destroying the Ring within one year.
Oh, and if you’re curious, according to my rough gorilla math, Frodo burned at least an additional 61,0000+ calories (100,000+ gross calories) by walking “there and back again” – you’re welcome[5].
What’s that?
You want some help getting out the door?
You got it – but only cause you asked nicely.
Here are three ways to level up alongside Nerd Fitness.
#1) Our Online Coaching Program: a coaching program for busy people to help them make better food choices, stay accountable, and get healthier, permanently.
You can schedule a free call with our team so we can get to know you and see if our coaching program is right for you. Just click on the image below for more details:
#2) If you want an exact roadmap on how to get in shape, check out NF Journey. Our fun habit-building app helps you exercise more frequently, eat healthier, and level up your life (literally).
We even have fun missions that will help you walk more, all while you earn XP! Righteous.
Try your free trial right here:
#3) Join the Rebellion! We need good people like you in our community, the Nerd Fitness Rebellion.
Sign up in the box below to enlist and get our Rebel Starter Kit, which includes all of our “work out at home” guides, the Nerd Fitness Diet Cheat Sheet, and much more!
Get your Nerd Fitness Starter Kit
The 15 mistakes you don’t want to make.
Full guide to the most effective diet and why it works.
Complete and track your first workout today, no gym required.
Alright, your turn:
What questions do you have about walking?
How have you incorporated it into your daily routine?
You’re probably wondering about the math on this one. I followed this thread down a rabbit hole and estimated a hobbit at 3.5 feet tall would weigh 60 pounds. I then put that into the calculator to determine calories walked. Again – this is just an estimation, and probably could be even more accurate if we had the topography of middle earth to determine elevation climbed too! Feel free to get me more accurate numbers in the comments and I’ll update this!
If you’re here because you want to go from skinny to muscular, you’ve come to the right place!
I know exactly how you feel.
I was once a very thin guy struggling to put on muscle! Hell, my “before photo” below on the left below is after a decade of training and “eating a lot.”
It took me 10 years of struggle to crack the “bulk up” code, so don’t beat yourself up if you’re really struggling to put on mass.
We’ve helped people just like you get bigger in our Online Coaching Program: we use the same tactics and strategies I’ll discuss below!
Okay, let’s get into it! Click any of the links below to learn about the 9 key mistakes skinny guys make when trying to bulk up:
I didn’t put the weight on a necessarily healthy or sustainable way, but after 6 years of struggle, this experience solidified the connection between diet and getting bigger.
It finally made sense.
If you don’t eat enough calories, you won’t get any bigger.
So if you are not getting bigger and more buff, then you are not eating enough.
It’s science.
If you’re trying to gain weight: when in doubt, eat.
Under optimal conditions, you’ll most likely be able to put on 1-2 pounds of muscle per month.
Now, this doesn’t mean you can’t make tremendous strength gains – you’re just not going to build 50 pounds of muscle in 6 weeks.
So start by having proper expectations: don’t try to “Put on 50 pounds” by the week or month. It’s time to think in terms of days and years to make your progress permanent:
Rome wasn’t built in a day, and muscle isn’t built in a matter of days either. It’s going to take months of sustained effort, and it’s going to take consistency and patience.
But you can get there.
If you struggle with not seeing results, and you want a Yoda in your pocket (that sounds weird…) to help you bulk up fast, our online coaching program fits that exact scenario
Mistake #3: Not Having a Solid Plan (How to Go from Skinny to Muscular)
If you want to go from skinny to buff, you need a plan.
A plan that is balanced, and provides you with big movements that stimulate growth all over your body.
It’s better to pick a basic plan and stick with it for months and months and months, than jump around from week to week chasing the newest shiny object.
Other great barbell-based programs are Stronglifts 5×5, Wendler’s 5/3/1 program, and Mark Rippetoe’s Starting Strength program.
I started with basic barbell training, then moved into more of a hybrid barbell/bodyweight program (thanks to my Online Coach).
Which should you pick?
Honestly, any of them will work – you just need to start, and stick with it for months at a time, focusing on getting stronger with each movement.
You can also download our Strength 101 Guide when you sign up in the box below:
Download our comprehensive guideSTRENGTH TRAINING 101!
Everything you need to know about getting strong.
Workout routines for bodyweight AND weight training.
How to find the right gym and train properly in one.
Mistake #4: Not Doing Enough (How to Grow Muscle)
If you are trying to get bigger, you might not be doing a tough enough workout in the gym or in the park to stimulate muscle growth.
No matter what, you need to be doing heavier weight, or doing more repetitions in order to challenge your body, breakdown muscle fiber, and force your body to rebuild stronger.
This is called “progressive overload,” and it’s the only way you’re going to build size in the right places.
Coach Jim breaks down different strategies for progressive overload in this video:
However, you must be scaling these exercises constantly to make them increasingly more difficult, which many people struggle to do.
Just doing more regular push-ups, bodyweight squats, and pull-ups is a good way to get conditioned, but after a certain point, it most likely won’t produce muscle growth without increasing the challenge.
That’s when you need to progressively overload your muscles with a more difficult movement.
I detail this during my “stay in shape while traveling” post, in which I packed on a few pounds of muscle while ONLY doing bodyweight exercises.
I started by doing just pull-ups and dips.
Now I’m up to doing pull-ups with 60 pounds on a weight belt, and dips with 70 pounds on a weight belt.
I used to just do push-ups and pull-ups, now it’s parallette gymnastic complexes:
And muscle-ups on gymnastic rings:
So, YES it can be done!
You just need a solid plan that allows you to consistently push your muscles further.
Looking for a plan to gymnastics mastery? Outside of our coaching program, our new app will show you exactly how to start training with rings.
You can try out your free trial right here:
Mistake #5: Going Too Quickly and Getting Injured (Being Safe)
In the age of instant gratification, we always want more, now now now.
Over the past decade, I followed a terrible cycle of setbacks and injury:
Try to get bigger. Eat lots of food, and put on some weight.
Ramp up my workouts too quickly.
Sustain some sort of injury from trying to do too much.
Take a month off to recover.
Start back at #1.
Repeat the process.
Have patience.
Start out with easy weight, and get a teeny tiny bit better every single day.
In fact, it wasn’t until I stopped chasing fast goals and instead focused on tiny habits that I went from Steve Rogers to Captain America.
Back when I started deadlifting again, I kept thinking “I can do more! I can go heavier!” – but I patiently forced myself to go just a tiny bit further than the week prior.
Live to train another day, and just focus on the process:
“Hit the gym 3-4 times per week, get a tiny bit stronger. Then go home and eat!”
As bodybuilder Lee Haney says:
“Exercise to stimulate, not to annihilate.”
Getting yourself to slow down and put faith in the process is really difficult. It’s why everybody fails at diets, and why nobody can get results that stick.
They try to do TOO much, TOO soon, and keep falling back to square one.
If you are tired of falling back to square one and want somebody to help you make sustainable, permanent progress towards bulking up, check out our coaching program!
Mistake #6: Not Following a Sustainable Strategy (Consistency)
As Coach Jim mentions in the video above (where he documents his journey on gaining 50 pounds), you need to be consistent with your workouts and nutrition.
For me personally, I’ve found sustained success by doing the following:
Eating roughly the same meals every single day.
Getting enough sleep by going to bed at the same time each night.
Training 4 days a week for about an hour.
As a result, I’ve been able to make consistent progress for the past 4 years, and my new “normal” is progress and strength improvements!
What I’m trying to say: be honest with yourself.
If you can’t work out six days a week for the next year, DON’T train that way!
Start with twice a week, doing a basic weight training program, and dump the extra time you would have spent training into eating more or getting more sleep.
If you can train three days a week, that should be plenty to make you bigger: muscles are made in the kitchen, after all!
Remember, if you’re not getting bigger, you’re not eating enough!
Eat more.
It might take you 6+ months longer than if you went all-in and did nothing but eat and lift all day every day, but you’ll actually KEEP the progress you’ve made rather than giving it all back.
This was a brutal lesson I couldn’t learn until I hired an online personal trainer who helped me get my mindset right, and put the right systems in place!
Mistake #7: Not Making It a Priority (Remember Your Training)
After telling myself “I want to get big and strong,” I realized that for much of the past decade, it wasn’t really a priority.
I put work, messing around on the internet, video games, and going out and drinking ahead of my training on my list of priorities.
Since 2014, I’ve made it a point to see what I could accomplish if I made getting bigger and stronger a priority in my life.
Most importantly, I started taking this seriously and hired an online trainer that I’ve been working with for 5+ years.
Here’s what I did to prioritize my transformation and training:
I ate extra meals even when I wasn’t hungry.
I rearranged my training schedule so work would NEVER be an excuse.
I said “no” more often to staying out really late and drinking.
I programmed my workouts into my calendar.
I had my coach keep me accountable.
I scheduled Saturday morning workouts so I wouldn’t go out drinking on Friday.
I made fitness a priority.
Is this goal of going from skinny to buff truly a priority for you? If it’s not, you’re going to give up when you’re tired, or not hungry, or don’t want to exercise.
As we talk about in our “How to Get in Shape” article, you need to have a BIG WHY: the reason you’re doing this!
I wanted to get bigger so I could be more confident when going on dates.
What about you? Why are you here?
Write down your reason, stick it on your bathroom mirror or laptop, and use it as a reminder.
Because this isn’t going to be easy!
If you always do what you’ve always done, you’ll always get what you’ve always got.
And if you want to GET bigger permanently, you need to do things differently, consistently, and permanently.
Never forget why you are doing this!
I did this journey alone for a decade before I finally got some help in staying accountable and keeping me on track.
If you’re looking for somebody to keep you accountable, tell you exactly what to do in the gym, and tell you how many calories you should eat, we can help there too.
Mistake #8: Sweating the Small Stuff (Keep It Simple)
Bicep curls! Forearm curls! Calf raises!
“Should I target all three heads of the triceps muscle?”
“I see the big guy over there doing 8 types of bicep exercises – should I do what he’s doing?”
“Does chest day need to be bench, incline bench, decline bench, cable chest flys, dumbbell flys?”
“But where’s my bicep curls, tricep extensions, ab work, etc.!?!?!”
ALL of those muscles get worked incredibly well with the above exercises, so don’t worry about isolating.
Instead, just get strong.
When you can lift heavy things or complete intense bodyweight exercises, your body needs to adapt.
If you want to do things like bicep curls or triceps extensions, great.
Just do them AFTER doing the big important workouts.
As long as you are eating enough to fuel your recovery and following the Bulk Up Like the Hulk Axioms, you’ll be good to go!(Covered in the free download when you join our email list in the box below!)
Download our free skinny guy’s guide to putting on muscle!
Enter your email below to download now
The Nerd Fitness “Get Bigger” Shopping List
Bulk like the Hulk with our rules for getting bigger
Mistake #9: Not Recovering Enough (Get Sleep)
I used to pride myself on not needing a lot of sleep.
I also used to be dumb, apparently.
Since putting a focus on getting bigger and stronger, I’ve had to considerably up my sleep time.
When you strength train, your muscles break down and need to rebuild over the next 24-48 hours.
Sleep is a key part of this process.
Without it, your body can’t recover, and you can’t grow.
I find I am exhausted the day of really heavy max deadlifts, so I prioritize more sleep on those days!
Muscles aren’t made in the gym, they’re made while you’re resting.
If you are somebody who wants to get bigger, and go from skinny to buff, make sure you don’t make the 9 mistakes I used to make!
And if you want results, here are 3 options we offer:
1) If you’re tired of the guesswork and just to be told exactly what to do, consider checking out our 1-on-1 online coaching program! We create custom programs and nutritional guidelines for people like you struggling to put on size.
2) If you want a roadmap for home workouts, check out NF Journey. Our fun habit-building app helps you exercise more frequently, eat healthier, and level up your life (literally).
Try your free trial right here:
3) Join the Rebellion! We have a free newsletter that we send out twice per week with new content helping you build muscle and level up your life.
Sign up the box below and I’ll send you a bunch of free guides!
Download our free skinny guy’s guide to putting on muscle!
Enter your email below to download now
The Nerd Fitness “Get Bigger” Shopping List
Bulk like the Hulk with our rules for getting bigger
I’d love to hear from you in the comments below:
What are your biggest struggles when it comes to bulking up?
Have you had success as a skinny dude or lady and made great progress?
Have you struggled your whole life with being skinny and still can’t seem to crack the code?
Let me know how I can help!
-Steve (former Steve Rogers, current Captain America)
PS: Check out these other articles in our “Build Muscle Fast” Series: